DIY: Ohm N2 Subwoofer Refinishing
Refinishing the enclosure
Ohm Acoustics was one of the first companies to design speaker systems with the tweeters and subwoofer housed in separate enclosures.
This design made so much sense, as bass frequencies are non-directional but the high and mid-range frequencies are (directional). By separating them, the larger bass unit could be put in one location (typically, out of the way or out of sight) and the directional high-frequency drivers placed in another location (wall, shelf, etc.) to create the stereo effect. Forty years later, the design is now standard.
We purchased a set of Ohm speakers (two satellites, one 8″ subwoofer) circa 1979. The units, while still functional, have some components that had begun to deteriorate.
This, of course meant a RainyDayProject.
Ohm Acoustics
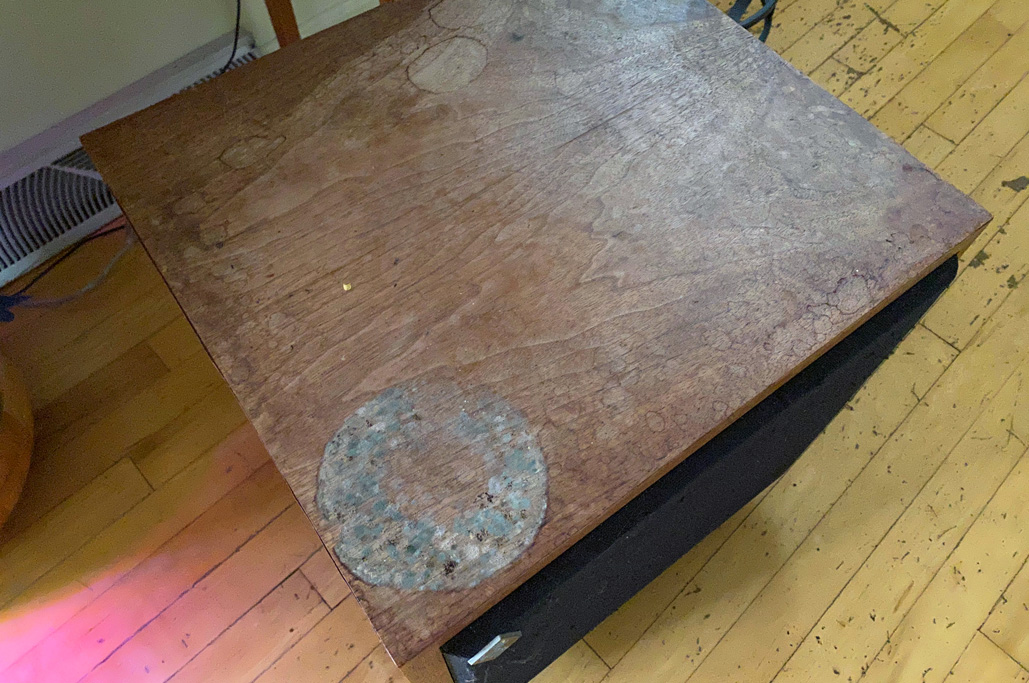
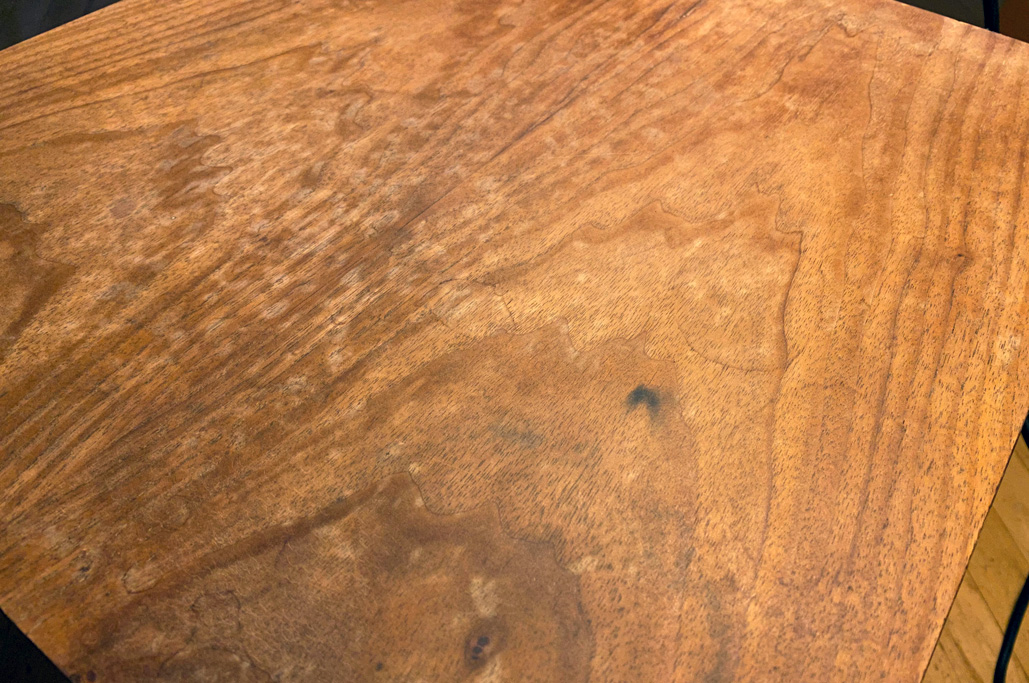
The years have taken their toll on the enclosure of the subwoofer. The original surface was oil-rubbed, and was only water-resistant if the oiling was kept up. Clearly it wasn’t.

Ohm my gawd, is that mold?
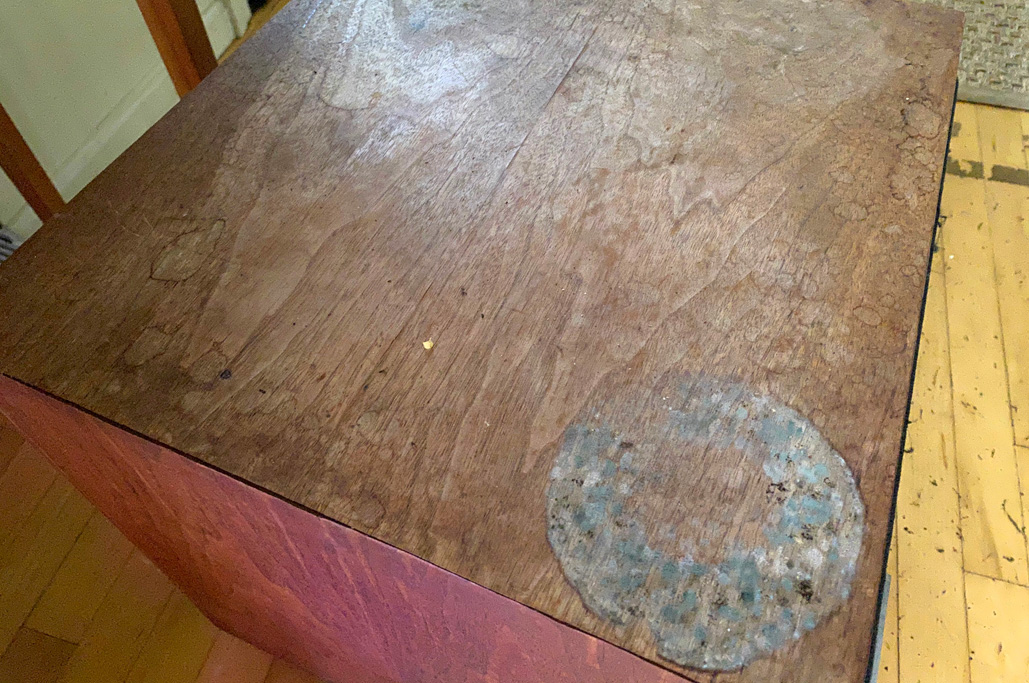
The walnut veneer was in the shape it was in was because it had been doing double duty as a plant stand for years. Note the water marks and mold. Mold. The saving grace was that nothing was actually peeling. So refinishing would just be a matter of sanding and polyurethaning.

Mold is as mold does: makes things moldy.
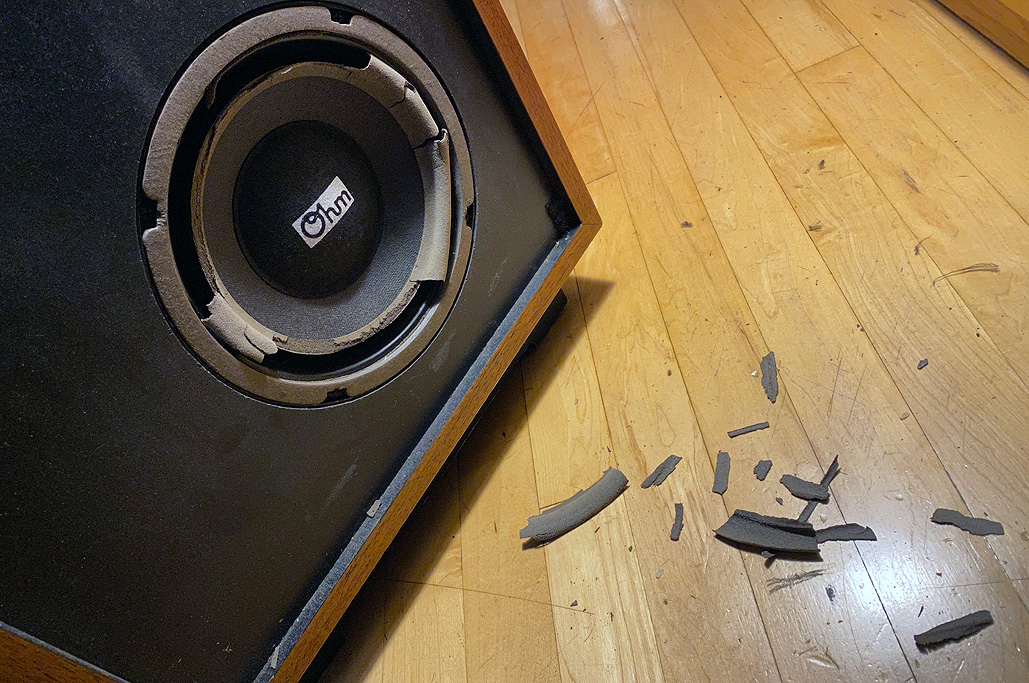
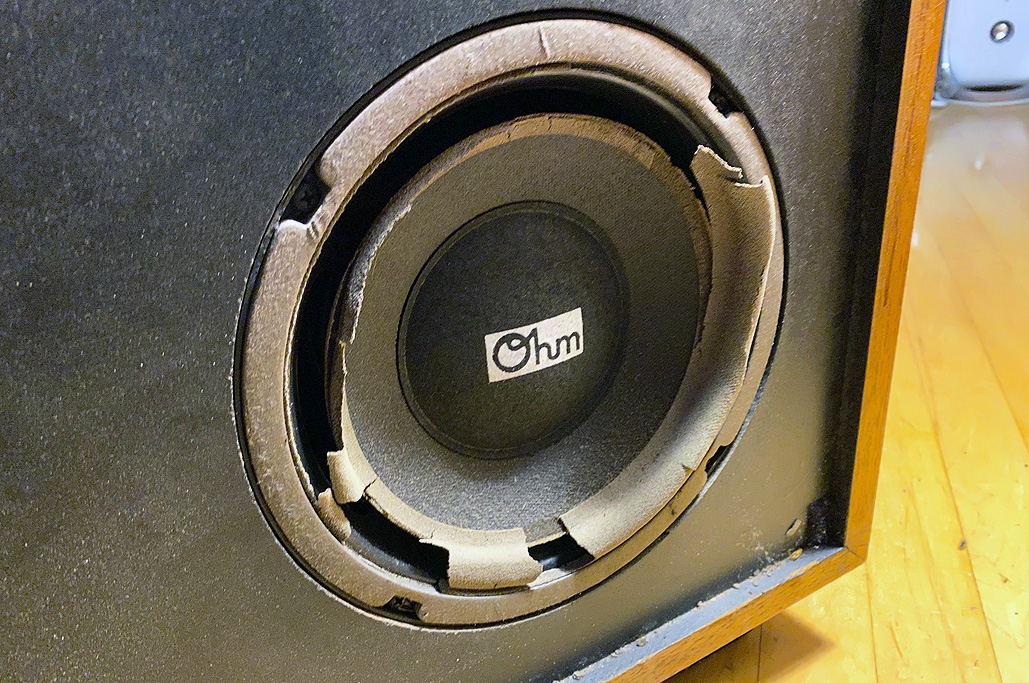
When we took the cloth grills off to inspect the drivers, we were met with a small cloud of dust. Even though they had not been abused like the enclosure, the drivers had not fared any better. The foam around the 8″ bass drivers had dried up and crumbled, literally into dust.

Hydrate, hydrate, hydrate.
Both drivers were in same state of deterioration. The good news was that the foam was the only thing that was in bad shape. The cones and domes seemed to be in good order. If we could find a source of replacement foam, we might be in business. If not, then we probably have to replace the entire driver assembly.
Whatever the case, we decided that it was worth the effort to bring these 40-year-old speakers back to life!!!

Ya crusty old fella–we still love you.
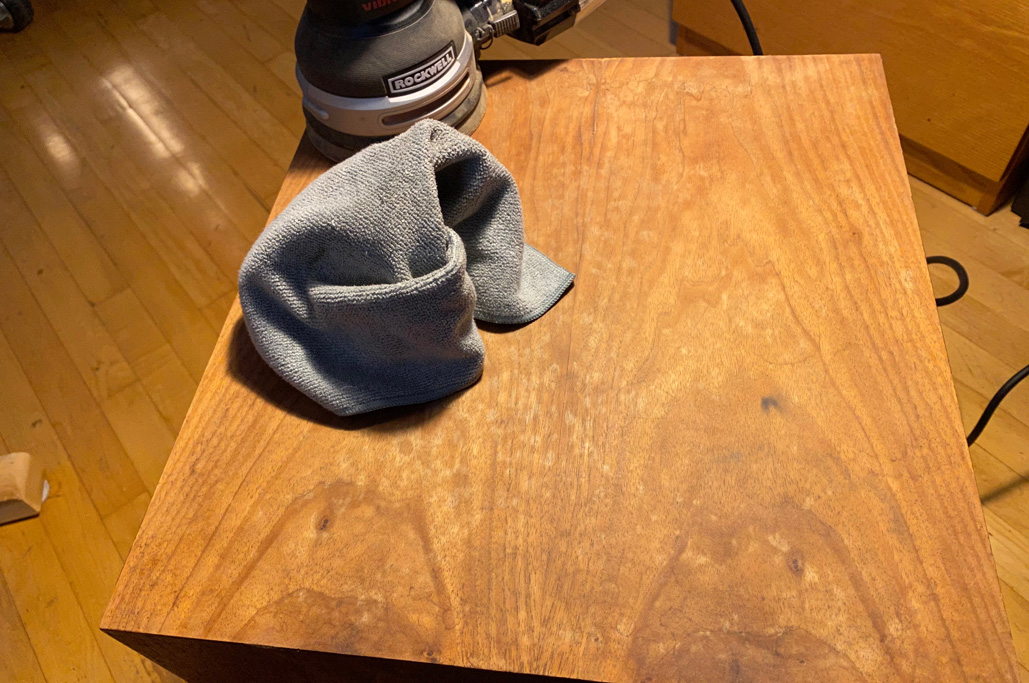
Let the sanding begin
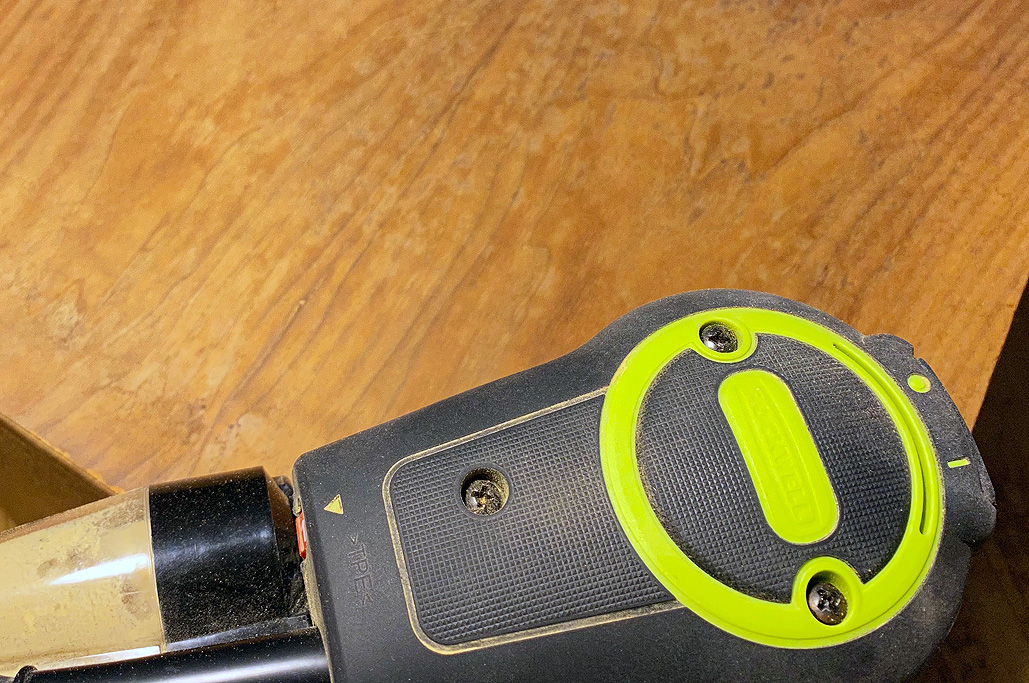
The first step to the restoration was to sand out the years of stains. Of course, when working with veneers, it is important to take care not to sand too deep! Our go-to sander for this task is the Rockwell Random Orbital finishing sander. We have used this orbital sander on a few projects and really like it because it is quiet, low-vibration, and makes short work of sanding tasks.

Totally worth the time. And plus, sanding’s fun!
We did the best we could, but some of the stains were just too deep to remove completely. Rather than over-sanding and ending up doing more harm than good, we opted to live with some of the shadows.
BTW, another reason why we love this Rockwell sander is how good the dust-collection is. We were able to work practically dust-free!
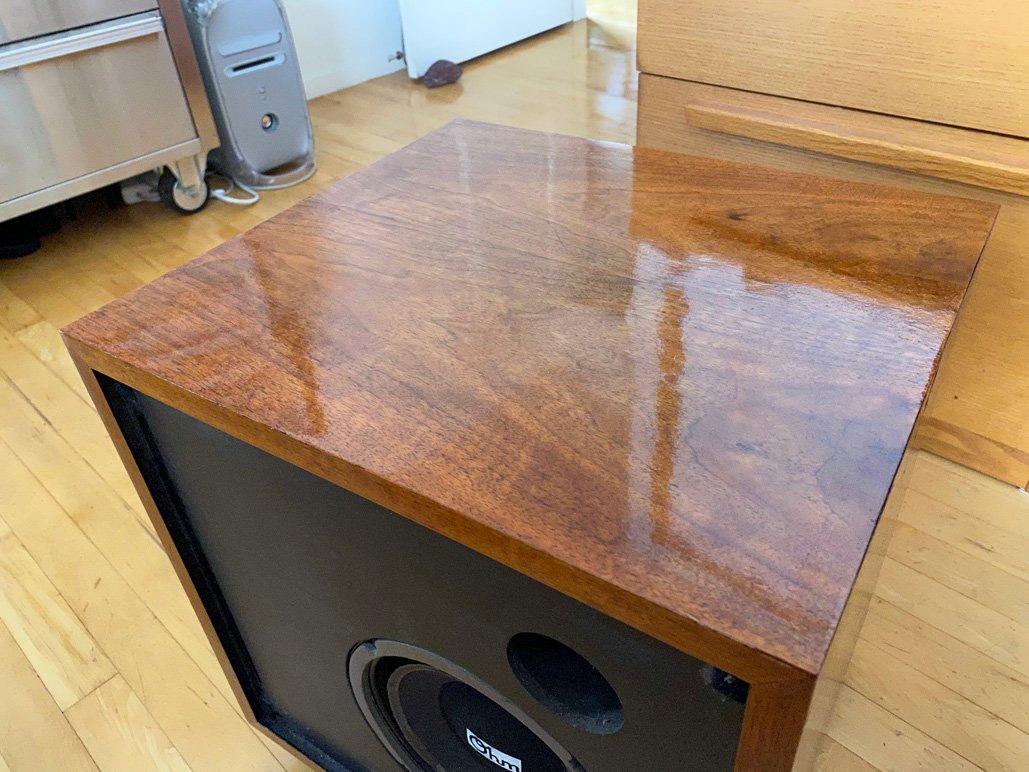
A-polyurethaning we will go
The first few coats of polyurethane just disappeared into the veneer, but after 6 or 7 coats with light sanding in between, the layers started to build.

Wait, that’s the actual color of the housing? Awesome!
Once the coats started to accumulate, we thinned the polyurethane for the final coats. After a few more layers, the shine really started to show. From here on out, the housing should be impervious to further water stains.

Oo look, shiny!
Who repaired the Subwoofer? Woof! Woof!
Now that the cosmetic stuff was out of the way, it was time to get onto the harder part, repairing the subwoofer’s 8″ drivers.
We reached out to a few sources that offered repair kits for the drivers, and also contacted Ohm Acoustic to see if they still had any of the original drivers “on the back shelf.” We’ll take a look at the options and go from there.

Such a cute family.
Why? Why ask why.
We know everyone goes on and on about Sonos, HomePods, and what have you. Yes, their “smart” features are cool, and some are useful, but for audiophiles who just want great sound without all the other bells and whistles, having a well-matched set of tweeters, mid-ranges, and a subwoofer is still the setup to beat.
Links to items mentioned:


Leave a comment