Weego Jump Starter: DIY Repair
No support? No problem :-)
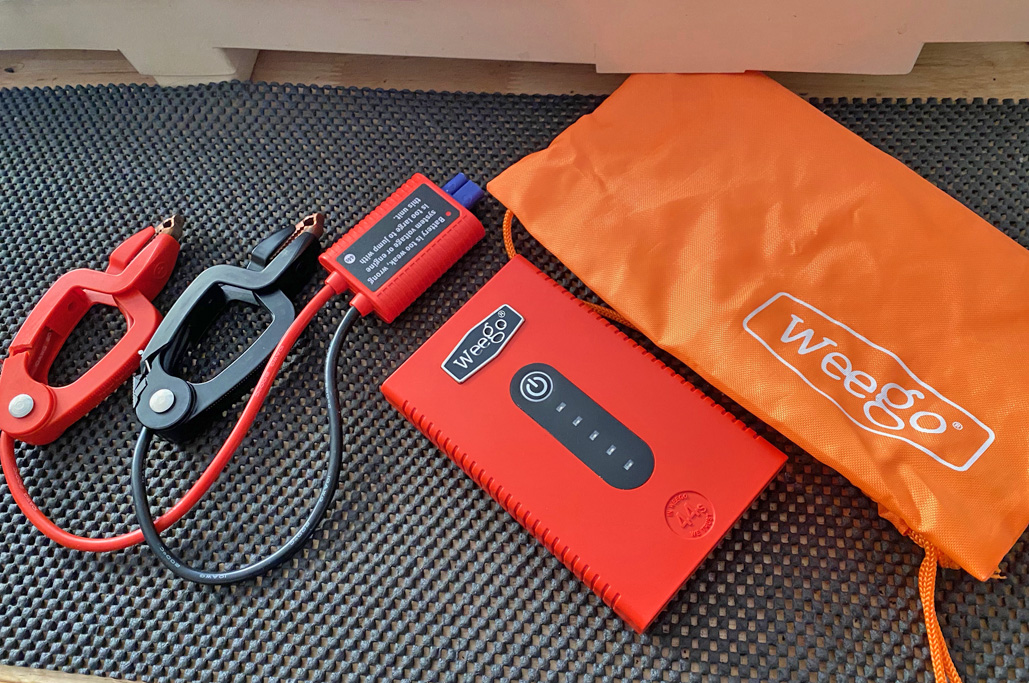
Jump starter power packs have come a looong way since we first looked at the Clore JNC Air way back when.
The newer power packs are small, highly portable, and extremely powerful. They don’t replace the Clore unit, but that is not their purpose: these jump starters are meant for emergency situations that happen once in a blue moon.
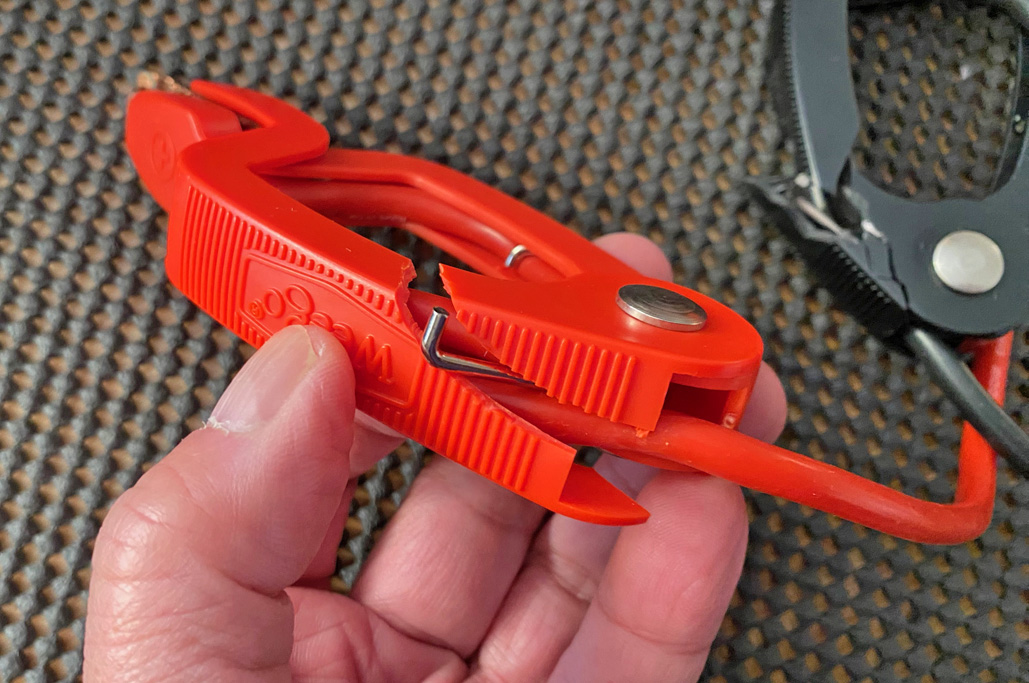
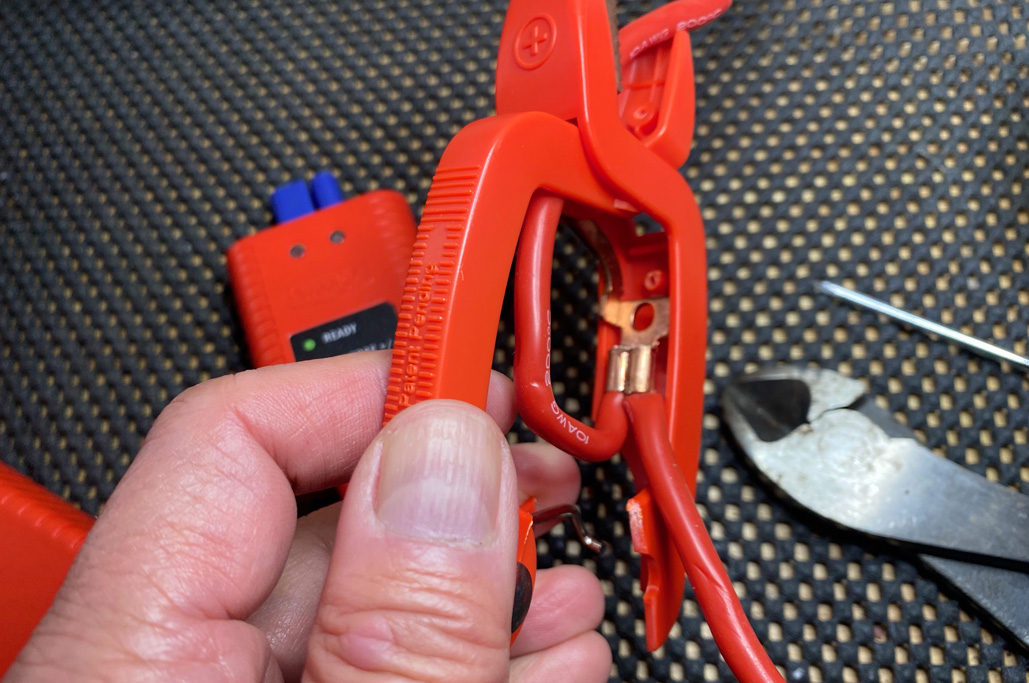
We have units in all of the RainyDay cars, and they get checked every six months or so. When we recently checked on the Weego unit, we noticed that the charge was still around 80%, but for some odd reason, BOTH clamps had cracks in the handle, rendering them ineffective in grabbing onto anything!!!
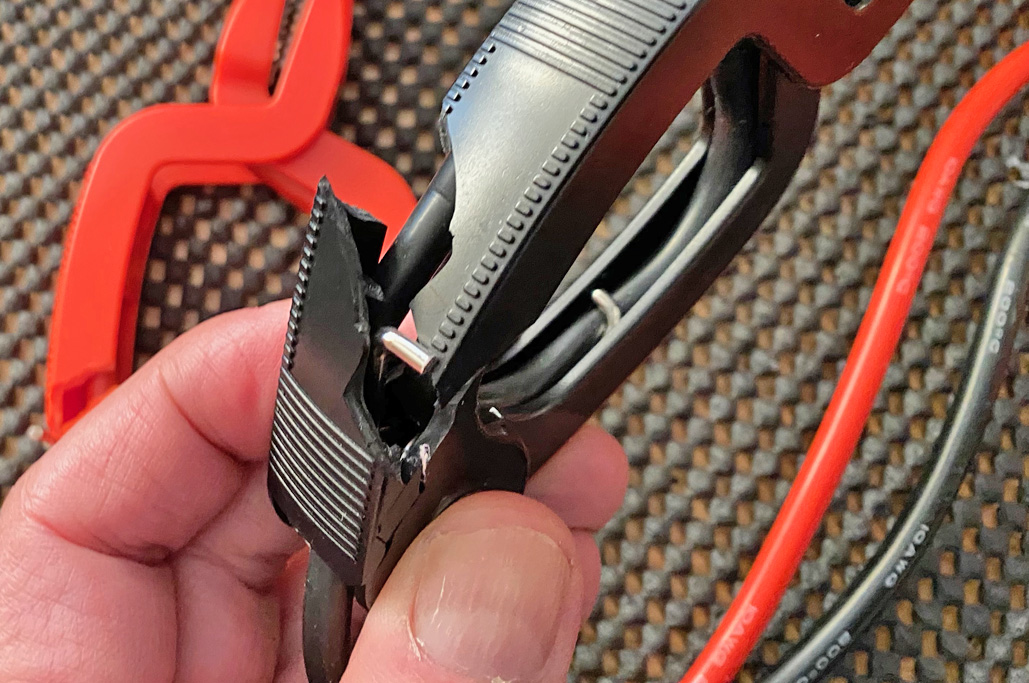
It appears that the plastic handles had cracked. We think it probably was from being exposed to the cold, as the unit was stored in the trunk of the car. Regardless of the reason, they needed to be fixed.
We reached out to Weego, but unfortunately, their tech support ghosted us after one email exchange. That didn’t matter, as we weren’t really sure we wanted a replacement: as the problem appeared to us to be a major design flaw, we figured a replacement handle would likely have the same issue.

Even the automotively disinclined of us could tell that “those aren’t supposed to do that.”
The Prep
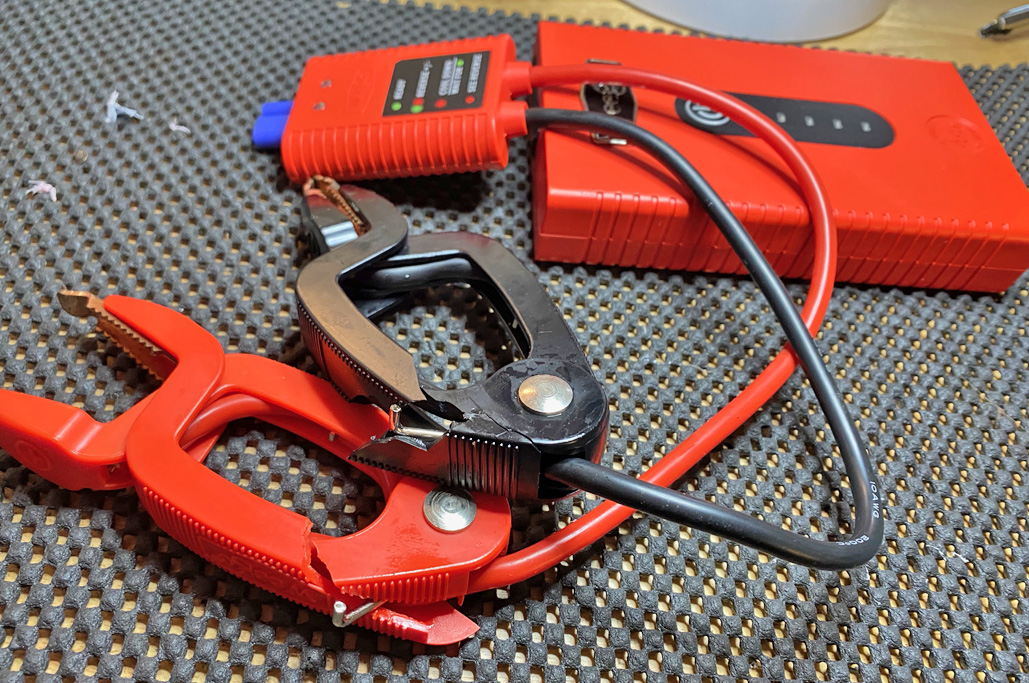
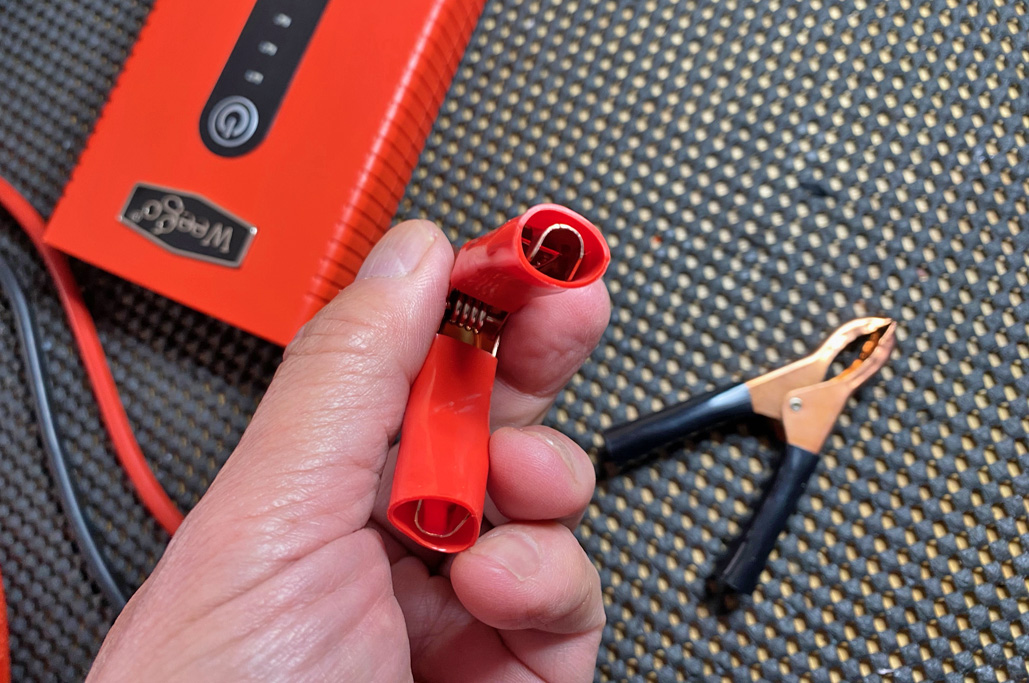
After examining how the cables attached to the clamps, we decided that the most efficient approach to the repair would be to cut off the cables but preserve as much of their lengths as possible.
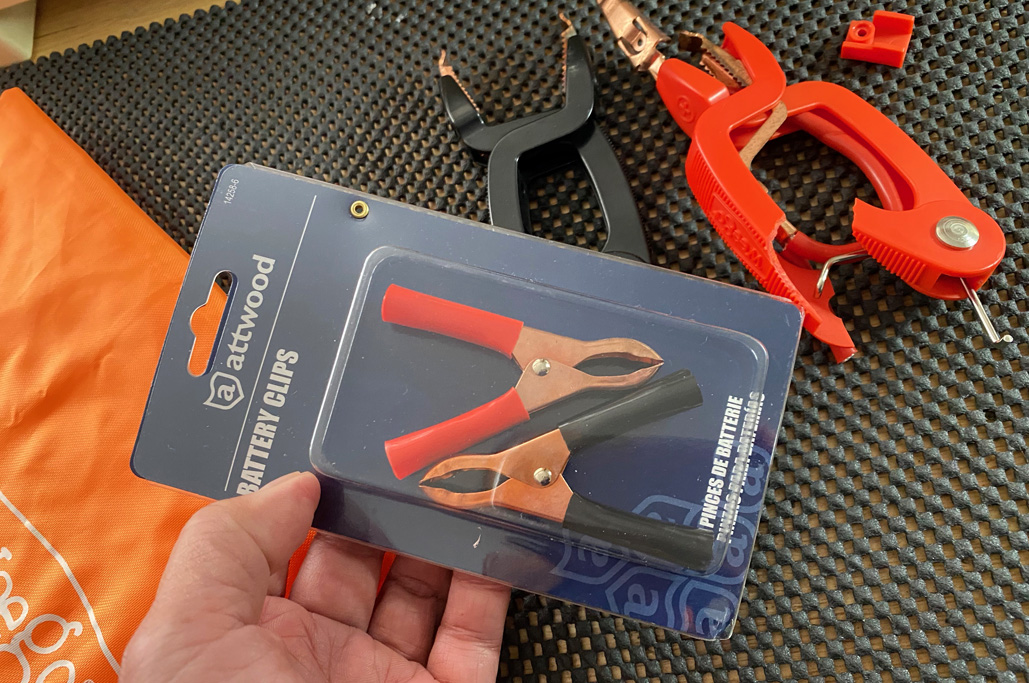
As for replacement clamp, we looked for ones that were all metal.

“Off with their heads!” Or handles, depending on the situation.
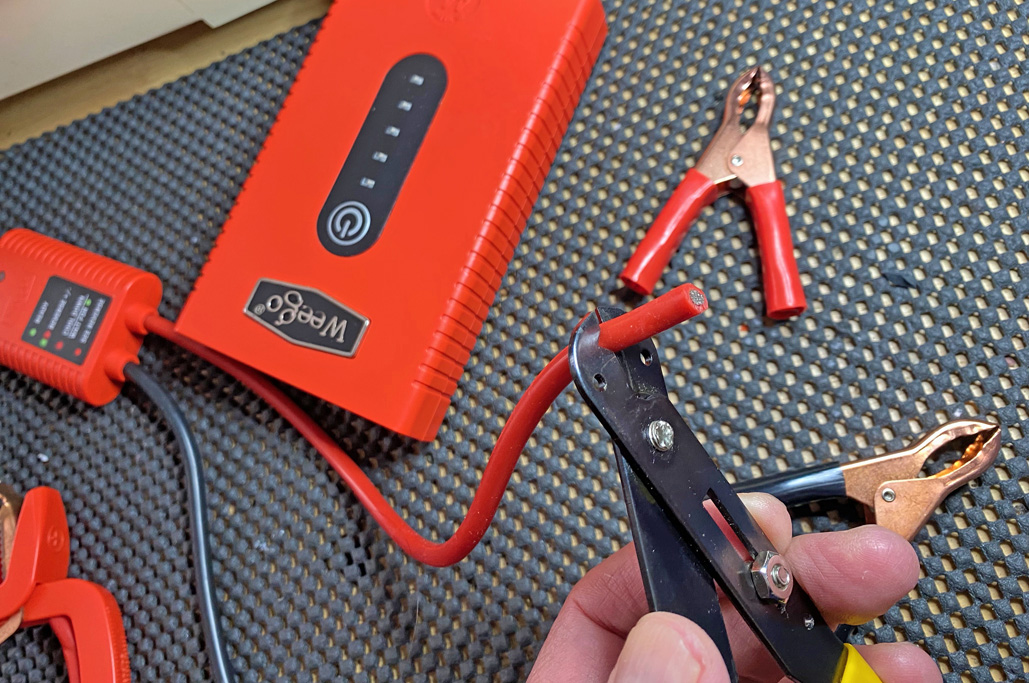
The Repair
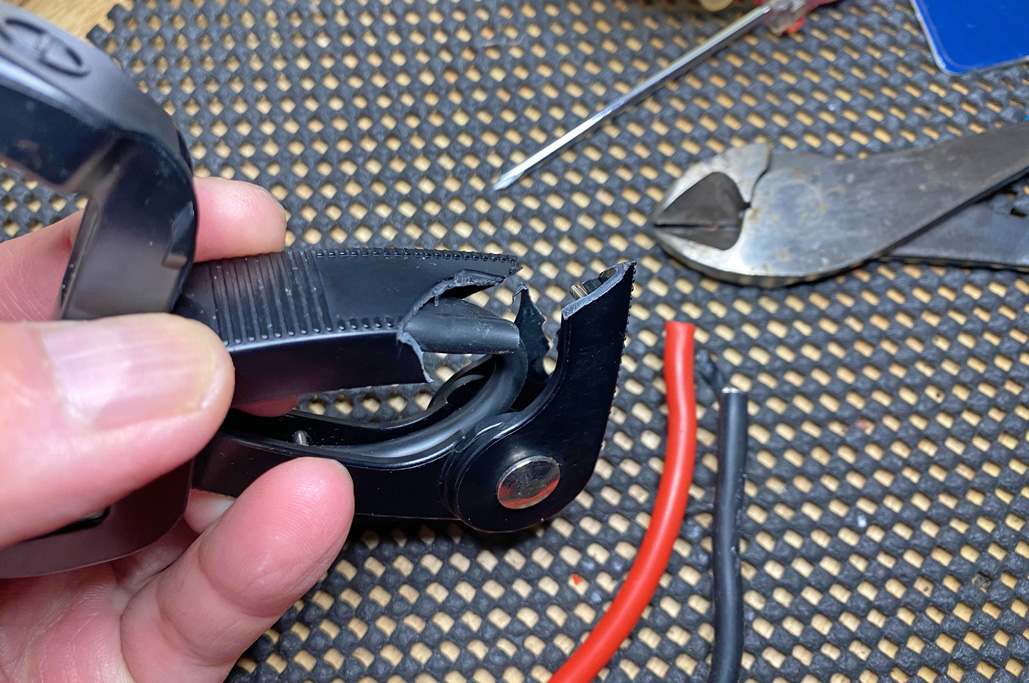
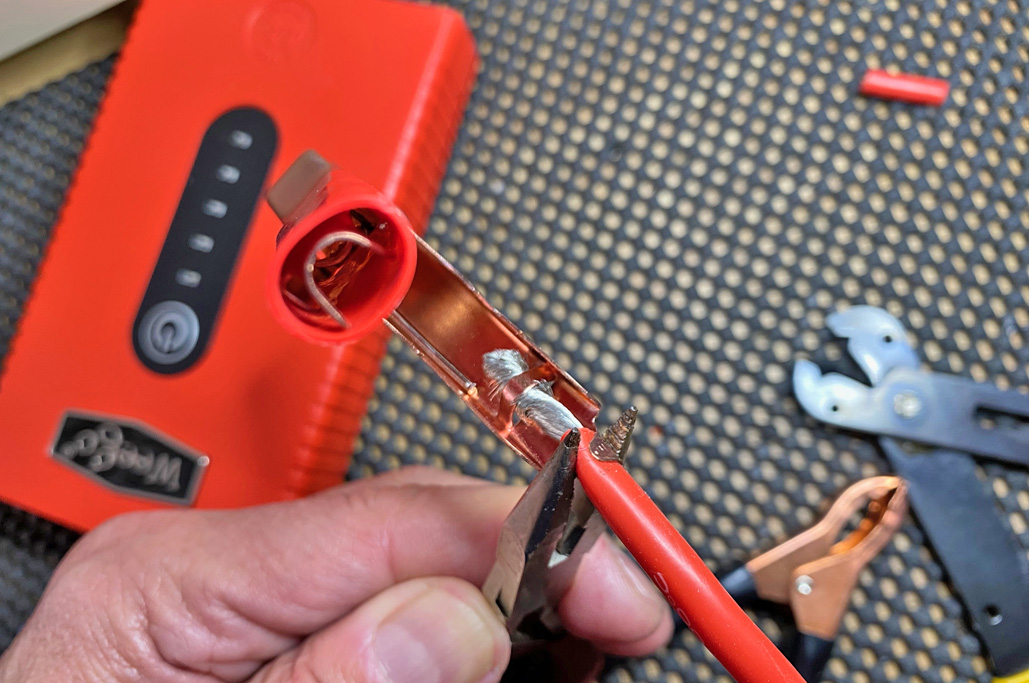
Repairing the Weego jump starter was straightforward, the tools basic—wire stripper, small pliers—and special skills—electrical, soldering—not needed. The only small potential “gotcha” was making sure to remove enough of the insulation so that the exposed cable would span the anchors under the handle.
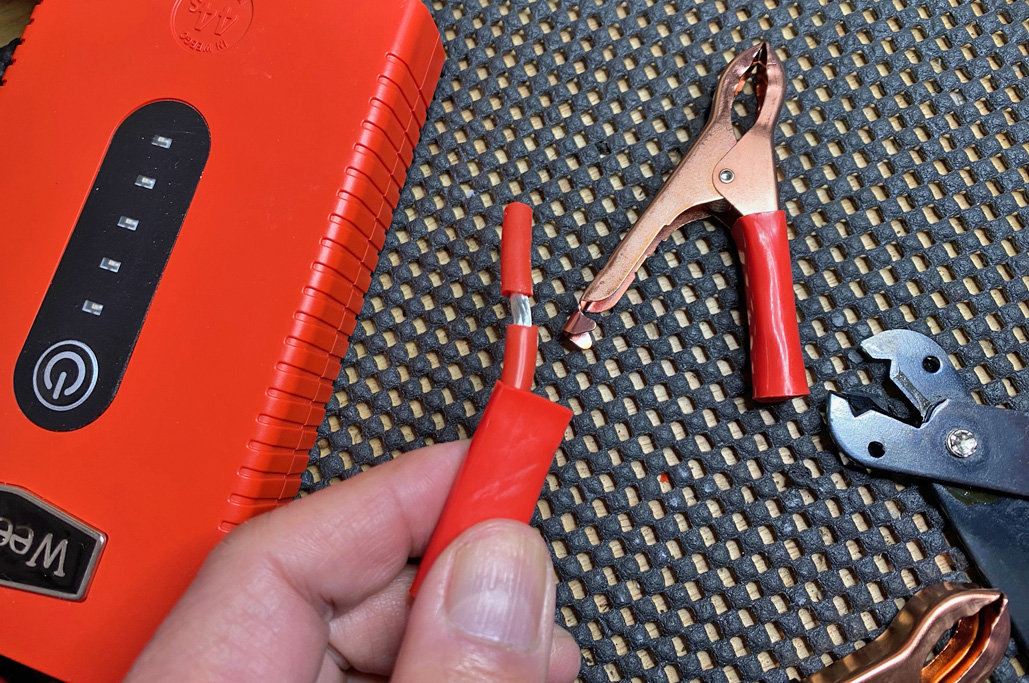
A “pro tip” for working with a bundle of wires: twist them so that they stay together when inserted into an opening. After cutting the insulation to expose the wire, don’t immediately remove the insulation: instead, use the cut insulation for a getting better grip for twisting.

Don’t be too quick to toss this stuff.
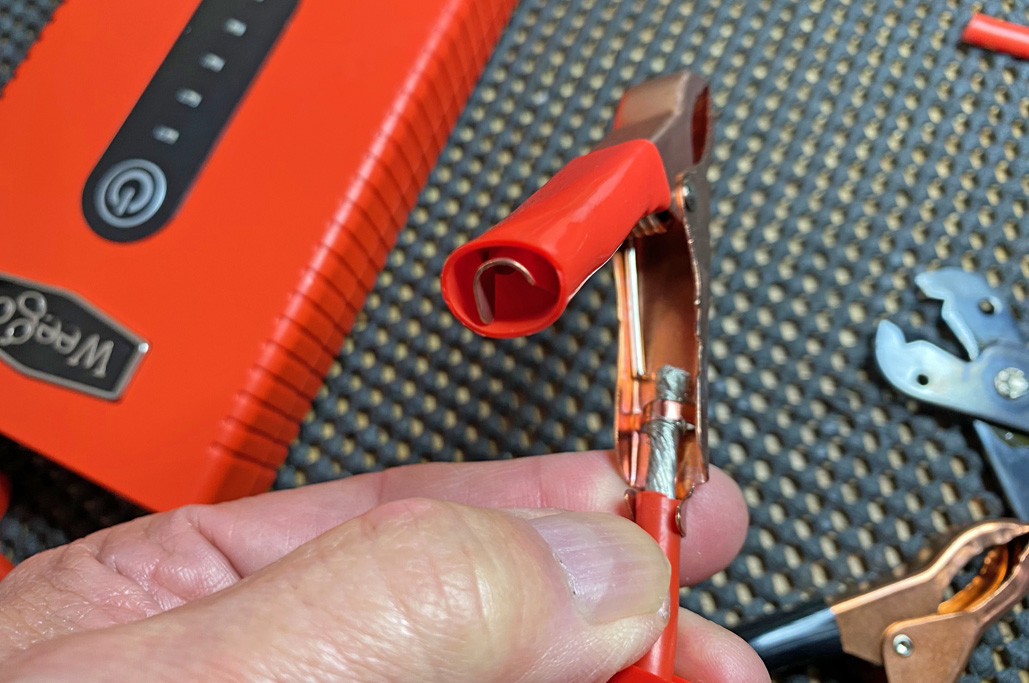
Twisting the wire bundle made it easy to insert the cable into the loop in the handle. Once inserted, the cable was locked in place by crimping the tabs with a small pair of pliers.

The electrical version “easy-peasy lemon-squeezy.”
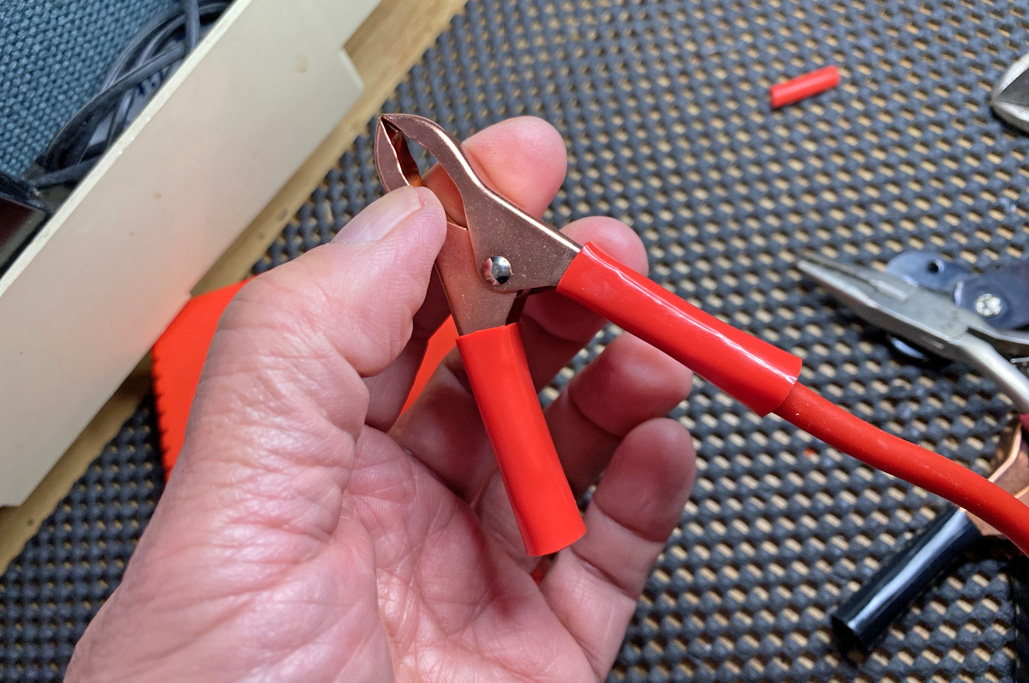
After checking that the crimp was solid, the protective insulator for the handle was slid back into place and the repair was complete. The same steps were repeated for the other clamp.

Super easy. Super-duper easy, even.
FinalThoughts
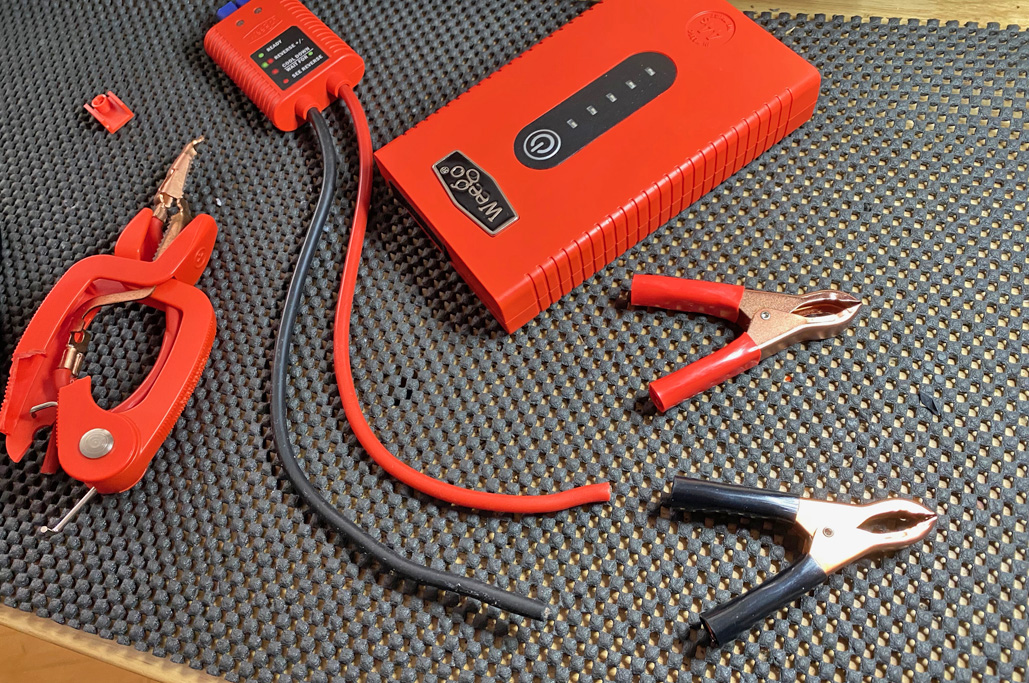
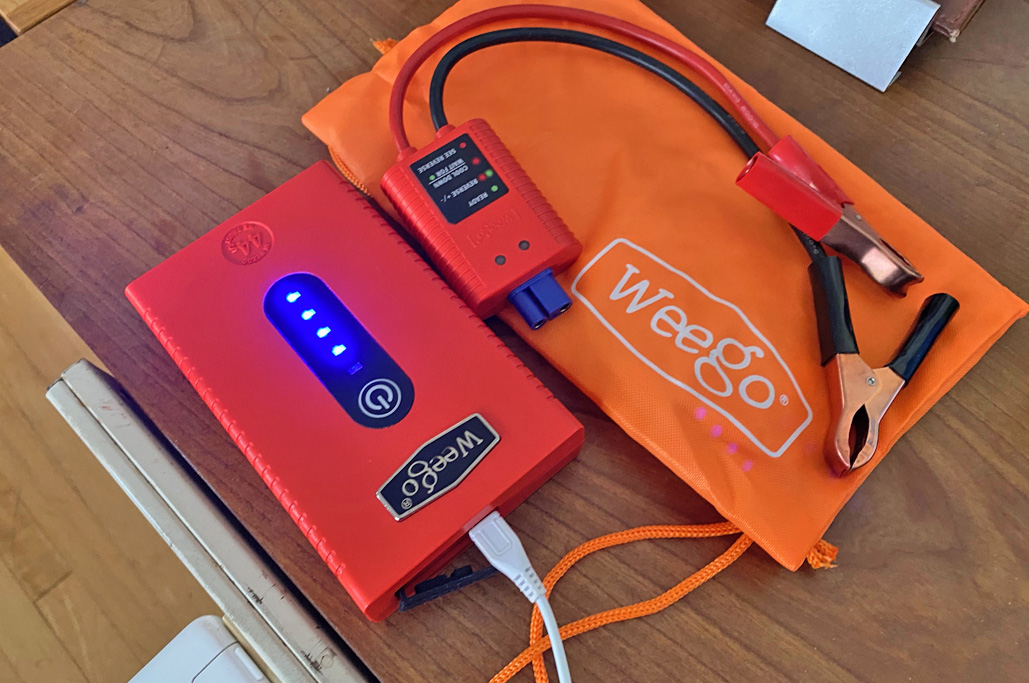
This DIY took about 5 minutes and should last for the lifetime of the device:-)
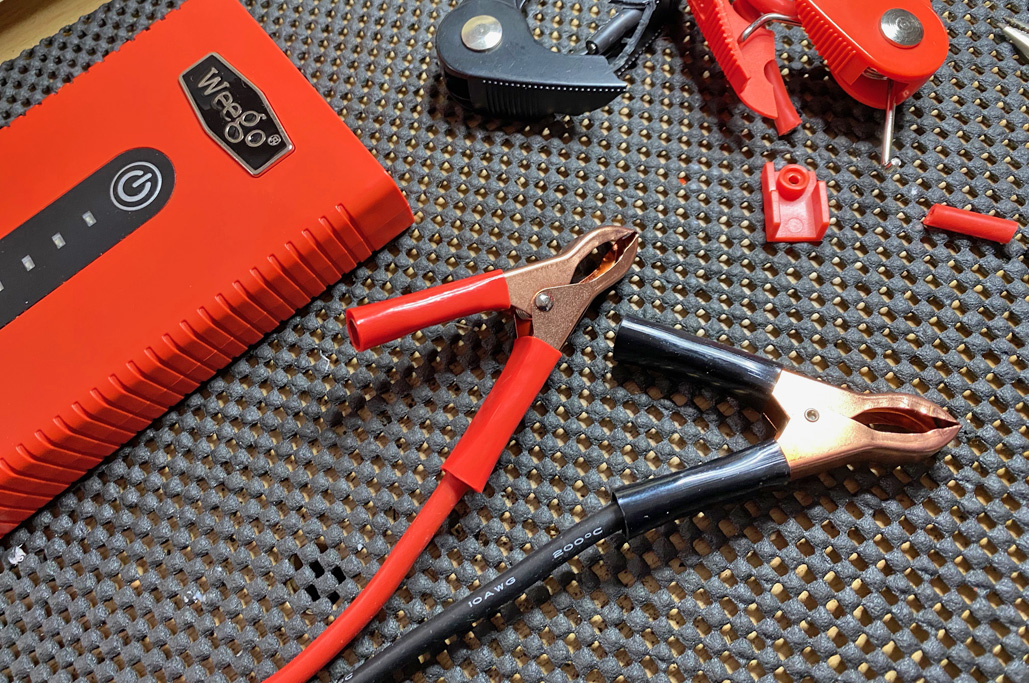
We are proponents of the adage: Sometimes simple is better. The replacement clamps were simple to use and will likely outlast the Weego battery pack itself. When that happens, we’ll toss the dead Weego, but save the clamps…just in case we need them for another DIY repair 🙂

Done and done!
Oh yeah…we topped off the charger before returning it to the trunk of the car.
Links to items mentioned:


Leave a comment