DIY: Apple Charging Brick Repair
Pay $80 for a new one or solder a few wires....
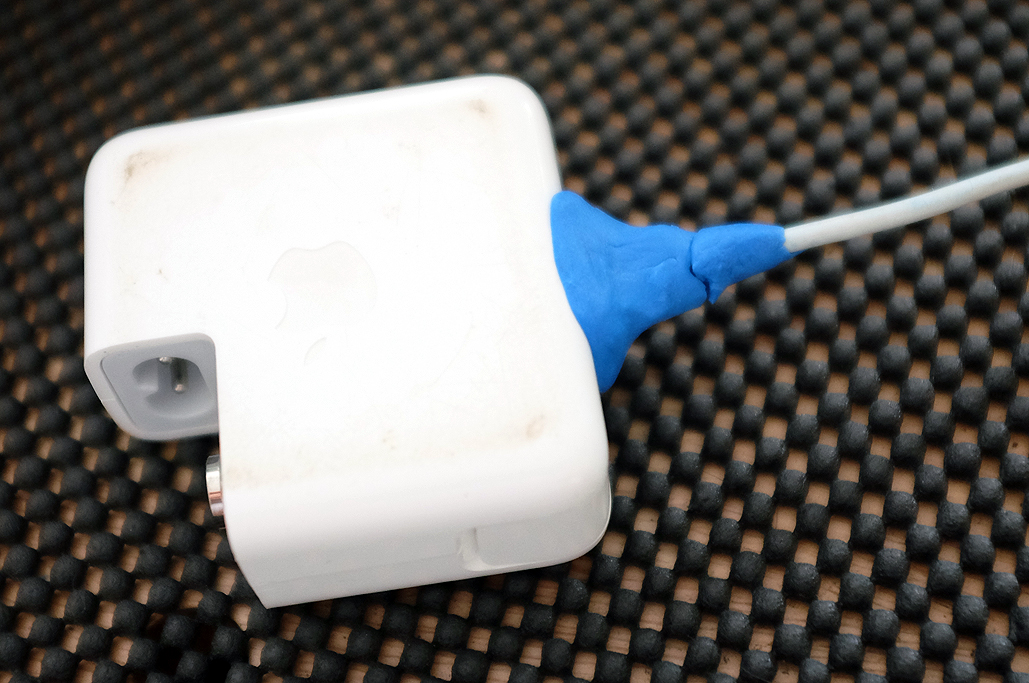
The Apple charger has a design flaw which makes it possible to break the charging cable if one is not careful with handling it (ahem). The cable can flex against the strain-relief sleeve in such a way that it breaks the wire inside. While some of us in the RainyDayOffice are careful with their charging bricks, not all are (ahem).
We noticed…someone’s…charger was working intermittently and knew its days were numbered. The Sugru we put around the weak point (note the crack) only staved the problem off for a day or so.

Of course, the day we will let a DIY repair opportunity pass us by is the day we’ll jab a hot soldering iron in our eye! Besides, having to wait for a freed-up charger is annoying when a laptop rans out of power, so its best to just fix it and be done with it.
Opening The Brick
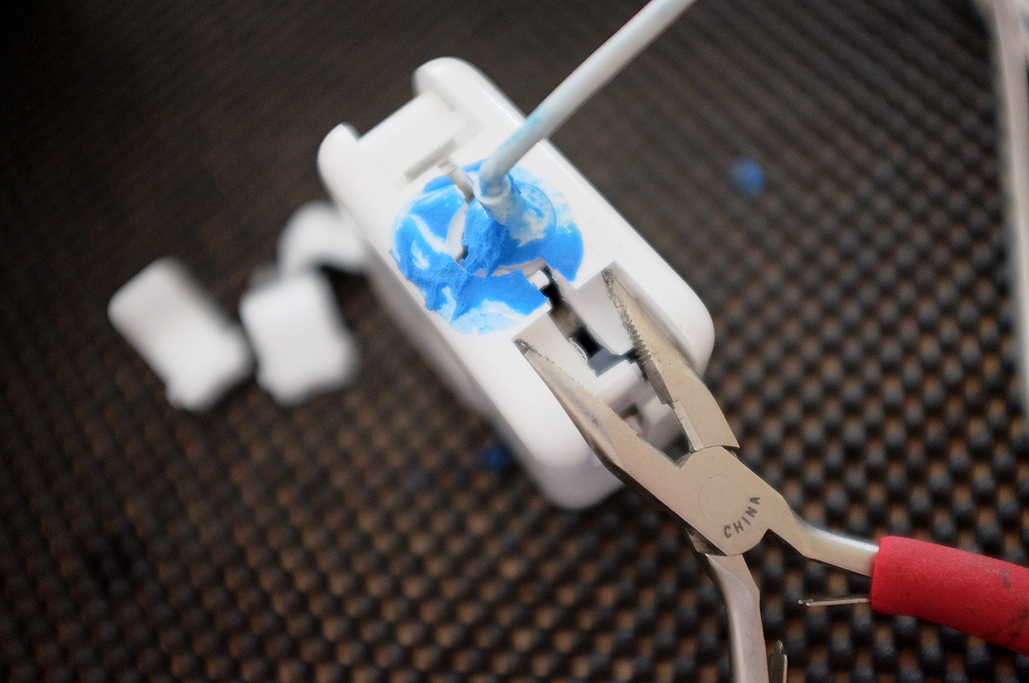
The Apple charger is made so that it can’t be opened without breaking the tabs holding the covers together. Clearly Apple did not want anyone going inside and mucking around. Well, Apple should have either fixed the design flaw or made the cable disconnect- able from the brick…because the day we’ll pay $80 to replace a broken wire is the day we jab a hot soldering iron in our other eye!
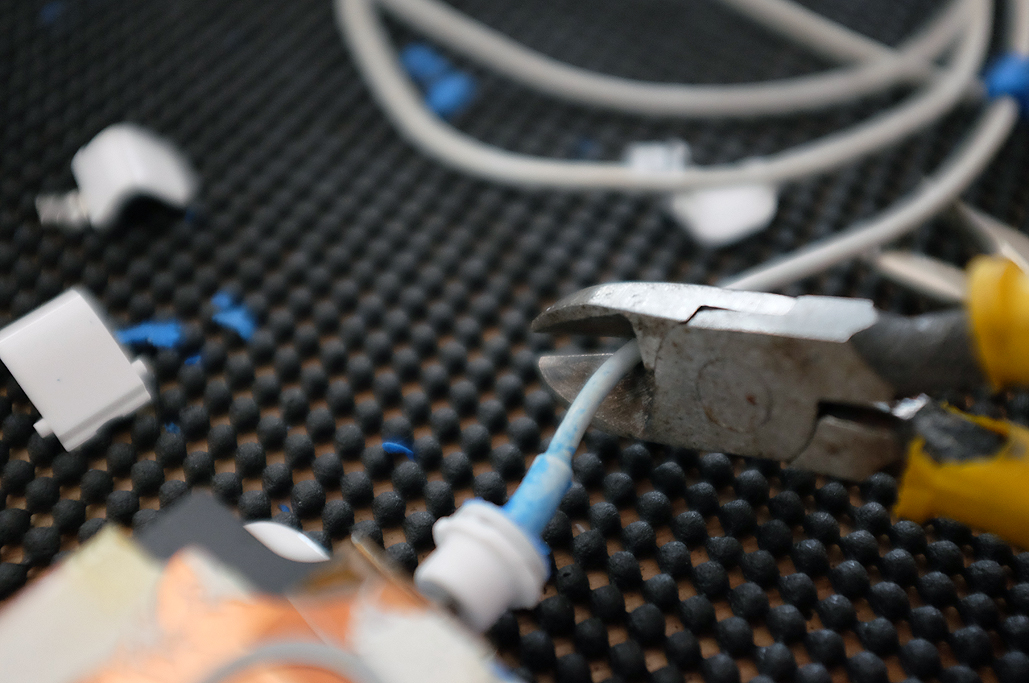
There are a lot of ways to crack open the charging brick. Since we WILL have to break it open, the “best” way is the “quickest and easiest” way: put the head of a pair of pliers in the space at the corner, pull open the pliers, and force the covers apart. The force WILL break the little tabs holding the covers together, but the covers cannot be pulled apart any other way.

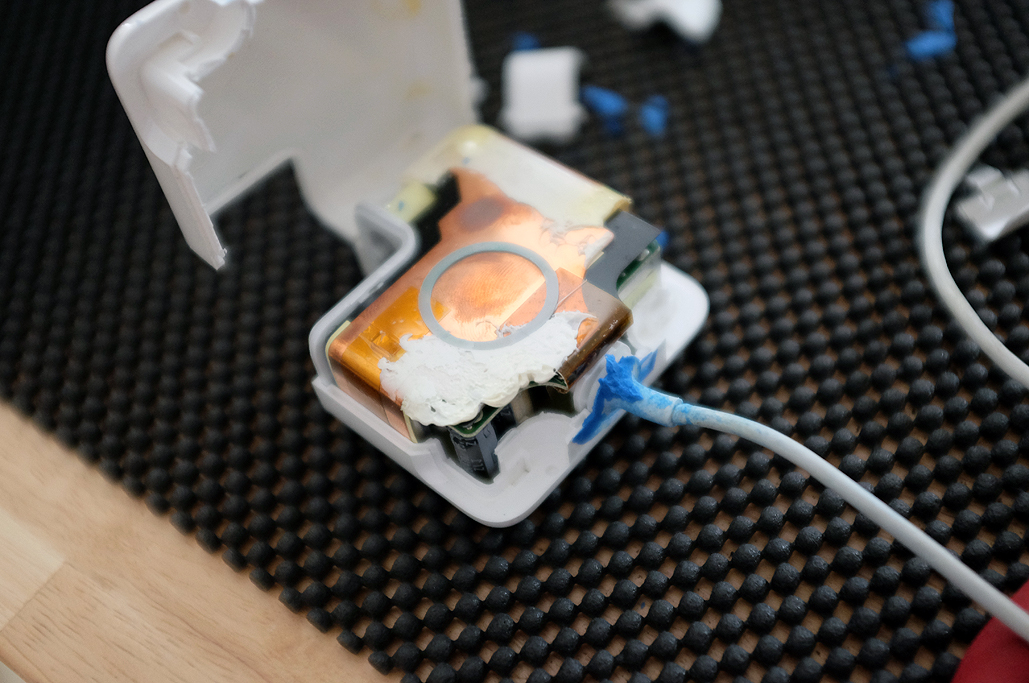
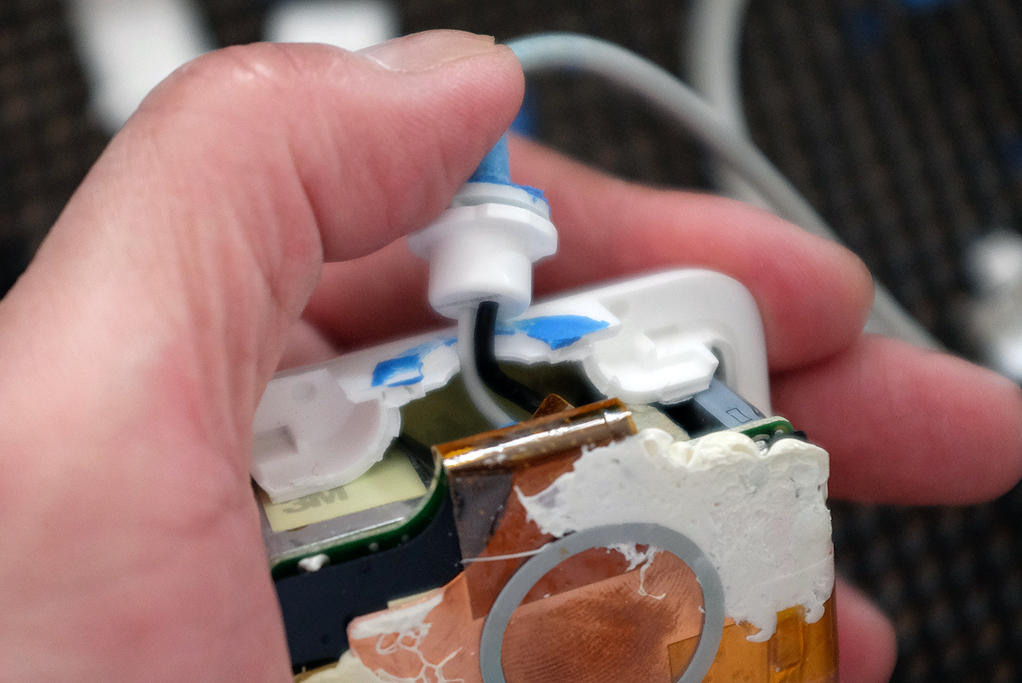
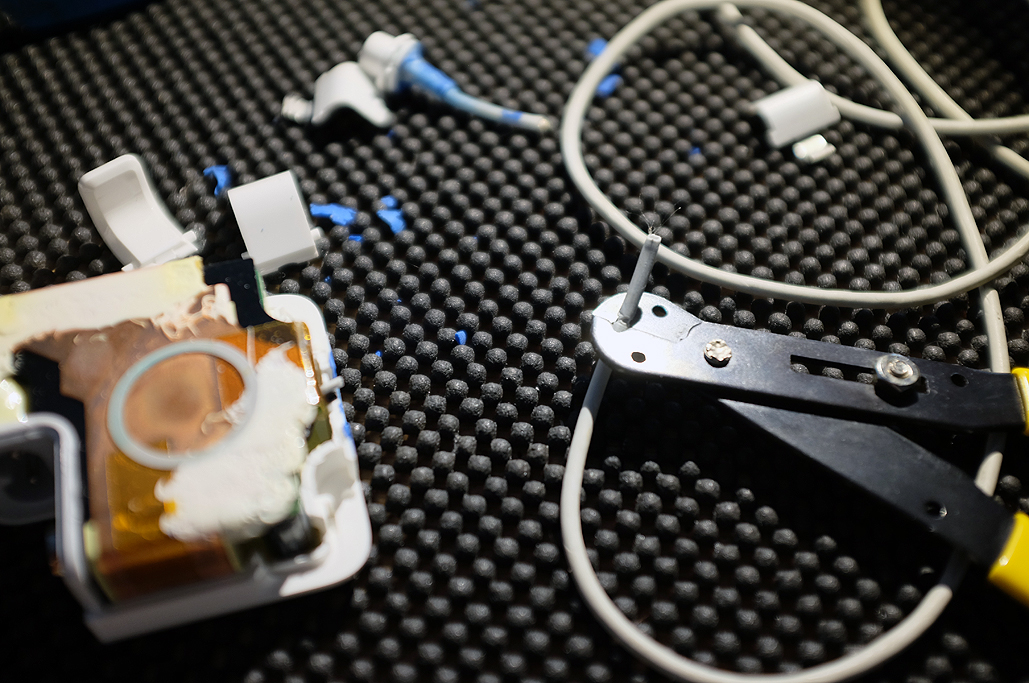
With the brick open, it was easy to free the strain-relief stem from the main housing. This exposed the black/white wires internal to the unit. However, if you cut the cable on the other side of stem, you will see something very different.
Cutting The Cable
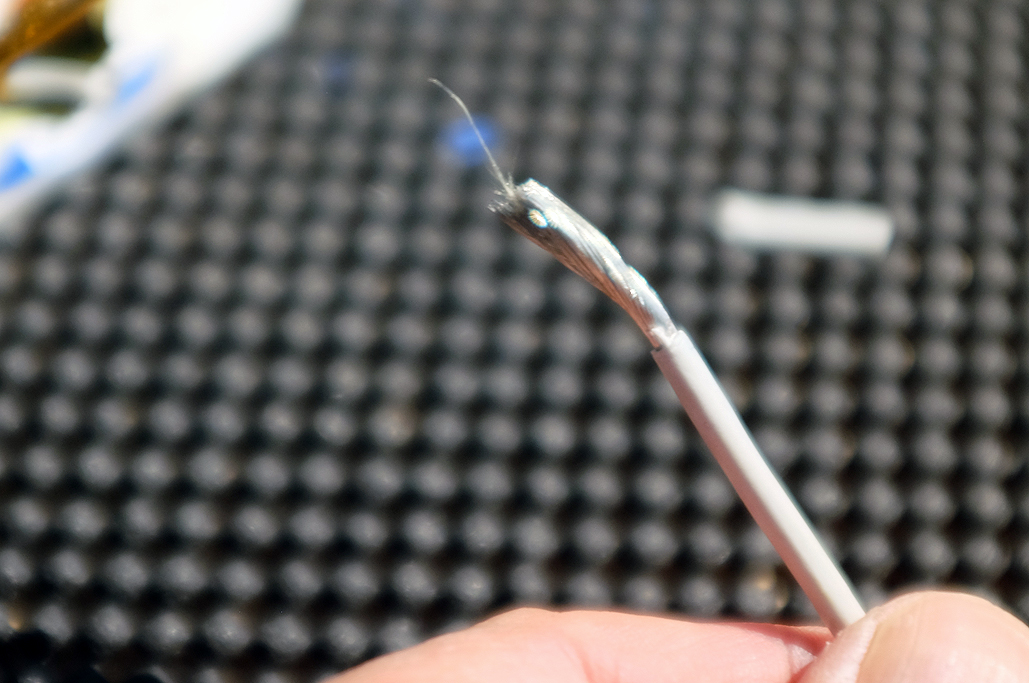
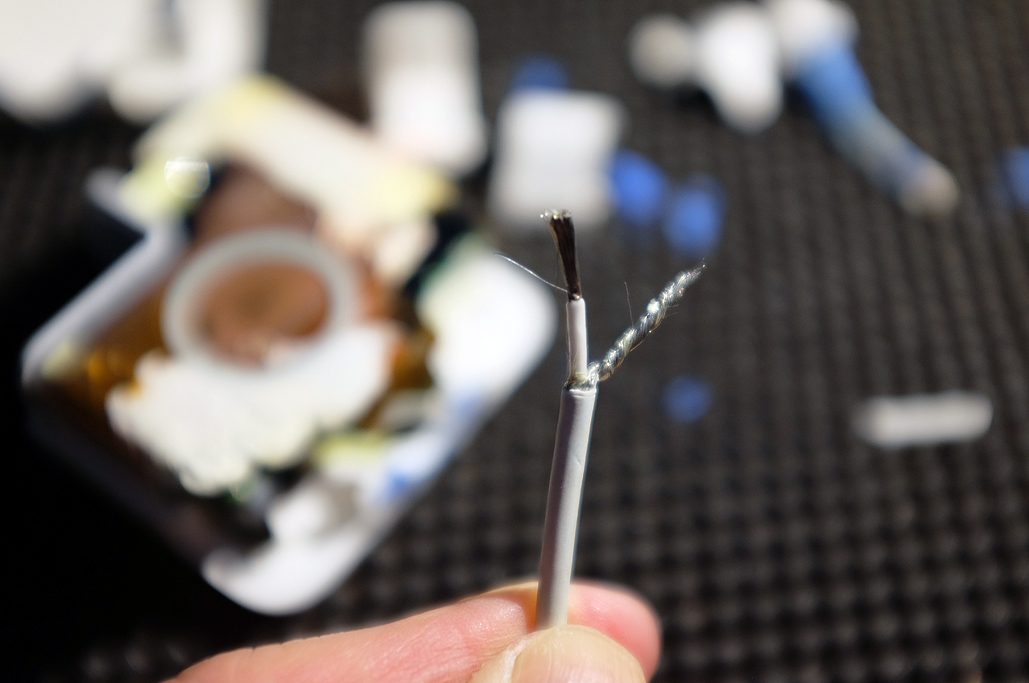
Our first step was to cut the charging cable at a spot beyond the broken point, and strip the outer coating. Once stripped, we twisted the outer coating of wire strands into a bundle. A sharp diagonal cutter is best for cutting as the cable is a coax design (an insulated central bundle surrounded by another stranded layer of wires).

For those wondering, here are two advantages that a coaxial power cable offers for DC power transmission over other types of conductors:
- Data may be combined with DC power from a power supply on a single coax cable; and
- A coax cable confines the high-frequency power supply switching noise components to the space between the center conductor and shield, thus eliminating undesired EM radiation/noise.
Granted, the Apple proprietary coax power cable design may have other benefits, and by our hack, we may have eliminated some of those advantages. However, in the end, we just needed it to work as a wire 🙂
Soldering The Wires
This step was the only “tricky” part of the DIY repair. It was not difficult, but this was where we could have bricked the project (as in, “turned it into a dead brick”). Why? Because the wires to the guts of the charger were really short and therefor a little difficult to work with soldering-wise. A fine-tip iron worked best for this situation.

We managed to join everything up, but the working quarters were a little tight 🙂 To make sure the two wires were well separated, we wrapped them individually, and then wrapped them together into a tight bundle. It was not as clean looking as the original, but it should be just as functional.
Closing Things Back Up
With the tabs broken, the best way to close everything back up was with SuperGlue. We used the gel type of SuperGlue for this task as we did not want it to flow into the unit. A bench clamp held it all together until the SuperGlue had a chance to set.


To make it all nice, prevent any bits from finding its way into the brick, and to add a bit of extra support for the cable, we seal it all up with some Sugru 🙂
Power It Up
The moment of truth came when we plugged the repaired charge into the AC outlet and connected the MagSafe connector to the MBP. Nothing sparked, smoked, or otherwise indicated that we had shorted anything out…AND the “charging” LED came on! Done and done 🙂

We will keep an eye on this charger to see if it continues to “behave.” After all, it is not much of a savings if it smokes our MPB or burns the place down!
Items mentioned in this DIY:


How about a hot glue gun on strain relief ?