WORX JawSaw Maintenance
We had some old tires lying around that had been destroyed by the rim eating potholes of last winter. So we fashioned these into an easy on platform to drag across longer branches we wanted to cut with the JawSaw. This would not have worked well for a normal chain saw but the JawSaw kept our branches stable and the logs we created dropped into the open tire center. That made it easy to grab and stack them later. Now we don’t feel so bad about the damage done to those tires.


After cutting for a while you should check the JawSaw for three things: lube level, chain tension and finally saw dust/debris build up. All three are easily accomplished with the saw disconnected from the power source. We also tested how easy it was to get the chain on and off the guide bar when it needs to be replaced. The clear plastic lube level window on the stock makes it easy to check there is sufficient lube for the chain. Periodically you should also open the housing with a twist of the socket wrench that is supplied and check for dust and debris build up.

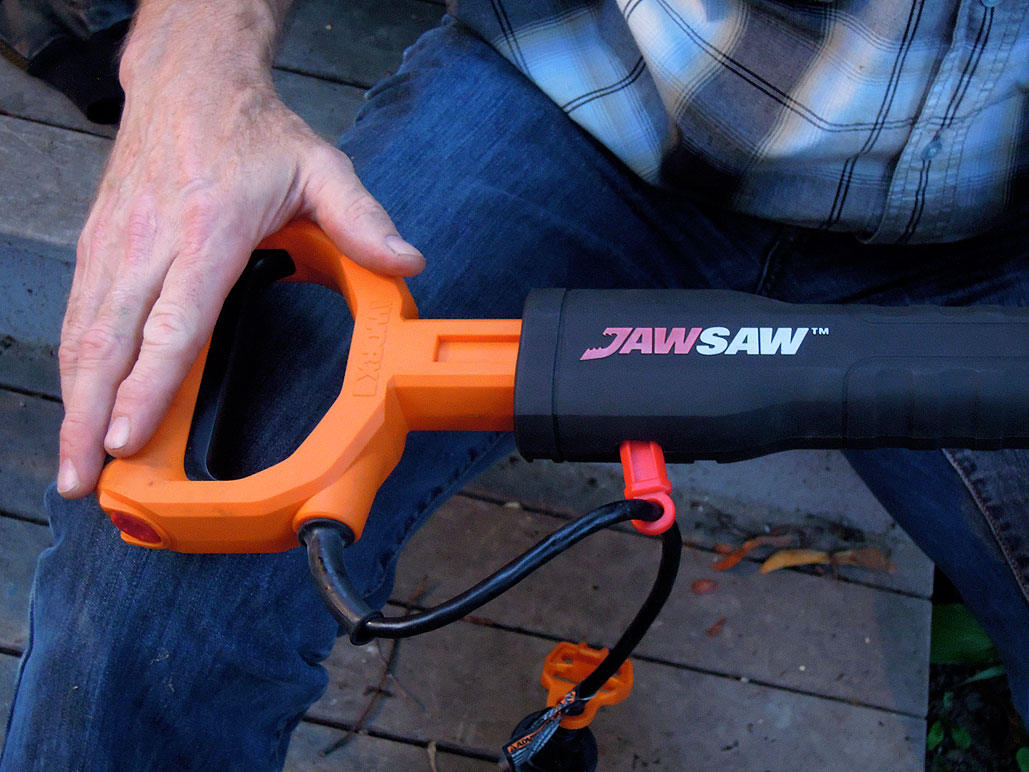
Caked sawdust and debris can clog the flow of lube oil to the chain and the drive sprocket. To visually check the chain and guide bar we secure the plunger handle so it positions the saw blade in the middle of the jaws. This is accomplished by pushing in the handle till the square hole in the handle is directly under the square hole in the black housing and then inserting the square red peg that hangs on the power cord. Now the spring loaded handle won’t return and we can work on the chain.

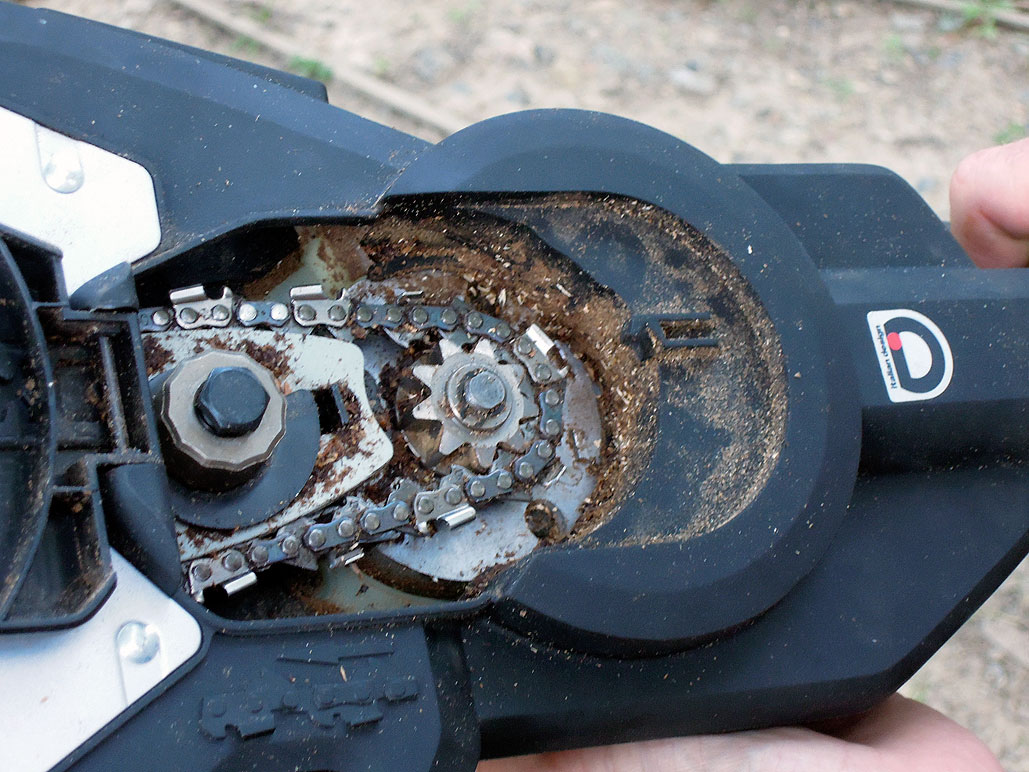
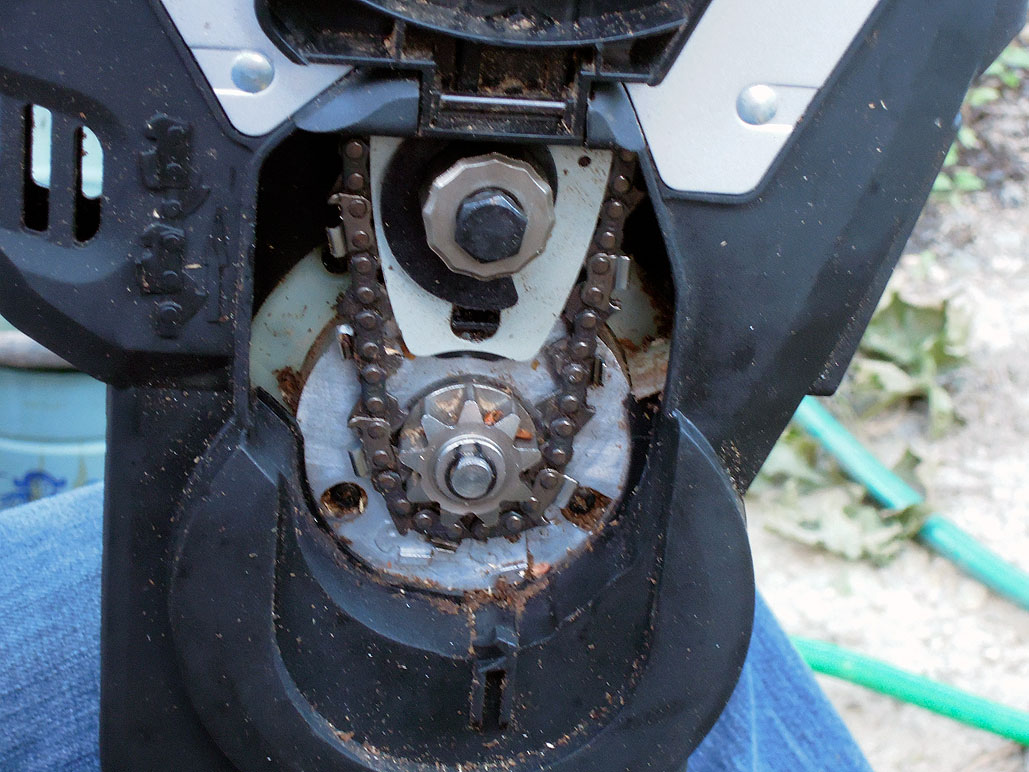
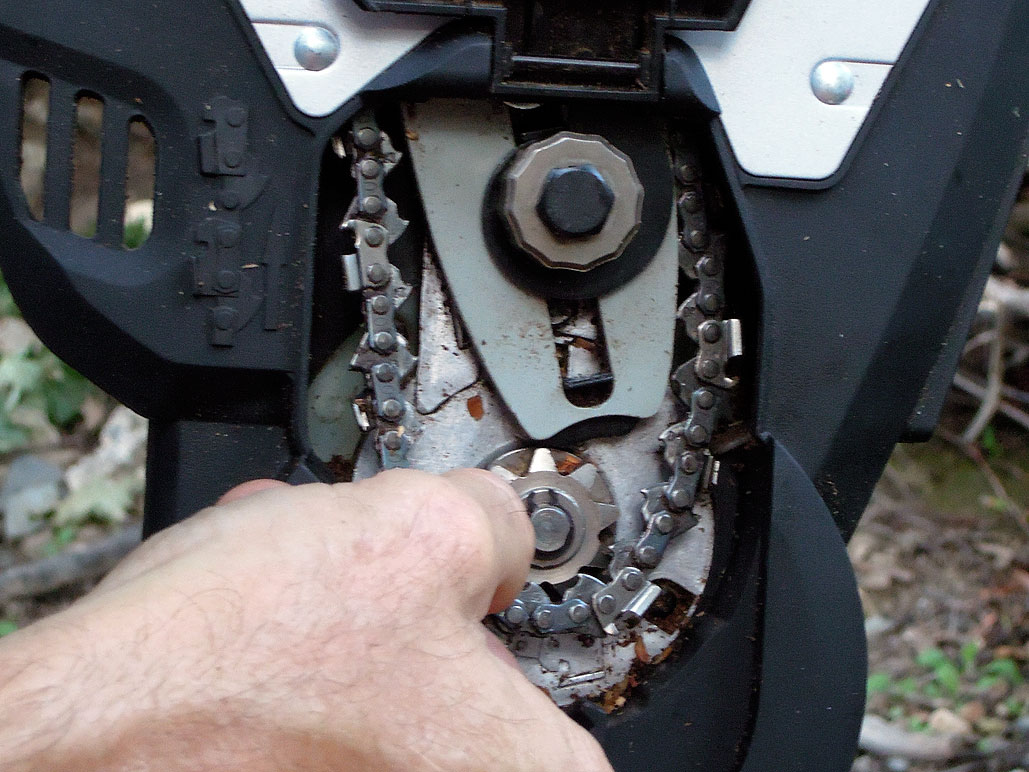
Next we popped the cover plate over the sprocket drive and used a soft bristle brush to clean off build up by the sprocket and along the guide bar. Then we used the socket wrench to loosen and remove the bolt that holds the black cam in place on the guide bar. It is positioned just above the sprocket that drives the chain. Loosening the cam releases the chain tension and we can readily slipped off the chain. That allows a more thorough cleaning and examination of the oil ports. The same process would be used to replace a worn chain.

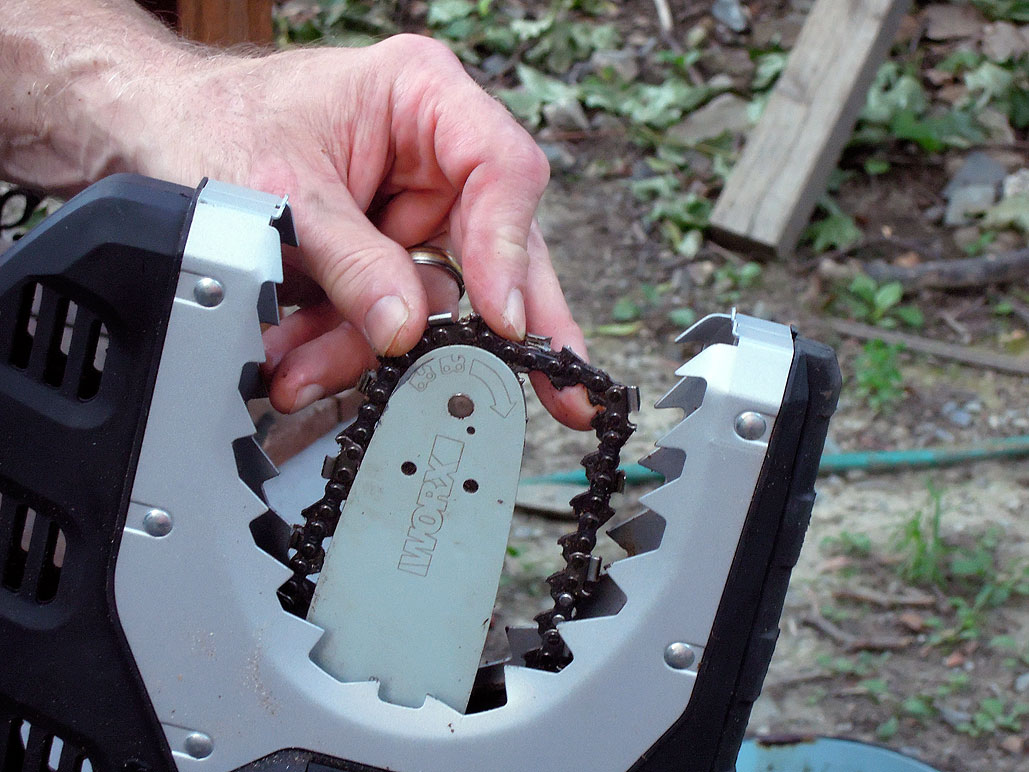
Putting on the chain back on the guide bar and sprocket is easy enough. Just cradle the saw with the guide bar pointed up. Let the chain hang down and position the top end so it sits down in the guide channels of the bar. That allows enough slack to fit the chain around the drive sprocket. Picture below shows chain is hanging down toward the ground with the guide bar pointed up.

Now fasten the bolt and cam to set the tension. The cam automatically sets the tension after it is sufficiently tightened. Check the tension on the bar so it can be pulled an 1/8th of an inch off the guide bar and before it is released and reseats in its channel. If needed give the bolt on the cam a quarter turn to tighten the chain.

That covers basic ground work with the JawSaw and routine maintenance. In our next look we take on some pruning and test out the extension handle that can be attached to the JawSaw for work overhead.
by Jay Rogers/Photography by Lisa Rogers


Leave a comment