Celestron NexImage 10: FirstUse
Camera, lights, action!!!
We posted a FirstLook on the NexImage 10 a while back, and had intended to follow up with the FirstUse a few weeks later. A few of our RainyDayScience readers called us out for not doing it!!!
So here it is…better (five years) late than never 🙂
Software
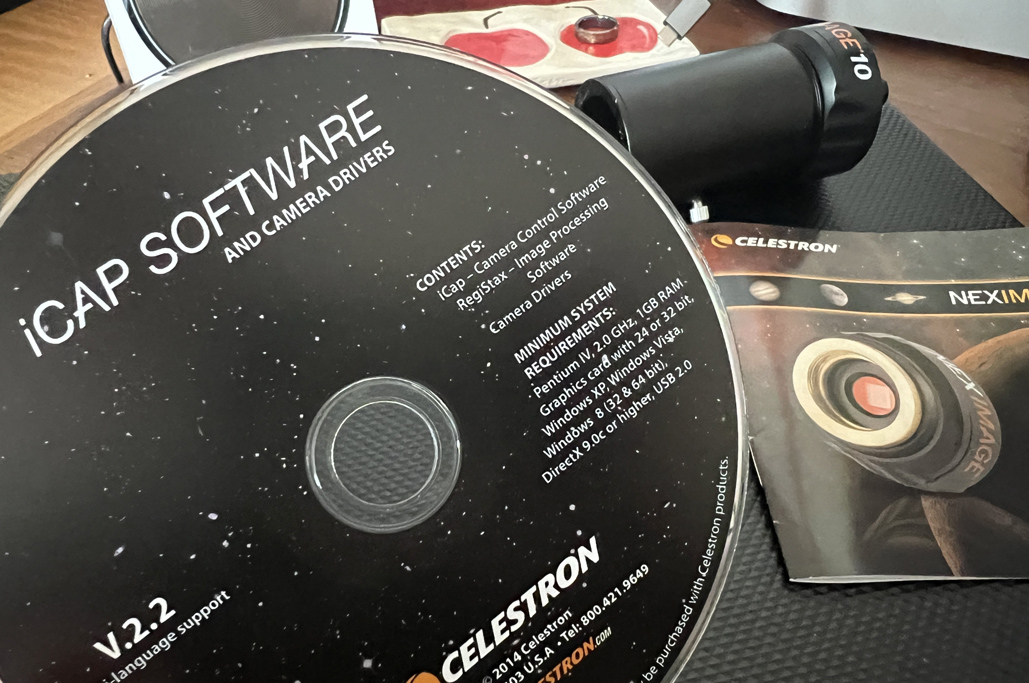
The software to run the NexImage 10 came on a CD, but the latest versions are available online.
- iCap
- Registax
- NexImage Driver
We first got the camera up and running on the PC. We will go into more detail on the software that runs the NexImage 10 on the PC and the Mac in another post.

Connect and Calibrate
Before we could take the NexImage10 for its FirstLight, we needed to:
- get the camera hooked up,
- load the software, and
- do some calibrations.
The calibration task is best done during the day, when we can see what we are doing and what’s what.

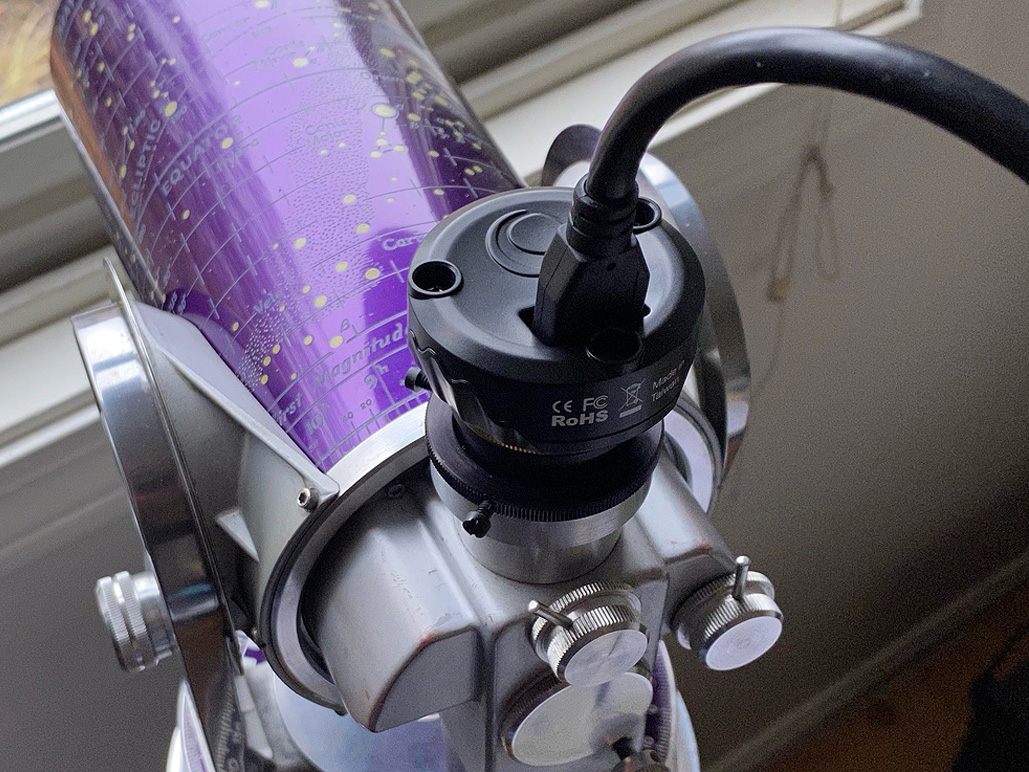
Attaching hardware to a computer can be a frustrating exercise. While the driver installed without any issues, it could not see the camera when it was plugged in. However, a call to Celestron tech support cleared up the issue in a jiff: There was a conflict with some Windows update that prevented the camera from being recognized. Once resolved, the camera showed up on the list, and we were good to go!

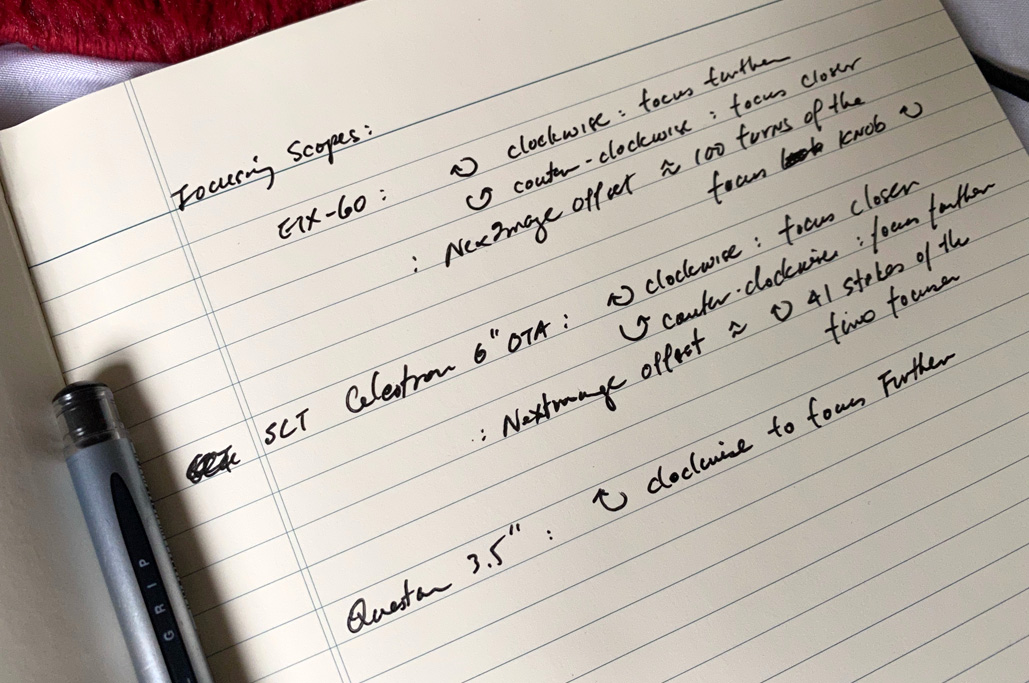
In our calibration notes, we took notice of approximately how many turns and in which direction we needed to rotate the focus knob on the various telescopes to get the camera image to come into focus. We hope this will save us some time when we are out in the field!

FirstLight
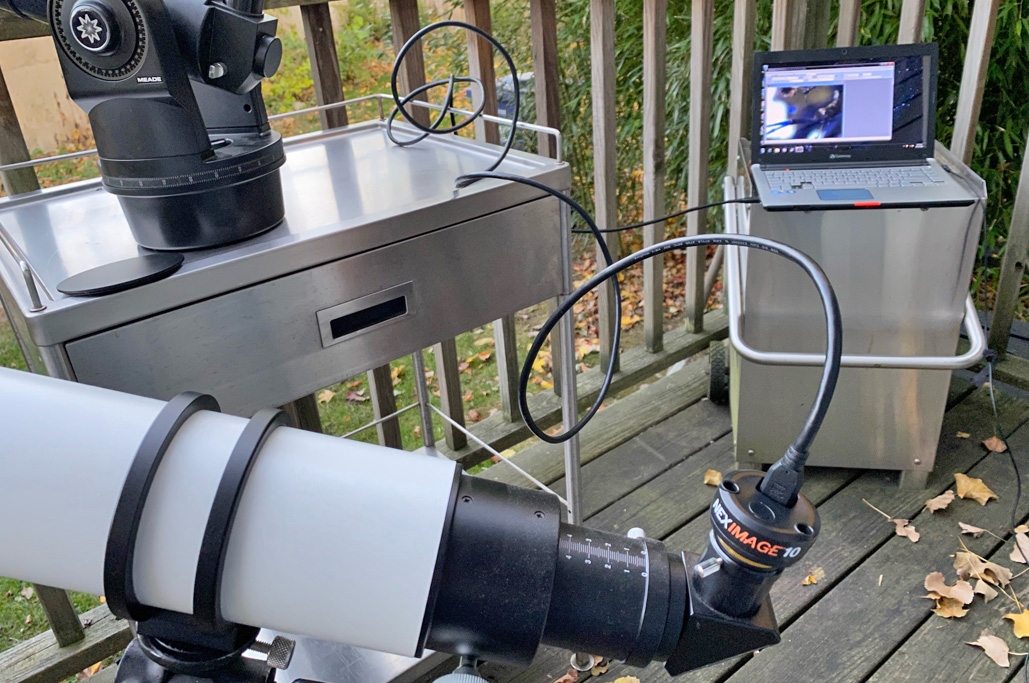
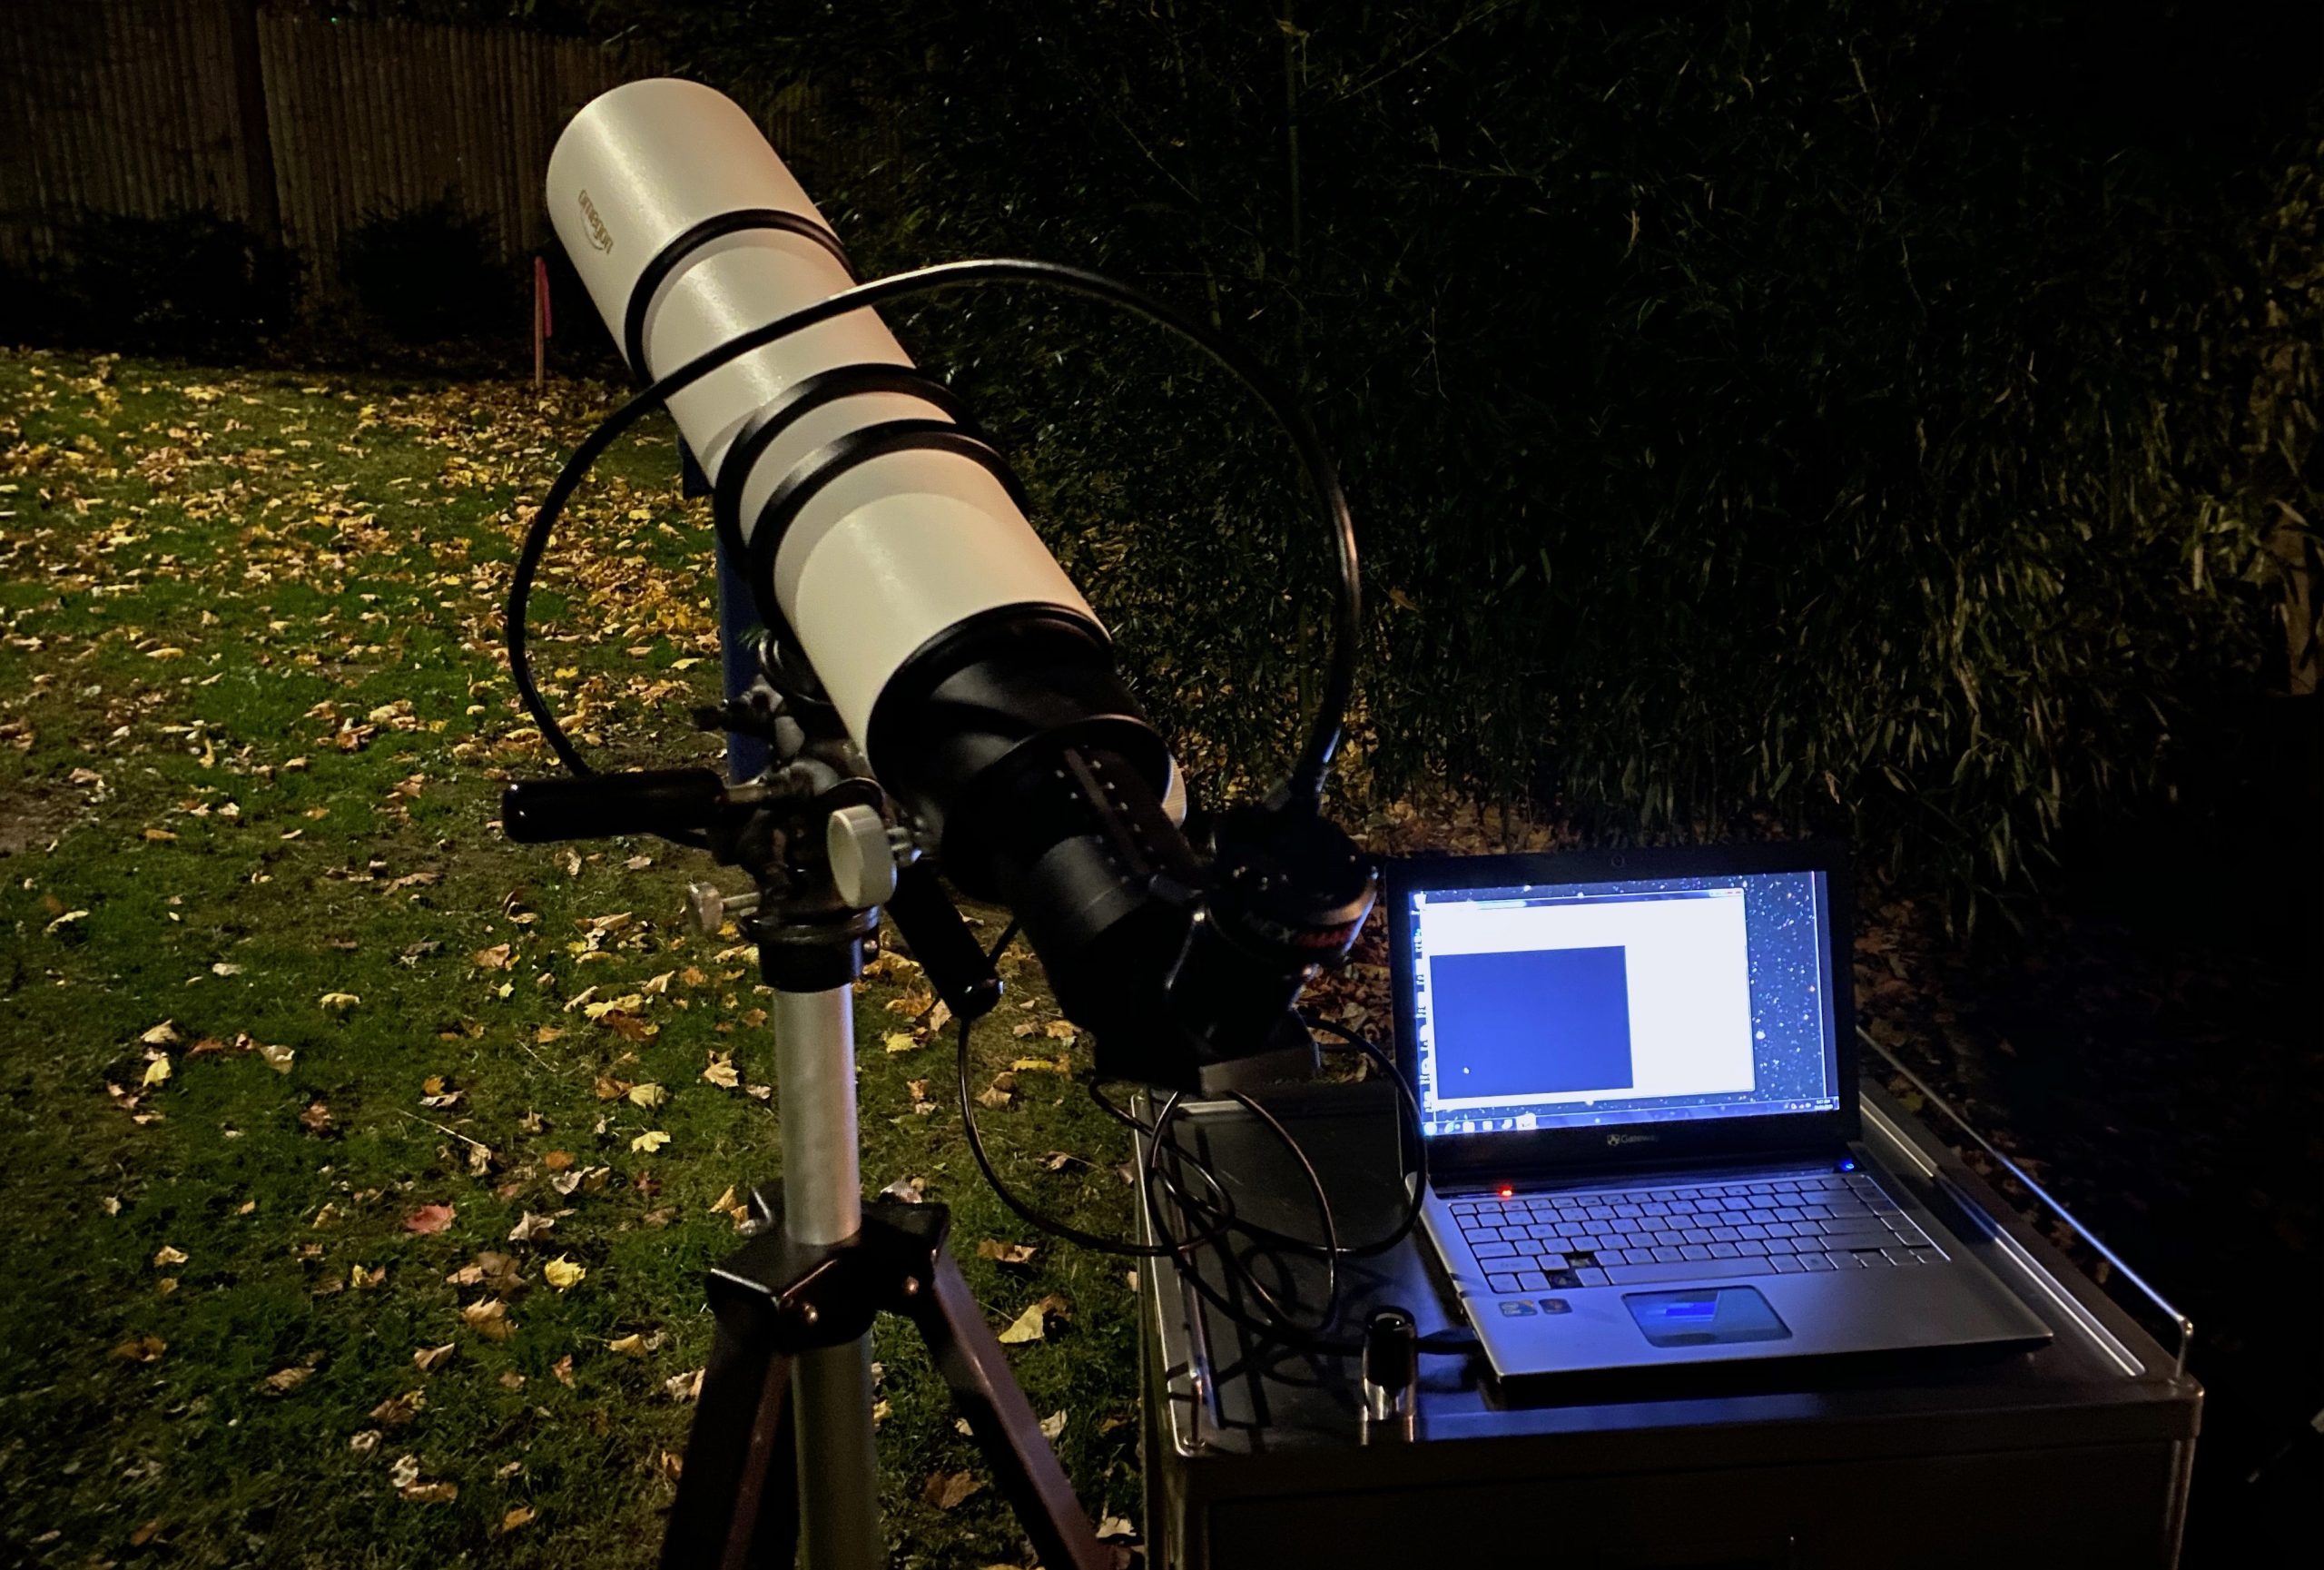
We took the NexImage10 out for the first time with the Omegon 500mm OTA. We pointed it at Venus and immediately realized that it would be too hard a task for FirstLight. While we could see the planet, we would not capture anything. We’ll give it another try once we get the tracking set up.

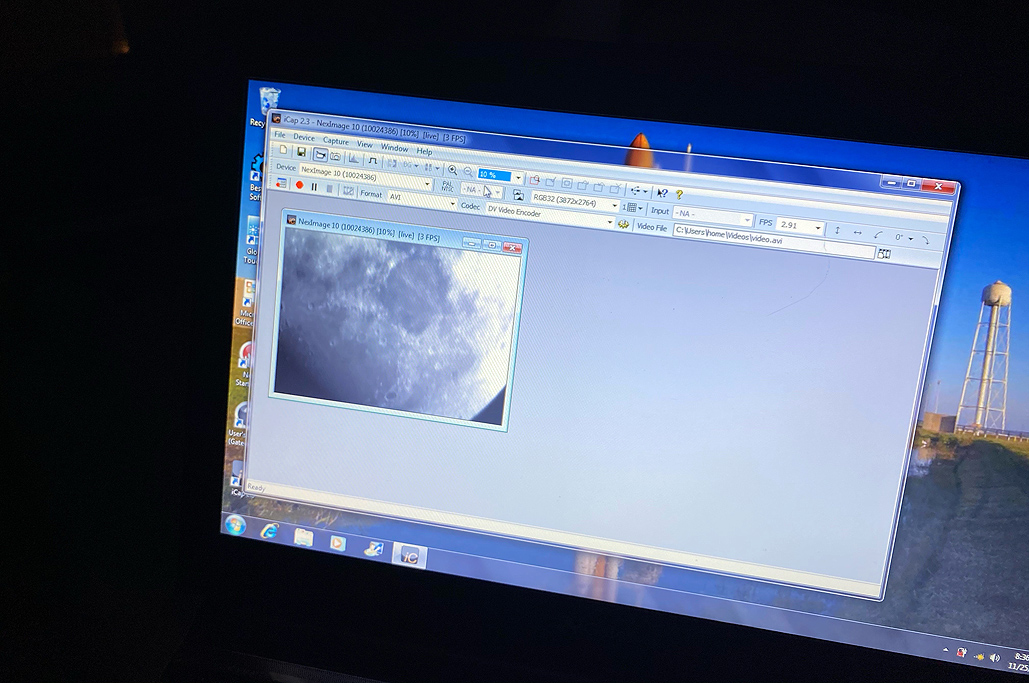
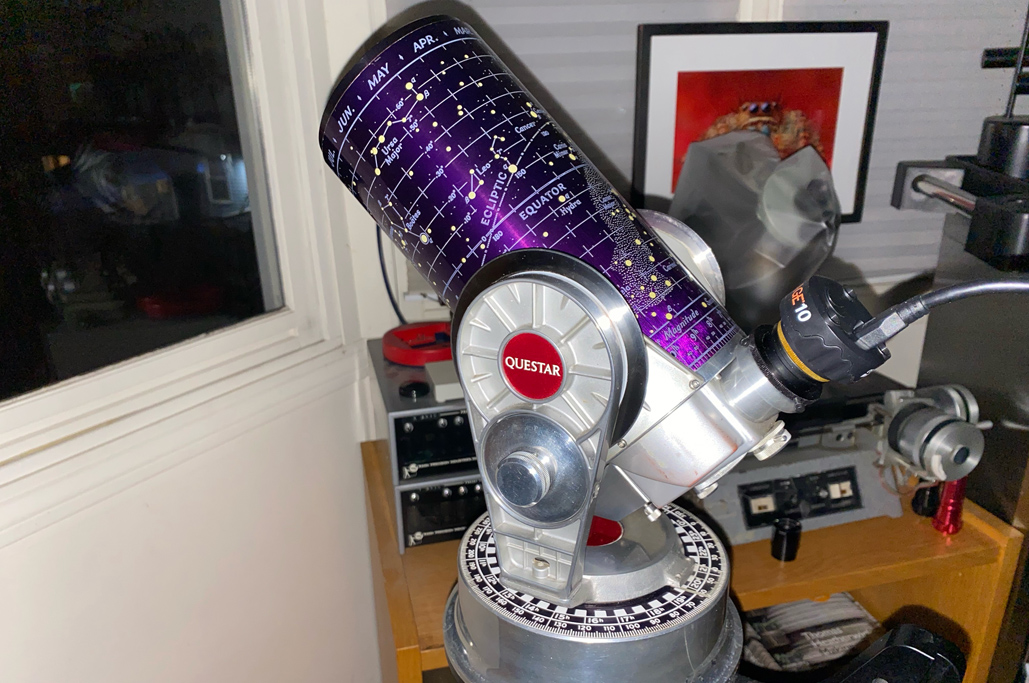
However, a brighter target was available. Fortunately for us, the full Moon was passing across our window, and we were able to set up the Questar and NexImage rig to grab some shots. Yes, we lowered the upper window so the double-pane glass was not in the way 🙂

While imaging outside is OK, being able to do it inside is a lot more comfortable:-) Also, the big advantage of working inside is that we can always turn the lights on whenever we need. No fumbling out in the dark, LOL.

FirstThoughts
The NexImage 10 camera was easy to set up on a PC laptop, especially if the OS was Windows 10 or newer. We had some issues with an older PC, but a call to Celestron tech support cleared it up ASAP. The calibration went smoothly, and we had a decent FirstLight experience using the NextImage 10 with various scopes.

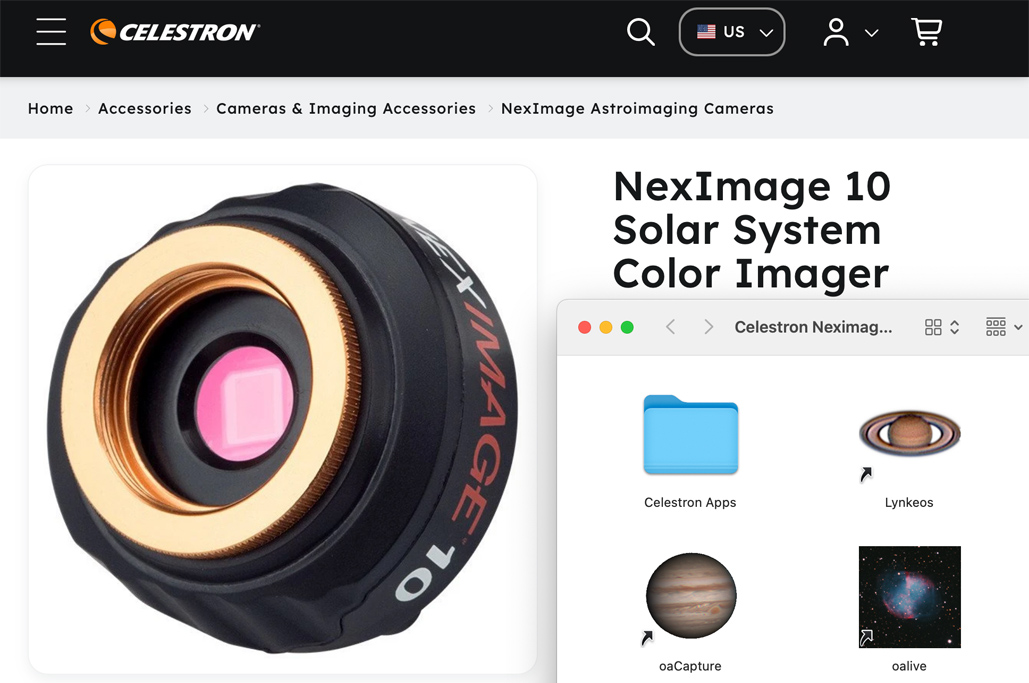
We have discovered that this camera is now supported on the Mac OS via oaCapture and oaLive!!! We’ll try the NexImage 10 with those applications and report back at the end of Spring…we promise 🙂
Links to items mentioned:


Leave a comment