RainyDayMagazine's content can now be licensed for your print magazine or web site. Please contact us directly here. If you want to see something reviewed, then drop us a note with a link and we'll be happy to take a look.
Photography is a big part of our daily activities. We used and reviewed quite a few pieces of photograph- related accessories in 2009. Many of them are useful, well made, and made great additions to our collection. For the Holiday Catalog, we wanted to highlight the ones which we found either particularly interesting and/or especially useful.
At the beginning of the year, we upgraded our Nikon from the D40 to the D90. The D90 has been a true workhorse. To increase its productivity, we recommend the following accessories: a Phottox vertical battery grip, a Nikon GPS-1 module,and a Nikkor 50mm 1.8 lens. Readers interested in exploring their creative side should check out the Lensbaby Composer. We got this unit late in the season and have not logged a lot of time with it yet, but with what we have been able to do so far, we will be usingit A LOT in 2010.
For readers interested in astrophotography, we recommend checking out HoTech's self-centering T-adapter (SCA). This piece of equipment will make an immediate difference in their efforts. HoTech also has the AstroAimer laser pointer specifically designed for astronomers. The use of laser pointers to coarse align telescopes has been gaining wide acceptance. The AstroAimer has a few additional features (LED flashlight, red lighting mode, etc...) which are useful for when out in the field.
The last piece of gear on this year's collection is the Stellascope. The Stellarscope has been around for a while, but we have found it to be such a handy aid for learning the night sky that we thought we would give it a plug this year. It would make for a great stocking stuffer :-) Happy Holidays!!! [Permalink] -Holiday Catalog: Photography
December 4,2009
A few folks from RainyDayMagazine went to NYC for a small media event in November. We used to go to the mega tradeshows like CES, but have been passing on them because of the cost and their sheer size. While it is great to be able to see everything all in one place, what good is it if we get no more information than if we had just read the press release? Instead, we have started to attend mini-tradeshows organized by companies such as PepCom. The main reason? We get to actually CHAT with the vendors and to play with their new gear, something which we've found to be seriously lacking at the larger tradeshows.
One vendor we specifically went to meet at this show was the folks from Lensbaby. We were intrigued by the Lensbaby 3G when it came to the office. We quickly realized what a cool and creative piece of photo gear it was when we had a chance to play with it. So much so we created a special container for it so we can take it with us on location shoots, as there are always opportunities to use the Lensbaby.
We met Craig, the inventor, and a few other nice folks (Sam, Keri) from Lensbaby at the show. They took the time to demo (soft focus effect, fisheye effect) for us all of the cool new Lensbaby gear. The newest items in the Lensbaby collection are the Fisheye and Soft Focus optics. These optics are part of the Optic Swap System. The core of the Optic Swap System is a Lensbaby called Composer. Currently, the system has six different optics in the collection, each designed for a different creative effect. The principle of the the Composer is the same as the 3G, but its design is completely different. Swapping out optics in this lens is lightning fast. Well, at least when Craig did it :-) It looks pretty simple, but we'll probably have to practice a little before we get proficient at it.
We will be taking a much more detailed look at the Composer and the two new optics in future articles. Since we already KNOW we'll want to take these "babies" out into the wild, we have secured the necessary protection from the one source we know will keep them safe...OtterBox! Many readers have told us that they too have "upgraded" their OtterBoxes with inserts to house their favorite gear. Well, if you have not heard, OtterBox now offers waterproof cases with foam inserts. Excellent!
Knowing that our collection of optics in the Optic Swap System will likely to increase, we got two of the OtterBox 3510 units so we will have enough room to grow :-) We'll have a write-up of the project once we decide how best to layout the Composer and the optics in the OtterBox.
Readers will have to indulge us as we will not only be recommending the Lensbaby as one of the top items in this year's RainyDayMagazine Holiday Catalog, we will also be using them extensively in shooting most of the product shots. Get ready for a crazy-fun next couple of weeks! [Permalink] -Lensbaby Composer
November 30,2009
We posted a write-up on the MFA's new Albrecht Durer exhibit last week. The collection showcased Durer's skill as a print maker. On that day a second print exhibit at the MFA, featuring Toulouse-Lautrec, also went live. Cafe and Cabaret: Toulouse-Lautrec's Paris will run until August 8, 2010. "Toulouse-Lautrec was one of the most original and creative artists of the late 19th century, a master of the great age of color lithography," said Malcom Rogers, Ann and Graham Gund Director of the MFA. "No artist captured the excitement of Parisian nightlife with more verve than Toulouse-Lautrec."
The MFA curators (Helen Burnham, Clifford Ackley) gave us a glimpse of 19th-century Paris' bohemian nighlife as captured in posters, prints and paintings of Toulouse-Lautrec. Toulouse-Lautrec, one of the more well-known Post-Impressionist artists, painted what he lived. His Paris was one of cancan dancing, drinking, and carnal pleasures. The bohemian lifestyle and heavy drinking did not pair well for Toulouse-Lautrec and he died early in his thirties. Even so, he managed to be both prolific in his merry-making and in his painting.
"Through his work, Toulouse-Lautrec drew new connections between art and daily life, becoming a central figure in the decadent society he portrayed," said Clifford Ackley, Department Chair and Ruth and Carl J. Shapiro Curator of Prints and Drawings, who organized this exhibition together with assistant curator Helen Burnham. "He transformed the art of the poster, and his designs were some of the greatest ever created."
Toulouse-Lautrec was famous for his ability to capture the essence of his subjects where most could be identified by their silhouette alone. His long thin strokes and quick sketches would expand into brightly colored works with broad flat colors, strong silhouettes, and unusual points of view.
In addition to works by Toulouse-Lautrec, this exhibit highlights images of the Parisian nightlife by several other contemporaries. Both Pacasso's Stuffed Shirts and Theophile-Alexandre Steinlens's poster Collection of the Chat Noir are also on display.
The MFA is open seven days a week. General admission (which includes two visits in a 10-day period) is $20 for adults and $18 for seniors and students age 18 and older, and includes entry to all galleries and special exhibitions. Admission for students who are University Members is free, as is admission for youths 17 years of age and younger during non-school hours. No admission fee is required (after 4 p.m.) on Wednesdays. For general visitor information, visit the MFA website or call 617.267.9300. [Permalink] -MFA Toulouse_Lautrec
November 25,2009
The MFA has put together an awesome exhibit of Albrecht Durer's work. Featured are about 50 pieces selected from the Museum's large collection. They are representative of this Renaissance master's skills in a variety of printmaking (engravings, woodcuts, drypoint) techniques.
Clifford Ackley (MFA's Curator of Prints and Drawings) and Helen Burnham (assistant curator of Prints and Drawings) gave us a fascinating view into the various pieces selected for the Durer exhibit. There were WAY too many interesting works to discuss in any in detail here, but we'll mention some of the many interesting things learned on the tour that struck a cord.
The first was the engraving Saint Jerome in his Study (1514). According to the curator, this work is probably one of Durer's best-known engravings. It was interesting both because of the strong perspective used to direct the viewer to the saint and the amazingly delicate treatment of the light and shadows in the room. Note the details in the shadow of the leg of the chair in this close-up.
The next were the two prints of The Prodigal Son amid the Swine (1496, 1525) done twenty years apart. It was interesting to see the difference in quality from the repeated printing. The earlier print was darker because Durer often chose not to remove the "burr" or metal shaving at the edges of the engraved lines. These bits caught and retained extra ink, leading to a stronger print. The burr would wear away over time. Some would say that resulted in a "weaker" image, but we thought it actually revealed additional details overshadowed by the additional ink in the earlier printing. Regardless, it was amazing that the MFA had two copies so visitors could see them side-by-side!
The last was an engraving called Melencolia I (1514). While this piece is already well-known to many in the art world, the recent release of Dan Brown's novel The Lost Symbol will expand its recognition even wider. In the book, many of the items depicted in the engraving were given special Masonic significance by the author. One item specifically mentioned was the magic square. The one depicted in the engraving was especially clever. Not only did the numbers sum to 34 in the columns, rows, and diagonals, they also added up to 34 in the quadrants. Durer even managed to work in the date (1514) of the work into the last row of the square. 16th century recreational math...geeks were cool even back then!
The Albrecht Durer: Virtuoso Printemaker exhibit opened on November 21st and will run until July 3rd, 2010. Durer's works require close inspection for full appeciation, so here is a RainyDay tip...bring a magnifying glass! You will be amazed at what you will discover at the MFA. [Permalink] -Albrecht Durer: Virtuoso Printmaker
November 16,2009
We have been experimenting with our macro setup when time permits. Most of our shots have been on inanimate or very slow moving objects. Because of the cooling Fall temperatures, an opportunitiy presented itself the other day which enabled us to try our hand at an insect.
We noticed a common yellow-jacket wasp on our upstairs window. The cool temperature had slowed down its movements to a crawl. Once things warmed up the insect would likely be on its way. We had to work quickly if we wanted to get some shots. The bellows setup works best when there is plenty of light.
The placement was perfect for our macro efforts (except for having to shoot through a pane of glass) because the wasp was back-lit and its exoskeleton nicely illuminated. However, even with such great lighting, it was still difficult to see exactly what was in focus.
In the end, we did manage to get some interesting shots of the wasp. Due to the shallow depth of field, only a part of the insect was in focus in any given shot. We picked out a few representative samples to show the different parts at full resolution. Click on any of the images for a closer look.
We now have a better appreciation of just how difficult it is to take good macro shots. There must be a more precise way of achieving critical focus. This will be our next topic of research. We will share more as we delve further into this interesting branch of photography. [Permalink] - Macro Opportunity
November 6,2009
There is a LOT of manipulation which can be performed with software after an image has been taken: color correction, sharpening, contrast/brightness adjustments, the list is practically endless. However, getting rid of unwanted glare is not one of them. To do that properly, a polarizing filter must be used when taking the image.
Light bounces around in all directions. Under certain conditions, some of the rays can muddy up a photo. A polarizing filter can be helpful in those situations by blocking light rays not oriented in a certain way from reaching the sensor. The effect is a clearer and crisper image.
When we took our walk down at the Boston Public Garden the other day, we knew we wanted to get some of the Fall colors reflecting off the pond, so we brought along our set of Tiffen filters. The set had the three basic filters: the warming filter for better skin tone, the UV filter for reducing haze, the polarizing filter for getting rid of unwanted glare.
A polarizing filter is directional. Its orientation must be set for each shot. This is not as cumbersome as it sounds and it is very easy to do during use: look through the viewfinder, rotate the outer ring of the filter until the desired effect is obtained, and take the shot.
To maximize clarity, we used the polarizing filter to filter out some of the glare of the water. This resulted in clearer reflections on the water and better color contrast overall. There weren't any clouds in the sky, but had there been, they would have appeared puffier and more dramatic.
There are other situations where a polarizing filter can be of help, but we'll save those for another article. A filter is probably the simplest piece of optical equipment there is. Most have no moving parts, are relatively inexpensive compared to a quality lens, and are simple to use. They should also be in every photographer's bag of tricks. [Permalink] - Tiffen Filters
NOTE: The weatherman was wrong about the snow prediction for today! Get out there because it is going to be a gorgeous sunny day :-)
November 5,2009
When the sun is out in Boston, we try not to stay inside. The sun has has been showing itself these past few days, so we accepted the invitation, got our butts out of the Aeron, and headed outside. As we had been taking in the Fall colors, we thought we would see what's going on down at the Boston Public Garden.
On the weekends, the Boston Public Garden is a pretty busy place, but during the week it is quiet and serene. Parking, usually a problem, is easy. We found an on-street spot right next to the park. There were plenty of folks strolling about, but absent were the throngs of tourists and their kids.
Boston is a very "visitor-friendly" city and we locals are happy that so many of them enjoy our lovely city. Sometimes, however, it is nice to walk around without being in the midst of so much, chatter. I know, I know...it is a sure sign that we are turning into a bunch of old farts! Regardless, we took full advantage of the quiet, tranquil, and beautiful day in the Back Bay.
If you live in Boston and have not had a chance to see the city's Fall colors, make some excuse for an errand, hop on the T and head to the Boston Public Garden. The colors will only be around for a few more days (snow is forecast for Friday). [Permalink] - Boston Public Garden
November 3,2009
Fall is a beautiful time of year in New England. On a sunny day brilliant colors of yellow, red, and orange colors are everywhere. We had plans to head to one of the popular "leaf-peeping" places (Western MA, White Mountains NH, etc...) but realized that the Arnold Arboretum at just three miles from the office would probably be as spectacular. Instead of spending hours driving to the enjoy this year's colors, we went for a walk instead.
We were not disappointed! The colors of the leaves on the trees at the Arnold Arboretum were at their peak. Their glory was enhanced by the sun shining behind them. Even the colors of the leaves on the ground were still quite vibrant.
There are different and distinct sections in the Arnold Arboretum. We entered the arboretum from the Centre street gate, but it didn't really matter as there are well-maintained paths throughout. Some of them are paved walkways, but there are plenty of colorful trails for those wishing to momentarily transport themselves out of the city.
One of our favorite site at the Arnold Arboretum is the Bonsai House. The structure is built in such a way that visitors can get up close to the beautiful bonsai. The miniature maples in the collection have turned a brilliant red. Others have started their changes as well. If you want to see them in person, go soon as they will be moved indoors some time in early November, depending on the weather.
Next to the Bonsai House is the new Victor and Frances Leventritt Garden. This garden is one of the most significant additions to the Arboretum since its founding in 1872. The Leventritt Garden's terraced beds feature a diverse array of sun-loving ornamental shrubs and vines. There is lots of room for future growth, and for now, a great place to have a picnic or to host an event!
The Arnold Arboretum has three man-made ponds. They are clustered together near the Forest Hill gate entrance and are quite popular with the water fowl and dogs looking to cool off. They also offer a lovely setting for some very nice photo opportunities.
This week is forecast to be very nice, weather-wise. We would recommend a visit to the Arnold Arboretum if you want to see some Fall colors but don't have the time or the desire to wander too far away from the city. [Permalink] - Fall at the Arnold Arboretum
October 26,2009
Digital FOCI's PhotoBook is a modern version of the venerable photo album. However, because it is digital, it can do so much more! Like a non-digital version, the PhotoBook can display photos. Unlike its non-digital counterpart, it can play music during the slideshow and play video.
The digital PhotoBook can also zoom into any portion of an image. This is an especially handy feature as most cameras can take photos at a much higher resolution than most displays can show. The ability to "dynamically crop" a photo is definitely cool. Of course, it would be nice if there was some way to "remember" the crop, but unfortunately not in this version :-) The great thing about the digital PhotoBook is the software is upgradeable.
Digital FOCI's UI was very easy to navigate. The response is fast and intuitive. It only took about a minute to put together a slideshow. All of the buttons were backlit for visibility. Personal music may be added to the unit for playback during the slideshow.
The obvious next evoluton is a touch screen so selection and page turning will be more natural. Colored e-paper would also allow multiple pages in a single album. However, we are getting ahead of ourselves. When those technologies are available, we are sure Digital FOCI will put it together into a nice, affordable, package. In the meantime, this digital photo album has all of the fundamental features to let us share our images in ways never before possible.
Viewing images right off a camera's memory card in the PhotoBook was very simple. All the popular flash memory formats are supported (CF, SD, etc...). It was pretty much plug-n-play: click on the memory card icon, select the image, hit OK, and view.
SD memory cards are inexpensive. A 1GB card cost just a few dollars. Digital FOCI's PhotoBook makes it so easy to view digital photos that it may make more sense to leave the images on the SD memory cards permanently. Folks may just buy new cards like they used to do with film. In fact, Digital FOCI should add SD card pockets on the inside of the PhotoBook cover. Companies like Lexar and Sandisk should give away PhotoBooks with a bulk purchase of SD cards! If Kodak was on the ball, they would have bought flash memory makers a year ago when their stocks were 1/10 of their current value and get into the "digital film" business :-)
Some readers may remember the scene at the end of Harry Potter and the Sorcerer's Stone where Hagrid gives Harry a photo album. The album was full of images from when Harry was a little boy. The magical thing about the photo album was that all the images in the photos were moving. When we first saw that photo album, we thought...that possibility is not too far off. It seems we were correct. Click on the image below to see what we mean. The resolution of our little movie is kind of low because we down-sampled the video file to shorten the download time. The quality of the video on the actual PhotoBook is MUCH higher.
The Digital FOCI PhotoBook is one of the best uses of LCD display in a consumer product we have seen this year. If you are looking to create truly unique gift for someone special this holiday season, think about making a multimedia photo album using this Digital FOCI PhotoBook. We think it will be a huge hit! [Permalink] - Digital FOCI: PhotoBook FirstUse
October 19,2009
The RainyDayMagazine team spent the past few days relaxing on the Cape. We love going to Provincetown around this time of the year because the tourists are gone, things are quiet, and we can totally unwind. OK...maybe not totally as we had seven laptops amongst the six of us :-)
A few of us went down on Friday. Others left Boston on Saturday and got there in time for breakfast. One advantage of driving down early in the morning is the light traffic across the Sagamore Bridge (Note: current bridge repair work--that has reduced the number of lanes to one each way--could add an extra 30-40 minutes to the drive).
Bill and Irfan's place looks out over the marsh, and the weather was wet and rainy for most of the weekend. We brought down the Sigma 80-400mm lens for the FirstUse test because we knew the marsh would be teaming with birds. It appears we were correct. There were about half a dozen grey cranes, a few herons, and a bunch of other birds. It was a target-rich evironment for our first outing with the Sigma lens!
The Sigma 80-400mm lens did pretty well through out its entire zoom range. The Optical Stablization (OS) worked well, but we did notice some odd stuttering of either the shutter or the mirror. It did not appear to affect anything.
The quality of the images were good for a low-contrast day. We got quite a few reasonable shots from about a hundred yards out, but none of them were pin sharp. We want to see how this lens will perform under optimal conditions. So our next outing would have to be on a much brighter day. [Permalink] - Sigma 80-400mm Zoom FirstUse
October 16,2009
Digital photo frames are popular gifts for the holiday season. The quality of these frames have improved tremedously from a few years ago. We reviewed an excellent digital frame from Parrot in 2007. The Parrot frame was high resolution and used Bluetooth for data transfer. Those features eliminated two of the problems with digital frames: resolution and ease of image updates.
Recently, we learned that Digital FOCI has released a product which addressed the last objection some have with digital photo displays... the power cord. When we took a closer look, we realized that Digital FOCI has not only cut the power cord, but has removed the computer from the process. All one needs is to insert the memory card with the images into the PhotoBook and follow the in-device instructions. Excellent!
The PhotoBook is, of course, both Mac and PC compatible. Its specs are quite impressive: 8" color TFT LCD screen, 800x600, 4GB of internal flash, and a 2.5 hr internal battery. The Photobook can handle most of the popular memory cards (CF, SD, SDHC, MemoryStick, xD-PictureCard) in use. All of the popular image (JPEG, TIFF, BMP, GIF, RAW), audio (MP3, WMA, AAC) , and video (MPEG-1, MPEG-4) formats are supported. A USB 2.0 port is available for image downloads from a computer.
Slots for memory cards, power buttons, and various connectors are on the side. All of the software to run slideshows are built right into the device. The PhotoBook is ready to go out-of-the-box (after charging up the internal batteries).
We will have a full FirstUse run-down on the features of this Digital FOCI PhotoBook next week. It does not take a genius to see that these devices will be commonplace in a few years. However, if you want one this Holiday season, Digital FOCI PhotoBook is the one with all of the "grandparents-friendly" features. [Permalink] - Digital FOCI PhotoBook
October 14,2009
We finished up the IR conversion project over Columbus Day weekend. As we had discovered during the first time we took one of these cameras apart, the best way to get at the filter was not from the front, but from the back.
This approach eliminated the need to mess with the lens assembly. The CCD is held in place by three screws and a few dabs of adhesive. Once the CCD was freed, the IR filter may be removed by prying.
We made and inserted six of the IR pass-through films into the cell The combined thickness of the films approximated the thickness of removed glass filter. It was not clear how this would affect the quality of the image, but it was a reasonable "best guess."
Reassembling of the camera was simple as we only took about only what was necessary to get at the CCD sensor and to remove the IR filter. Still, we took care and reconnected all of the cables in the reverse order as per our notes. We also checked everything twice before the power-on test. Once we had positive confirmation, we replaced the front and back covers and tightened everything down. Time for a more thorough image test.
The image test was not as successful as we had hoped. It appears that we did something to throw off the autofocus sensor. The IR pass-through filter definitely worked. The closeup shots were quite sharp, but all of the normal and distance shots were out of focus :-(
We learned a lot from this DIY project, but are not sure if this project is worth another go. There are just too many things to go wrong with the filter replacement with such a compact camera. However, we do have three more S100s in our collection...so we may give it one more shot if we have nothing on our project list come the next "rainy day." [Permalink] - Canon S100 IR Conversion
October 7,2009
We got some emails asking about our trip to Ayer to check out the Sigma lens. The photo below should give readers a clue on how things went :-)
We drove up and met Jim M at an Irish pub (which is how all Craigslist business should be conducted) in Ayers on Saturday. Jim is retired and was letting the lens go because, due to arthrititis, it was getting too heavy for him to use. We checked out the lens, took some test shots, and closed the deal before the appetizers arrived.
This Sigma zoom lens is a beast. The weight of the lens without a camera body is almost 4lb! It will be great to have a long zoom for wildlife shots and bird-watching outings. We will likely take it along with us on our outings, but probably will not have it in our day-pack.
The package from Jim included a set of Hoya 77mm filters (UV, polarizer, warm). It was good because while Sigma did supply a lens hood, shoulder strap, and a soft case, it did not include a lens cap. The lens is a few years old and does not have the latest in autofocus (HSM) mechanism from Sigma. It does, however, have an autofocus motor which means it will work perfectly well with our Nikon D40 and D90 bodies.
The 80-400mm zoom lens has an angle of view from about 30º to 6º, a minimum aperture of 32, and a min focusing distance of about 6'.
The biggest problem with using a long lens is keeping it stable. Sigma has designed an Optical Stablizer (OS) feature into this lens to compensate for the camera shake. This effectively translates into the ability to take photos at about 2 steps slower than typical.
We will likely use it with tripod, but it is nice to know that hand-held shots are a possibility.
This Sigma 80-400mm lens is in excellent condition and a welcomed addition to our toolbox. It will take us a few weeks to get acquainted with this big boy. We know that at F4.5, it is not a particularly fast lens. We'll wait for a nice sunny day and take it out for a full work out. Test shots will be coming soon :-) [Permalink] - Sigma 80-400mm zoom
September 30,2009
A few years back we did a project where we converted a digital camera to be sensitive to infrared. This was not as difficult as one would imagine.
The camera was small and the images were pretty low resolution. It was a good first attempt, but we wanted to try converting a camera with a bit more capabilities. Looking around, we realized we had a collection of Canon S-100s laying around. We could take one apart to see what would be involved. It would not be a problem if we messed up as we could just save it for spare parts!
Taking things apart is easy. Putting them back together is a whole different story. The one lesson we learned from all of our years of "seeing how things work" is to make a map of which screw came from where. Trust us, you will NOT remember.
Taking the Canon S100 apart was relatively straightforward. There were a LOT of tiny screws, plenty of flat cables, and some pretty interesting engineering. However, once we found all of the key structural points, the pieces came apart easily. The trickiest part was opening up the lens assembly. The housing is part of the zoom mechanism. There a few gears which must be placed in the proper order to get it all working again. We are not completely sure how difficult that will be. The big problem is that there will be no way to tell until EVERYTHING has been put back together.
Once we had the lens assembly opened and the CCD freed, we realized we didn't have to approach it from that direction to get at the IR filter! The CCD was accessible from the back. Three screws held it in place. From this approach, we could skip a large part of the disassembly process. All of a sudden, this project appears a lot more doable.
Here is a photo of the complete disassembly of the Canon S100 camera. Nothing was forced and no parts were broken during the tear down. We are pretty confident we can put it all back together again. We are going to review our notes, gather the various filters for the project, and attempt the IR conversion. Anyone else game? [Permalink] - S100 IR Conversion
September 15,2009
MASS MoCA is a big place. That's a good thing because some of their art installations need all the space they can get. One such work is the Simon Starling: The Nanjing Particles installation.
The work challenges the viewer on many dimensions: time, size, and space. The photos transport us back to an earlier time, but they literally let us SEE through them into the present.
Looking through the holes, one sees an enormous version of two silver grains which are present in the photographs' film. The grains' shape is faithfully reproduced in three dimensions. They have also been scaled up to the size of a small car. From a distance, the grains appear as they would if viewed under a very powerful microscope. Up close, the giant silver granules take on a sculptural quality and answer the often asked question, "What would this thing look like if we were the microscopic ones?"
Another installation which we found interesting was the large wall drawings conceived by Sol LeWitt. They reminded us of some of the color-perception experiments from Psych 101.
Lines, arcs, colors and spacing are all described in exacting detail in LeWitt's instructions because works of this size cannot be done by just one individual (there were many people actually painting). In order to execute these giant paintings, LeWitt had to develop a vocabulary to describe how to implement his vision. The build "instructions" are as interesting as the results.
We took some images of the wall drawings at different resolution to give readers a sense of the enormous level of detail at all levels. The playful lines and colorful movements are evident at all scales.
There are a lot more installations at MASS MoCA. We have only mentioned a few of the ones that "spoke" to us in particular. If the ones we mentioned do not intrigue you, we are pretty sure something else there will. Go check out what's at MASS MoCA. It may push you in ways you may not expect. [Permalink] - More MASS MoCA
September 14,2009
When we were out at North Adams this past weekend, we checked out MASS MoCA. There is always something interesting happening at this museum.
Readers who have been out to MASS MoCA will be familiar with the inverted tree installation. The plantings have been suspended in that fashion long enough for the effects of phototropism to be clearly evident.
The installation is by Natalie Jeremijenko. This arboreal art work, called Tree Logic, was completed in 1999. Six live trees are permanently suspended upside down to challenge the viewer's preconception of what is natural.
MASS MoCA has sprung from the grounds of Sprague Electric Company. Sprague was a major research and development center back in its day. Its focus was on conducting studies on the nature of electricity and semi-conducting materials. Sprague's products were used in the launch systems for Gemini moon missions.
MASS MoCA was conceived as an institution for the display of contemporary visual arts. It has evolved into a center that presents and stimulates the synthesis of works that pushe the boundary of creativity. MASS MoCA, opened in 1999, is currently celebrating its 20th year of supporting artistic innovation and experimentation.
Many readers know about our interest in mind-mapping. Imagine our delight when we came face to face with this work at the This is Killing Me installation.
From the MASS MoCA info..."In contrast to the popular mythology of the studio as a site of inspired genius, these artists depict the studio as a space of always difficult labor, laced more with self-doubt than triumphant brilliance. Part and parcel of the pervasive uncertainties of economic distress, war, and environmental collapse that define our moment, the works in This is Killing Me reveal the specific anxieties of artists in these generally anxious times."
All we can say is...we loved it. The exhibit will be at MASS MoCA until April 15, 2010. We suggest that you make time and go see it. [Permalink] - MASS MoCA
September 13,2009
Today we got up early, had a leisurely breakfast, and got on the road by 11 AM :-) We didn't have a lot on our schedule...just heading to North Adams to climb Mount Greylock and check out MASSMoCA.
We did bring our hiking boots and backpacks for the camera gear, but decided that we would probably not have enough time to make it up to the top if we hiked it. What we did discover was that we could just drive the 5 miles up to the summit and forego the physical exertion all together. We all quickly agreed that this was the better option.
The drive up was quite attractive...lots of twisties, switchbacks, and views onto the valley below. We also saw some cyclists ripping downhill at speeds which we wouldn't attempt in a car.
The view at the top was pretty spectacular. Suppositly we had a clear view to four states: Vermont, New York, Conneticut, New Hampshire. We looked but couldn't really tell you if that was true.
What we can tell you is how form-fitting and comfortable the Kata 3N1 pack was during the little bit of hiking around we did do. While we cannot really claim that this was an exhaustive test of the wear-ability of this pack, we can say that we will definitely be grabbing this bag for our next outing.
There is a really nice lodge at summit (great views, high ceilings, large fireplaces, and food service). Apparently one can rent rooms there even in the Winter. Not sure whether cars can make it up when there is snow or if it is hike-in only. In any case, we are making plans to come back for some snow-shoeing this Winter.
This was more of a scouting trip for our Fall Foliage outing. We got a lot of great info on places to stay, things to do, and where to eat. The drive is a little over 3 hours from Boston. It is possible to do it in a day, but would be much nicer as an overnight trip.
We look forward to coming back in a month or so when the foliage is peaking. It will be a lot cooler at the top of Mount Greylock then. If the weather is nice and we don't have too many Lemon Drops the night before, we may even actually hike part of the trail next time :-) [Permalink] - Mount Greylock
September 9,2009
Next weekend is our annual Fall Outing. We'll be heading to Western MA for a few days of hiking, photography, and a visit to MassMOCA. As always, we'll be bringing gear with us to review. One item we are excited to field test is this new digital camera backpack from Kata. Most readers know that we are partial to Kata gear. We have quite a few of their bags. So do we REALLY need another one? The answer is, of course, YES!
Our everyday "goto" bag is the Kata T-212 sling. We love it because it is easy to use, offers great protection, and is just big enough for the D90 with the 18-200mm VR lens. When we heard that Kata had a new line of camera bags, we made a note but did not check it out. However, we kept getting emails asking about it and our interns kept bugging us to take a look. Finally, we relented and put it our our review schedule.
The new line is the Kata 3N1 Sling-Backpack. It comes in three sizes (10, 20, 30). The really cool thing about the bag is the multiple ways in which it may be worn: right sling, left sling, backpack. The handles are strategically placed and nicely integrated into the bag.
The compartments are easily accessible from multiple angles and the various carry positions. Additional internal and external pockets and storage let the user easily organize small accessories (flash cards, cables, etc...) for quick access.
The Kata 3N1 bag is padded at all of the critical contact points for maximum in-use comfort. High quality parts were chosen throughout. This is one awesome bag.
In the next installment of the FirstLook series, we'll show you just how much gear this Kata 3N1 bag will hold. With the 3N1 in the lineup, our T-212 sling may not get as much "field time" as in the past! [Permalink] - Kata 3N1 FirstLook
September 8,2009
When we purchased our Meade LX200 GPS scope, it came with a lot of accessories. One of which was the Deep Sky Imager (DSI). The DSI is a special-purpose CCD camera designed for astrophotography. When the original owner purchased the unit, it cost over $300. He never used it. In fact, it looked like it had never been taken out of the box.
We thought that since we wanted to take it with us on the Columbus Day Weekend trip, we should get the the DSI set up and do some trial runs now. We also realized that since it required a PC to drive it, this would be a perfect task for one of our really old, but perfectly serviceable ultra-slim Sony laptops.
It has been a while since we installed any software on a Windows 98 machine, but the Meade software installation was relatively pain-free. We did run into some confusion when we got a dialog about some bizarre communcations error. We just ran the installer again and it completed without problems the second time around.
The software is pretty "techie," but we think we can muddle through it. We did manage to get the camera to be recognized by the software at the first try...which is a big deal in the Windows world. The specs on the camera are pretty low by today's standard, but we are still eager to see what kind of images we can get with this DSI. The sensor appears to be working, but we should really do a daytime test to confirm the quality of the image. We'll post more soon. [Permalink] - Meade Deep Sky Imager Installation
September 4,2009
Could you tell that some of us are very excited about the new macro photography rig? We have been fiddling, experimenting, and talking about it all week. The only piece of the setup we have not gone on and on about is the Nikkor 50mm f1.8 autofocus lens. So to wrap up the week, we will have a brief discussion of that lens. I promise we'll go on to something new next week :-)
We did purchased this lens for macro use, but this 50mm lens is a great lens for a lot of reasons. It is light weight (5 oz), very small (2.6"D / 52mm filter), and very sharp. It is also amazingly inexpensive. The lens has six elements, 7 blade diaphram, and can focus down to about 18". Nikon has a faster version of this lens, but it is about 4x more expensive. If money was no object, we might still buy this one because it might actually be sharper based on various reports (Tan, Rasmussen, Rockwell), on the Web.
This Nikkor 50mm f1.8 does NOT have an internal auto focusing mechanism so it will not auto-focus when attached to a D40, but it will with our D90. Of course, this is not an issue when we use it for macro photography as all of the images will be manually focused.
The 50mm lens is pretty amazing when coupled with the D90. These sample images were taken around the office in a quick "point-n-shoot" fashion. We will have to spend a little more time with it to see what it REALLY can do...once we can get over this macro-photography obsession. [Permalink] - 50mm Nikkor Lens
September 3,2009
All the discussion regarding the Nikon PB-4 macro bellows setup brought an onslaught of email. Most were requests for more image examples. Not knowing what would make for good subjects, we just grabbed a few objects and started firing away.
It didn't take us long to get the hang of using the macro setup. All of our examples were shot with available light. The images were taken with the camera in "manual" mode. We didn't note the aperture/ shutter speed setting as it was so easy with digital to just arrive at the right combination by trial and error. We wanted a large depth of field (more things in focus) so we set the aperture at F16 and "found" the right shutter speed setting when we got a bright enough exposure. Click on any of the images to see the larger versions.
Since the weather was gorgeous yesterday, we spent some time outside in the RainyDayGarden. With all the rain this Spring and Summer, the vegetable (beans, tomatoes, etc...) got plenty of water and the vegetable garden produced a very nice harvest. While picking some of the remaining tomatoes Carolyn noticed this giant caterpillar. Even before she finished saying "you gotta see this..." we were setting up the macro gear :-)
Shooting outside was a whole different experience. There was plenty of light, so we were able to use a much smaller aperture, thereby giving us greater a depth of field. We found it easier to first focus with the aperture wide open, then stop-down to a smaller opening when we were ready to take a shot. While the increase lighting was helpful, the occasional breeze made it harder to get a sharp photo. Eventually, we decided to open up the aperture a little in exchange for a faster shutter speed.
The compromise meant a slight loss in depth of field so not everything we had wanted to be in focus was, but it was the best option available under yesterday's conditions. We had to guess at the shutter speed. At f8, most of these shots were taken at 0.5 sec. However, we didn't really pay all that much attention as we were just looking at the LCD and adjusting on the fly.
Shooting macro images with our new bellows setup is a lot of fun. The gratification was immediate and the results often surprising. There are so many unexpected patterns when you get up really close that we could have easily spent the day in one spot and not exhaust all of the photographic possibilities. We think we'll be spending a lot of time outside this Fall. BTW...the catepillar was a Tomato Hornworm (Manduca quinquemaculata) and it will emerge as a moth in next Spring. [Permalink] - Macro Samples
September 2,2009
The Nikon PB-4 macro bellows setup from last week generated quite a bit of reader emails. Most of the requests were for a more detailed look at the Nikon bellows. We had some down time during the Snow Leopard upgrade this past weekend. So we took a few shots of the PB-4 for those who were curious about its details.
The Nikon PB-4 is no longer in production. EBay and Craigslist are now the main sources for one. These units were built like tanks, so as long as the bellows is light-tight, the rest of the unit will likely be in excellent shape. Expect the prices to range from $100 to $300 depending on luck and included accessories (adapters, slide copier, etc...).
A bellows is actually a very simple contraption. A lens attaches at one end, the camera body at the other. The bellows main purpose is to allow the photographer to vary the distance of the lens relative to the imaging plane (film or CCD sensor) of the camera. By adjusting this distance, one can control the focus and the degree of magnification of the subject.
One of the more diffcult things with shooting good macro photos is achieving proper focus. A ridgid and stable rail supporting the bellows is the key. There are multiple ways to get an image into focus, as both ends of the bellows can be moved as well as the rail itself.
To mount the camera body, the connector must moved to the end of the rail. Once attached, the body may be rotated to the desired orientation. A viewfinder magnifier is also a great tool for achieving proper focus. A while ago we had adapted an Olympus Varimagni viewer for use with the Nikon to assist in our astrophotography. It should come in handy for our macro photography efforts.
There is an additional feature of the PB-4 which we did not cover in the FirstLook: the PB-4 has the ability to shift the focus point from the center of the image plane to other horizontal locations. This is achieved via a lateral movment of the lens relative to the image plane. We'll save that discussion for a future article. In the meantime, let us know if have any further question on this Nikon bellows. We'll be happy to talk more about this interesting piece of gear. [Permalink] - Nikon PB-4 Bellows FirstLook
August 27,2009
Taking closeups, even of everyday things, can make for an interesting experience. Looking "really close" can open up a whole new world. The equipment needed for macro photography can be expensive, but it does not have to be. We managed to put together a lens/bellows macro setup for our Nikon D90 for around $200.
The 50mm Nikkor lens was obtained new from Amazon for $100. We had to search a bit on Craigslist and EBay and was finally successful in getting a used Nikon PB-4 bellows for $109.
We don't have much experience with this macro setup yet but did manage to get some reasonably good images our first time out! The seed pod below was taken using the 50mm without the PB-4 bellows.
However, with the bellows attached, we were able to get MUCH closer. What we gave up was depth of field. There are ways around the DOF problem, but that is a topic for another day.
For now, we just wanted to show some first attempts of our macro efforts with the new 50mm Nikkor and bellows combo. It took a little work to get used to working at this scale, but it was a lot simpler than we had expected. We will be taking the macro rig outside and trying it on everything we can find. Check back in a few weeks to see what we were able to reveal. [Permalink] - Macro Bellows
August 18,2009
Summer has finally arrived in Boston. The temperature has topped 90º for most of the week. The blooms in the RainyDayGarden have done pretty well despite the heat and the lack of rain (we don't like to water).
We are hoping that all the water we got in June and July is still deep in the ground and our plants have had enough sense to reach down and get it. We'll see. If nothing else, it will select for which type of plants are more drought/heat tolerant ;-)
The bamboo out back has actually been thriving this year. It has almost doubled in size. The New England Winters and short growing season has limited its spread. Still, we are keeping our eye out for pandas anyway.
The one big project we did in the RainyDayGarden recently was the severe "hair cut" we gave the Japonica bush. We really wanted to take it all out, but it was too hot to actually exert that much effort to dig it out of the ground. Instead, we decided it was sufficient to trim it down to the ground. If we get some new growth, that would be fine. In any case, we'll plant a new tulip garden this Fall and figure out what to do with the new spot next Spring.
This RainyDayGarden has seen a lot of changes over the years, but our philosophy about what to plant in it has not. All items must not require anything more than periodic trimming and feeding. No pest control, no herbacides, and a minimum of watering. Flowering plants are preferred, as they attract bees, butterflies, and other interesting things. They must be perrenials. Once in a while, we make an exception. Can any of our readers find the exception in our garden? If you think you know, drop us a note via email with the subject line... "This one is not like the others" and the name of the plant in the body of the email. We'll pick a winner from the correct entries and send them something for their garden. We'll announce the winner this Sunday. Good luck! [Permalink] - RainyDayGarden in August
August 16,2009
We didn't have to do much to cover this story as it happened right across the street from the office this morning. We were not sure exactly how the fire started, but we smelled something burning and a few seconds later the Boston Fire Department was everywhere. We got a first-hand look at the Boston Fire Department at work. Click on any of the images below for a larger version.
It was pretty impressive to see these BFD guys work. We don't think about these guys much when there are no problems, but we are glad they are just around the corner. [Permalink] - Roslindale Fire
August 13,2009
When it gets really hot in Boston, many people head to the Cape. The Cape has become so popular that a two-hour drive can turn into a four-hour crawl. We hate sitting in traffic, which is why when we get the urge to take a mini-vacation, we head to "The Cape Cod of the South Shore"... Wollaston Beach in Quincy.
During the week, Wollaston Beach is pretty empty. There is a lifeguard watching over the crowd, such as it is. While we are not big on sitting in the sun in an attempt to alter our DNA, we are all about finding great fried clams.
If we were up in Essex we would find our way to Woodman's. When we are in Quincy, we stop at the Clam Box. Today we went all out for lunch: spicy crab/corn chowder, fried onion rings, and the seafood platter. It was way more food than we needed and all of it was excellent.
For us, this mini-vacation (a half-day in the middle of the week) to Wollaston Beach was a nice alternative to driving all the way to the Cape. We got the same salty ocean breeze, the fried seafood, and the walk along the beach... all without a traffic jam. [Permalink] - Wollaston Beach, Quincy
August 11,2009
Graphics tablets are an important tool for anyone who deals with images. We have reviewed a few of them (Intuos, Genius) in the past. The usual rule of thumb for graphics tablets is the bigger the better. That was true until we got a look at the Wacom Bamboo.
The Wacom Bamboo is a high-resolution tablet (active area: 6x4, 2540 lpi) with 512 level of pressure sensitivity. Integrated into the tablet are four programmable buttons and a touch-sensitive circular area. The pen has two customizable buttons. As with all Wacom pens, no batteries are required. This is actually a very significant feature, so much so that we only use Wacom tablets in-house because of it.
All of the buttons are software programmable. Once installed, users cna adjust the settings via the Wacom control panel in the System Preferences. Some applications support them directly and the controls on the tablet and the pen will behave in a context-sensitive fashion as appropriate.
The Wacom Bamboo is perfect for sketching, diagramming, and general cursor control. It is USB-powered, light-weight, and small enough to travel with the laptop. An additional "nice touch" is the cable detaches from the tablet, making it less likely to be damaged during transport.
Of course, what would REALLY be amazing is if Apple would incorporate the Wacom technology into their laptops, allowing users to write directly on the screen. Until then, we will make do with this perfect accessory for our Macbook Pro, whether it is in the office or on the road. [Permalink] - Wacom Bamboo Tablet
August 4,2009
Yesterday we took a FirstLook at the HoTech "self-centering" adapter. Today we will show the installation and discuss a bit more about why this 2" SCA T-adapter is an improvment over the traditional T-adapter.
The scope we used for this installaion was the Meade LX200 GPS. Unlike the Celestron C8, the LX200 has a removable 2" threaded ring. The ring is held in place by the two thumbscrews at the bottom (red arrows).
The 2" ring threads on to the normal T-Adapter on one end and the camera adapter threads on the other end. In order to hold the entire assembly in place, the thumbscrews push from the bottom. Even though the tolerance is very tight, a slight mis-alignment due to the uneven forces is unavoidable with the thumbscrew approach. The slight difference in pressure will cause a detectable shift of the imaging plane.
The HoTech approach to holding the adapter in place is to use three gaskets. The gaskets are forced to press outwards when the end rings are tightened. This outward movement forces the adapter to center itself inside the opening of telescope.
The end of the adapter is threaded to accept a camera body adapter. The type of mount is specific to the camera manufacturer (Nikon, Canon, etc..). A different one is needed for each make. Fortunately, this piece is only about $10 on EBay.
Shown above is the Nikon D40 mounted to the Meade LX200 using the HoTech 2" SCA T-Adapter. Here is a close-up image of the adapter assembly. The HoTech approach solved a long-standing problem imaging problem. We are eager to see if we can see the difference. [Permalink] - HoTech SCA T-adapter installation
August 3,2009
A few readers told us about this T-Adapter from HoTech. We did not pay much attention to the emails at first because the t-adapter is just a simple connector between the camera body and the telescope. There is no glass involved. It is literally just a tube...or so we thought.
HoTech took a fresh look at this simple connector and made a clever design change which will have an impact on anyone trying to do astrophotography. The amazing thing about this improvement is the elegance of HoTech's approach. Instead of a screw-in mechanism to tighten the mount to the scope, the HoTech adapter uses an expanding gasket to self-center the unit within the channel of the scope.
The outward push of the gasket ensures an even and precise centering of the tube. On the camera end is the standard tread for attaching a camera adapter. It is not included with the SCA T-Adapter, but they are camera specific and are readily available on Ebay for under $10.
In our next installment, we'll show to attach this HoTech SCA T-Adapter to our Meade LX200 scope. We will also discuss a bit more about why this adapter is so cool! Once the skies clear, we'll have some fun with the astrophotography setup. [Permalink] - HoTech SCA T-adapter
July 26,2009
Last Sunday we were at the Larz Anderson Auto Museum for the Ford Taurus event. When we went upstairs to get a few shots of the crowd from above, Sheldon Steele, Education and Lecture Manager of the museum, asked if we wanted to something "really cool." He didn't have to ask twice!
Sheldon led us to a non-descrip door at the top of the stairs. The door opened into a sun-drenched attic. It took our eyes a moment to adjust to the brightness. When they did, we were totally blown away. We only had time for a quick walk-through, but what we saw was quite amazing.
The attic was filled with all kinds of antique cars parts, carriages, and sleds. We now know what it must have felt like when a "treasure hunter" discovers a find! Aside from all of the antique automotive goodies, we also noticed the then state-of-the-art architectural construction (ceiling, floor) of this space. The techniques were amazing, even by today's standards. They definitely don't make 'em like this anymore.
All of the stuff in the attic is in great condition, if a bit dusty. Properly displayed, they would make a great addition to the museum. In order to make these "treasures" available for viewing to the general public, the Larz Anderson Auto Museum could really use our support.
Thepurple coneflowers in the RainyDayGarden typically bloom in July. Just in time, too, as the day lilies have started to fade. This year's crop of coneflowers appears to be quite happy in spite of all the rain. Their colors did seem a bit pale this season, but it may just be our imagination.
Coneflowers do spread a bit on their own, but they are by no means invasive. They are resistent to pests, fun to look at, and require zero maintenance. They also attract all kinds of bees and small birds. The bees love the pollen. The birds nibble on the seeds in the dark orange center cone. The flowers may even have health benefits.
Blooms adds colors to our RainyDayGarden, but we try to select and arrange the plants such that even when the flowers are gone, there are still different shapes, shades, and textures. In this way, even when all that is left are just leaves, they are still visually interesting :-)
Another way to keep all the sections of the garden "active" is to mix plants that have staggered flowering times. The daylilies bloom in June, the coneflowers in July. In practice, they overlap for a period of several weeks. The purple Witches Brooms runs more toward the end of July/ early August. All three have long stalks and combine well visually. Mixing them is a good way to keep a section flowering longer. These plants propagate easily and are nice investments for any garden.
Not all plants in the garden in the RainyDayGarden were store-bought. There are plenty of flowering "weeds" which fit happily into the garden. The Queen Anne's Lace is one of our favorite "weeds." It is hardy, requires no watering, and looks amazing in full bloom. And, the ladybugs love them. They can pop up anywhere. We do pull them out when they "assert" themselves in the middle of something else, but we usually leave the ones in the back corner alone. They can grow to be quite tall and flower for a few months.
Watering is always an issue for those with large gardens. We try not to water if at all possible. When we do, we like to do it deeply. It promotes deep root growth, which helps the plants survive during the dry periods. Some really hot days have been forecast for this week. However, with all the rain this year, there is a lot of moisture deep in the ground. We may get away with not having to water at all this year! [Permalink] - RainyDayGarden in July
July 19,2009
Today was a perfect day for the 1st Annual Great American Car Show at the Larz Anderson Auto Museum. The event was made possible by the FORD MOTOR COMPANY in collaboration with the Greater Boston YMCA. Judging by the turnout, it was an enormous success.
Everything American was welcome to today's event, including Pre-War Classics, Post-War Classics, Muscle Cars, Pony Cars, Modern Exotics, Street Machines, Customs, Hot-Rods, and Motorcycles. A lot of folks brought their "babies" to the event.
We got there around 10AM and the place was already hopping. It was going to take the better half of the day if we wanted to check out all the cars. We didn't have that much time, so we only looked at the red ones... and there were a lot of them!
We spent about an hour walking around, but it was this metallic gold Excalibur Cobra that stopped us in our tracks. This car is owned by Anthony Fernandez and is in fantastic condition. The crest is on the hood of the car is actually that of his family's.
One of the fun things about being at these events is being able to get up close and getting a really good look at the interesting details (side window, dash, convertible top) of the cars.
Not all the great American autos were outside on the Museum's lawn. One of them was in the main gallery inside the Museum. The car is a Ford Taurus. Yes, we said a Taurus.
Ford made available one of its redesigned 2010 Taurus models for the event. Ford also sent the head of the design team, Earl Lucus, to personally talk to the crowd about the redesigned Taurus. It was an awesome PR move as they could not have found a more receptive audience. The talk was a huge crowd pleaser.
The Taurus's image is a dependable family car, not too exciting, but it gets the kids from A to B. Ford wanted to keep that fundamental usability of a family car (carries 4, lots of trunk space, etc...) but asked...why not also give it the styling of a much higher-end luxury/sports sedan?
While they were at it, they also made it feature competitive with technologies found only in cars at twice the price. Features like keyless entry, adaptive cruise control, rear view camera, voice-activated navigation, brake-assisted collision avoidance, etc...
From the outside, the lines gives the vehicle the appearance of a much smaller and lower car. This is a well designed illusion. The car will easily accommodate four adults. Under the hood can fit an engine with up to 365HP. The trunk is huge.
The Taurus model at the event ran just under $30K fully loaded. If we were in the market for a 4-door sedan, this 2010 Taurus would definitely be on our list...in silver, of course.
We are not sure how long the 2010 Taurus will be at the LAAM. It may already be gone (we forgot to ask!). However, if you have a chance to take a look at one in person, definitely do. We think you will be impressed. [Permalink] - Great American Car Show
July 17,2009
It has been a few years since we last went to the Jamaica Plain Lantern Festival. This was the 11th year for the event and the crowd has gotten much larger. The Lantern Festival is held every year at the Forest Hills Cemetary in Jamaica Plain. The admission was free. There were taiko drummers, Kendo demonstrations, and lantern painting.
We got there around 7:30 and had a nice picnic dinner with some friends. We also took the occassion to celebrate Bill, Irfan, and Carolyn's birthdays with a yummy cake, which we finished around dusk. The timing was perfect as it was then that they started the lighting of the lanterns.
The Jamaica Plain Lantern Festival is similar to the Japanese Obon Holiday, at which ancestral spirits are believed to return to their families to visit for three days. Families gather to pay their respects with offerings of food and drink. Lanterns are lit outside the house to symbolically guide the returning souls to the home.
On the last evening of the holiday, lanterns once again guide the departed back to their resting places. The inscriptions on the lanterns carry well wishes and words of love and peace.
It was quite an amazing sight to see hundreds of these lanterns drifting slowly about the pond, making random patterns as they congregated and separated. We are happy we got to enjoy this evening with friends past and present. We hope to be back to visit with them again next year. [Permalink] - Jamaica Plain Lantern Festival
BTW, for readers who were wondering about the effectiveness of the vibration reduction feature of the Nikkor 18-200mmVR lens, all of these images were shot hand-held!
July 12,2009
Getting up at 3AM on a Sunday to drive out to Provincetown to meet friends for brunch may not be everyone's idea of a relaxing weekend, but this was not a typical weekend. It was one of our contributing editor's b'day weekend. In fact, half of our "gang of six" have birthdays with in days of each other!
Four of the gang were already out at Provincetown for various reasons. We thought we would get going early to avoid the traffic. One thing lead to another and our plans morphed to "let's go watch the sun rise over the Mayflower in Plymouth!" There was a moment of hesitation when the alarm went off at 3:15AM, but we were in the car and on our way within the hour.
We got to Plymouth around 5AM (sunrise was at 5:10AM). Needless to say we had no trouble parking. In fact, we had no trouble parking anywhere all morning. The only other creature awake at that time was a lone bird on a rock. We were not able to actually see the sunrise as the cloud cover was too thick. As we still had another 95 miles to go, we decided to get some coffee and continue on.
Since we were the only car on the road, we made GREAT time. We were in Wellfleet before we knew it. It was clear we would get to Provincetown WAY before our 11AM brunch appointment. With a few hours to kill, we did a quick check on the GPS and found a few nearby attractions (Marconi Beach, Wellfleet Bay Audubon sacutary) which looked interesting. As it was in Plymouth, parking was not a problem.
Carolyn, who does not like to be reminded that she has a passing resemblance to a certain Alaskan politician, was seen here looking out over the horizon. When asked what she was looking at, she winked and said "Just keeping an eye on the Russians."
We followed one of the trails and took a hike out to the marsh and saw all kinds of birds. One in particular was especially cross with our approach. We must have been getting a little too close to its nesting site as it was louding "expressing" its displeasure with our presence.
The rest of the day was just as wonderful as the morning. We met up with the rest of the gang, had a nice brunch outside, and took a nap before our return drive to Boston. The others were not heading back until Monday, but around 2-ish we decided it was probably time to get back on Route 6 before the "back-to-Boston" traffic got serious. We wouldn't do it all the time, but this pre-dawn drive gave us an opportunity to enjoy a side of the Cape that we have not experienced before. [Permalink] - Morning Drive to Provincetown
July 5,2009
Every year we brave the crowds and head down to Castle Island to watch the USS Constitution fire its guns, turn around in the harbor, and dock back in the Charlestown Navy Yard. This year we decided at the last minute to head down to the waterfront near the ICA to see if we could watch the event away from the 10-15,000 "locals" who pack themselves into South Boston.
We got to the waterfront around 11:45AM. The USS Constitution should have already turned around at Castle Island and be making its way back to the Charlestown Navy Yard. We had no trouble parking. The walkway was empty of people. Our thought was that we were too late and had missed everything. Actually, we arrived at exactly the right moment as the flotilla was just coming into view.
The USS Constitution was flanked by tug boats, protected by the US Coast Guard, and surrounded (at a distance) by various pleasure boats. At one point the USS Constitution stopped and fired for a 21-gun salute. It was amazing to hear the sound echoing off the various downtown office buildings.
The masts of the USS Constitution must be currently under repairs as most of them were not on the vessel. Here is how it looked in 2007. Clearly the vessel is a lot more majestic when it is fully rigged.
The other part of Boston's 4th of July celebration is the famous BSO concert and fireworks on the Esplanade. This event usually draw close a 250,000 person crowd. It ties up traffic at various parts of the city all day long. We got an early taste of it when we tried going back to the office via Storrow Drive. The road had already been closed so the crowds can gather in front of the Hatch Shell. Folks were also starting to claim their patch of grass on Memorial Drive, but lucky for us, it had not yet been shut down to vehicular traffic.
Since we managed to avoid the Castle Island crowd in the morning, we decided not to fight the fireworks crowd on the Esplanade neither. This year we went to the top of Peter's Hill in the Arnold Arboretum to watch the light show.
A small crowd (150-200?) had already gathered on the hill by the time we arrived. The BSO finished the 1812 Overture around 10:35PM and the sky lit up in the distance. Considering we were about 5 miles or so away from the downtown action, the view of the show was better than expected.
From the Peter's Hill vantage point, the fireworks were nice, but not immersive. We still managed to capture some reasonable shots of the display. If you really love fireworks, this setting may not be enough to satisfy you. However, if you are in Jamaica Plain area and don't want to endure the 2 hour trip home from the Esplanade, then it is a fantastic option.
What we have shown yesterday was there were a lot of fun July 4th events in Boston. One can enjoy them with a big crowd or enjoy them in a less dense setting. You just need to know where to go :-) [Permalink] - No Crowds
BTW, the last photo above is a Photoshop composite of some of the different fireworks from the evening's show. It was a fun little Photoshop project which we'll show you how to do in a future article.
June 27,2009
Chatham is at the "elbow" of Cape Cod. Like the various parts of the Cape, it occassionally gets smacked in the ulna by hurricanes or what is locally called Nor'easters. Sometimes these storms are strong enough to do more than just knock out the electricity. They can literally reshape the landscape.
Last week a storm that moved up the coast came on shore near New England. Boston and some of the inland area got mostly rain. However, the Cape took a direct hit. Nauset Beach in Chatham was severely affected as can be seen in these satellite images. We went down there this weekend to take a look for ourselves.
Nauset Beach is a barrier beach (essentially a big sand bar) which runs for miles along the outer edge of Chatham. Some parts of this stretch of "land" has been around long enough that houses have been built on it. Storms have been claiming more and more of the beachfront in recent years. Many of the houses have since been washed away. The remaining ones' days are clearly numbered. The storm last week breached another section of the beach and took out the foundation of two more of the remaining houses.
We were able to see the houses from across the inlet from the mainland. We didn't want to intrude on the folks trying to deal with the wreckage by the driving out to the houses. These sandbars are temporary and will unexpectedly shift. Building on them is literally "building on sand." Those willing to do it will eventually pay the price. Two more houses paid the price this past week, but the front row seats to the Atlantic storms must have been spectacular. [Permalink] - Chatham Storm
June 25,2009
When we purchased our used MacBook Pro we learned it had a slot for something called an ExpressCard. We were not sure what type of cards were available for the slot, but thought it would be great if we could turn it into a flash card reader. A quick search on EBay resulted in this 18-in-1 card reader. We don't have that many types of cards, but it is suppose to work with an SDHC card.
The ExpressCard is a bit bigger than a typical flash card reader that plugs into the USB port. The nice thing about the ExpressCard is that it will completely disappear into the machine.
The ExpressCard slot is on the left of the laptop. The opening is covered by a flip-down lid. The lid will move out of the way when the reader is inserted. When the reader is inserted properly, it will disappear into the body of the case. The ejection mechanism is a spring-loaded release. Push the ExpressCard in a little more and the card will just pop out.
We normlly attach our USB card reader on the right and it sticks out about an inch and a half or so. While this particular ExpressCard reader sits flush with the laptop case, the flash memory card does not insert all the way in. This means it will be best not to leave the card in the reader as it may snag on something.
The flash memory was recognized and appeared on the desktop...no driver installations needed. Plug and Play at its finest. We now have a non-protruding flash card reader in our MacBook Pro. As we constantly use the card reader to shuttle images into the computer, adding the ExpressCard reader is definitely a worthwhile addition. Highly recommended. [Permalink] - ExpressCard Reader
June 22,2009
Kodachrome film has been around for 74 years. Some of the world most iconic images were shot on Kodachrome. Today Kodak announced that they will no longer be making the slide film due to lack of demand.
One of the editors here remembers the exact moment when he decided to give Kodachrome 25 a try. It was at an exhibition where there was an image of the Grand Canyon blown up to wall-size. Upon closer inspection, he was able to make out in the print tiny telephone poles on the other side of the canyon.
Since that day, he shot all of his analog photos with Kodachrome 25. OK...there were occasional rolls of Fujichrome here and there, but we won't hold that against him.
However, with the advent of flash memory, the writing was on the wall for film. Still, when we heard the news today we felt a little sadness and a bit of nostalgia. We remembered when we would have to wait for the slides came back from the lab, spread them out on the light table, and examined them with a loupe before we knew whether we "got" the shot. At least we know that the shots we did get on Kodachrome will last a long long time. Thank you, Kodak, for the lasting memories. Go check out some of them on Kodak's Kodachrome tribute page. [Permalink] - Last Day of Kodachrome
June 17,2009
The cool wet June may have been responsible for the lovely blooms in the RainyDayGarden, but it was the well-stocked feeders that brought in all the song birds.
The RainyDayGarden is now a well-known destination for all the freeloading feathered flyers in the immediate vicinity. There are two feedings a day of a buffet of peanuts, sunflower seeds, and other assorted tasty bits. It is first come, first served and there is a line...unless you are a Blue Jay. They just jump right to the beginning of the queue. Queue? What queue?
One cool looking bird that showed up the other day was a Grackle. The body was mainly black, but it had this purplish irridescent head. Today it came back with a bunch of its buddies and got into a little shouting match with the Blue Jay.
The Cardinals seem to prefer to eat at another feeder on the edge of the garden. They don't seem to be bothered by any of the other birds. We are not quite sure why.
The Sparrows are very "polite." They all seem to wait their turn. Being a rather small bird compared to the others, we guess they don't have much of a choice. Still, it is nice that they are polite, at least to the bigger birds.
We took all of these images with the Nikon D90 and the 18-200mm DX lens. Once again the Nikkor 18-200mm zoom did a pretty decent job. We took these images at about 70 feet away. The in-lens image stablization was on for all of these images. Even at maximum zoom, the image was reasonably sharp for a woodpecker poking away at the peanuts. If we were only allowed one lens for our Nikon, the Nikkor 18-200mm zoom would be the one we would pick. [Permalink] - RainyDayBirds
June 16,2009
All of the rain and cool weather this June not only gave us a big Cottonwood "snow storm", it also gave us an enormous bounty of Peony blooms. The RainyDayGarden was just bursting with huge blossoms this season. We had to cut many of them all at once because most were too heavy to stay upright.
After we ran out of room for arrangements inside, we started placing them outside (front porch, back deck, etc...). About a dozen of them were on the entry way to welcome the package delivery folks (USPS, FedEx, etc...). They all seem to appreciate the floral greeting and the heady scent.
The many floral arrangements was also a great opportunity to practice in taking close-ups with the D90. Our original intent was to do some experimenting with the Lensbaby, but got distracted by the various bugs which kept coming out of the crevices of the blossoms.
One particular ant had a great time posing for us. We spent about 30 minutes working with this ant. It climbed and wandered all over the petals, stopping at various points for us to get a few shots and then moved on to new petals and new poses. The high contrast of the dark ant and the pink petals made for some interesting combinations. The Nikkor 18-200mm zoom did a fair job. We found the focus was a bit soft. Someday we are going to have to spend a little more time comparing the manual to auto focus and see if we could get pull a little more sharpness out of this zoom. [Permalink] - Peonies
June 6-7,2009
Boston's waterfront has always been used more for industry than for recreation. For years those looking for a place to eat down by the waterfront could choose between the No Name and Anthony's Pier4. Newer additions to the dining scene have slowly made their mark, including our favorite the Barking Crab. However, a few places to eat is hardly reason to spend a day down by the waterfront.
Fortunately things have been changing, slowly (this is Boston). In 1999, the John Joseph Moakley US Courthouse construction was completed. Along with that was a welcome renovation of the Fan Pier area. A few years ago, the ICA relocated to their beautiful home right at the edge of Fan Pier.
The weather this weekend in Boston was perfect. We were going to go for a drive along the coast, but decided to stay in town and spend the time checking out the waterfront instead. The City has done a really did a nice job with the Fan Pier area.
There are plenty of open spaces, great views of the Boston skyline, and lot of plaques with interesting bits about the history of the waterfront. There are also lots of places to sit and just hang out.
One thing we would hope to see more of is cafes along the water. There are some outdoor eateries along the Long Wharf and Rose Wharf sections of the waterfront. They are very nice, but a bit pricey if you just want to sit and have an espresso.
It would be great to see a more vibrant section with an open market and lots of small vendors. If you are looking for a nice relaxing way to spend your next sunny day, go check out the new waterfront in Boston. You will be pleasently surprised at the updates. [Permalink] - Boston Waterfront
June 1,2009
A rearview camera is useful when you have a large SUV and want to avoid running over stuff that is low to the ground. We wanted to add one to the Boxster because we had a couple of LCD screens already in the car and thought...hey, we could use one for a rearview camera! What made the project irresistable was a local MicroCenter had a sale on Swann Security Cams a while back. When everything was said and done, the total cost came to $5.00 after discounts and rebate. Not much of a financial risk even if the project goes completely belly-up.
The Swann camera uses a 9V power source. In order to adapt it for in-car use we needed to get a 12V-to-9V DC-DC adapter. We managed to snag two adapters after a little haggling (hey...we are sure we'll need another one some day) for $15 from a nice seller on EBay.
The first step was to make sure the camera was functional before bench-testing with the converter and the 12V DC supply. A quick 9V battery check confirmed the camera, adapter, and mic were all working as expected. We did notice that the video picture was pretty weak when powered by a 9V battery.
The next step was to attach the 9V battery adapter to the DC-DC converter. We had a few connectors options, but chose to use the quick and dirty twist-on caps...fast, easy to rework, and secure enough for the task at hand.
The DC-DC adapter was actually a lot more versatile than we expected. It put out both a 9V and an 5V line. We have no use for a 5V line at present, but it was good to know where to get one should we need it in the future!
The wiring diagram was pretty straightforward. We wired everything up, hit the power switch, and everything came to life. The image from the camera was a lot better when powered by the bigger power supply. Now that we have successfully confirmed that all the parts (camera, DC-DC converter, wiring) were functional, we are ready to lay it out in the project car. Stay tuned. [Permalink] - Rearview Cam
May 30-31,2009
One of the many great things about having a garden is all the photo ops available through out the day. Birds come by to check out what's in in the feeder, bees zoom around looking for pollen and nectar, and the bugs are crawling around doing whatever they do. All are good opportunities for sharpening ones nature photography skills.
Getting a decent close-up shot is easy in a studio under controlled lighting, no wind, and a sturdy tripod. When we are out "in the field", shifting light and sudden breezes are always there to mess up a perfectly composed shot. The goal is to train yourself to work fast... compose quickly (shot now, crop later), be familiar with the camera (no time to search for a feature), and work with a versatile lens (no time to change lenses).
We have been using the Nikon d90/Nikkor 18-200VR combo for the past three months for all of our shots. The pair have been proven themselves to be a nice "grab and go" piece of gear. Even a the edge of it zoom range, the lens is sharp enough for most applications, color rendition is true, and you absolutely cannot beat the versatility of the D90's 11 point autofocus, movie mode, and amazingly great battery life.
There are still quite a bit about the camera we have not yet explored. What we have seen have been very impressive. If you have been trying to decide whether to get a digital SLR to replace that pocket point-n-shoot, we can definitely recommend the D90/18-200mm VR combo. If you are unsure, you can test the DSLR waters by going with the Nikon D40. Want more background info on either one? Go check out the RainyDayPhotography section for our entire series regarding the Nikon D40 and D90.
One fun thing we like to make ourselves to do is to "find" different visual textures, grouping of similar colors, or compositions with a lot of high frequencies. Besides being an enjoyable exercise, we find the photos can also be great as computer desktop backgrounds and screen savers.
Readers are free to download any of these pics (just click on them for a larger version) for use as backgrounds for their own computer desktop. We, of course, reserve all rights to them regarding any commercial and/or for profit use. If you do want the huge original files, drop us a line. We can work something out :-) [Permalink] - RainyDayDesktop pics
May 27,2009
There is a movie theater we go to on opening nights of blockbusters such as Star Trek, Angels & Demons, and Terminator Salvation. The reason is there is never a line. We don't know why. The screens are big, there's plenty of free parking, and good restaurants are nearby. Maybe the folks of Chestnut Hill don't go to the movies on Friday nights. In any case, it is our first choice when we know tickets will be hard to get or the lines may be long.
Another bonus with going to the Chestnut Hill theater is that it abuts Hammond Pond. Instead of waiting in the theater, we stroll around outside until it is time to go in for the show. On a typical evening, there are all kinds of wildlife out and about... especially during feeding time.
Our favorite are the ducks. They are always friendly. Ok, they are always hoping for a free meal. Most of them will come right up to anyone approaching the edge of the pond. While they won't eat out of your hand, they will definitely do a "swim-by" to see if there is anything yummy to be had.
On this particular night, we had our Nikon D90 with us and decided to play around with the "Sports" mode. The vibration-reduction feature of the Nikkor 18-200VR lens made it possible to hand-hold all the shots and to quickly go from taking close-ups to grabbing a take-off in the distance.
The detail and sharpness was pretty surprising considering all of the factors (long lens, moving subjects, twilight). A monopod or some other supporting device would have helped, but the results were still acceptible.
The wildlife were friendly up to a point. Once they realized that we were not going to feed them they swam off to work some other folks who were approaching the other side of the bank. We didn't care. It was time for us to go get a seat for the movie anyway. [Permalink] - Hammond Pond
May 20,2009
We got tons of emails with a link to this awesome video, shot using a modified DSLR (IR filter removed) configured for astrophotography. The video was created using a wide angle lens and time-lapsed over the the course of the night. Truly spectacular.
Some of us were working for Kodak in the early 90's when digital photography was just starting to become mainstream. There were a LOT heated discussions regarding the direction of digital imaging. One of those discussions was around how photographers were going to convert their slides and negatives to digital files. There was a camp which believed that "real" photographers would never give up shooting film because of the huge gap in image resolution between fil. The same camp was also arguing for the creation of "scanning centers" where large scanners would deliver 1 megabyte "high quality" scans for customers as an option along with their prints. It was a nice PowerPoint presentation.
Fast forward to today. Digital photography has eclipsed film photography in a huge way. Almost nobody shoots film or slides anymore. Some of our younger interns have never actually seen a film camera. So when this ImageLab scanner showed up at the office, they were not quite sure what to make of it. The older staff immediately said..."Finally, I can digitize those slides and negatives I have stacked on the shelf!"
Slide and negative scanners have evolved a lot in the past 10 years. They used to be large, low resolution, and expensive. This new unit from ImageLab is the complete opposite. It does not require a computer to operate, has a built in LCD display, can store the files to a removable SD card, and cost around $100. OK, at 5 megapixels, if you are a professional photographer, this scanner will not be right for you. However, for the 90% of the folks who want to transition some of their old "analog" images into the digital realm, this device may just be the perfect solution. The ImageLab scanner package comes with a 5 MegaPixel scanner, 4 trays, USB cord, and an AC power adapter. It does not come with any software...because it doesn't need any!
The unit is so portable that we can take it to our parents house instead of lugging all the negatives back with us and putting it on our shelf. Better yet...I think we'll give them a scanner, have them scan the slides and negatives, and just have them send us the SD card ;-) We'll have time this Memorial Day weekend to give it a test. Results of our efforts will be posted shortly. [Permalink]-ImageLab Scanner
May 15,2009
Recently our RainyDayLA team visited the Flower Fields of Carlsbad, CA. Almost 50 acres of Giant Tecolote Ranunculus were in bloom and arranged in amazing bands of color. Each spring this fabulous sight blooms from March through May. Throughout the season there are a number of events, and this year included a demonstration of macro photography sponsored by Canon.
As beautiful as these fields are, they are easily missed, as the view from the freeway is blocked by trees and other vegetation. Many may have driven past this section of California and had completely missed this incredible scene.
The fields are unfortunately now closed (as the blooms are now ended), but if you are ever in the Los Angeles, Orange County, or San Diego areas, this is a "must do" side trip. Carlsbad is located about 30-45 minutes north of San Diego and between 1.5 to 2 hours south of Los Angeles (depending on traffic on the 405 Freeway). Carlsbad is also home to Legoland--a lovely little amusement park geared toward families with small children--as well as a large outlet mall. So there is fun for almost everyone!
The tickets were $10 per person and can be purchased online and picked up at will call (recommended as during bloom season the lines can be quite lengthy, our LA folks had to wait about 20 minutes for entry). For those want to see the amazing display but don't want to walk the 50 acres, there are tractor rides which will take you around the entire farm. [Permalink]-The Flower Fields
May 7,2009
With all the shorelines in MA, we are always surprise at how difficult it is to find a restaurant with a decent view of the ocean. There are a few in Boston, but they are not a prevalent as one would think.
When we were sitting around lamenting this observation, one of our editors, who grew up in Quincy MA, told us about the Ocean Club in Hull. She said it was right on the beach, has a great sunset view, and is less than a 30 minute drive from the city.
As it was pretty close to quiting time, we rounded up the crew, and went on a road trip. The suggestion was a good one! The Ocean Club was everything it was billed to be...reasonable food, fantastic views, and plenty of seating. As it turns out, it is also a popular local hangout for watching the Celtics during playoff.
The weather was a little cool for us to sit outside, but there is a large open patio section in the back with a direct view of the ocean. We definitely go back during the Summer for another sunset dinner. If you are looking for some good bar food, a great view, and a relaxing place to hang...go check out the Ocean Club in Hull MA. As always, top down vehicles are recommended for the trip. [Permalink]- Ocean Club, Hull MA
May 2,2009
The weather for this weekend is suppose to be overcast with a possibility of rain. A low contrast day is always perfect lighting for photos of the RainyDayGarden. The timing couldn't have been better as the May blooms are just starting to peak.
Many of the Spring tulips have been blooming for about a week already. The Japonicas have just started to flower and should be in full glory by mid-May. The Tiger Lilies and iries will follow in early June.
Our approach is to select plants which require minimal watering and no special care (meaning: no fertilizing, weeding, or pest control). With this approach, not only is the workload on our interns lighter, our environmental footprint of maintaining the garden is, too.
One advantage of having a garden is the joy of seeing our efforts grow with each passing year. We have quite a few projects planned for 2009. Bookmark the RainyDayGarden section and check back periodically and see what's new. [Permalink]- RainyDayGarden May Blooms
April 22,2009
A copy of Apple's iLife comes with every Mac computer. This collection of applications (iPhoto, iMovie, GarageBand, iWeb, iDVD) are without equal in the PC world. We upgrade whenever there is a new version not because we need or use all of the new features, but because there is always that one really cool feature that we really wanted to try.
While each of the iLife 09 apps has something new, the one feature we were most intrigued with was iPhoto's facial recognition capabilities.
The new version of iMovie now requires an Intel based Mac to work. The other apps will work with the older G4-based units. Included in the package is also a trial copy of iWork. We don't know much about it, but will give it a look-see.
We'll install this new version of iLife and report back on how well the facial recognition feature works. We will also try out the other apps to see if there are any surprises to those upgrades as well. [Permalink]- iLife 09
April 20,2009
When you hear terms such as "focus" or "get a grip"...what is the first thing that comes to your mind? If you have been following our Winter projects, then the Feather Touch MicroFocuser/Meade LX200GPS scope upgrade would have been your first thought :-) We gave readers a FirstLook of Starlight Instrument's Feather Touch MicroFocuser back in Mid-March. Today we'll show how easy it was to install.
The replacement/installation is conceptually very simple and if the instructions are followed, should only take about 15 minutes. However, if the scope is not properly "prepped," things could go awry very quickly. The step-by-step instructions from SI were very thorough, but we have a few suggestions which may make the task even easier.
As per SI's warning, the scope must be in a HORIZONTAL position. This is to prevent the main mirror from moving forward or backward accidentally. So triple check this before loosening any screws. The kit came with a 5/64" allen key. It fits, but was a bit cumbersome to use as it was too short. We had a 4" long one which made the job of removing and replacing the screws much easier. For readers with large fingers, don't even bother trying to use the small allen key. Go get a longer one. It will save you a lot of headaches.
Once all of the screws had been removed, we followed the SI directions and had no problems freeing the OEM knob. With the focus knob removed, it was easy to clearly see the dowel inside the scope. This is the dowel which must be threaded into the hole at the stem of the MicroFocuser.
To ensure that the stem will reach the dowel, we extended the length of the screw of the FeatherTouch unit to match that of the one removed. As our scope was the 10" SCT, we did not have to worry about the orientation of the fillet, but those with an 8" SCT should take note.
Installing the new focuser was just a matter of sliding the end over the dowel and replacing the screws. This step cannot be done by "feel." You have to visually line up the hole with the dowel before you can slide it in. We found it easier to see and thread the end if we lit the inside of the scope using a flashlight.
Once everything had been retightened, we played with the knob and could immediately tell that the new knob will make a huge difference in achieving critical focus. We are very happy with the quality of the unit and the ease of the upgrade. This project is within the skills of everyone and will probably be one of the most significant aftermarket upgrades you can do for your equipment.
We have time to do a few more quick projects (Bob's Knobs, laser pointer, EZ FinderII) as it is still a bit too cold at night for us to do much viewing. Once the weather warms up some we'll be getting this scope outside to test out all of our recent upgrades. It is going to be a fun Spring! [Permalink]- FeatherTouch Installaiton
April 19,2009
Tomorrow is Patriot's Day and the annual running of the Boston Marathon. Athletes and tourists have been trickling into the city all week. We covered the Marathon craziness last year, so we thought we would go down and take in the "calm before the storm."
We were at the Boston Garden at 10AM and it was pretty empty. In fact, we even managed to find on-street parking! By this time tomorrow, downtown will be packed and Boylston Street will be standing room only.
Signs of Spring were everywhere. We have been taking advantage of the beautiful weather since Friday and were surprised not more people were out and about, not that we were complaining :-) In fact, this was the first time we've been down at the Swan Boat section and there was no line! We decided not to look a gift horse in the mouth and took an impromtu boat ride around the Garden. At $2.75 a ticket, this has to be the best sightseeing deal in the city!
Another icon of the Boston Garden are the Make Way For Duckling sculptures. That children's story by Robert McCloskey has been entertaining kids for generations. The ducklings are named in alphabetical order...Jack, Kack, Lack, Mack, Nack, Ouack, Pack, and Quack. A little over twenty years ago, an installation of Mrs. Mallard and her eight ducklings were placed near one of the entrance to the Garden.
Every so often, some idiot(s) would think it was amusing to make off with one of the ducklings. This time it was Pack that was taken. Fortunately he was found a few days later, a little worse for wear, but generally in good condition. When we visited today, he was still "recuperating." We wish Pack a "speedy recovery."
If you haven't been down to the Boston Garden lately, we urge you to go for a stroll soon. Spring is a short season in New England. Get out there and enjoy it while you can. [Permalink]- Boston Garden
April 17,2009
When the weather forecast is for 70º on a Friday before a long weekend, there is no option but to take the Friday as a vacation day. We got out early, took the hardtop off the Boxster, and when for a drive out to the Great Marsh and the beaches of Plum Island.
The Great Marsh is the largest salt marsh in New England with over 20,000 acres of marsh, barrier beach, tidal river, estuary, mudflat, and upland islands spanning from Gloucester to Salisbury. The Great Marsh is an internationally recognized Important Bird Area (IBA) as it contributes to the preservation of many breeding and migratory birds. We learned all about it when we took a "rest" at the Audubon Visitor Center just before the bridge out to the island.
Plum Island is pretty quiet this time of the year. How quiet is it? It is so quiet that we didn't even have to call ahead to reserve a table at Mad Martha's! If you go to Plum Island, this little shack is THE place to go for breakfast. Parking is limited (4 spaces), but it is just across the street.
Once fortified, we continued our trek further out toward the end of the island. With the salt marsh on one side and the beach on the other, awesome views and wildlife (egrets, swans, etc...) were everywhere. We made frequent stops for various avian sightings and photo ops.
The drive from Boston to Plum Island is about 35 miles and took us around 50 minutes. The traffic can get pretty bad on the weekend, but it is a great day trip for those who can get away during the week. [Permalink]- Plum Island
April 12,2009
Today was supposed to be rainy and we had planned to be inside working on a few "rainy day" projects. However, it turned out to be a beautiful sunny Easter morning so we thought we would take advantage of it.
Last weekend, we stopped by the Arnold Arboretum to test out the Nikon GP-1 module. At the time we noticed that many of the plants were starting to wake up from their Winter sleep. We went back today to check out the marshy area near the front entrance of the Arboretum.
Most of the marsh was still a tan field of dried stalks from last year. Not much was happening there yet. There were some alien-looking pods pushing their way out of the muddy ground, though.
The pods were not the only strange thing we saw in today's visit. The oddest were the blooms on this bush. From a distance, the branches looked as if they were covered in thousands of silvery wriggling catepillars.
In another week or two, the Arnold Arboretum will be exploding with color. If you are near the Boston area, it will definitely be worth a daytrip to see the awakening. However, no worries if you can't make it there in person as we'll be going back every weekend to chronicle the emergence of Spring. [Permalink]- Easter Sunday
April 7,2009
The ViewNX software is a free download from Nikon. The software is available for Mac and PC. It is pretty useful as an image viewer, but if you are playing with geotagged images, you will want to start with this app.
As we had previously mentioned, we wanted get a feel for the accuracy of the geotagging information. To check, we took an image of the "You Are Here" map at the Arboretum and looked to see if Google Maps would tell us where the image was taken.
When just using the Google Map graphics mode, the location detail was pretty good, but not as impressive as when mapped using the satellite overlay. If it had been a real-time feed, you would have seen us waving at the satellite overhead!
A cool feature of the ViewNX/GoogleMap dialog is by clicking on the "pin", a small view of the image mapped to that location will pop up. The tabs at the top of the pop-up window allows the user to toggle between the photo and the GPS data.
So when in ten years we want to know where we took the photo of the first robin of Spring 2009, since the image was tagged with GPS data, we will just pair it with GoogleEarth and get the exact satellite location :-)
GPS tagged images is obviously an incredible feature for travel and outdoor photographers. We think it will be even more valuable for the applications which have NOT been created yet. If your camera supports the capability to add GPS data to your images, we would advise you to start tagging them now! You will thank us in a few years. We guarantee it. [Permalink]- mapping geotagged images
April 6,2009
This weekend's trip to the Arnold Arboretum was more than just to get some fresh air, we used the outing as an opportunity for a FirstUse test of our Nikon GP-1 equiped D90 camera.
Digital images are often tagged with info about the capture conditions (F-stops, shutter speed, etc...). When a GPS module is attached, the D90 also attaches the latitude and longitude data to the file. The information may be reviewed directly on the camera. While interesting, the utility is limited when examined in that fashion.
What occurred to us when we were taking the photos was we had no idea of the accuracy of the GPS data. Fortunately, the Arboretum had a map with a big red arrow with the label "You are here."
The power of the GPS info is evident when it is coupled with a mapping software such as Google Earth. We will have more details to show just how cool this is. For now, unless you get one of these GP-1 modules and try it for yourself, you will just take our words for it. [Permalink]- Nikon GP-1 FirstUse
April 3,2009
Judging by the sudden swell of unread emails in our InBox with the subject "Nikon GPS..." there were a lot of readers interested in the subject of geotagging images. We will go and try out the Nikon GP-1 this weekend. First, we wanted to show how easy it was to get this GPS module up and running.
As we had indicated in the FirstLook write-up, the Nikon GP-1 gets its power from the camera. When the unit is properly attached and the camera turned on, the GPS module will automatically try to lock on the satellites. When the LED on the GP-1 is blinking red, it means it is trying to acquire a signal.
In addition to the LED, there is a GPS status icon in the top LCD panel of the camera. The detail information is available in the GPS section in the "tools" menu. There are two options in the GPS section: Auto Meter-off, Position.
The Auto Meter-off will save the camera's battery (w/ the GP-1 attached) by turning off the exposure meters after a set period of time of no activity. The Position page shows the current GPS location info when it has acquired at least 3 satellites.
When four or more satellites have been acquired, the LED will go from blinking green to a steady green. We were impressed that the GP-1 had no problem getting a fix on our position even when inside. Now that we have the module installed, we'll take it out this weekend and check out the accuracy of the GPS info. [Permalink]- Nikon GP-1 Installation
April 2,2009
GPS is useful for getting us around town, back to base camp, and tracking the vehicles in our motor pool. A newer and increasingly popular use of GPS information is for location tagging of digital images so they can be mapped or sorted with applications such as Google Maps. We take thousands of travel photos each years and do try to sort and categorize them, but it does get a bit tedious.
Our new Nikon D90 has GPS capabilities. The GPS sensor is not built into the camera, just the ability to take GPS information and associate it with the photo. The GPS sensor itself is an add-on accessory.
Nikon has a dedicated GPS module (GP-1) for their digital SLRs based on the same chip technology as those in handheld units. The GP-1 will work with our new D90 as well as many other Nikon DSLRs (D3, D700, D300, D2, D200). The unit takes it power from the camera and can be attached via the neck strap or onto the flash mount.
There is a dedicated GPS port on the camera with a special connector. It is not the standard USB type socket. The GP-1 package includes cables for both the newer D90 camera and for the other Nikon DSLR models.
The GPS accessory is a bit pricey at $200, but just think of all the time you will save sorting your travel photos! Also, in ten years, you may not remember where you took that amazing photo and will be wishing you could.
If your current camera can take a GPS module, start tagging your photos now because the applications which will be able to take advantage of the info may not be here today, but they are coming. [Permalink]- Nikon GP-1
March 31,2009
A lot of readers ask us how we shoot our product and review photos. Many assumed we have a dedicated studio. In reality, we don't do anything fancy. The walls in our work area and ceiling are painted a flat off-white. When the sun is out, the rooms double as a perfect photo studio. The reflected light is soft and does not cast much of a shadow. When it is right we can just shoot away, but sometimes the sun does not cooperate (we ARE in New England after all) and we may need the help of a flash.
Used appropriately, it can bring make a photo pop. However, flash photography is a lot more than just using the pop-up flash on the camera. To use a flash properly, one must have an understanding of the camera, the flash, and the scene.
The Nikon Creative Lighting System by Mike Hagen helps with all of that. It is a step-by-step guide on how to get the most out of the Nikon flash system. Photographers of all levels will find useful info. Many will appreciate Mike's tips on getting around some of the more frustrating lighting problems (multiple sync, close-up, etc...). We are eager to try out some of the techniques and will report back on how well they worked. [Permalink]- Nikon Creative Lighting System
March 30,2009
Many older photographers have a collection of slides and negatives sitting in the back of the closet. The intention is to convert them to digital files "some day." We had the same goal when we got our slide scanner a few years ago. However, we did not get very far with our project. There were a few good reasons. Some were process related, but the main reason was our results were not very good.
Scanning slides and negatives is more than just popping some slides into a slide scanner and hitting the scan button. It is about understanding the dynamic range of the analog source material and how best to fit that into the small color space of the digital scanner.
It is also about how to use software tools to remove scratches, dust, and other defects during the scanning process rather than afterwards. When we saw this book in the RockyNook collection, we thought, finally, everything we need to know gathered in one place. This 2nd Edition of Scanning Negatives and Slides by Sacha Steinhoff covers all of the steps necessary to tackle a conversion project. There is even a CD full of useful software and tools.
We had sold the first scanner bacause we didn't think we would ever get back to our project. With the info from this book we may give our slide conversion project another go...once we get another slide scanner. [Permalink]- How to Scan
March 17,2009(TelescopeTuesday)
There are two sets of knobs which can influence the sharpness of the image seen through our Meade LX200 GPS telescope. The first set is the collimation screws at the front. They are for aligning the secondary mirror so that it is perfectly planar to the larger primary mirror. When the two mirrors are perfectly aligned, the stars should appear as a sharp point. The other knob affecting the quality of the image is the primary mirror focus knob. The job of this focus knob is to carefully move the large primary mirror in the back closer or farther from the secondary mirror in the front so objects can come into focus when viewed in the eyepiece.
As with most equipment, refinements can be make to the original. The two items listed above may be upgraded with minimal cost and effort to enhance the LX200 GPS scope's ease of use. A company called Bob's Knobs sells a set of replacement screws to make quick work of the secondary mirror calibration task. Another company called Starlight Instruments make a replacement focus knob which, when installed, will enable the user to make ultra-fine adjustments of the mirror unattainable with the OEM knob.
The FeatherTouch knob has two controllers to replace the single one on the Meade scope. The black inner knob is a 1:1 focusing knob. The smaller gold one is a 10:1 fine focusing knob. Note the presences of the deep ridges on both of the knobs of FeatherTouch as compared the OEM one. The ridges are so they could work with a motorized controller for completely hands-free remote control of the focusing operation. We'll save that for another day.
We are going to do the installation and post the write-ups of both the collimation screws and main focus knob replacements by the end of April. If you are looking for a few final Winter projects for your telescope, consider these upgrades. Dollar for dollar, these focus- related upgrades will probably have more impact on your viewing experience than anything else you can do for your scope. Starlight Instrument's FeatherTouch (FM-MEA8) Micro Focuser is a direct replacement for the knob of our 10" Meade LX200 GPS scope. Starlight makes them to fit all of the popular SCTs. Check their site for info regarding your specific model. [Permalink]- Meade Focus Knob upgrades
March 6,2009(FlipVideoFriday)
Last month we did a quick mention of a cool little digital HD video camcorder from PureDigital. The folks in the office have been playing with it and the general concensus is that the unit is simple enough to use by our grandmother and has quality high enough for most casual video situations.
The Flip MinoHD videocam has two buttons which the user needs to know about before shooting: the Power button and the Start/Stop button. The Power button is on the right side (as viewed from the back) of the unit. The Start/Stop button is the red one on the back.
The MinoHD has an internal rechargeable Li-ion battery. The battery lasts for two hours and is recharged via the built-in USB plug. There is a button on the left side of the MinoHD which when pressed releases the USB plug.
The lens and the microphone are located at the front of the Flip. Totally "point and shoot." The unit is desiged to be portable: 4"x2"x0.6", 3.3 oz. There is video-out port for playback on a TV or monitor. A tripod socket at the bottom allows the unit to be mounted for hands free recording.
A handstrap may be lashed onto the Flip via a small slot on the side of the unit. We normally don't attach one, but we found that it was quite convenient to have one on the Flip.
There is a 1.5" no-glare LCD display and touch-sensitive controls for playback, pause, fast forward/rewind, and delete. There is no zoom, special effects, or any of the extraneous features of a typical videocam to clutter up the interface.
What PureDigital has created is an extremely easy to use HD video camcorder that we can carry with us everywhere. They have even included a nice microfiber pouch, perfect for cleaning the lens and wiping fingerprints off the shiny black surface.
The microfiber pouch is fine for the pocket and normal outings. To protect and transport the MinoHD in more demanding situations, an OtterBox 1000 case is an excellent option and a perfect fit.
The Flip MinoHD is a well thought-out and well designed product which makes it easy to grab and share high quality clips. We'll post some FirstUse videos soon. In the meantime, feel free to check out the samples and accessory options on the PureDigital site. [Permalink]- PureDigital Flip Mino HD
Feb 27,2009(FlowersFriday)
A few weeks ago we did an article on the neglected orchid which started blooming. Two of the three buds had opened, but the last one stayed closed. Well, that third bud finally bloomed.
We took the opportunity to test how close we can get with the Nikkor 18-200mm VR lens. Click here to see a cropped version of the orchid at full resolution. The image was a bit noisy because we shot it using only the light available. We'll show how a brighter surrounding will influence the image quality tomorrow. [Permalink]- Orchids
Feb 19,2009(TeleAccessoriesThursday)
The Meade LX200 GPS telescope we purchased in January came with quite a few accessories. We had not expected so many items to be part of the deal when we were negotiating with the seller, but we were thrilled when he decided to throw them all in as part of the package after we had agreed on the price.
The first set of boxes we opened had items such as an eyepiece, a 2x tele-extender, and an erect image prism. The other boxes contained two CCD cameras, one for auto-guiding, one for deep sky imaging. Both of them were brand new as they were still sealed in their respective packaging.
The difference between these CCD imagers and a webcam is these does not have a lens in front of the imaging sensor. The telescope is the lens. The larger imager also has fins on the back of the unit for heat dissipation. This is so the noise affecting the CCD sensor is kept to a minimum during long exposures.
One "big" surprise accessory is the 14mm Ultra Wide Angle eyepiece. We had no idea this expensive lens would be in the mix! We have never used one before and are eager to see what we can see with this huge unit.
Meade Series 5000 eyepiece has a 82º field of view and appears to be extremely well crafted. Even the box was heavy duty and made with care.
We posed it next to one of our standard lens just to give you a size reference.
The last item we found was a dew remover/ dew shield (not in photo) combo. A dew remover is basically a heating strip. It wil keep things warm, preventing condensation from forming. This item also looked unused.
We had thought our initial deal for the Meade LX200 GPS scope was a great one. After adding up the value of the accessories, we realized this entire package was an AMAZING steal. We have bought and sold seven telescopes since we started the RainyDayScience section. I think we have finally found the two scopes which will keep us busy for a while. Of course, if a good Questar deal comes a knockin', we'll be a dealin' :-) [Permalink]- Telescope Accessories
Feb 17,2009(TelescopeTuesday)
Astronomy is a great hobby. One can start just by going outside and looking up at the night sky. Once comfortable with what is up there, a telescope is useful to see out a little further, details a little clearer, and objects a little bigger.
Last month we found a great deal on a 10" Meade LX200 GPS telescope up in New Hampshire. We took half a day off, drove for 2 hours, and brought back an almost brand new telescope along with a large collection of accessories.
The 8x50 finder is standard, along with the zero image-shift microfocuser, and 145,000-object library. The Meade LX200 GPS scope is that of a Schmidt-Cassegrain design. The near focus is about 50 feet. The focal length is 2500mm with a focal ratio of f/10. The maximum practical visual power is about 650X. Ours came with the optional UHTC coating. We will have more on the UHTC technology in a future article. The GPS alignment system is comprised of a 16-channel GPS receiver with magnetic declination compensation and true-level North sensors.
The Autostar II control system consists of a handheld controller, an upgradeable database, and an integrated control panel. Software upgrades may be downloaded from Meade and transferred to the scope's flash memory via the RS-232 port.
We expect that the software in our scope is probably a few upgrades behind. We will take a look on the Meade site to see what is the latest version of the firmware and upgrade accordingly. The next segment of this series will focus on the accessories which came with this Meade scope. Look for it in March.
We will set up the LX200GPS scope for a FirstUse when the weather gets a bit warmer. Both the the Meade 2045/CG-5 and the LX200GPS will be contributing to our astrophotography efforts in the Spring. [Permalink]- Meade LX200GPS
Feb 14-15,2009(WeekendEdition)
Last Fall we went to World's End in Hingham for a hike. The Lobster Pound was open and the weather was warm. We went back this weekend to see what the place was like during the Winter.
The grounds were quiet. There were a few birds out chirping, but pretty much everything else was in hibernation. Spring is clearly still a few months away.
It felt like we had the entire preservation to ourselves. The solitude and calm of the hike was very relaxing. We did have to pay attention on the trails as some of the paths were quite icy.
As it was a clear day, we could see all the way back to Boston. We took these two shots (18mm, 200mm) with the Nikon D90 and the 18-200mm VR zoom.
This place would be quite beautiful after a fresh storm. We hope to be back the next time it snows. We'll definitely visit in the Spring when things start to bloom. [Permalink]- World's End
Feb 13,2009(OrchidPhotoFriday)
Amongst all of the tech in the office here, nature still finds a way to assert its presence. A few weeks ago we noticed buds on the much ignored orchid near one of the windows. We watched as they grew and opened up this week.
The blooming orchid presented a perfect opportunity for us to take some close up shots with the D90 and 18-200mm VR lens. We took photos at various times during the day to see how the D90 handles the different lighting conditions.
The ones above were taken during the morning and early afternoon. The one below was taken a few days later at night. All of the photos were taken with the D90 mounted on a tripod but without using a flash.
Here is a snippet of an orchid photo at full resolution. We were impressed with the color rendition and low noise level of the D90 sensor even when the lighting conditions are quite poor. There is one more bud waiting to pop. It may be this weekend. The interns are setting up a rig with hopes of capturing the unfolding of the petals. We'll post the results if we are successful. [Permalink]- Orchid Close Up
Feb 10,2009(AttachAGripTuesday)
Yesterday we did a FirstLook of the Phottix D90 battery grip. We really like the fit and finish of the Phottix Premium Series. It matches the quality of the Nikon much better than their regular line of grips. Today we'll show how to attach the D90 battery grip to the D90 camera.
As it was with the D40, in order to attach the grip, the small cover of the D90 camera's battery compartment must be removed. We've covered the steps with the D40, so we will not repeat them again.
However, we did take some pics of the installation steps for readers who may want a closer look. Just click on any of the images for the larger version.
The D90 battery grip holds two of the Li-ion rechargeable batteries, effectively doubling the available shooting time. AA batteries may also be used with the supplied holder.
The next look will be a side-by-side comparison of the two Phottix grips. It will give readers a chance to see the differences between the regular and the premium Phottix lines. [Permalink]- Nikon D-90 Grip Install
Feb 9,2009(GetAGripMonday)
Last month we gave readers a FirstLook at the Phottix D40 battery grip. Today we will do the same with the Phottix Premium Grip for the Nikon D90. Phottix is not a brand you yet see in stores, but they are very active on EBay.
We like dealing with the Phottix folks because of their great products, low prices, and excellent customer service. The Phottix products have all the same features as the OEM version. The "Premium Series" units even have a high quality finish similar to that of Nikon.
The Nikon D90 is a much bigger and heavier camera than the D40. A battery grip on the D90 actually made the camera more balanced when paired with a heavy lens such as the Nikkor 18-200mm VR zoom.
This battery grip is designed to fully support all of the D90 capabilities, whether holding/shooting horizontally or vertically. The mount screw has an oversized wheel for ease of tightening. The tripod mount used to attach the grip is duplicated at the bottom as expected.
The Phottix D90 grip, like its D40 cousin, can handle both AA batteries or the Li-ion rechargeable cells. The battery compartment has a twist-lock on the cover, a spring-loading mechanism, and has slotted guides to ensure the proper alignment of the batteries.
There are a lot of differences between the "regular" and the "premium" line. We will do a side-by-side comparison later this week. If you are considering one of these Phottix grip and can't wait for the full report, just go to EBay, search for "Phottix grip", and buy the premium one. There are situations where we would advise buyers to go with the "regular" version, for most we think the "premium" difference is worth the extra money. [Permalink]- Nikon D-90 Battery Grip
Feb 6,2009(FlipVideoFriday)
A few years ago, RainyDayMagazine was amongst the first to review the low cost disposable digital video camera from CVS. The CVS videocam was designed and built by PureDigital.
Since that time, PureDigital has continued to refine and improve both their low cost digital photo and digital video devices. Their latest product is a simple, iPod-esque, HD digital video camcorder that just about anyone can learn how to use in around 2 minutes.
The Flip minoHD showed up this week, so here is a quick teaser look of the unit. The Flip Video has 4GB of internal memory, sufficient for 60 minutes of HD recording.
The package includes the HD camcorder, TV cable, wrist strap, soft case, and a quickstart guide. The full FirstLook will be posted next week. [Permalink]- Pure Digital Flip Video
Feb 2,2009(MoreNikonMonday)
We have had our new Nikon D90 camera and 18-200mm VR Nikkor lens for close to a month and have been extremely pleased with all aspects of this combo. The D90 is a solidly built camera with well thought out control placements. The 18-200mm lens is a great complement to the D90.
We had considered going with just the 18-105mm kit lens, but decided to to go with the bigger zoom lens because we didn't want to keep changing lenses. The main reason is taking a lens off and on the body can potentially introduce dust into the body and on to the sensor. The D90 has a built in dust-removal feature for the sensor, but the less often we open up the system
When we first announced that we'd be reviewing the Nikon D90, one of the most received requests was a side-by-side look of the D40 and the D90. We thought we would start with a series of photos and maybe do an actual features comparision in some future article. The other questions were where did we purchase our gear and did we pay full price.
We purchased both of Nikon cameras via Amazon.com. One directly from Amazon, the other from Cameta selling via Amazon. Both companies are great and the items were exactly as described. The one advice we have about buying expensive cameras via the Internet is to stay away from sites offering "deals" that are too good to be true. If a newly released camera is offered at 50% off, it is a good bet that it is a bait-and-switch scam...even if the "site" looks good.
A good way to check is to Google the site and see if there are any complaints against them. If it is a scam site, then chances are good that there will be plenty of chatter. Nikon makes great gear, so don't let a bad buying experience be your first memory. Buy from sites with a good reputation. The little extra cost is worth the savings in headaches! [Permalink]- Nikons Side by side
January 27,2009 (CameraTechTuesday)
The Nikon D40 is a very lightweight and easy-to-carry DSLR. When we are out shooting with it we always take along a few extra fully charged batteries. However, there were times when we wished we had some additional juice, especially when we couldn't afford to miss a shot. One way to give the D40 some backup power is to attach a battery grip.
Nikon makes an OEM battery grip, but there a a lot of aftermarket units available. These 3rd party units are typically at least 30-60% cheaper than the OEM version. We purchased ours from Phottix for $50 on EBay. It was shipped directly from Hong Kong and arrived in about 15 days.
Having a container for AA batteries is a great backup as those types of batteries are available all over the world. This could be a lifesaver when the charger dies or when recharging is not convenient.
In order to attach the grip, the D40's battery compartment cover must be removed. The removal directions are in the manual, but basically the cover will slide out at an angle. The Phottix grip has a convenient storage slot for the battery compartment cover.
The camera is quite a bit bigger with the battery grip mounted, but it is much easier to grip, both horizontally and vertically. It is likely we'll need to get a slightly larger camera bag to accommodate the camera and grip combo. Once we get that sorted out, we'll take it our in the field and give it a go. [Permalink]- Phottix D40 Grip
January 24-25,2009 (WeekendEdition)
Many readers have commented that they really like browsing around and looking at past articles on RainyDayMagazine. So, to make it easier for readers to scan, browse, and randomly find interesting things to read on a "rainy day," we have decided to make some updates to the the visual index. Based on our "page hit" stats, we realized that many of them were RainyDayPhotography related articles. Since the RainyDayPhotography section was the most popular, we started with that.
The top of the RainyDayPhotography page now have hyperlinks to all of the back articles. Clicking on the year will jump to a page with all of the related articles for that year. The left column on the page now have hyperlinks to the index page for all of the gear reviews, outings, and projects for that year. For readers who know what they are looking for, the Google Search box is always available at the top of the page.
Each annual RainyDayPhotography visual index now has three main sections: PhotoGear, PhotoOutings, PhotoProjects. Each group is a collection of hyperlinked photo icons of all of the relevant articles for that year. The hope is this will make it easier for you to jump to articles of interest just by scanning, finding, and clicking at the photo icons.
We will also be doing the same kind of indexing to other RainyDay sections. The order will be based on popularity. If your favorite one is not as popular, don't worry. We'll do plan to index all of the sections... eventually :-) [Permalink] - RainyDayPhotography Index
January 22,2009 (PhotoTechThursday)
Our inbox got a lot of interesting links to various inauguration photos. None was as interesting as this one from Eric in PA. It is a panorama of the Inaugural Address taken by David Bergman. The photo's vantage point is pretty cool, but the amazing part was its resolution.
The image is so large that to see the full content, the viewer must pan and zoom using the navigation tools in the image's upper left corner. In the image above, the red arrows point to... [More]- Inauguration Pano
January 13,2009 (TelescopeTuesday)
A few weeks ago, we sold both of our larger telescopes (8" Celestron, 10" Newtonian) to raise funds for a very specific type of SCT. We were looking for a Fastar, Celestron, or Meade with a removable secondary mirror so we could do some deep space imaging using a Hyperstar lens. Check out Hyperstar's site and find out why we are so excited about their technology.
As luck with have it, Greg L in New Mampshire had a 10" Meade LX200 GPS that was exactly what we were looking for. The problem was not that we were nowhere close to where he lives. The problem was that we were nowhere close to... [More]- Meade LX200 GPS
January 8,2009 (TravelBagThursday)
We use the Kata W-92 waist pack to carry our Nikon D40. We also have the larger Kata WS-604 bag which was used for transporting some of the less often used gear and the occassional telescope.
The W92 case was our first choice because it is compact, light weight, and yet still roomy enough for... [More]- Kata WS-604 w/D90
January 7,2009 (WowUsWednesday)
Theinterns were out at a local mall yesterday doing some after-Christmas bargain hunting when they spotted a stack of this amazing book (Cosmos: A Field Guide - Giles Sparrow). The book is no longer in print and were marked down to just $19.95!
This book is BIG. 17.5 x 14 inches big. We took a few photos of the book next to some familiar objects (telescope, desk, Buffy) to give readers a sense of its size. As the book's subject is the... [More]- Cosmos
January 6,2009 (TelescopeTuesday)
TheMeade 2045 scope came with a very sturdy tripod and motorized mount, but now that CG-5 GoTo mount has been fixed we thought it would be good to try attaching the Meade OTA and use the duo for some deep sky astrophotography.
There are two things needed (rings, rail) to attach an optical tube assembly (OTA) onto the CG-5 mount. We managed to locate what we needed from Orion Telescopes. Orion Telescope carry a lot of hard to find gear at reasonable prices. They are the first place we check when looking for parts.
Since we did not get any manuals with the Meade 2045 when we purchased the scope, we had to attempt the OTA disassembly by trial-and-error. After a careful "once over", it was apparent that the OTA was attached to the fork mount by... [More]- Meade 2045 on CG-5
January 5,2009 (MoreNikonD90Monday)
The Nikon D90 package came with all of the accessores (strap, cables, battery, charger, software) except for the lens. We had thought about getting the 18-105mm VR kit lens, but decided we wanteda more versatile lens for the D90 which we could leave on the camera most of the time. As with all of our images, click on them for a larger version and a closer look.
The first thing we noticed about the D90 is how substantial it feels. The layout of the various controls and buttons are similar to the D40, but more ergonomically arranged. The Mode dial is now on the left. There is also an LCD control panel which gives the photographer a quick at-a-glance view of the camera's status.
The D90 has a large 3" LCD monitor in the back. Its high resolution display is perfect for previewing the D90's 12.3 MB images. The D90 also has... [More]- Nikon D90 FirstLook
January 3-4,2009 (WeekendEdition)
We had the perfect reason for a road trip to NYC this weekend... to field-test our new Nikon D90 and VR zoom. The goal was to put the camera on "auto" and just walk around and shoot. How did we do with the new camera and lens? Click on the images below and see.
The weather was excellent for walking around the city and we did a LOT of that. We parked the car on the upper East side and strolled down to Union Square. The wide angle and zoom capabilities of the 18-200mm zoom lens enabled us to... [More]- NYC
January 2,2009 (fotoFriday)
A new Nikon camera and zoom lens appeared under the Bubble Christmas tree at the RainyDayMagazine office this year. In 2008, we reviewed a Nikon D40 SLR for RainyDayPhotography. We liked the D40 was so much that we sold all of the Canon S2s and replaced them all with D40s. Fast forward a year and a few thousand photos later, we are totally sold on the Nikon digital SLRs. They are easy to use, handles well, and can stand up to the rigor of studio and field use.
When Nikon released the higher resolution D90 mid-range SLR in Q3 of 2008, we knew it would be... [More]- Nikon D90 and lens

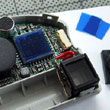

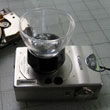
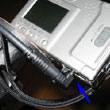
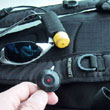


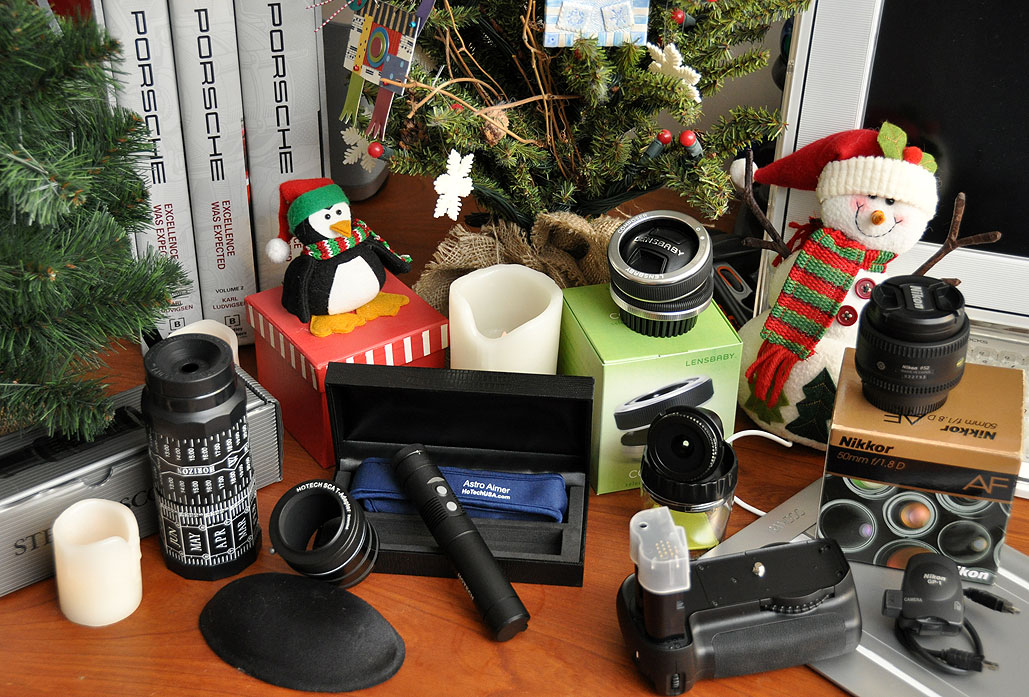
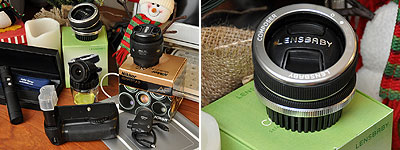
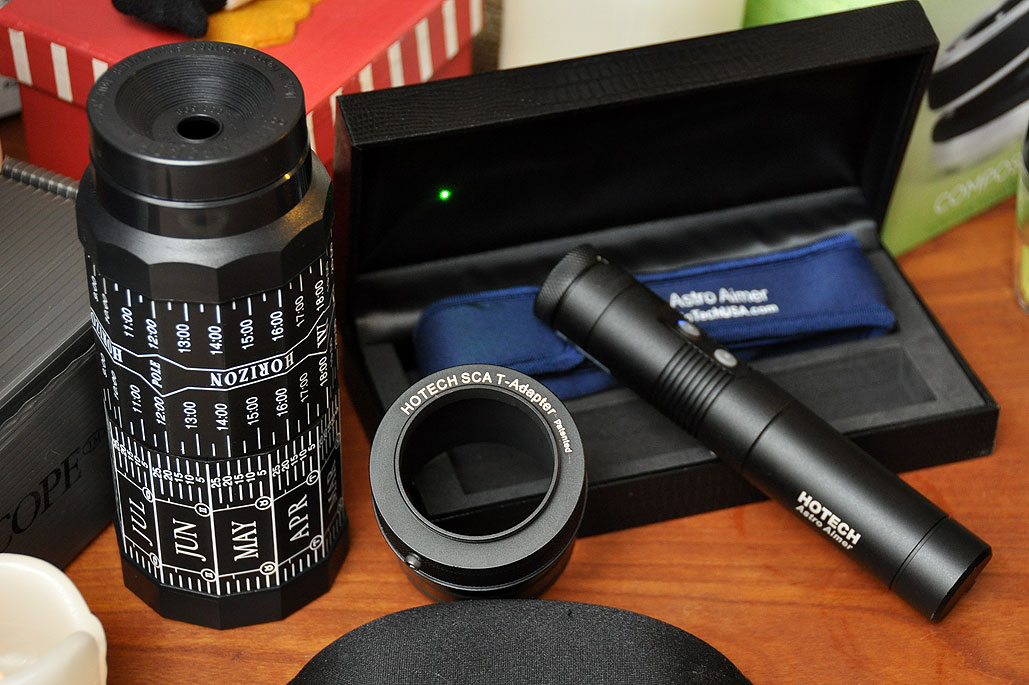
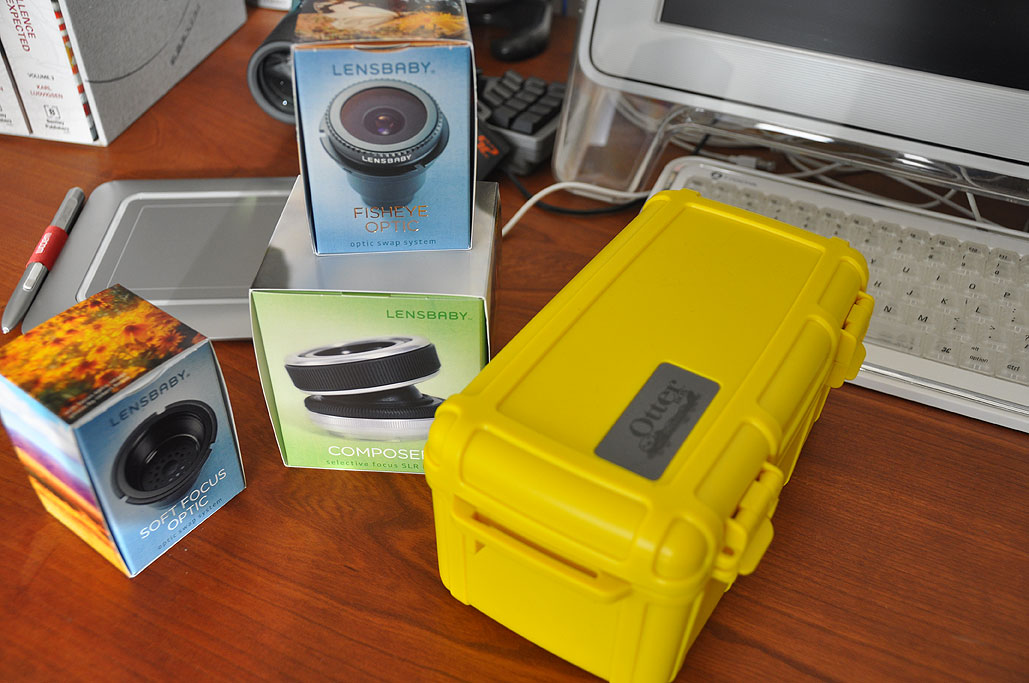
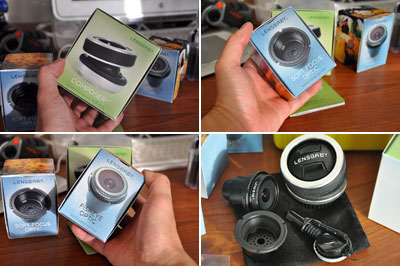
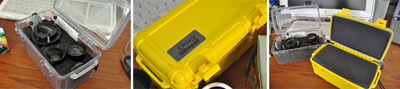
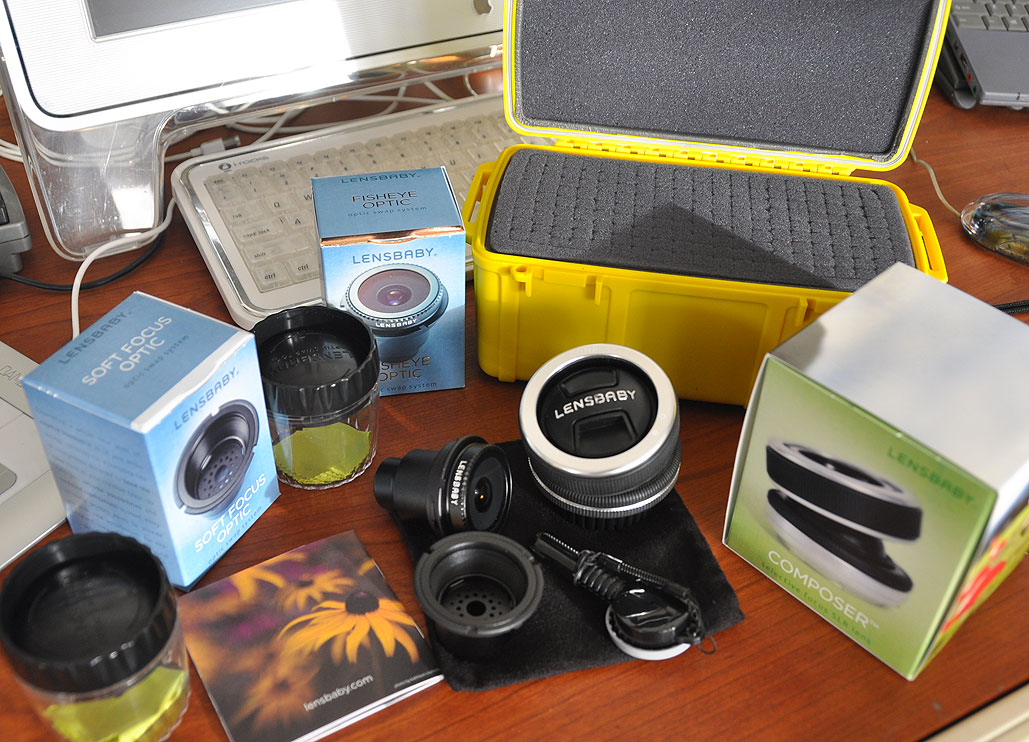
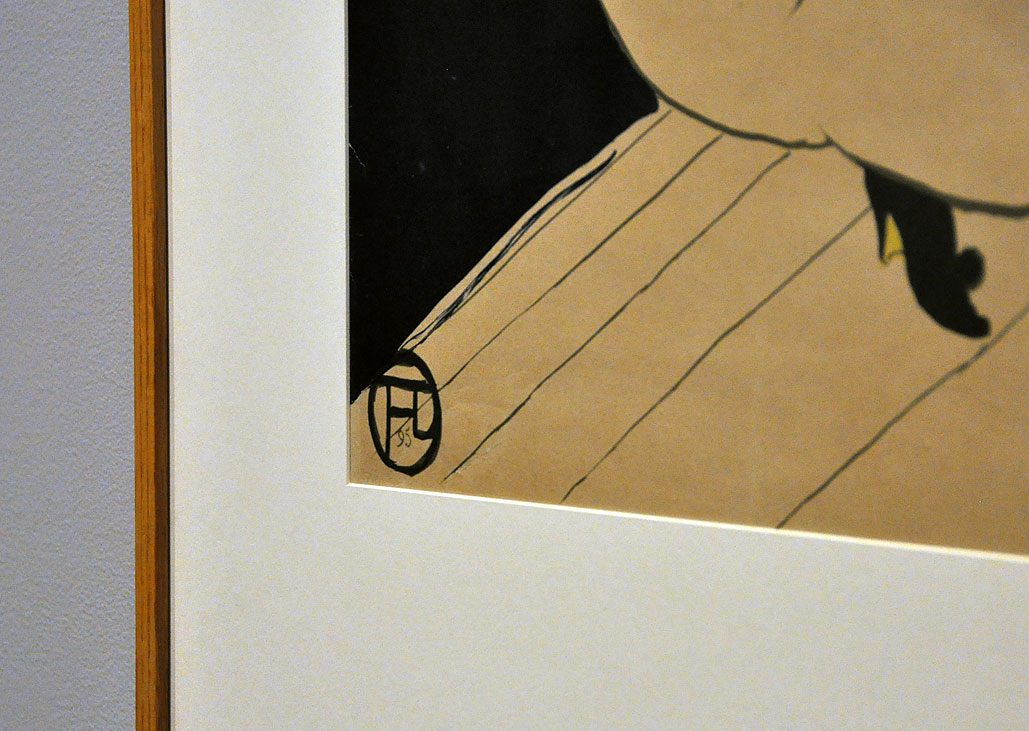

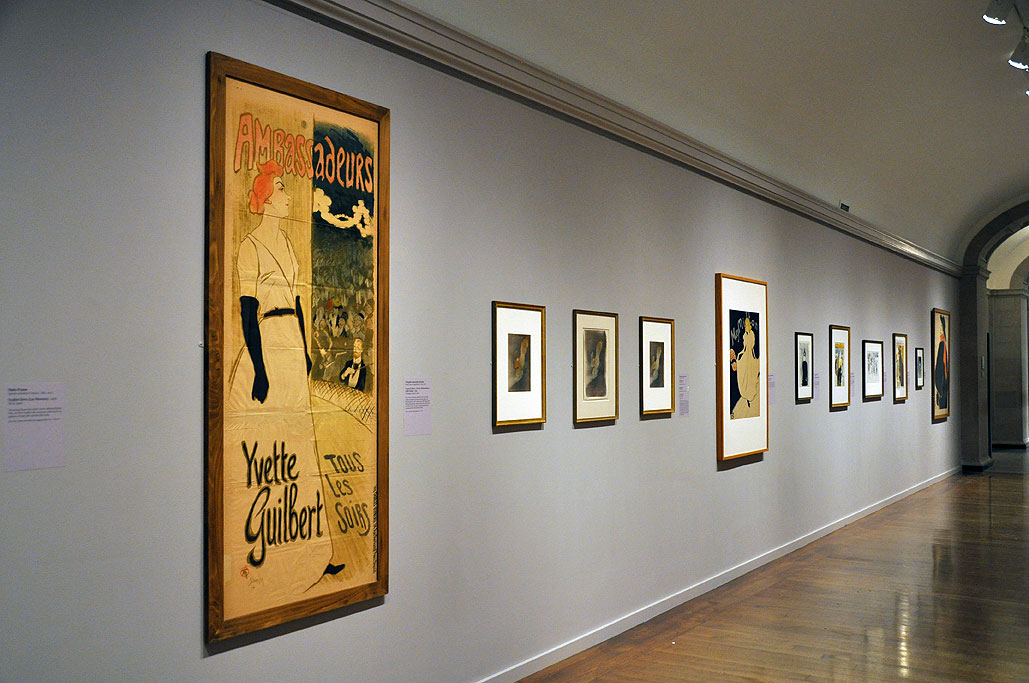
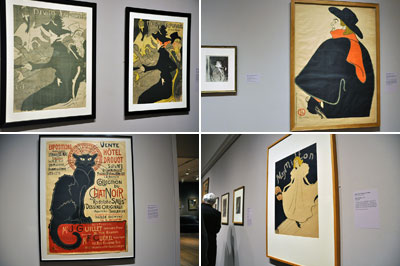
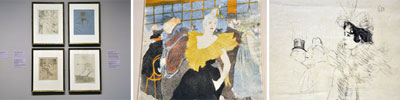
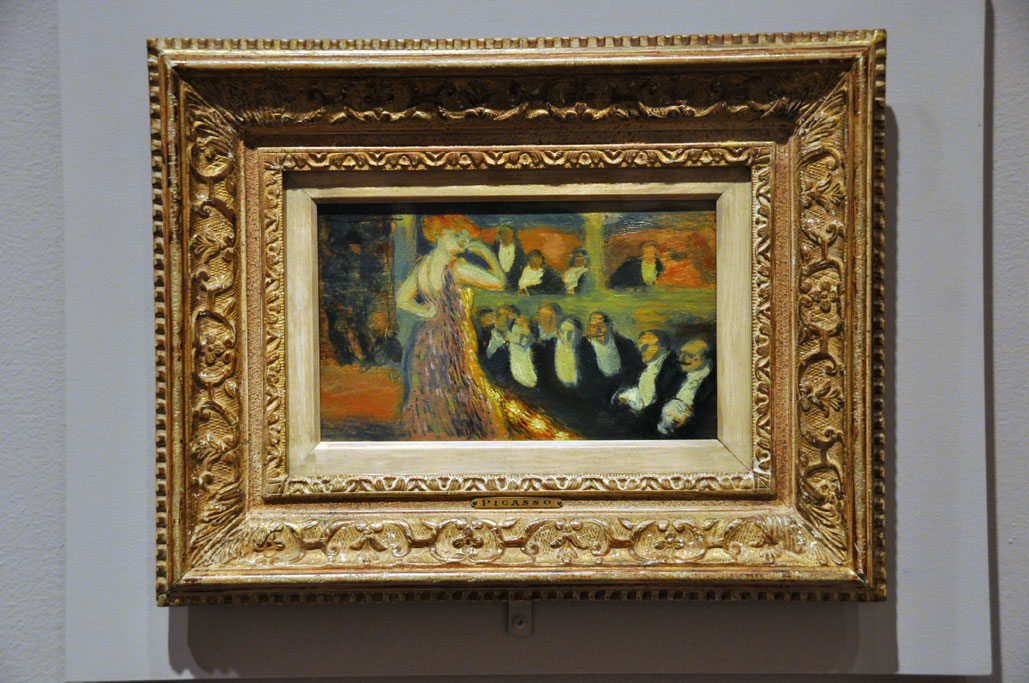
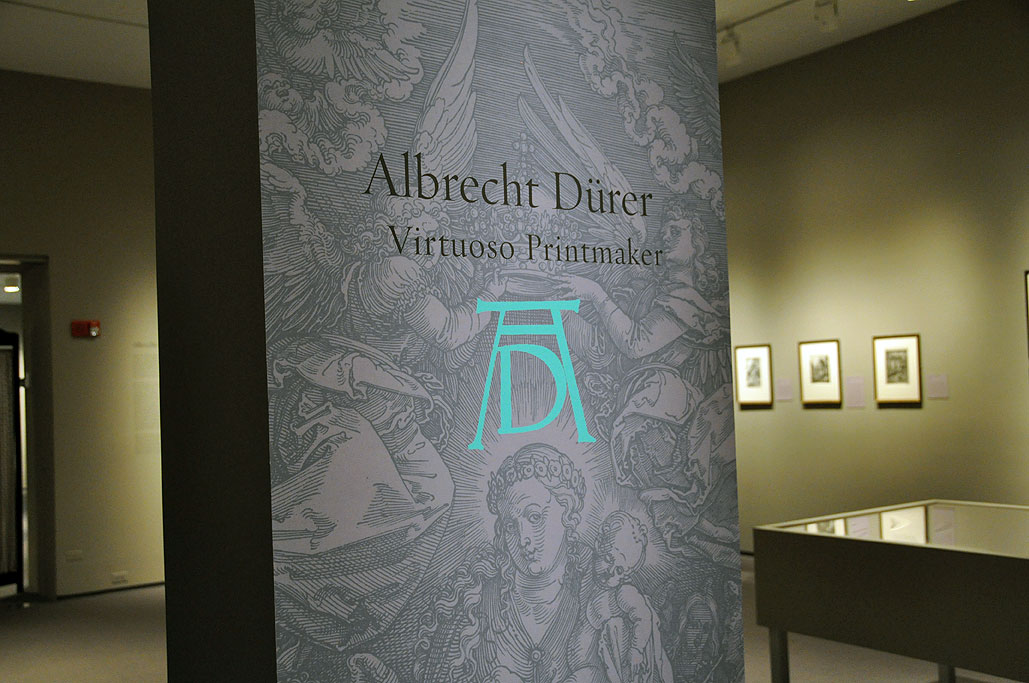
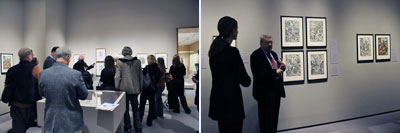
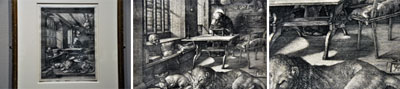


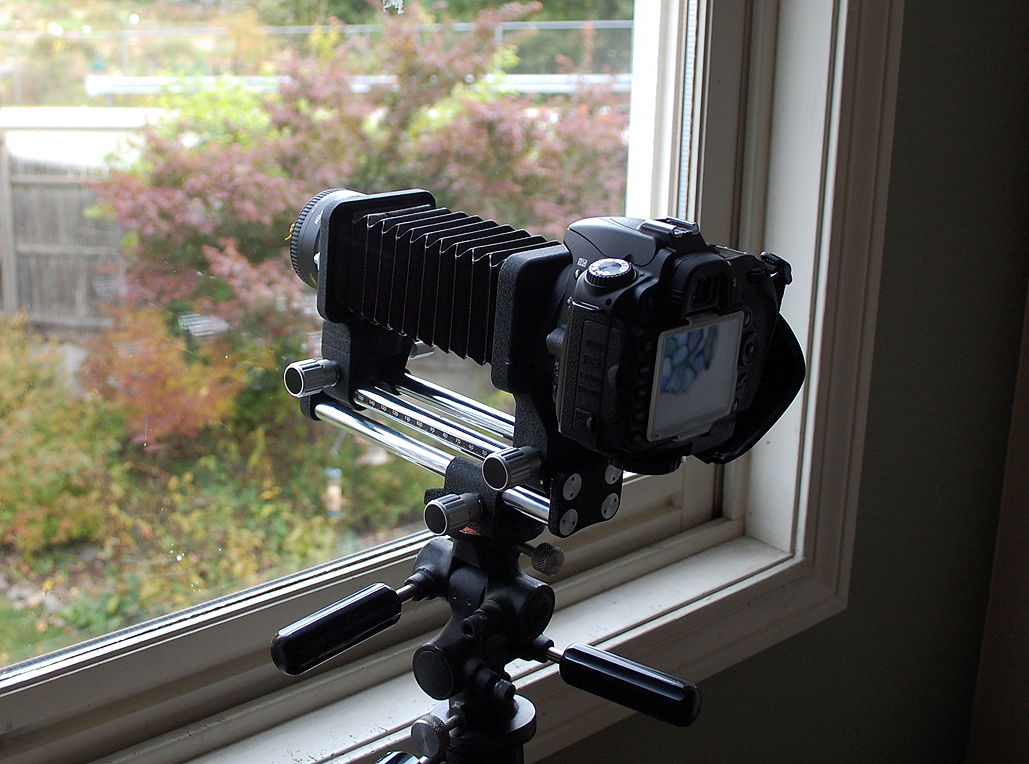


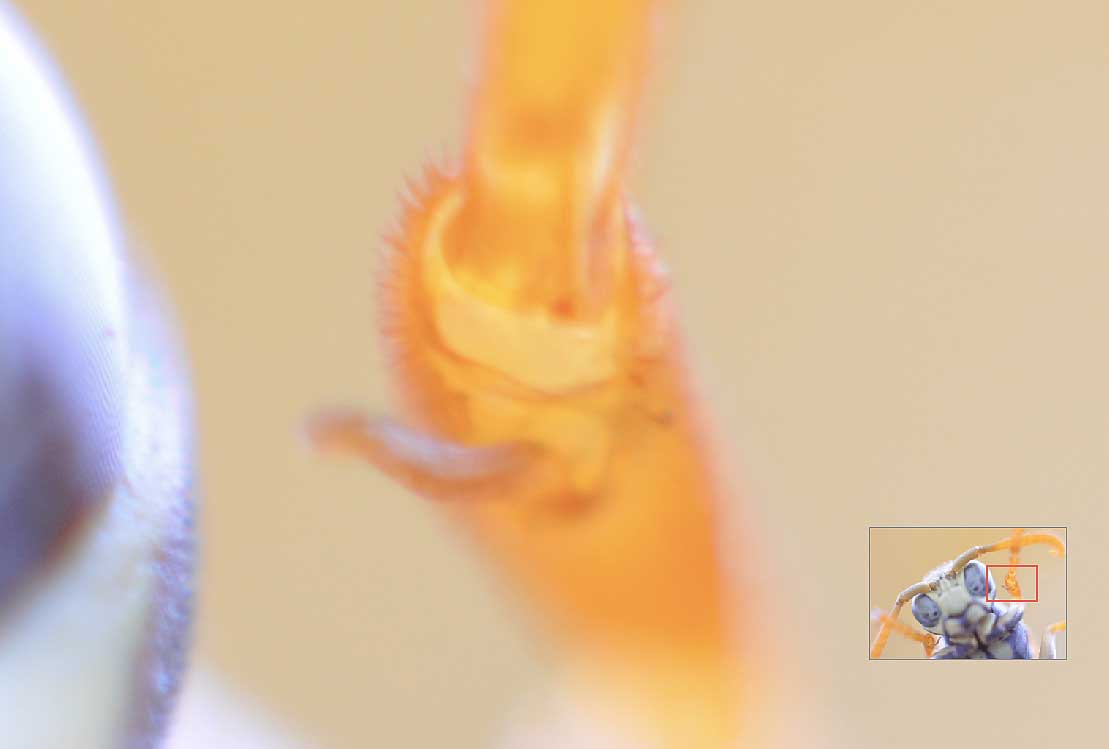
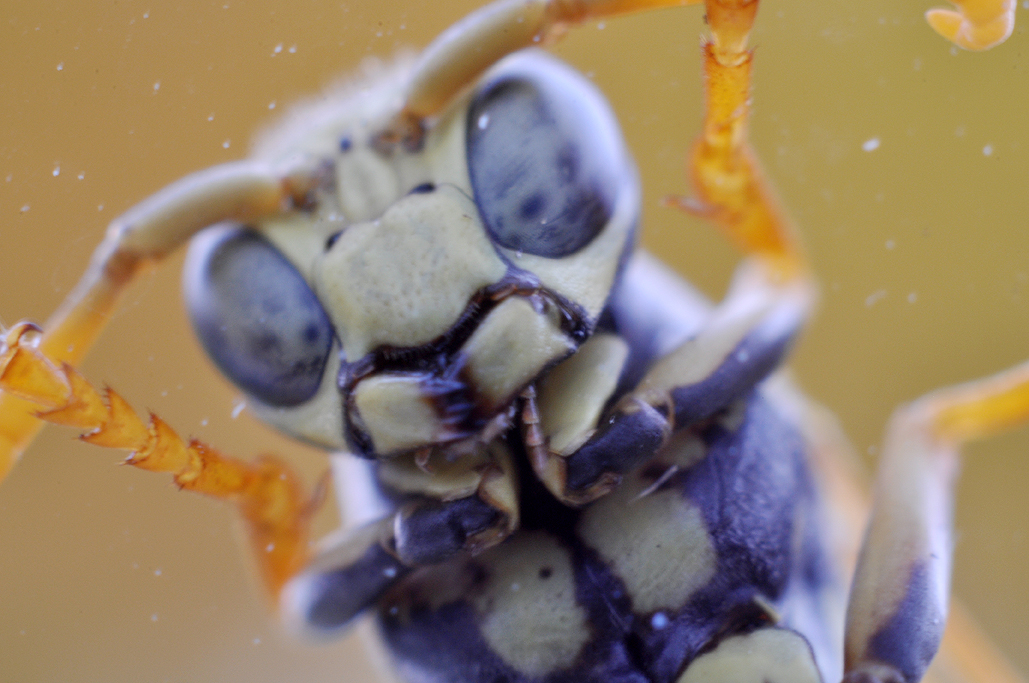
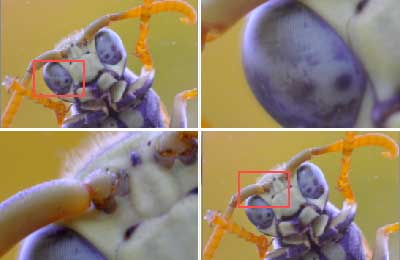


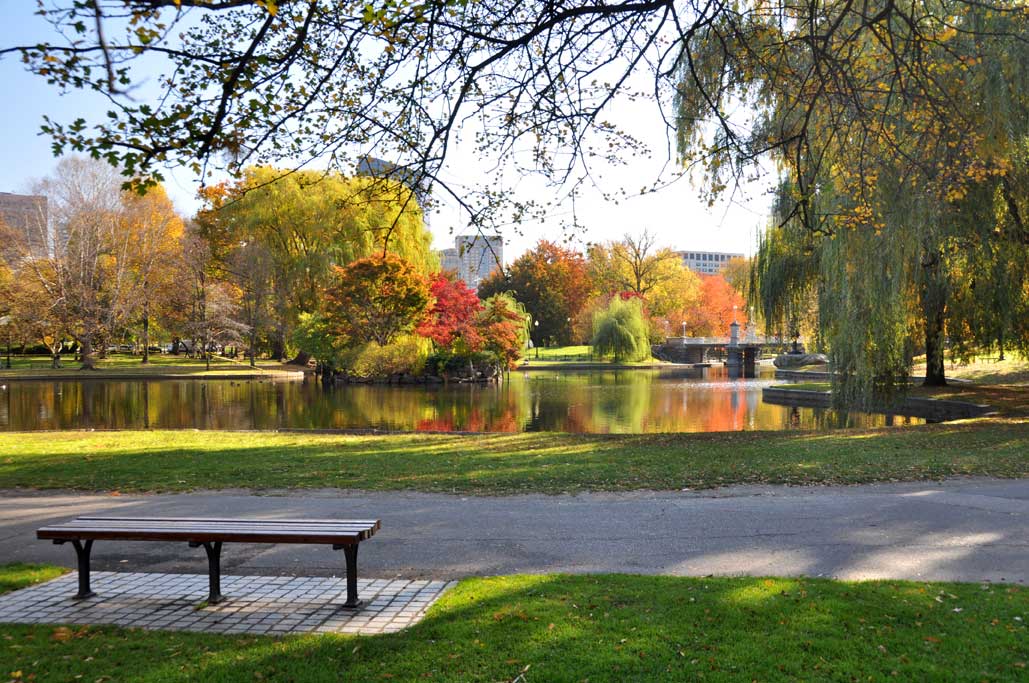

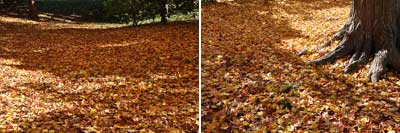


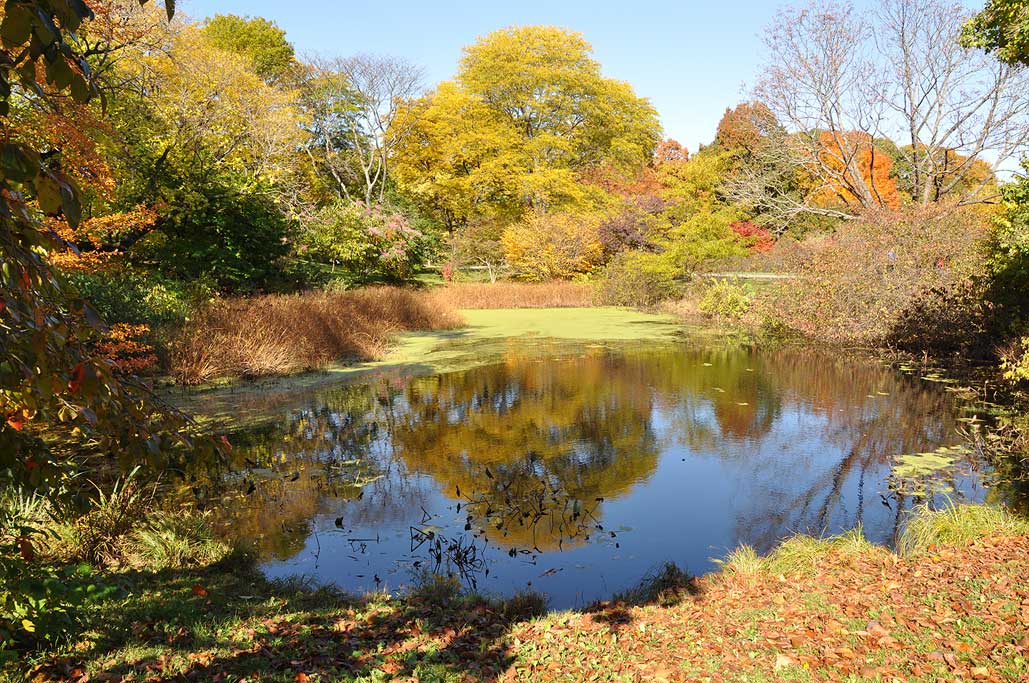
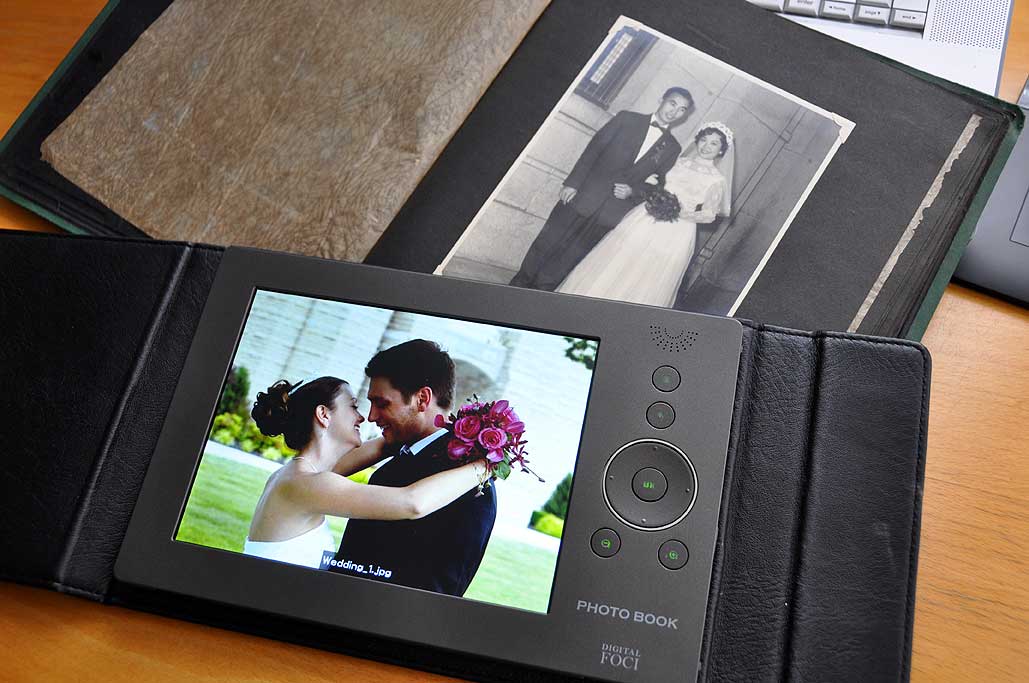
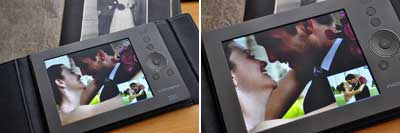
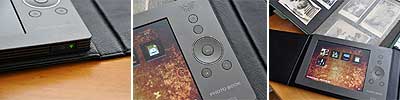
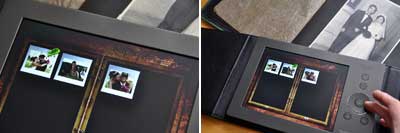


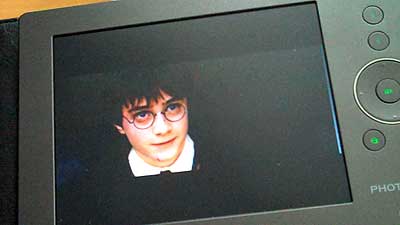
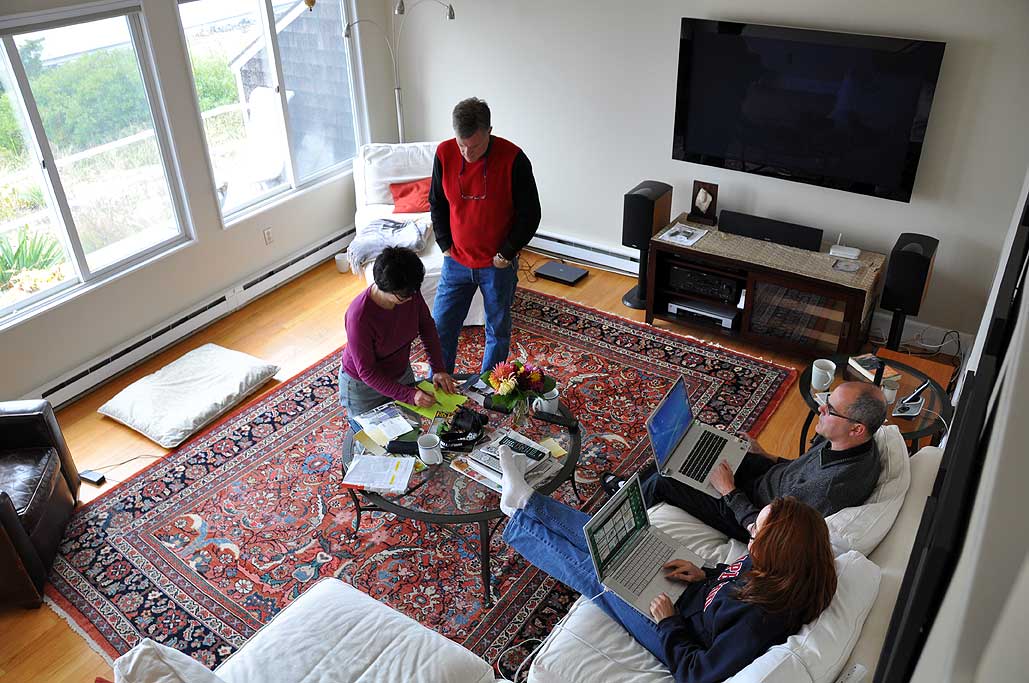
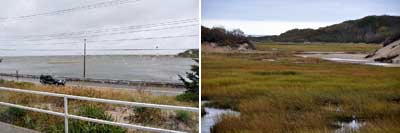

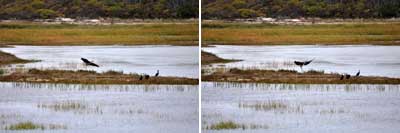
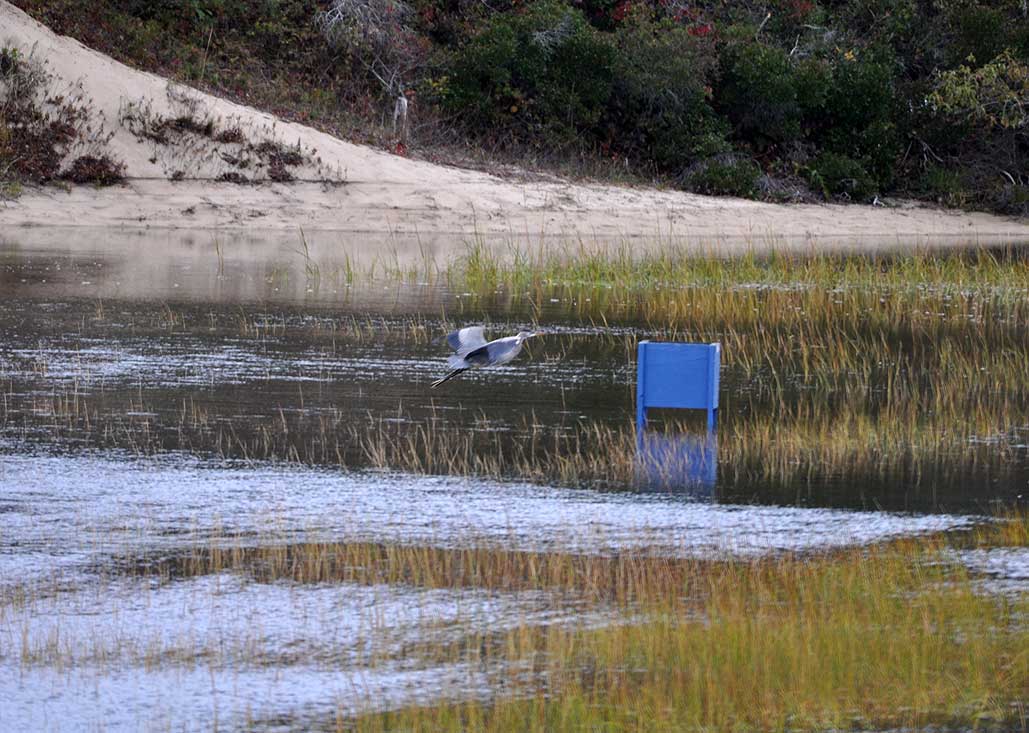
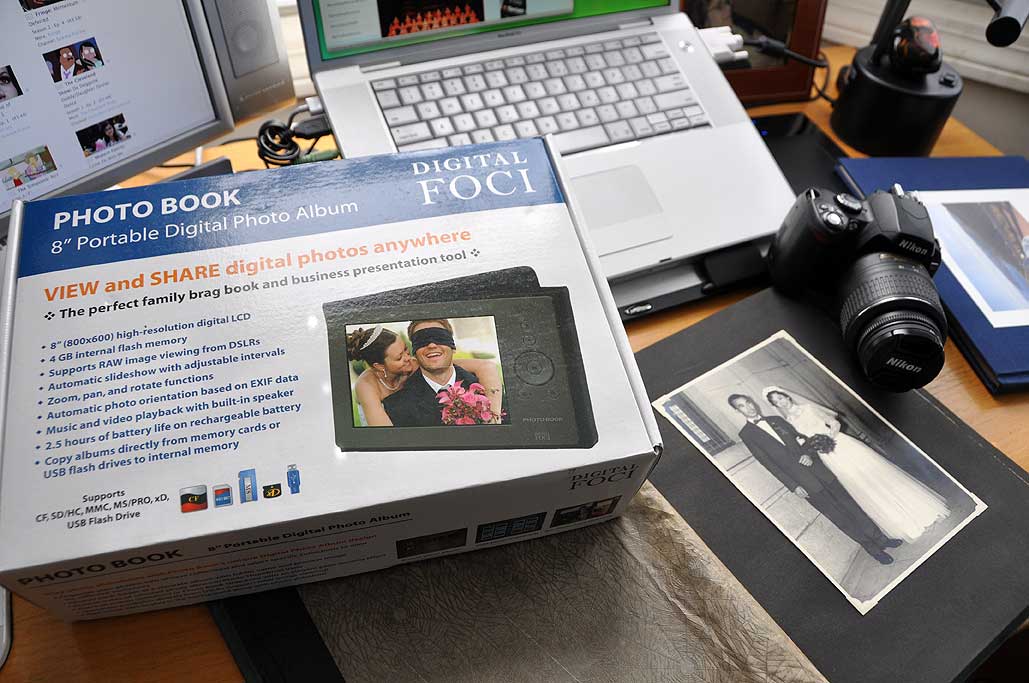

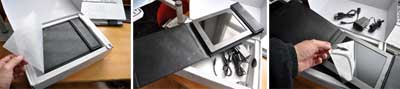
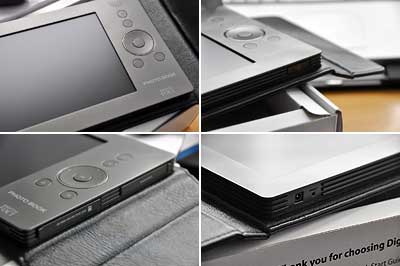
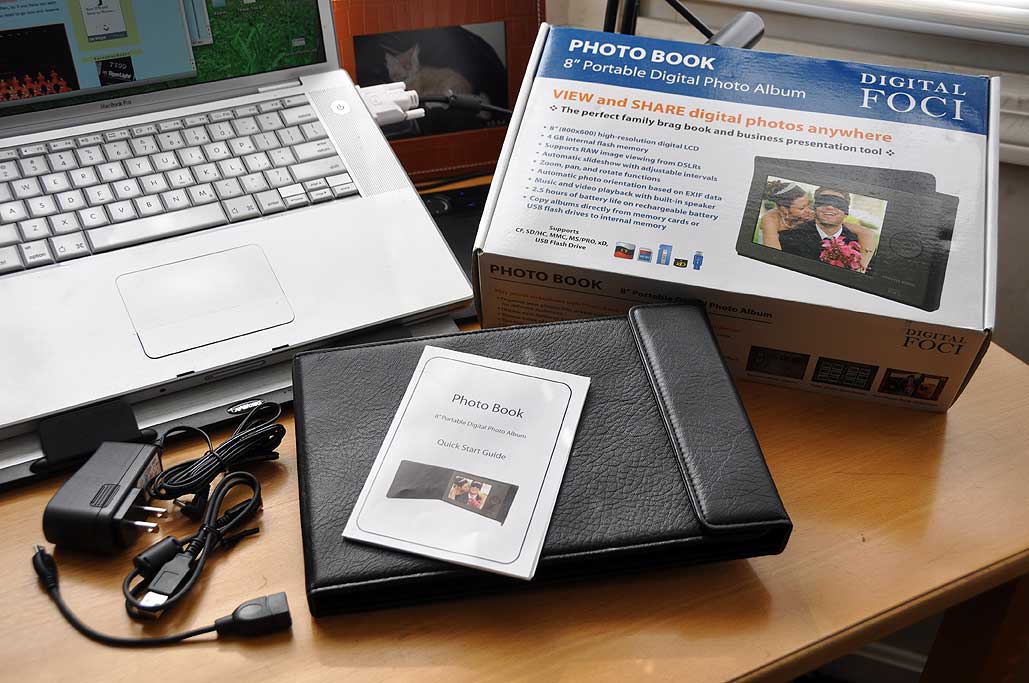
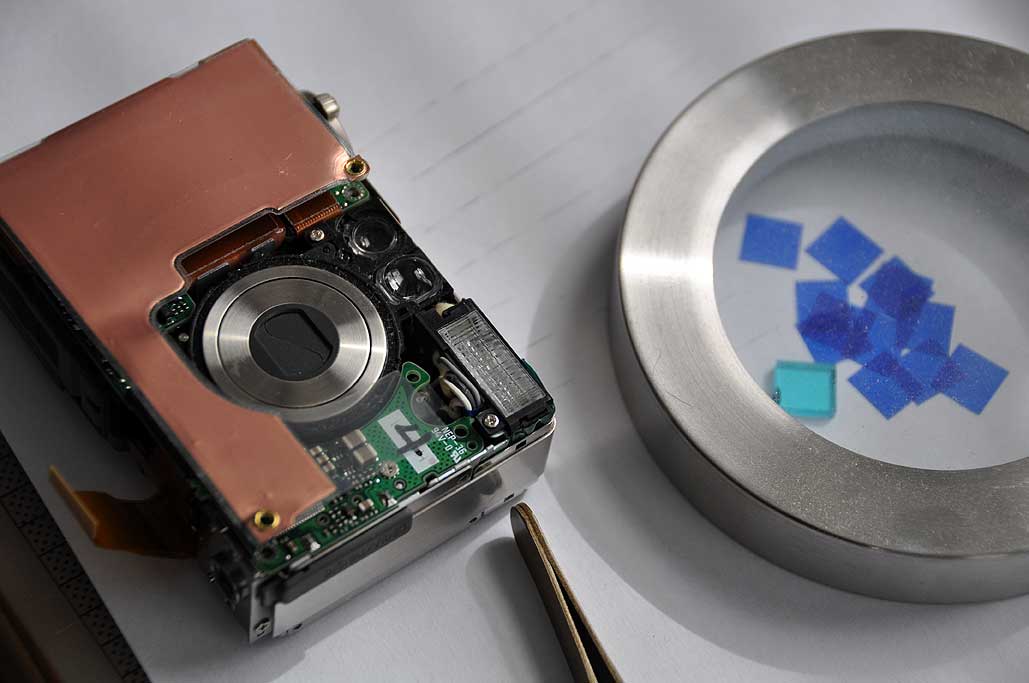
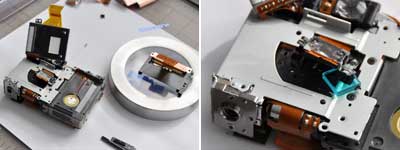
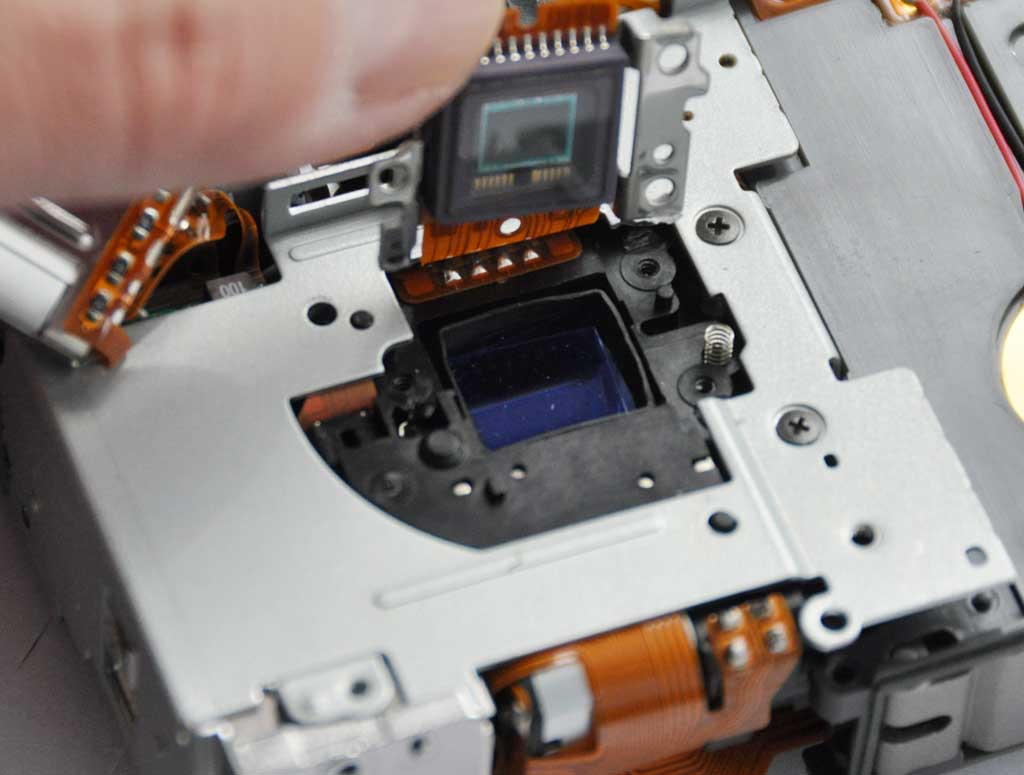
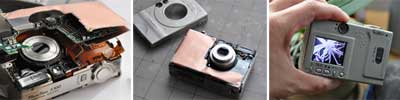
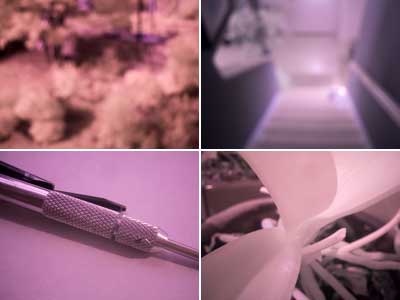
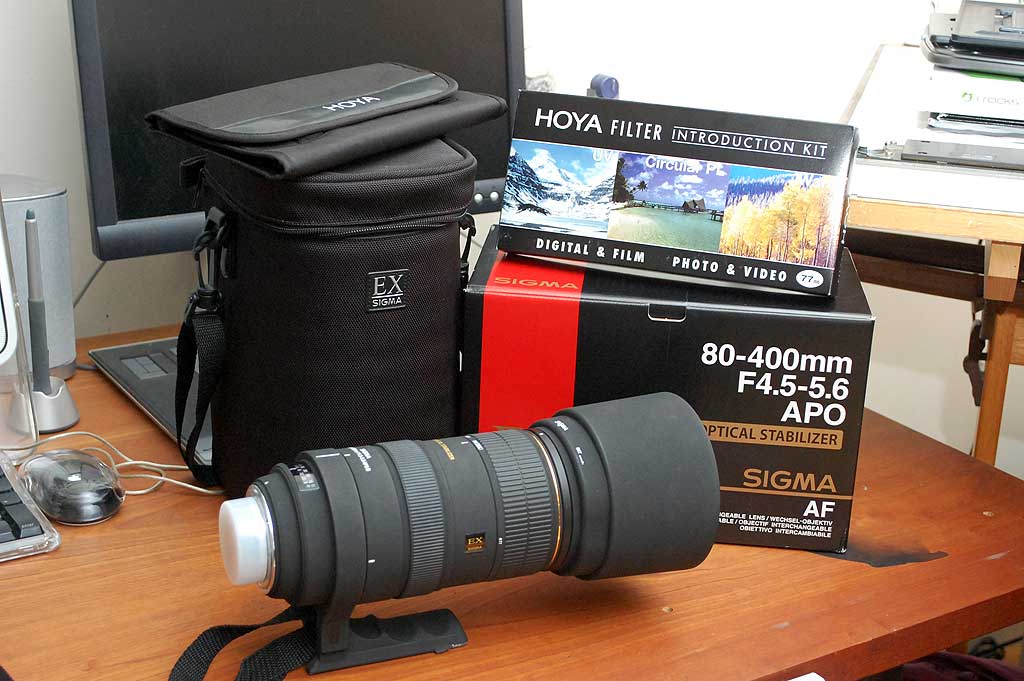
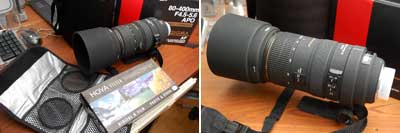
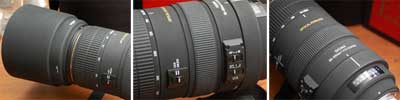
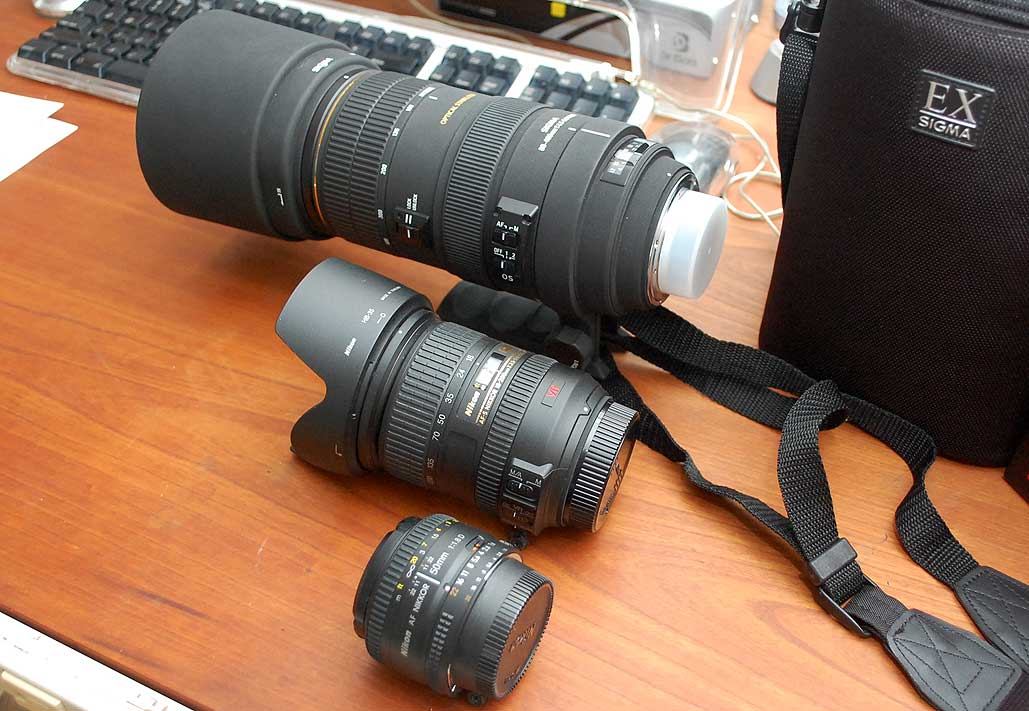

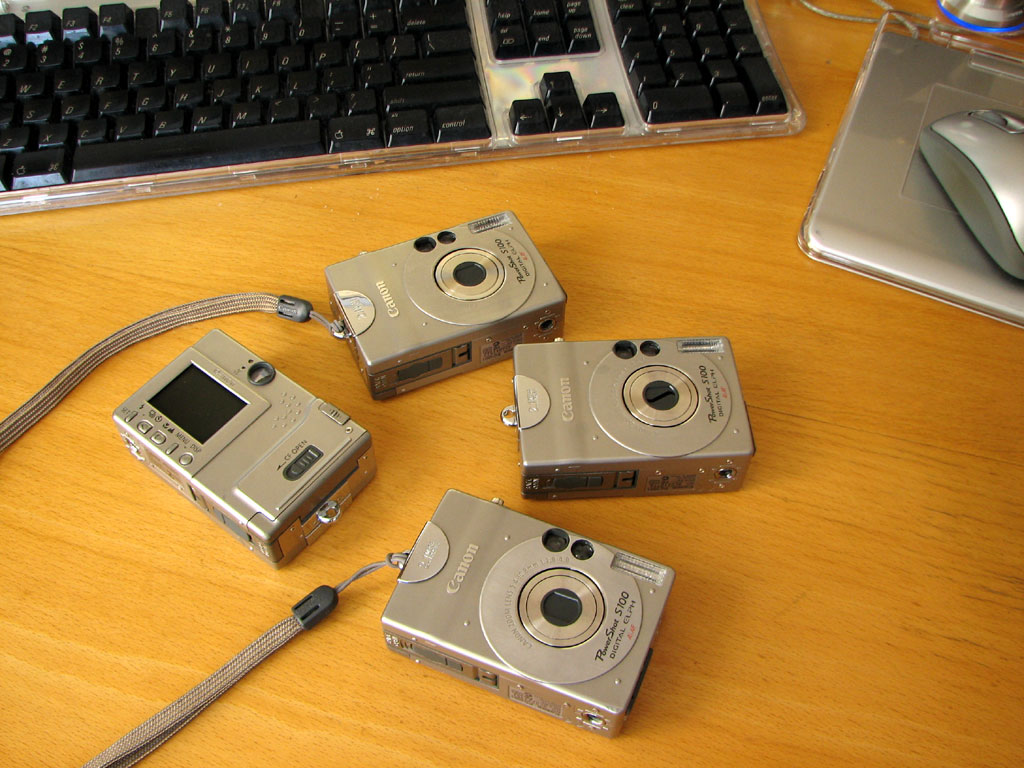
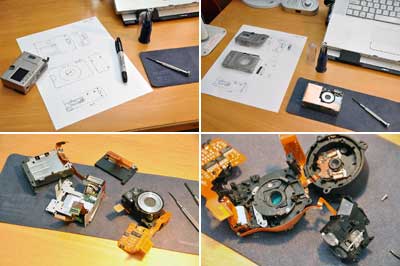
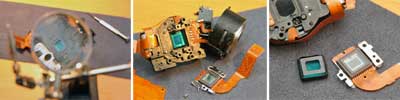


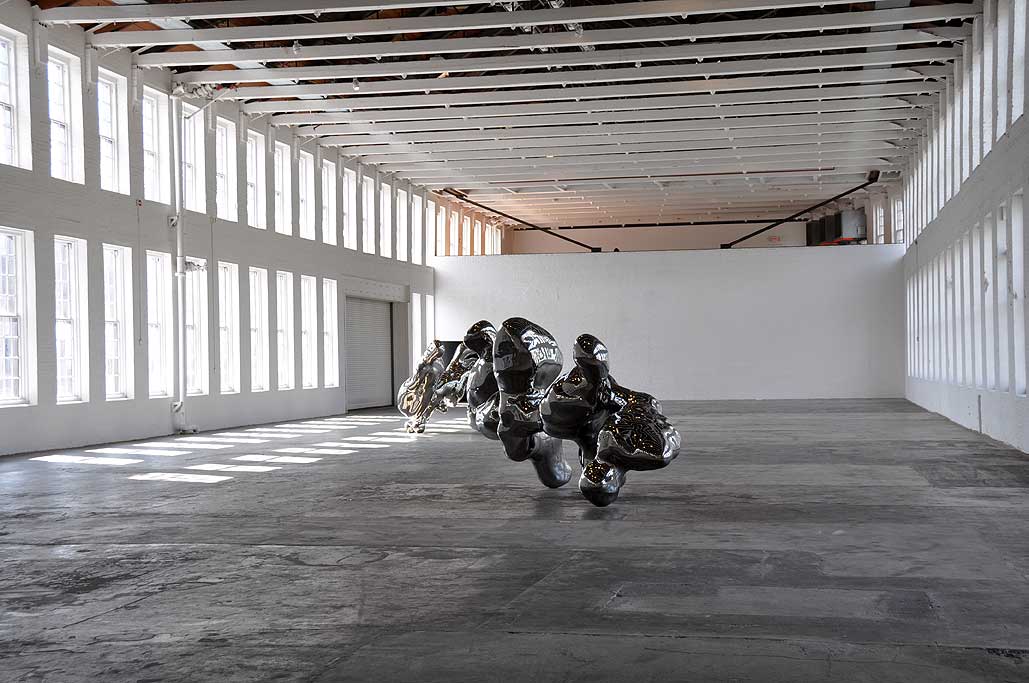

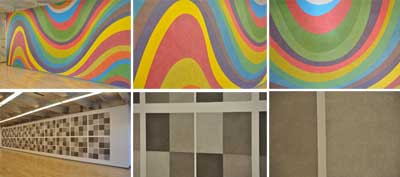
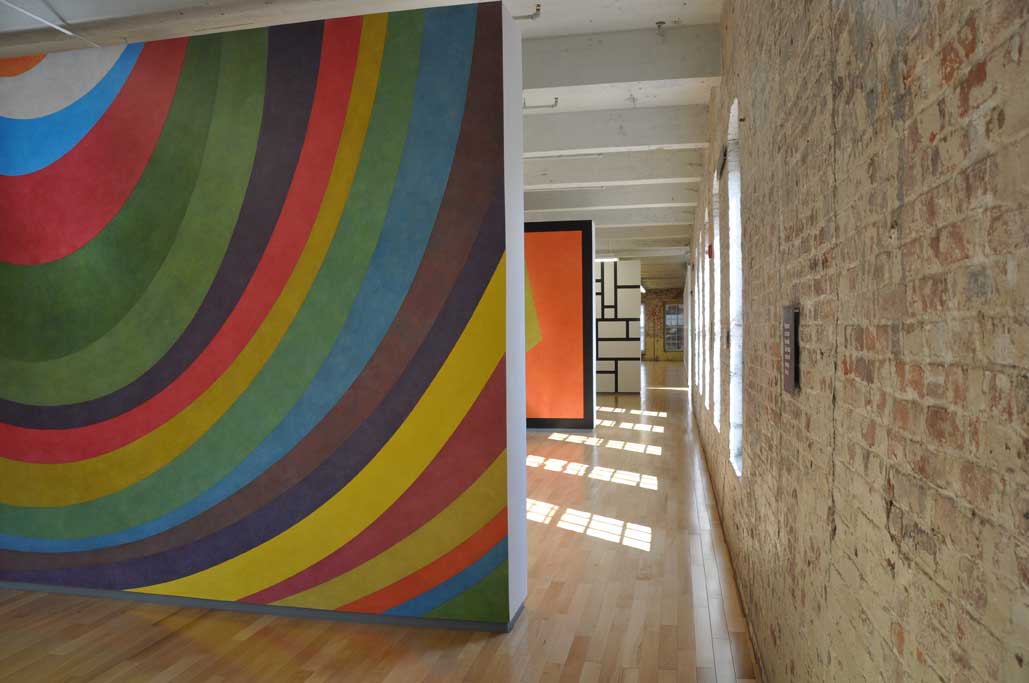
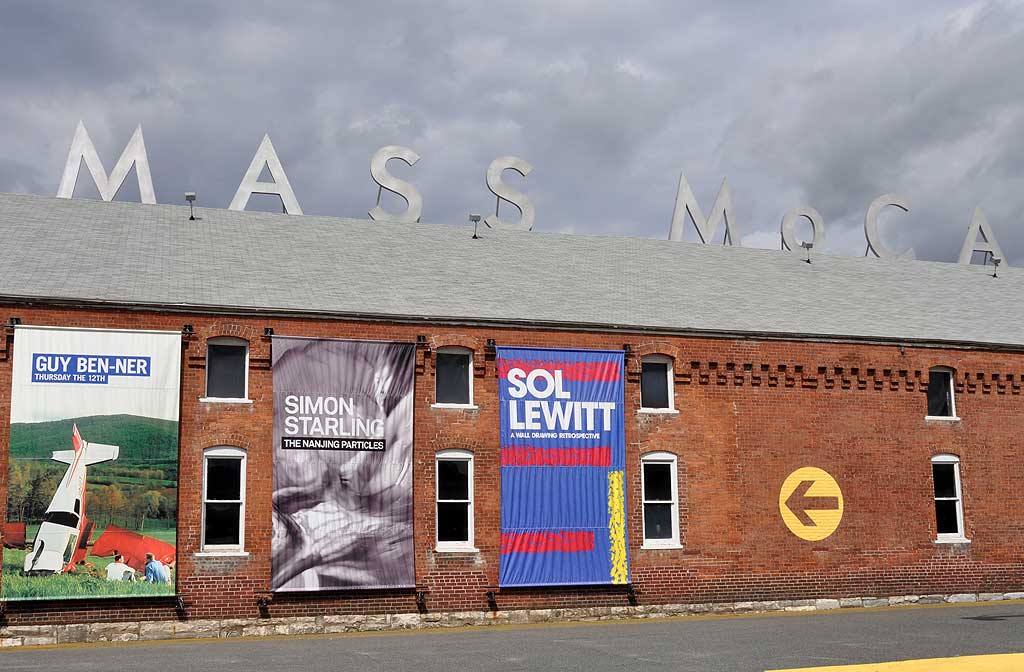
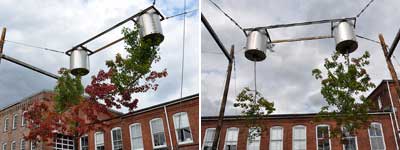
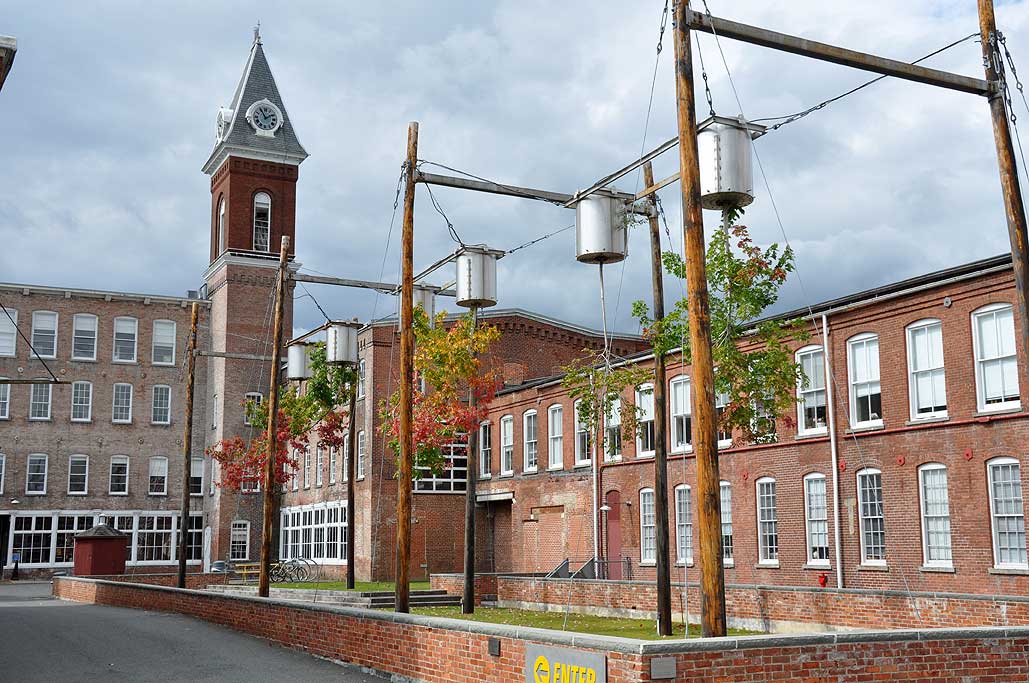

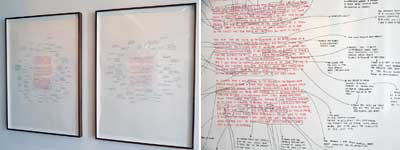
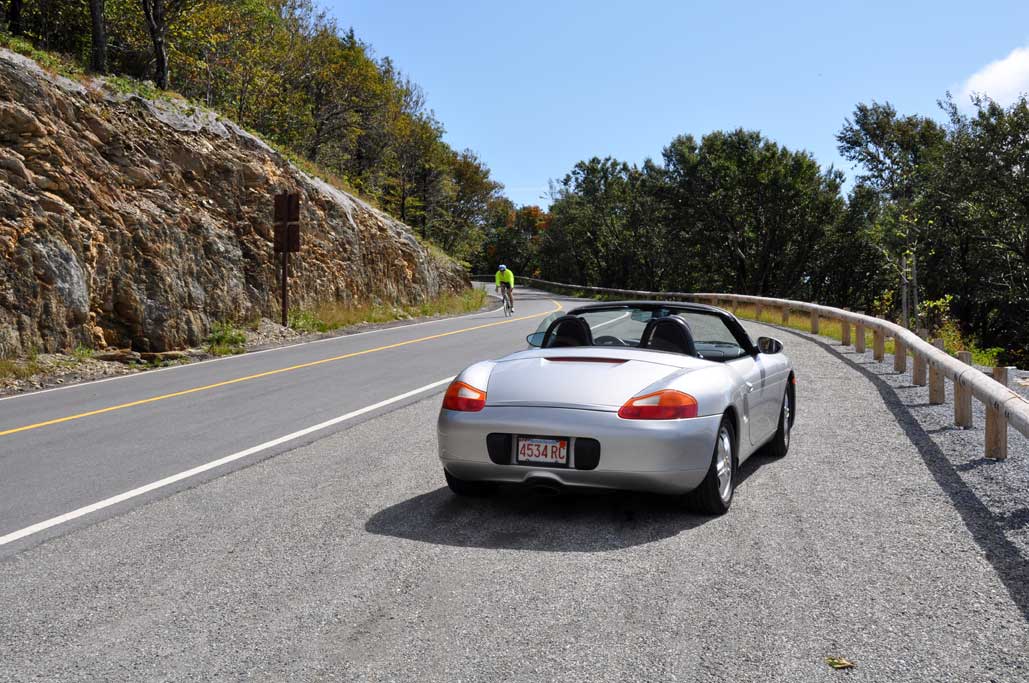
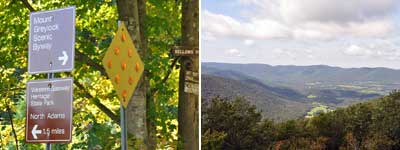
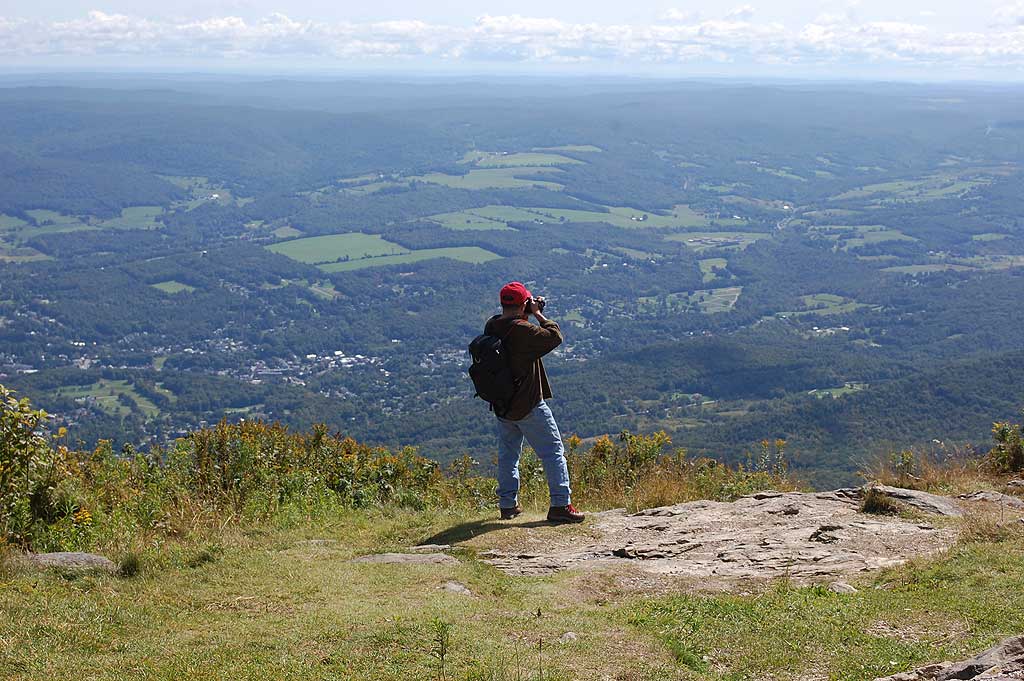
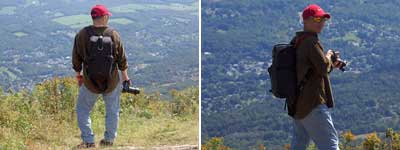
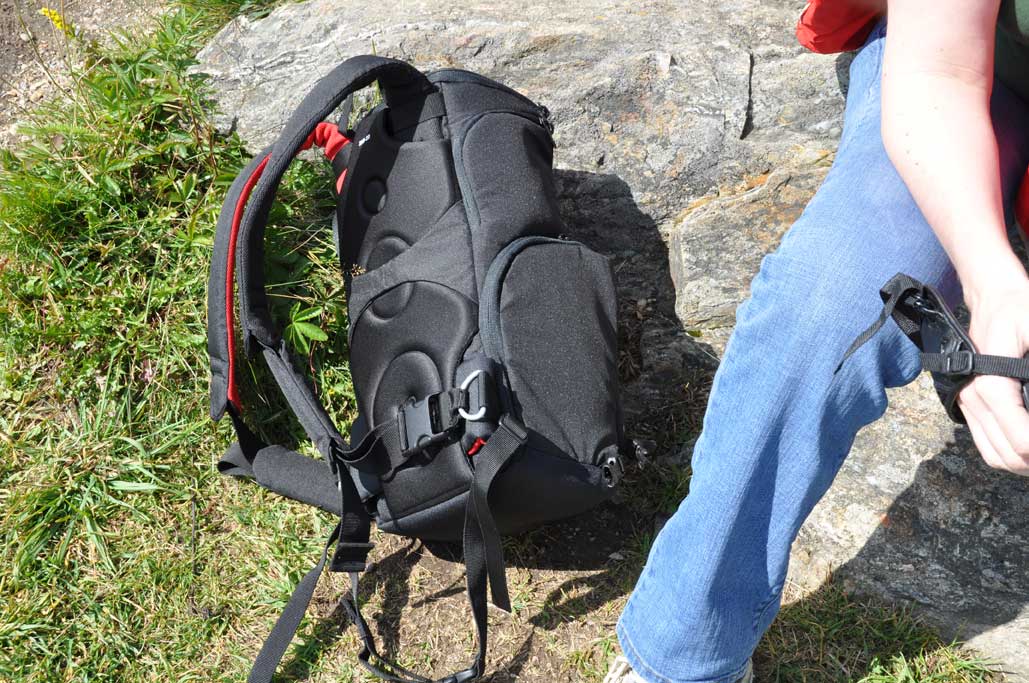
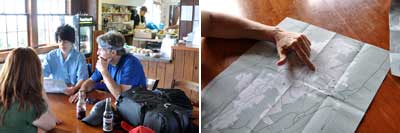
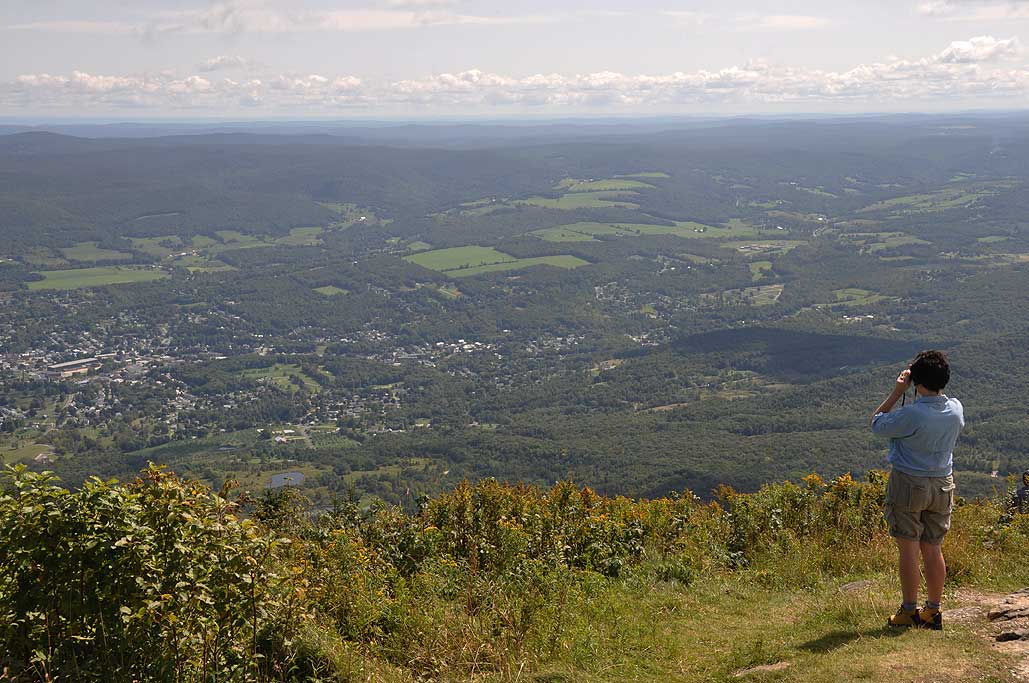
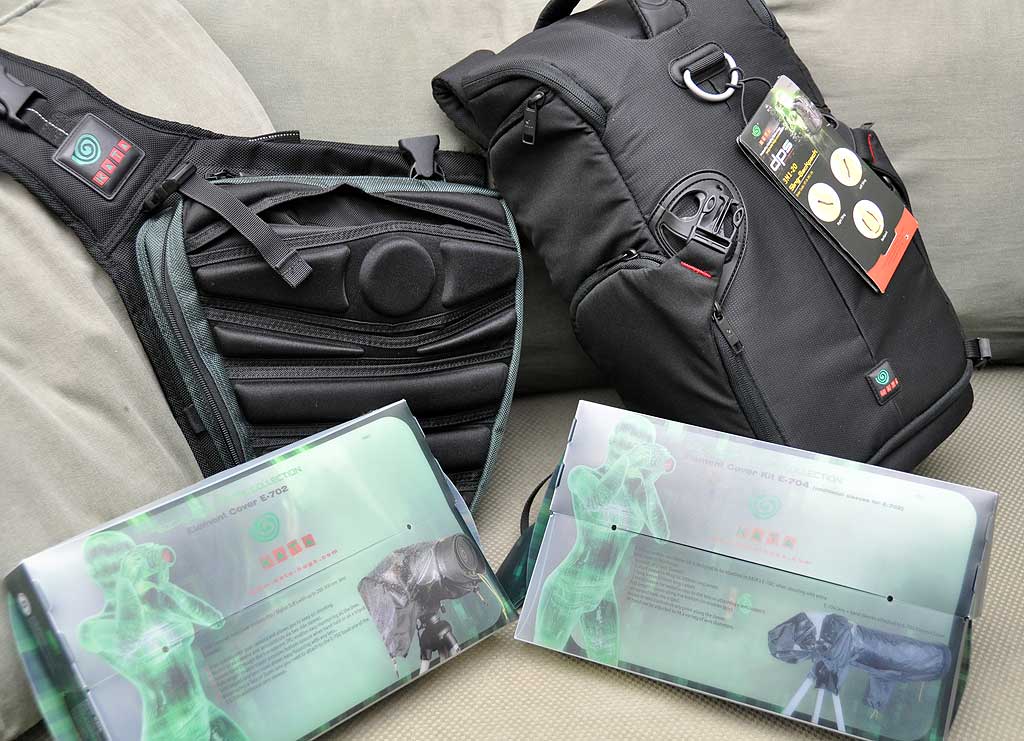

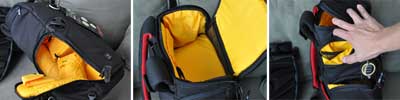

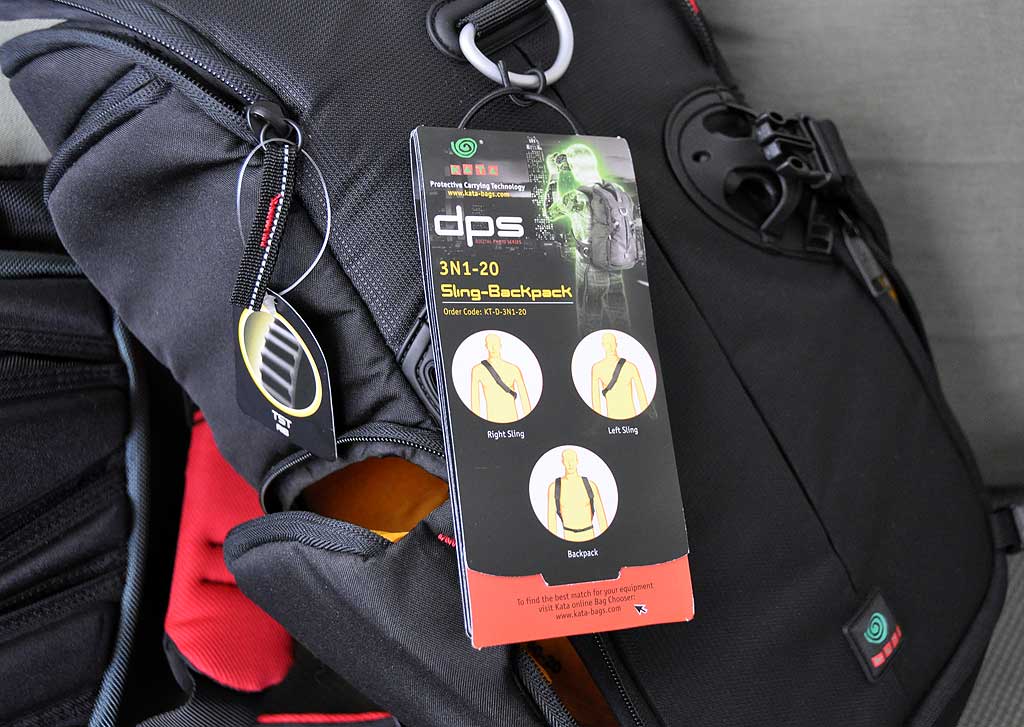

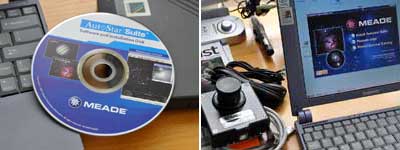
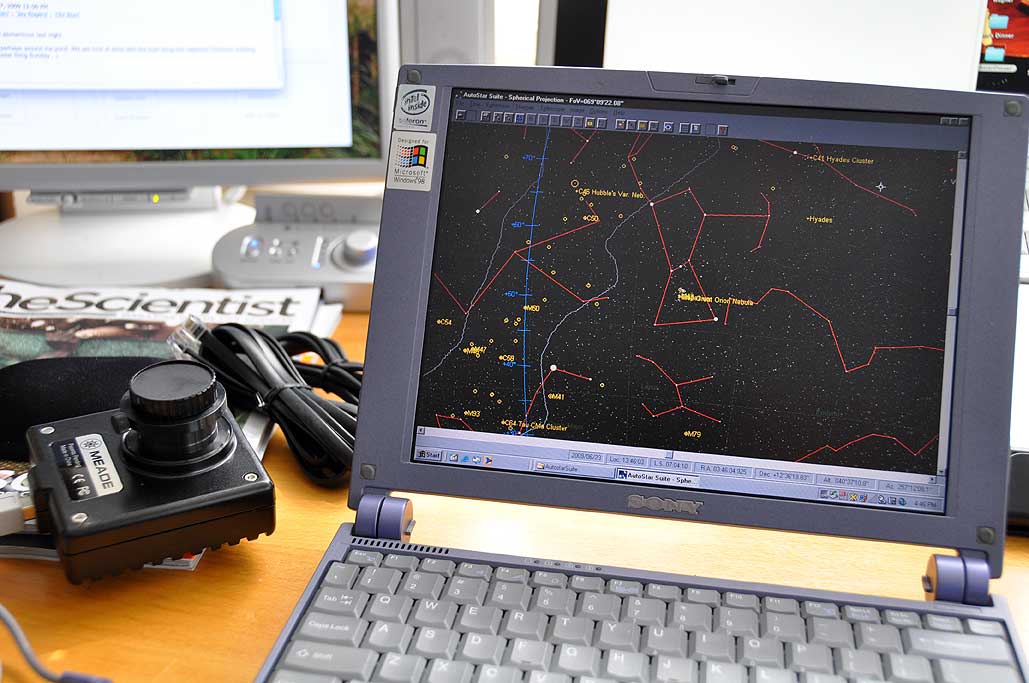
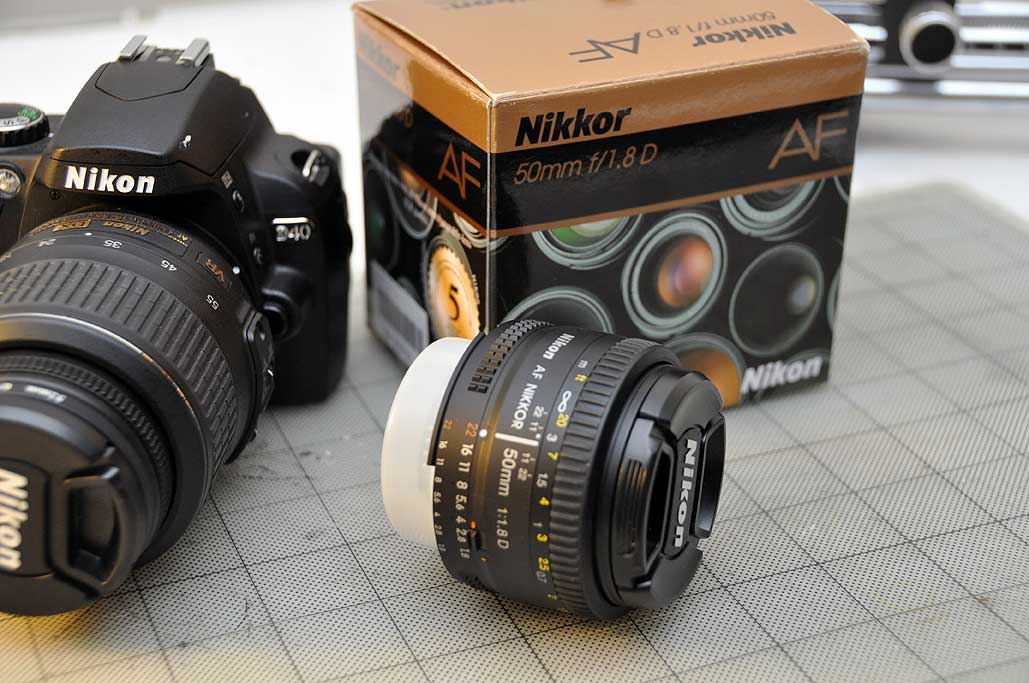
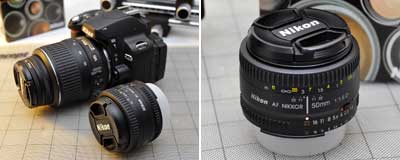

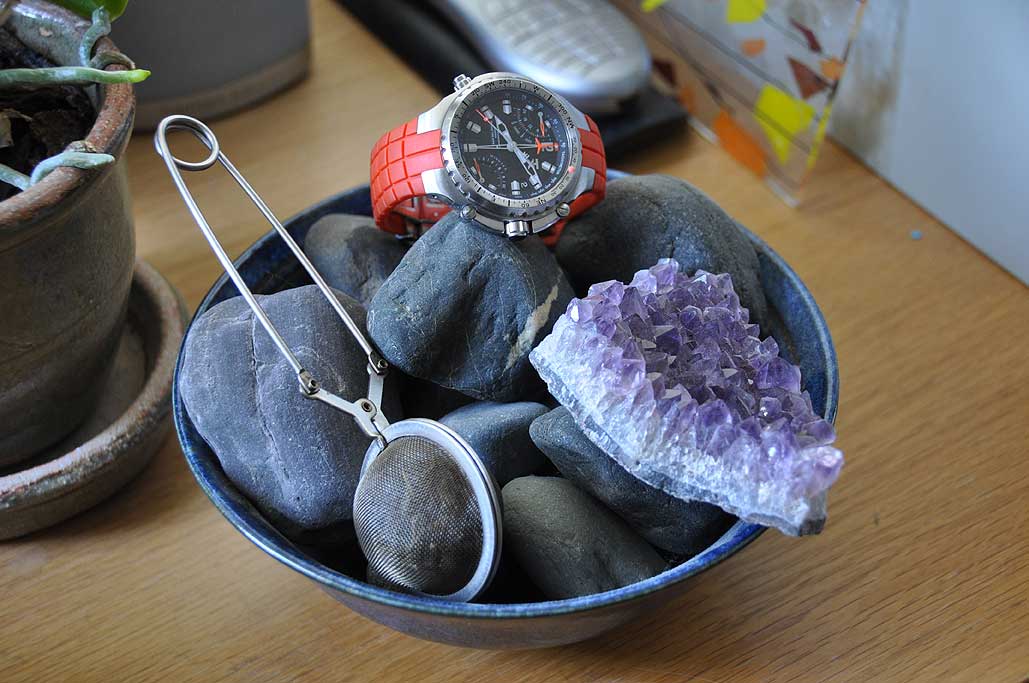
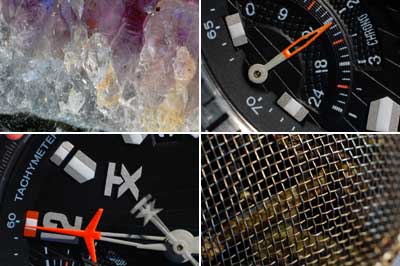
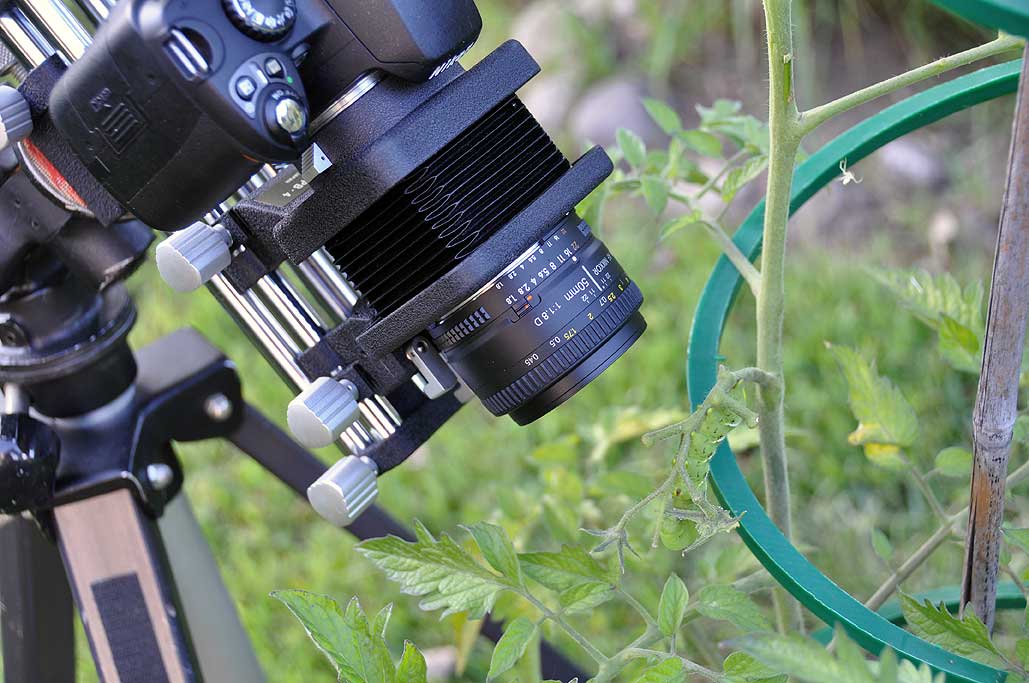
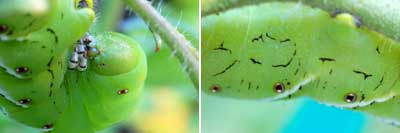
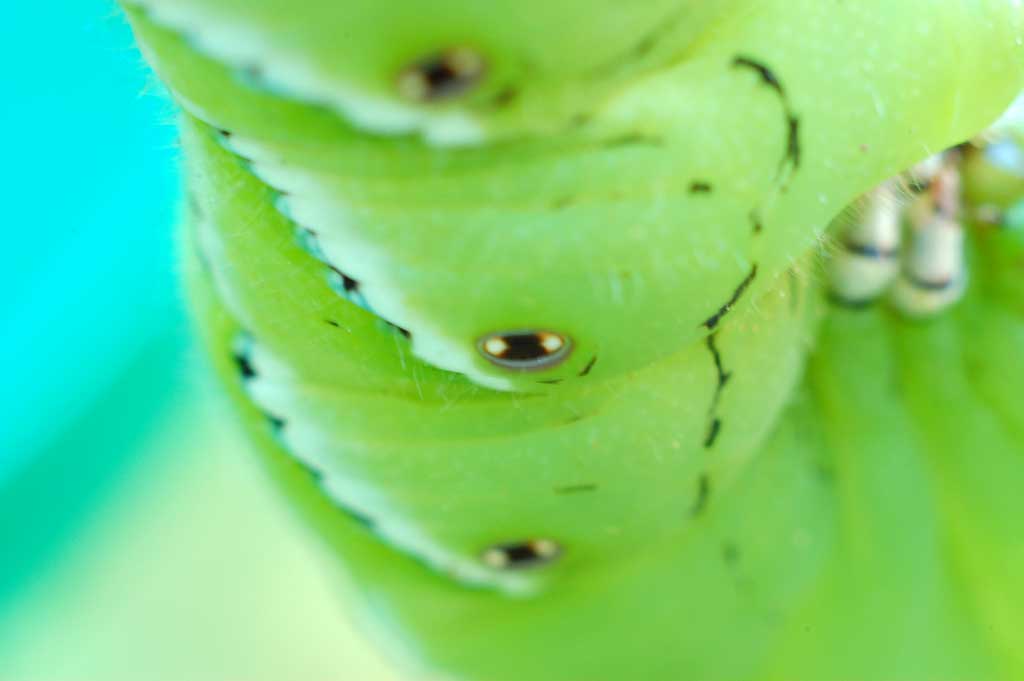
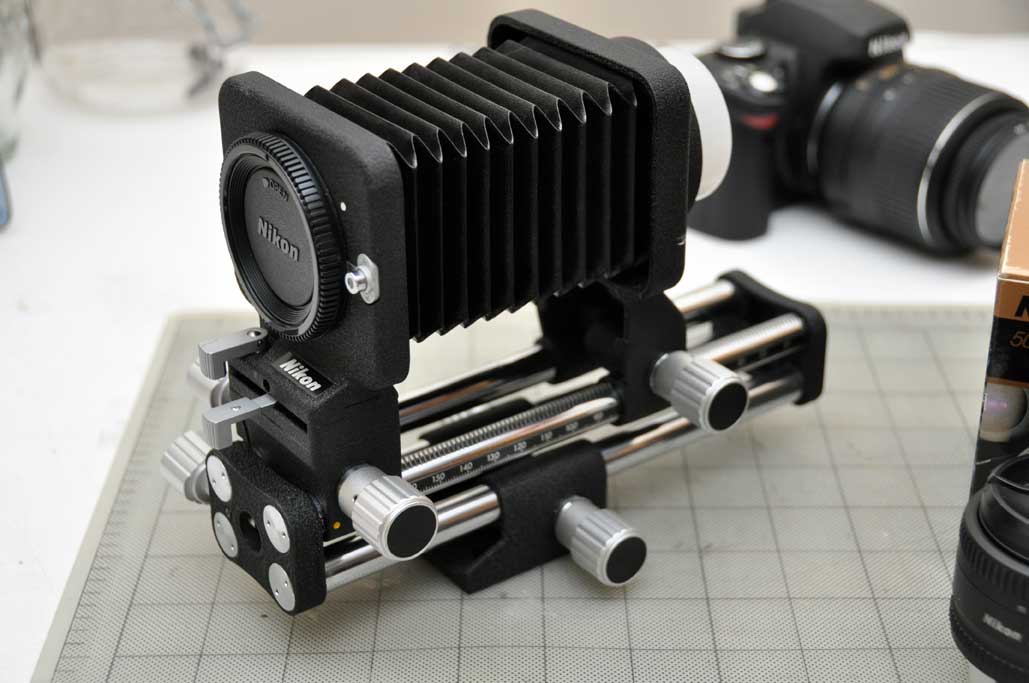
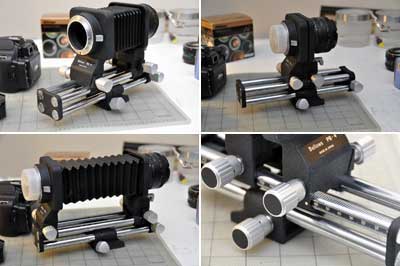
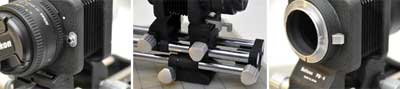
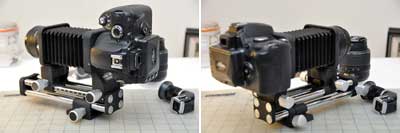

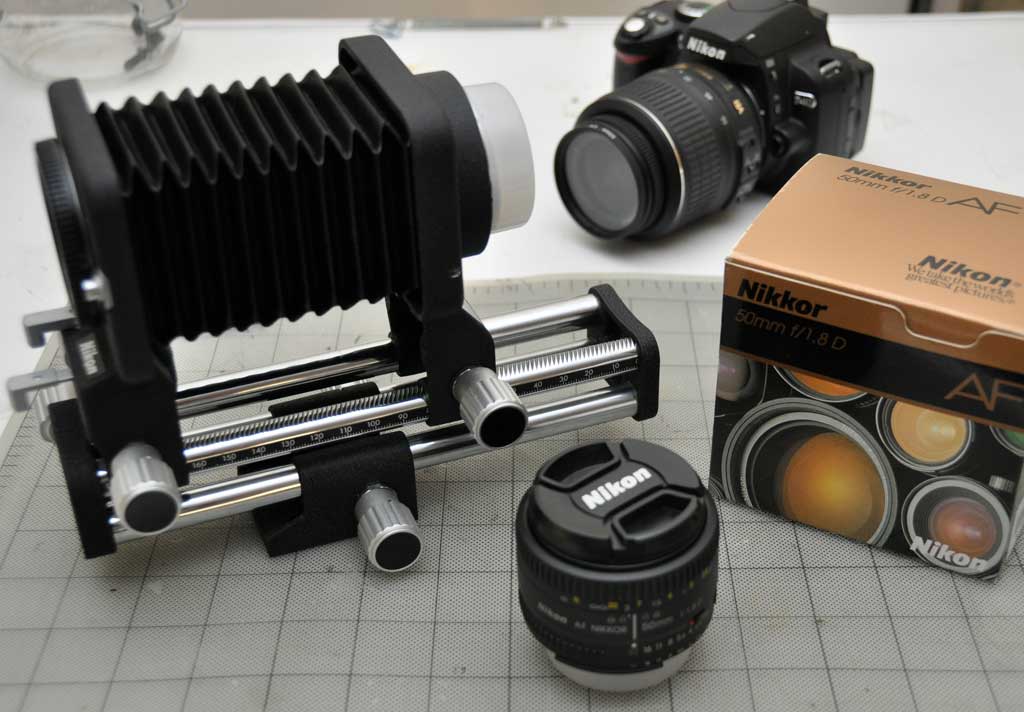
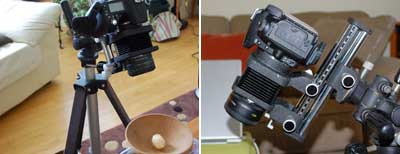
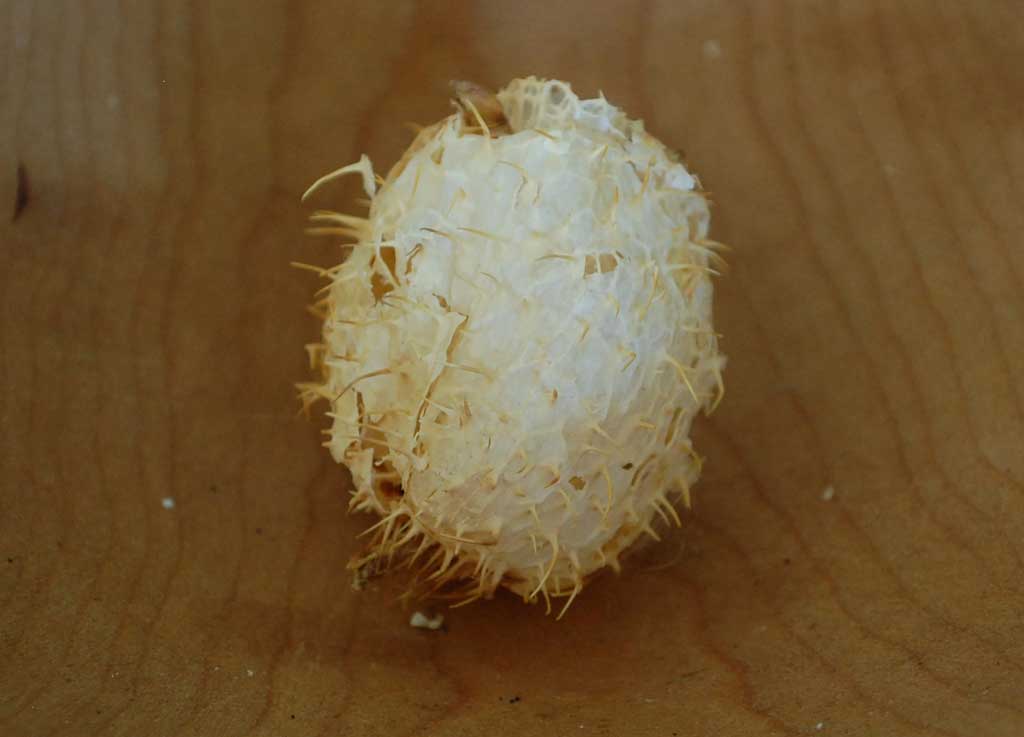
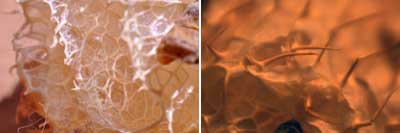


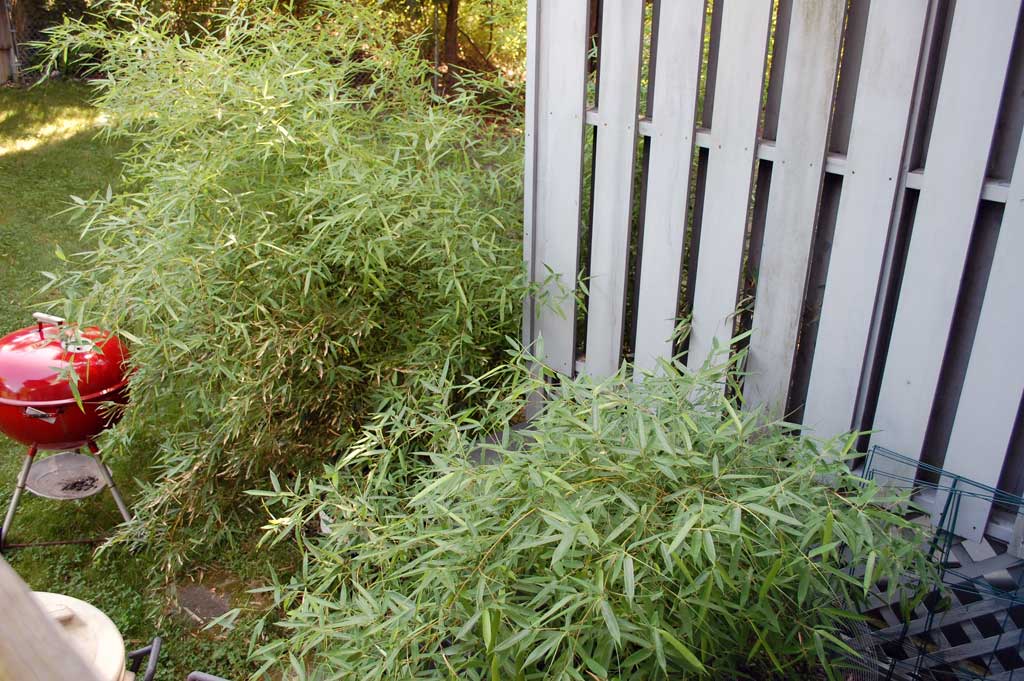


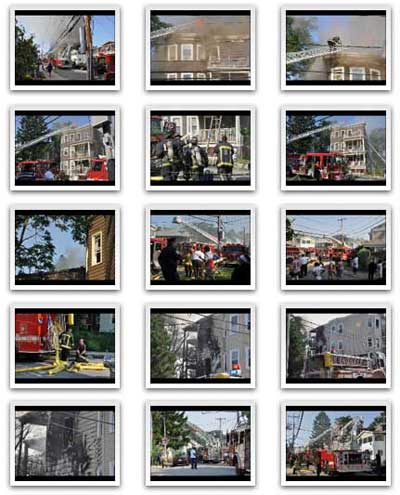


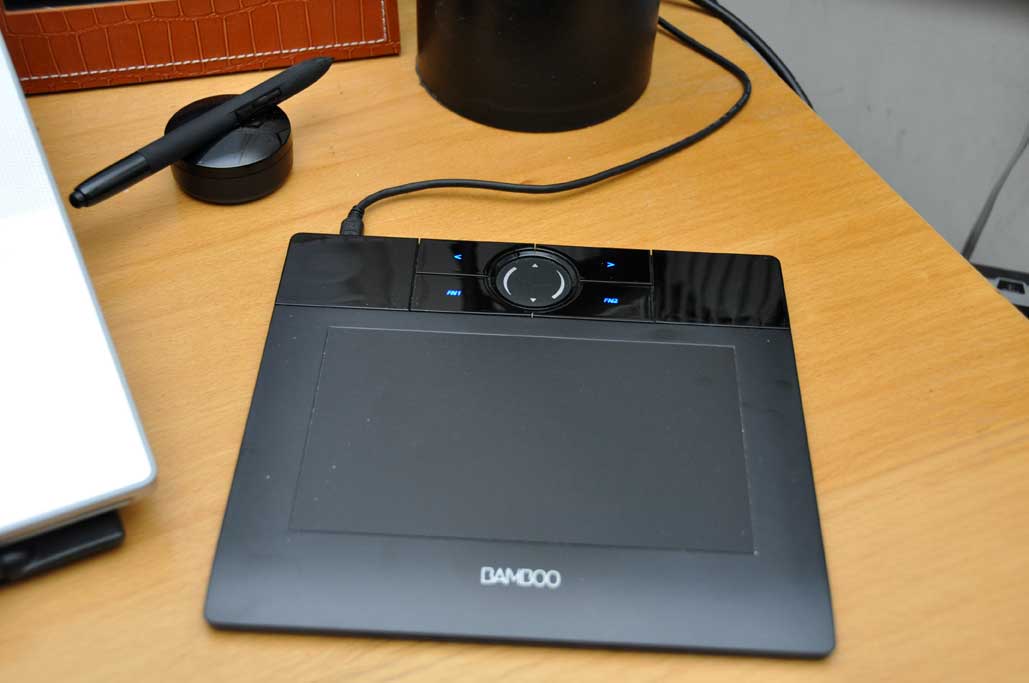
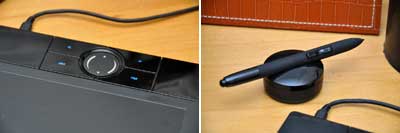
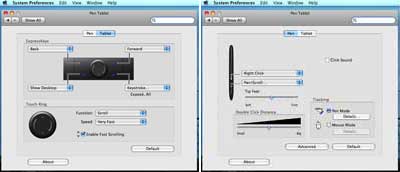

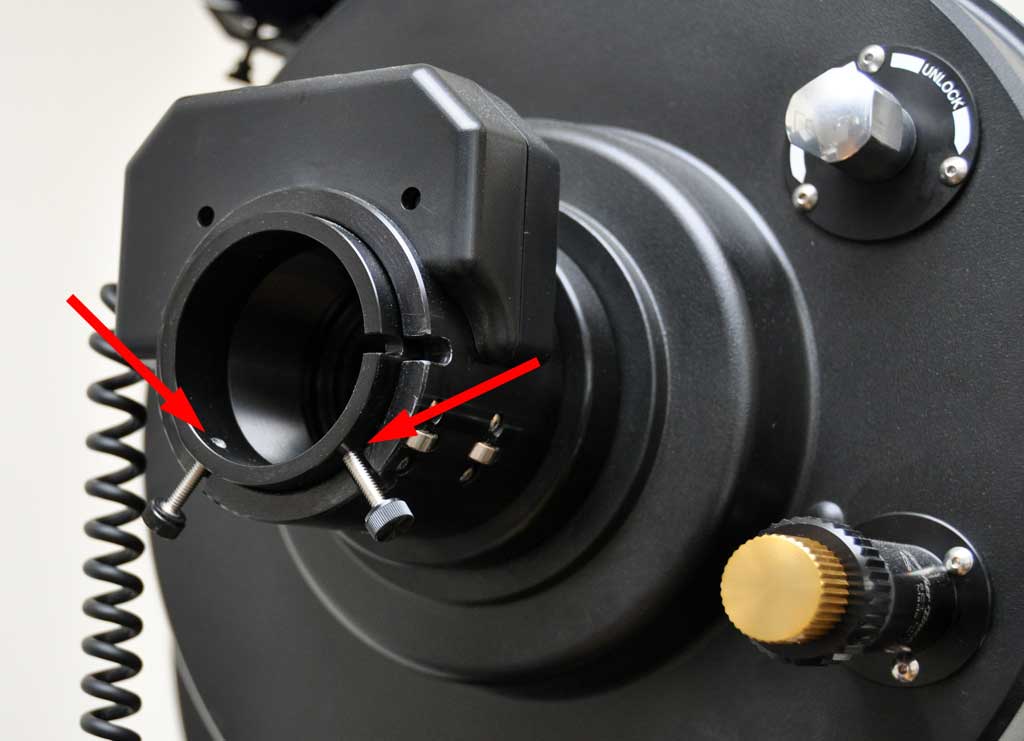
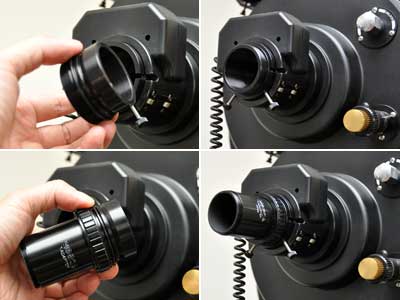
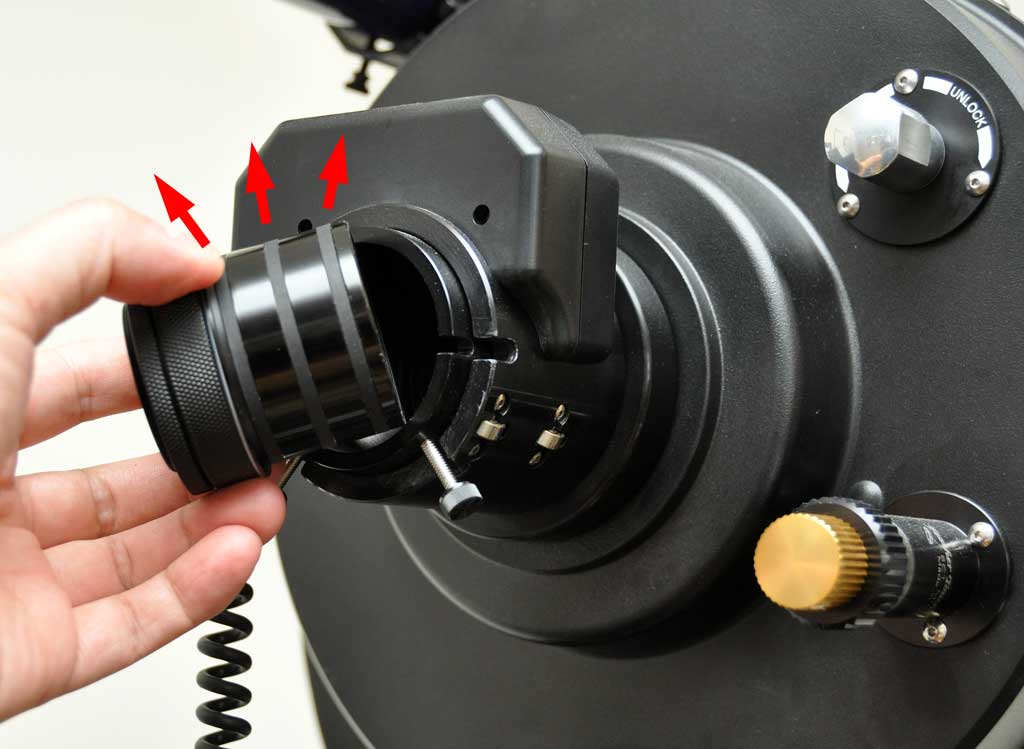
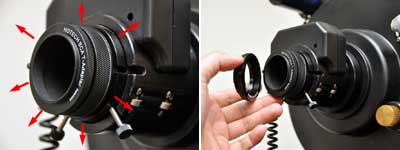
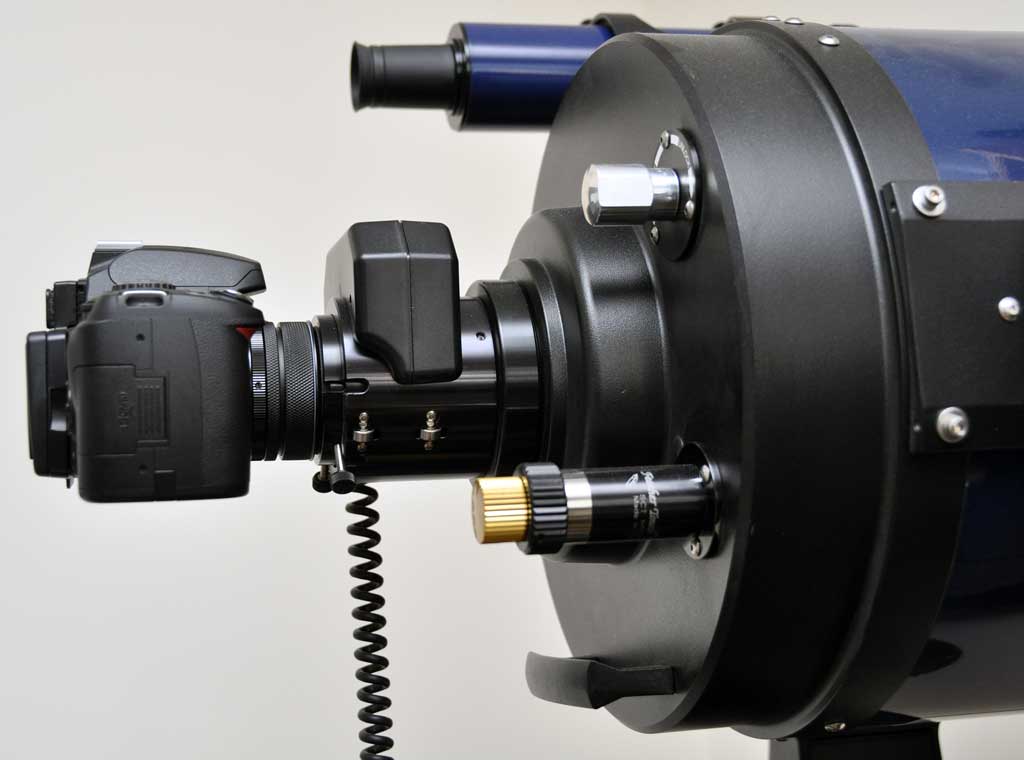
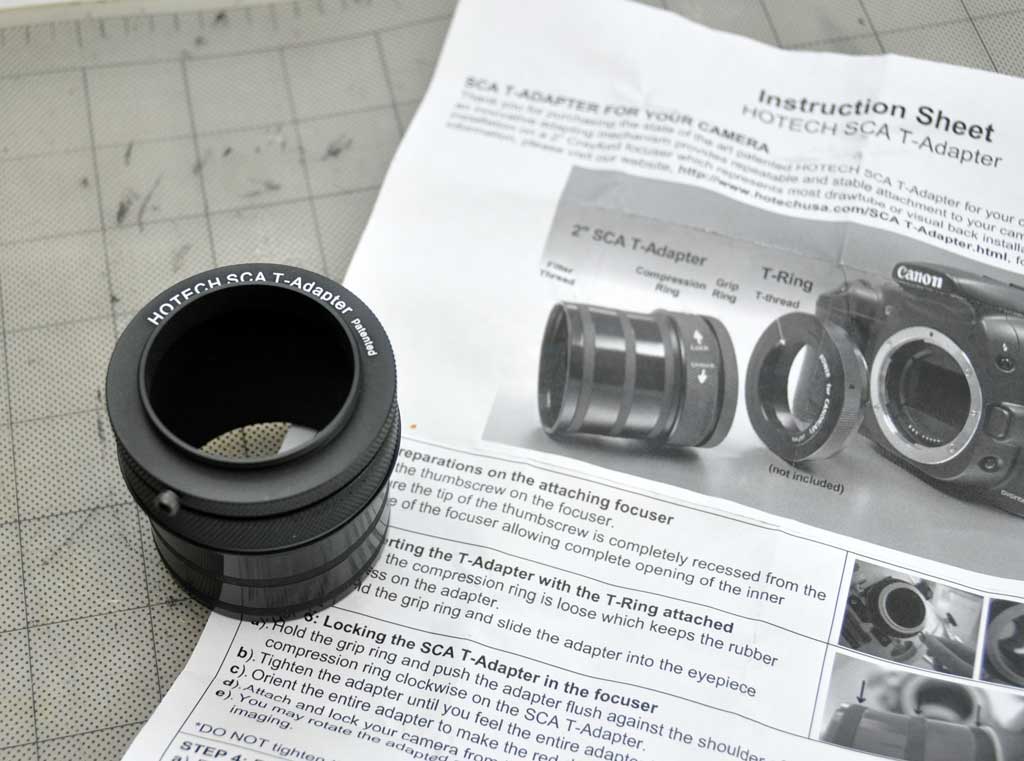
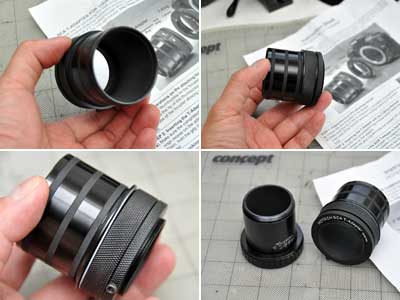
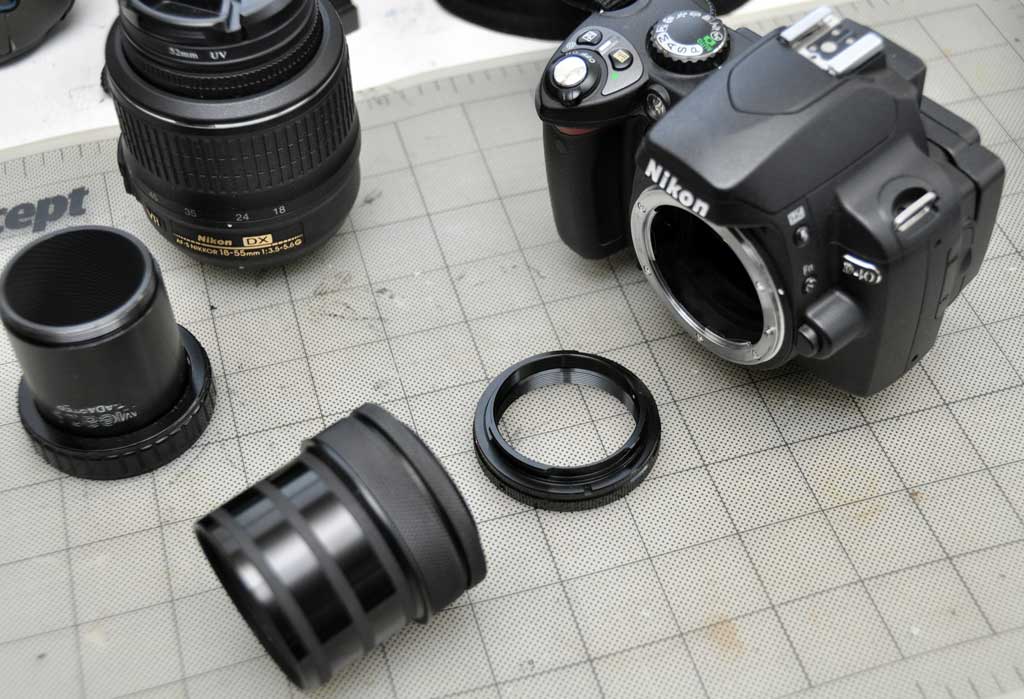
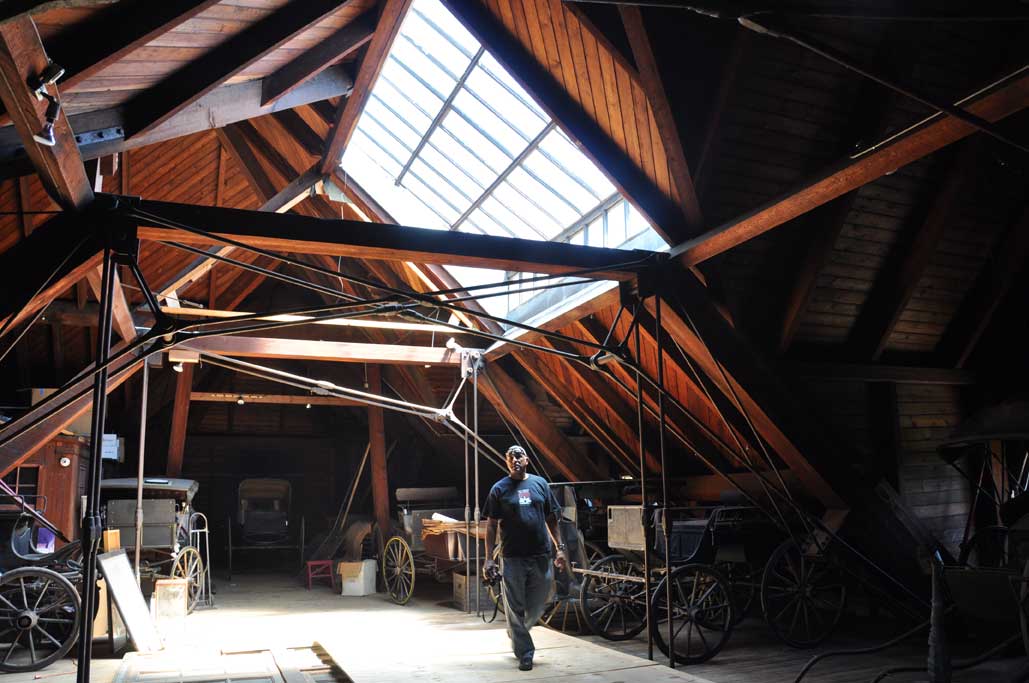

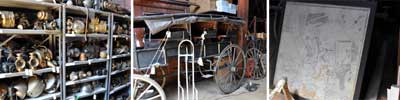
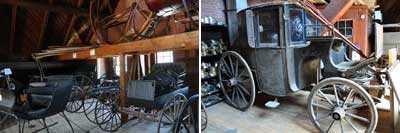


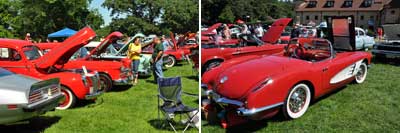
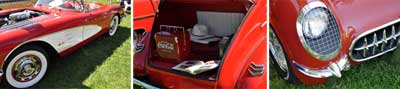
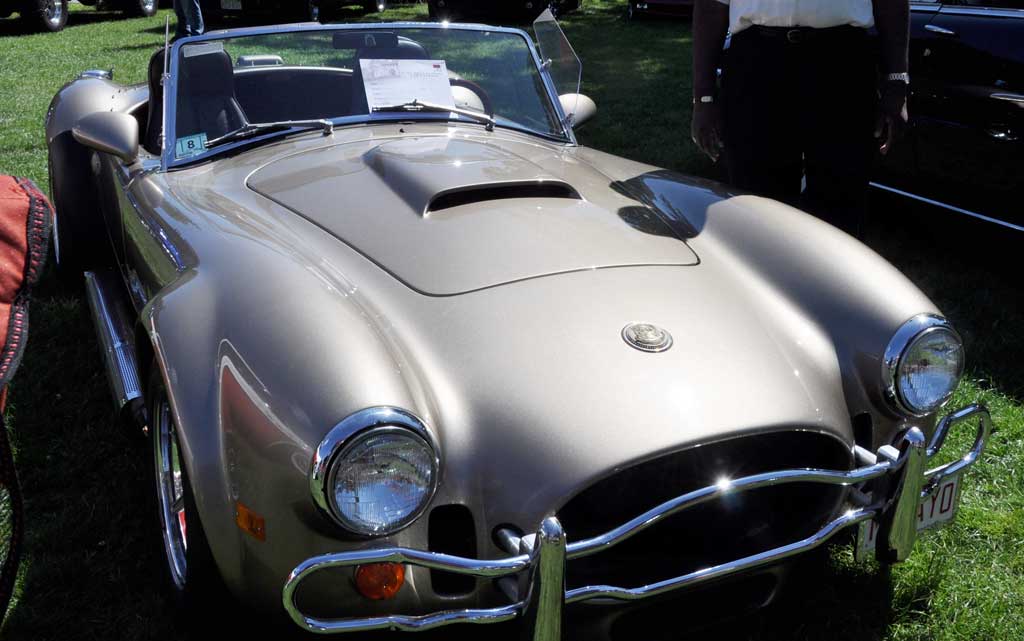

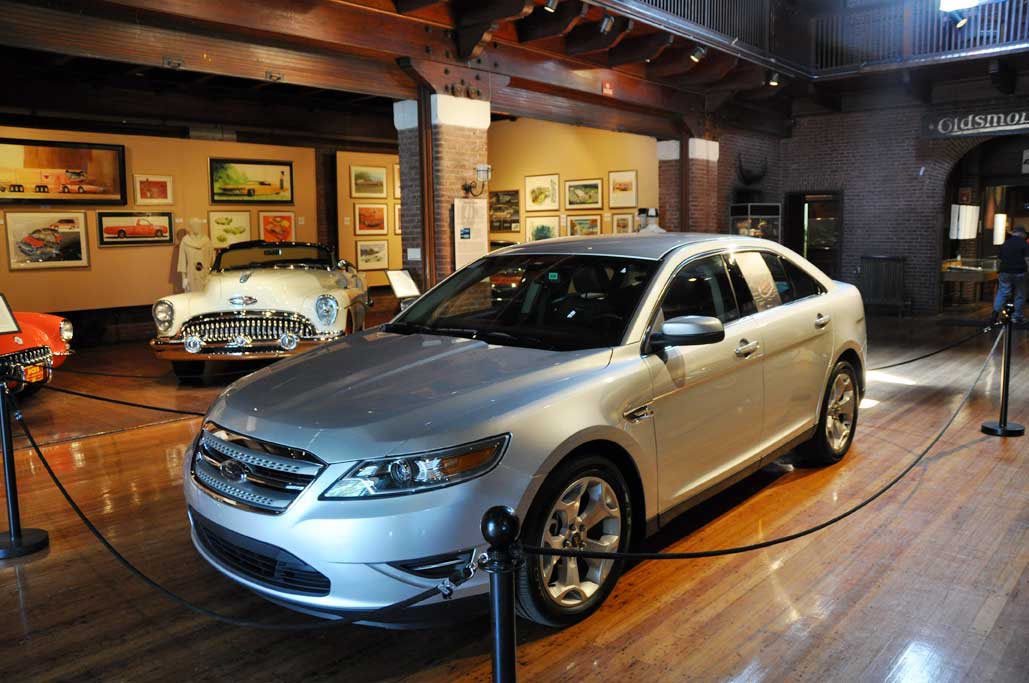


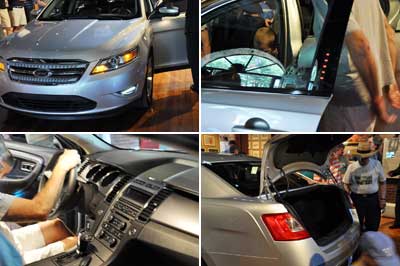

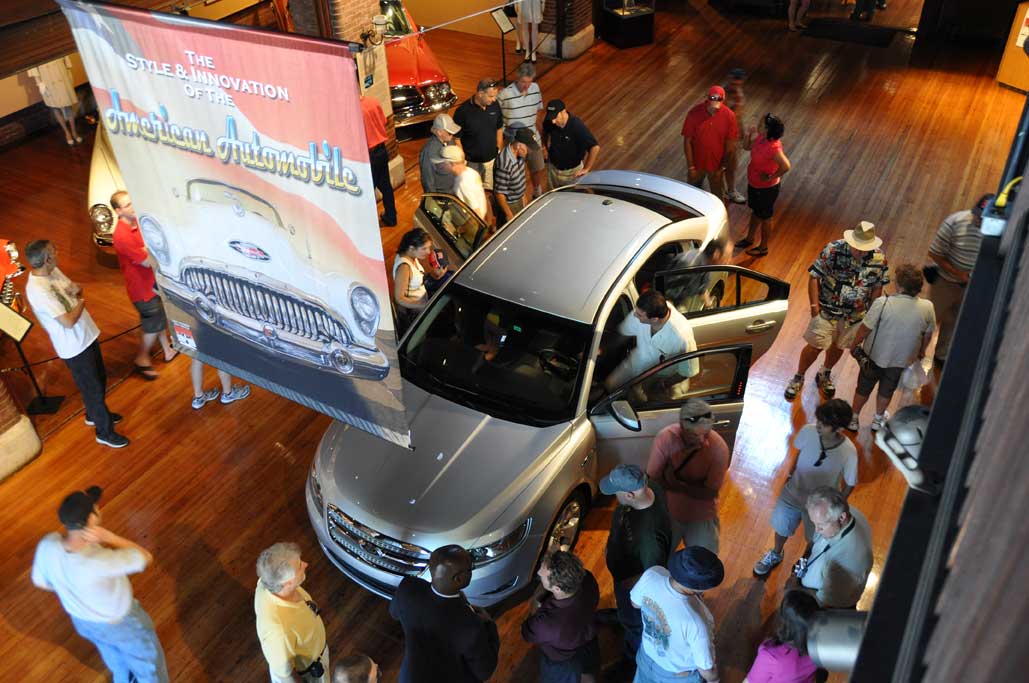


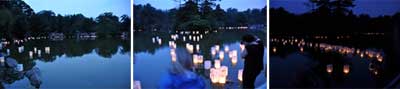

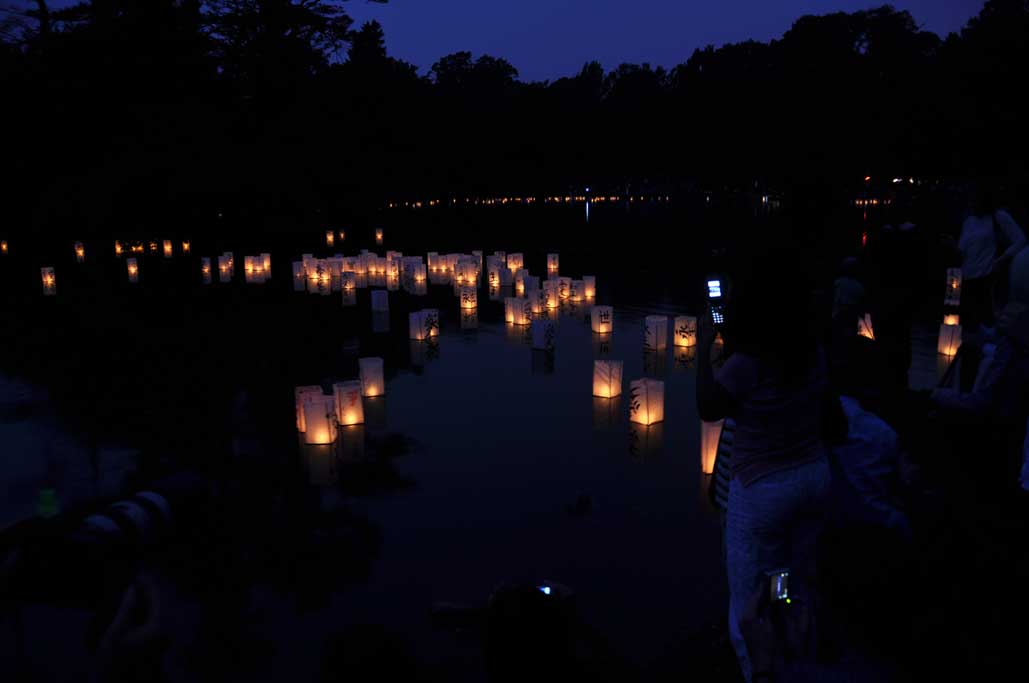

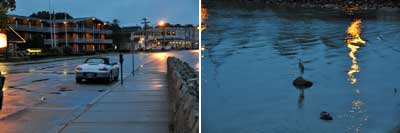


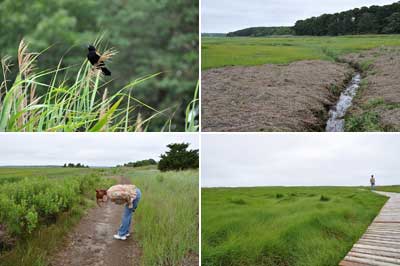
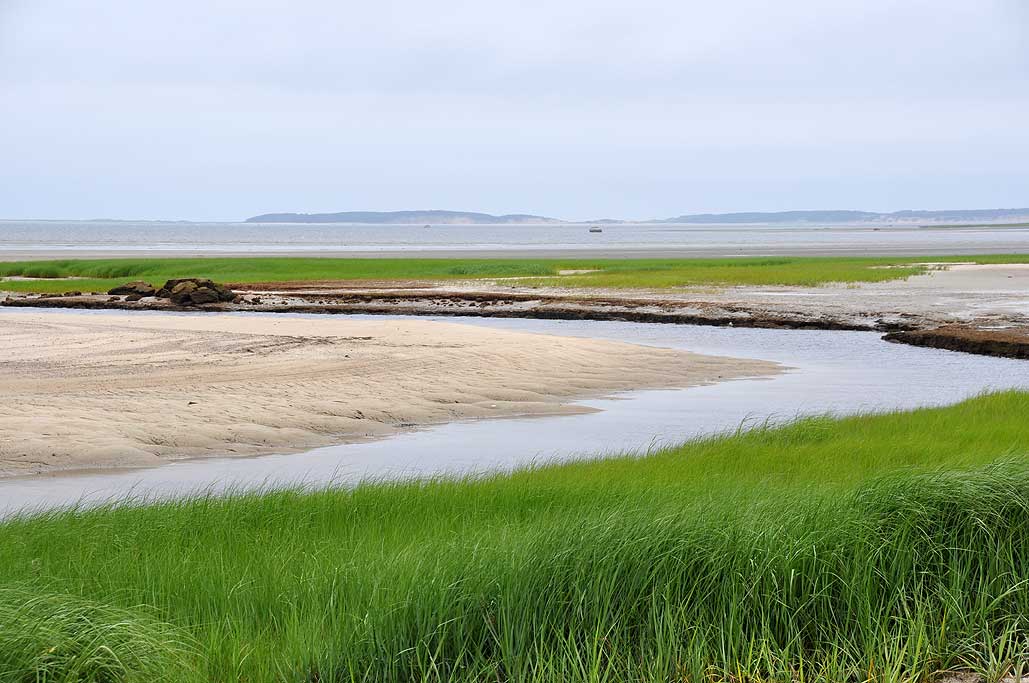
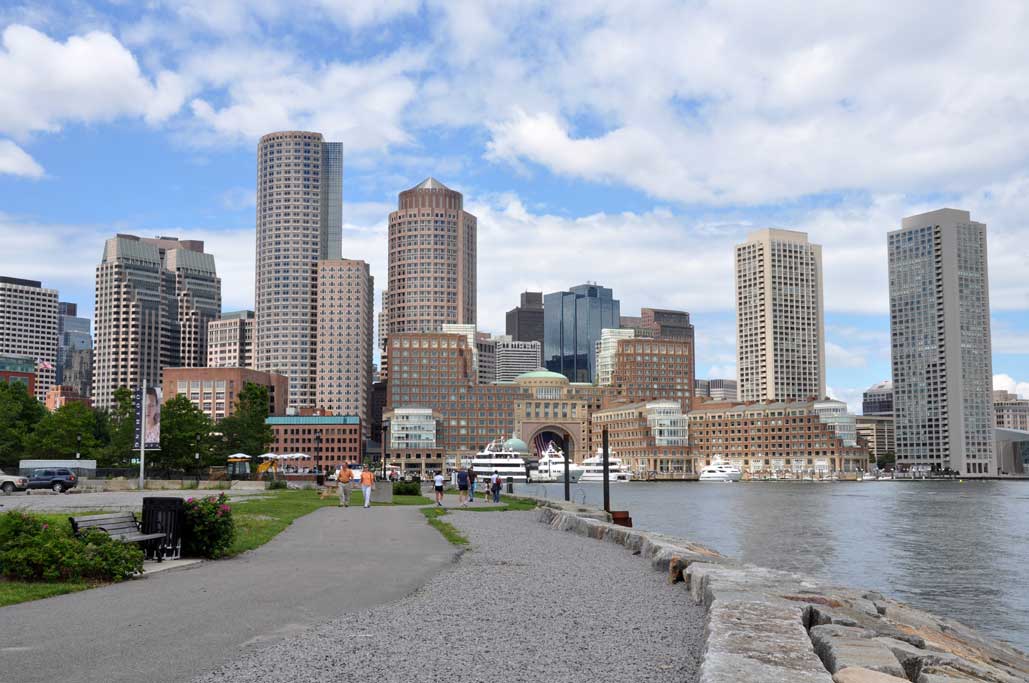
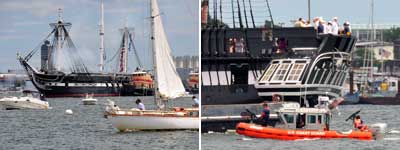
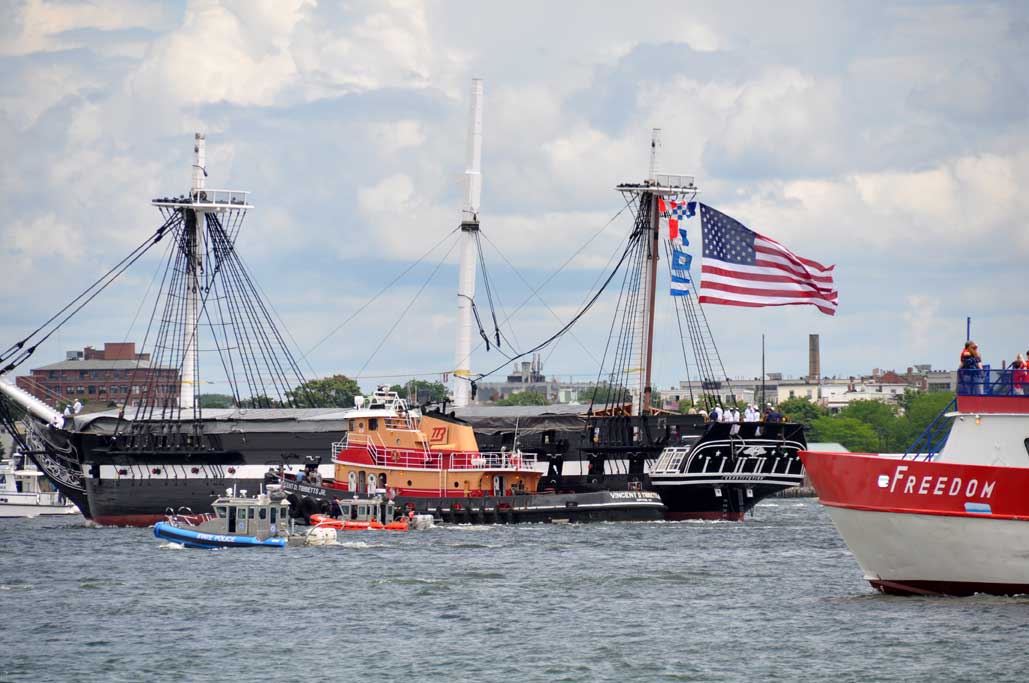

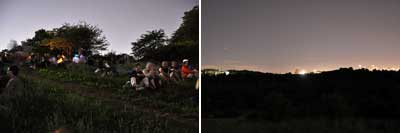
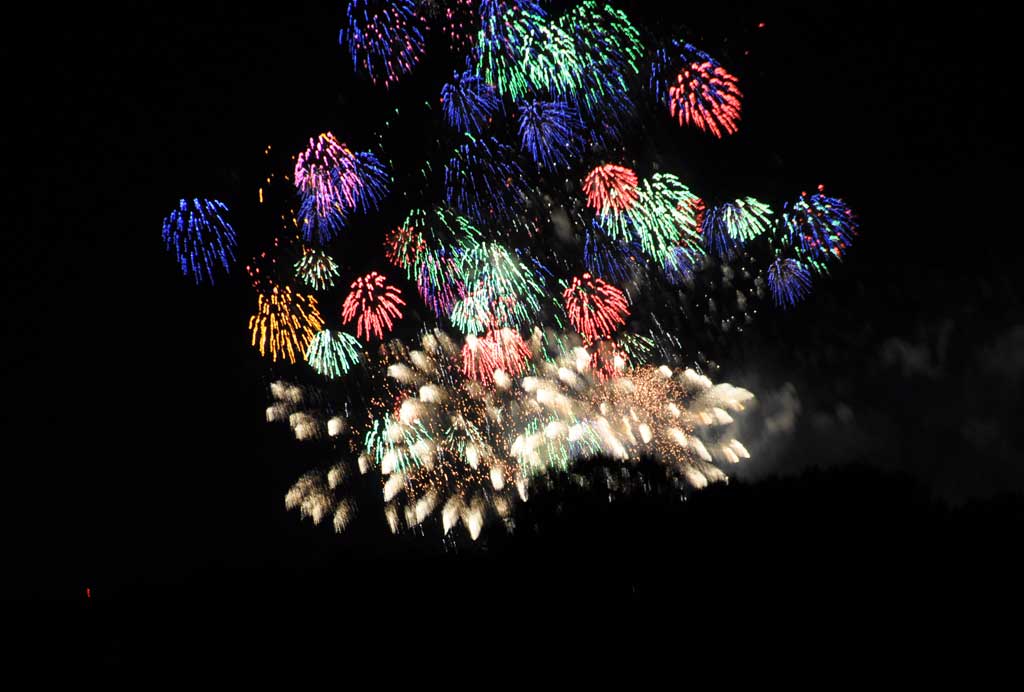
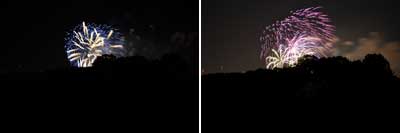
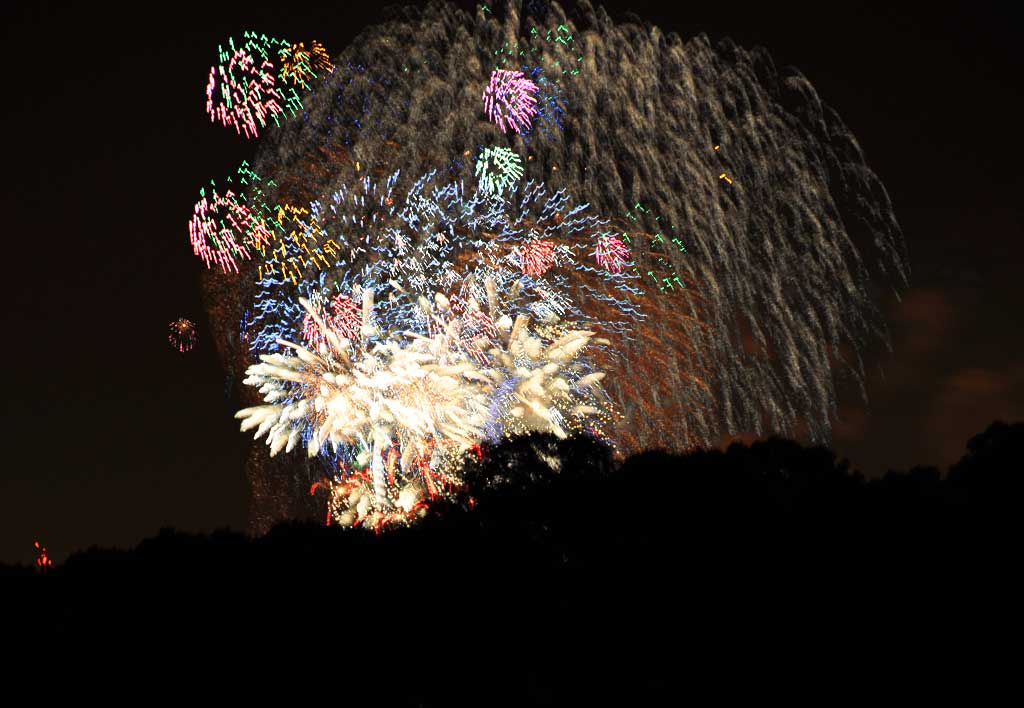
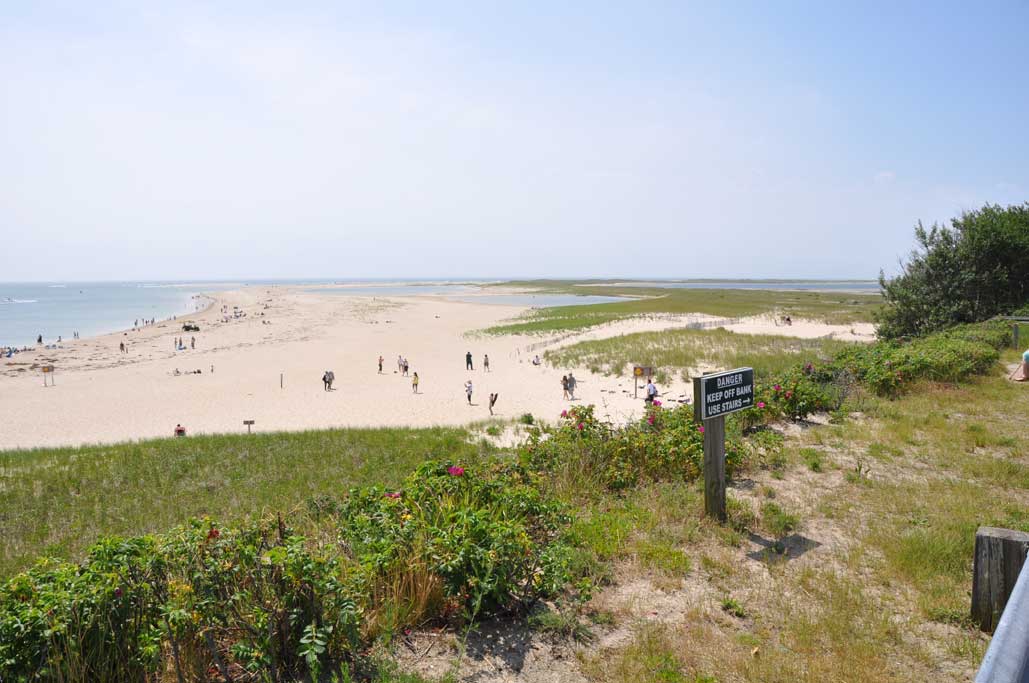
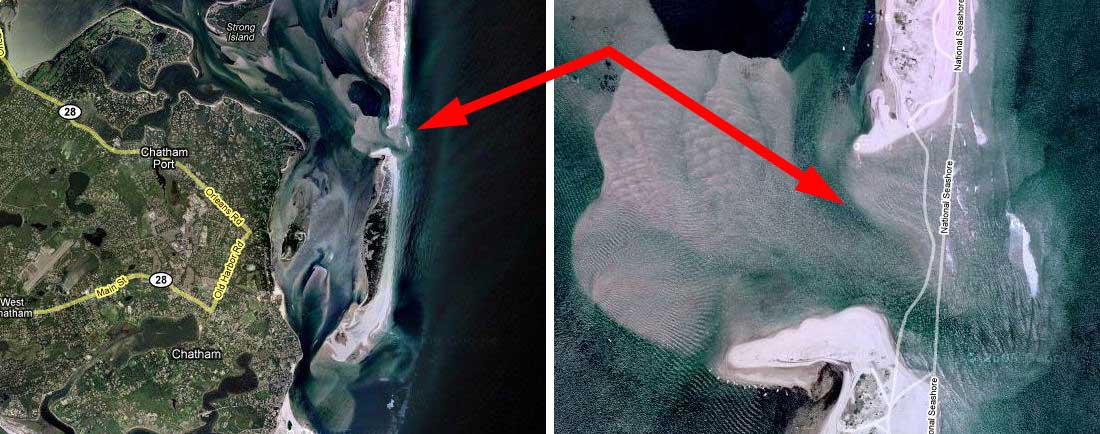
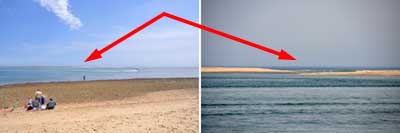
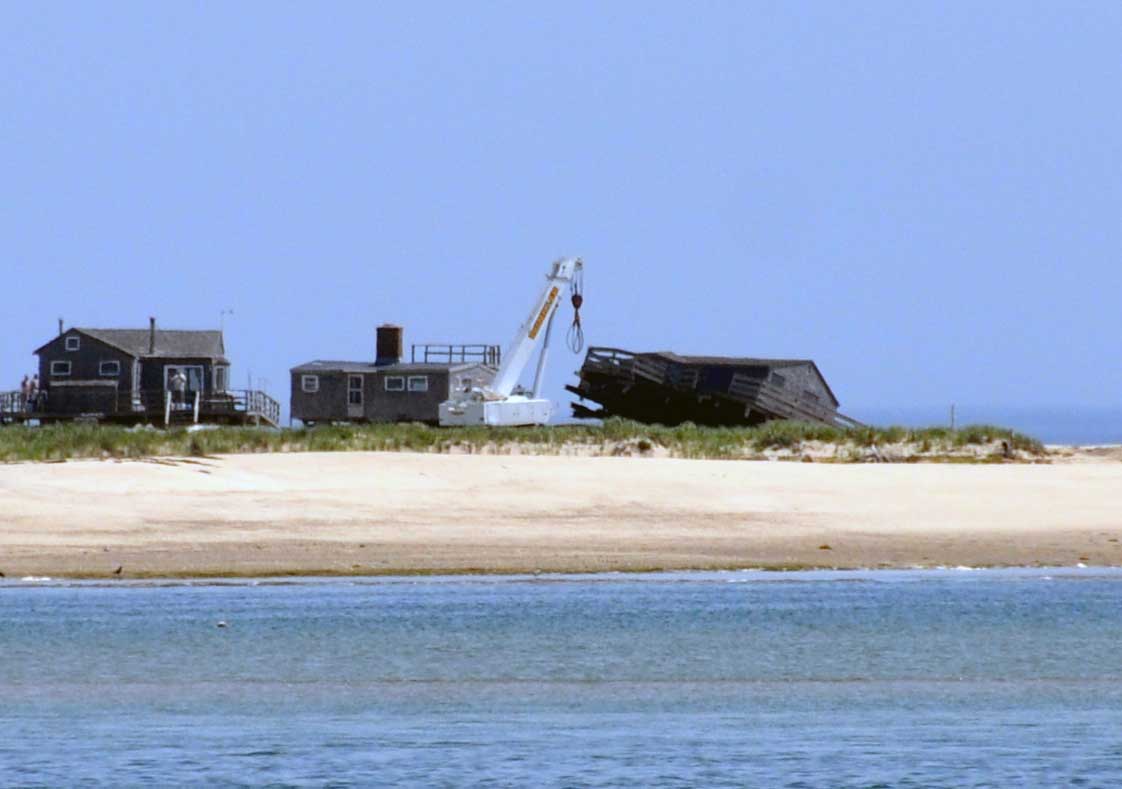

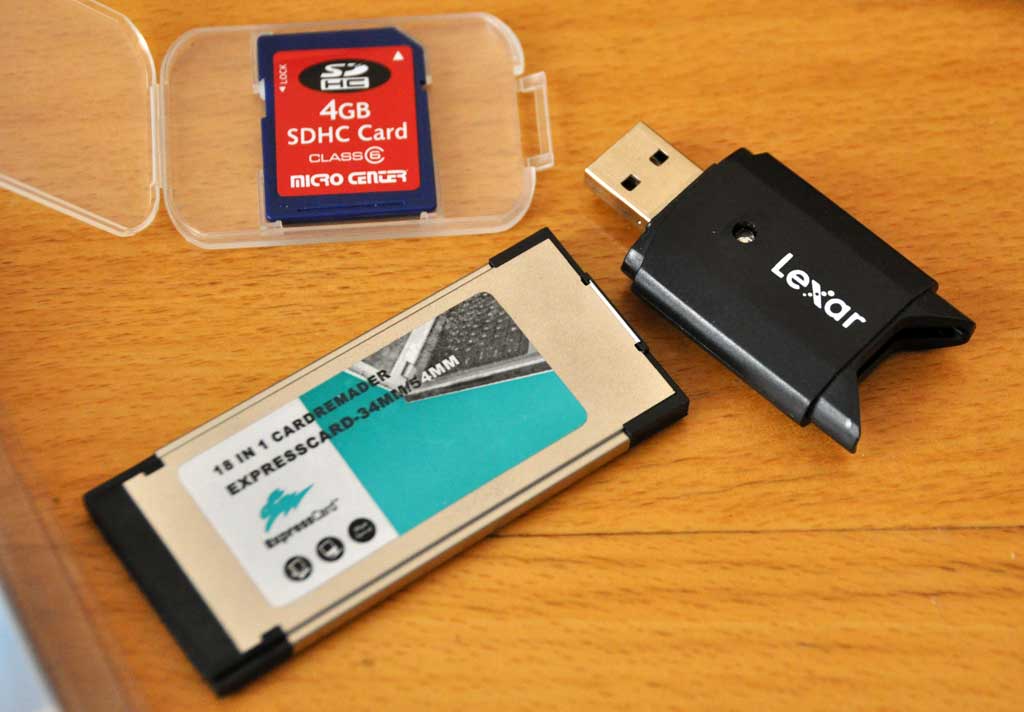
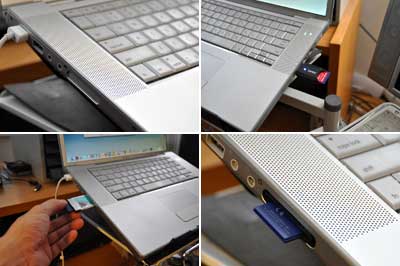
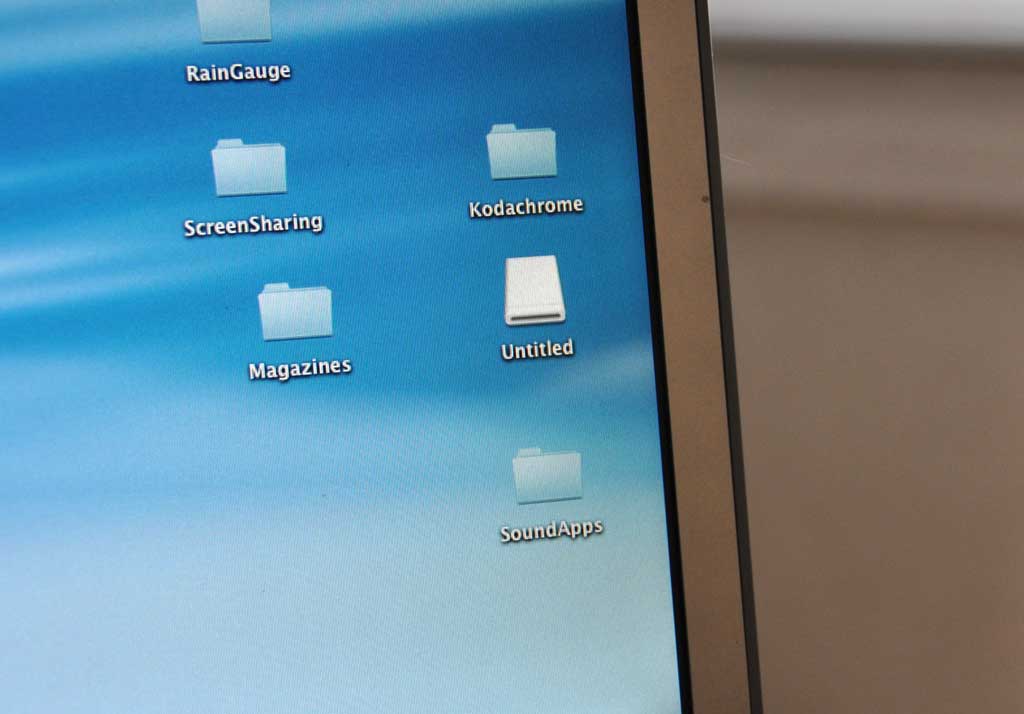
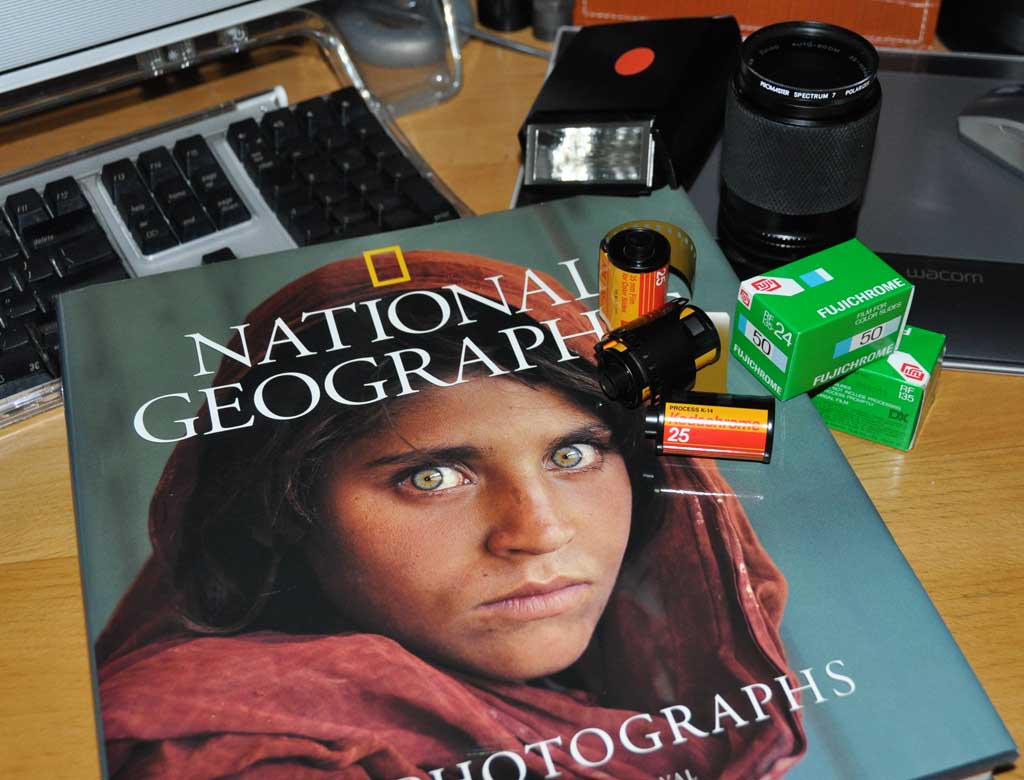
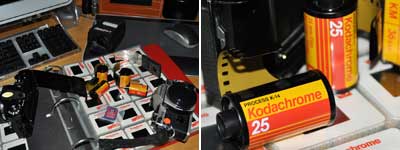

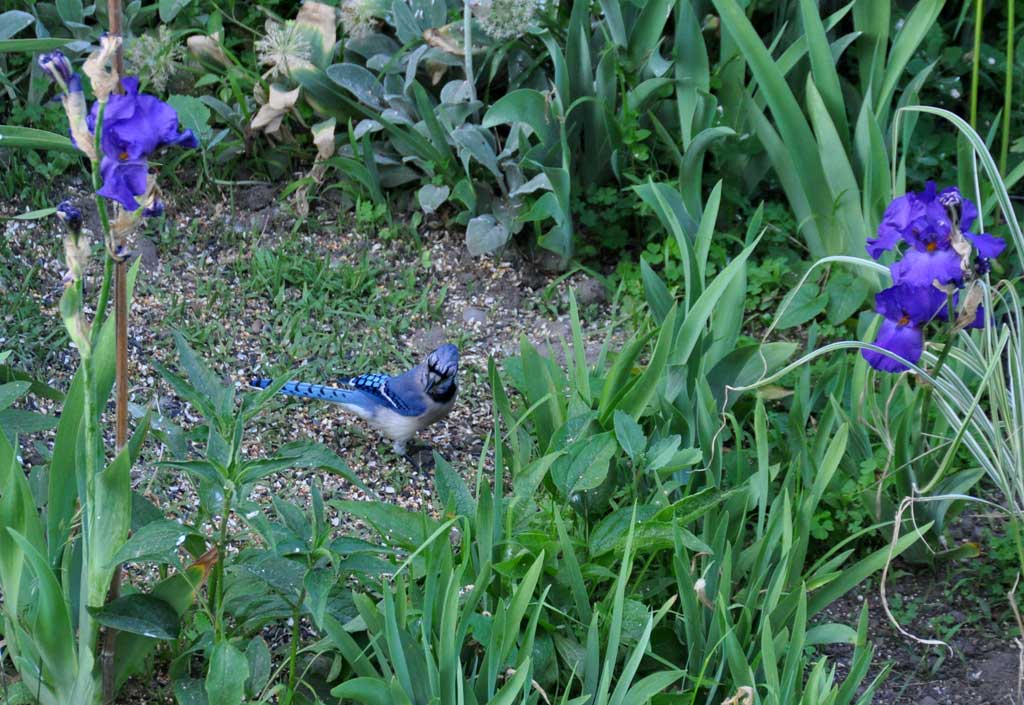
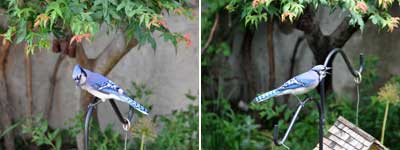
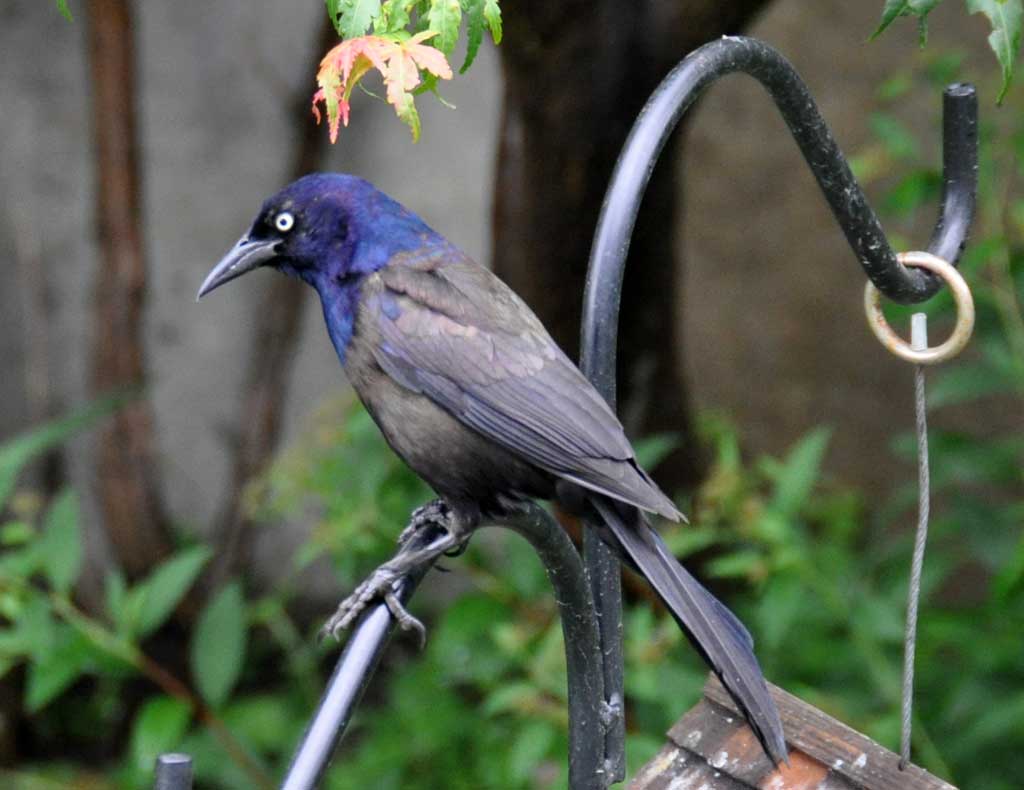
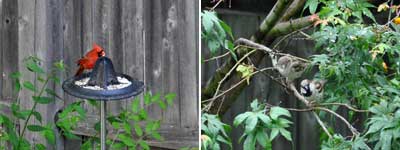
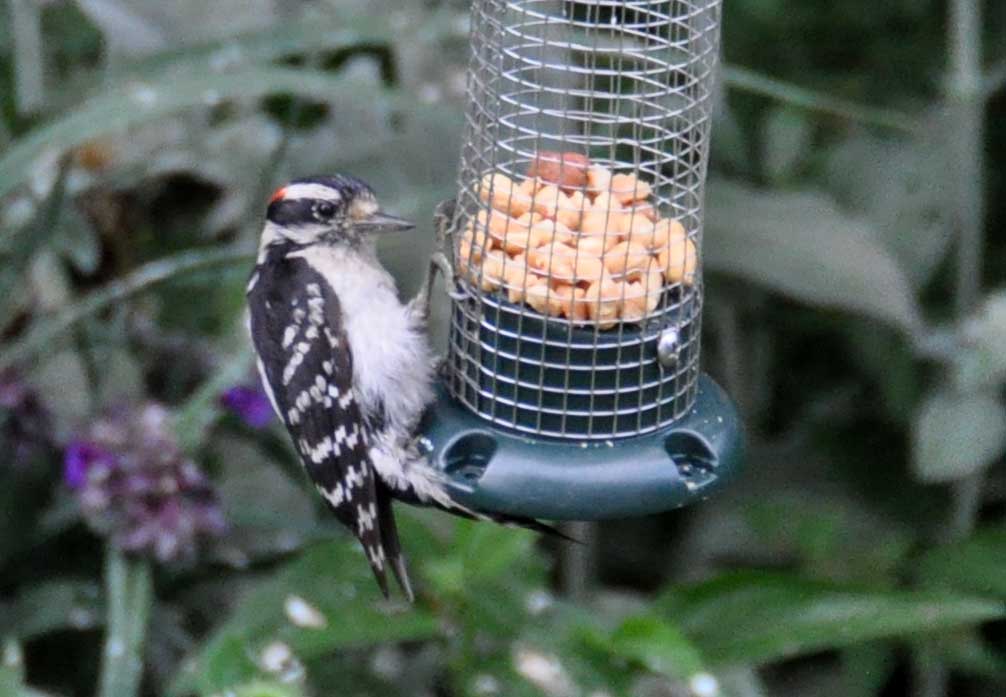


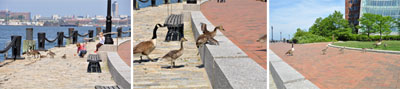
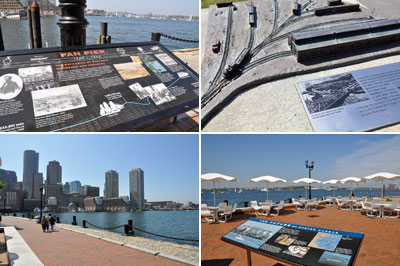

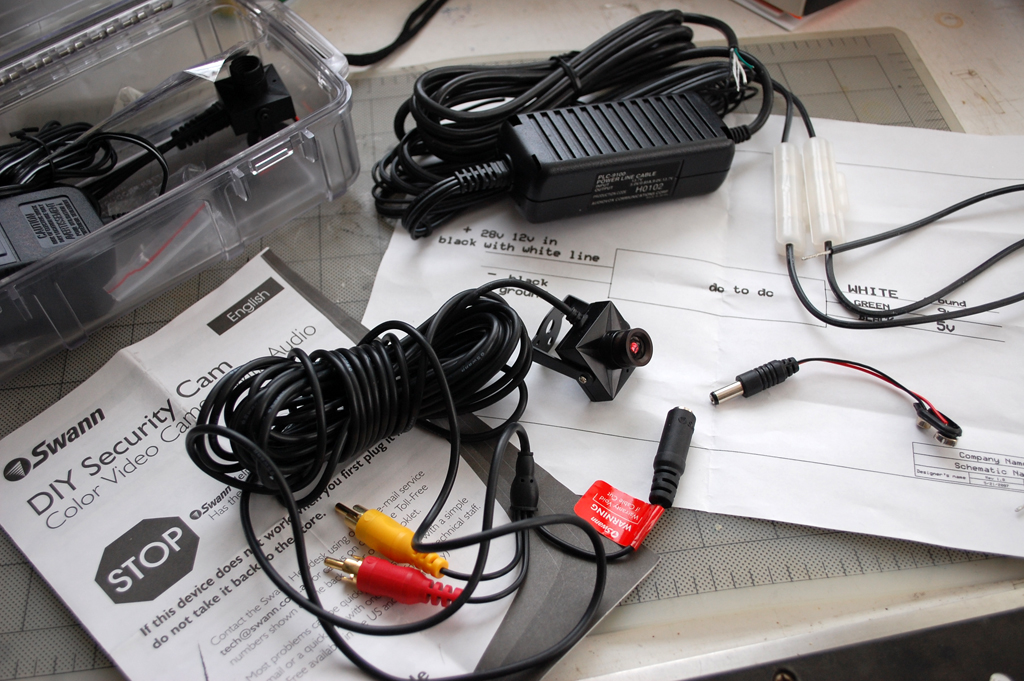
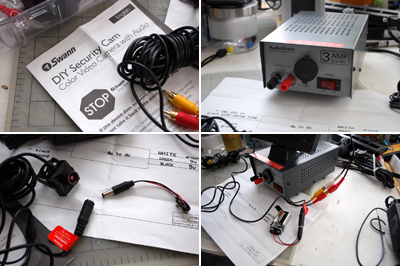
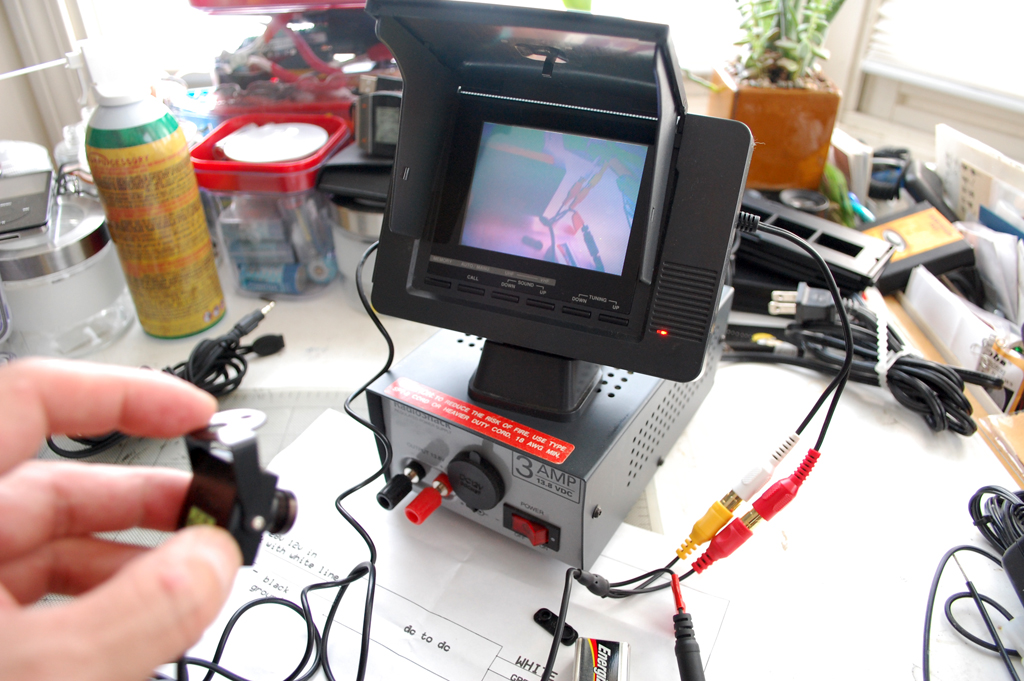

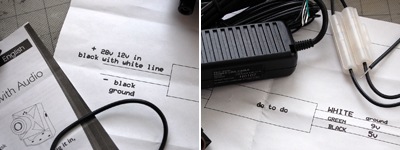
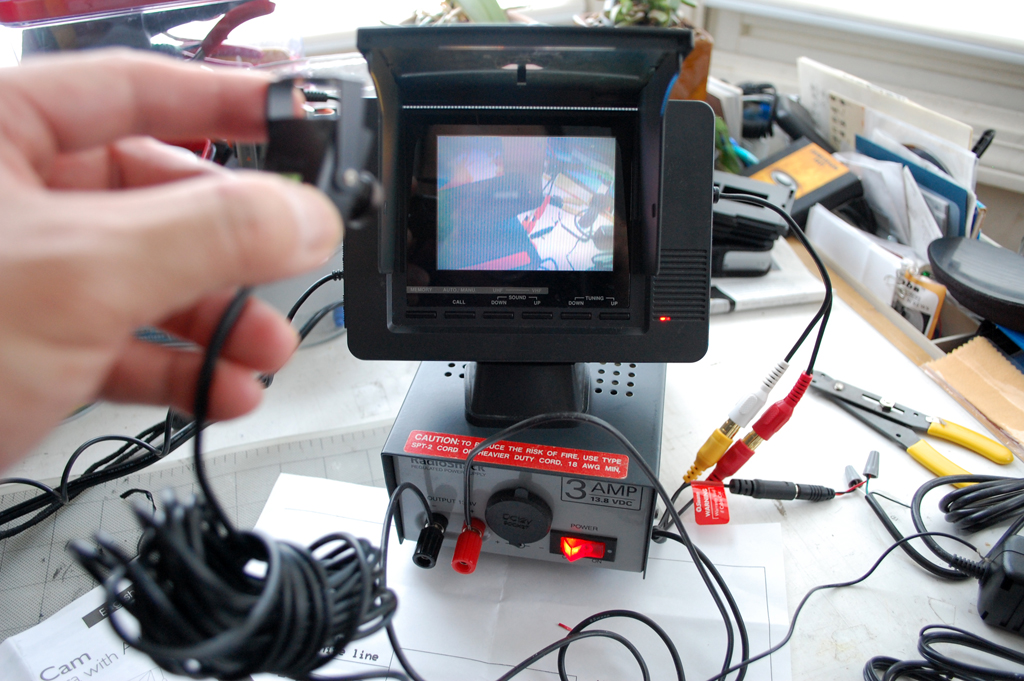
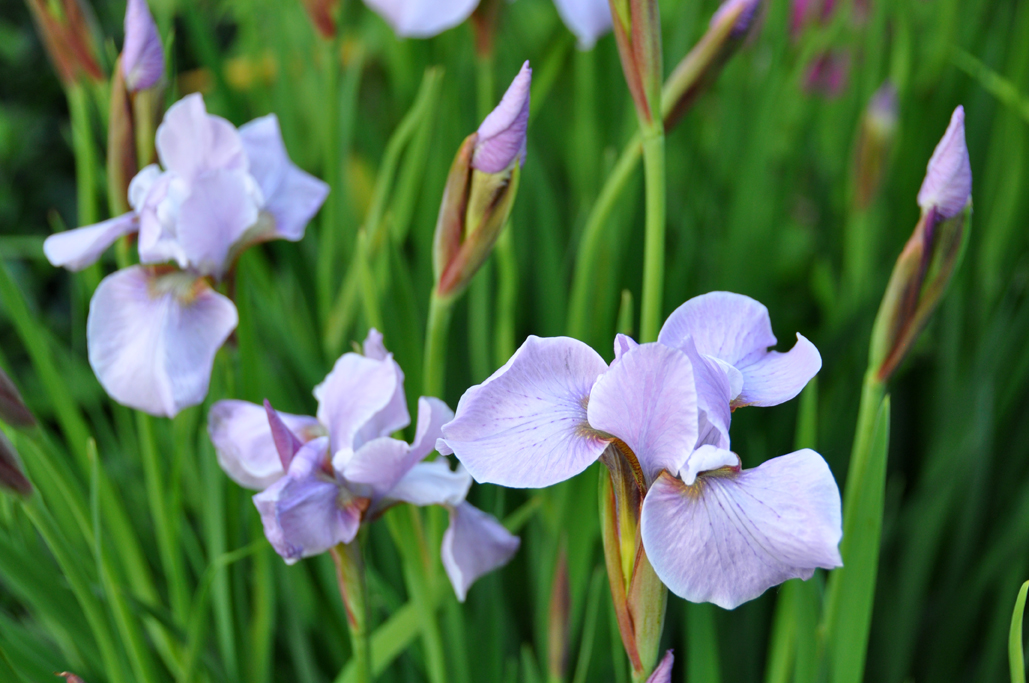

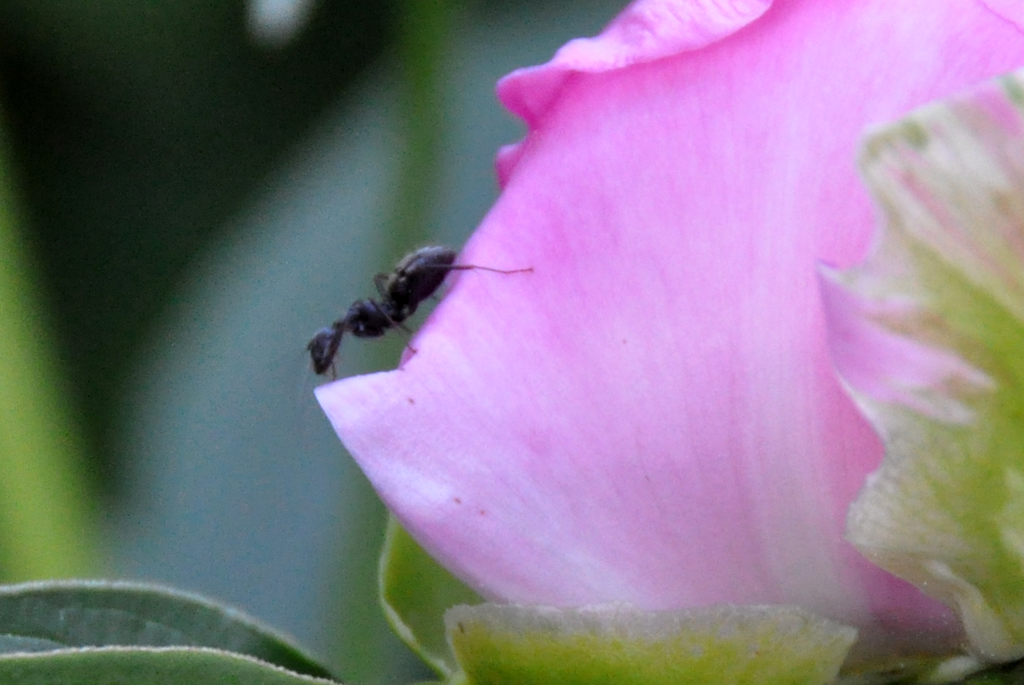


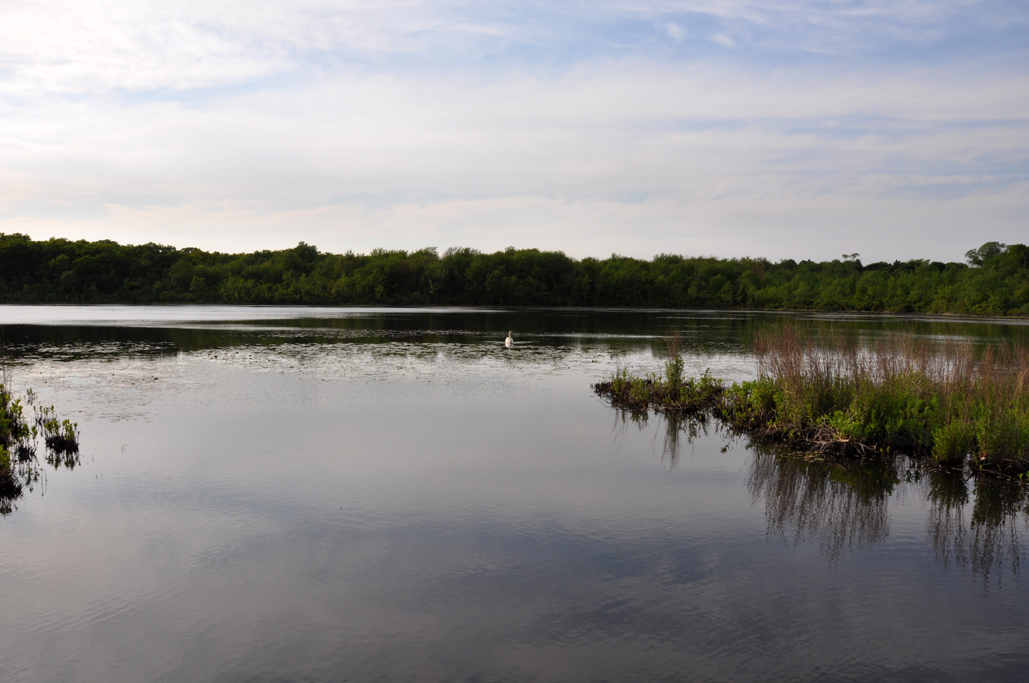
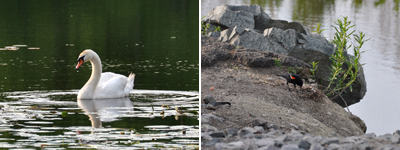
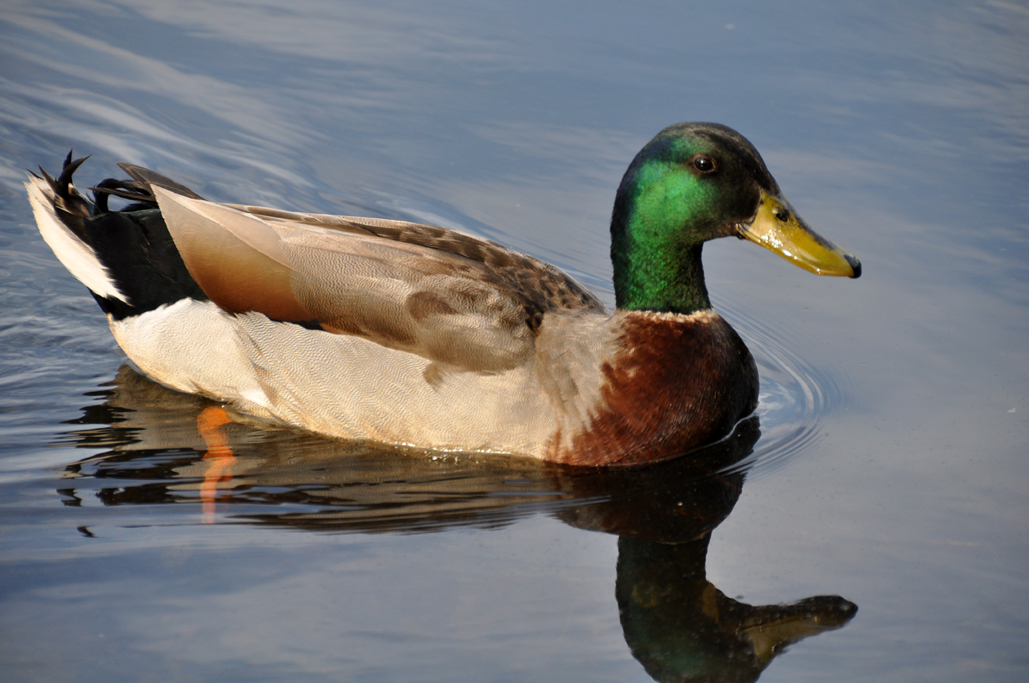
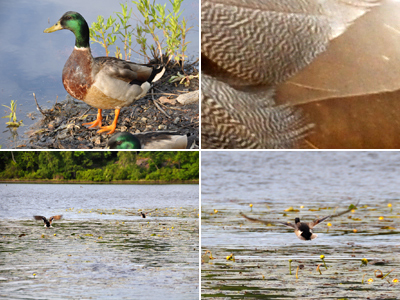
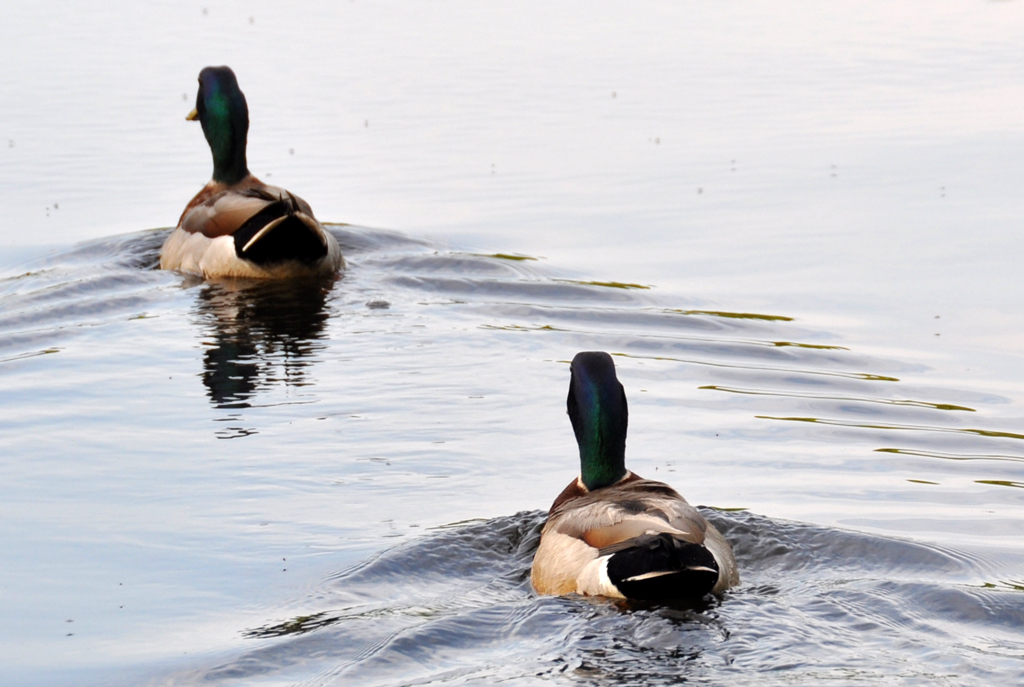
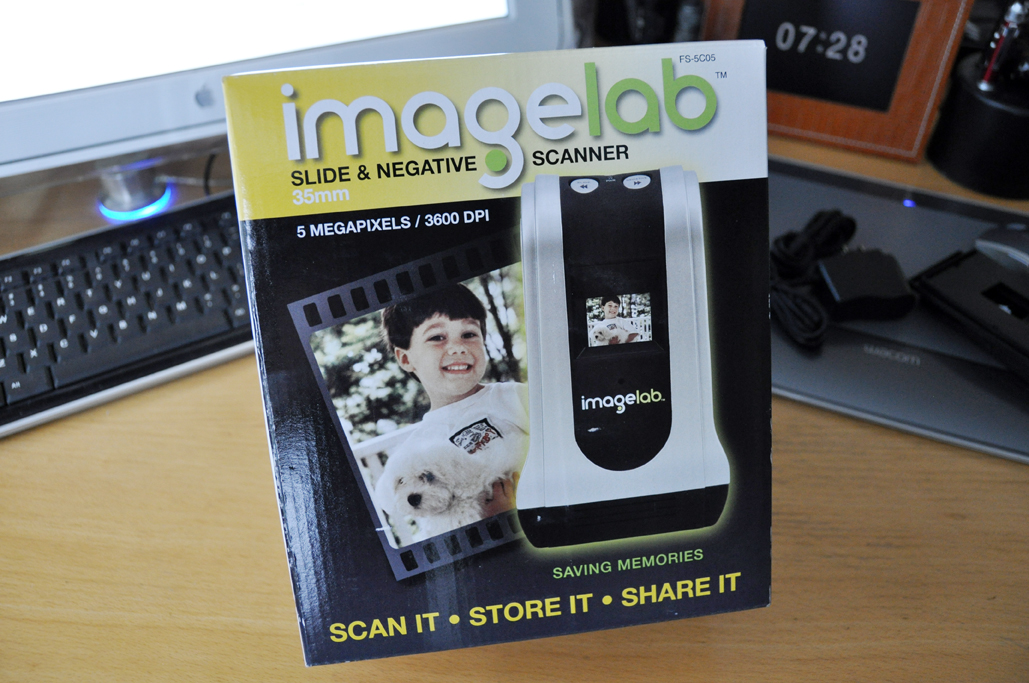
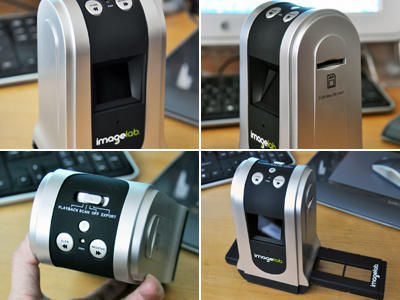
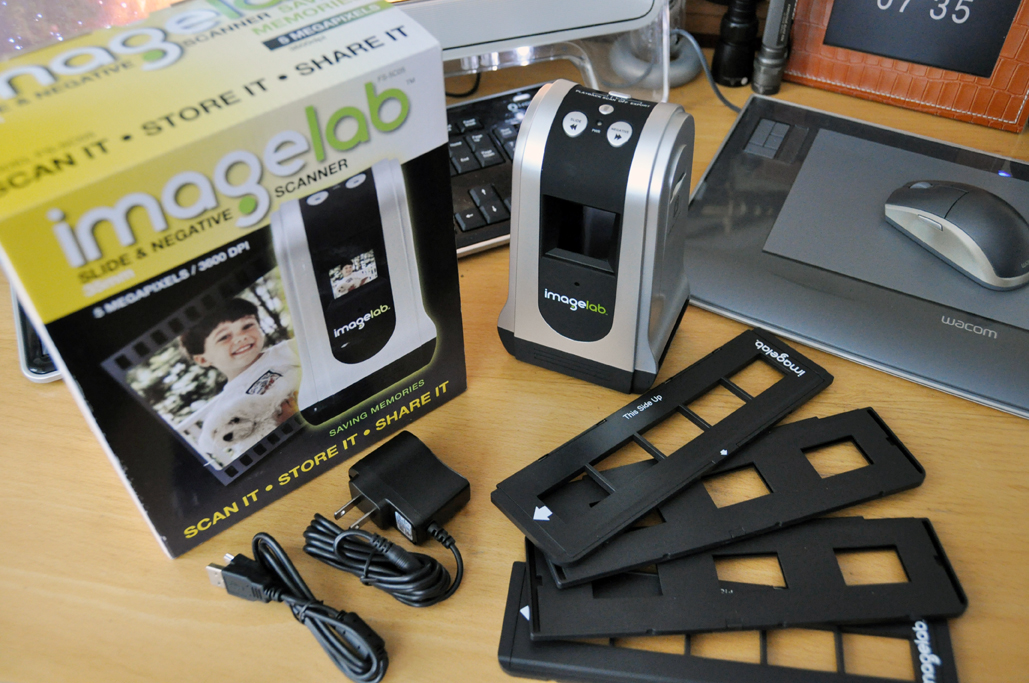


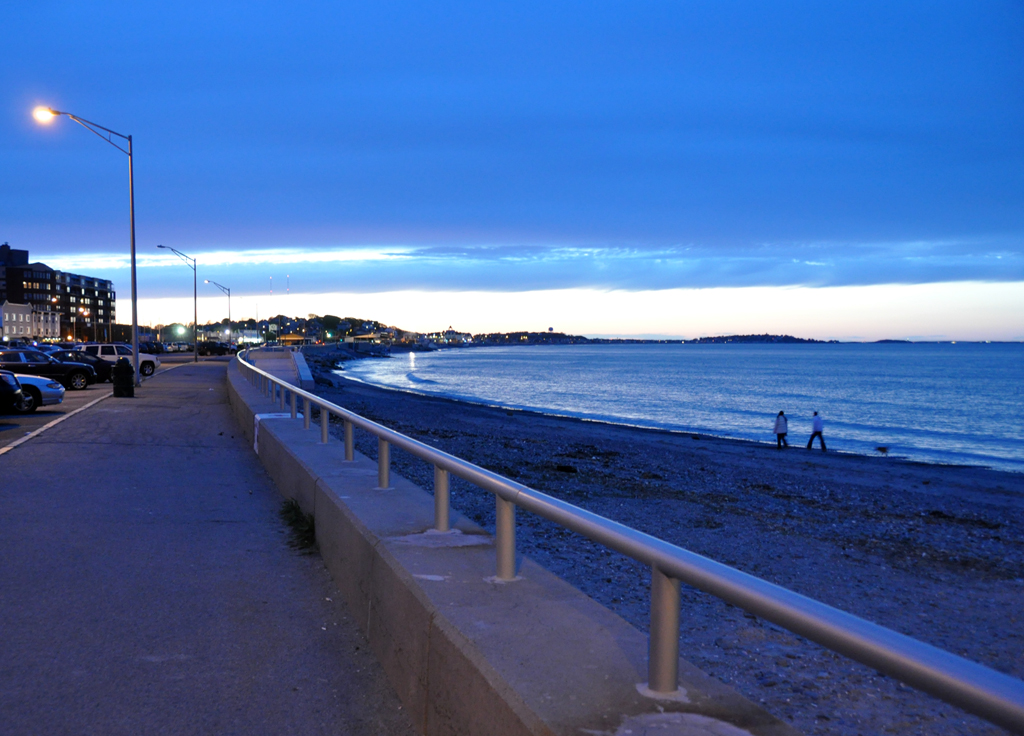

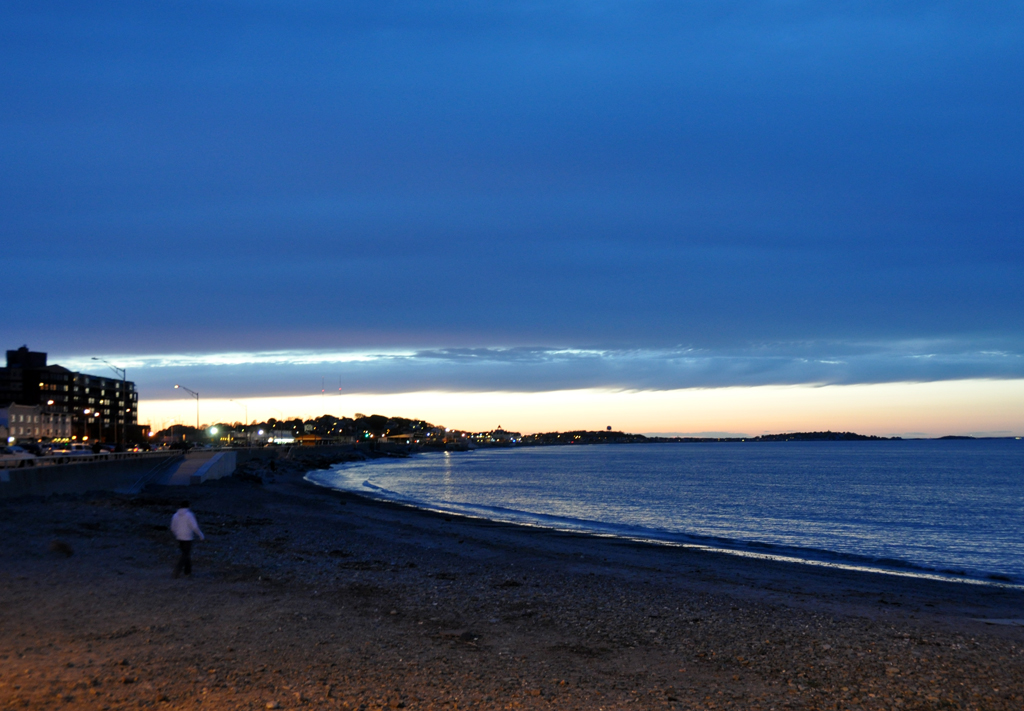


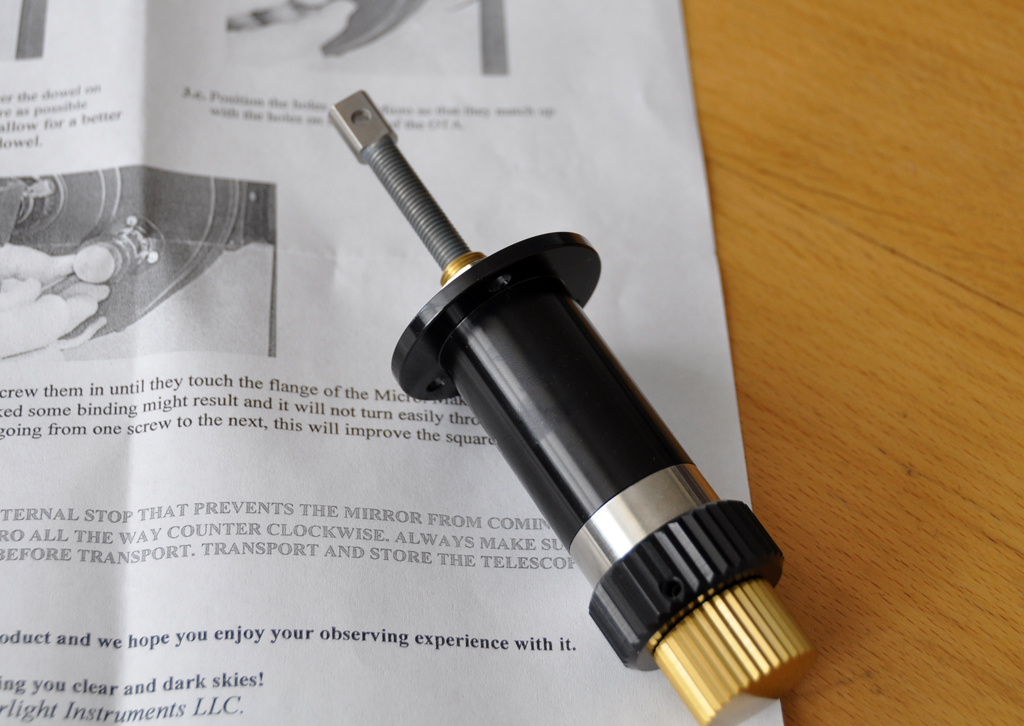
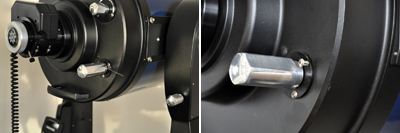
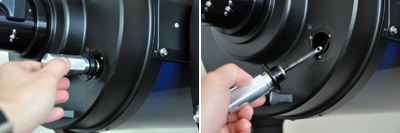
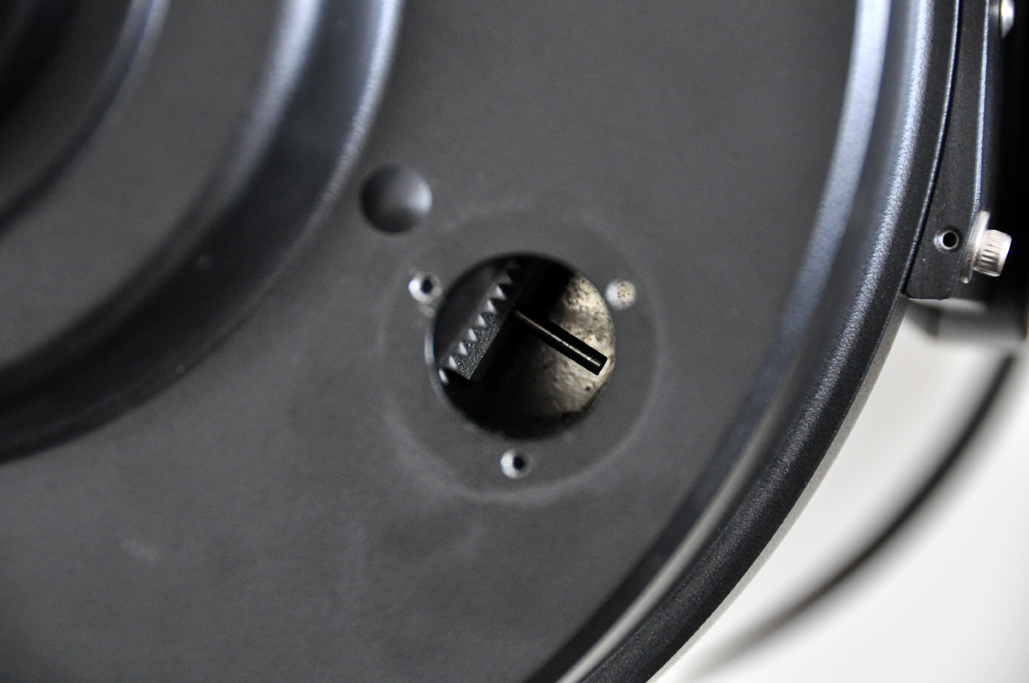

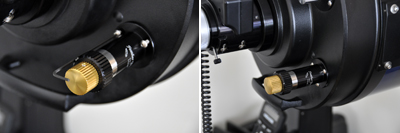

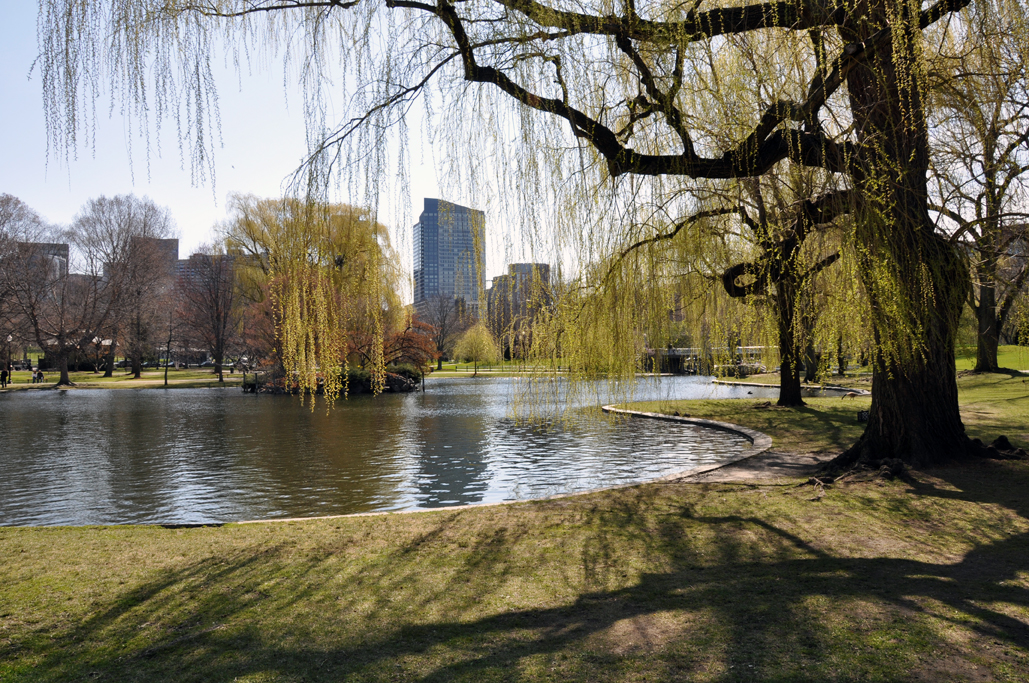


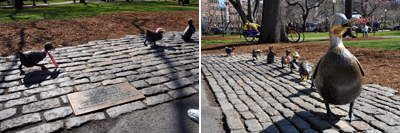
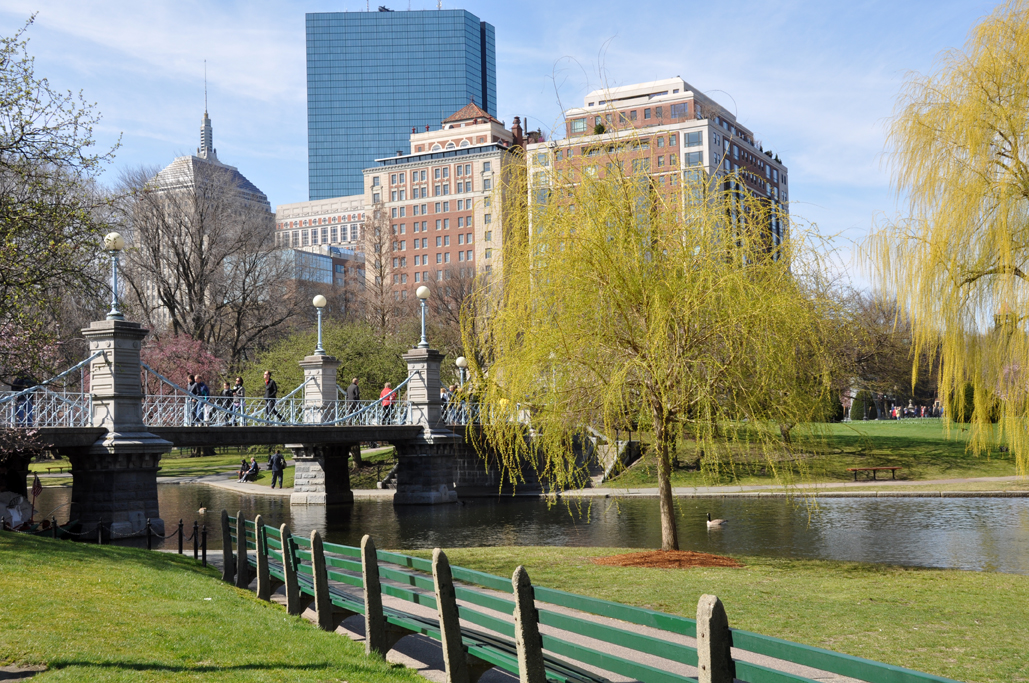
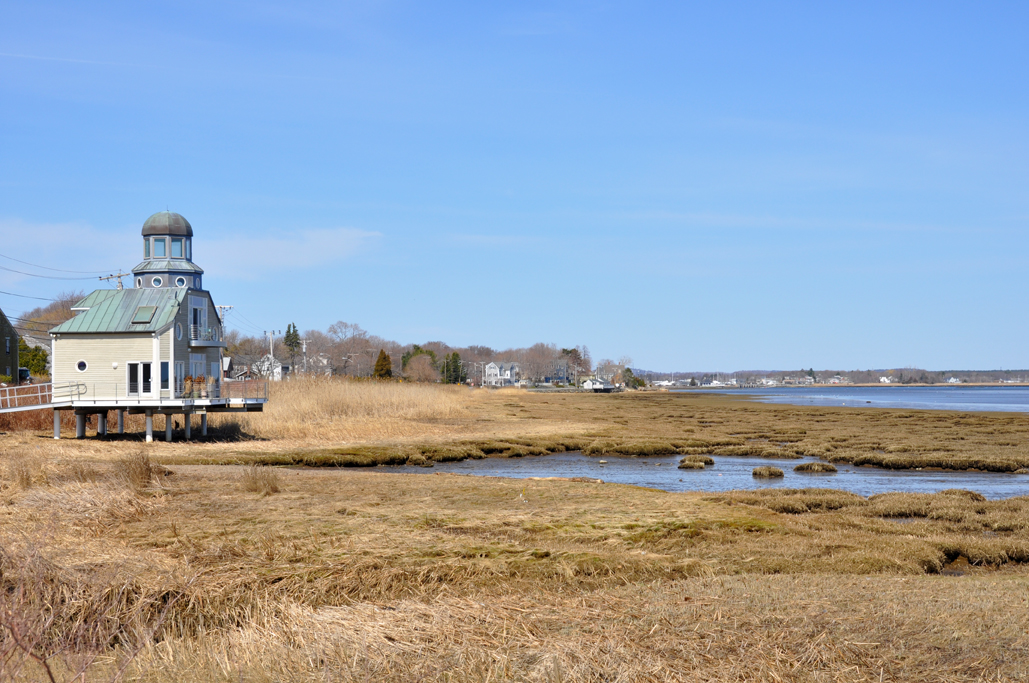
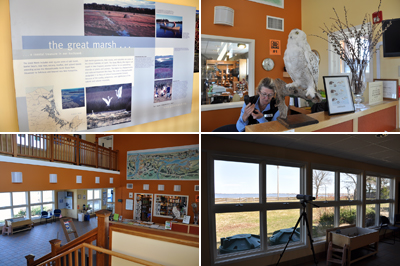


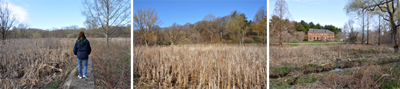

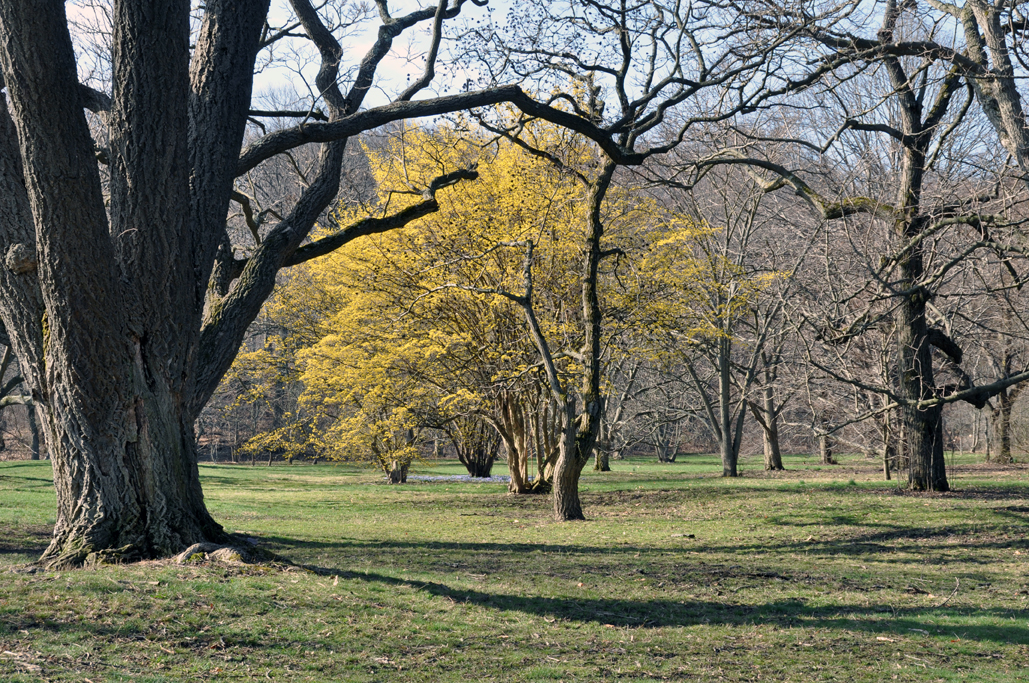
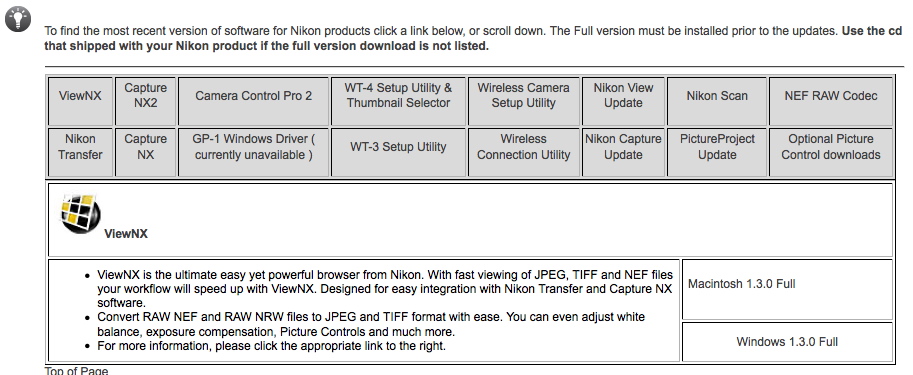
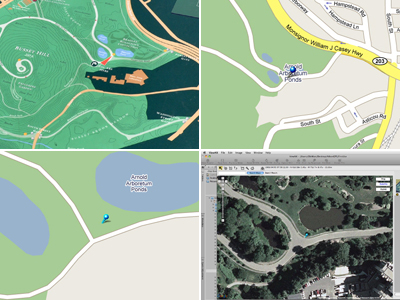
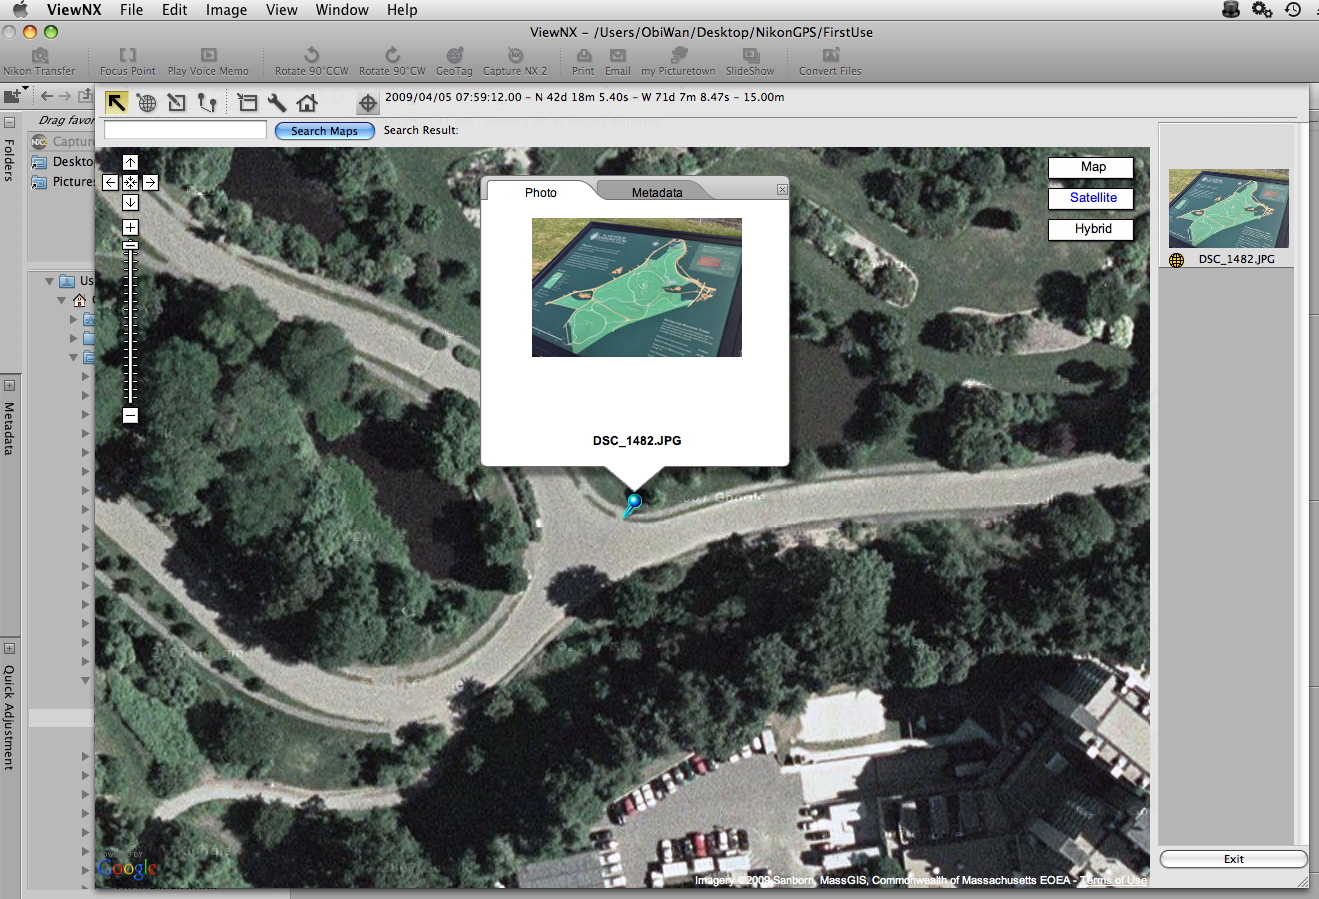
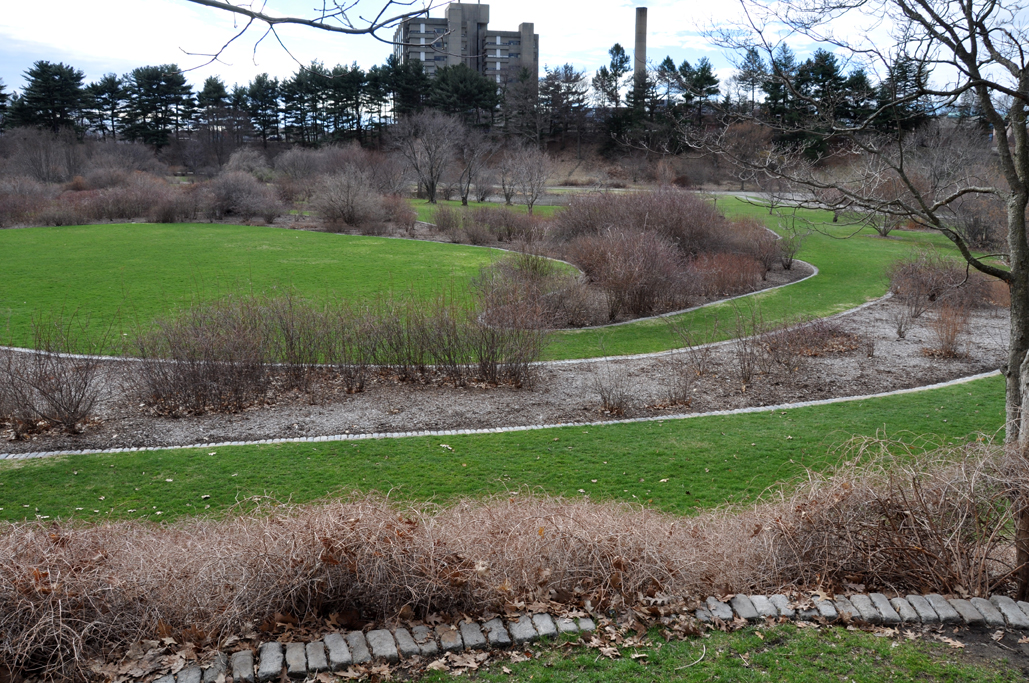
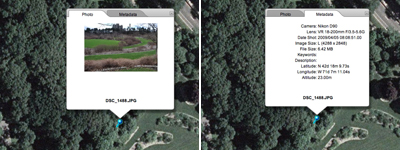
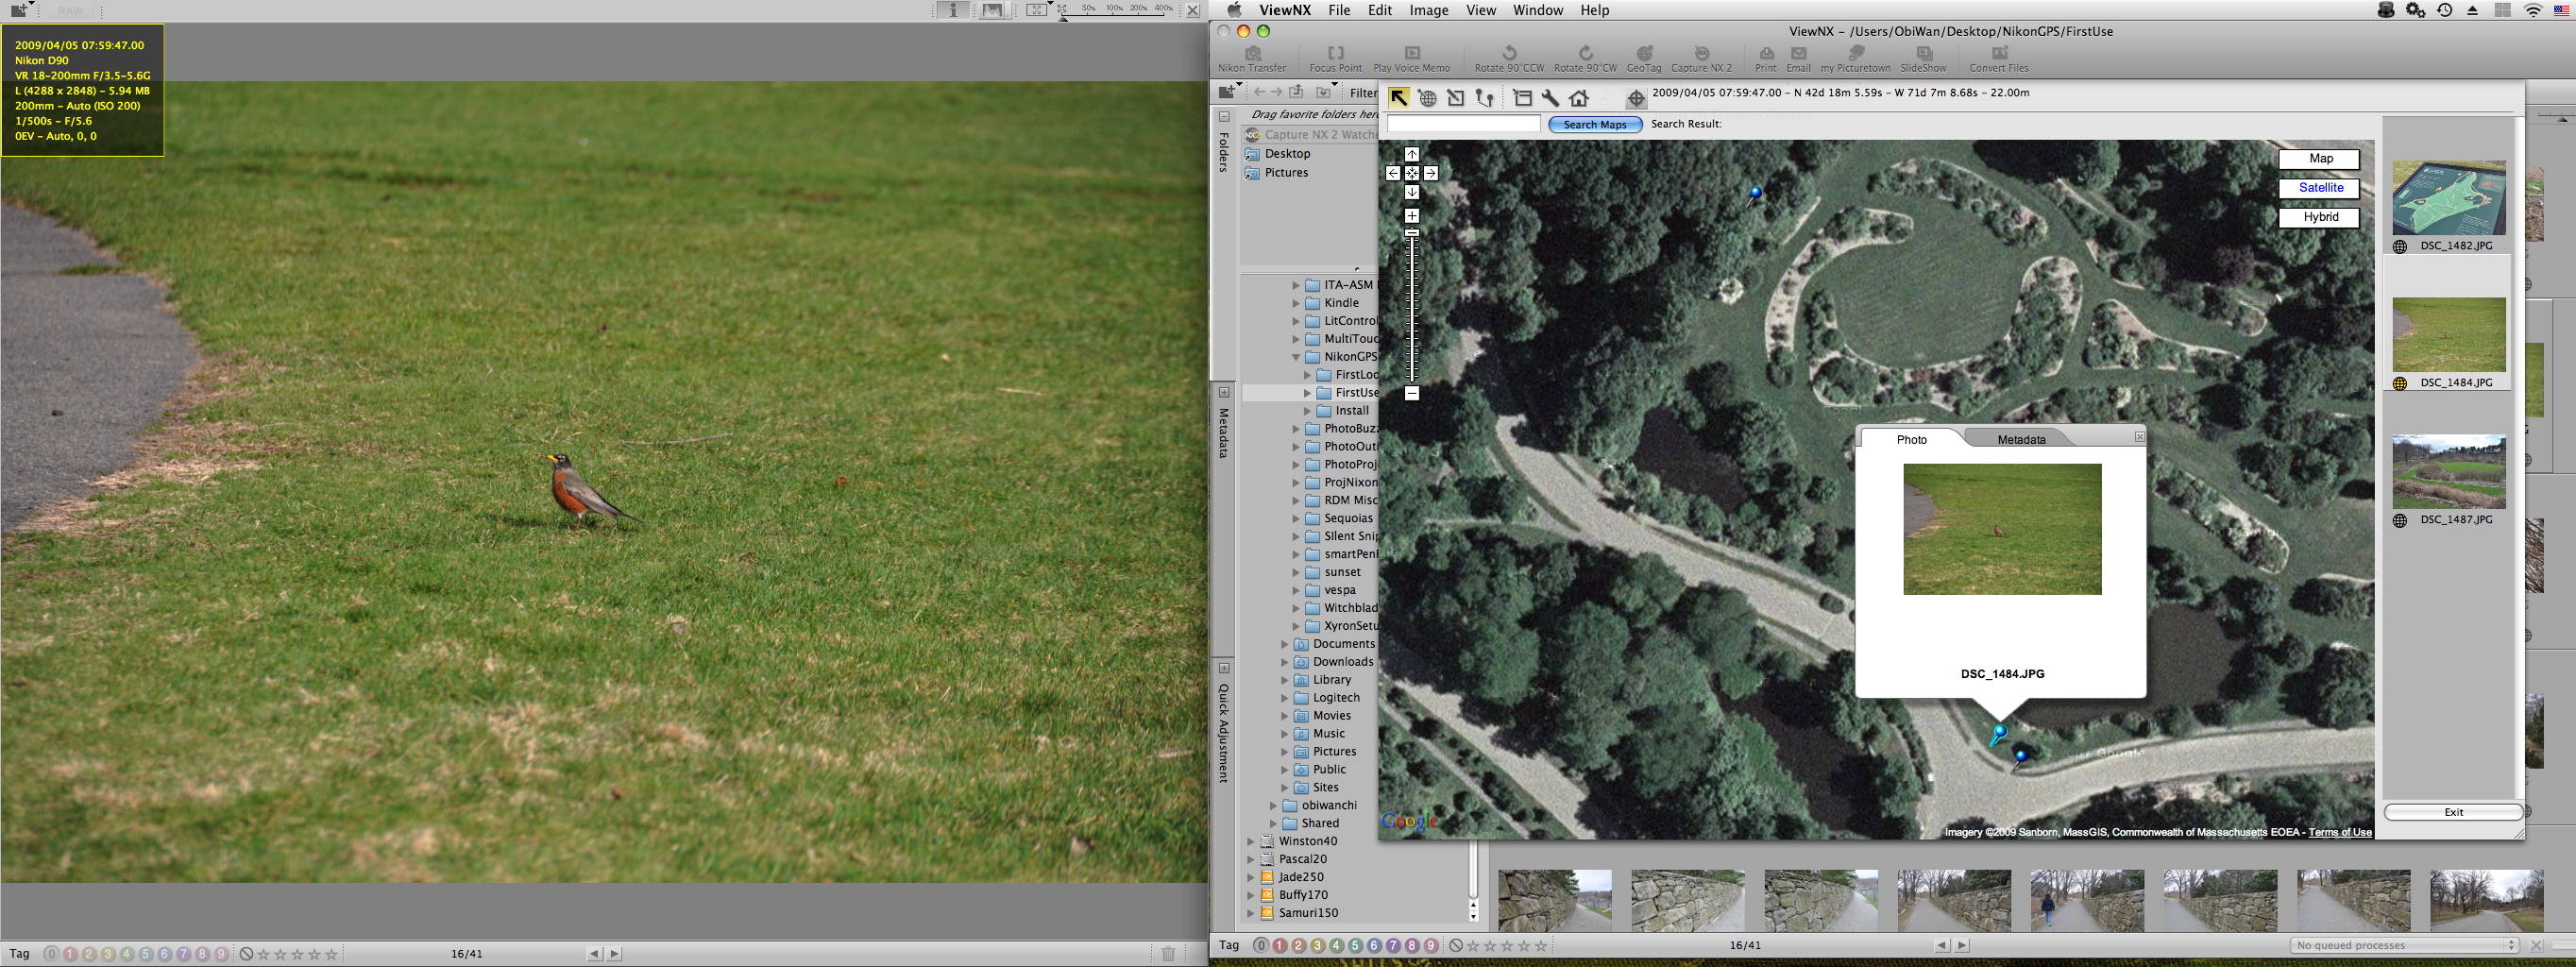

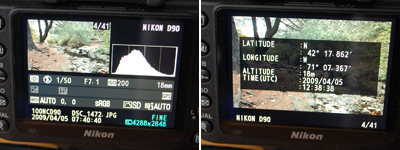
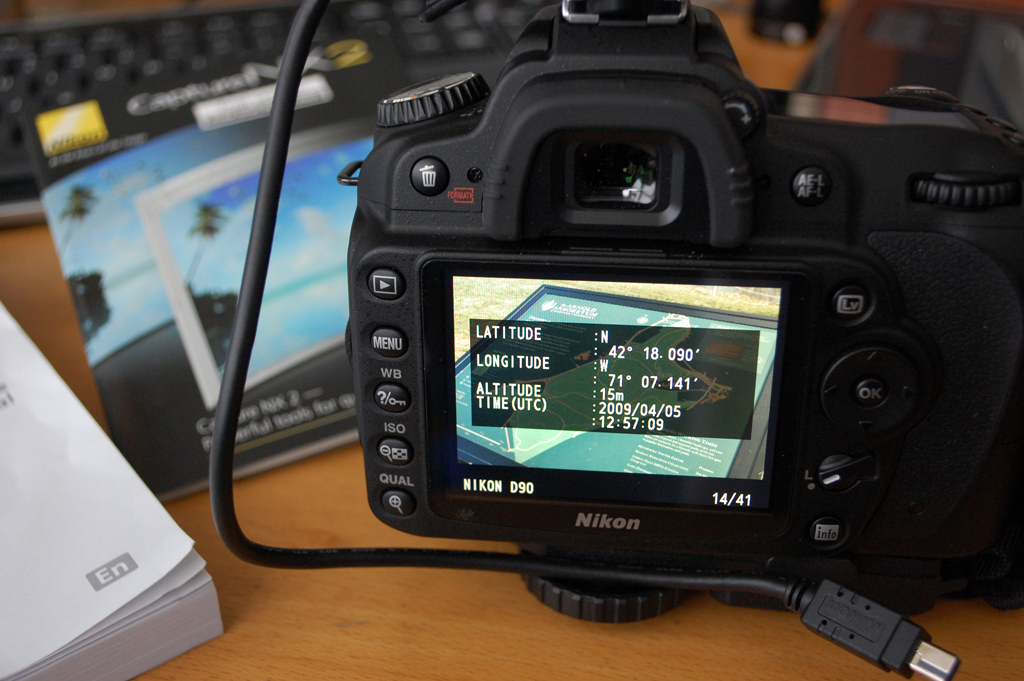

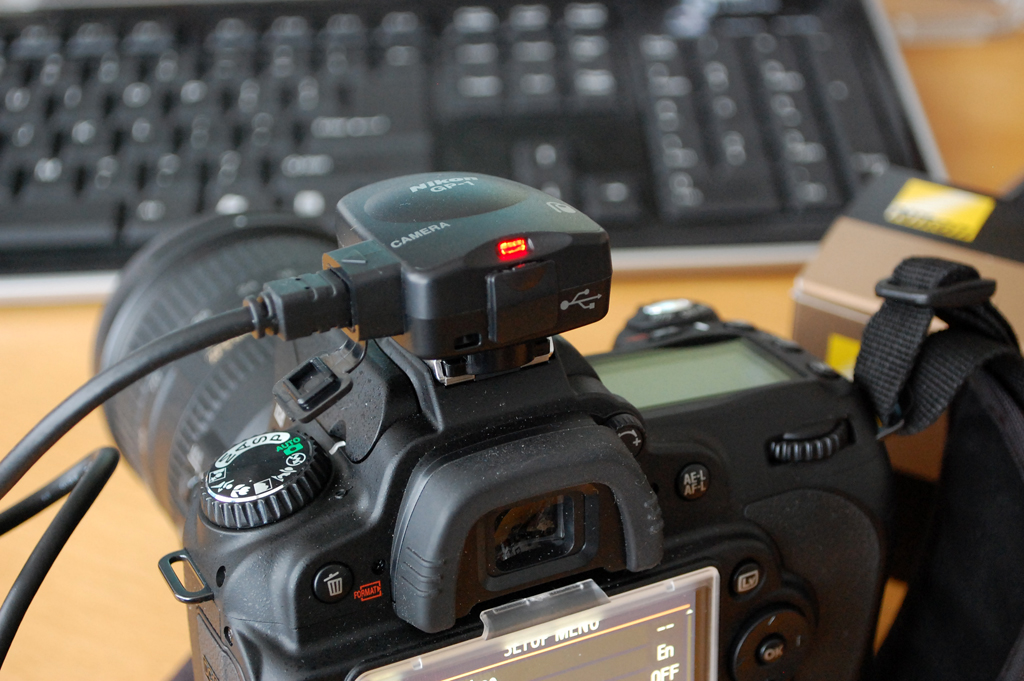

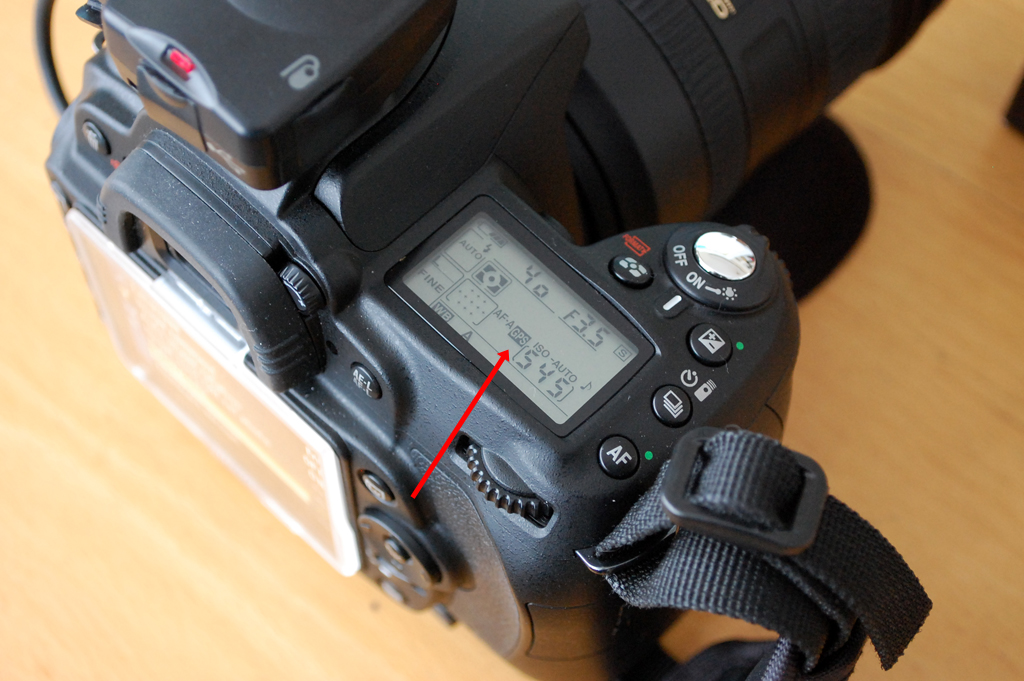
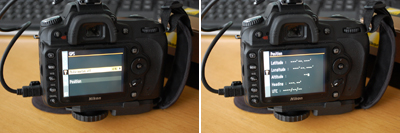
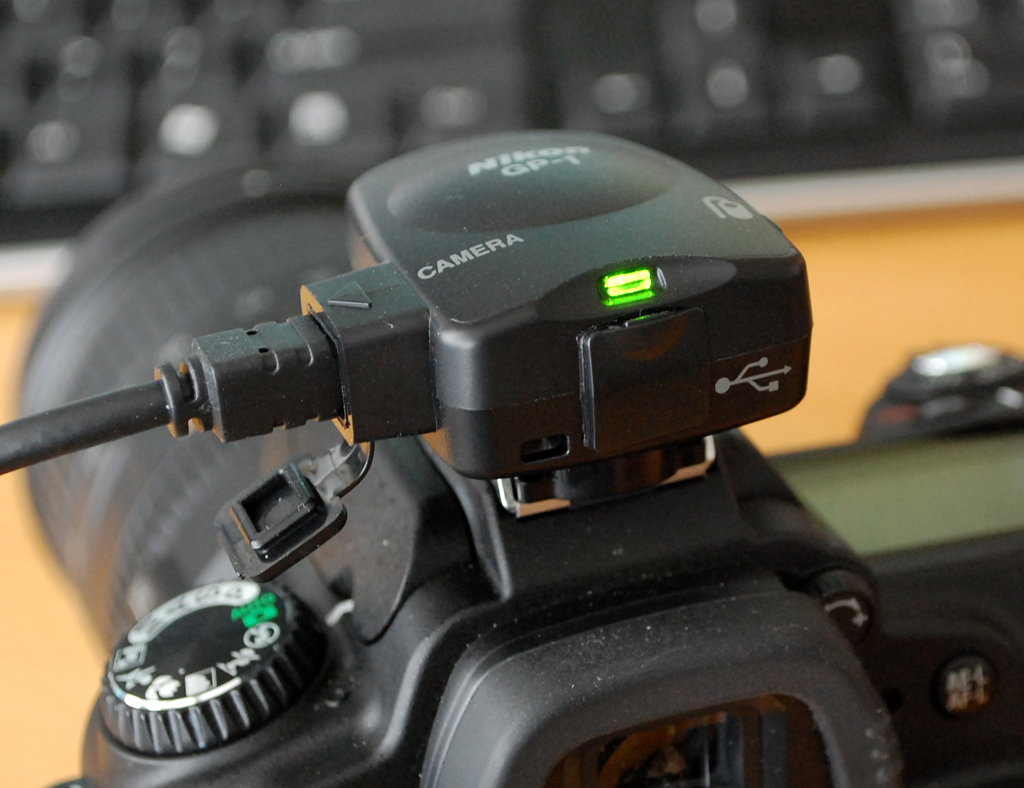
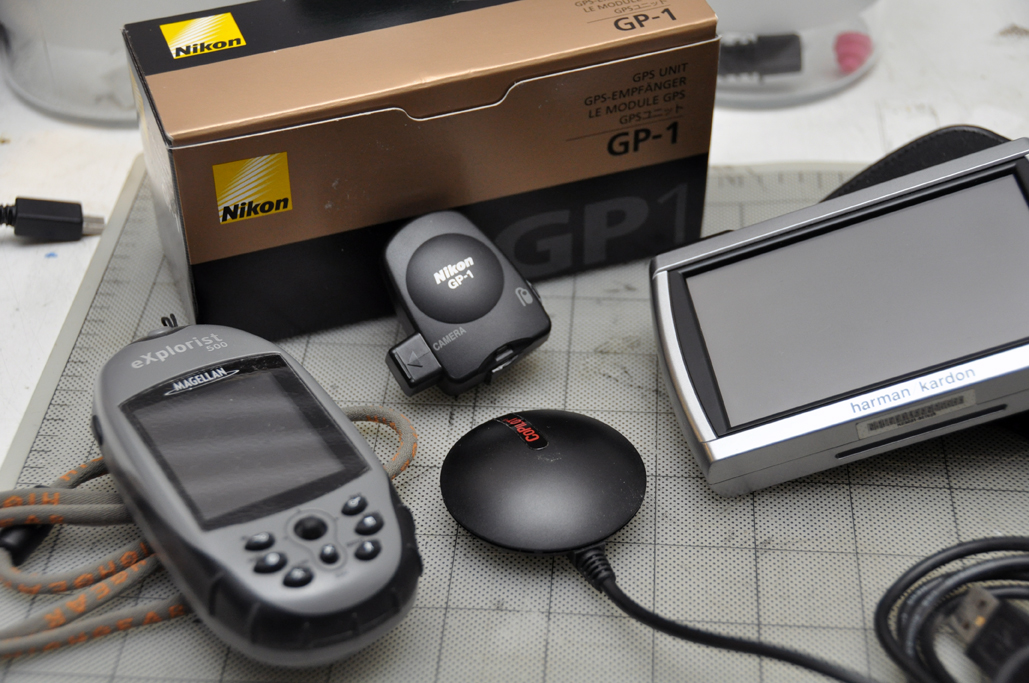
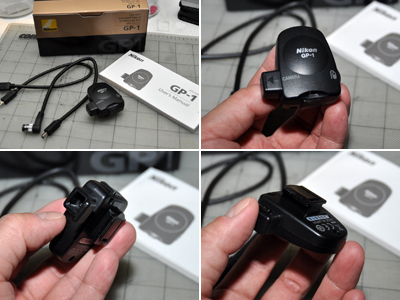
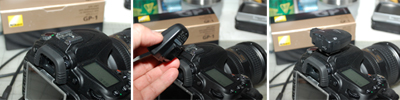
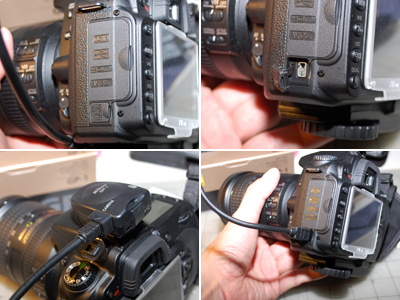
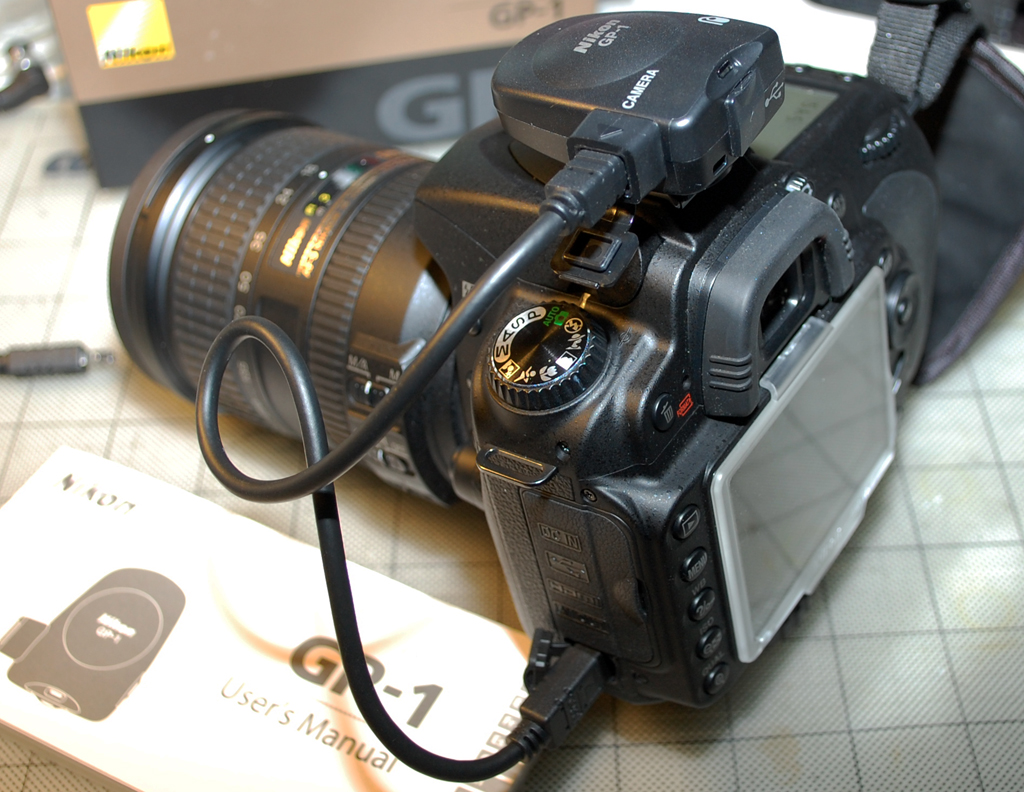
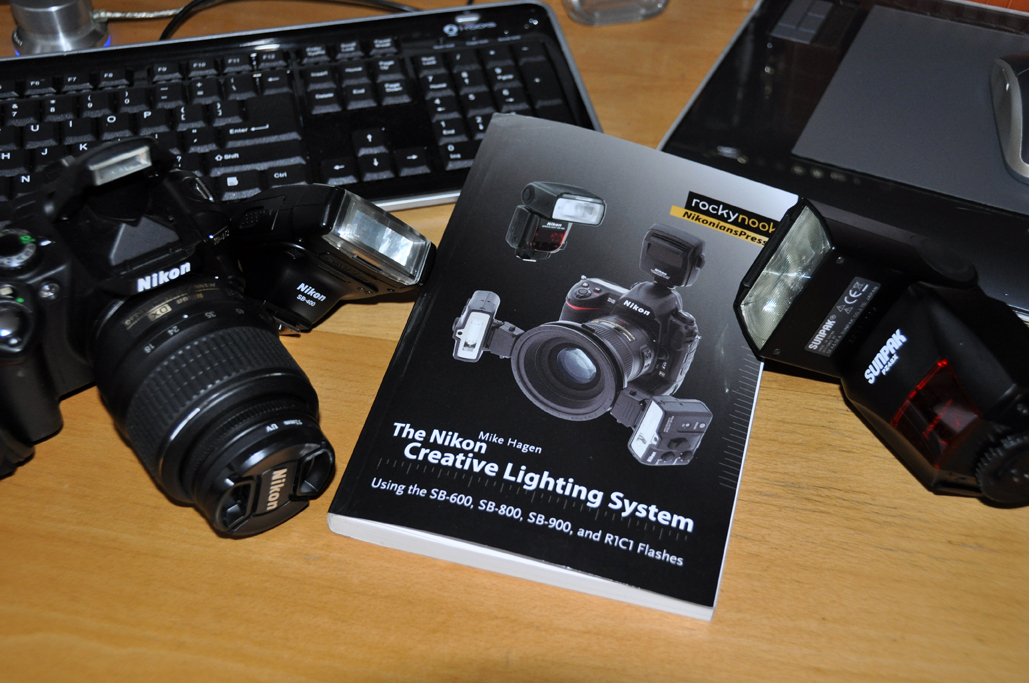

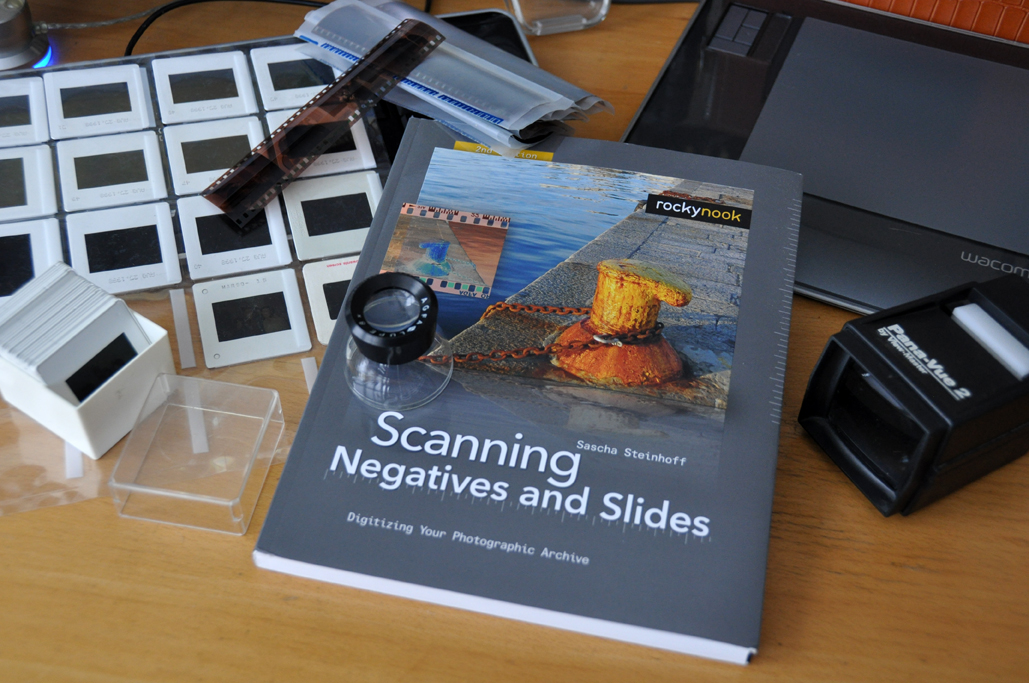


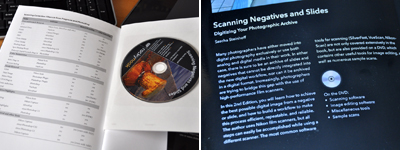
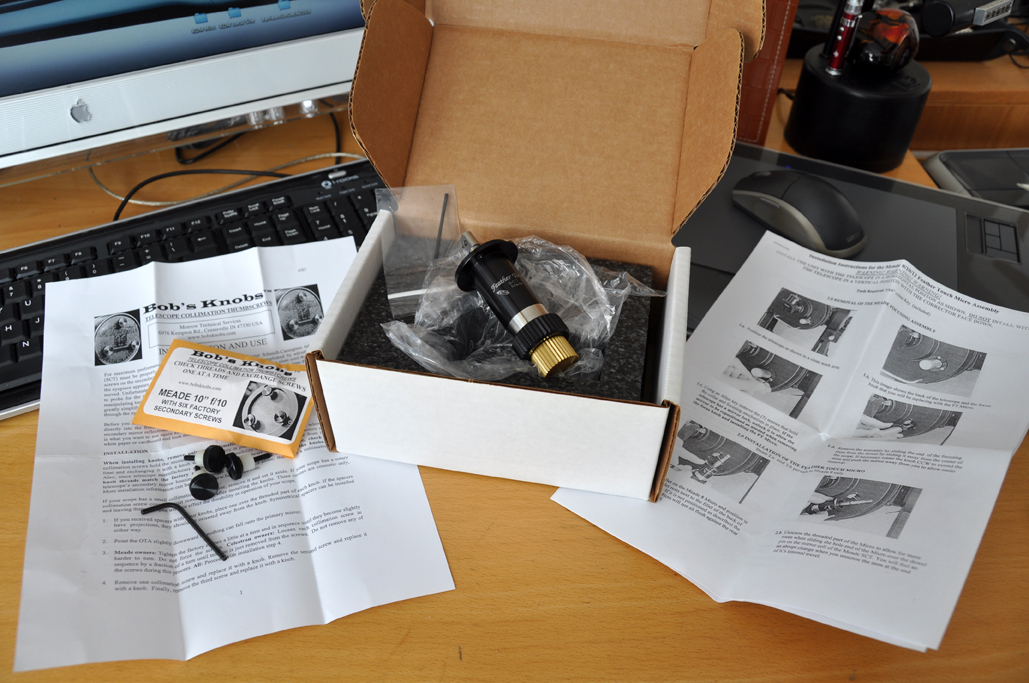
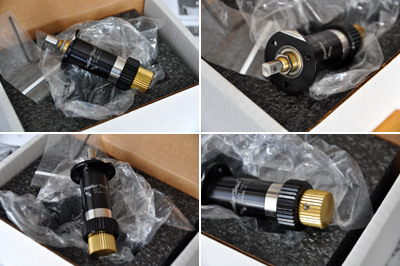
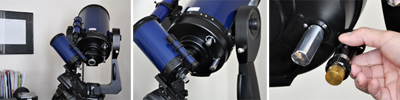
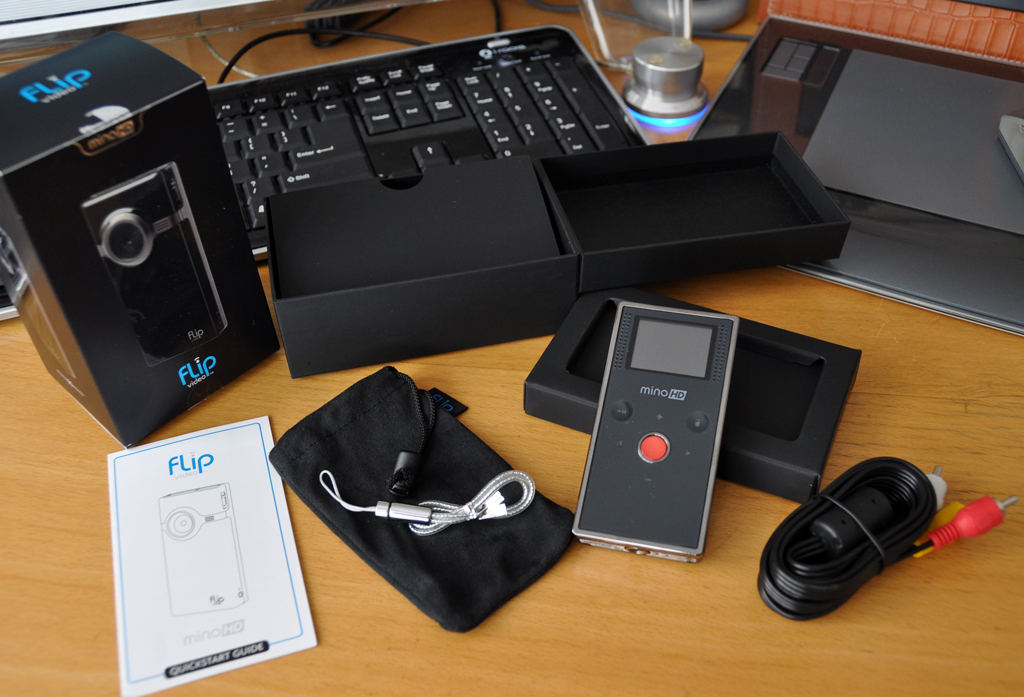
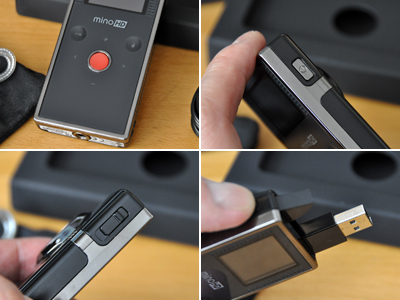
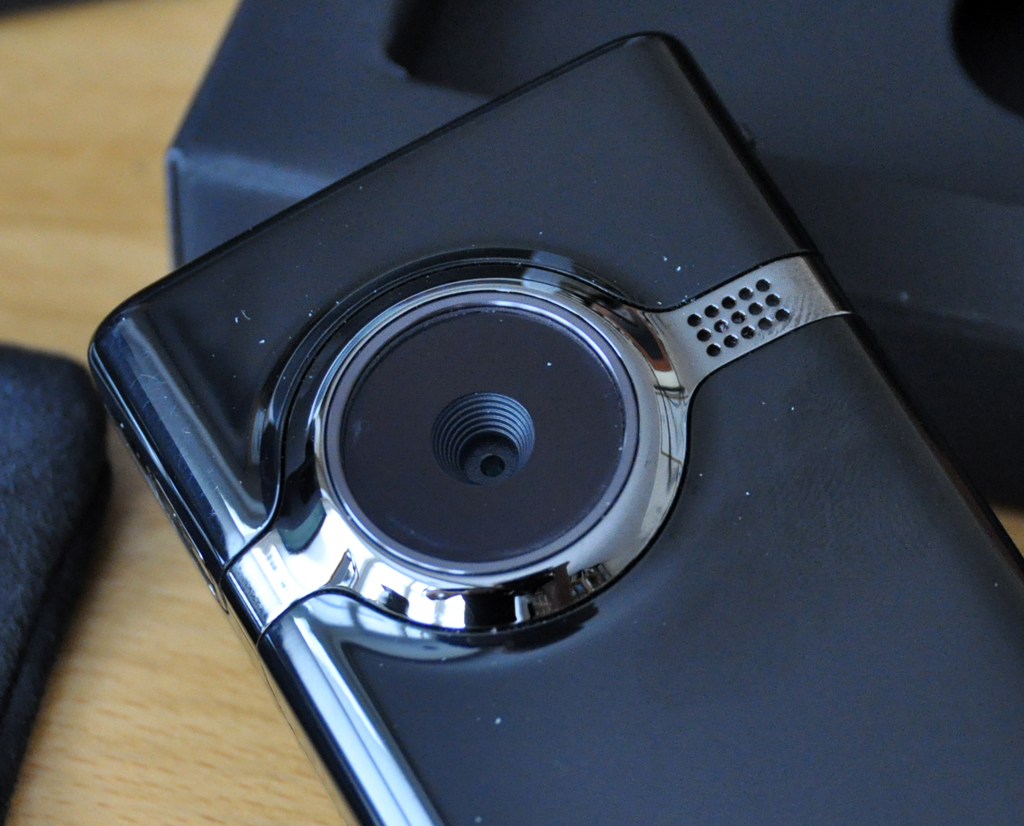

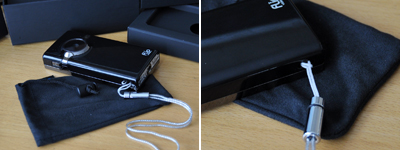

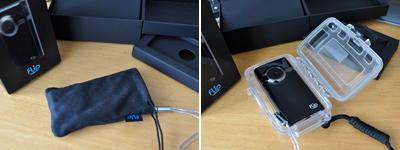


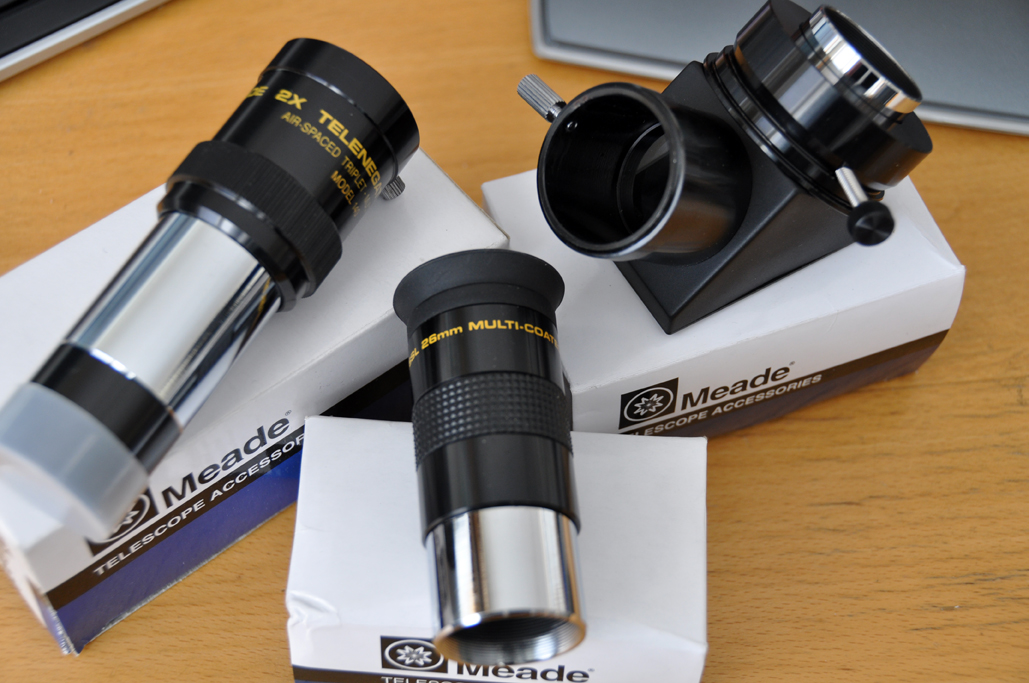
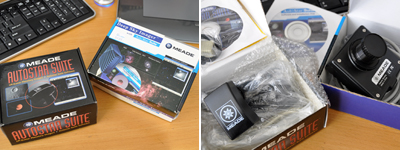

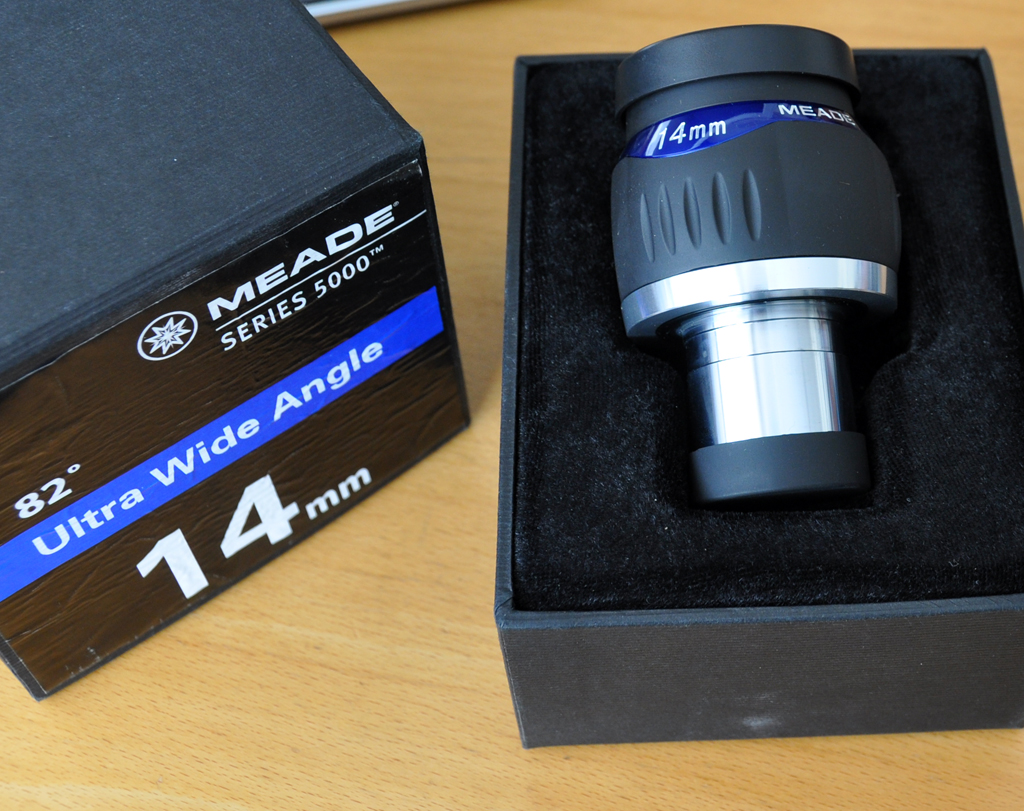
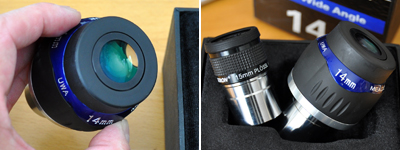
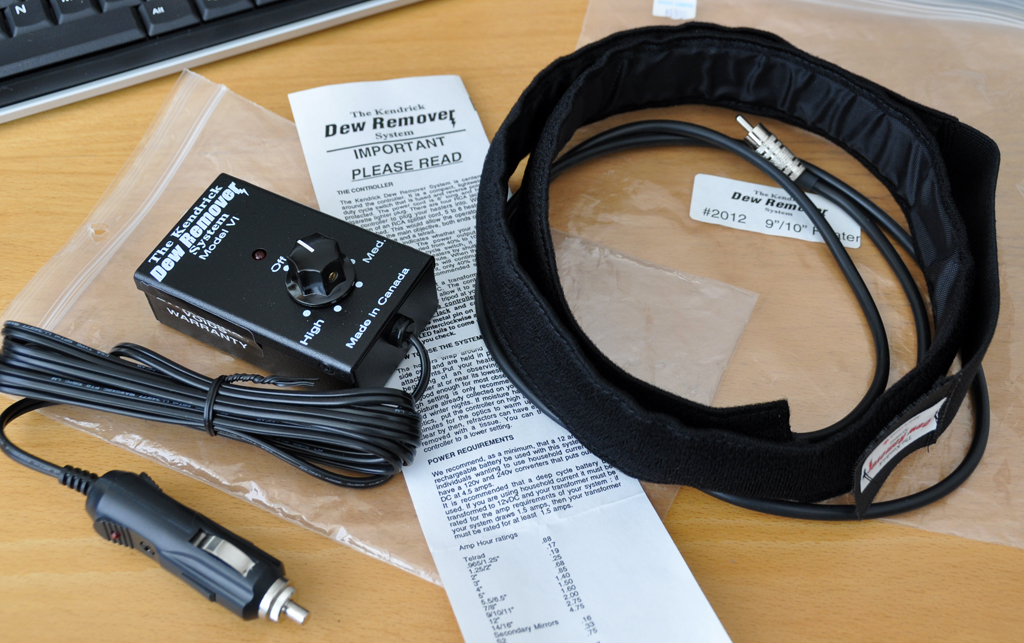

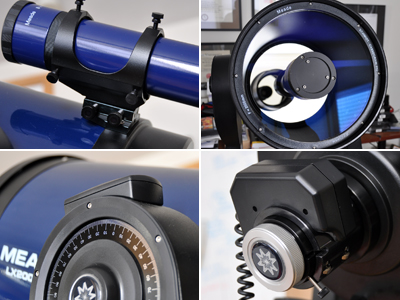

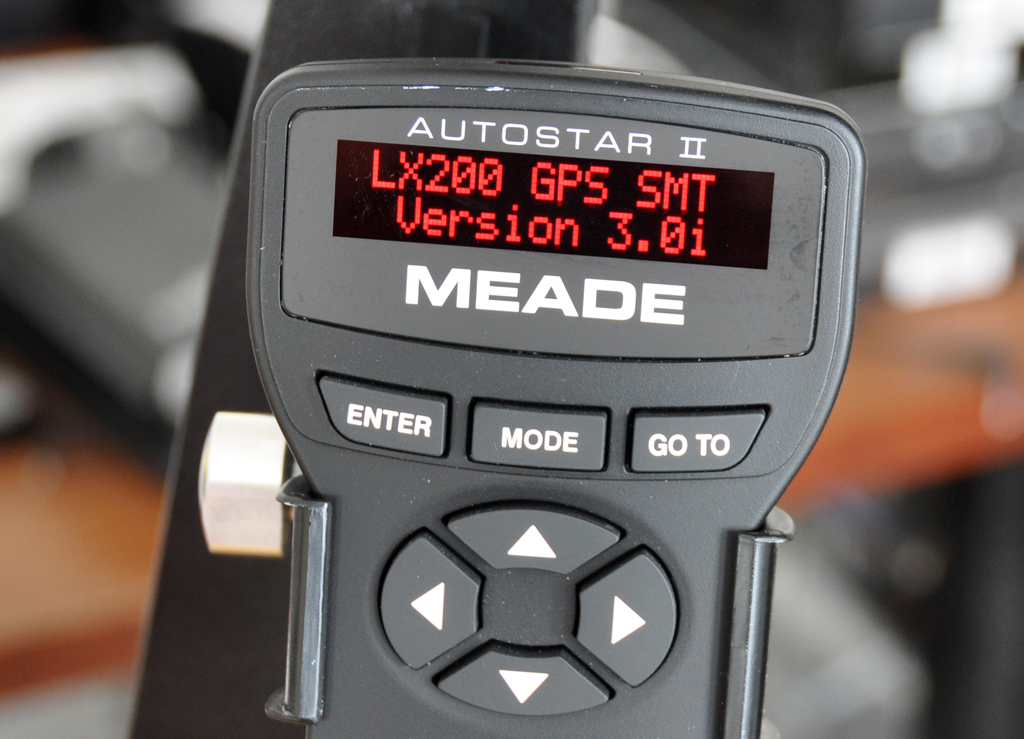
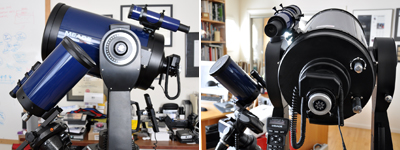


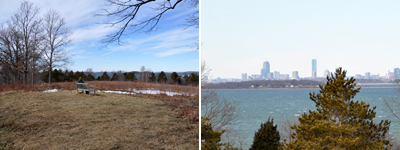
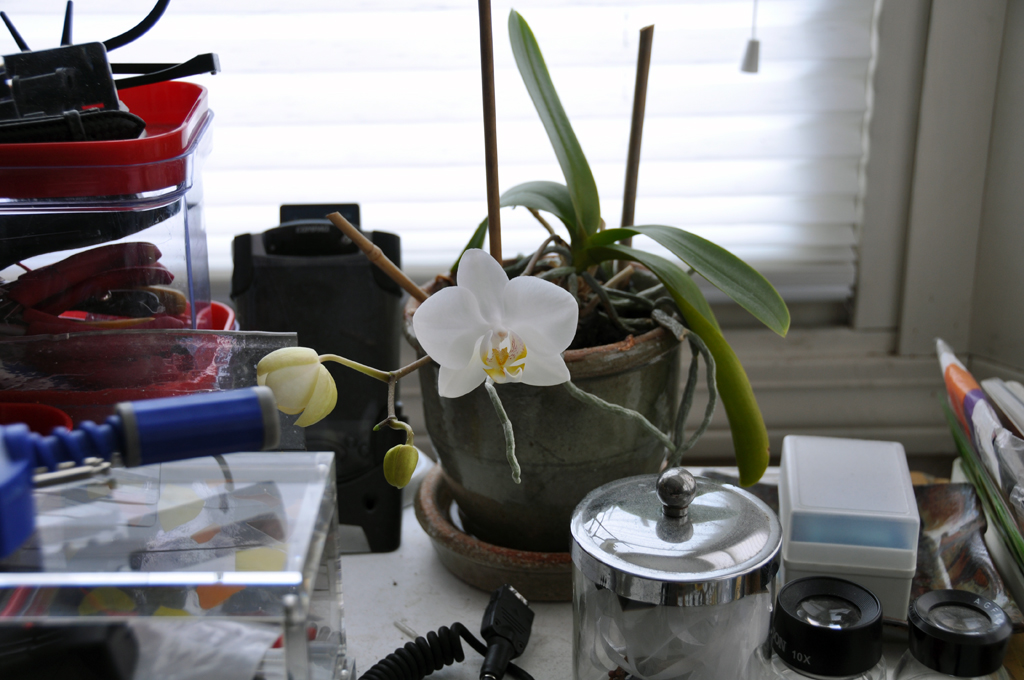

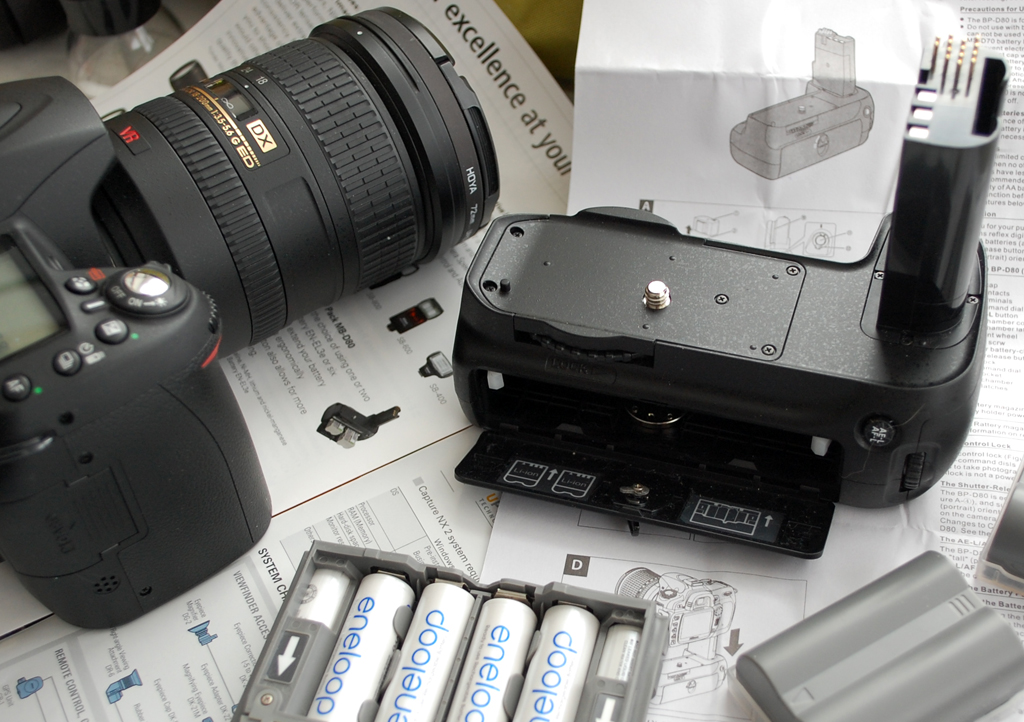
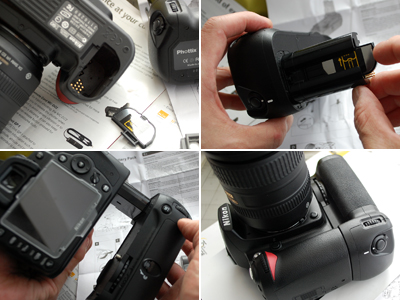
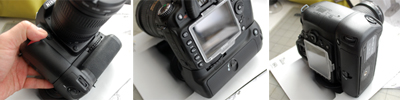

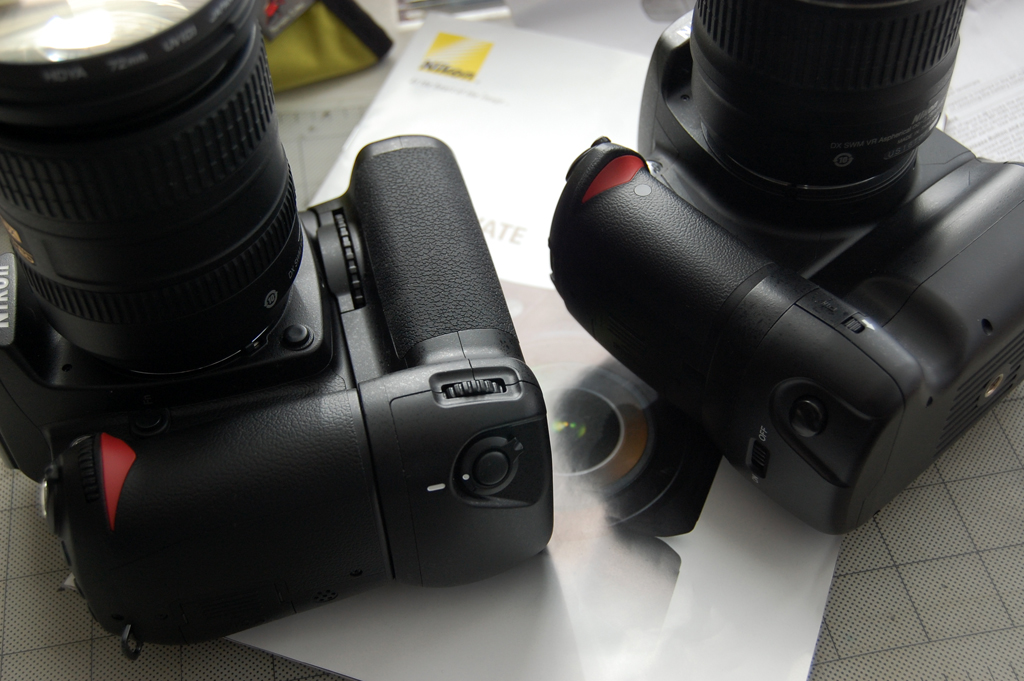


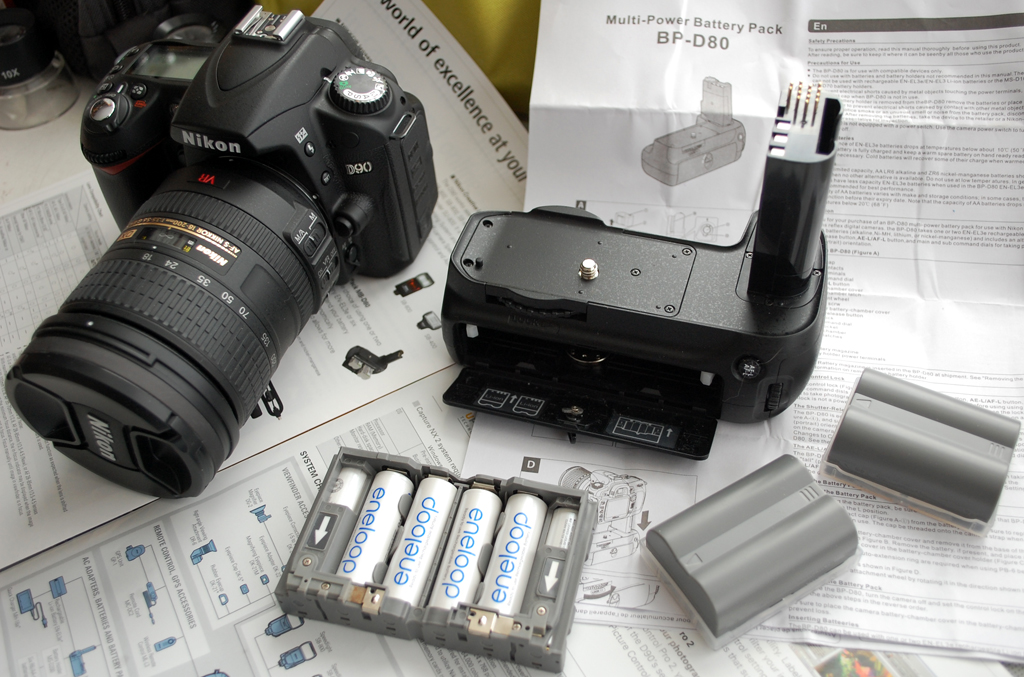
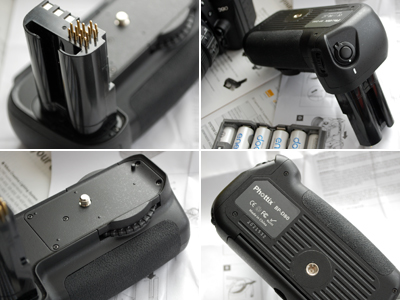

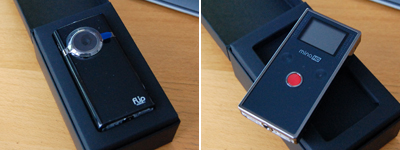
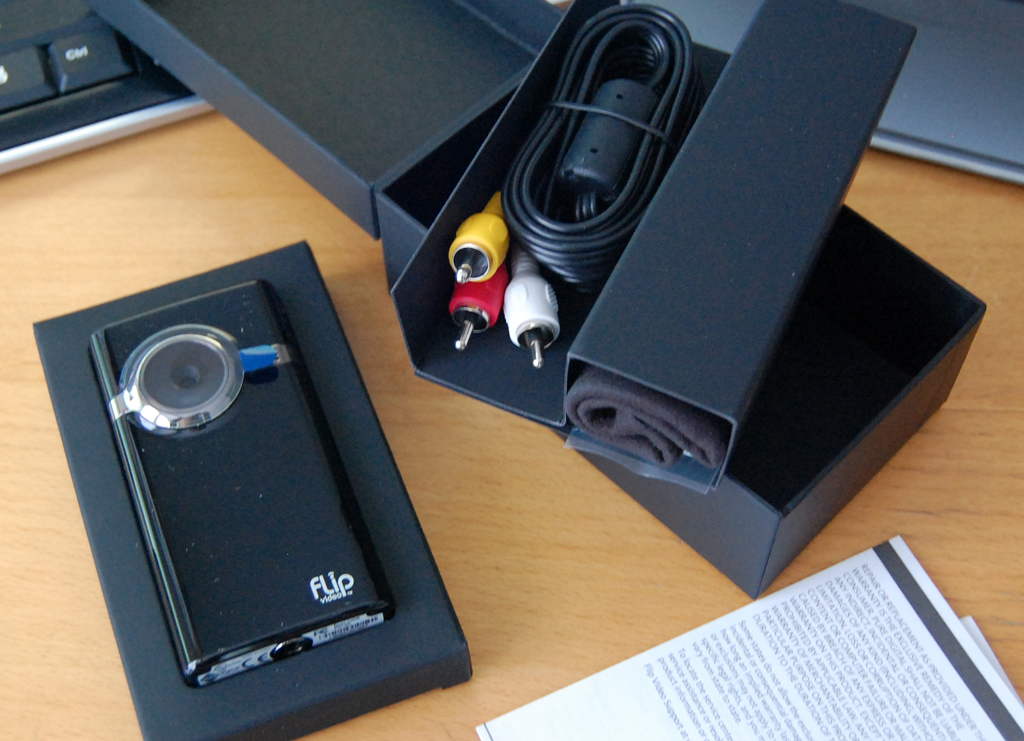
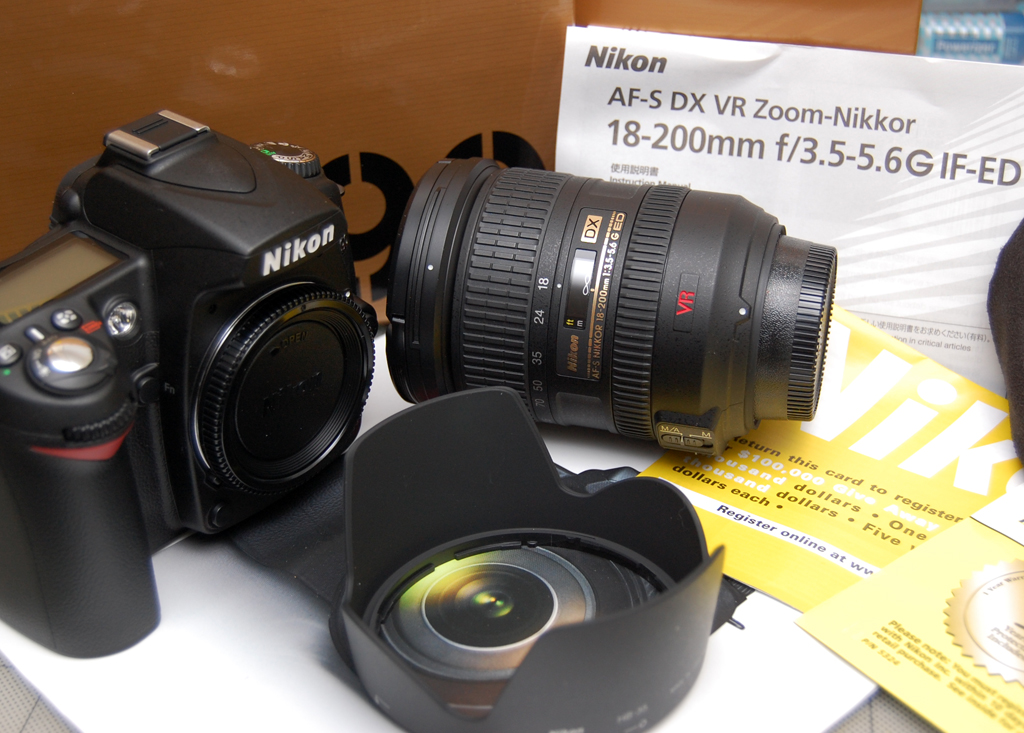

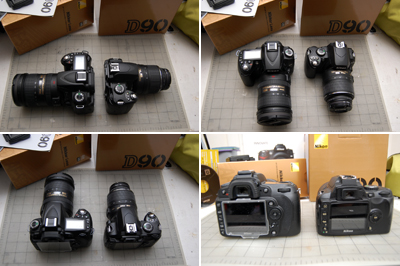

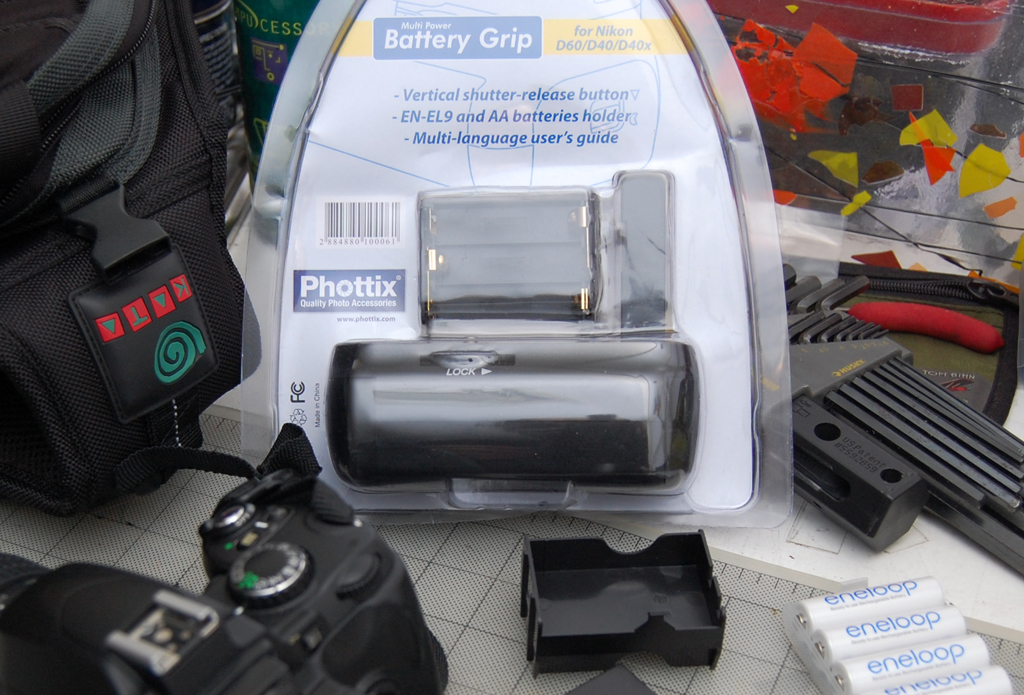
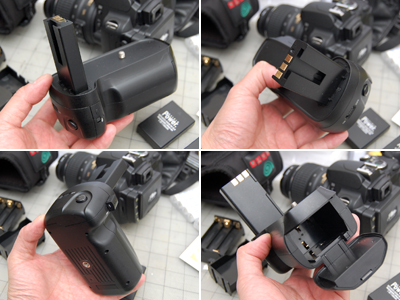
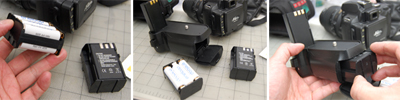
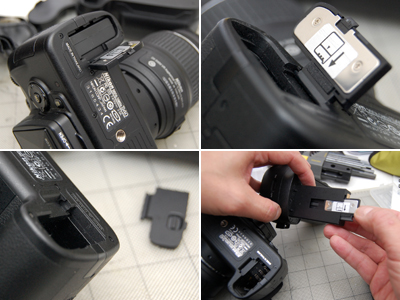

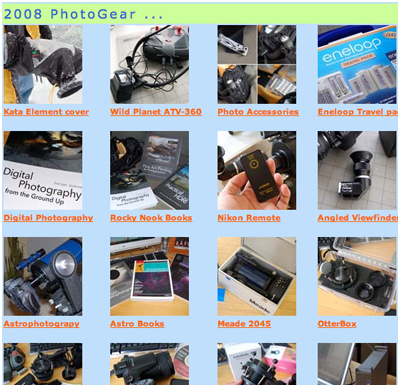


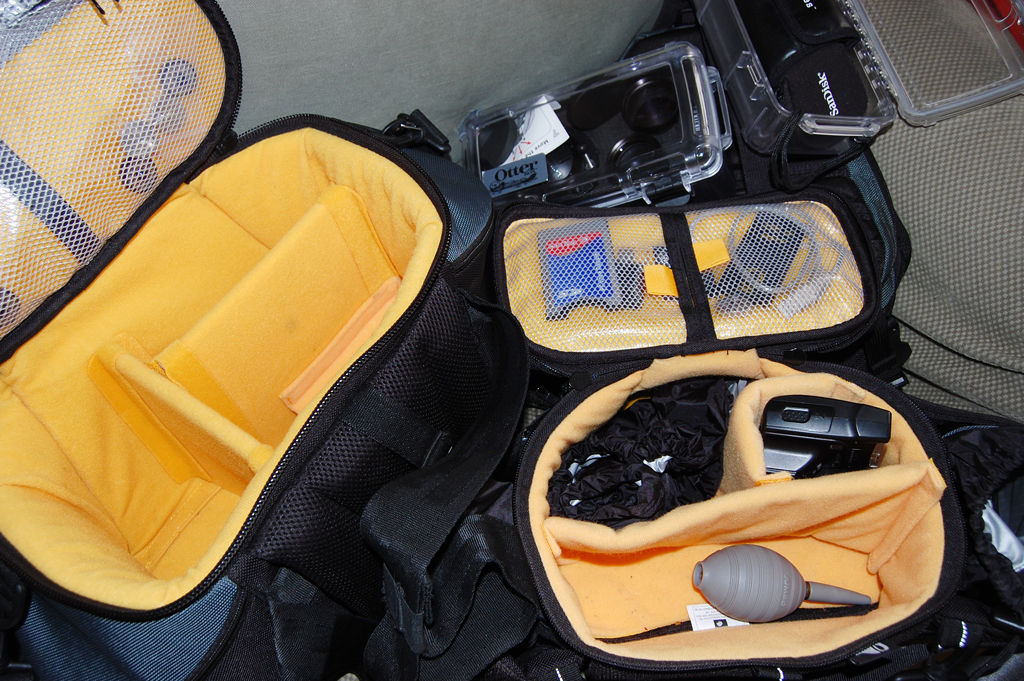


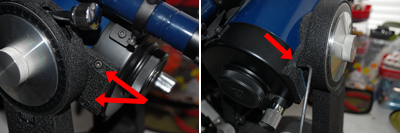
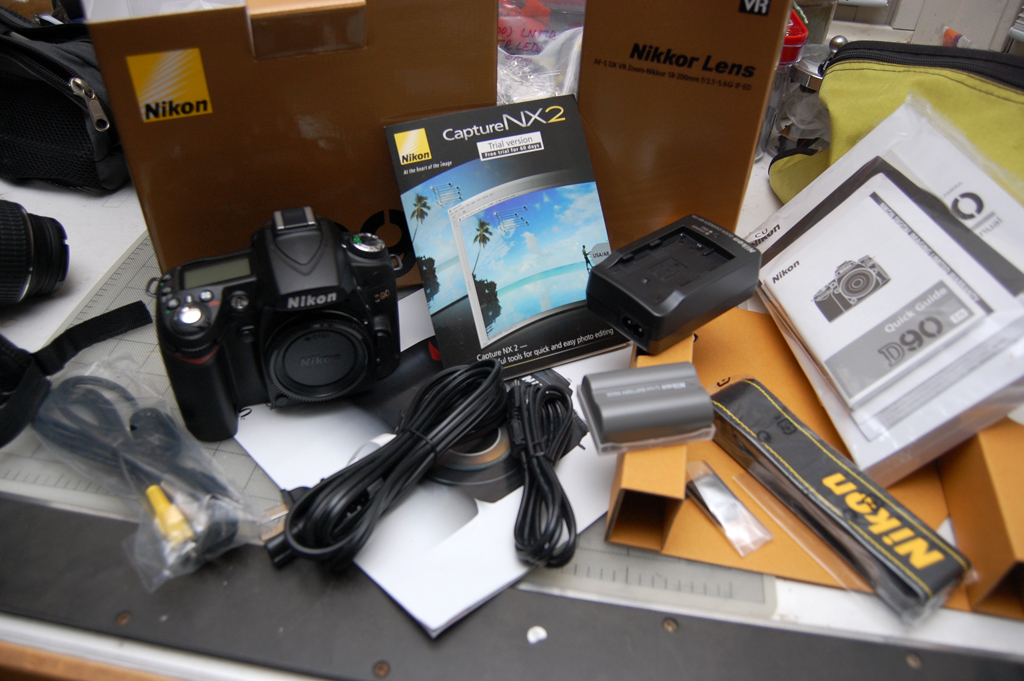
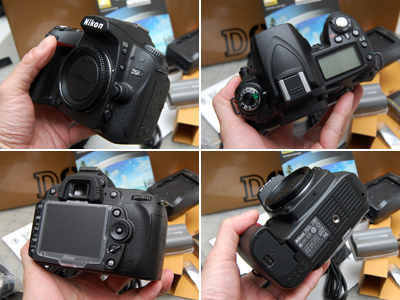

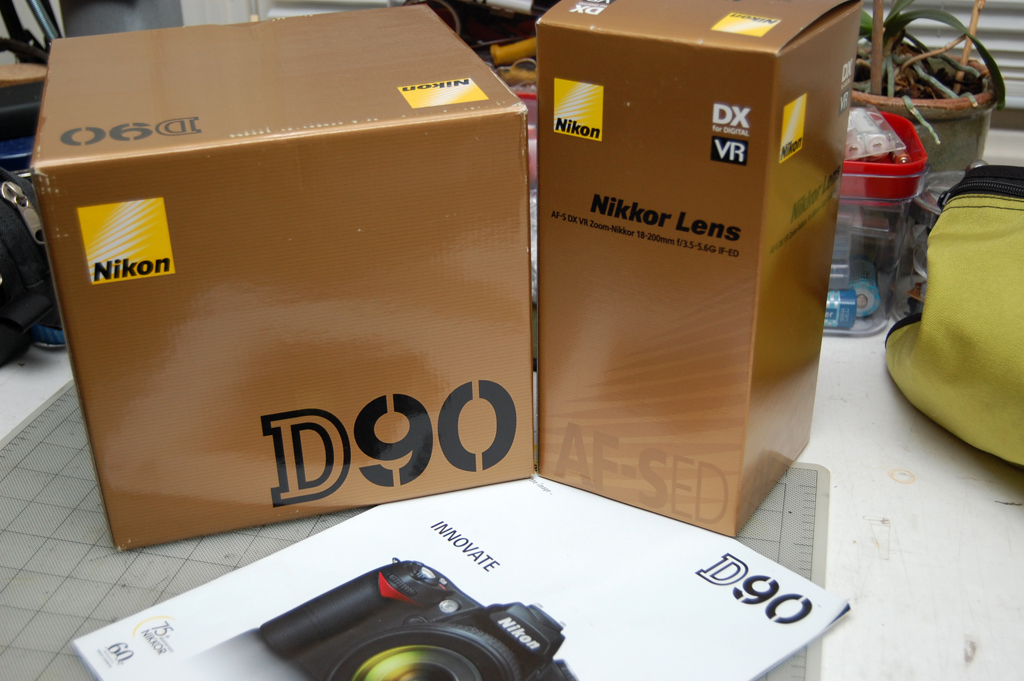
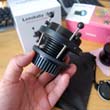
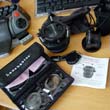


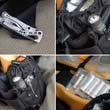

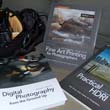

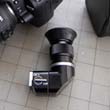
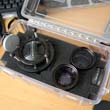
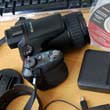

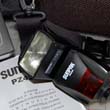
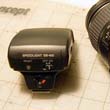
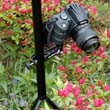
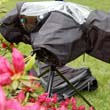
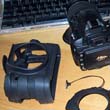
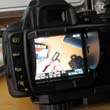
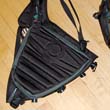

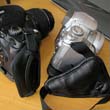
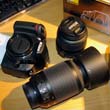
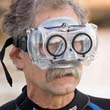

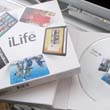
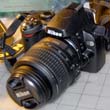


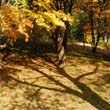


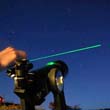
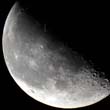
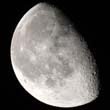


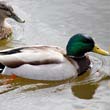
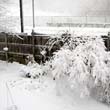
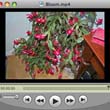
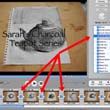
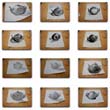
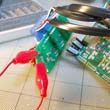
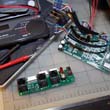
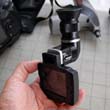
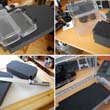


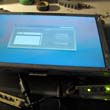


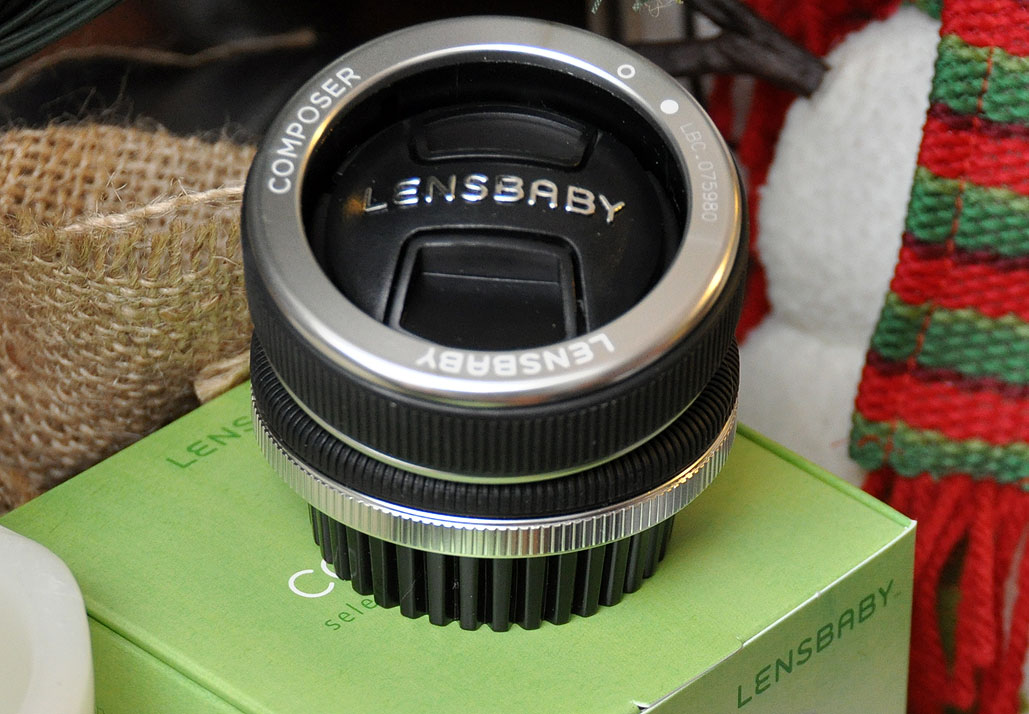
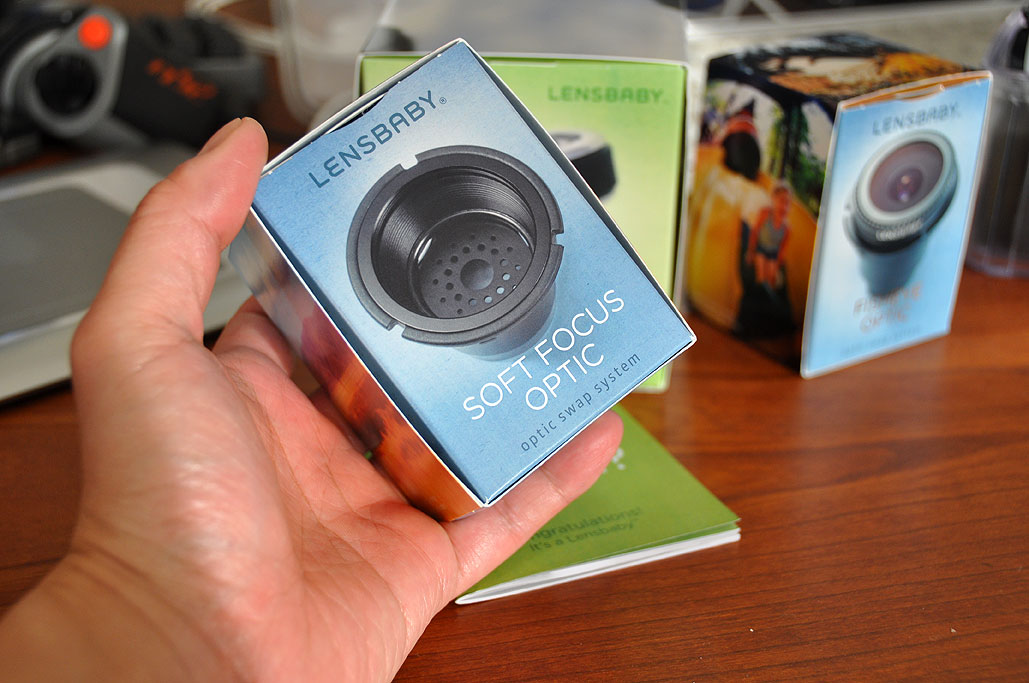
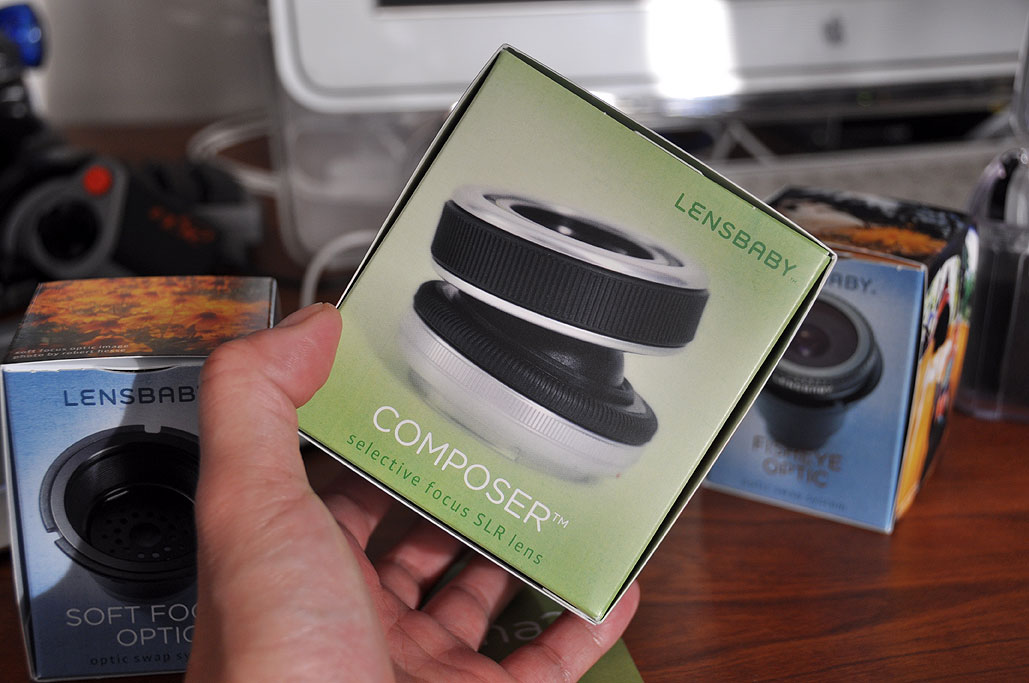
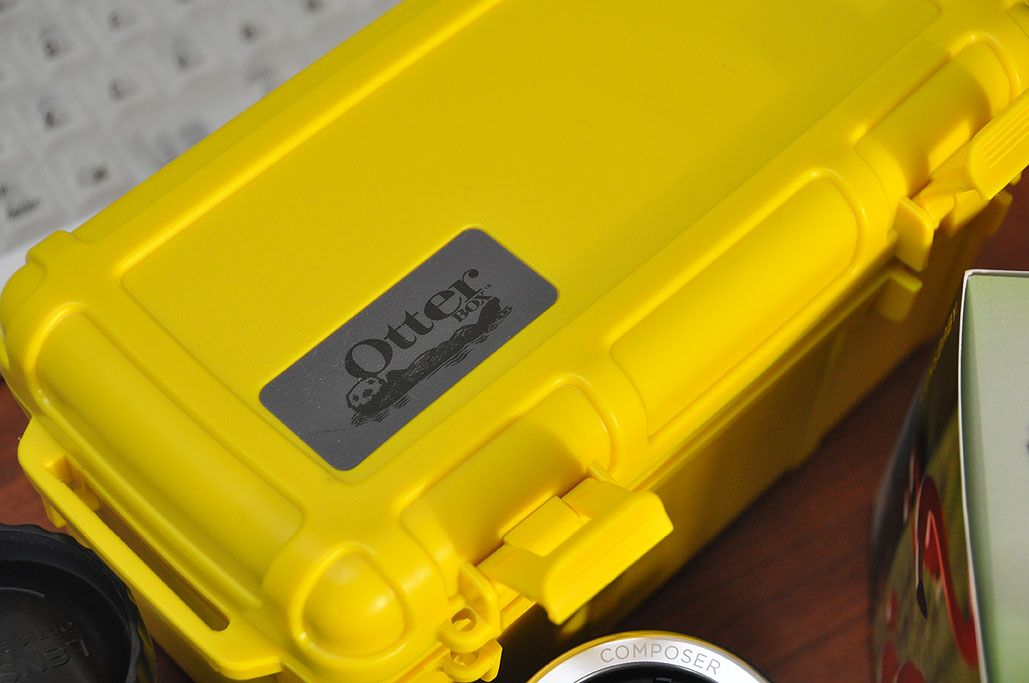
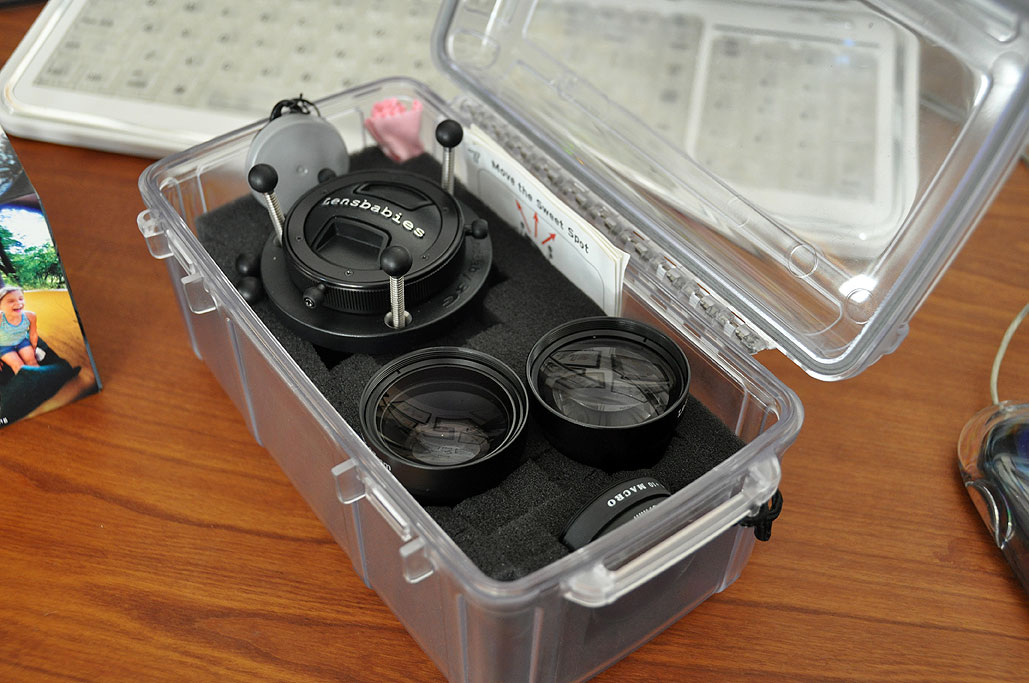
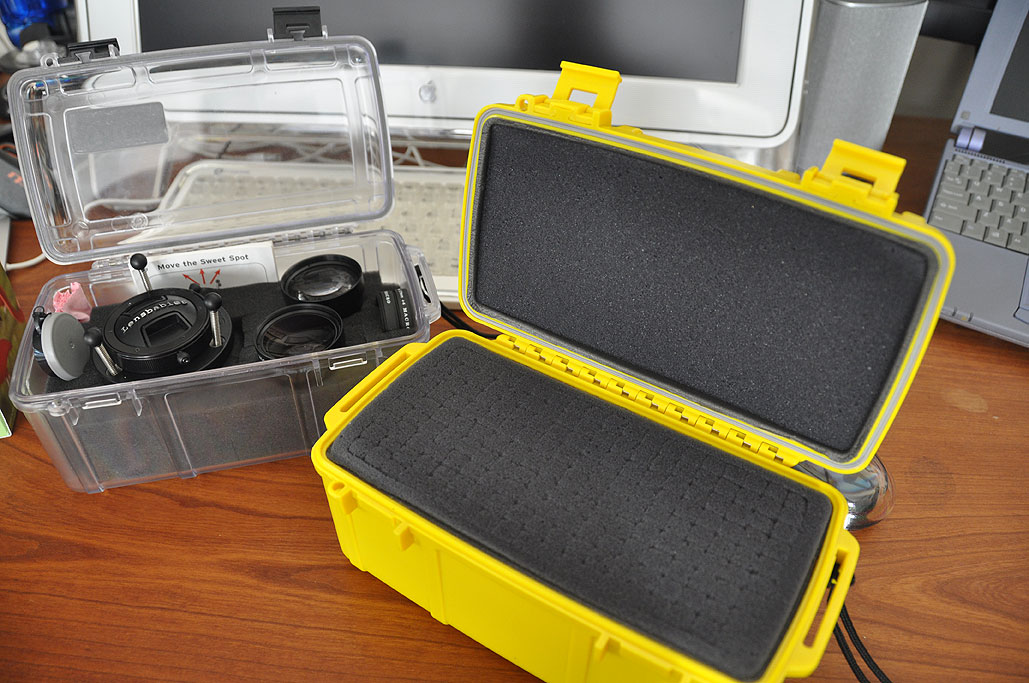
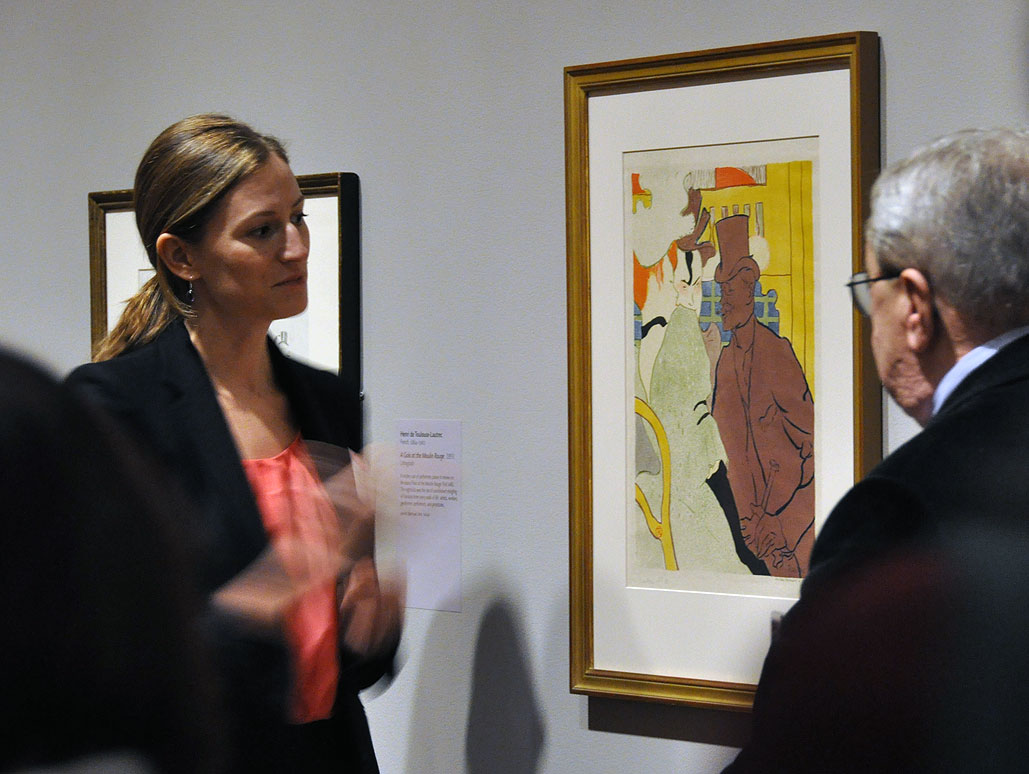
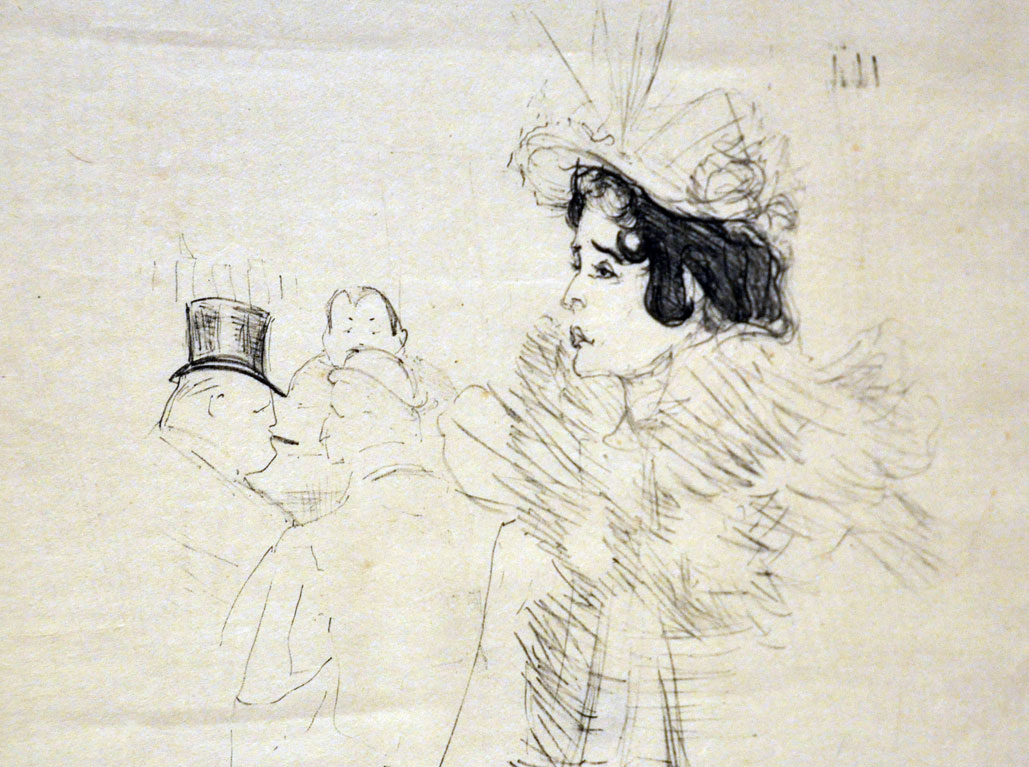
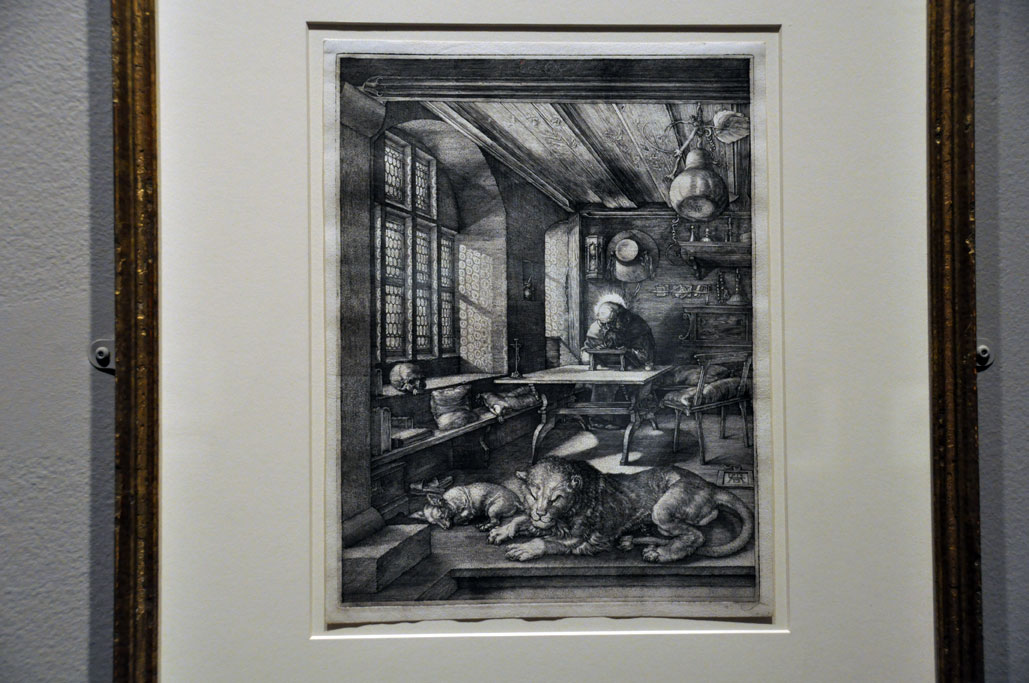
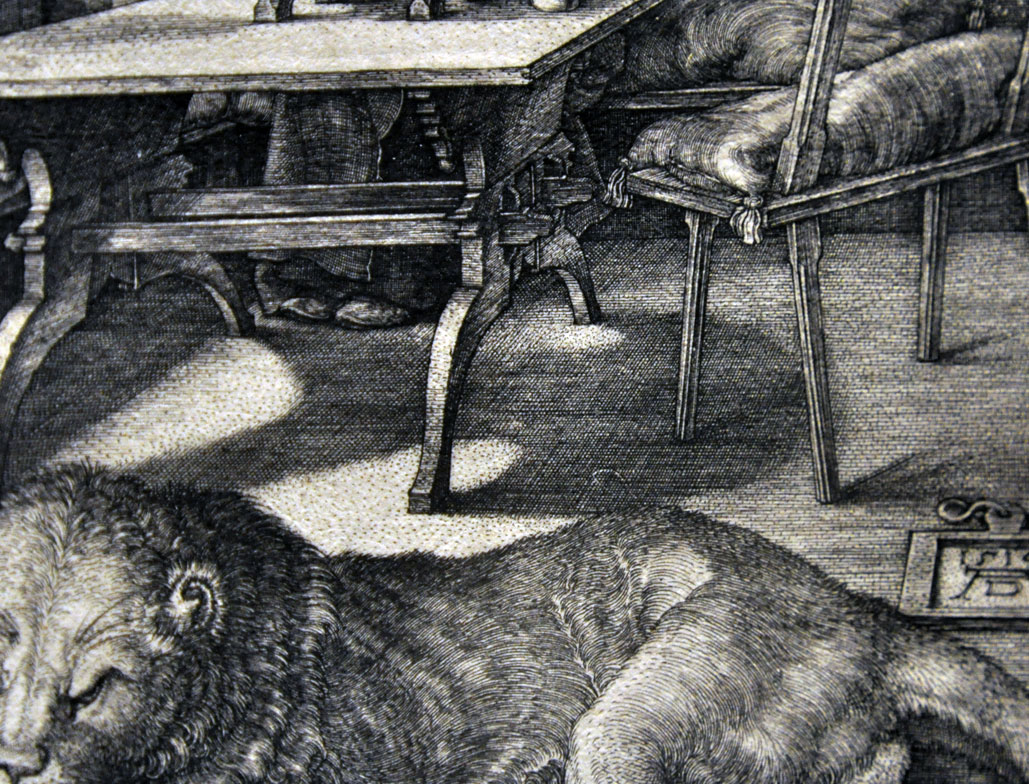
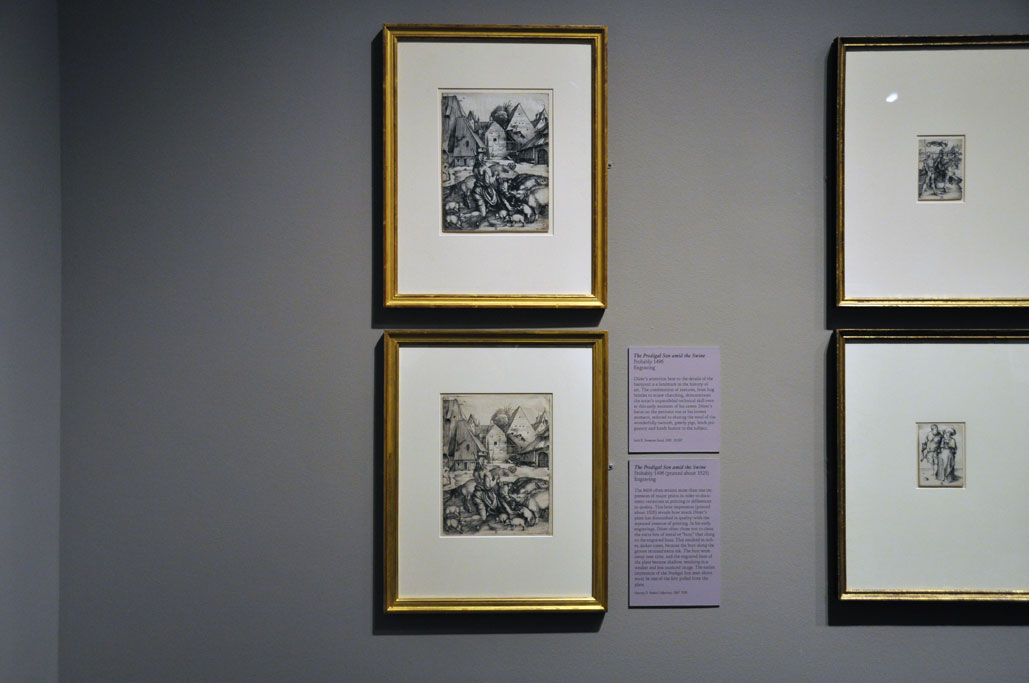
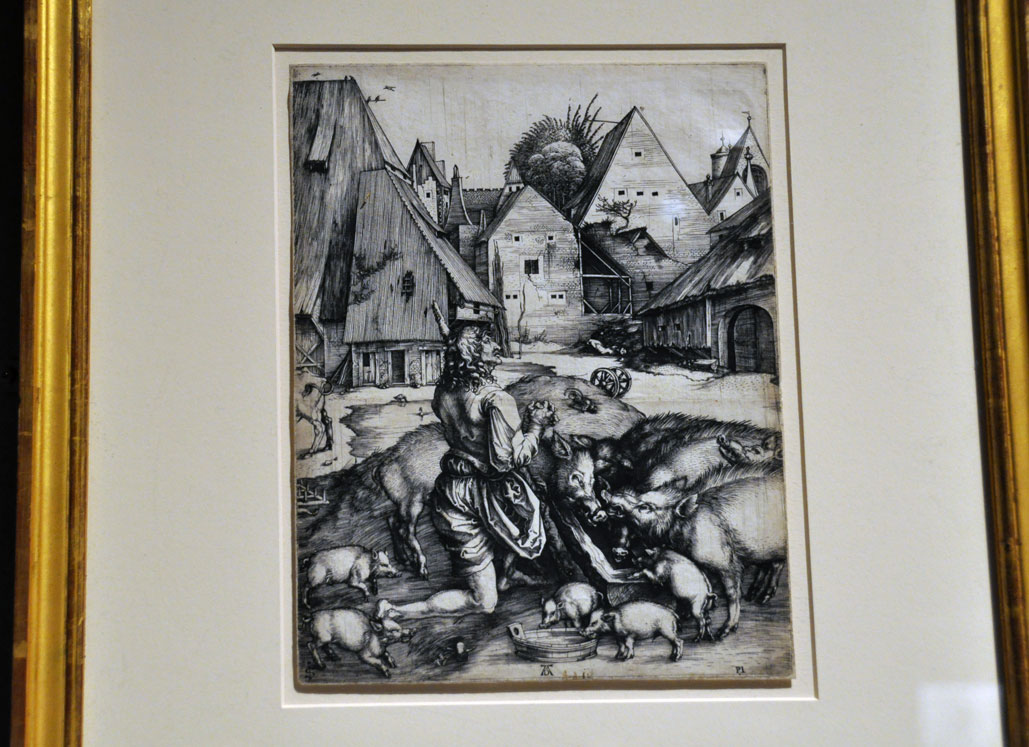
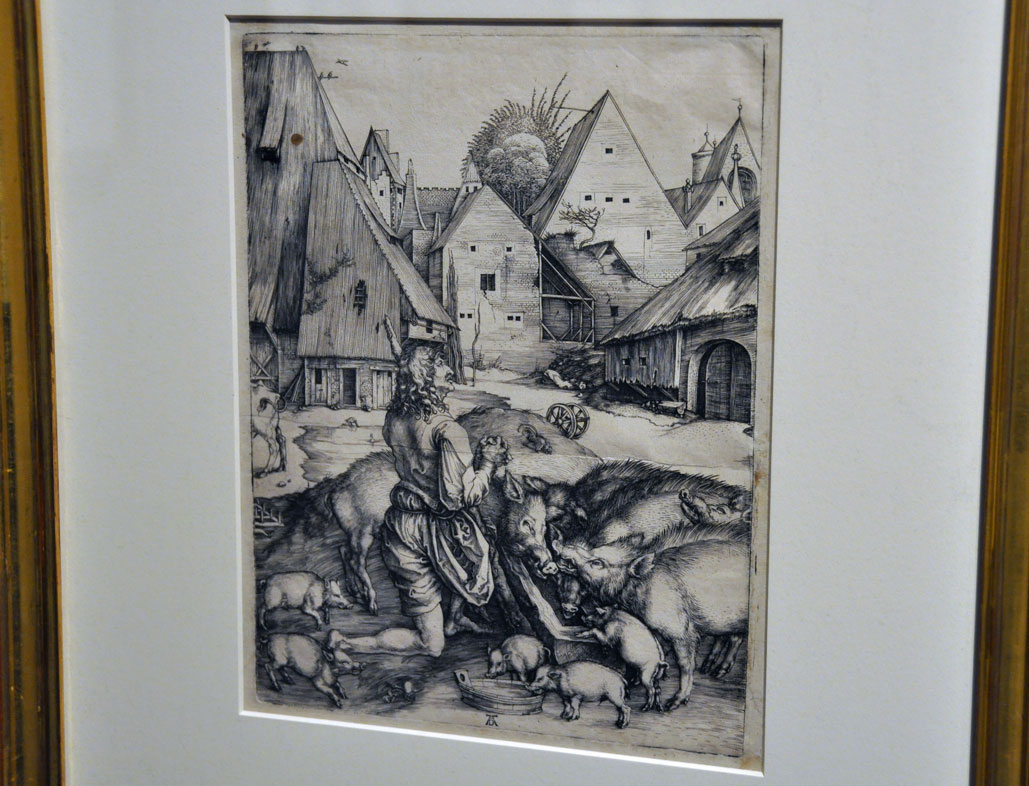
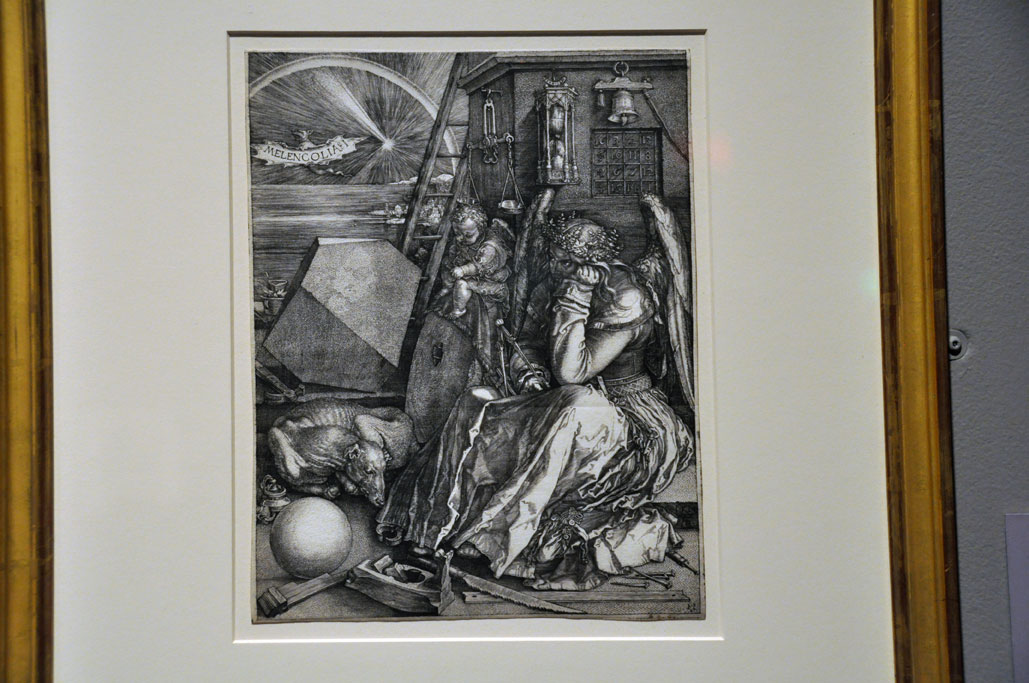
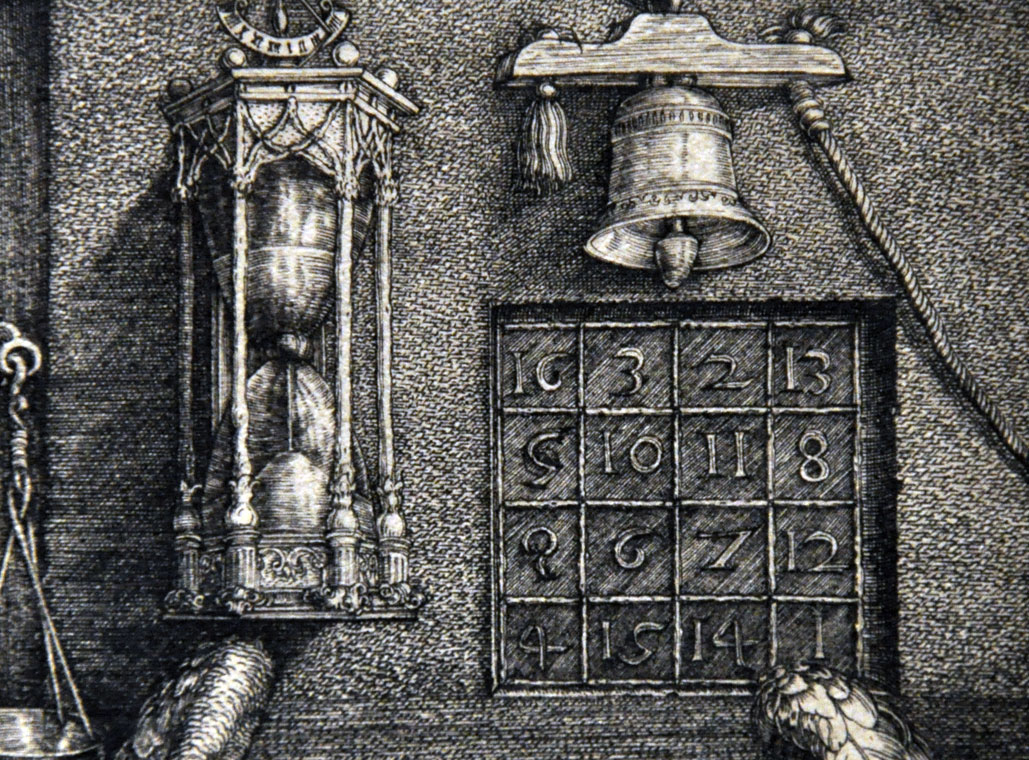
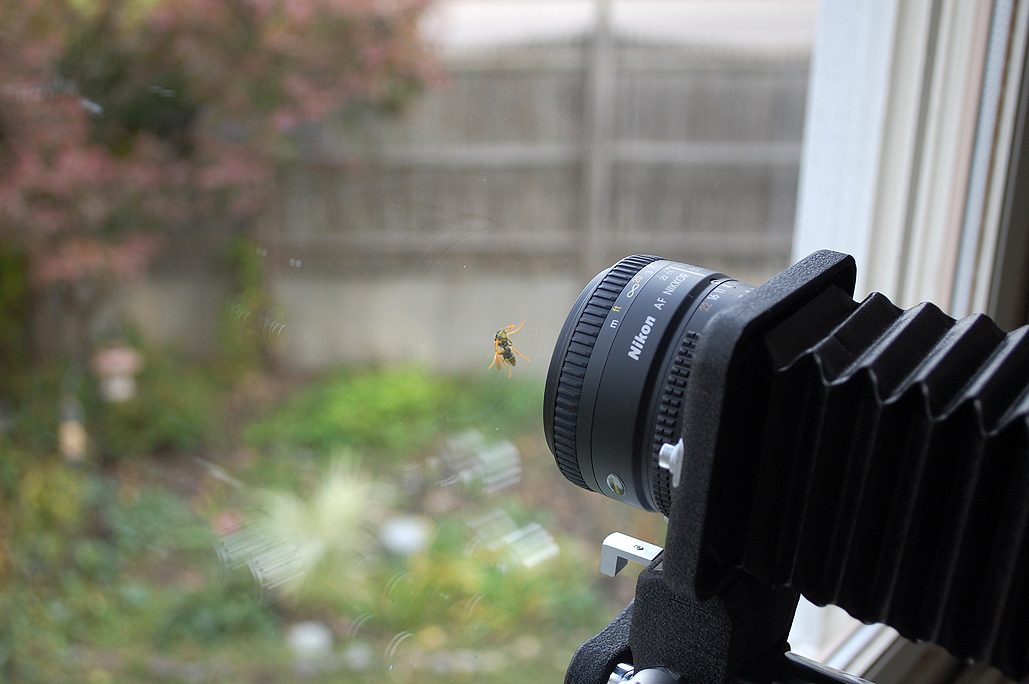
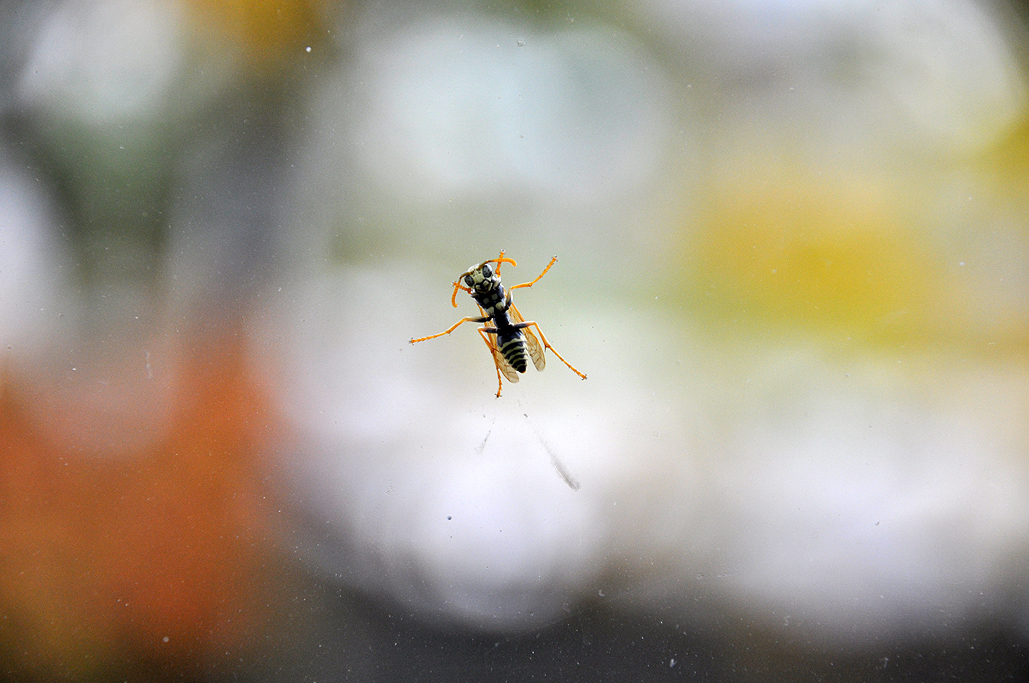
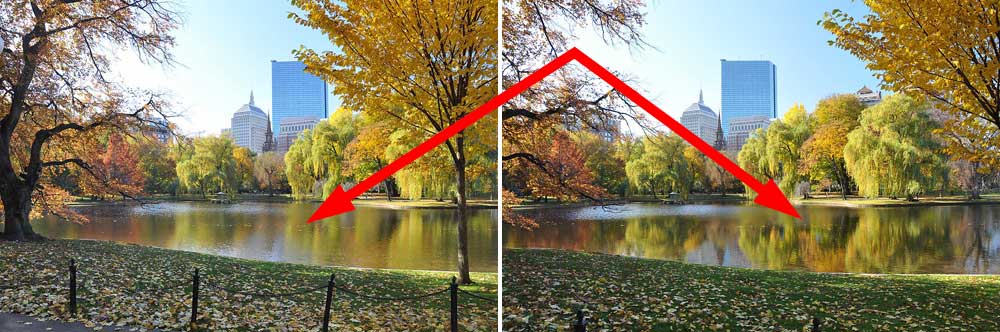
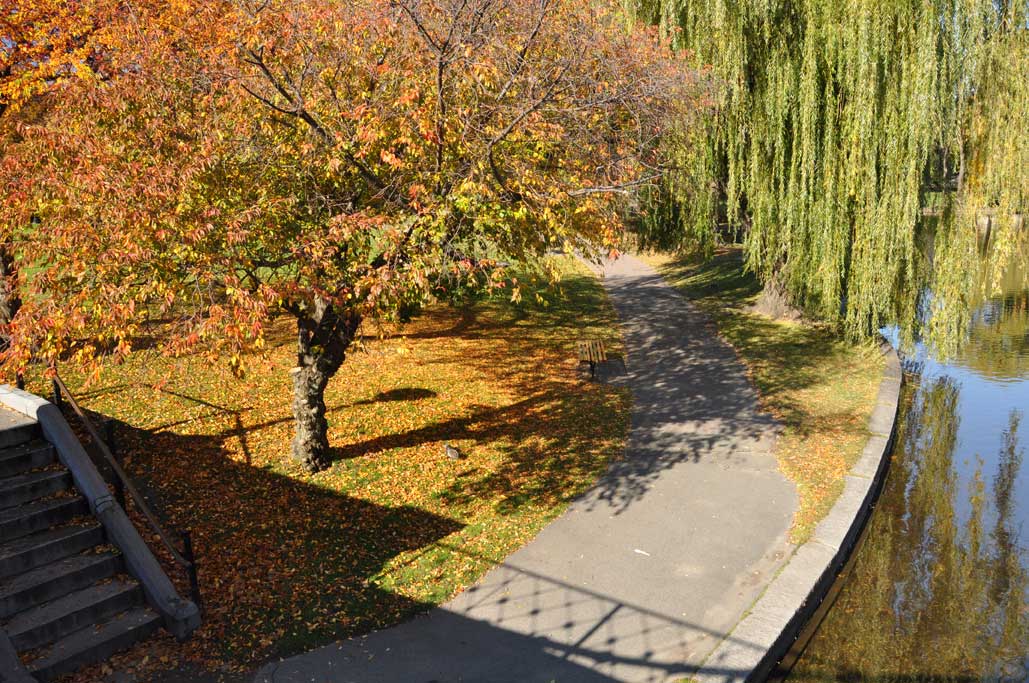
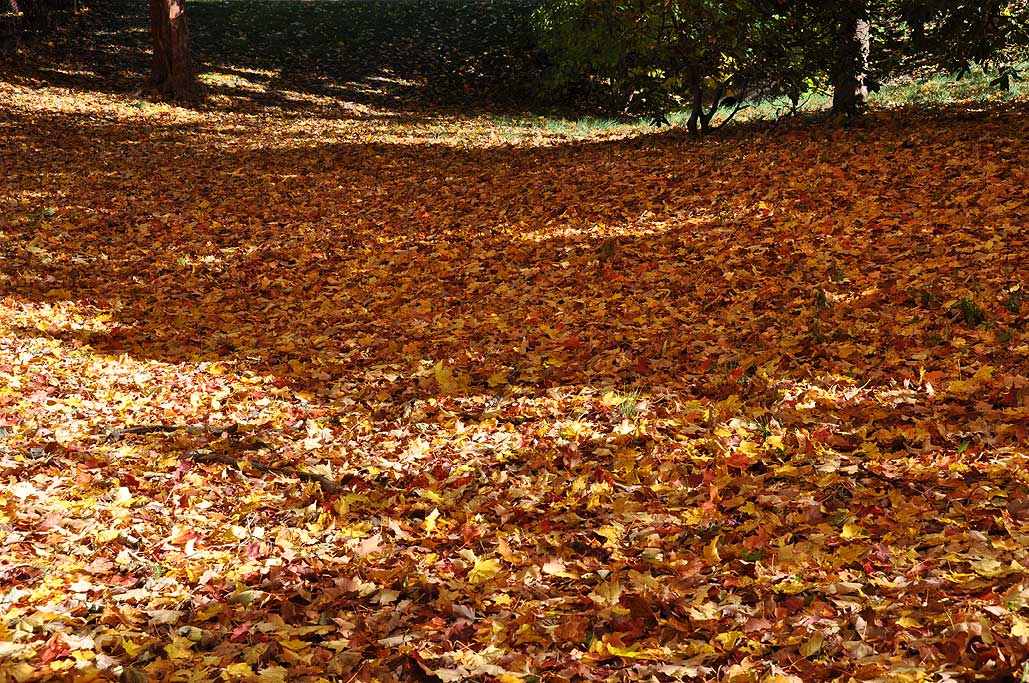
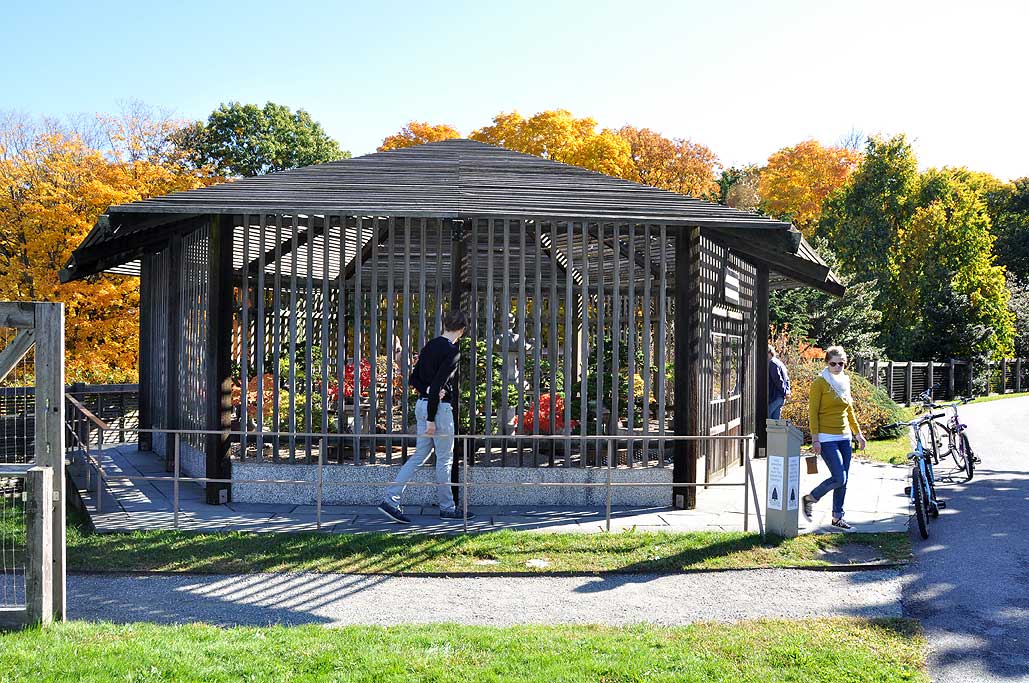
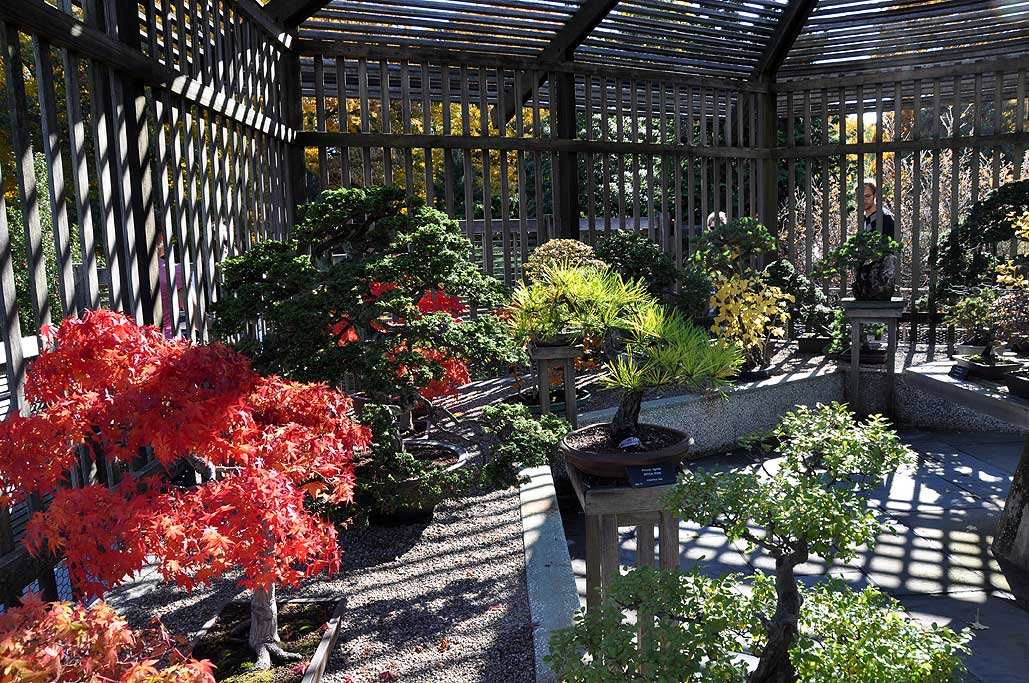
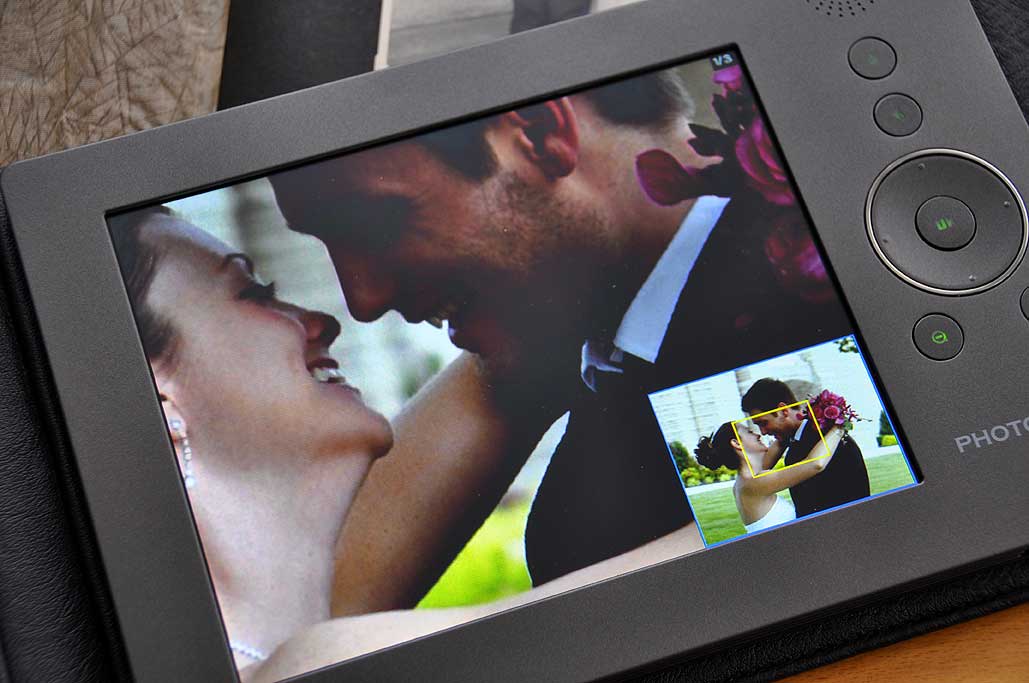
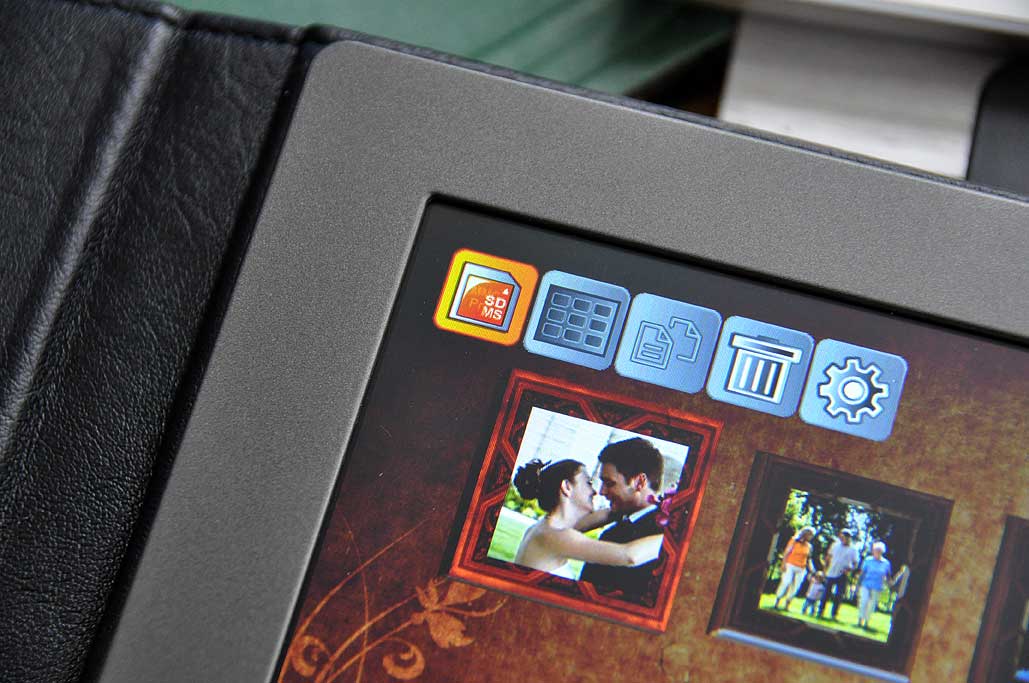
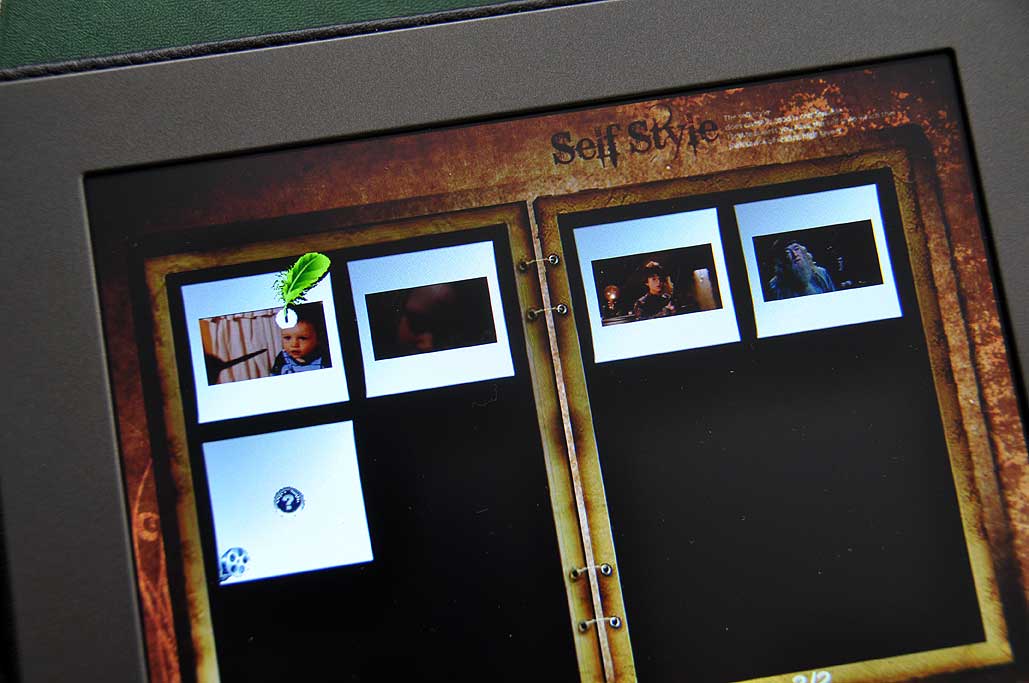
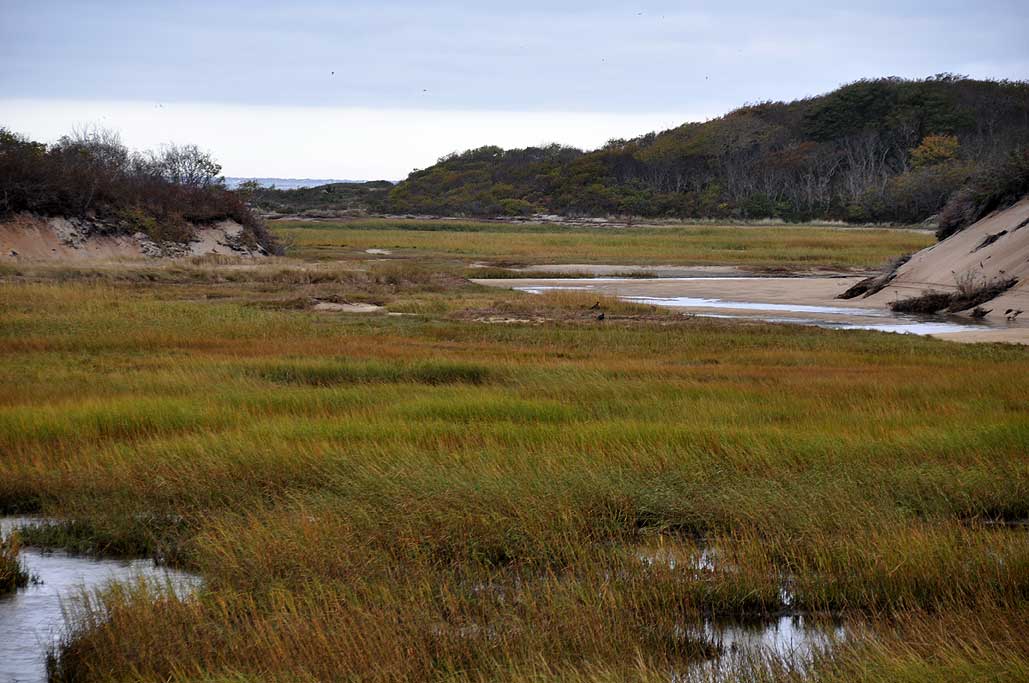
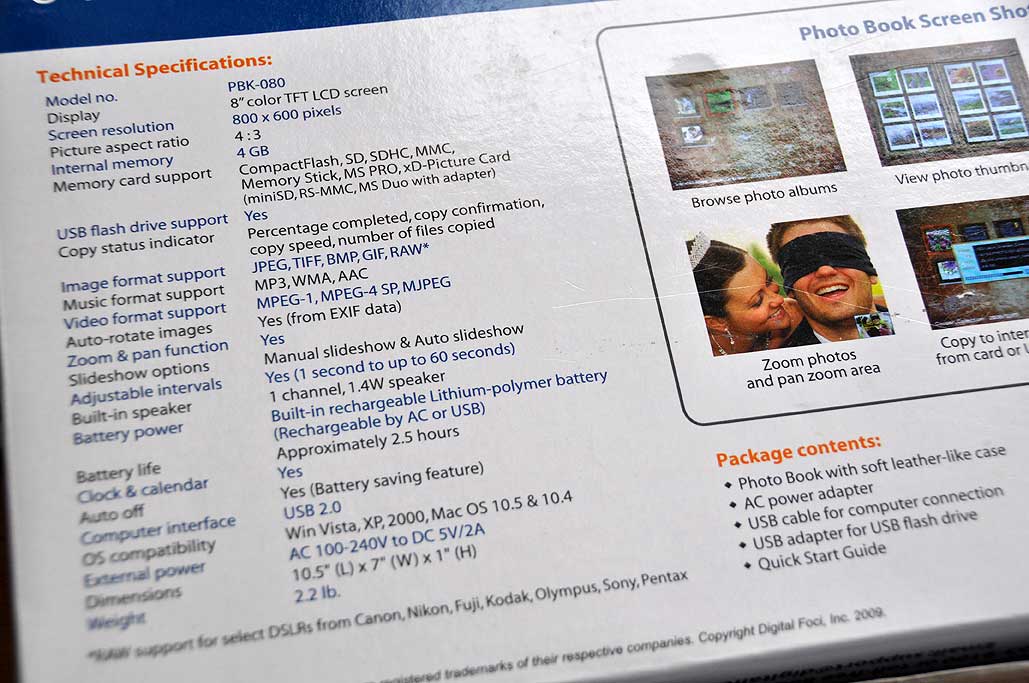
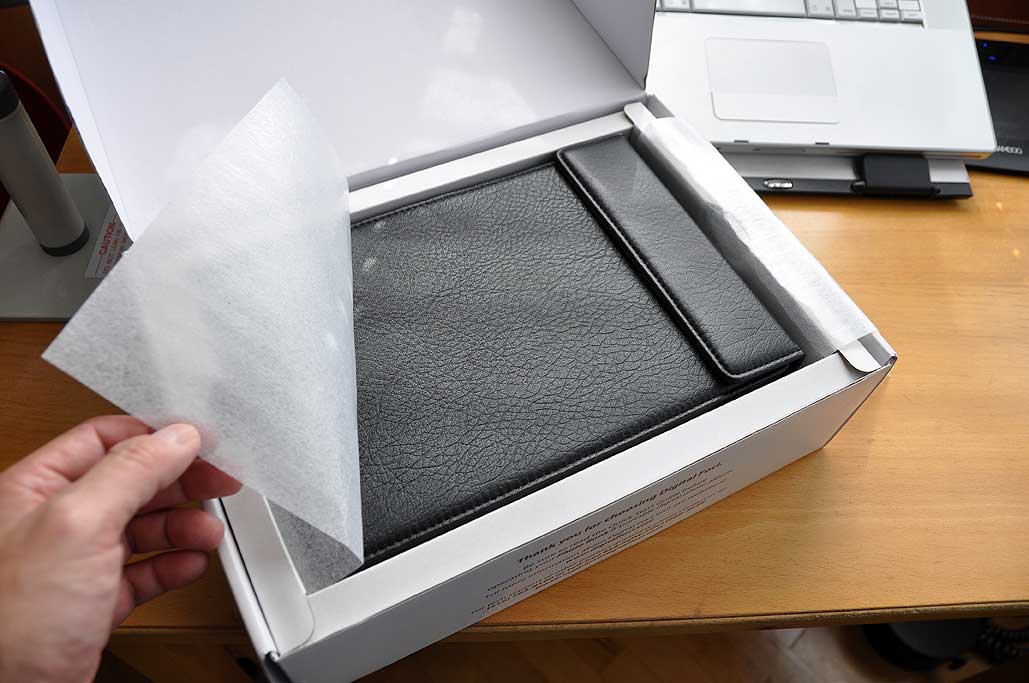
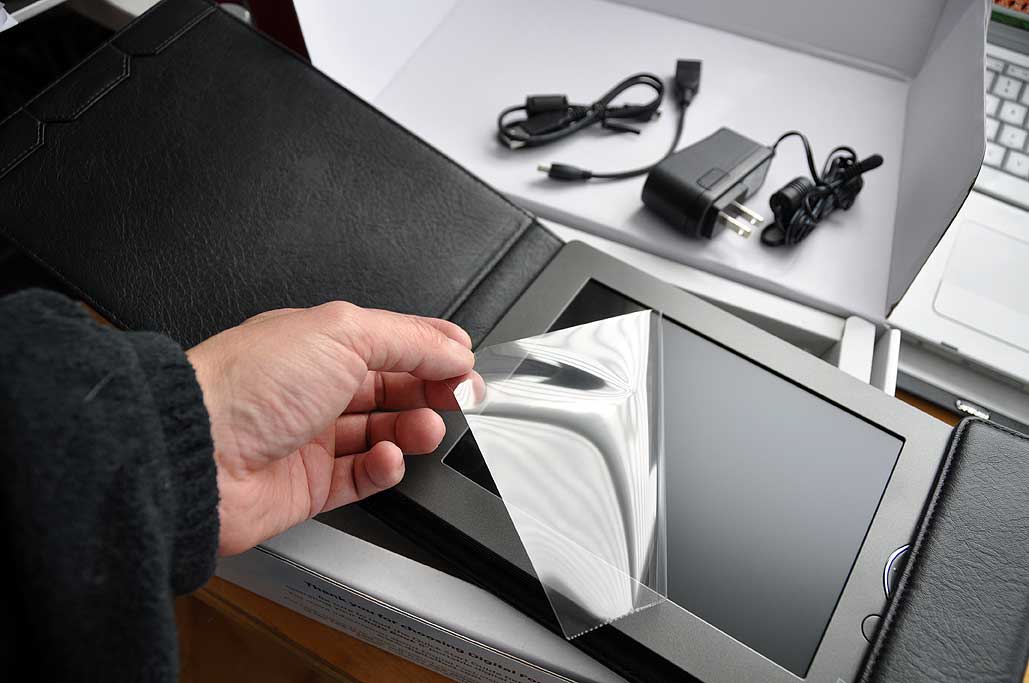
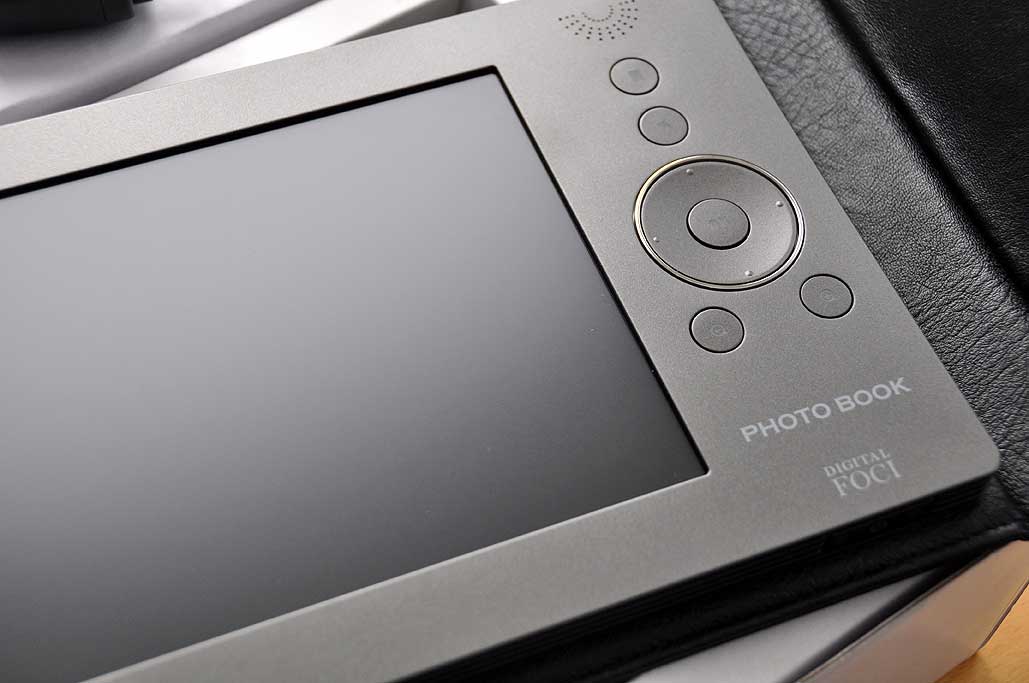
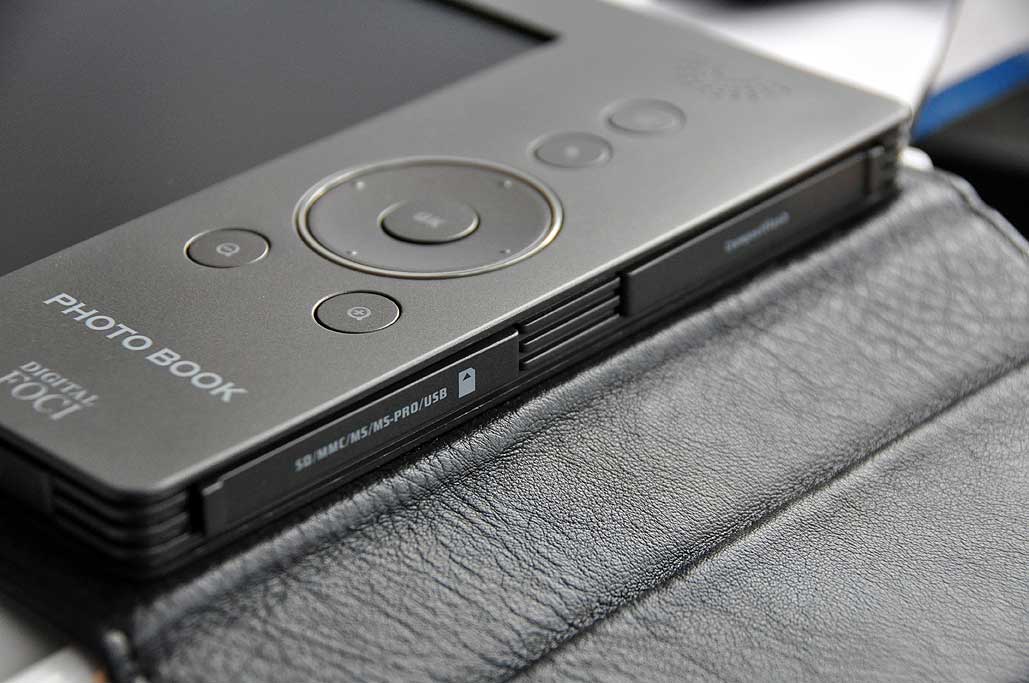
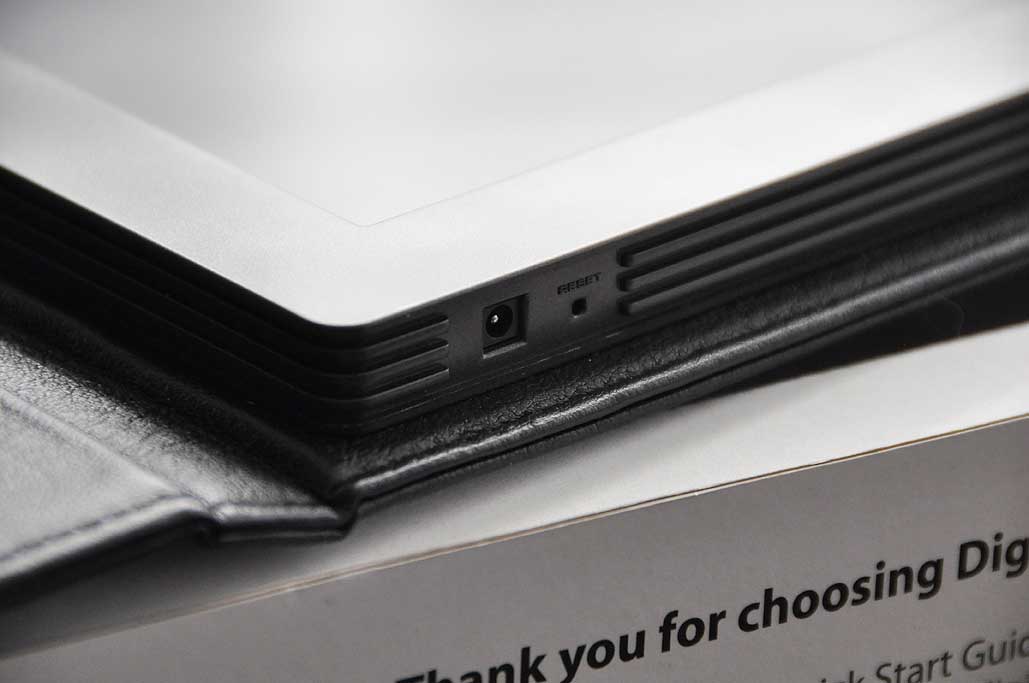
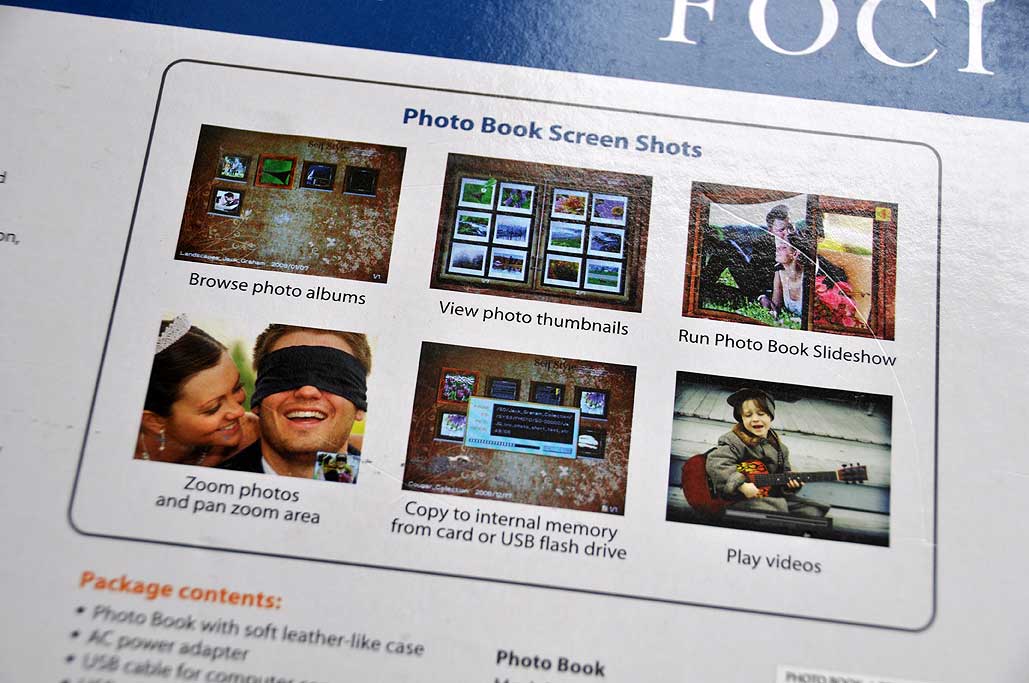
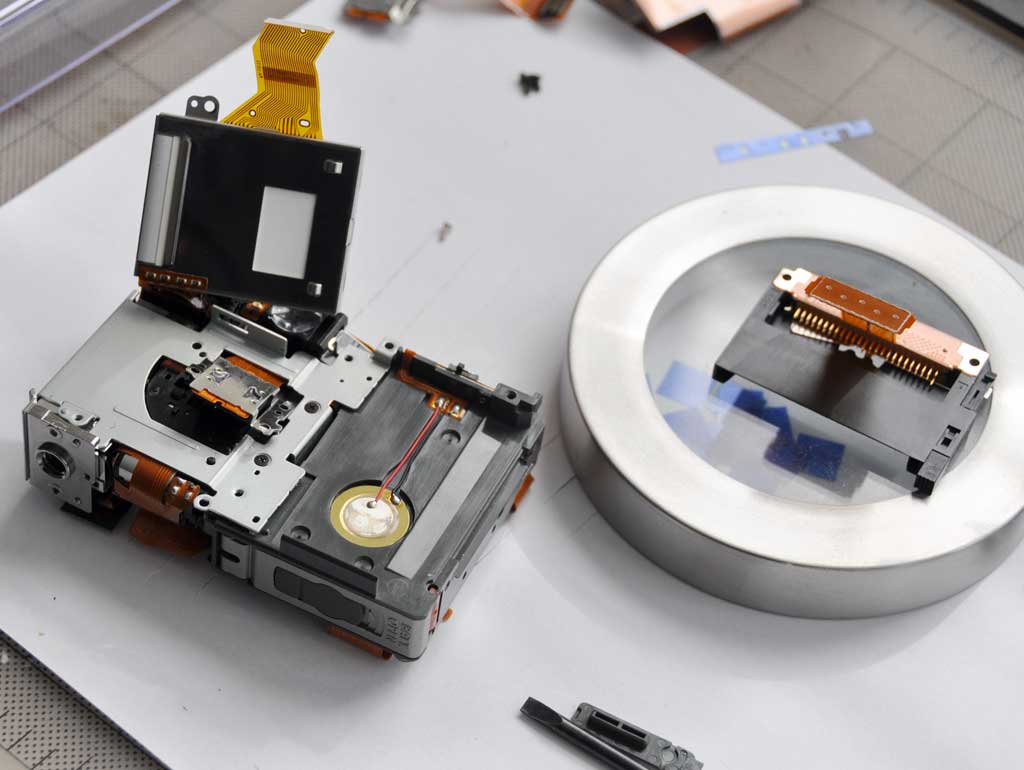
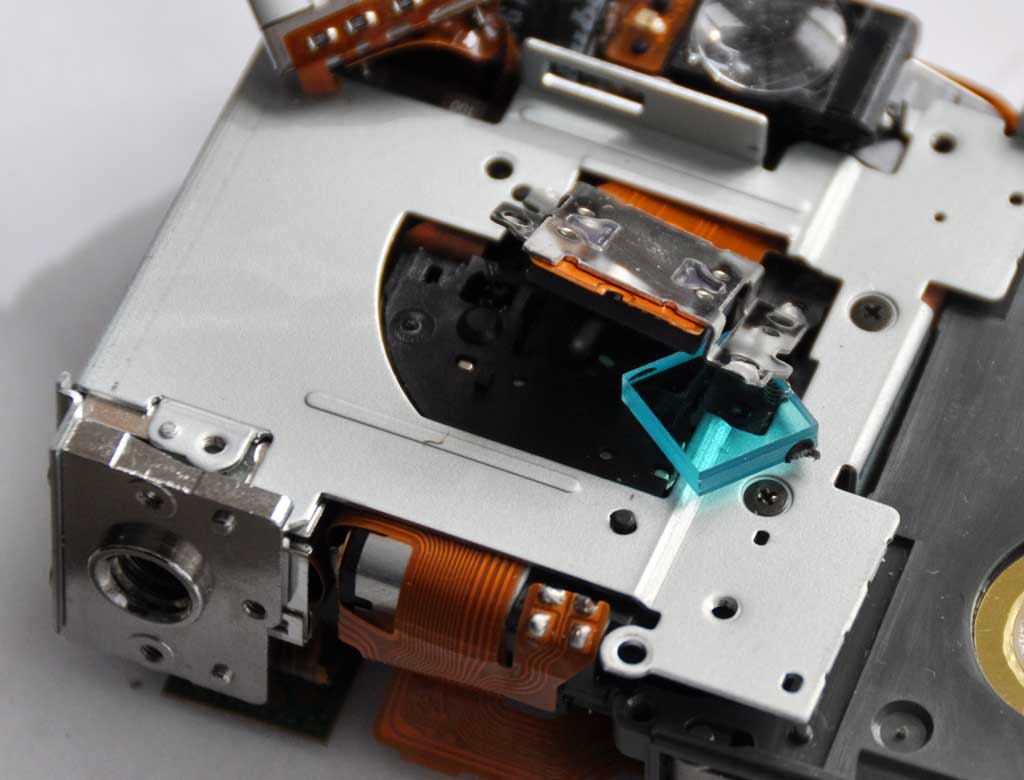
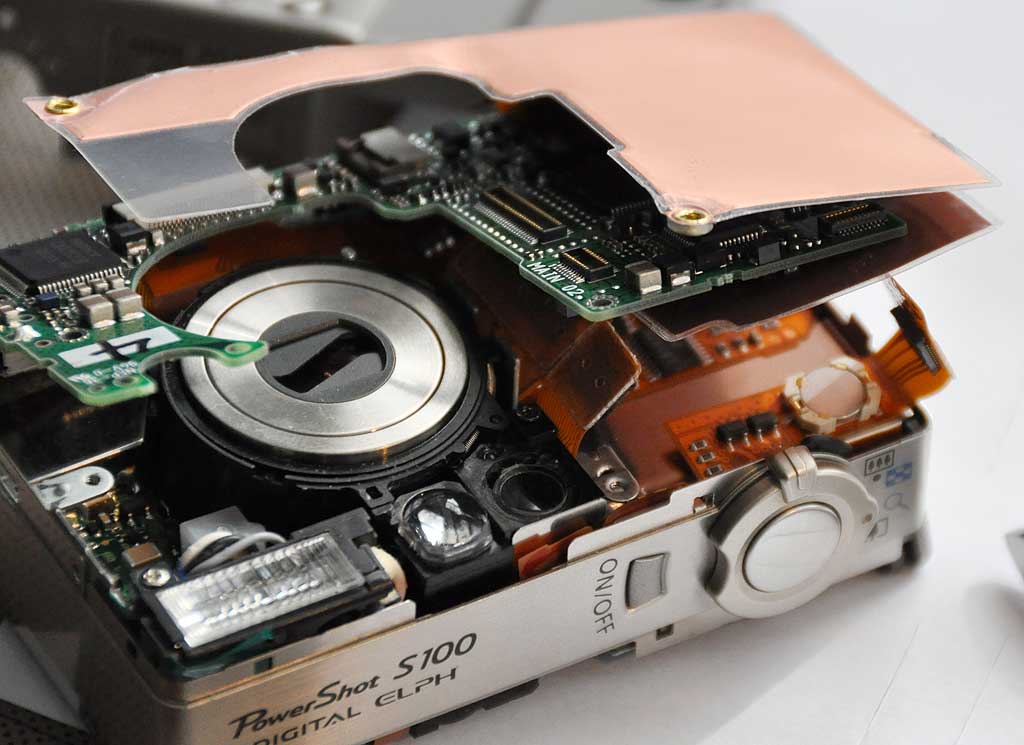
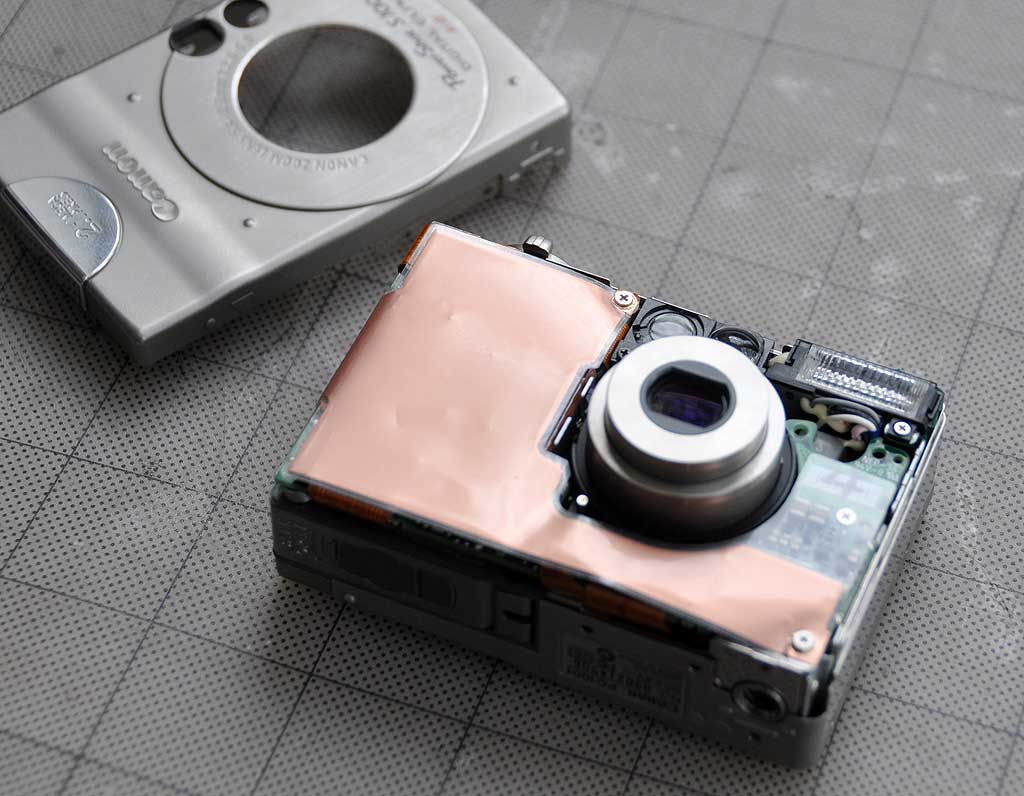
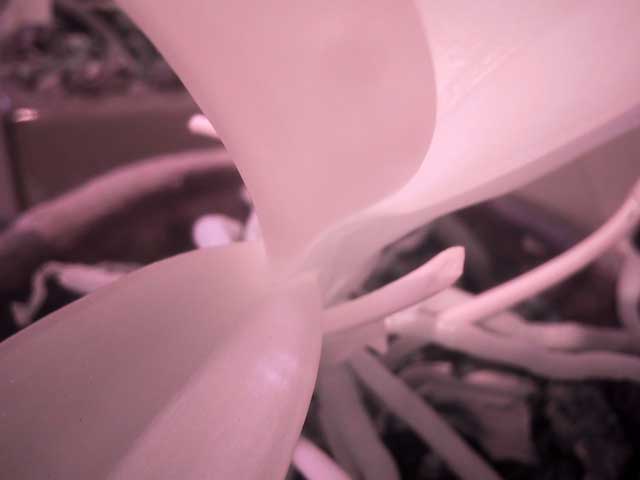
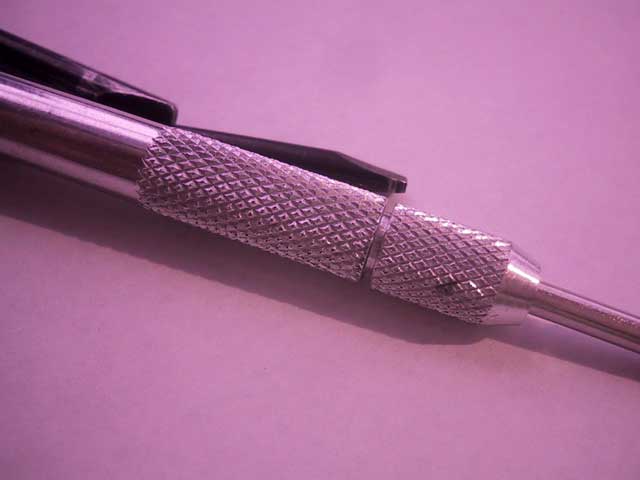
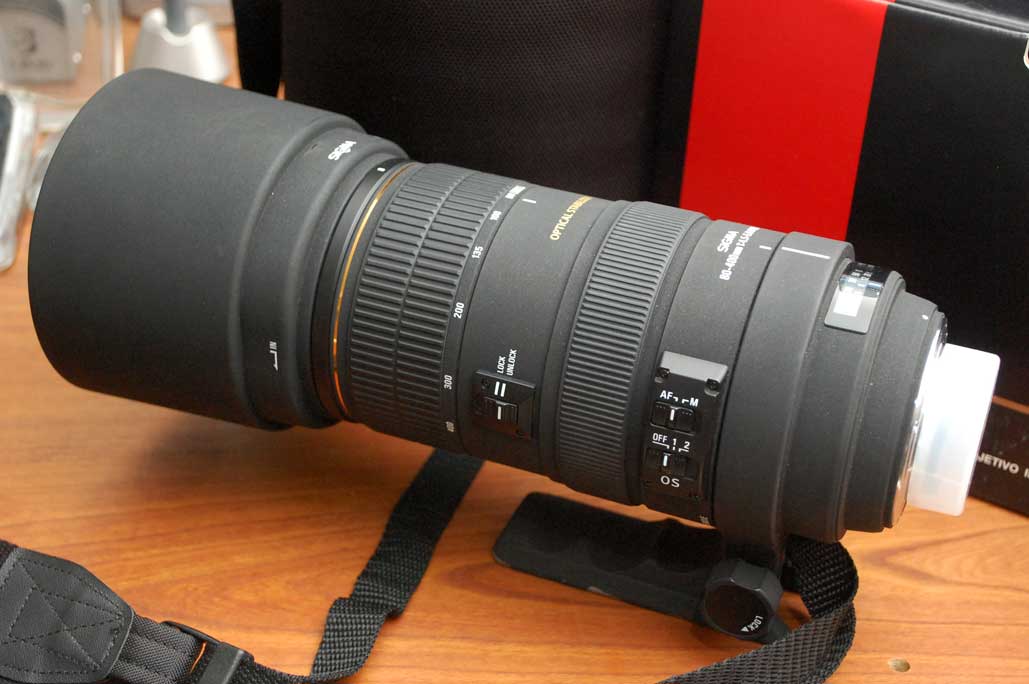
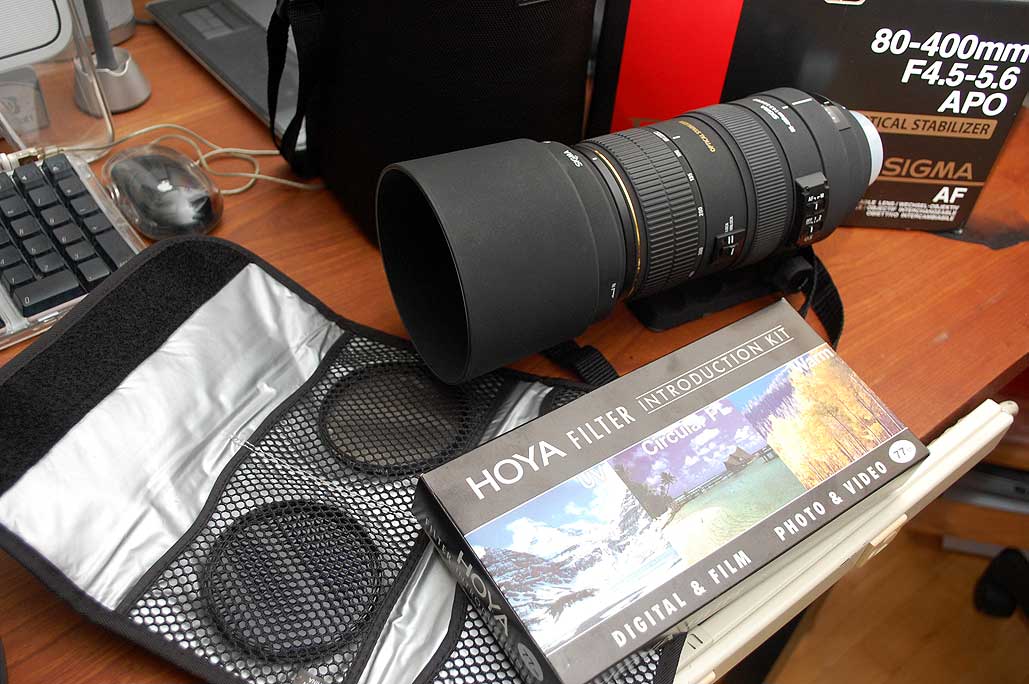
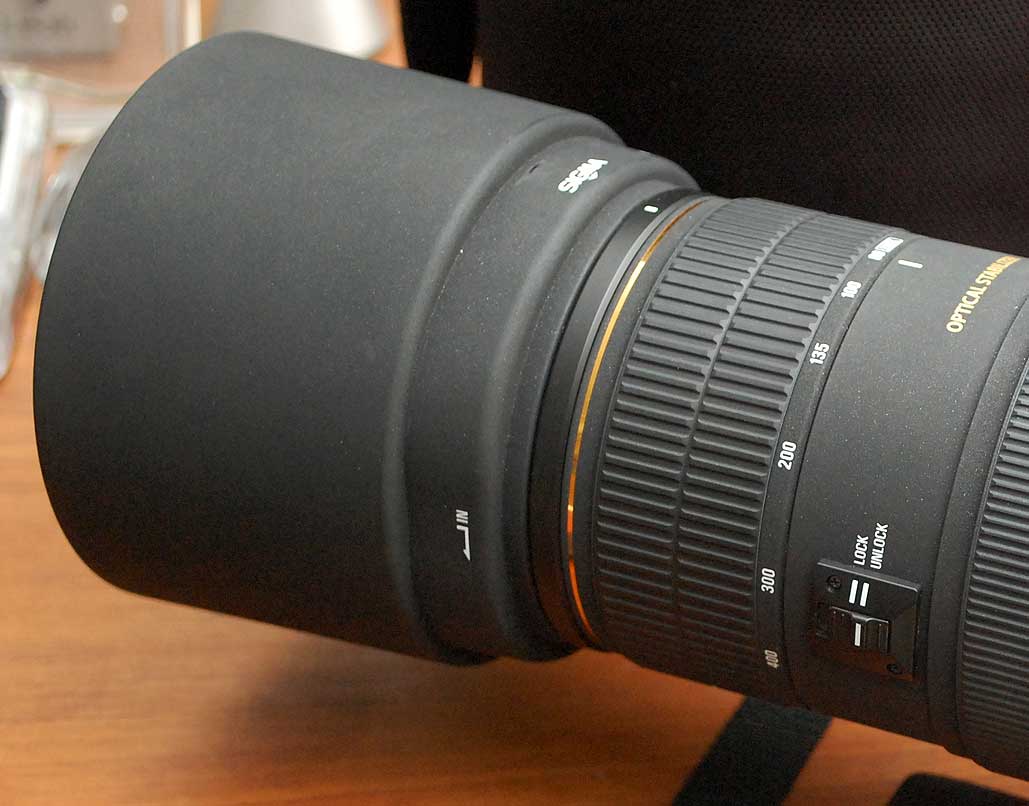
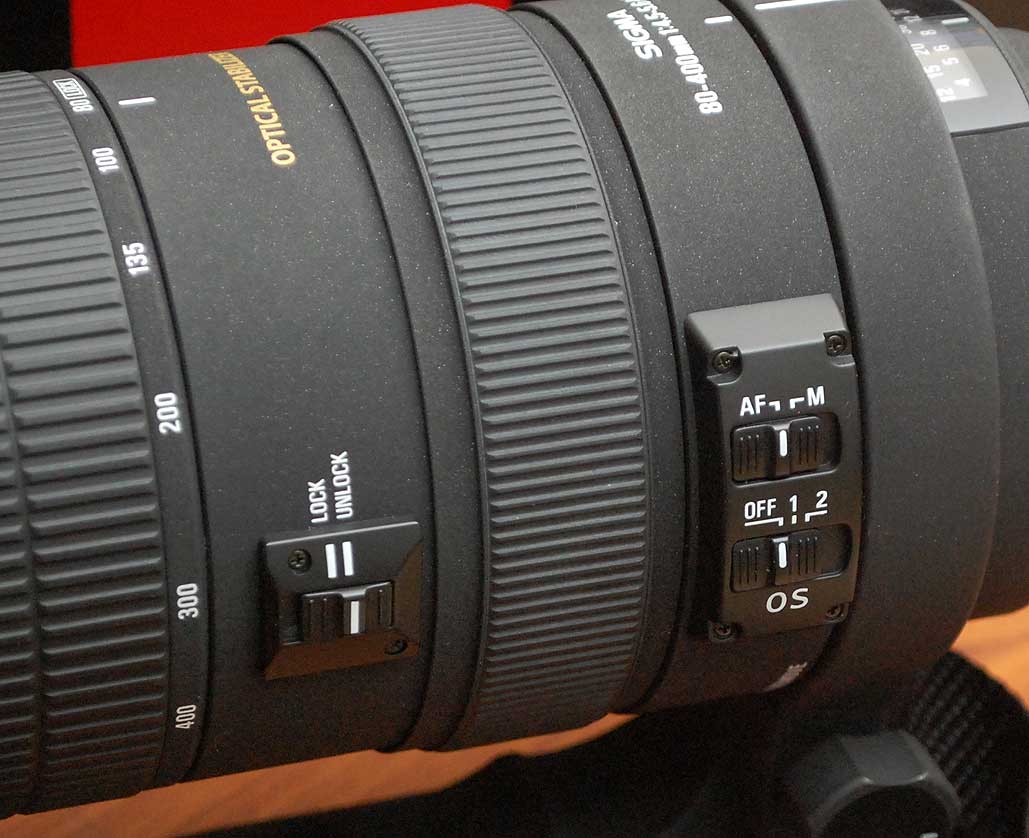
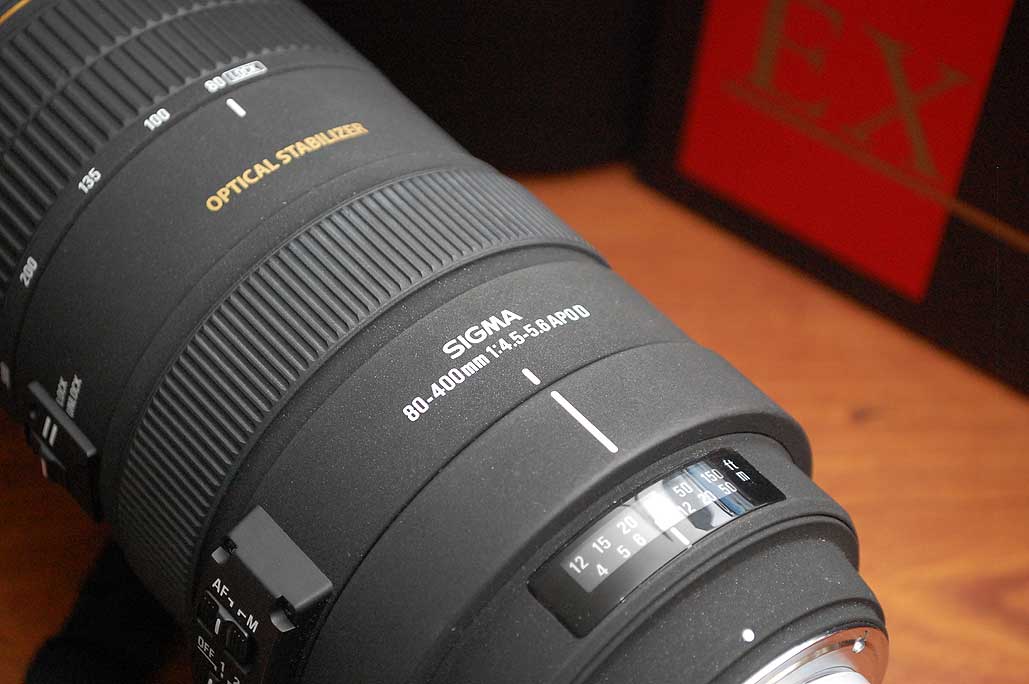
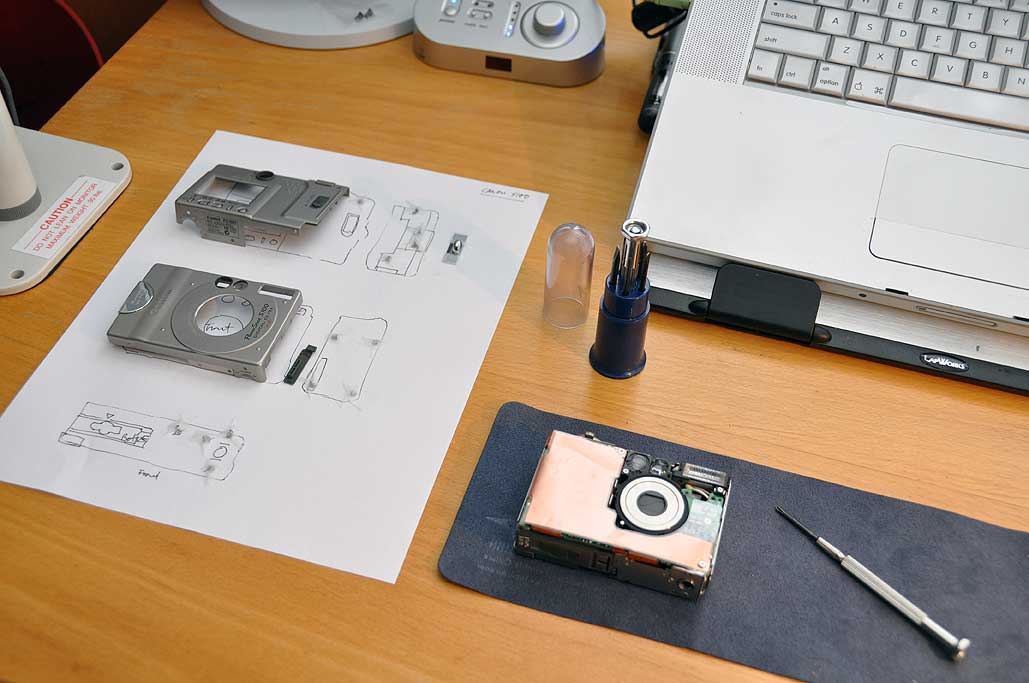
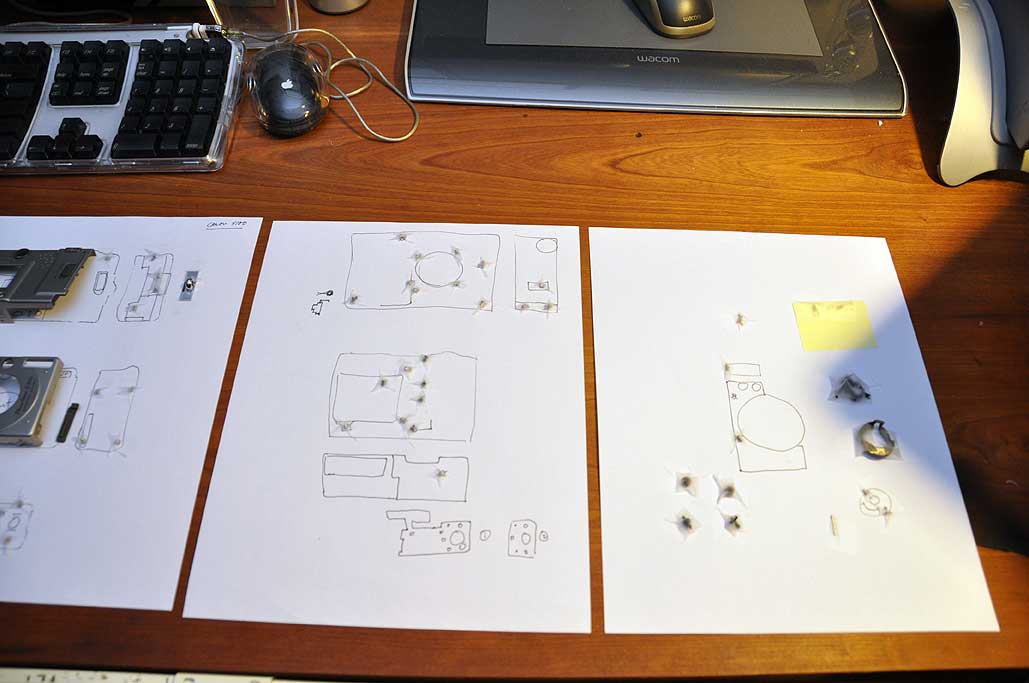
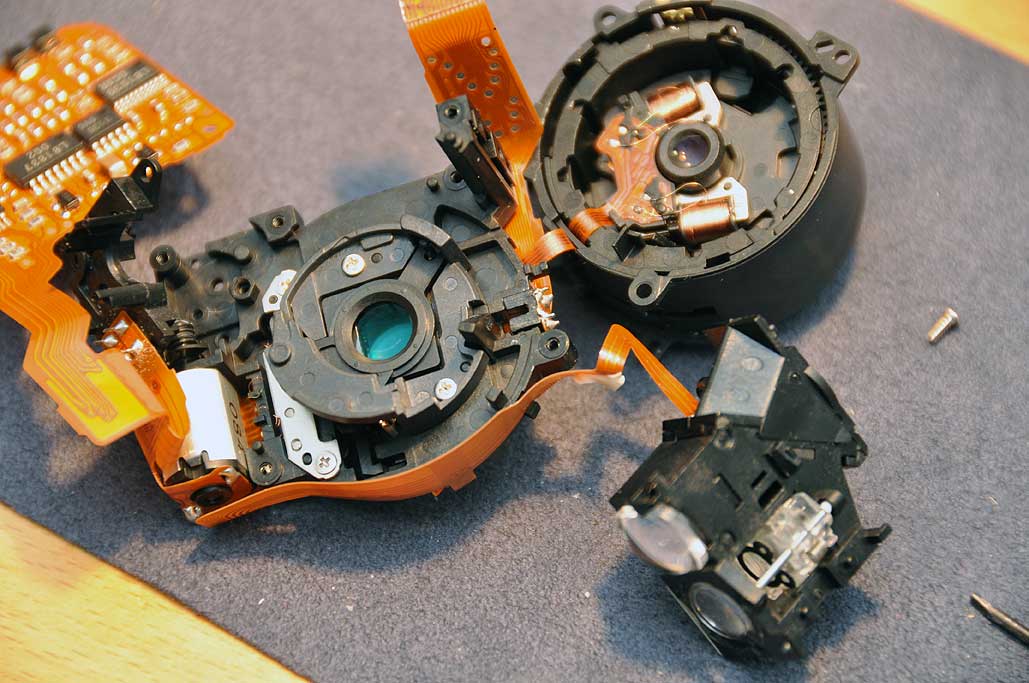
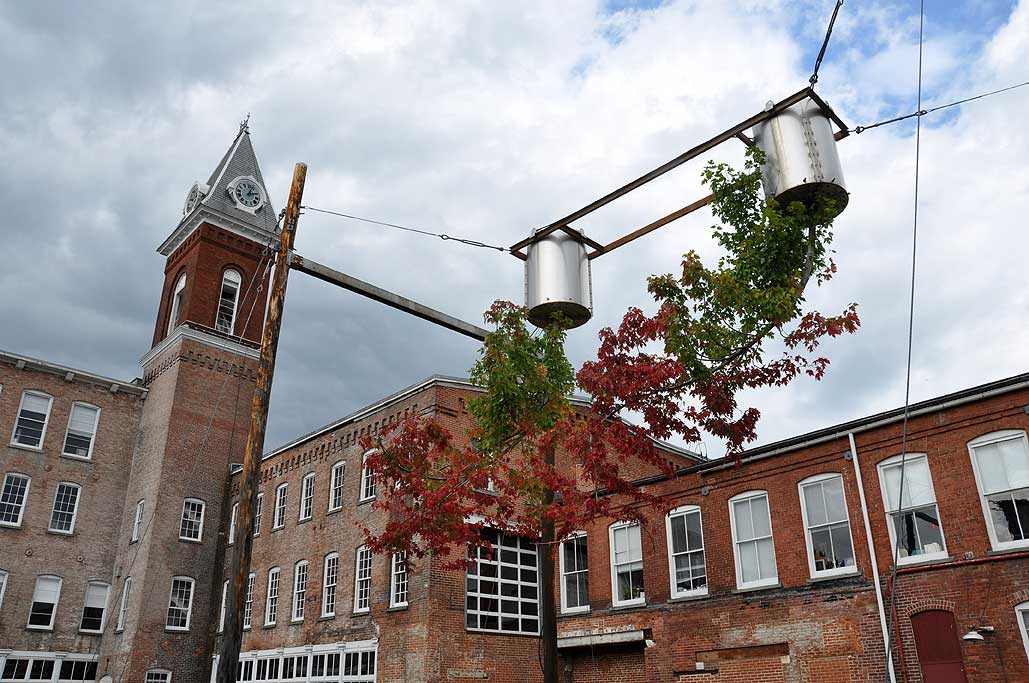
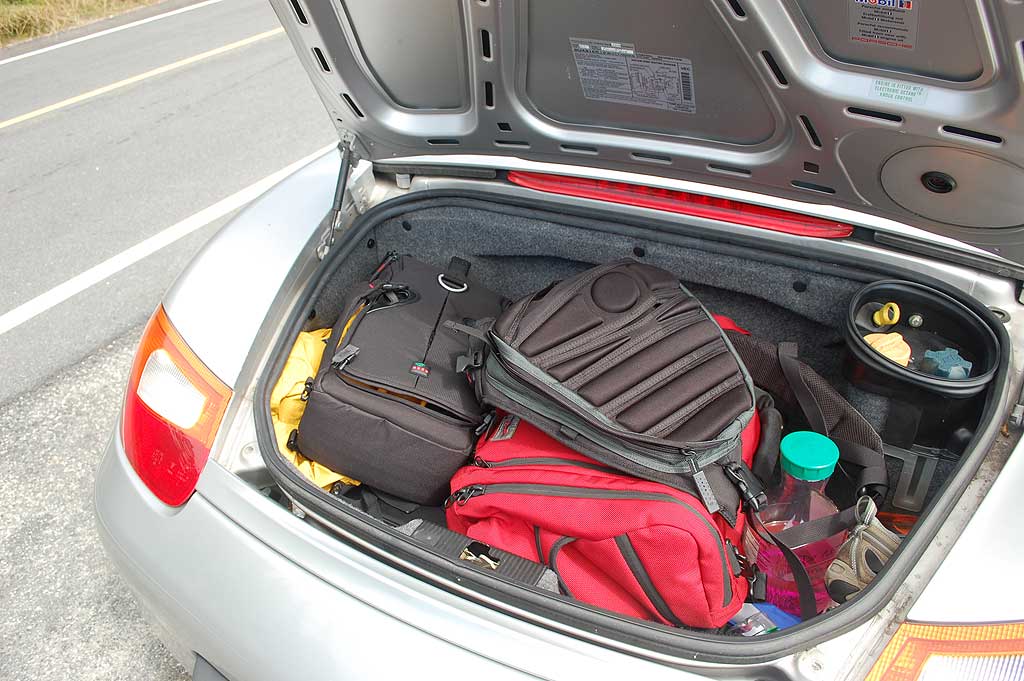
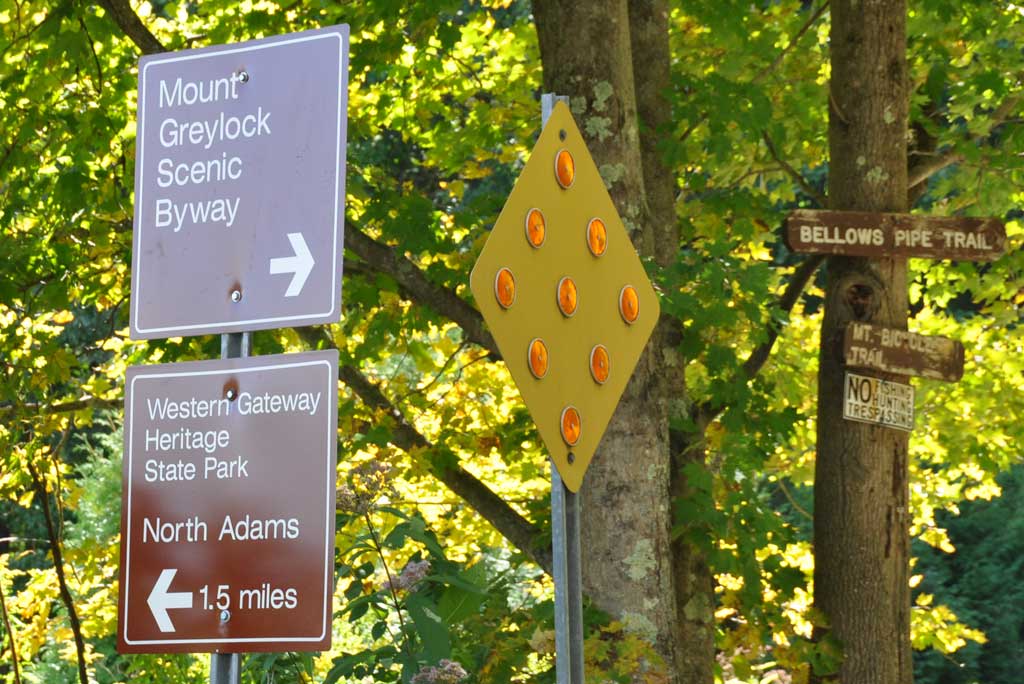
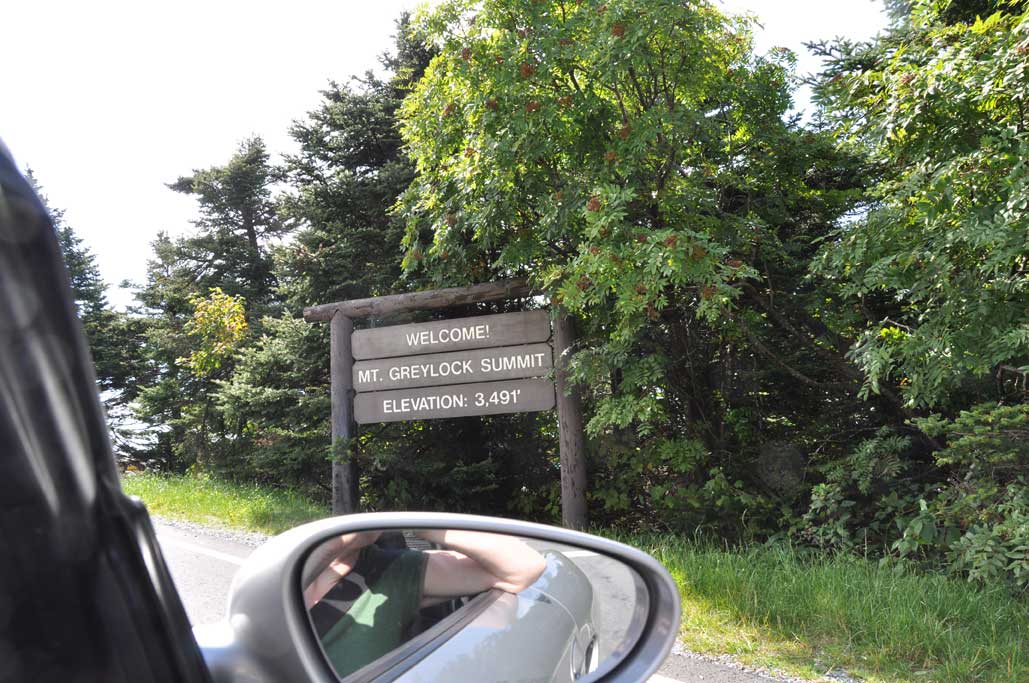
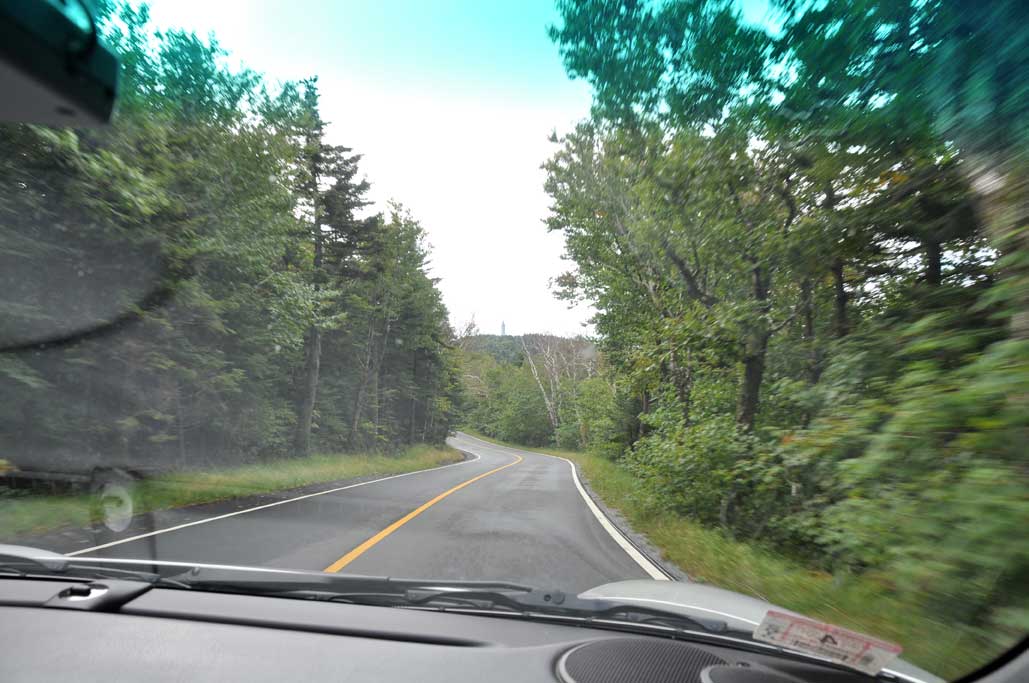
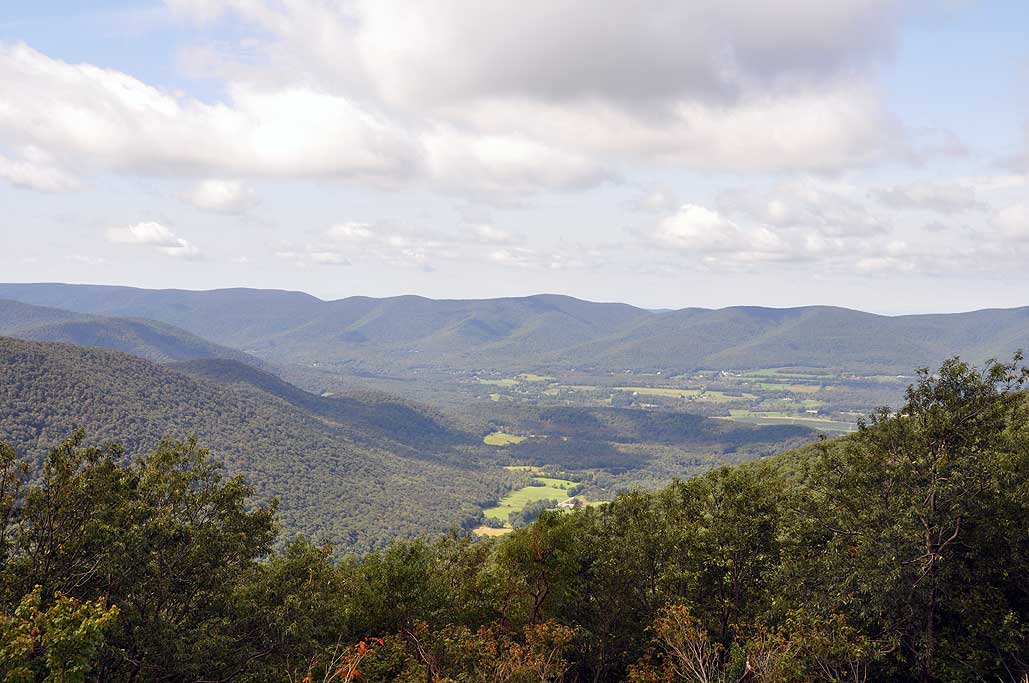
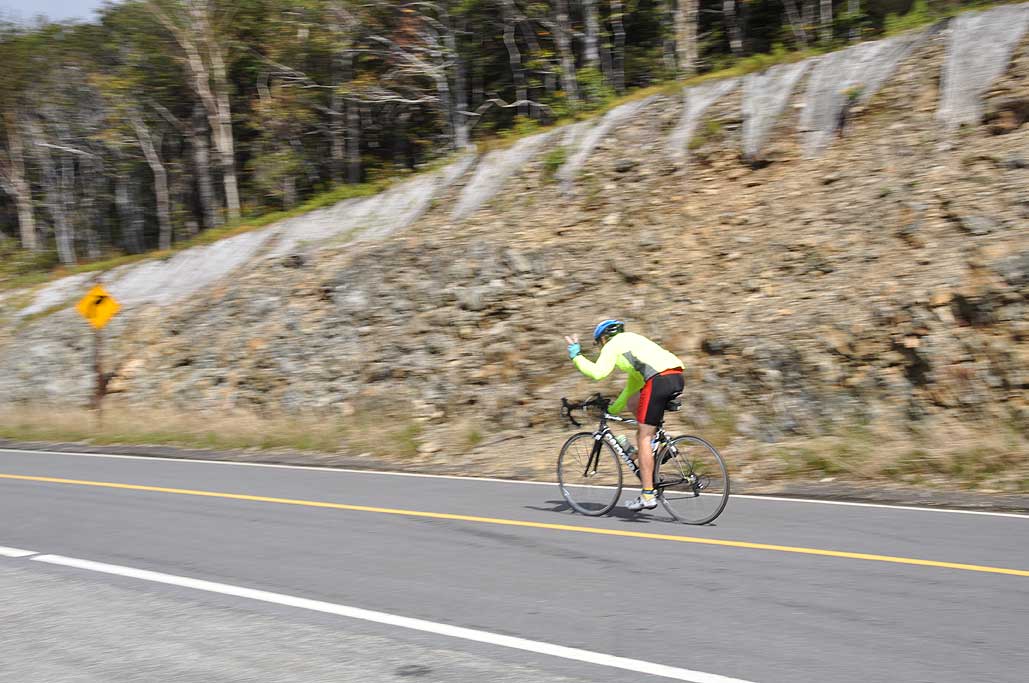
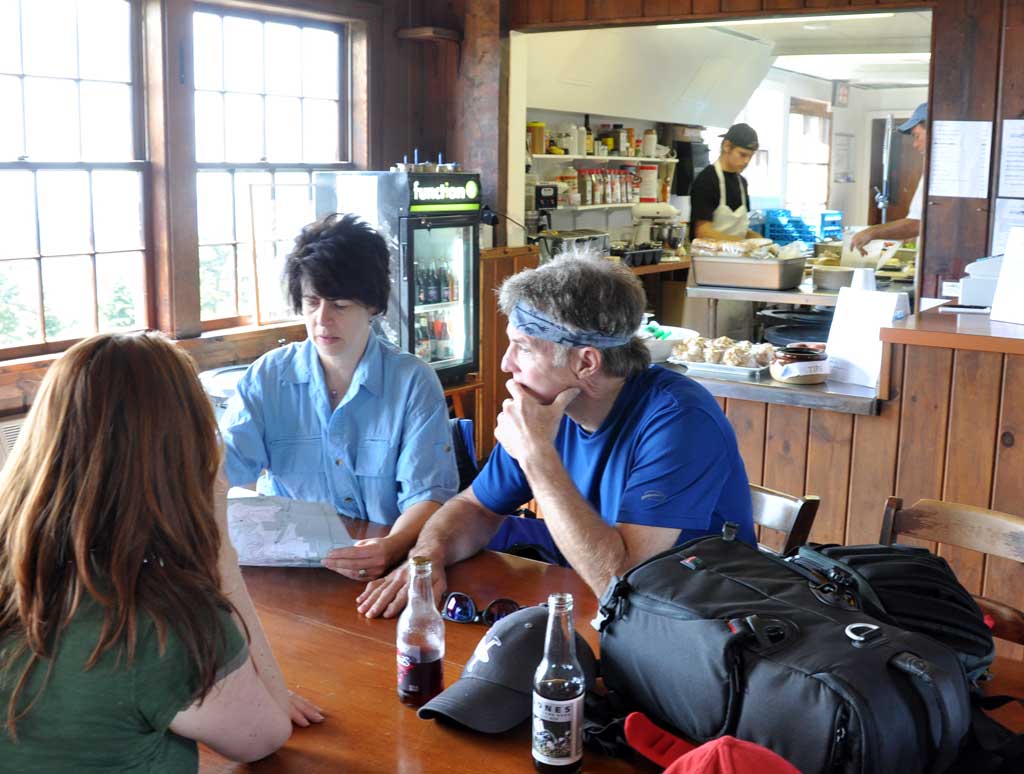
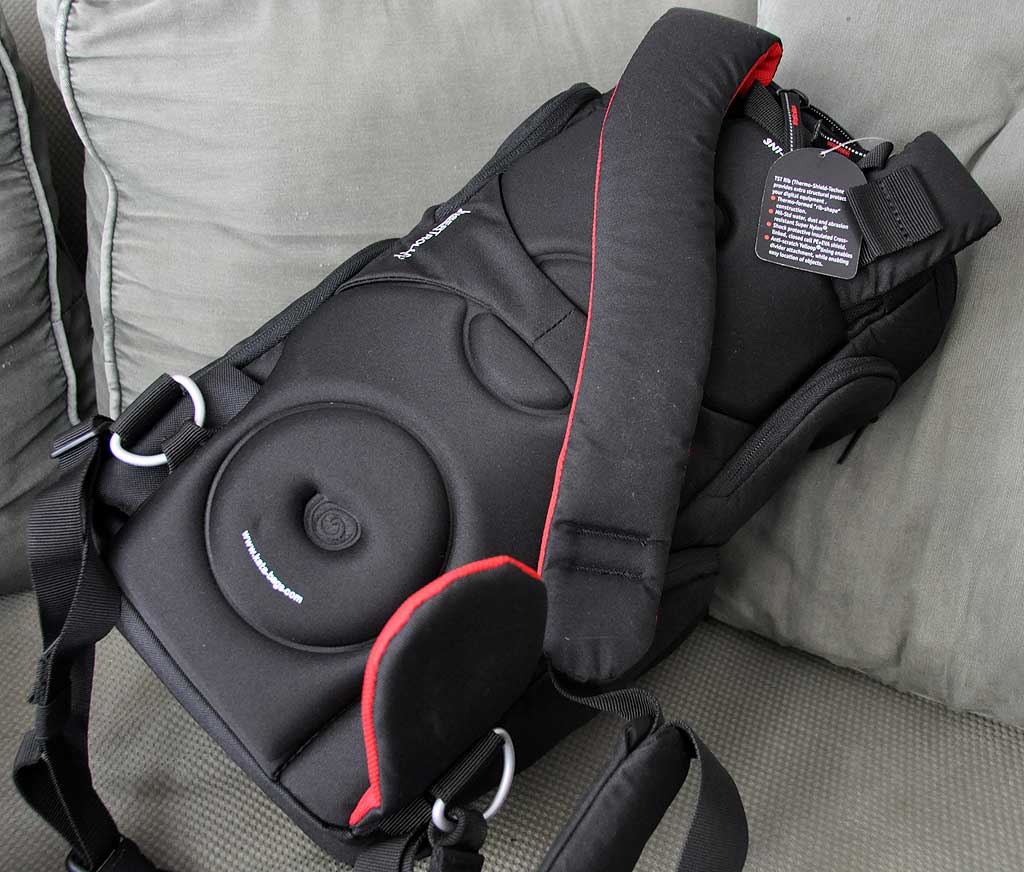
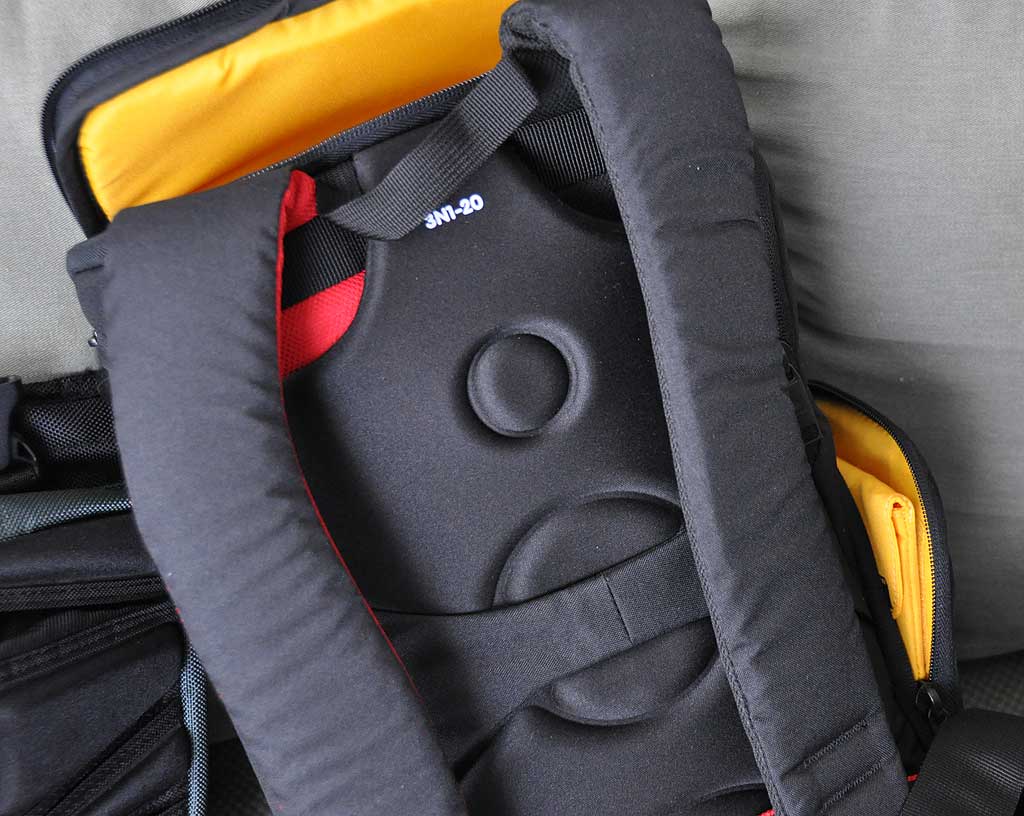
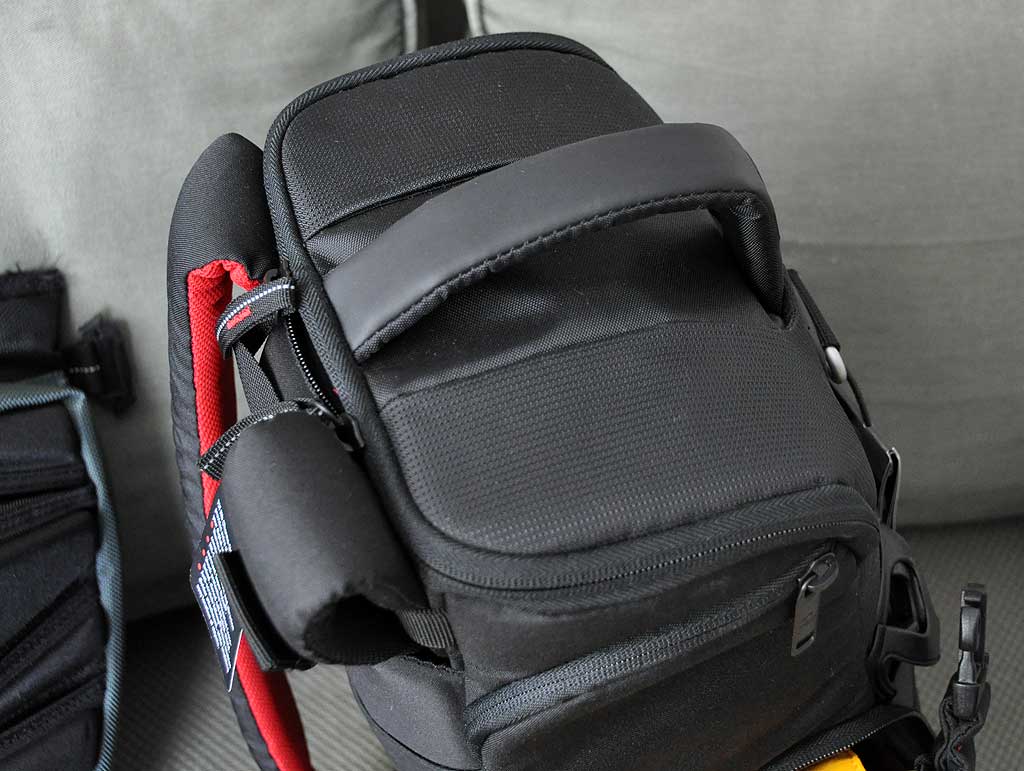
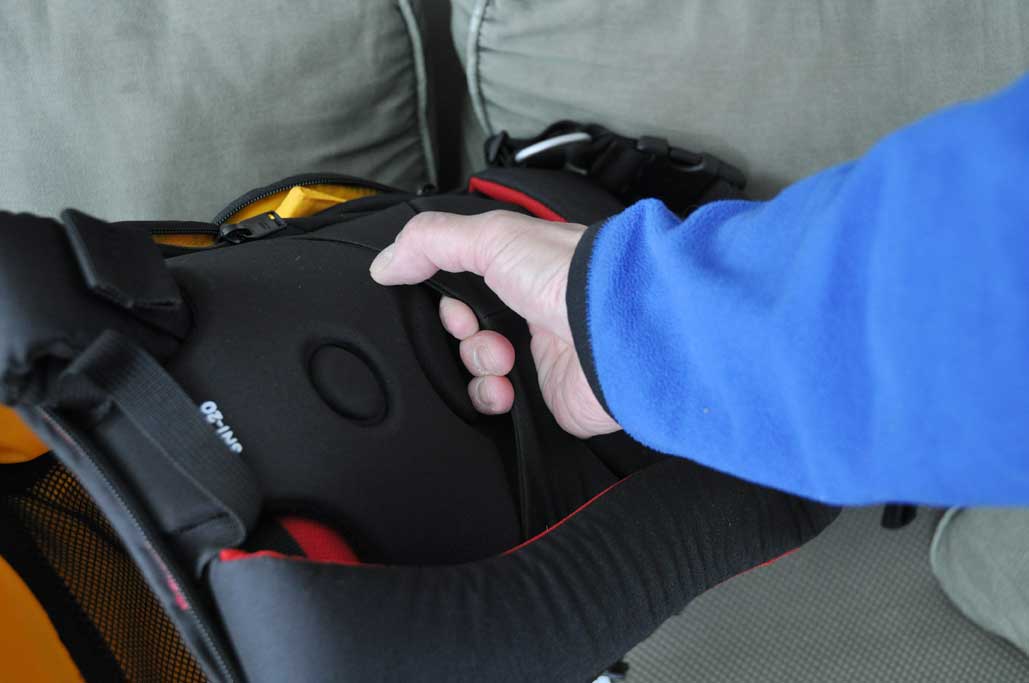
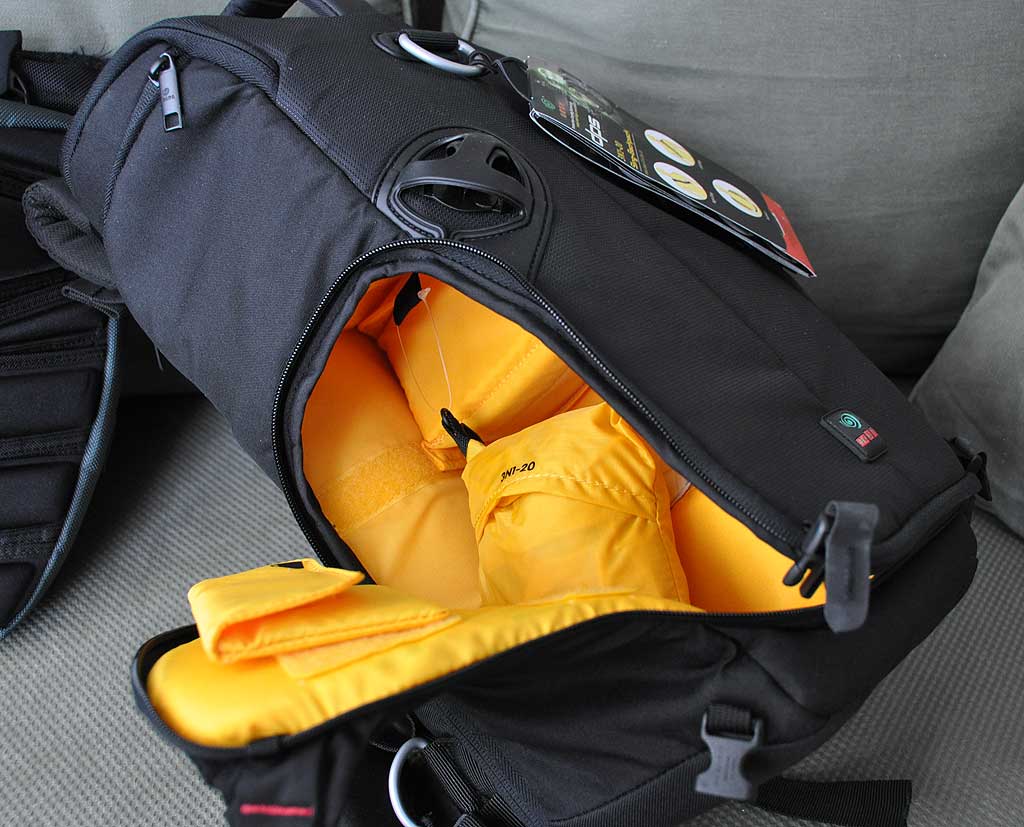
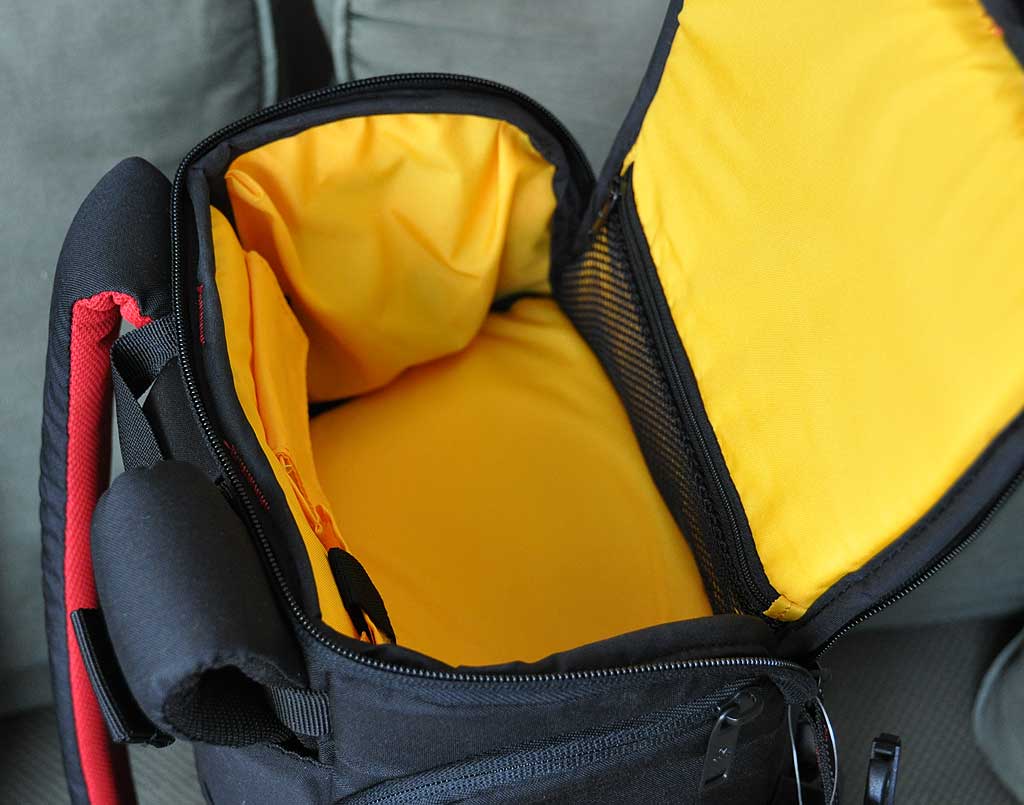
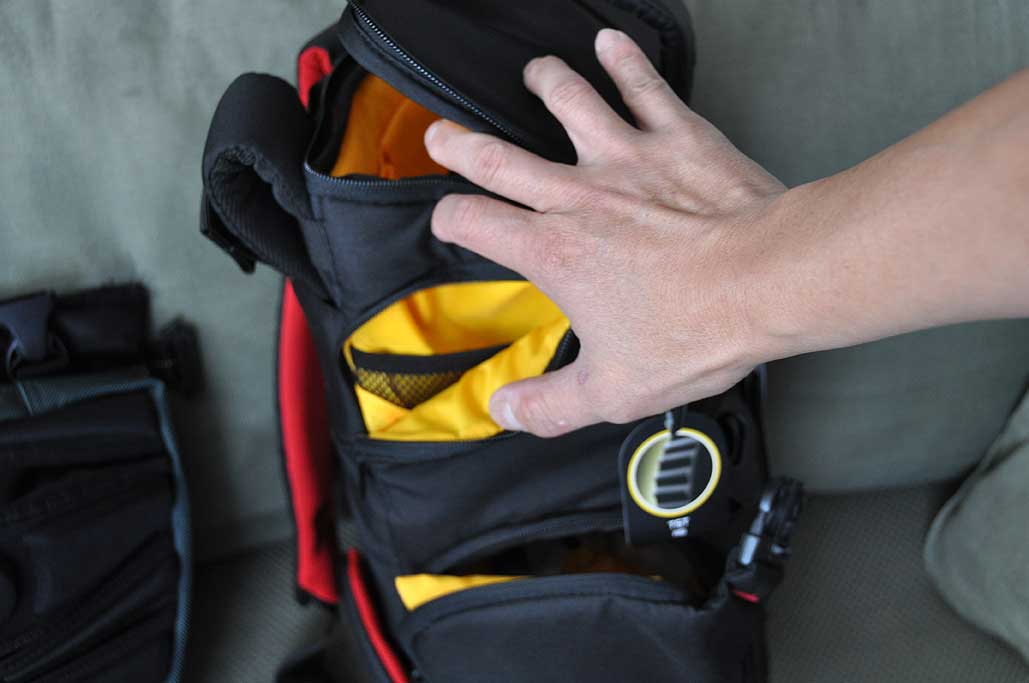
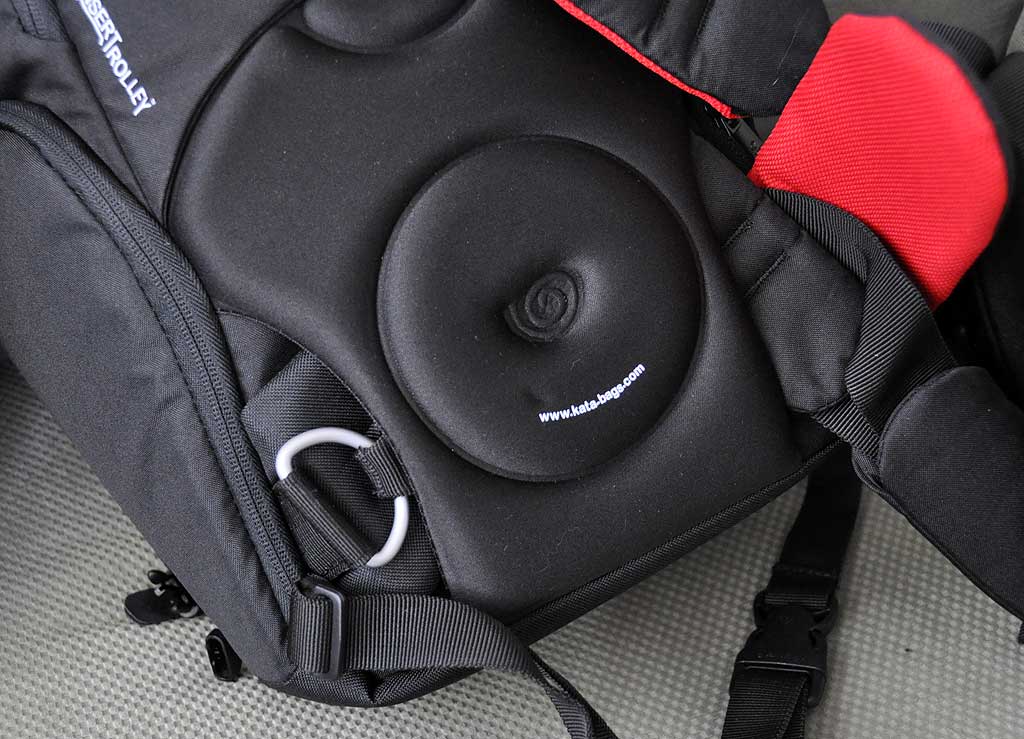
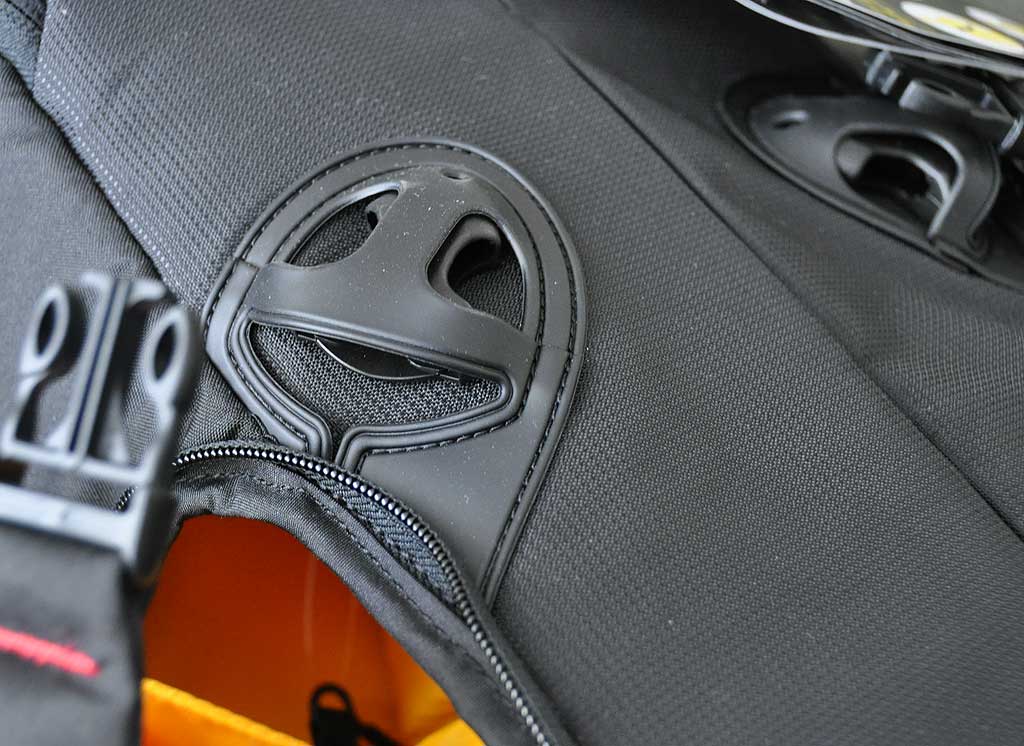
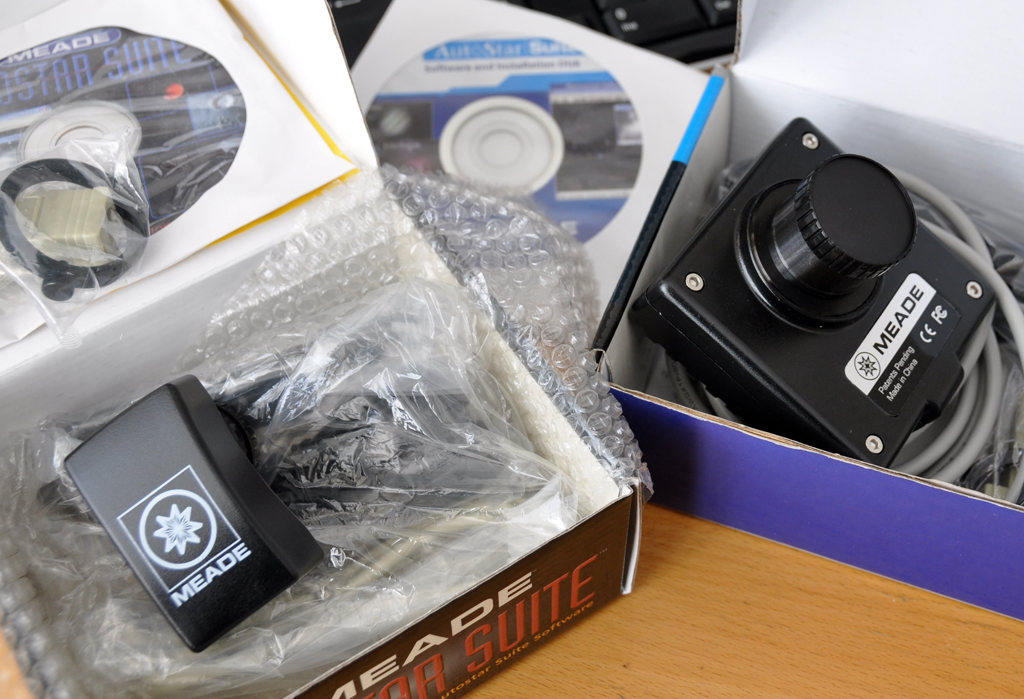
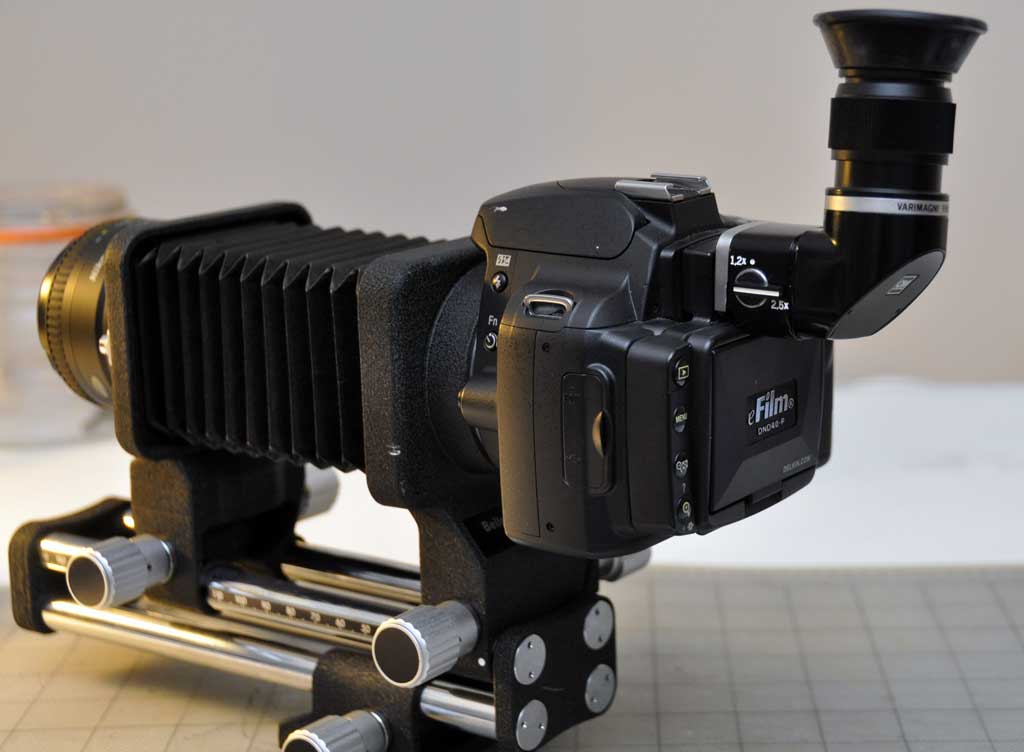
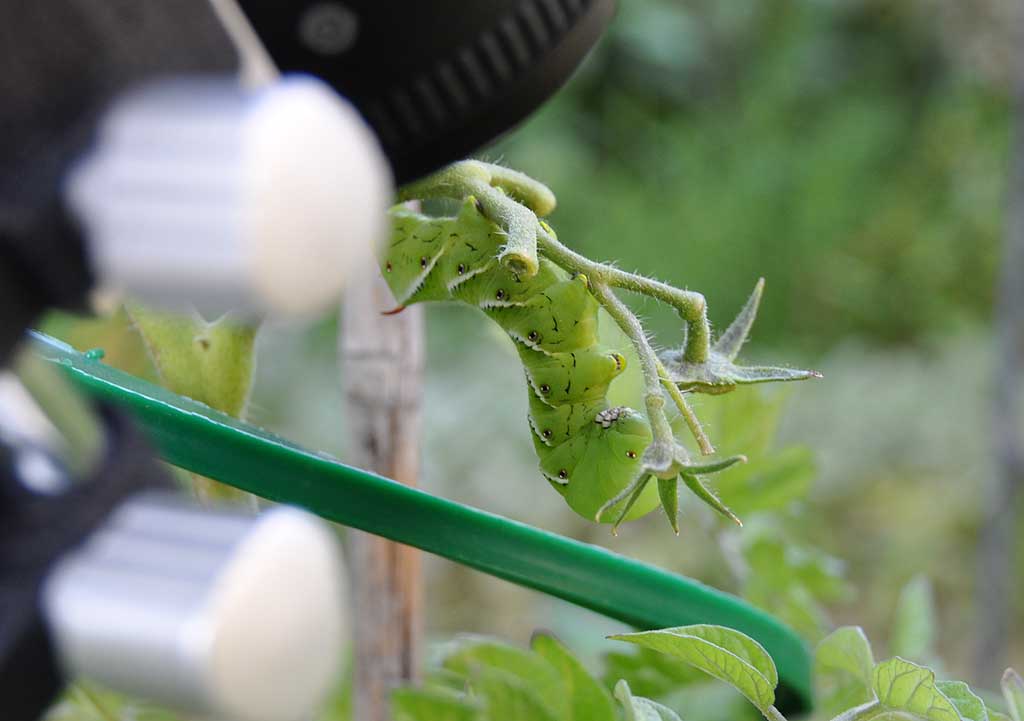
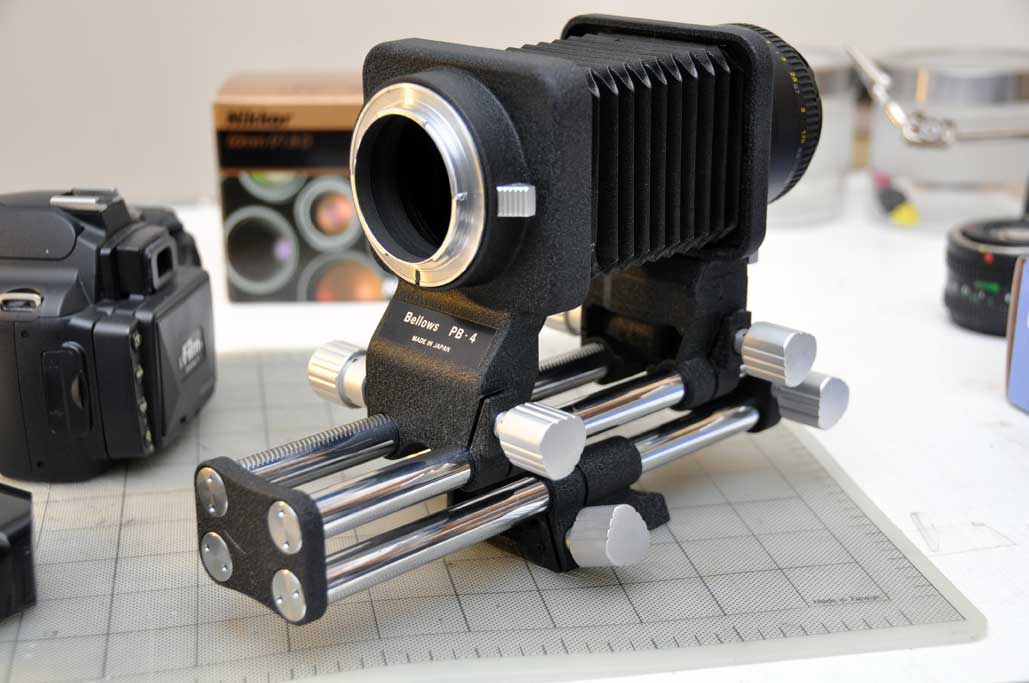
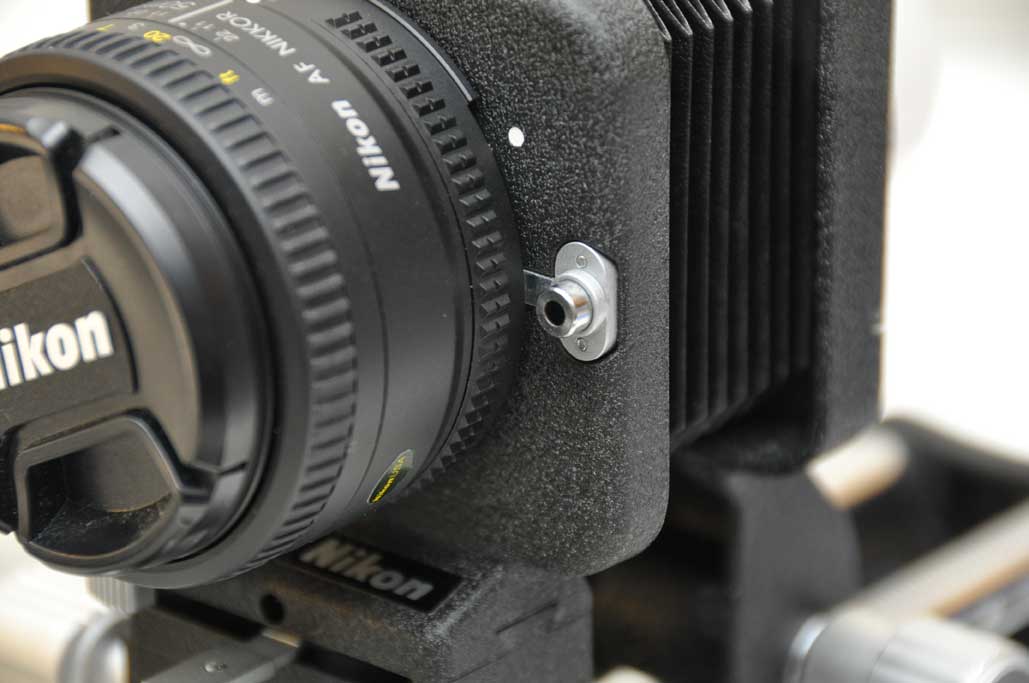
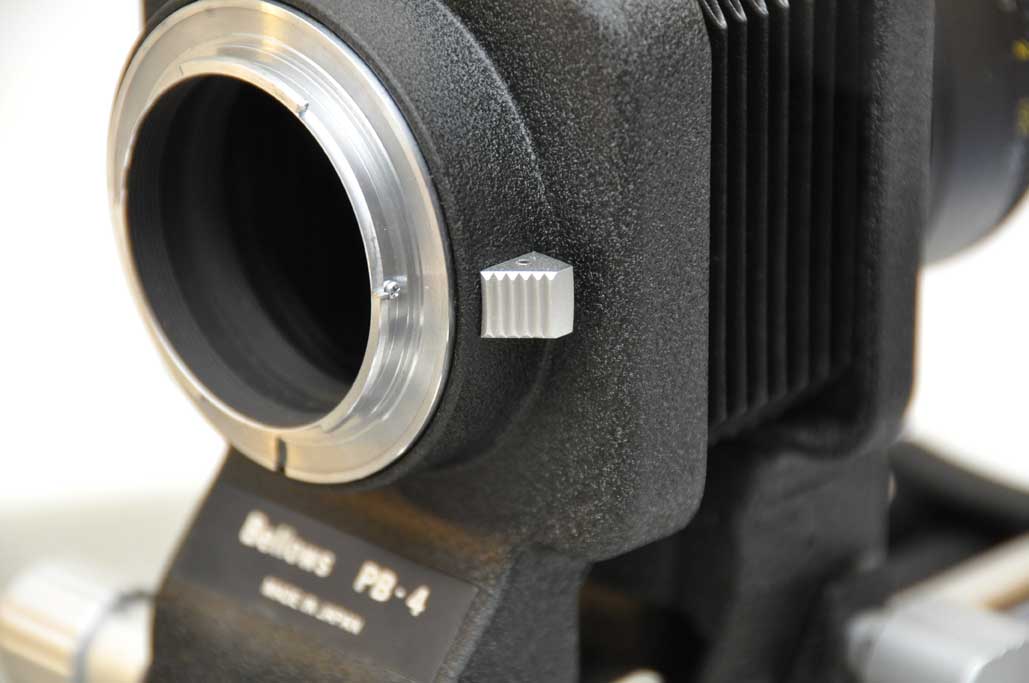
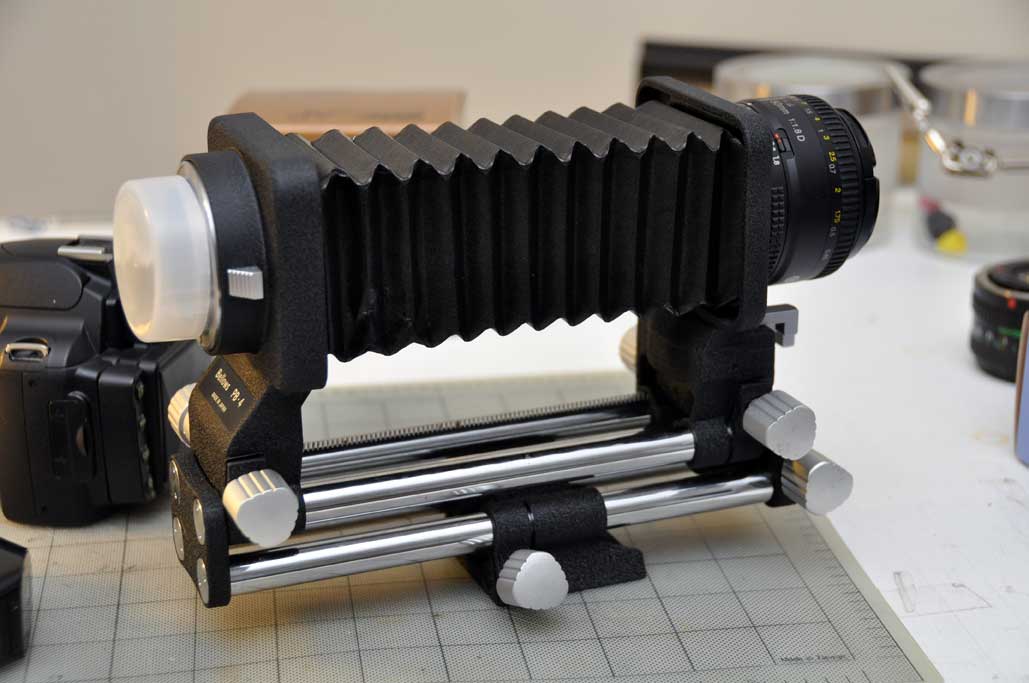
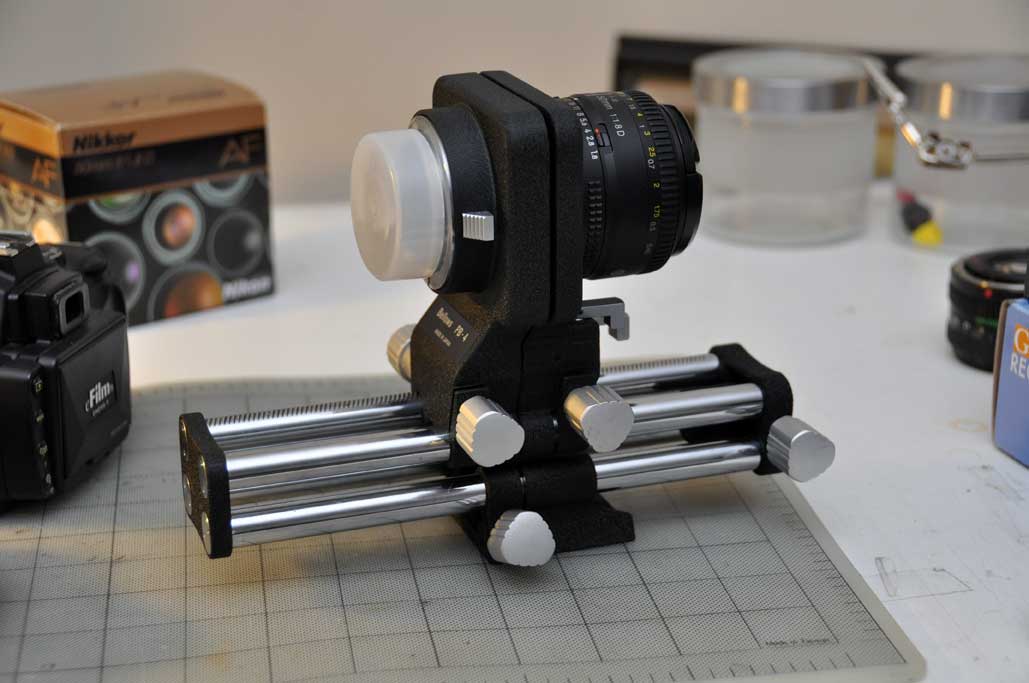
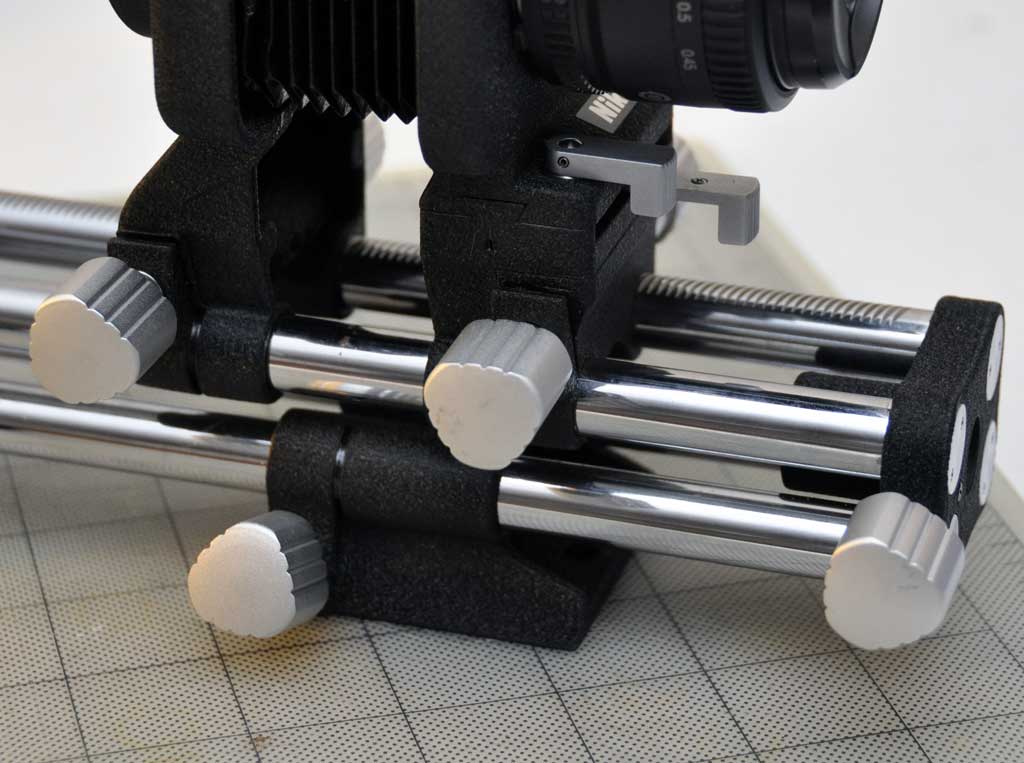
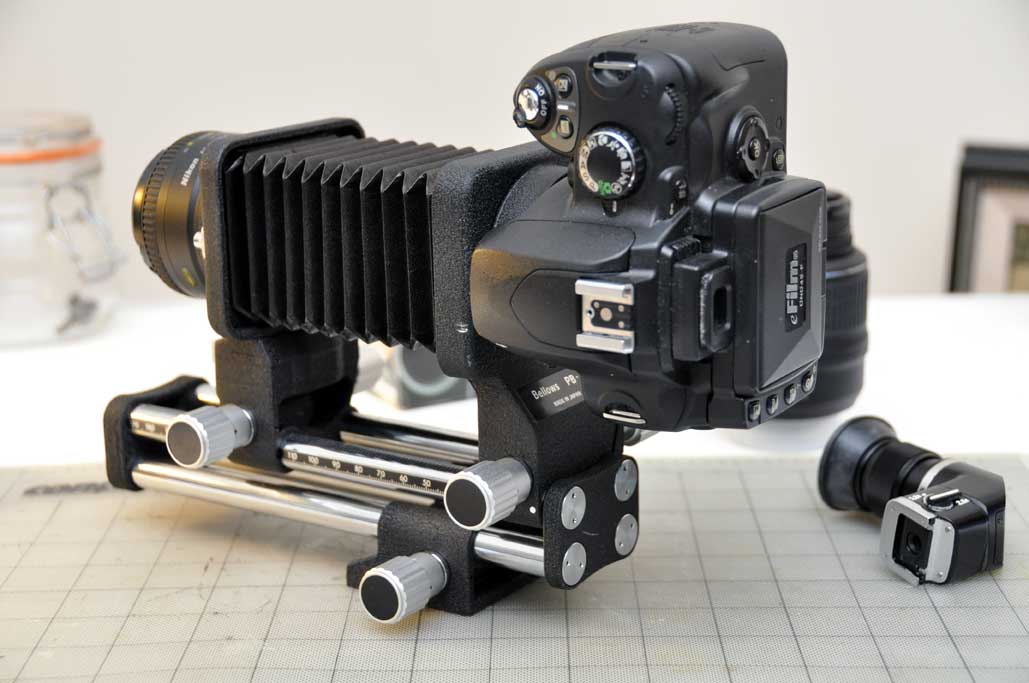
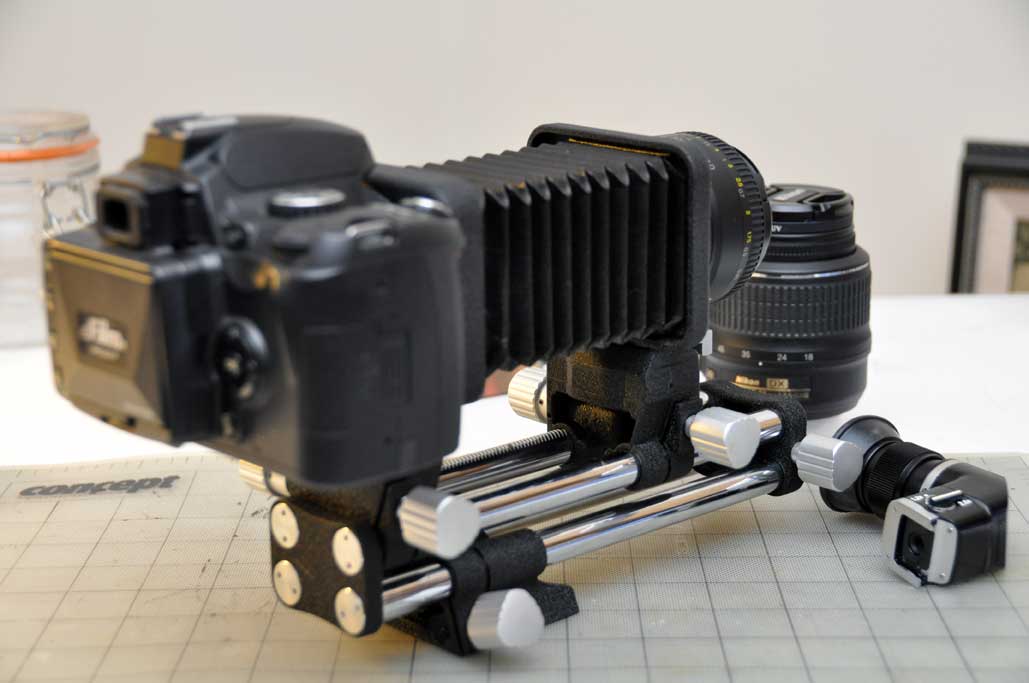
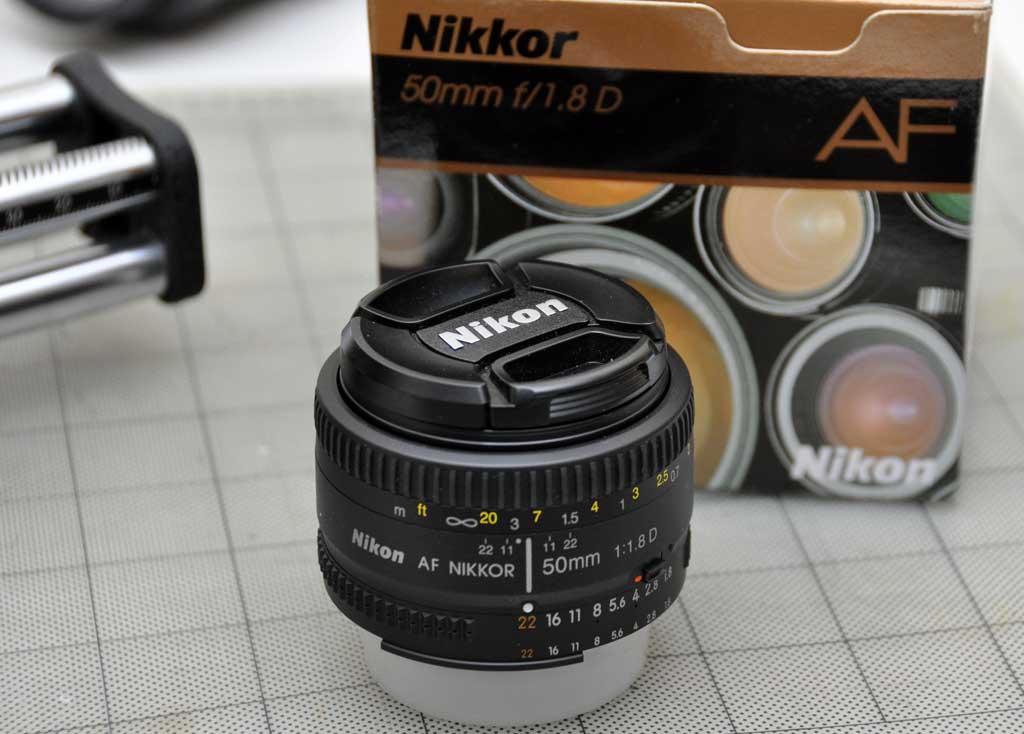
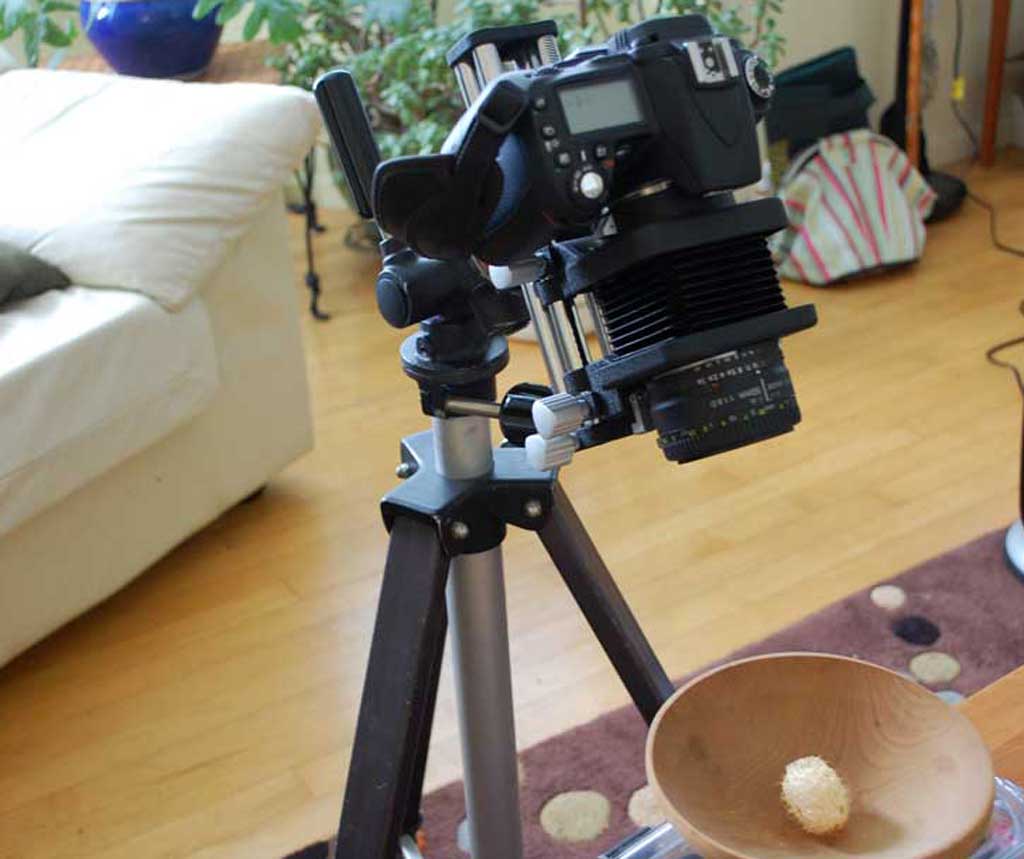
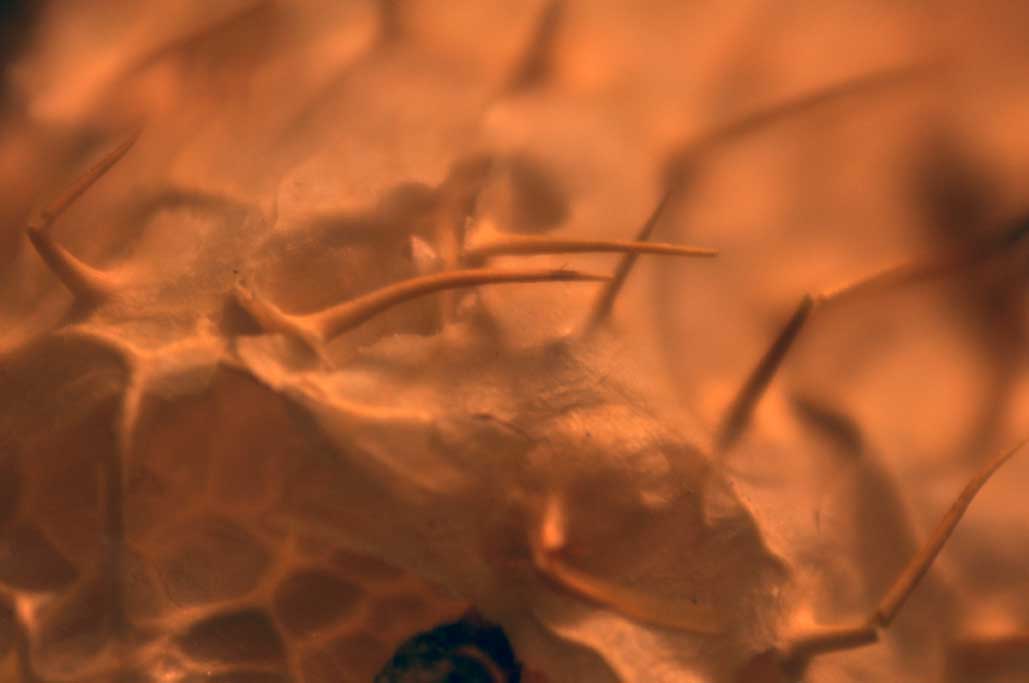
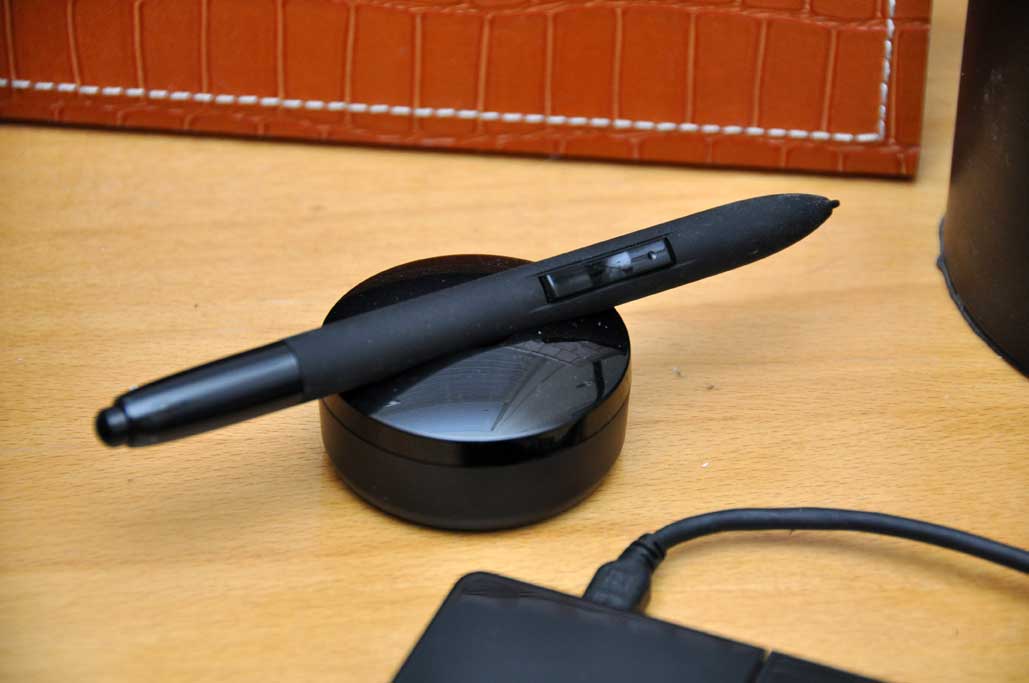
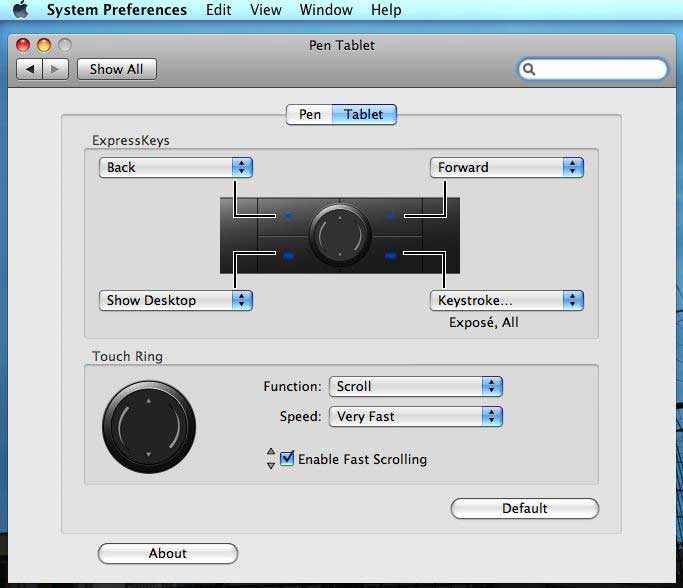
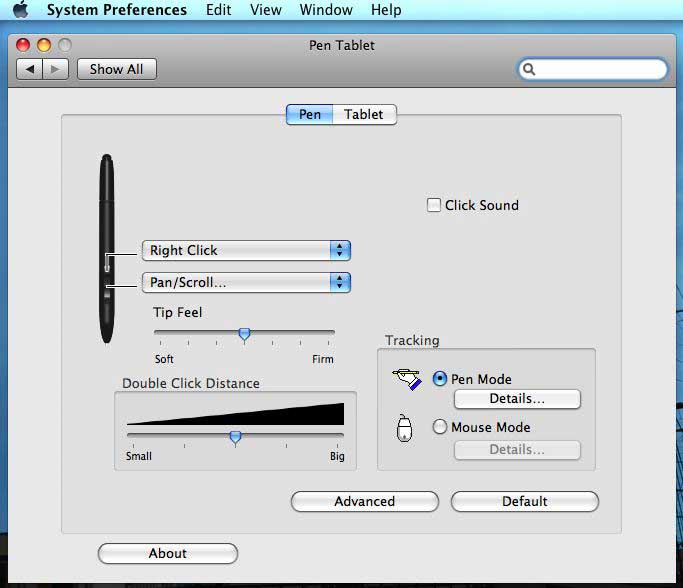
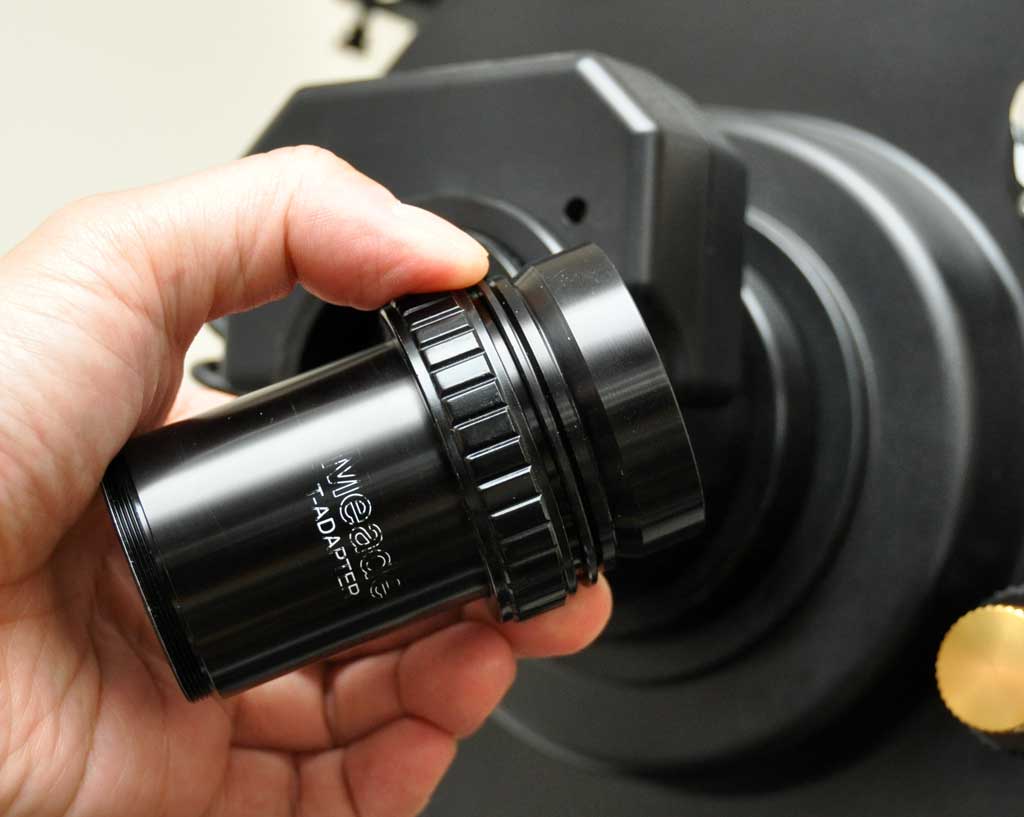
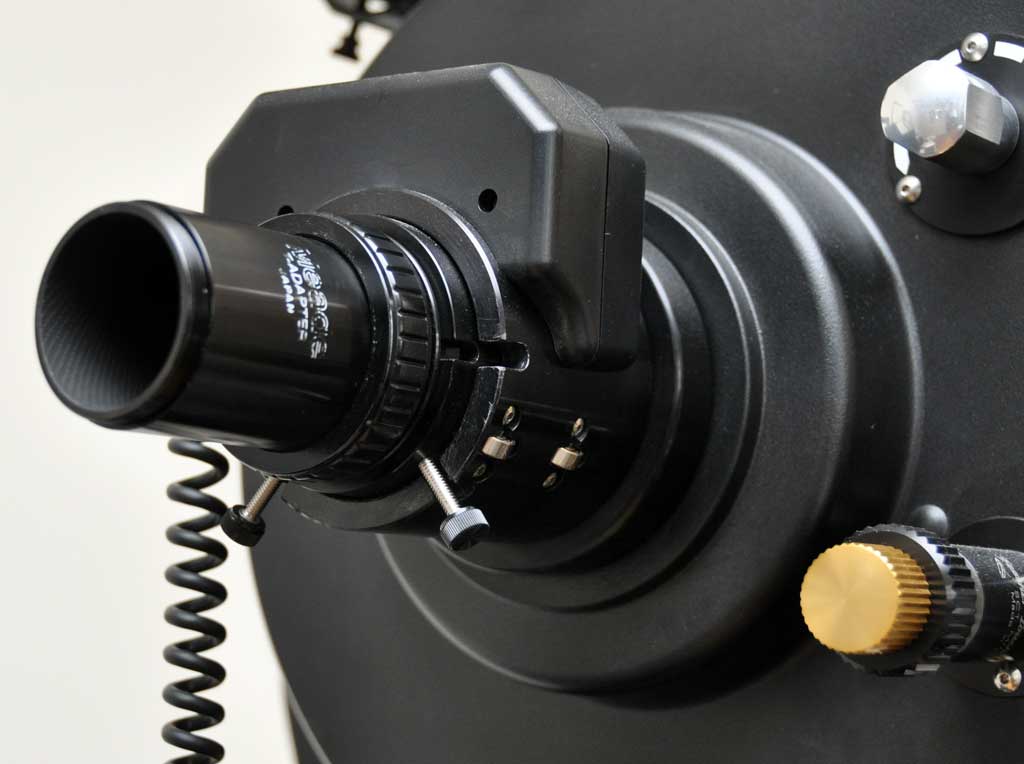
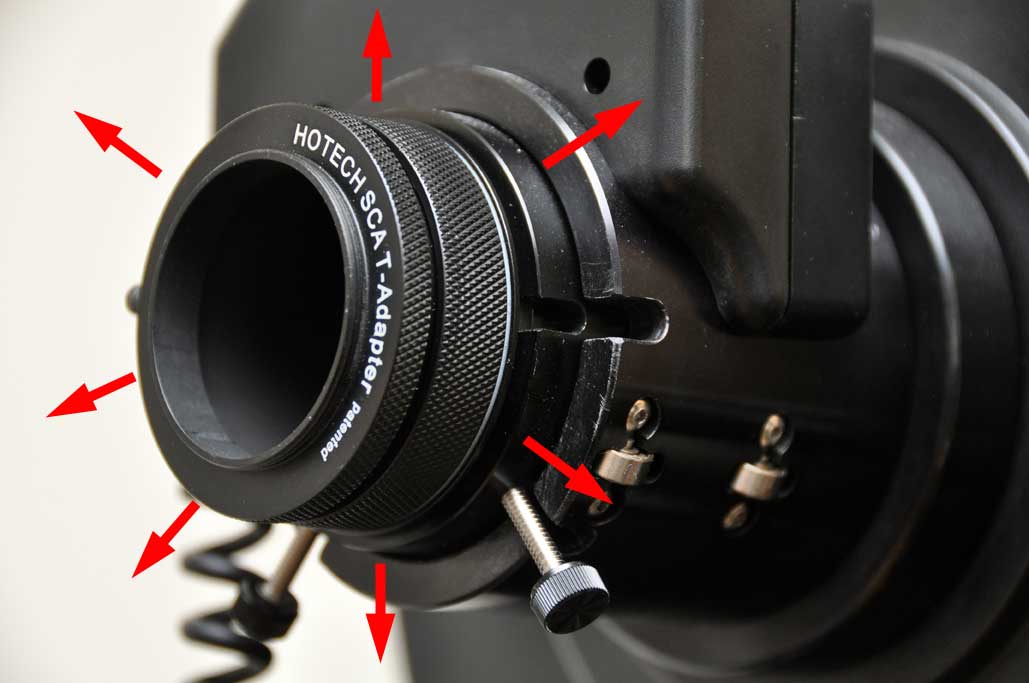
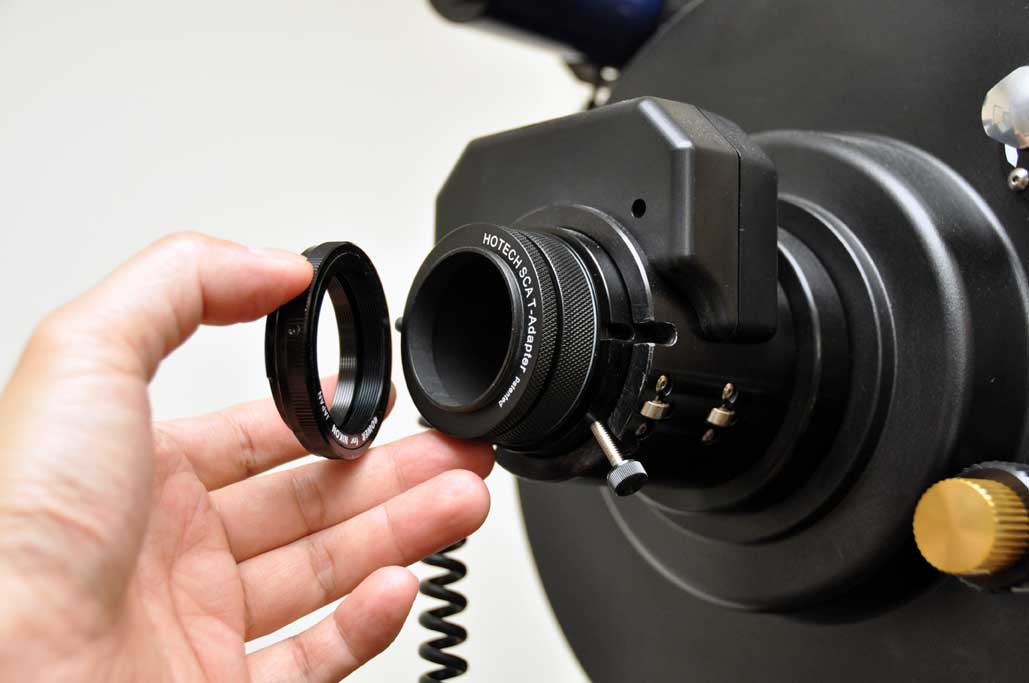
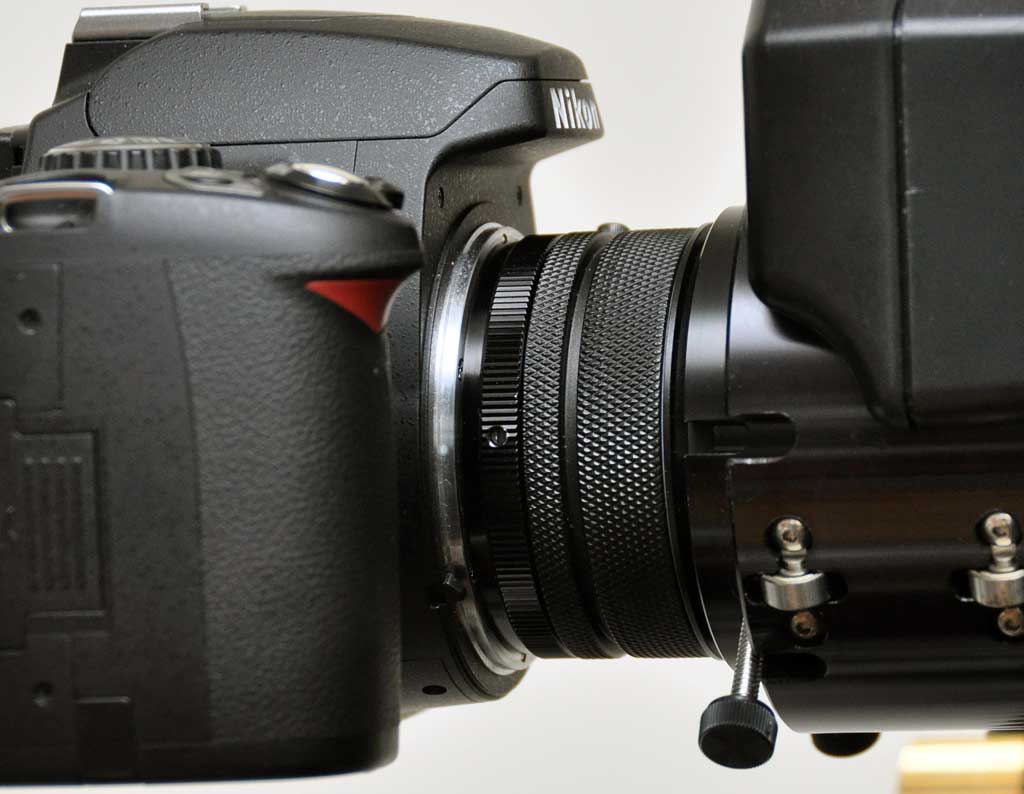
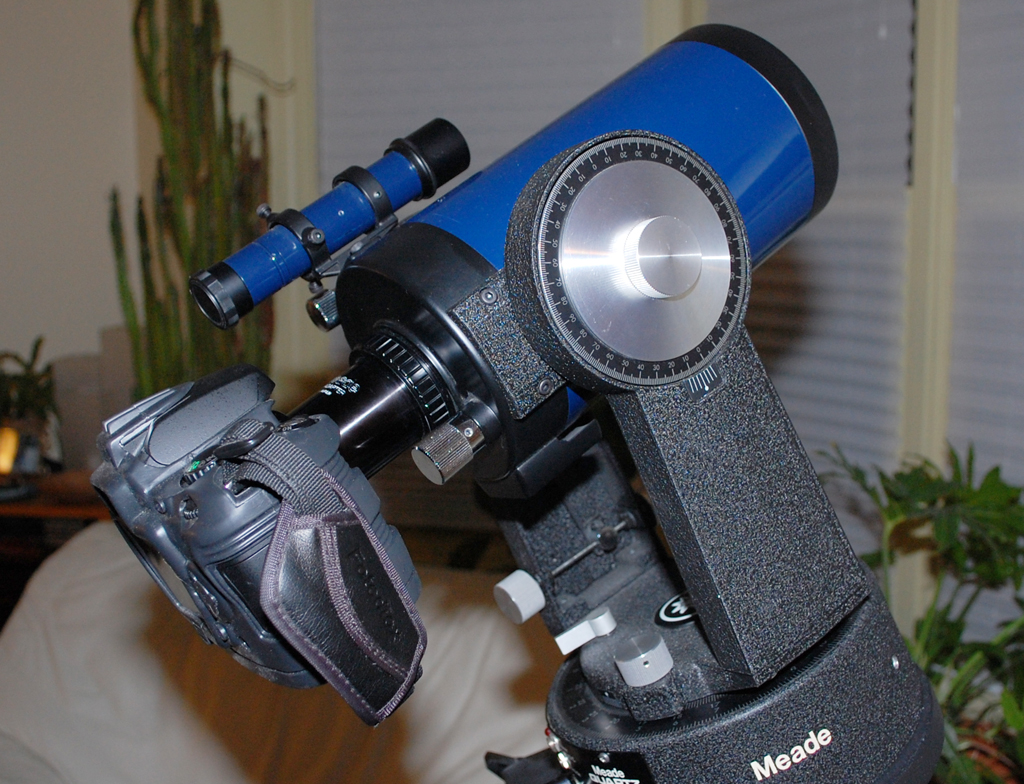
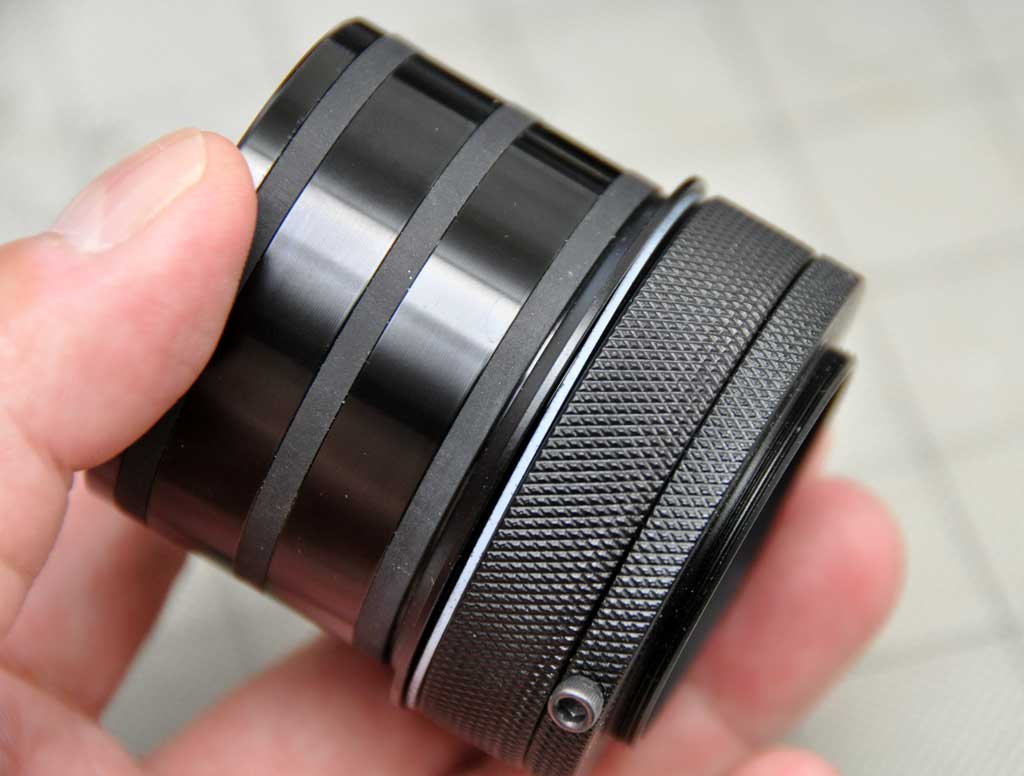
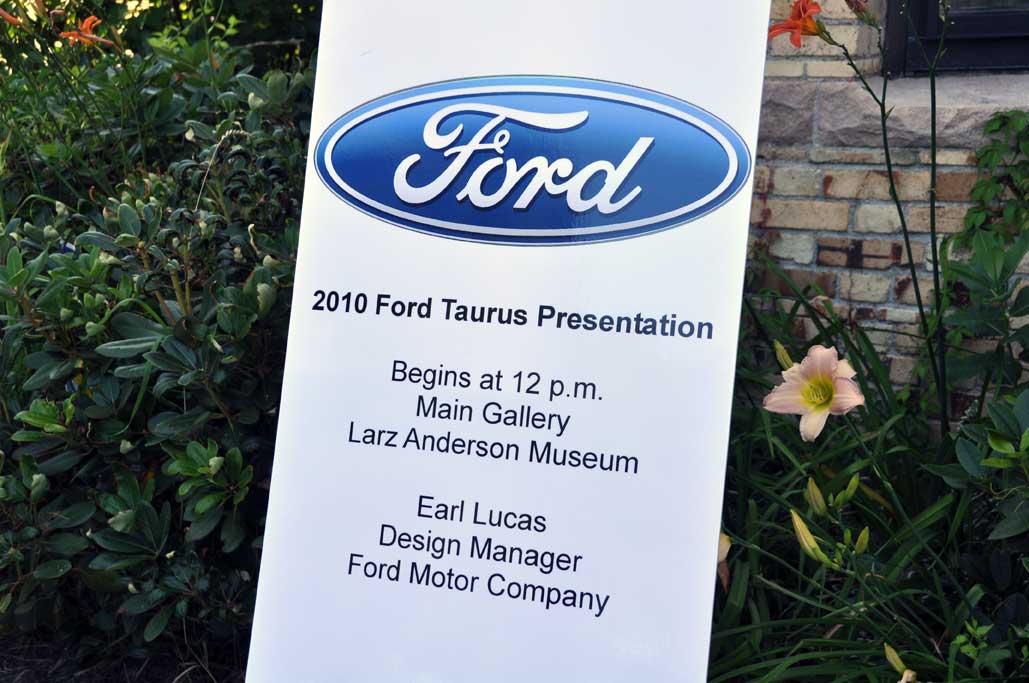
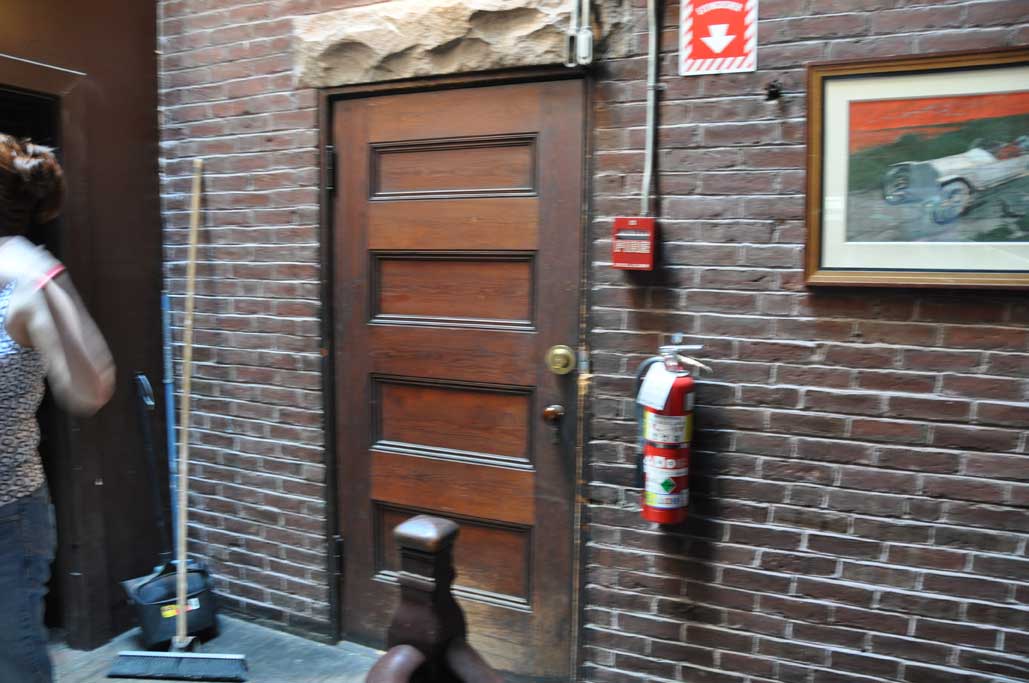
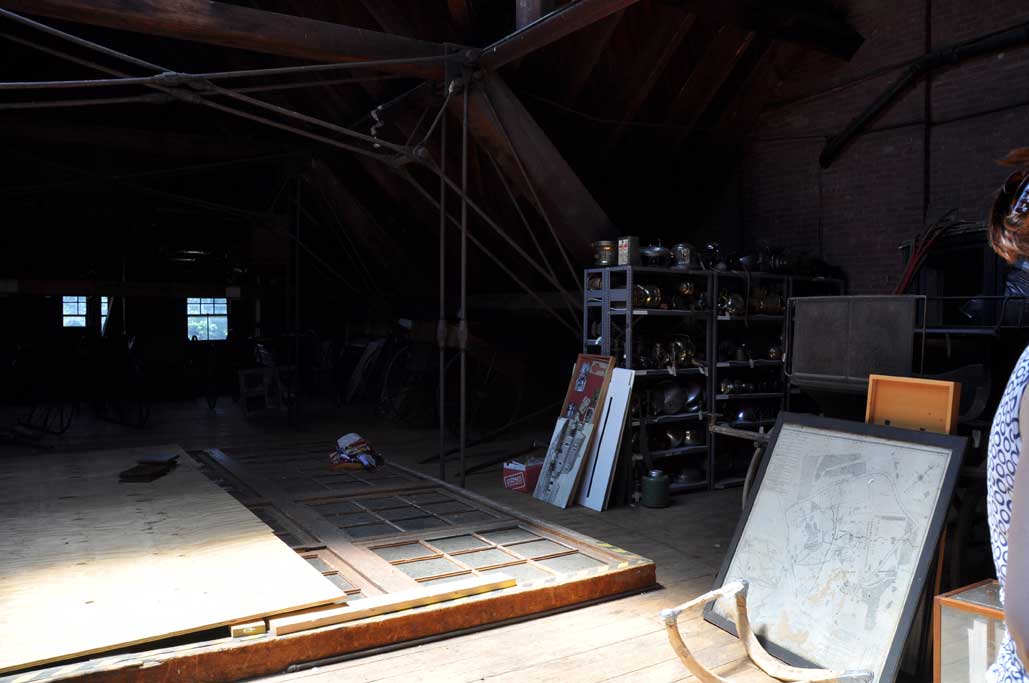
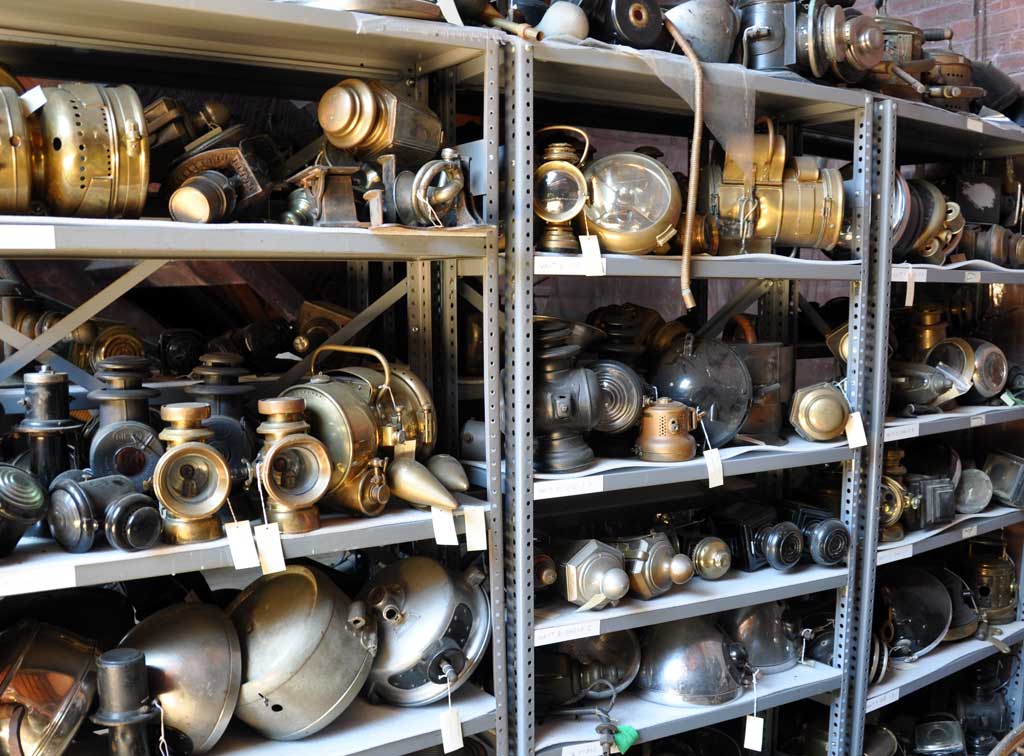
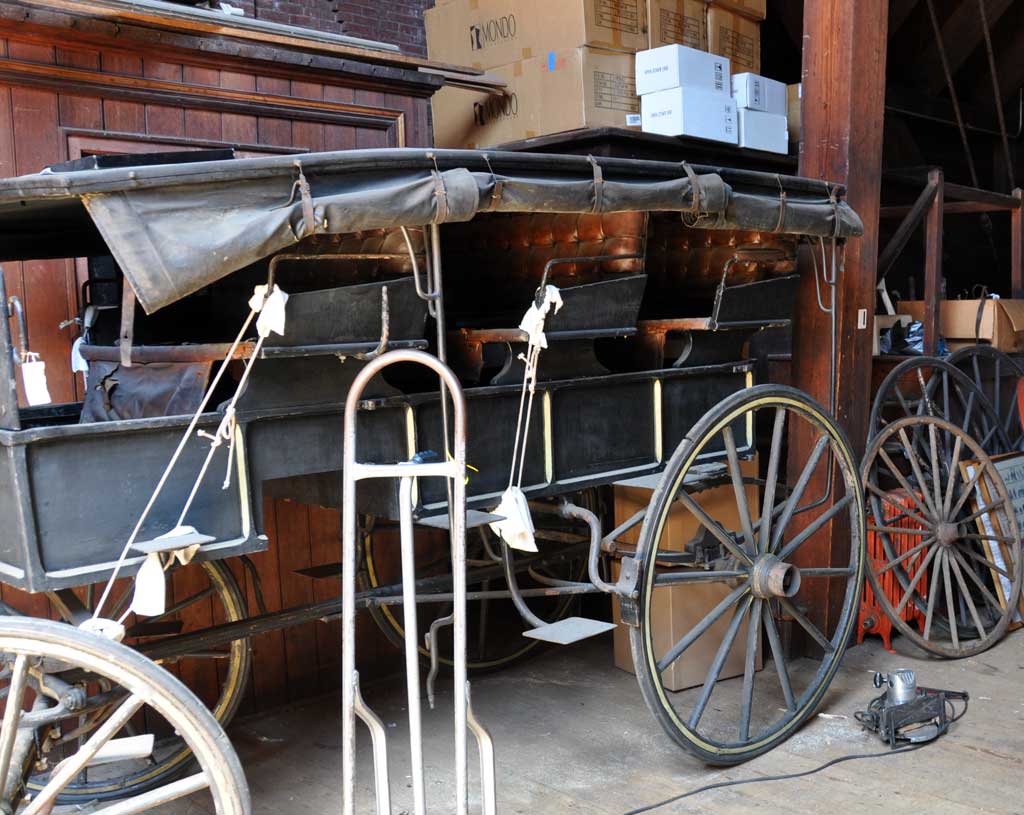
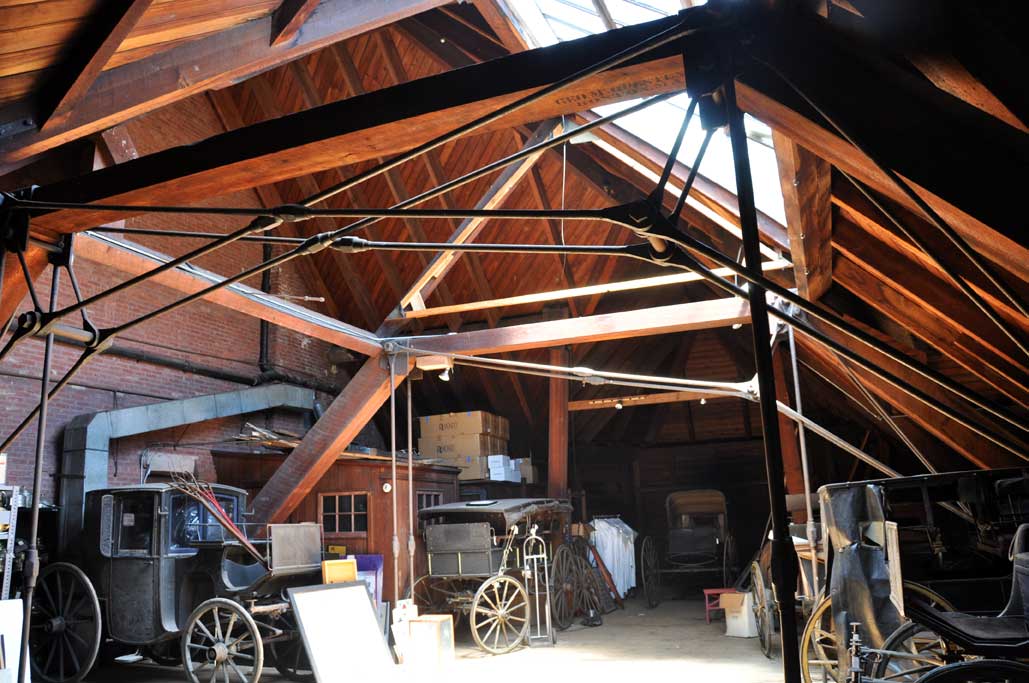
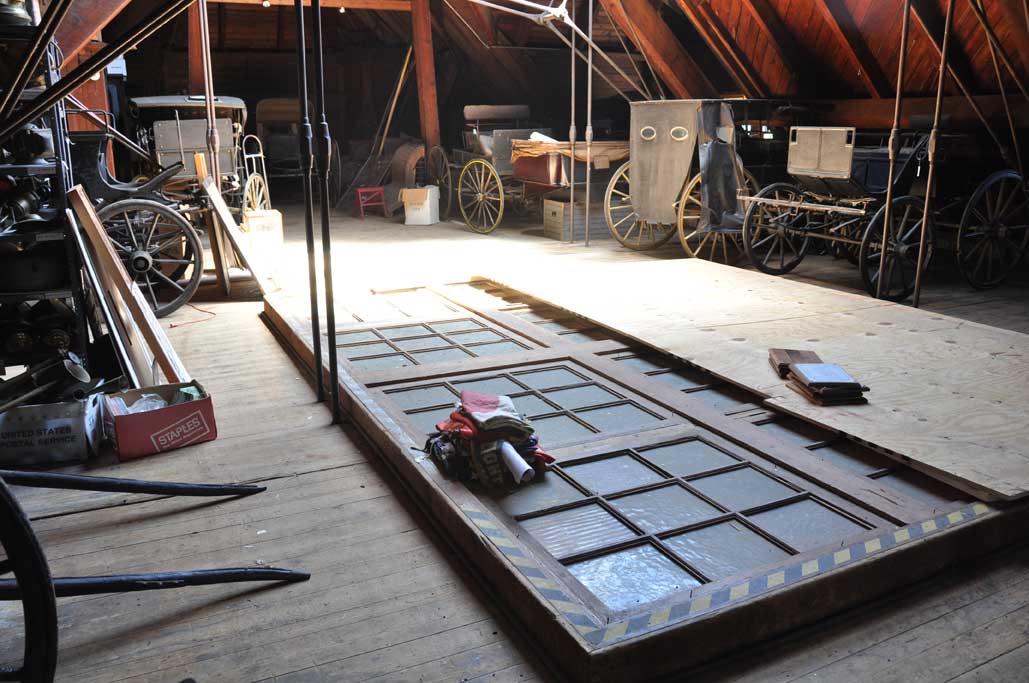
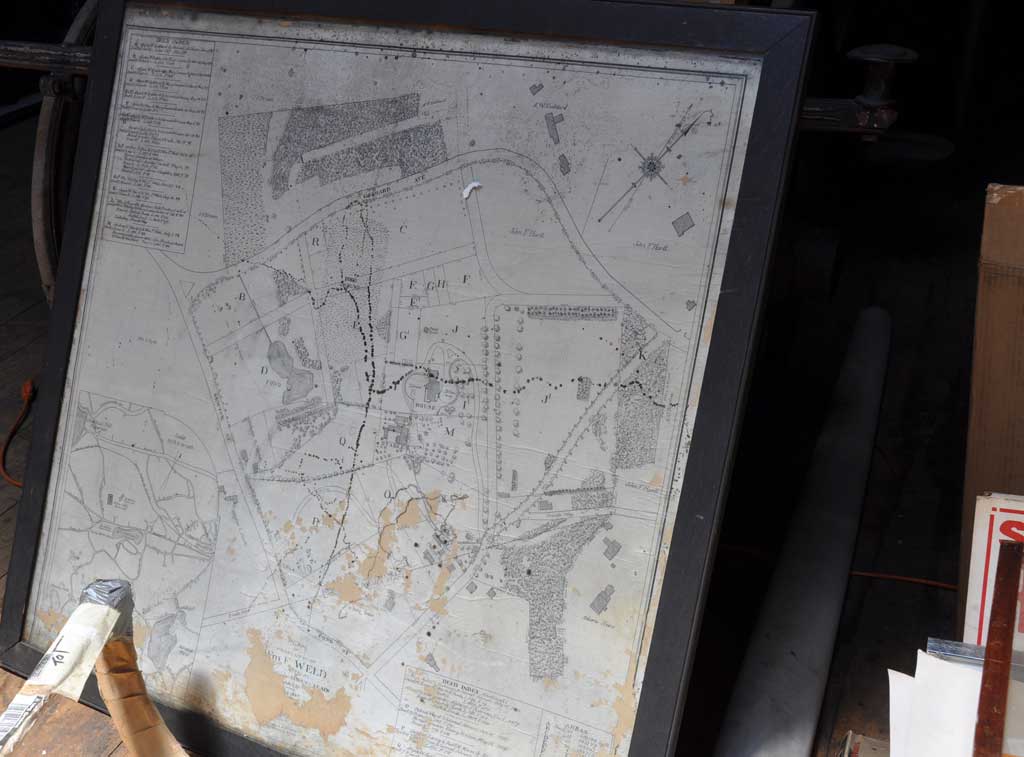
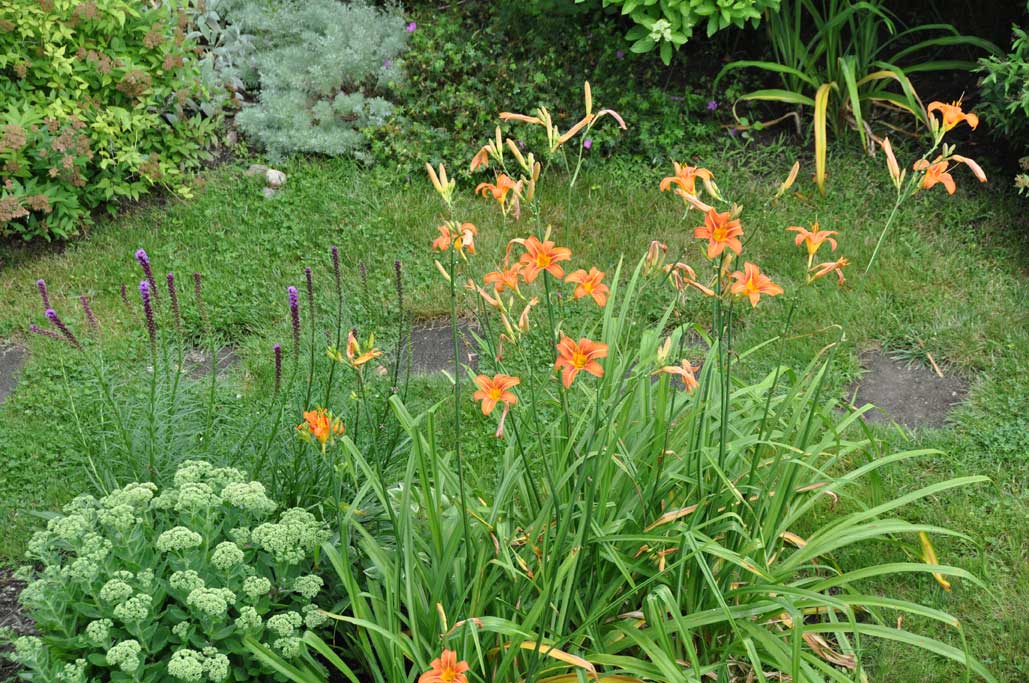
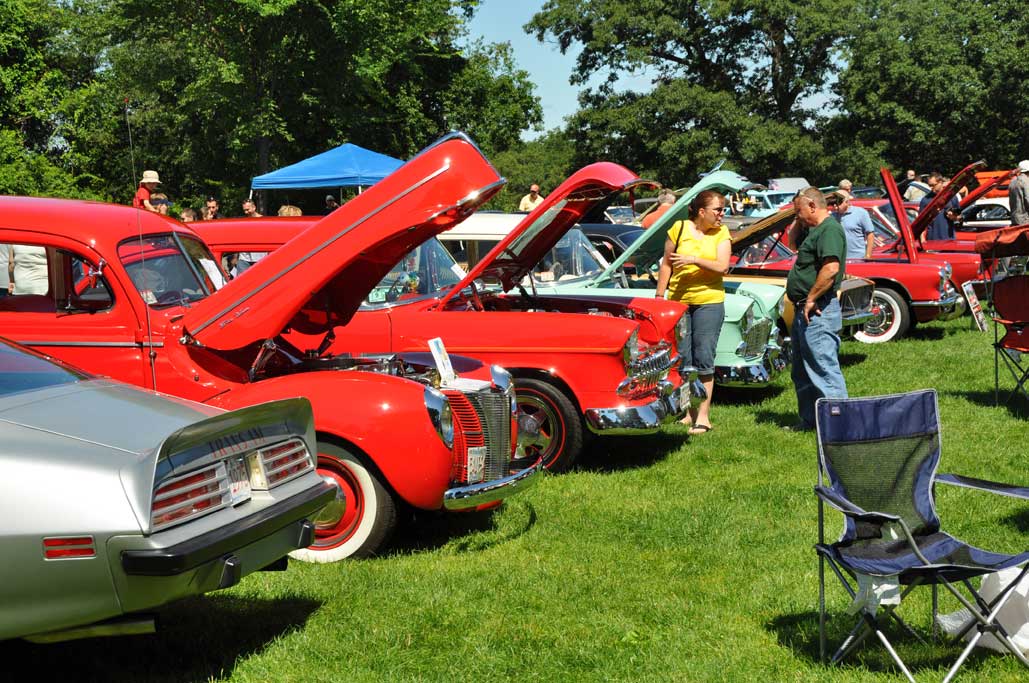
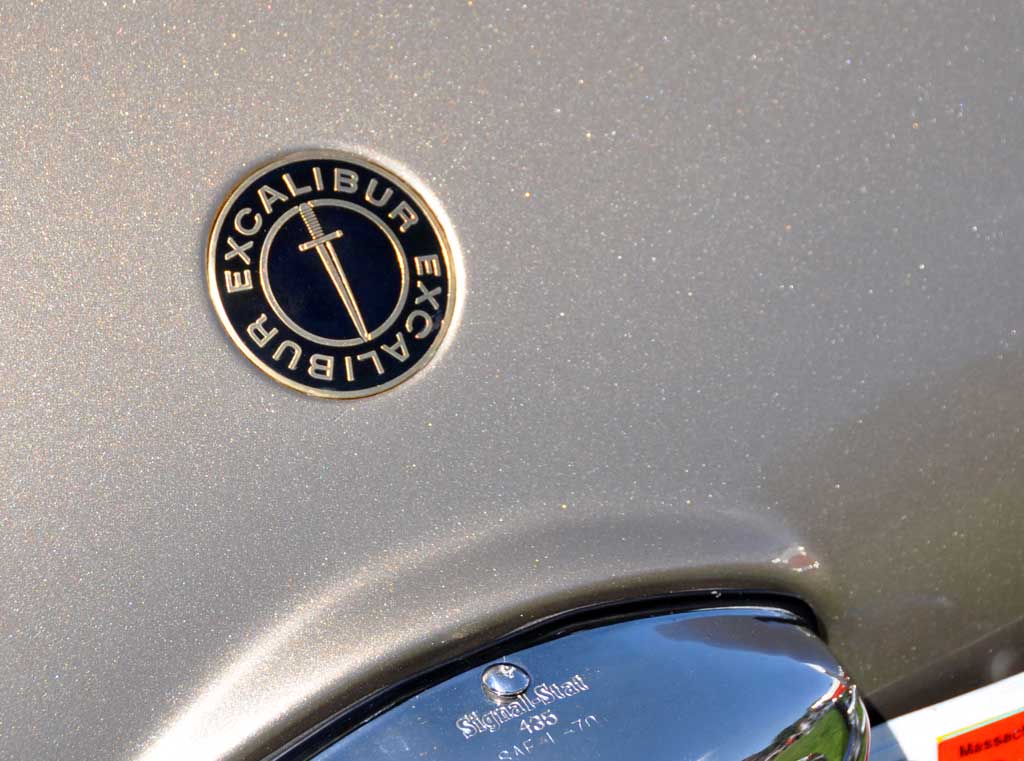
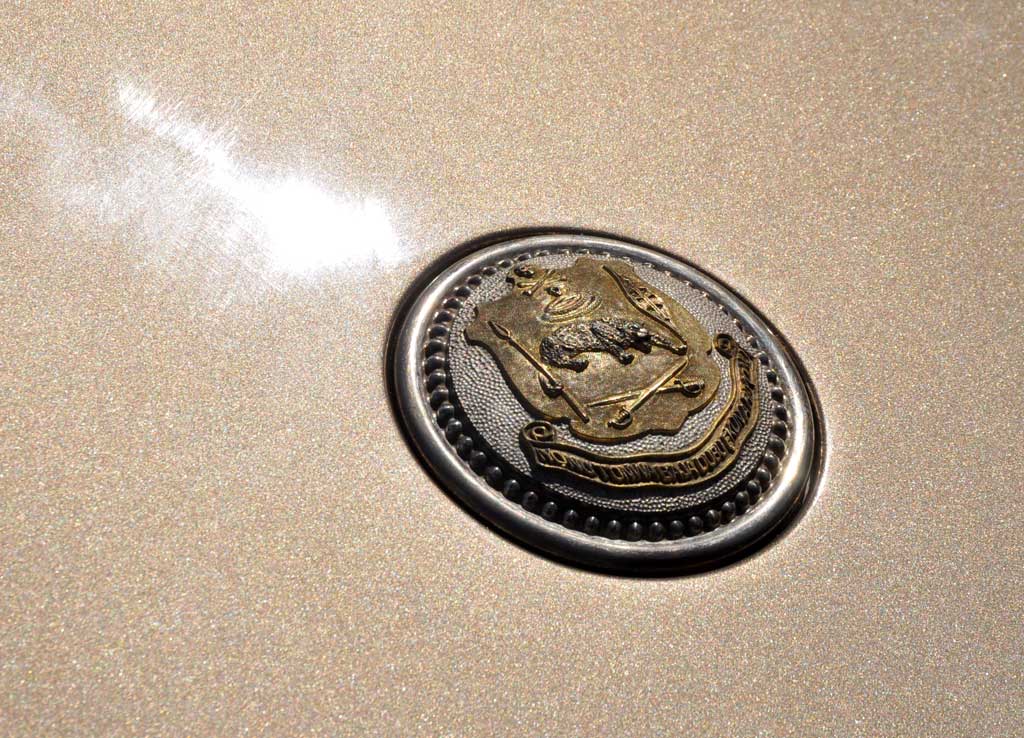
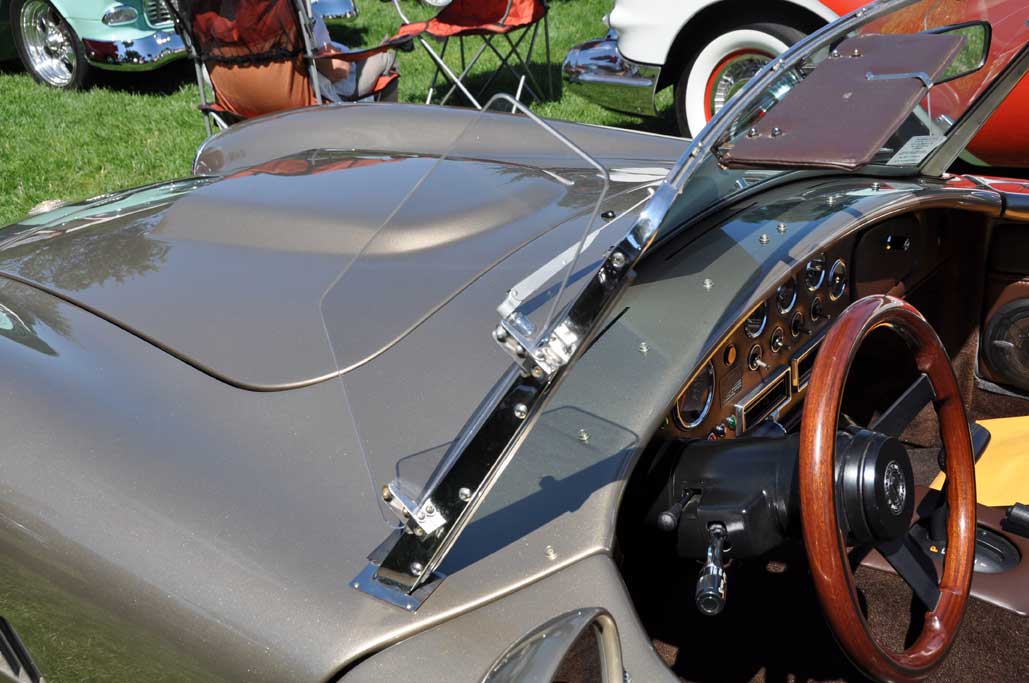
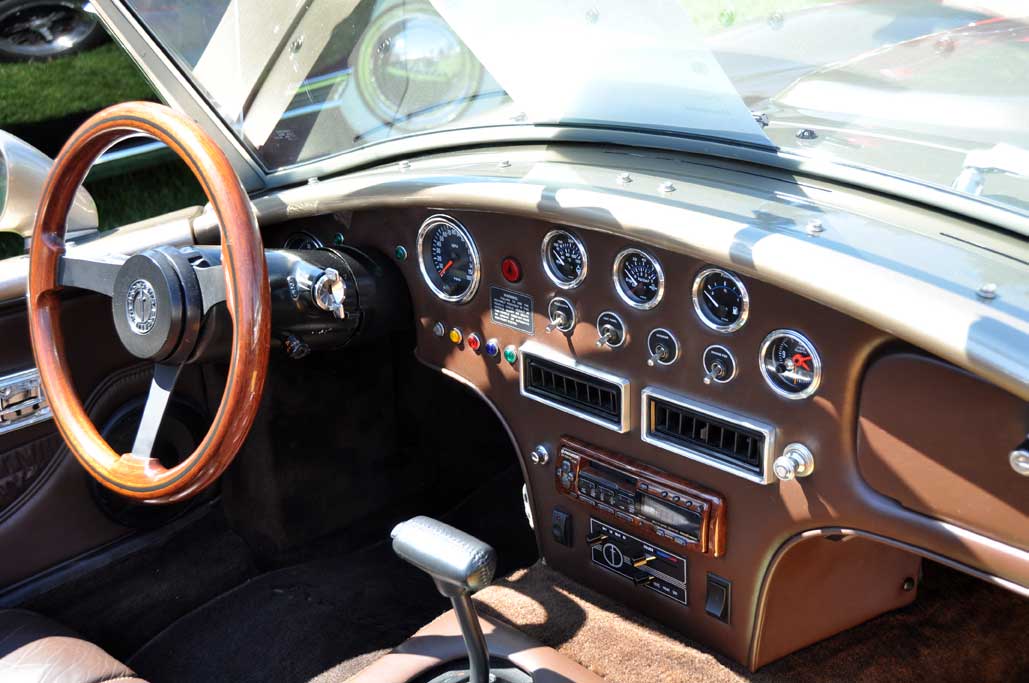
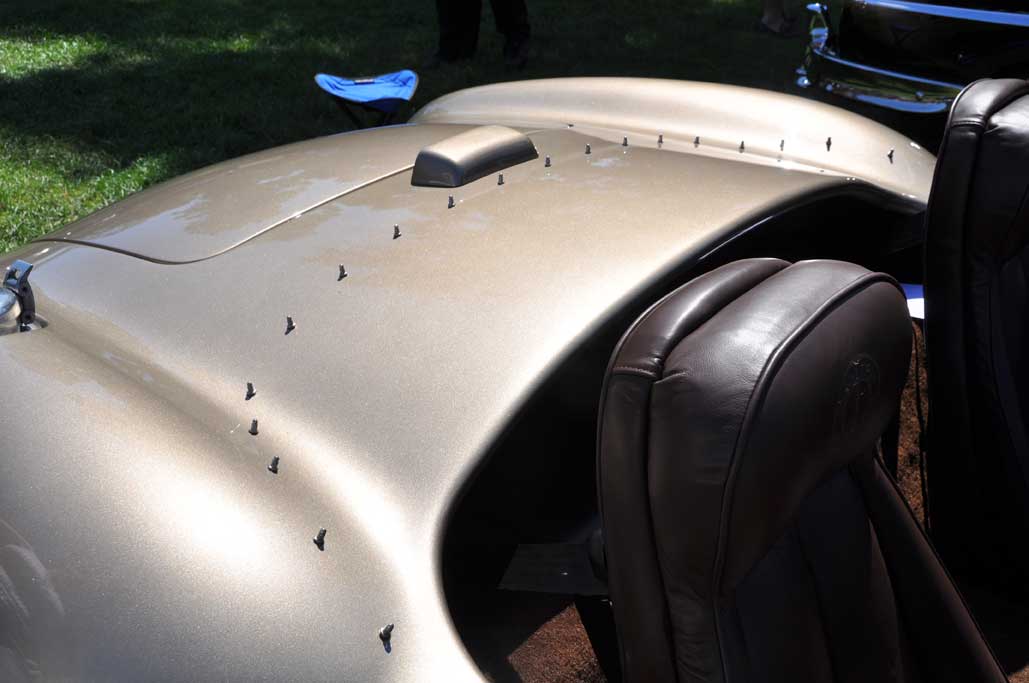
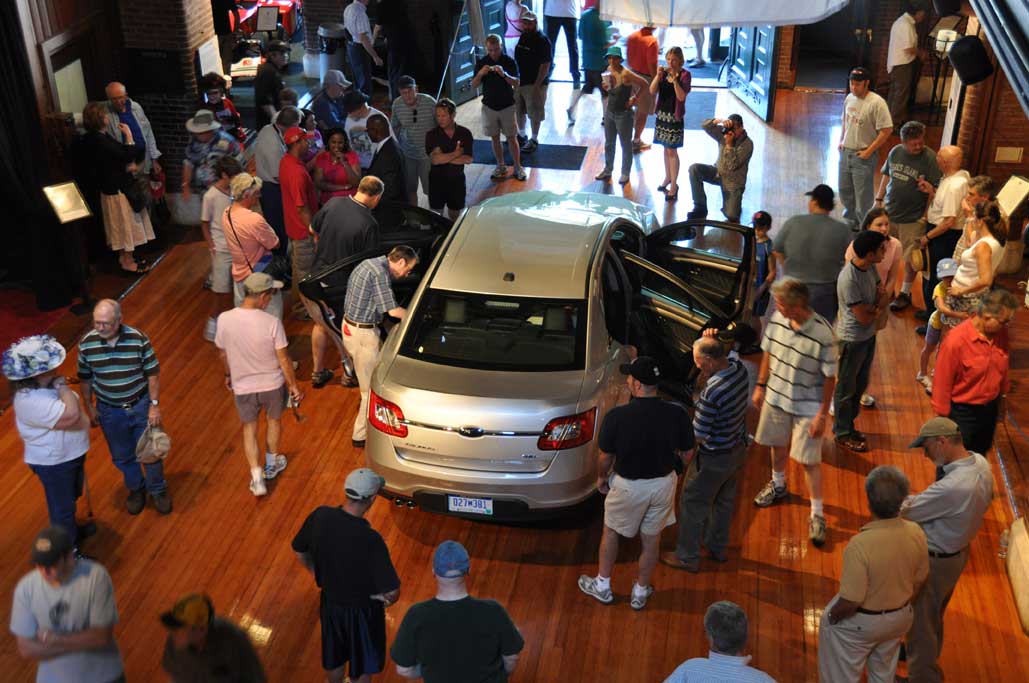
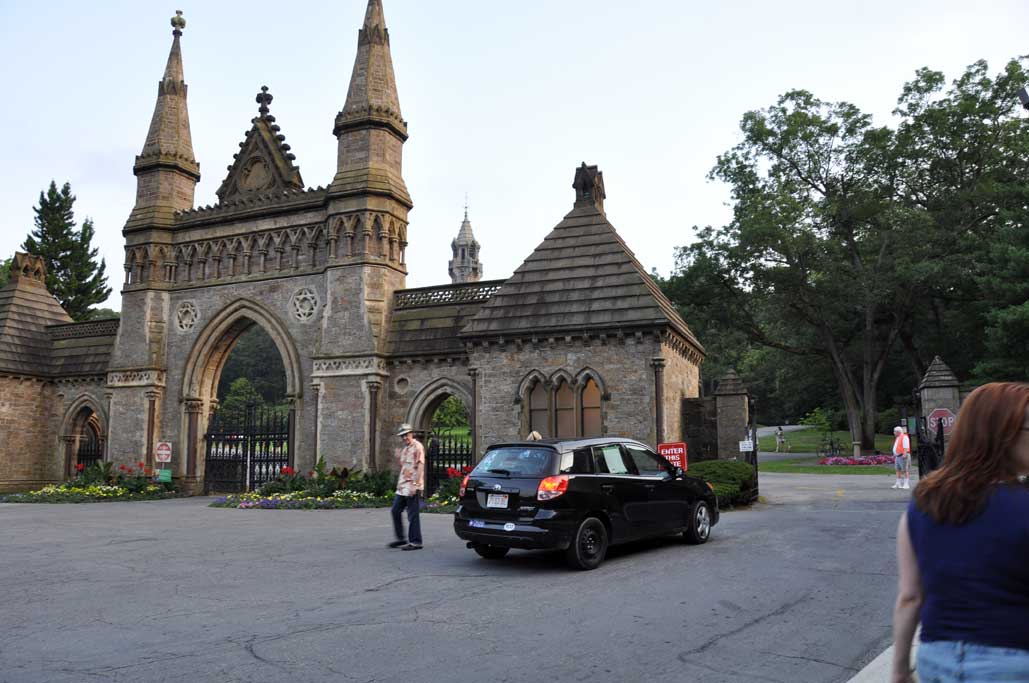
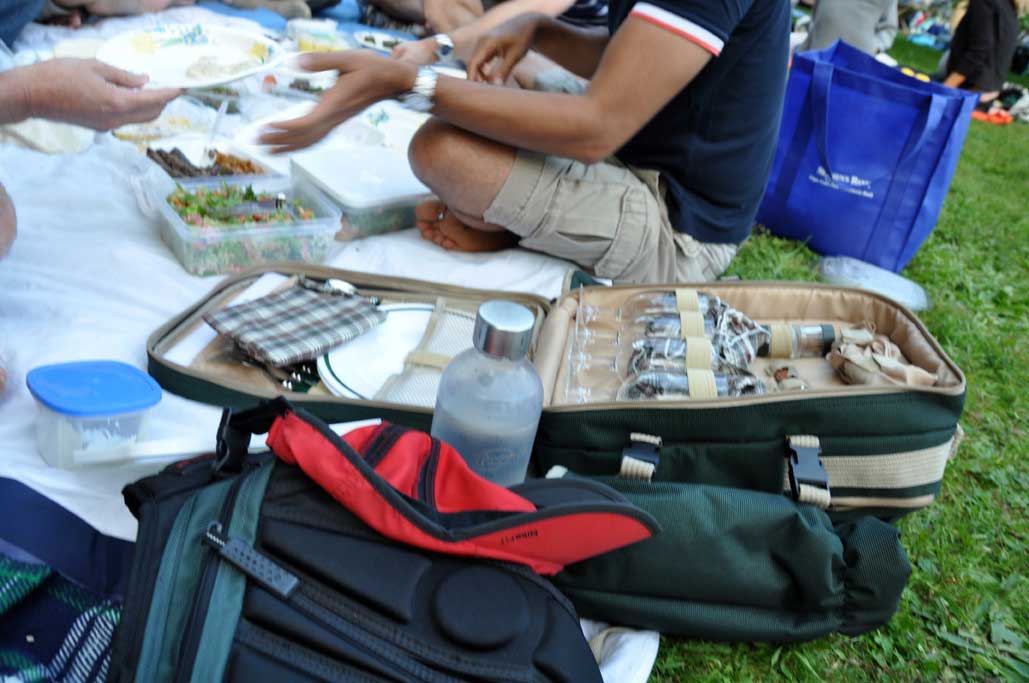
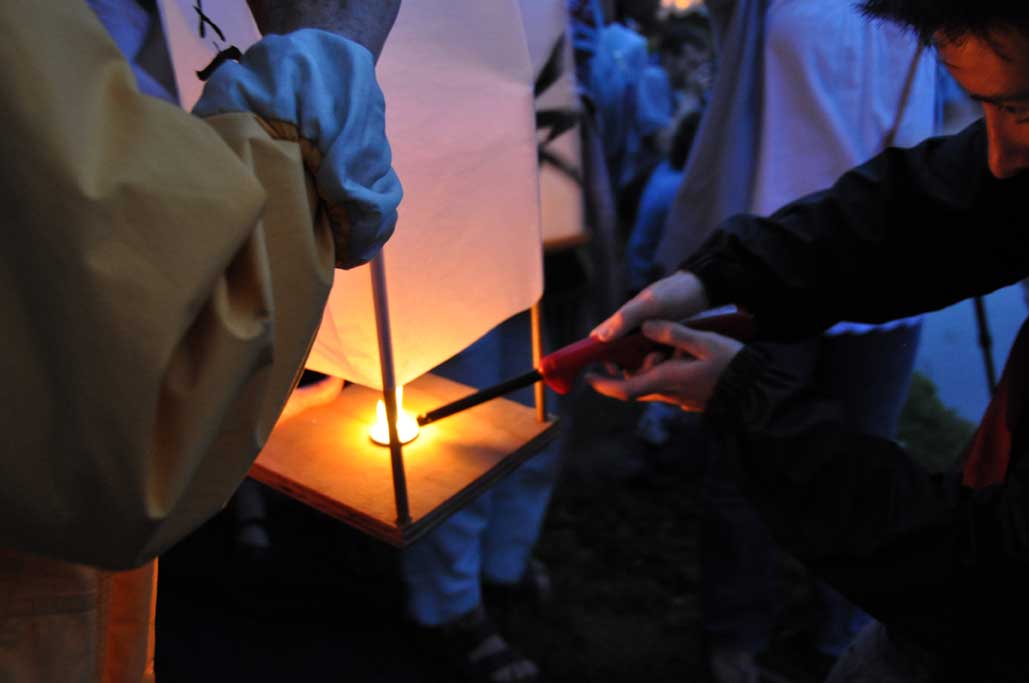
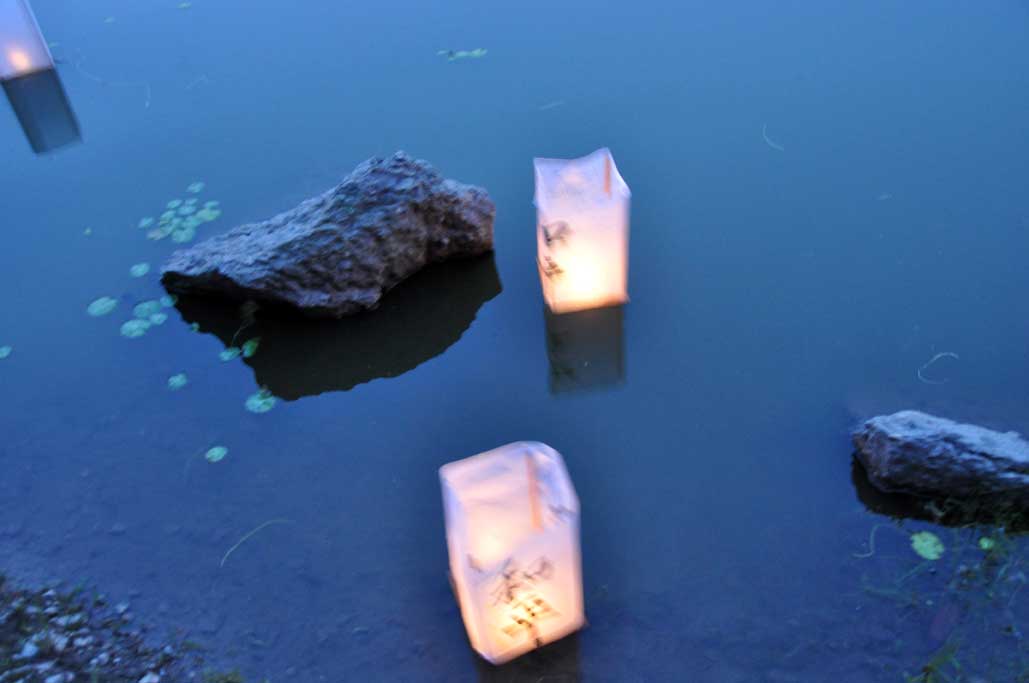
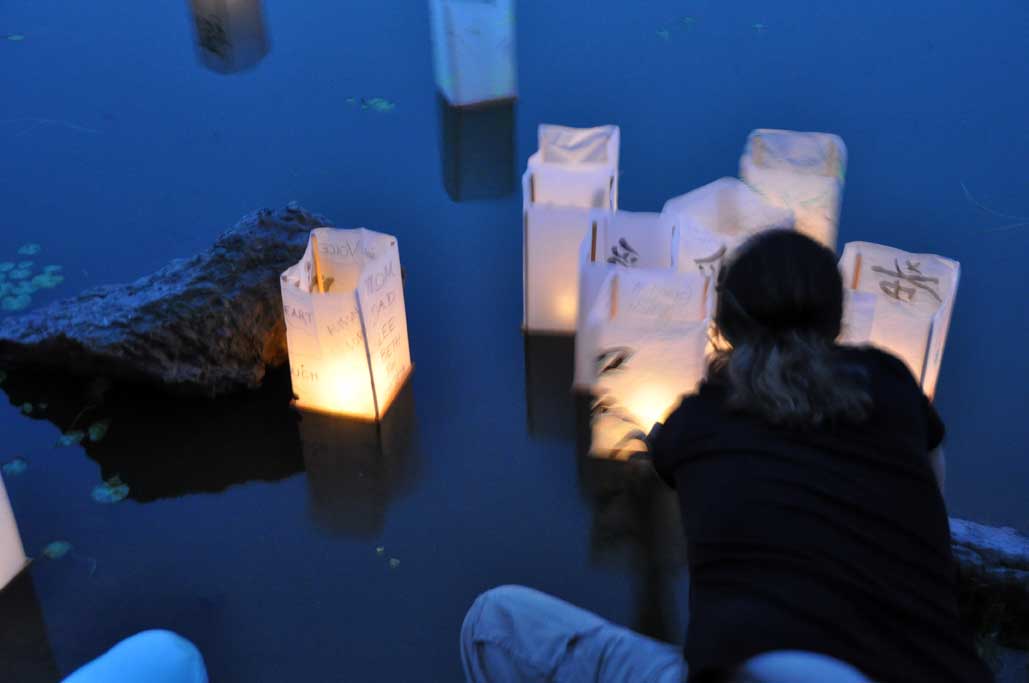
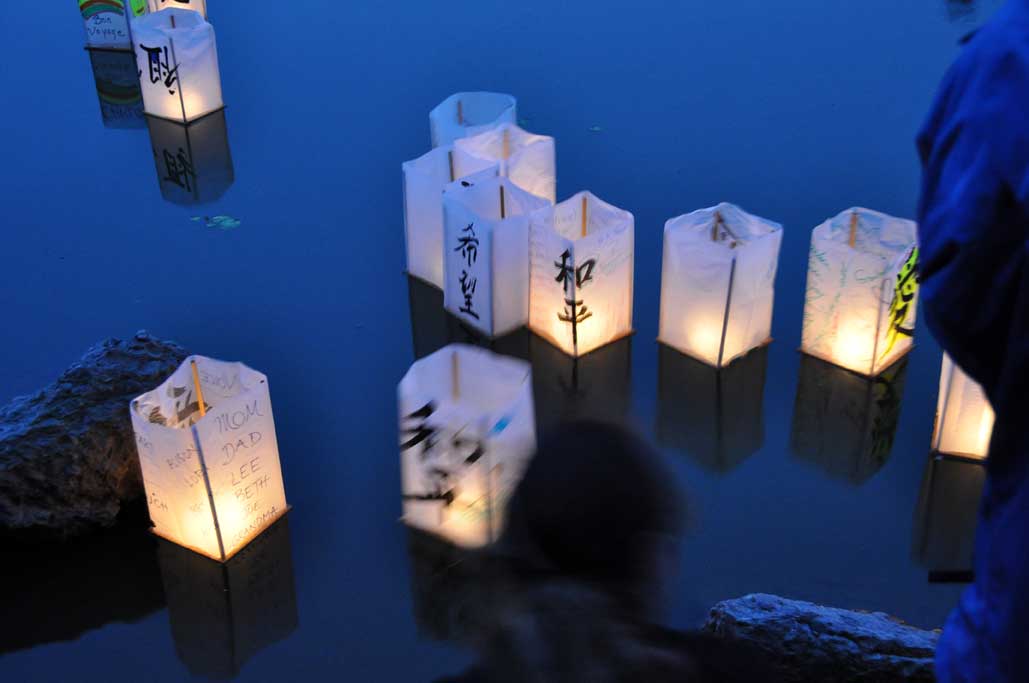
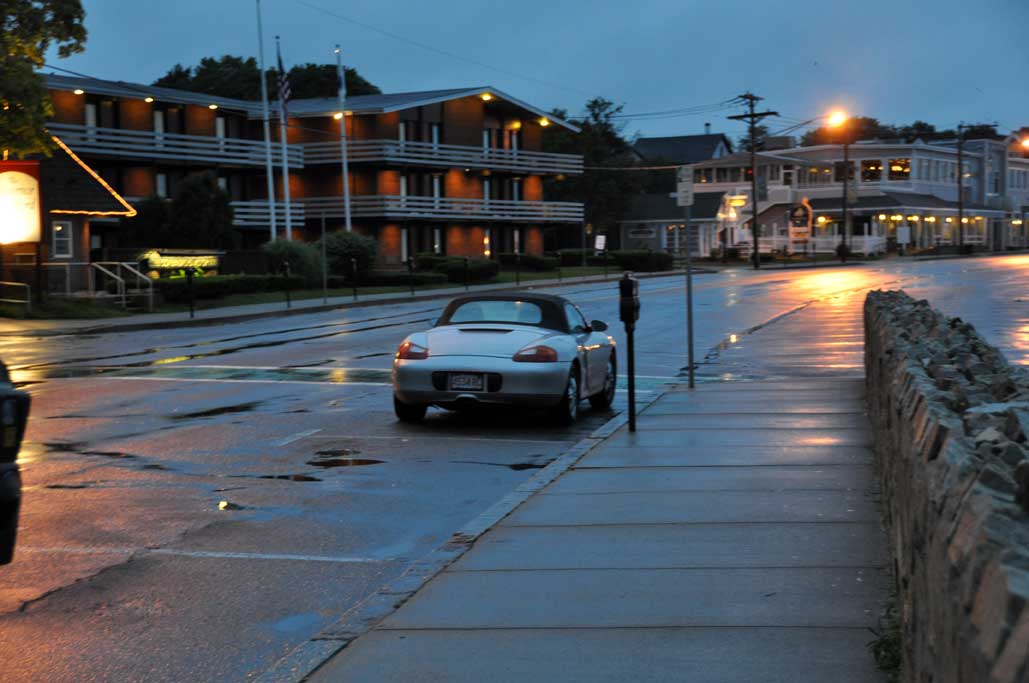
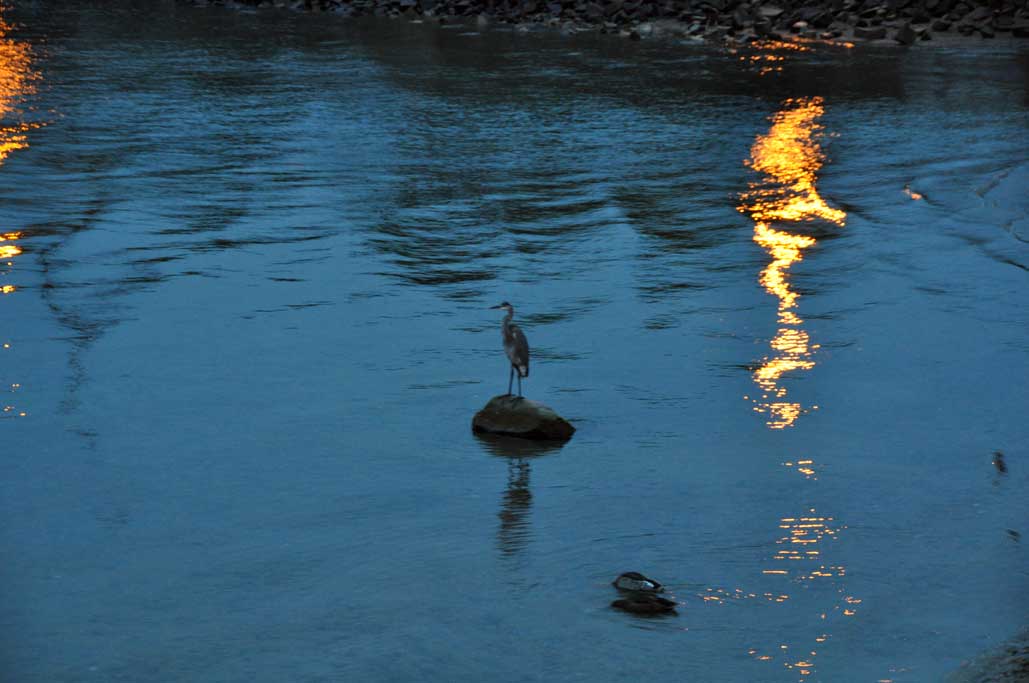
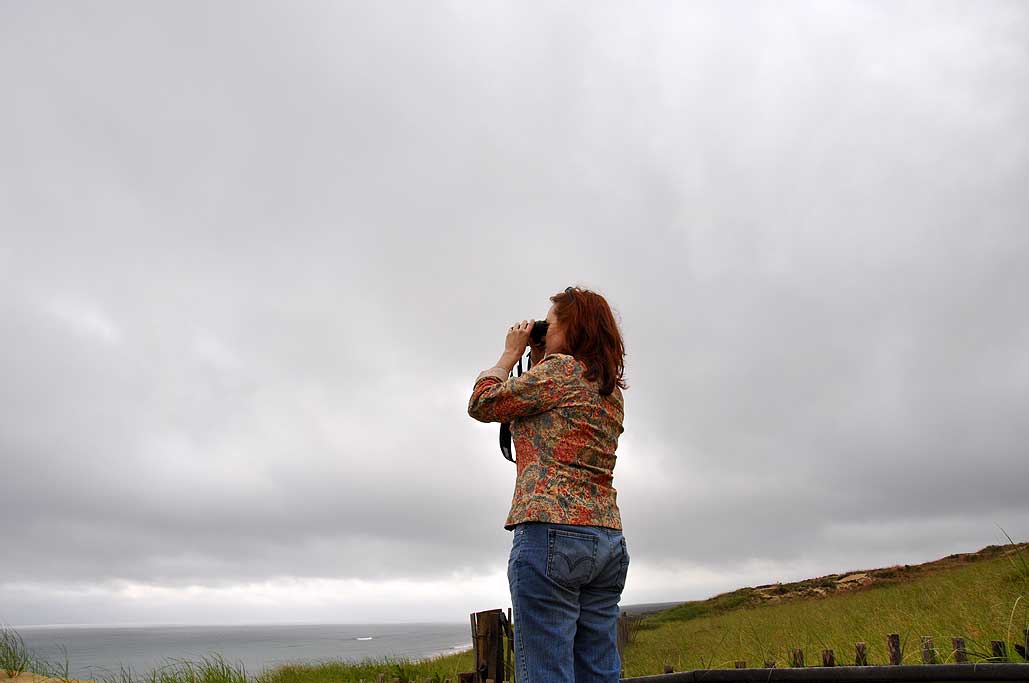
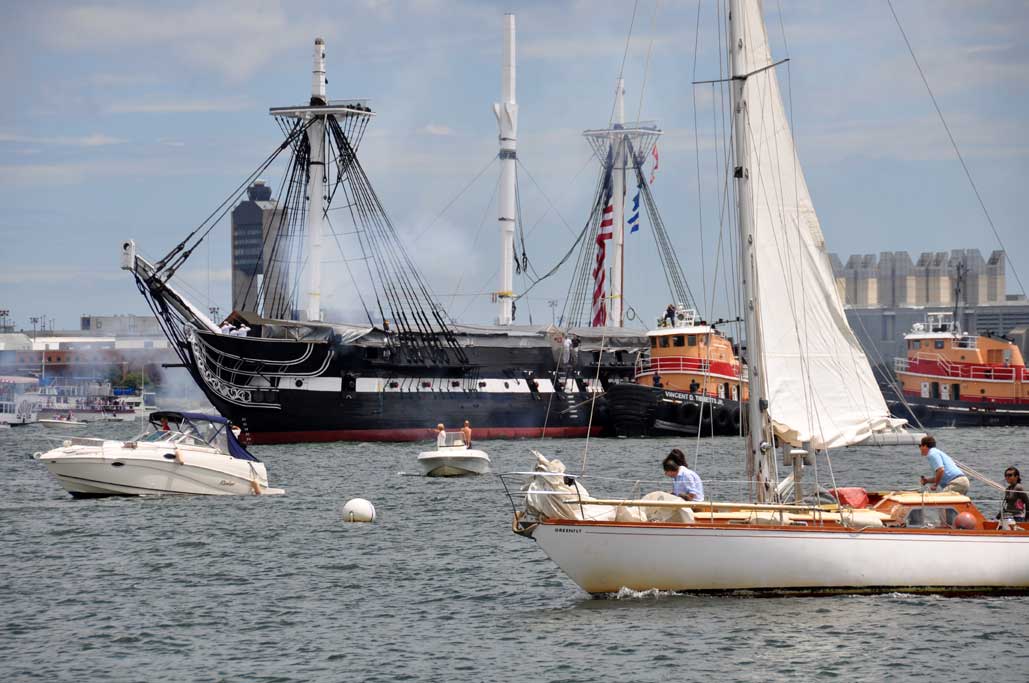
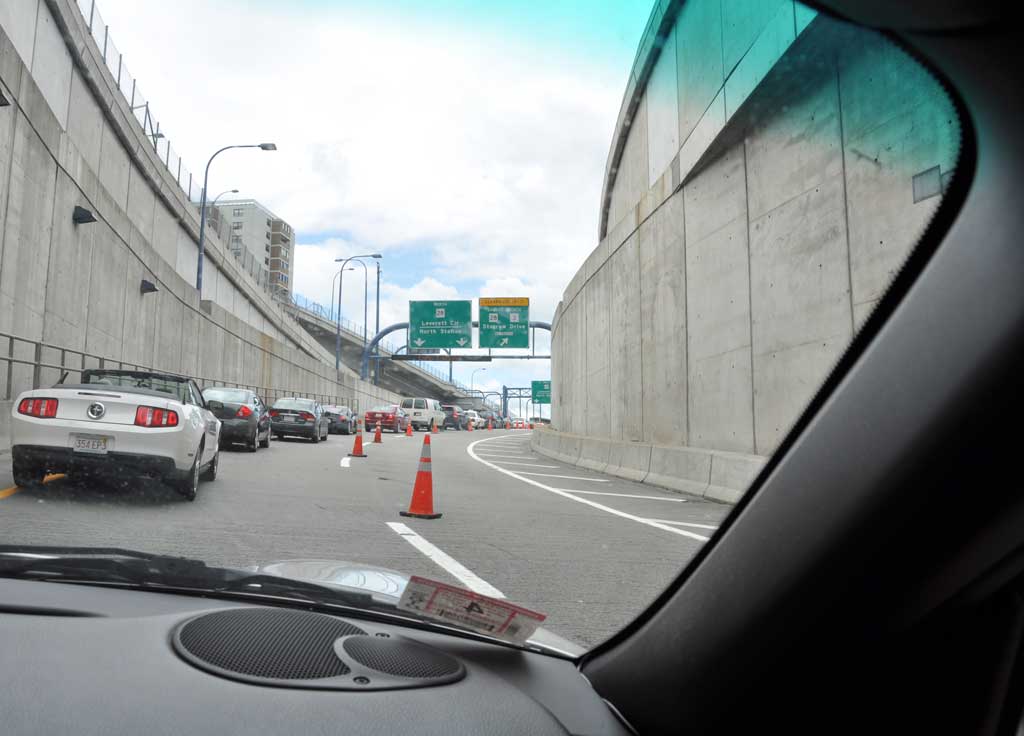
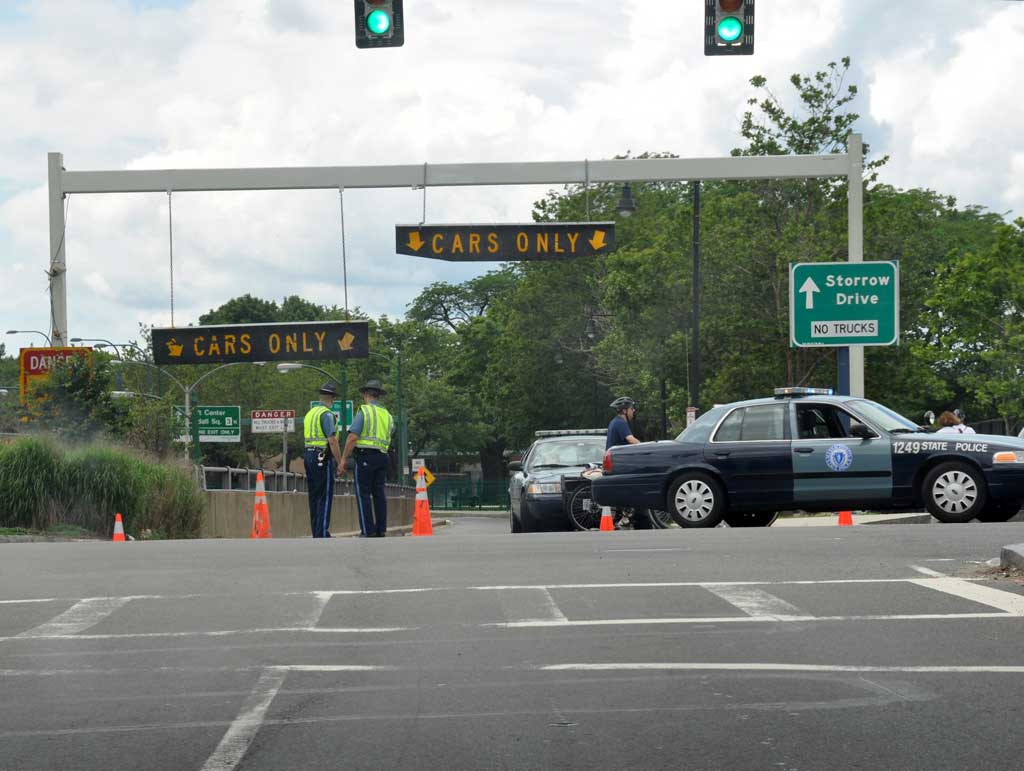
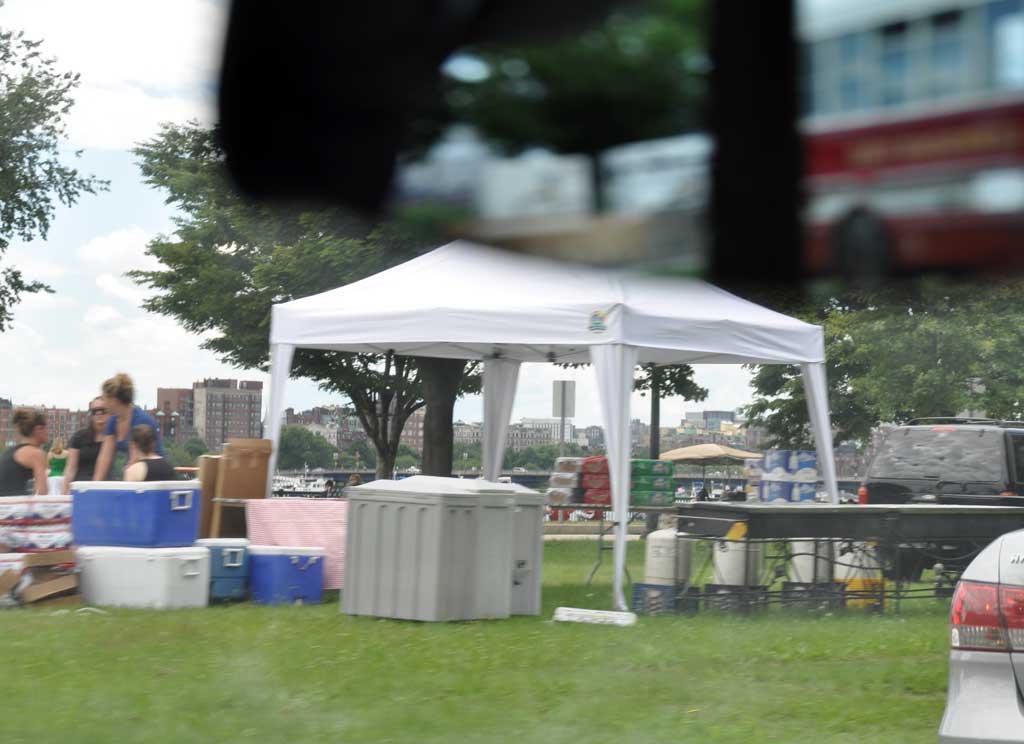
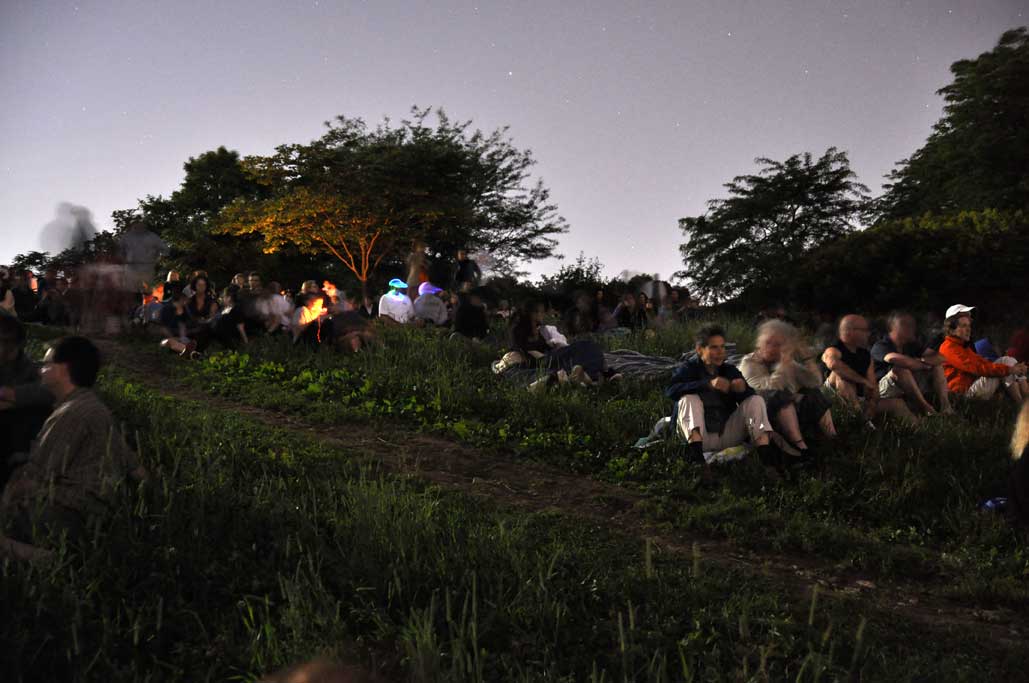
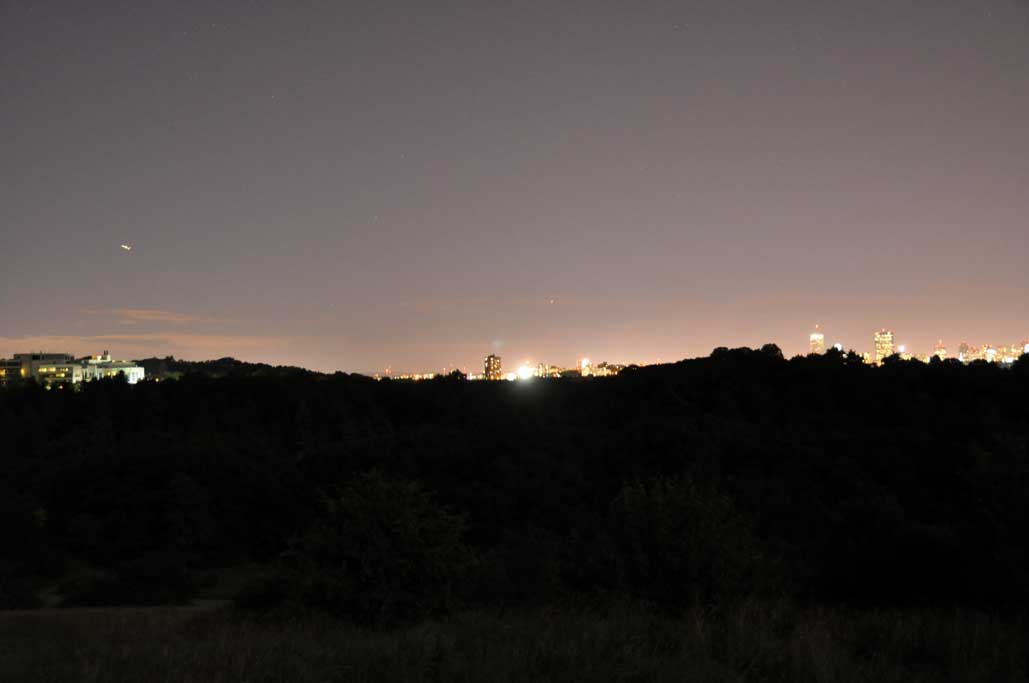
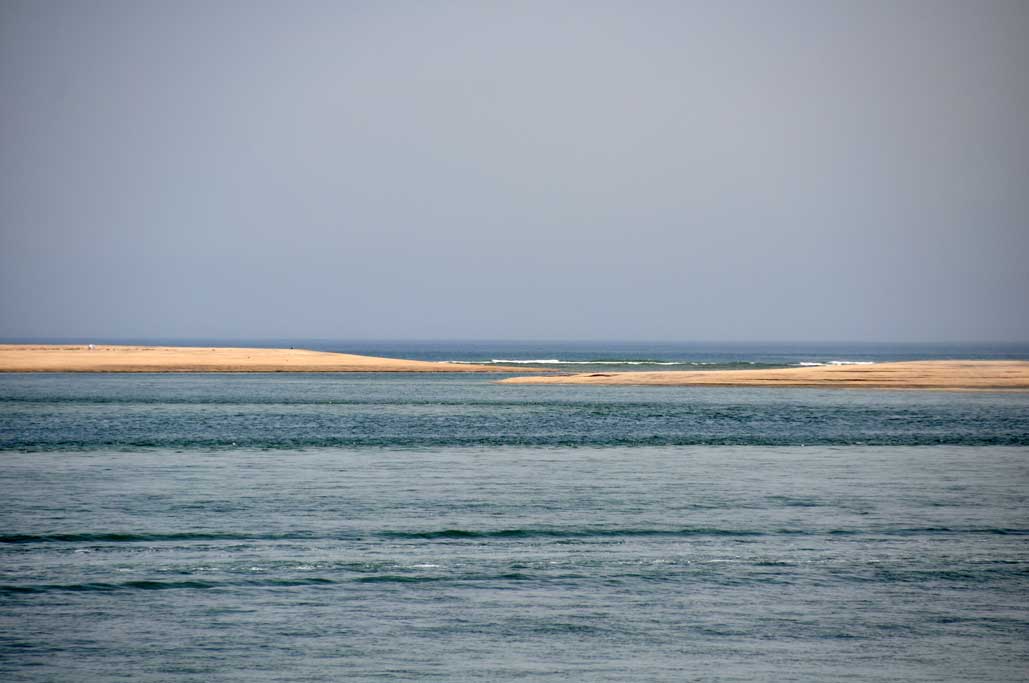
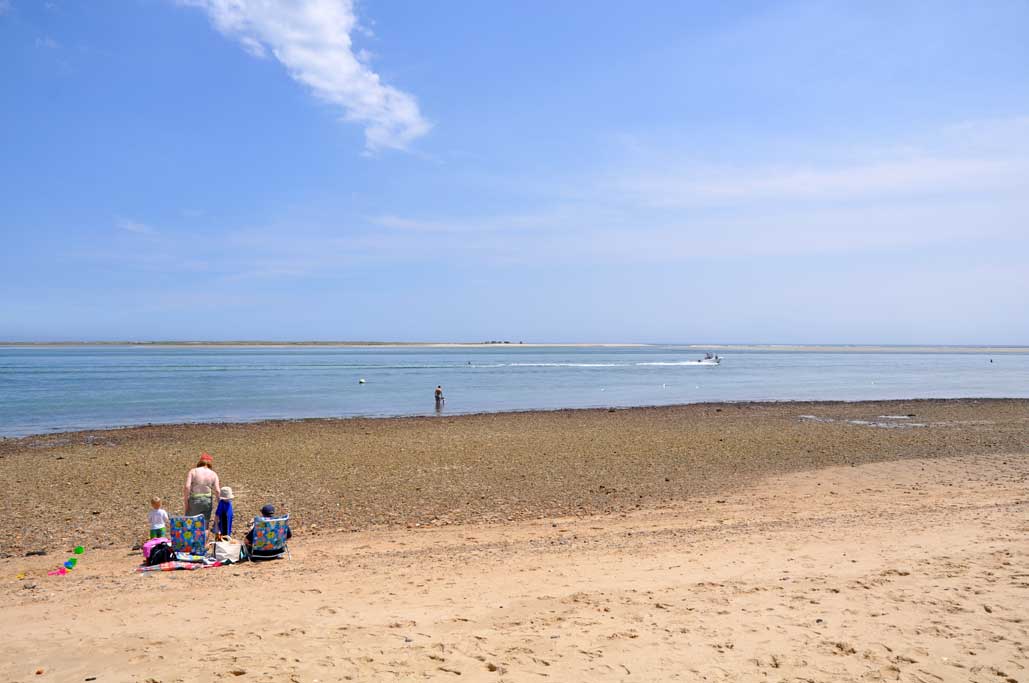
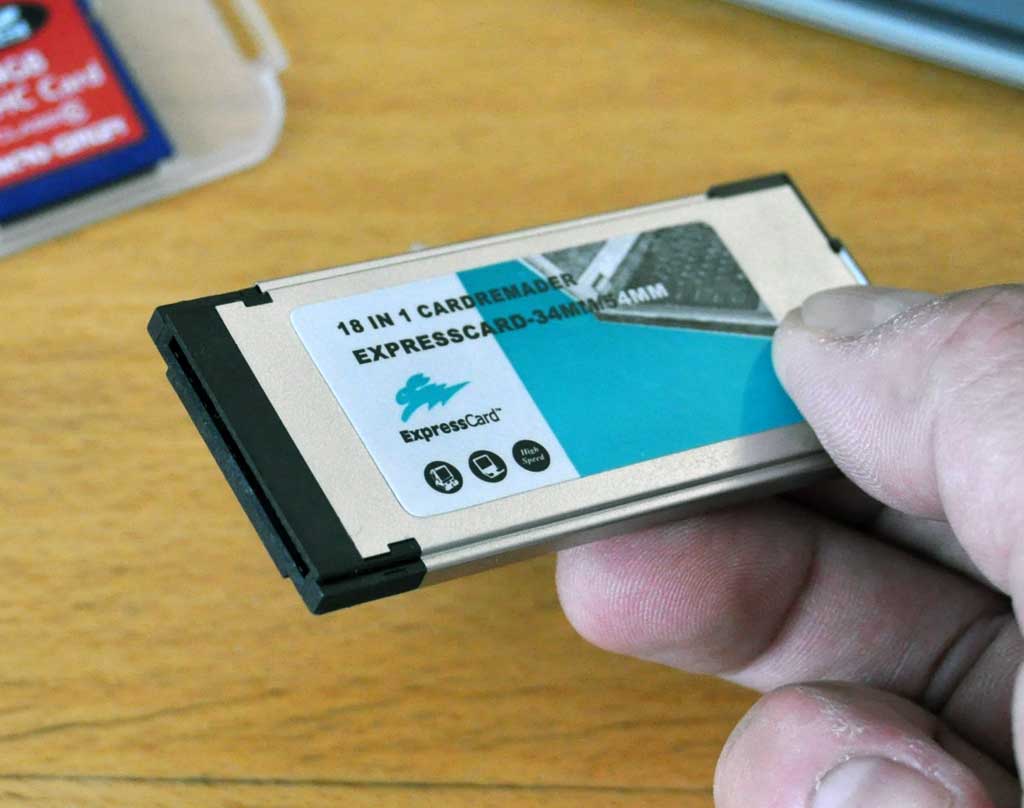
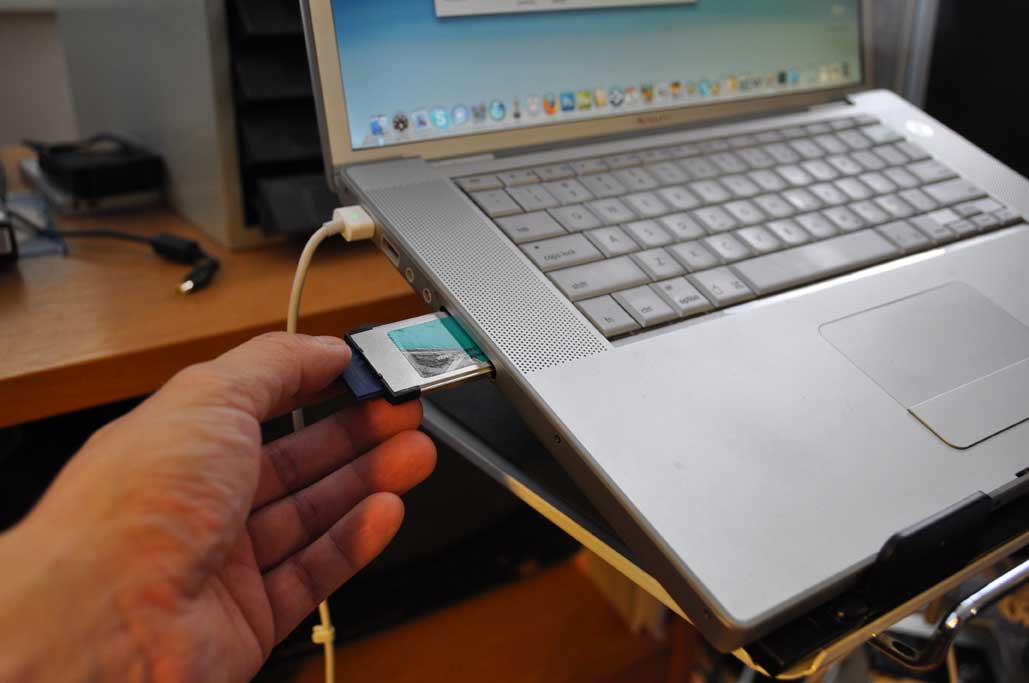
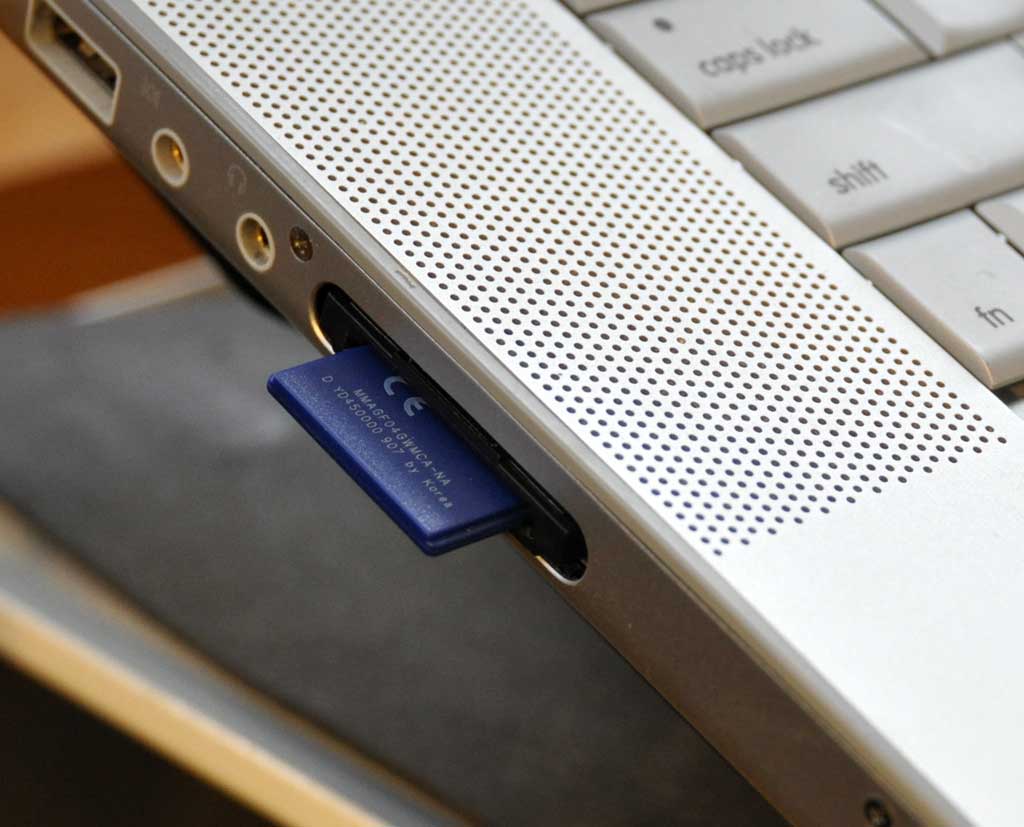
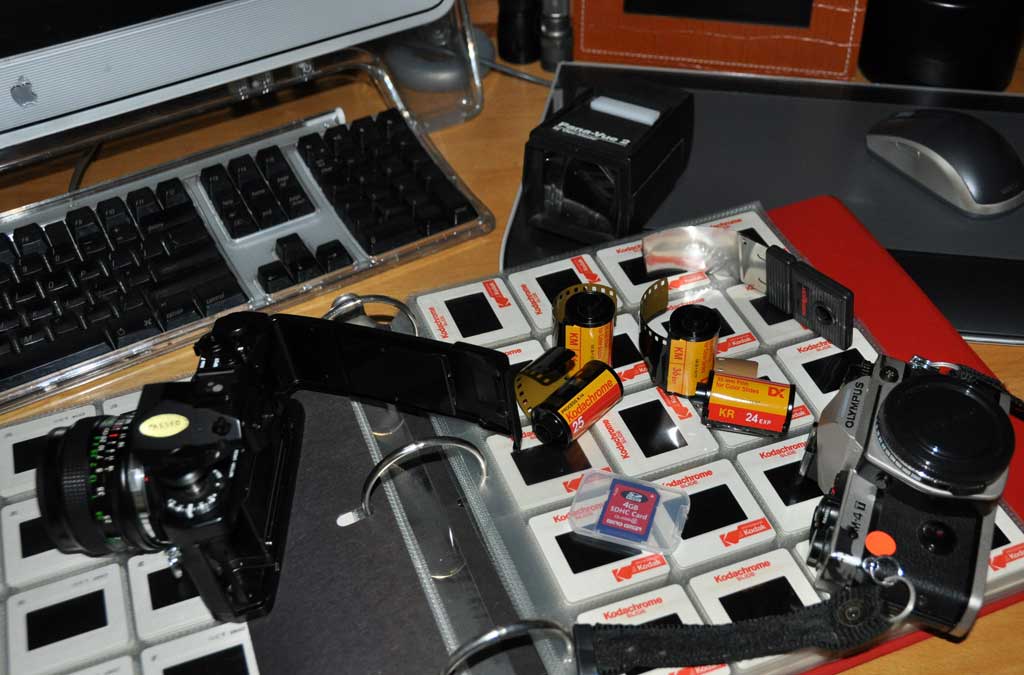
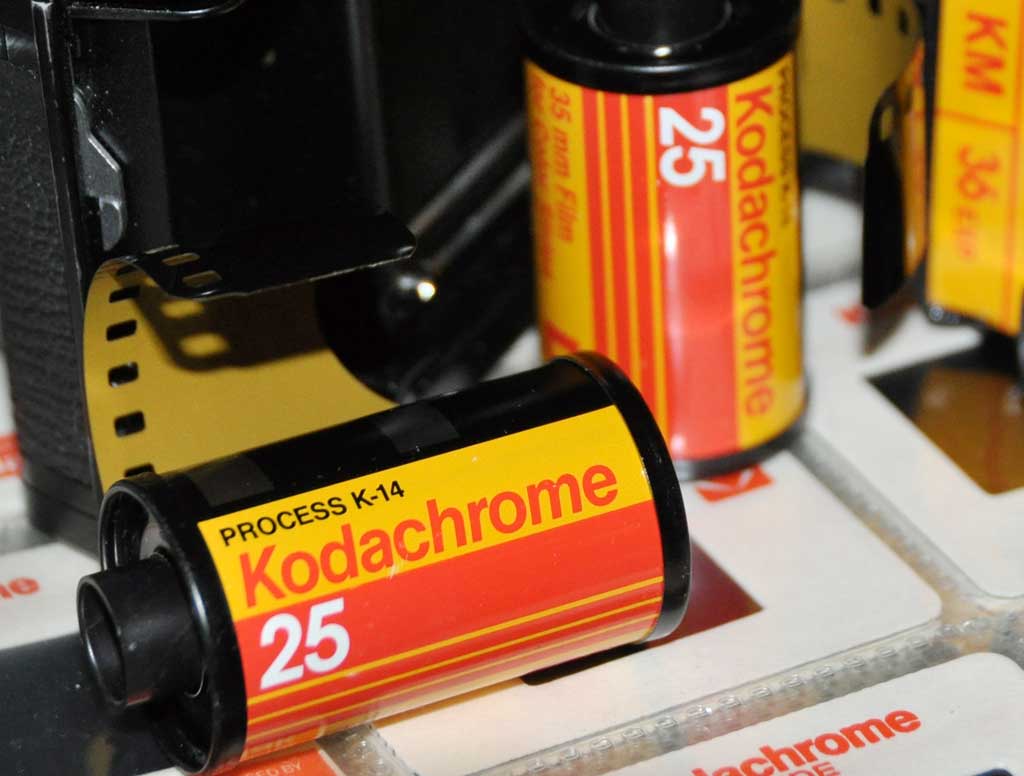
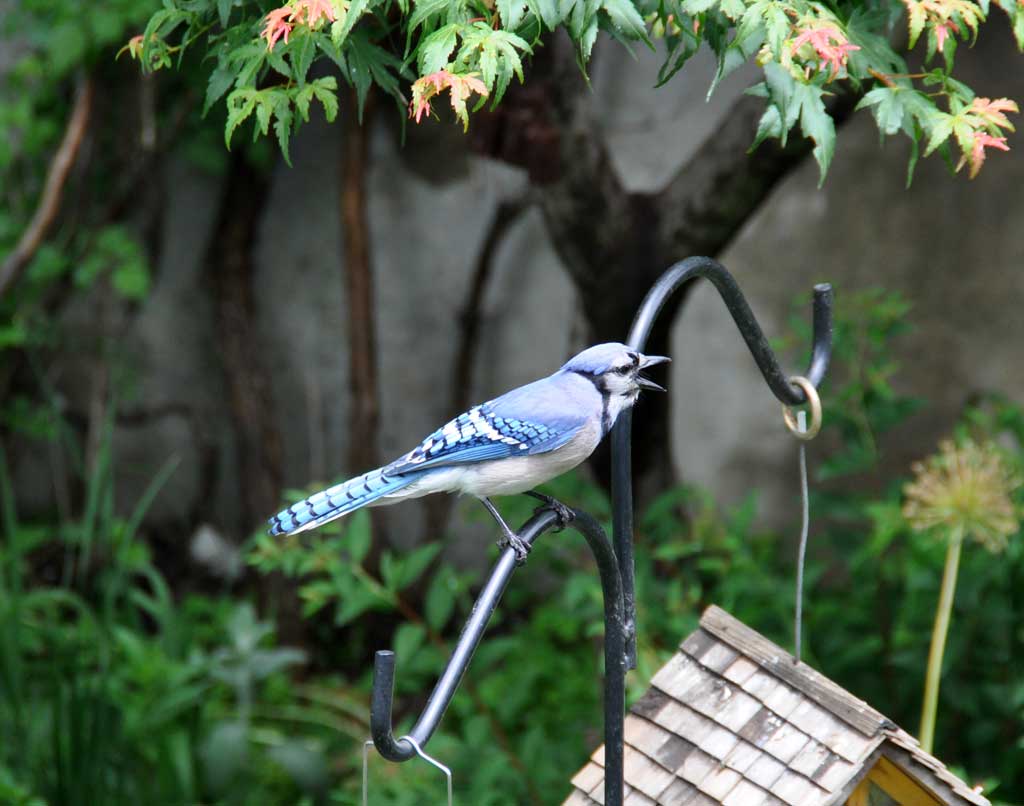
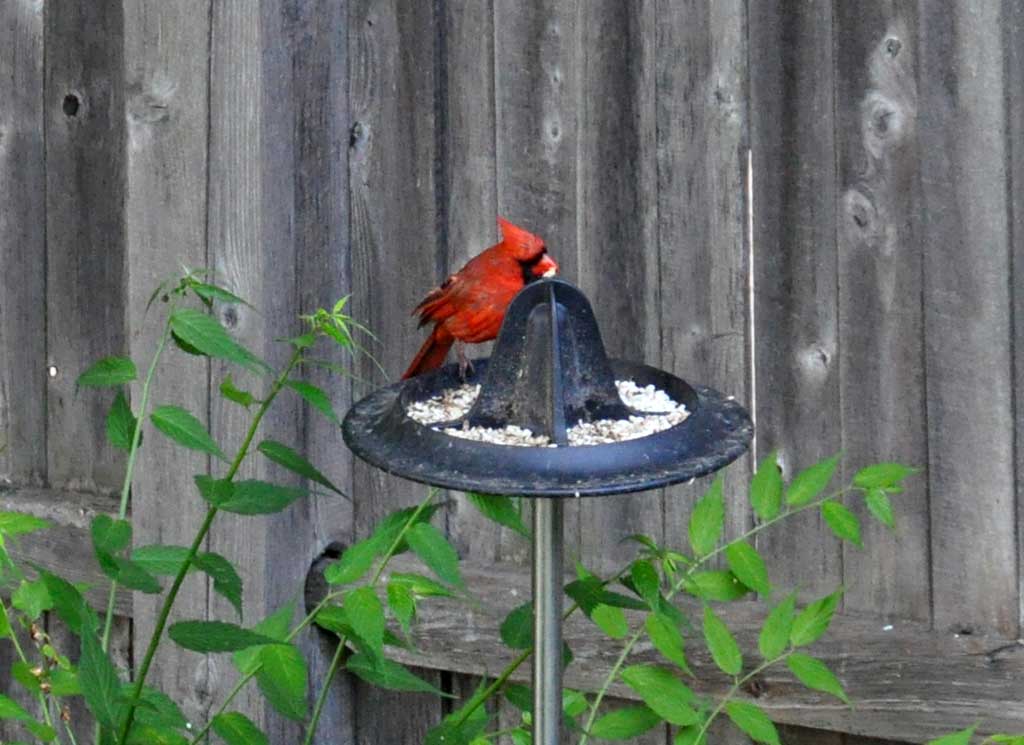
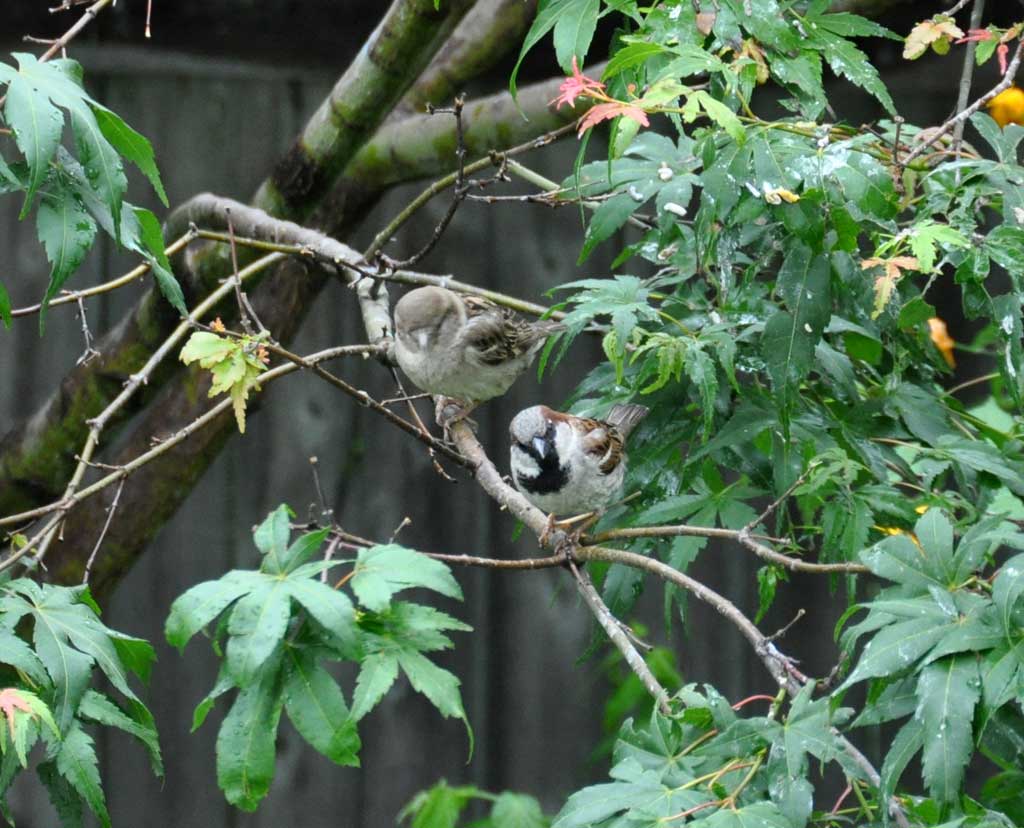
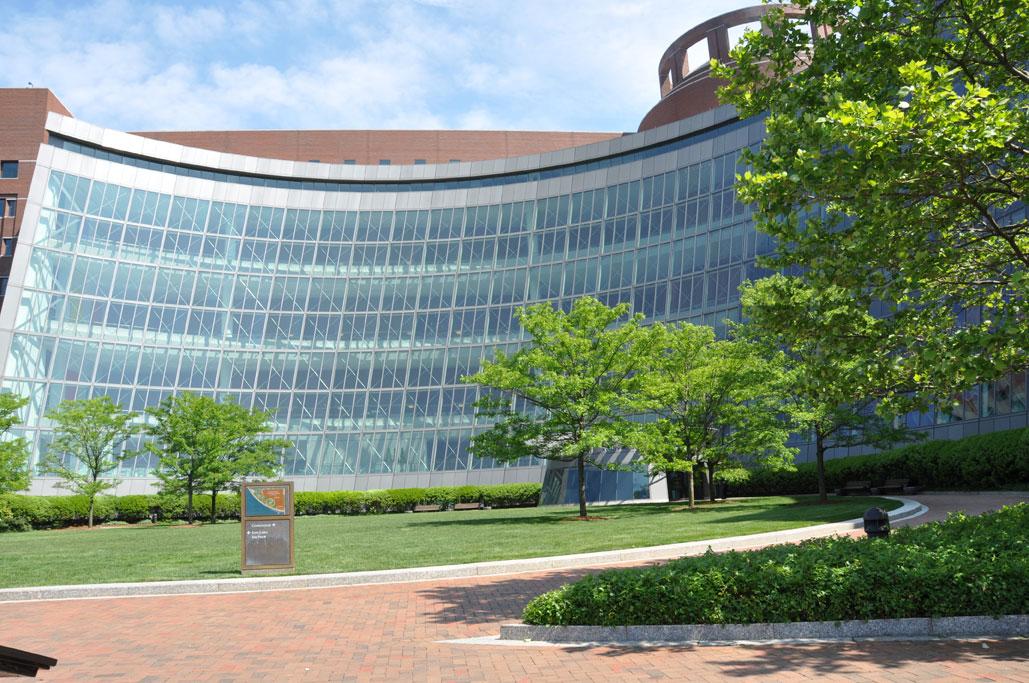
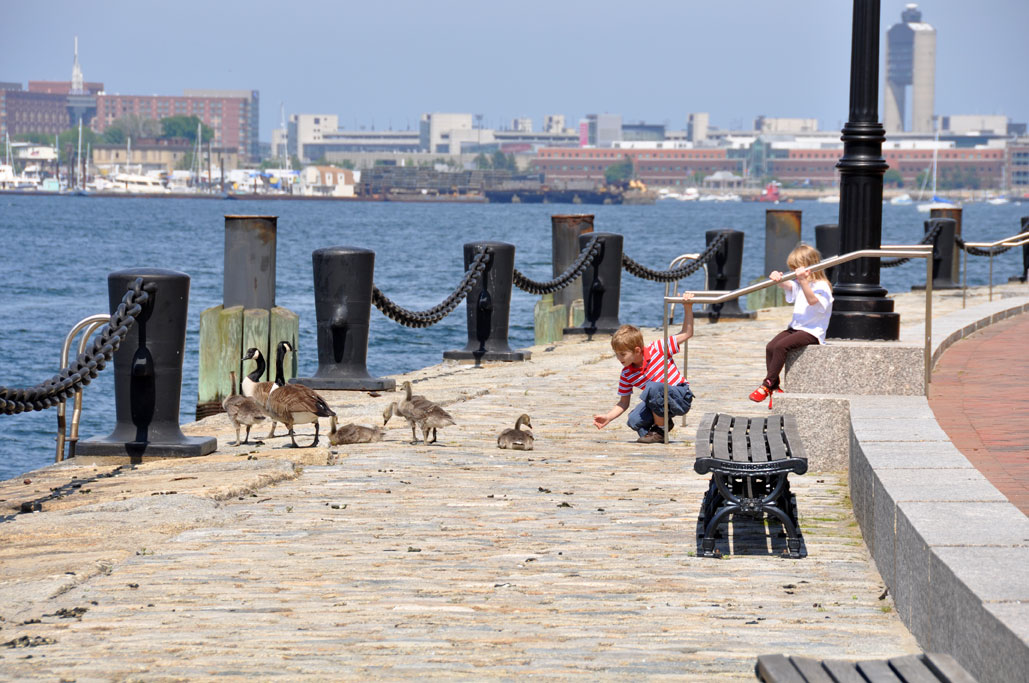
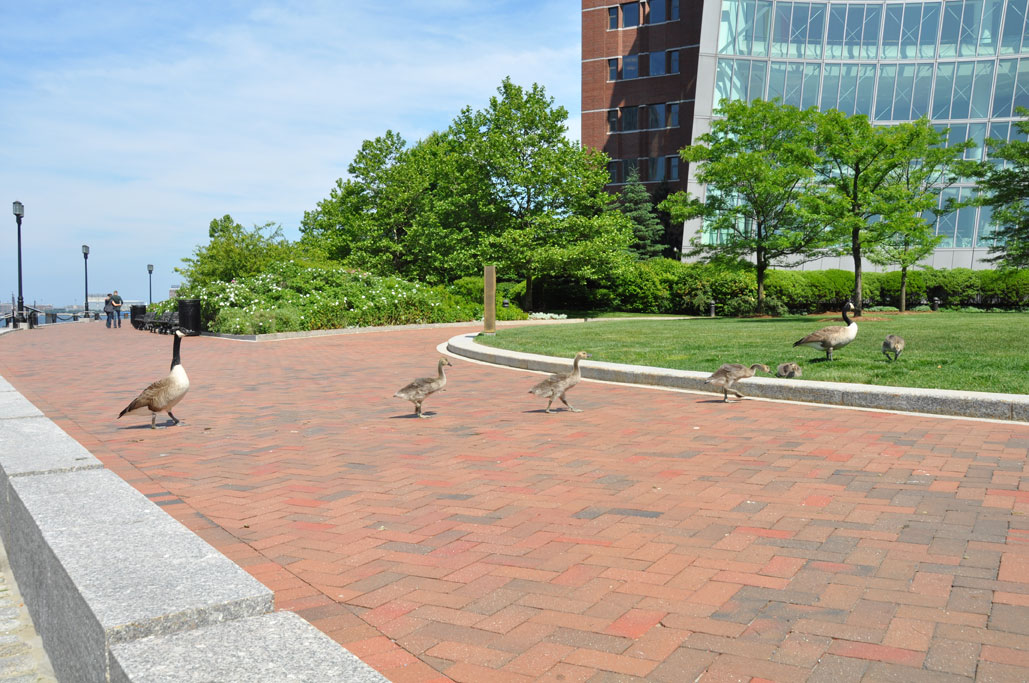
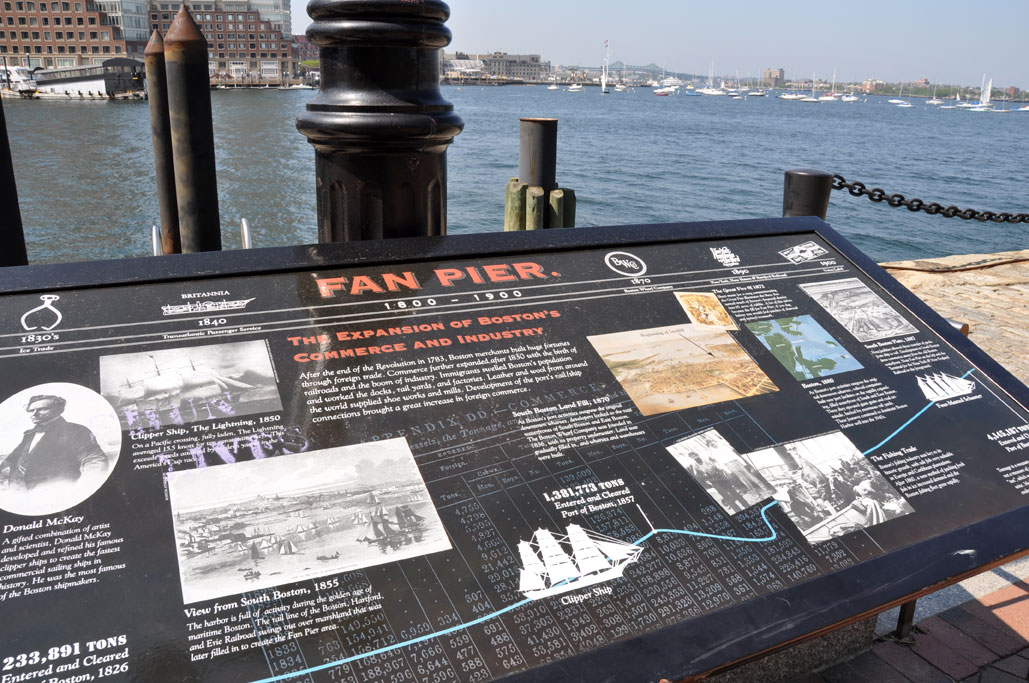
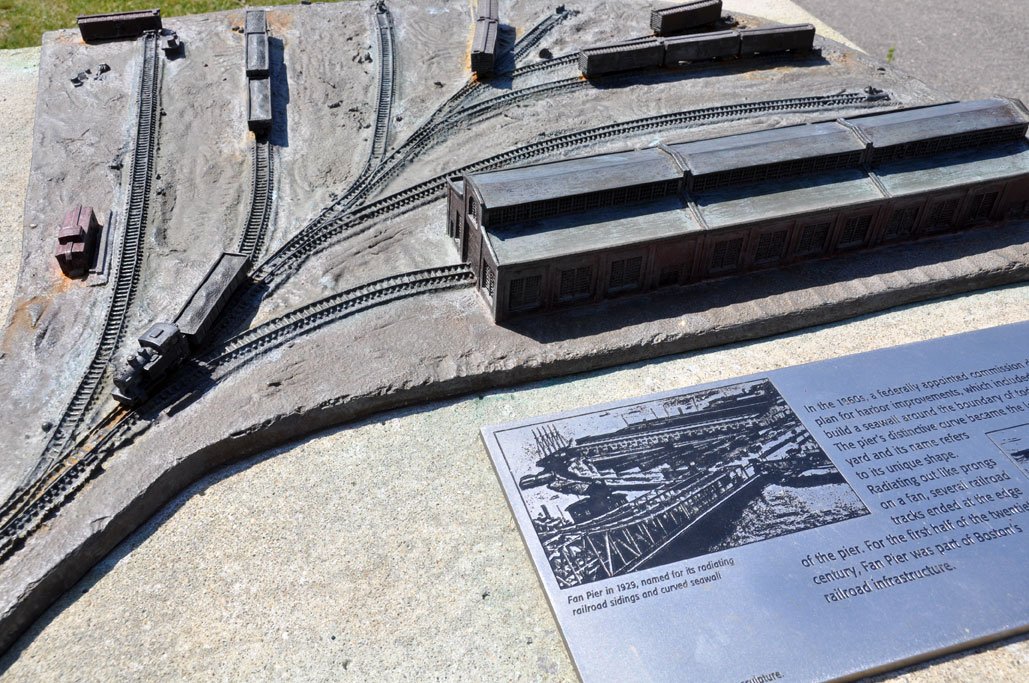
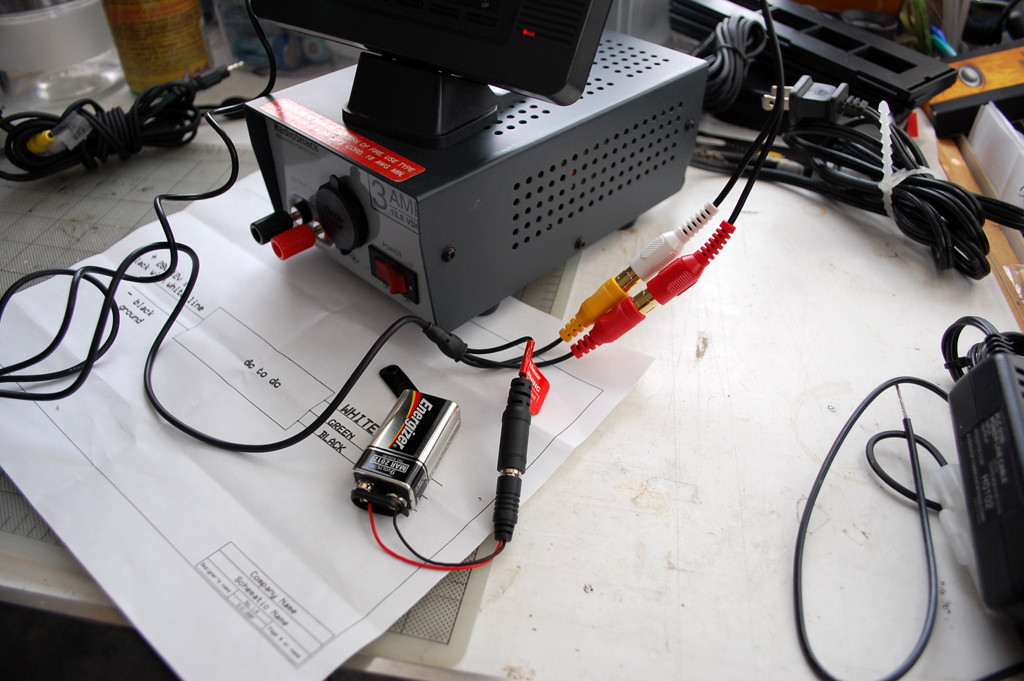
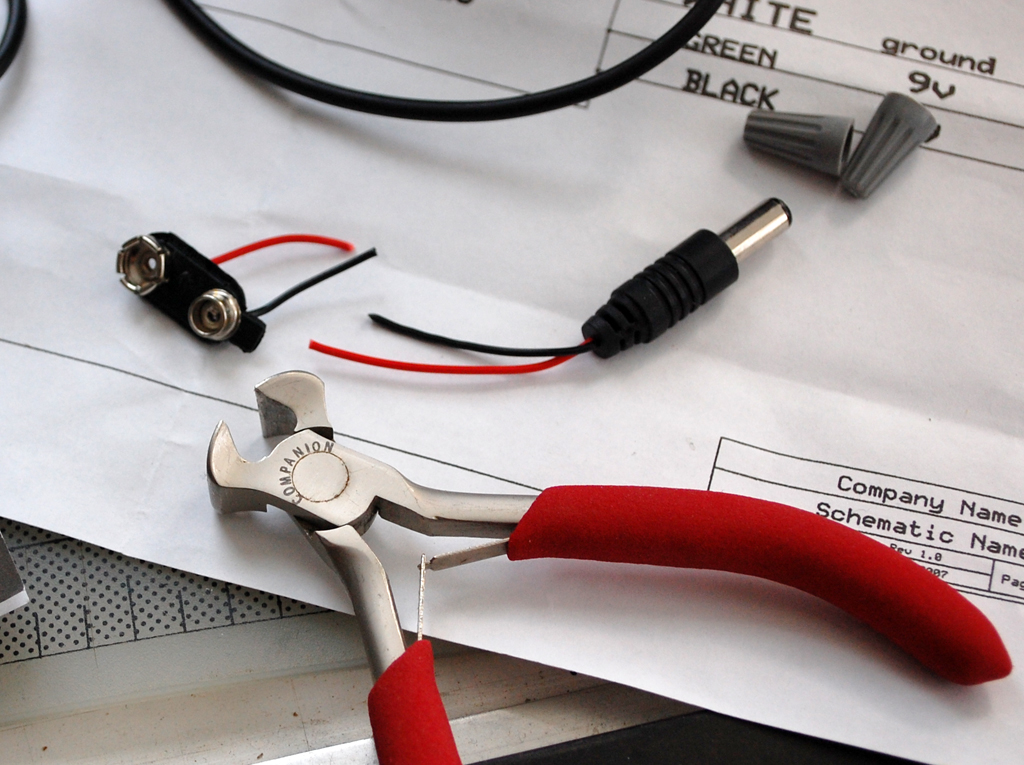
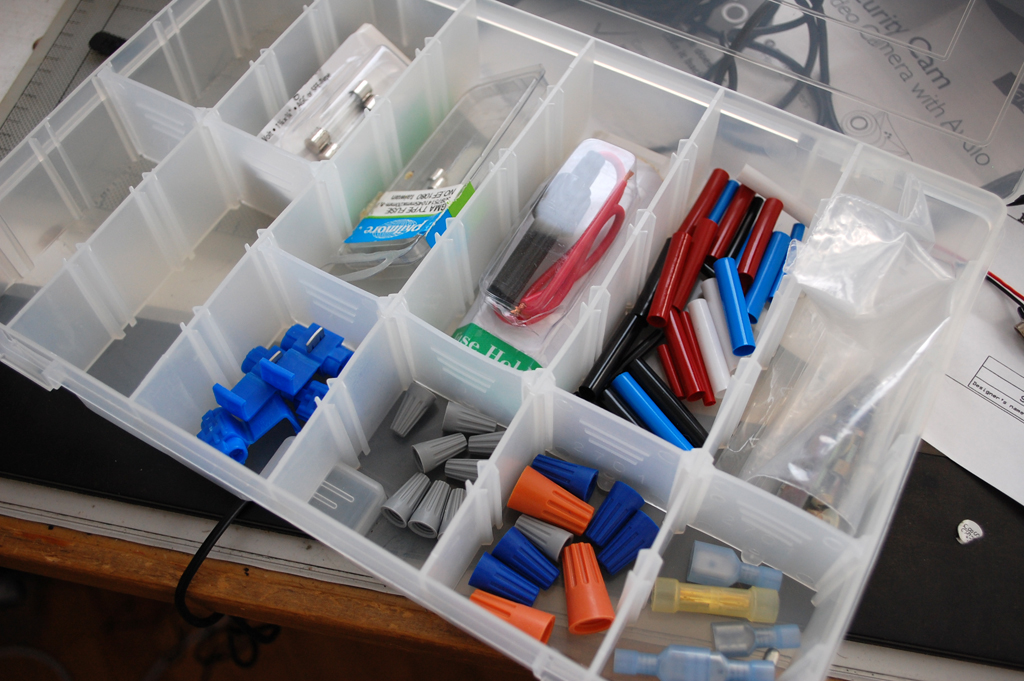
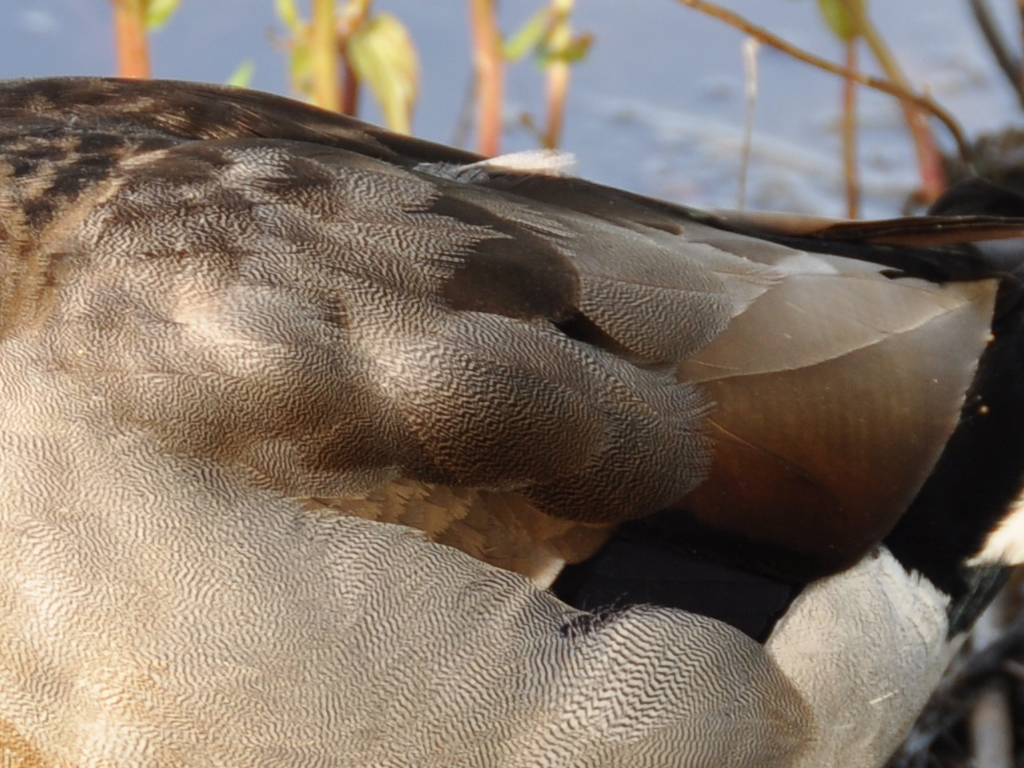
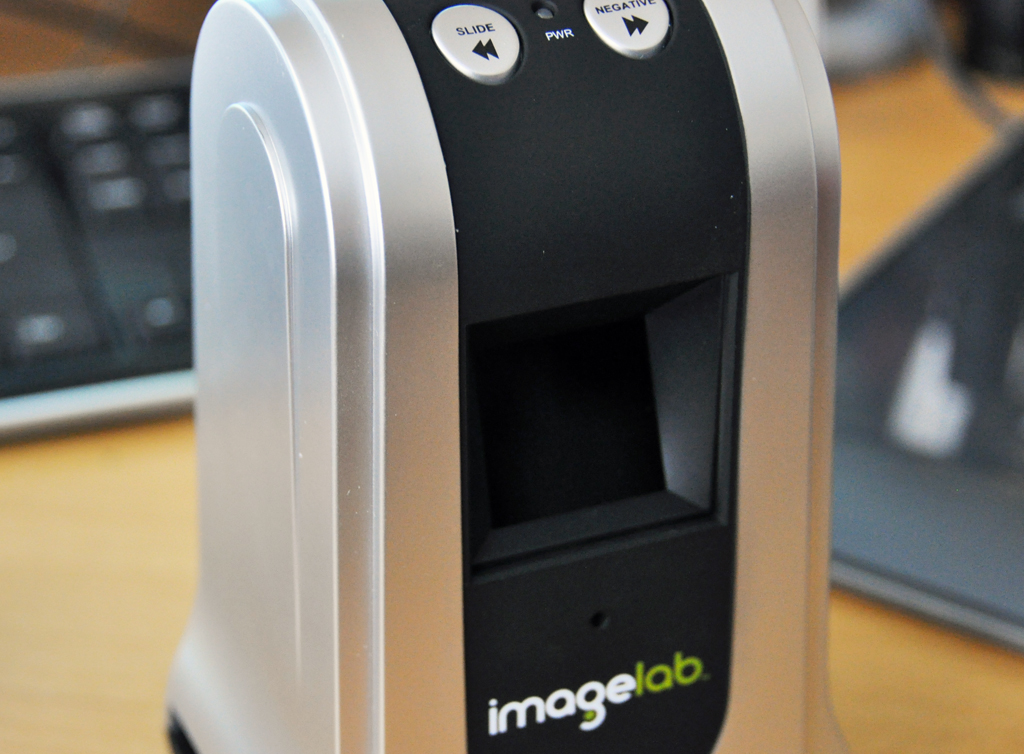
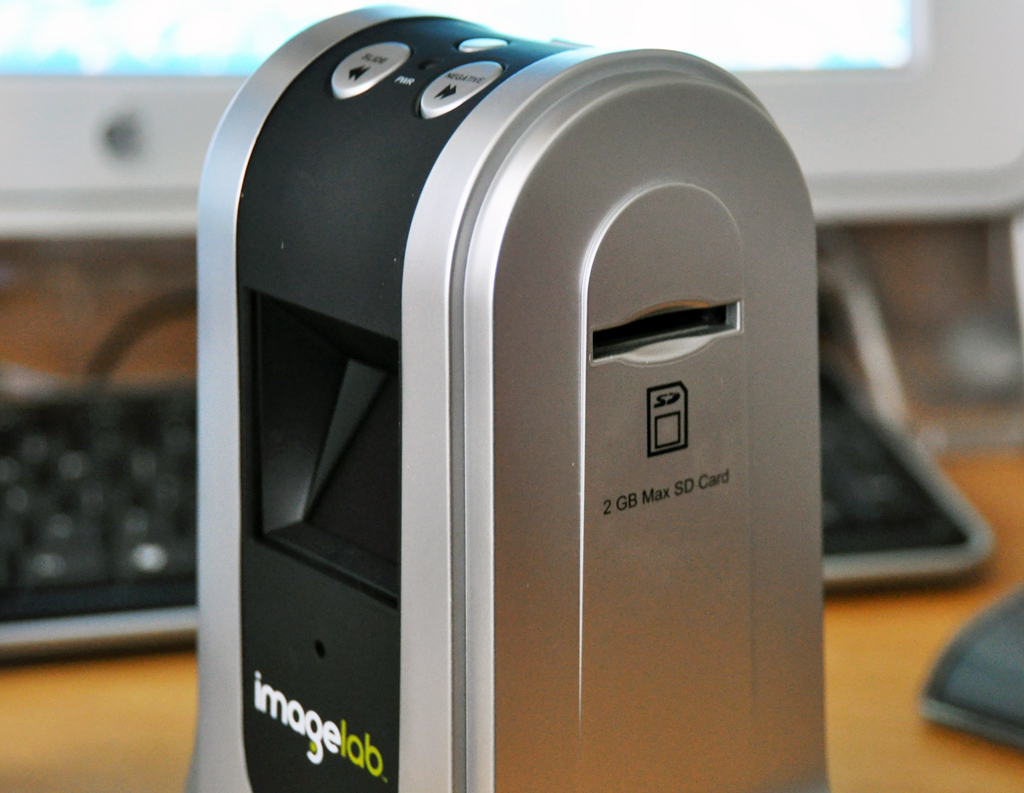
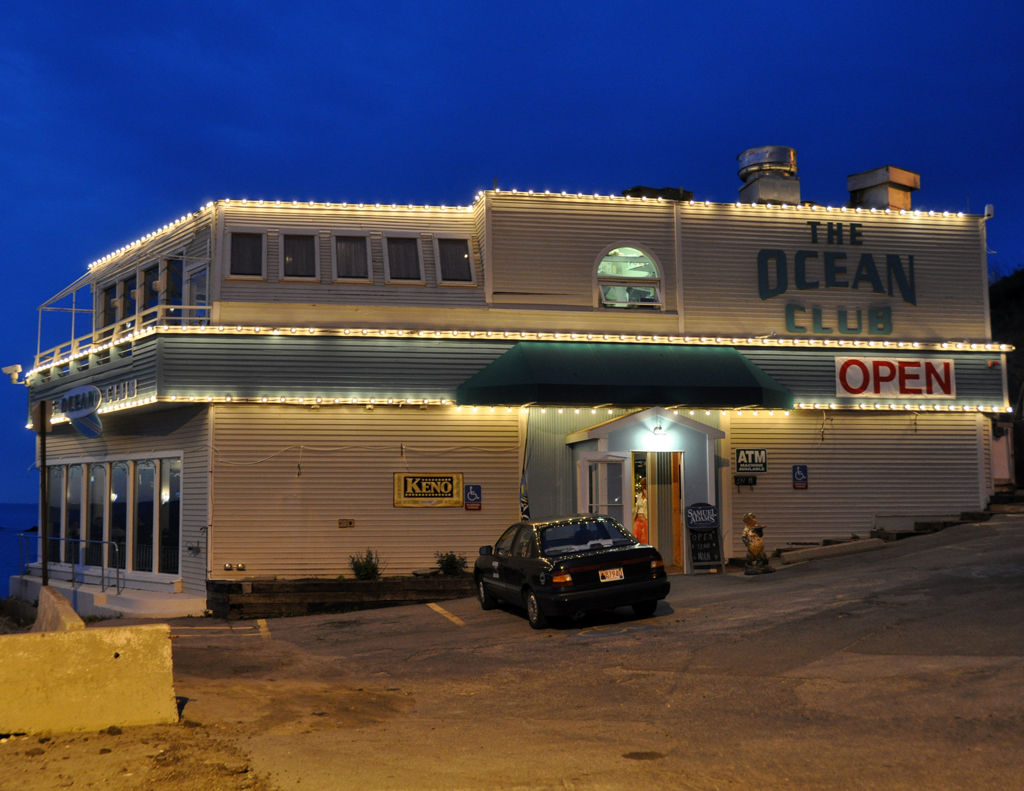
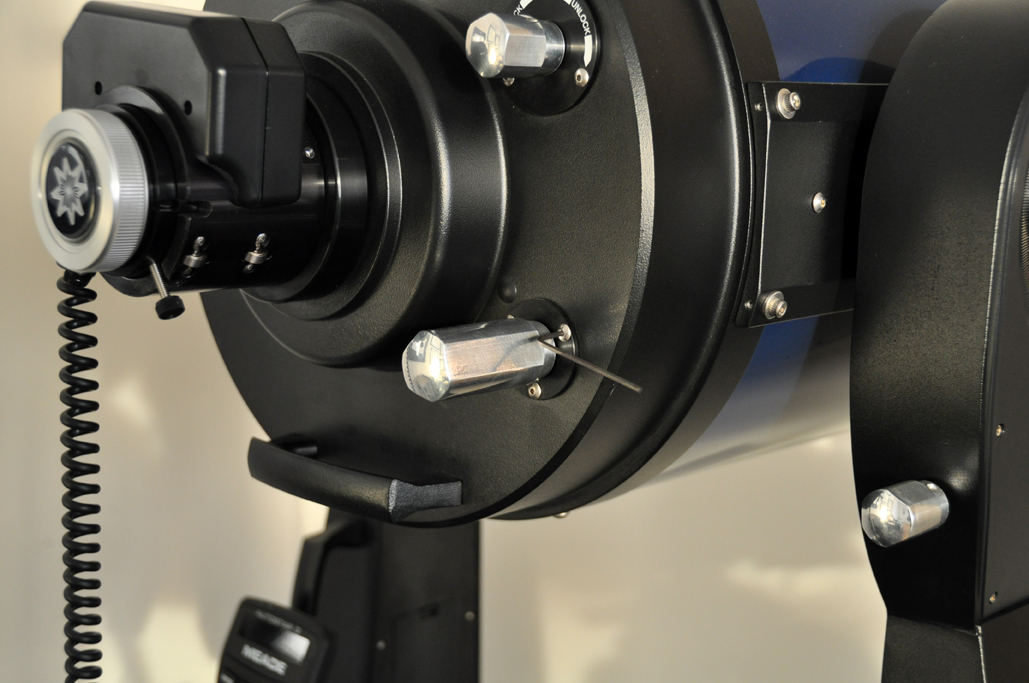
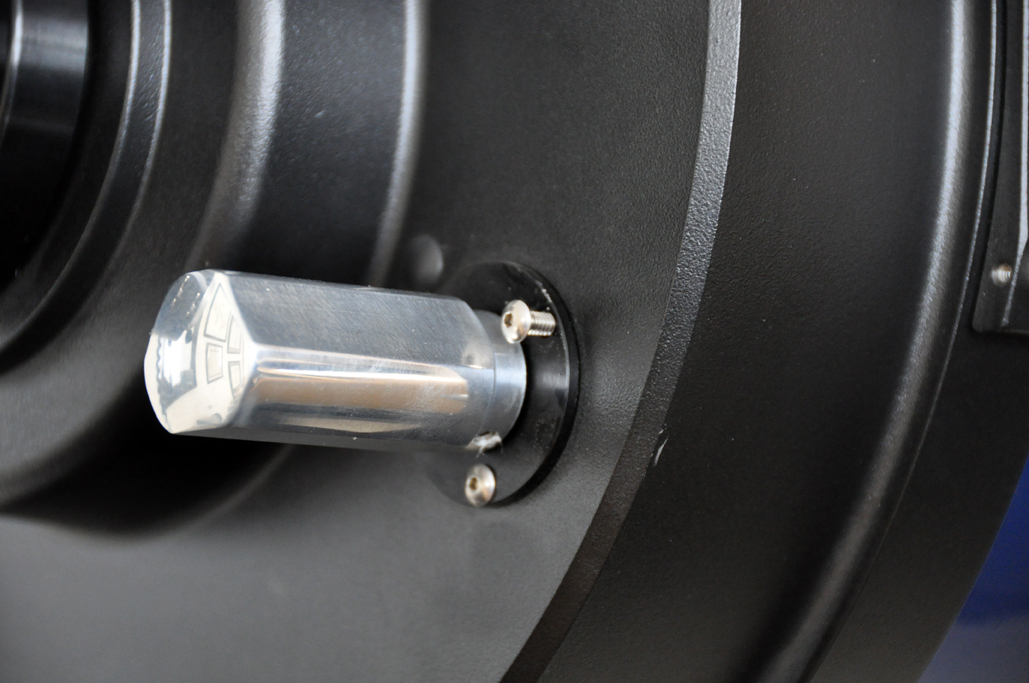
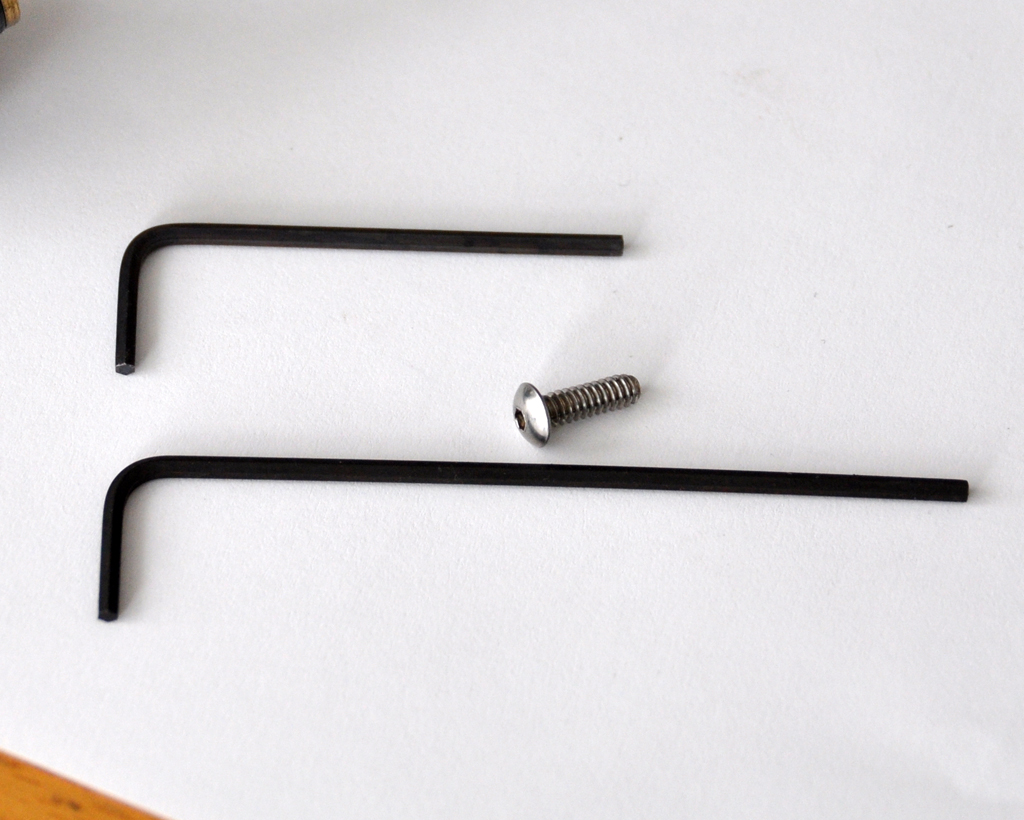
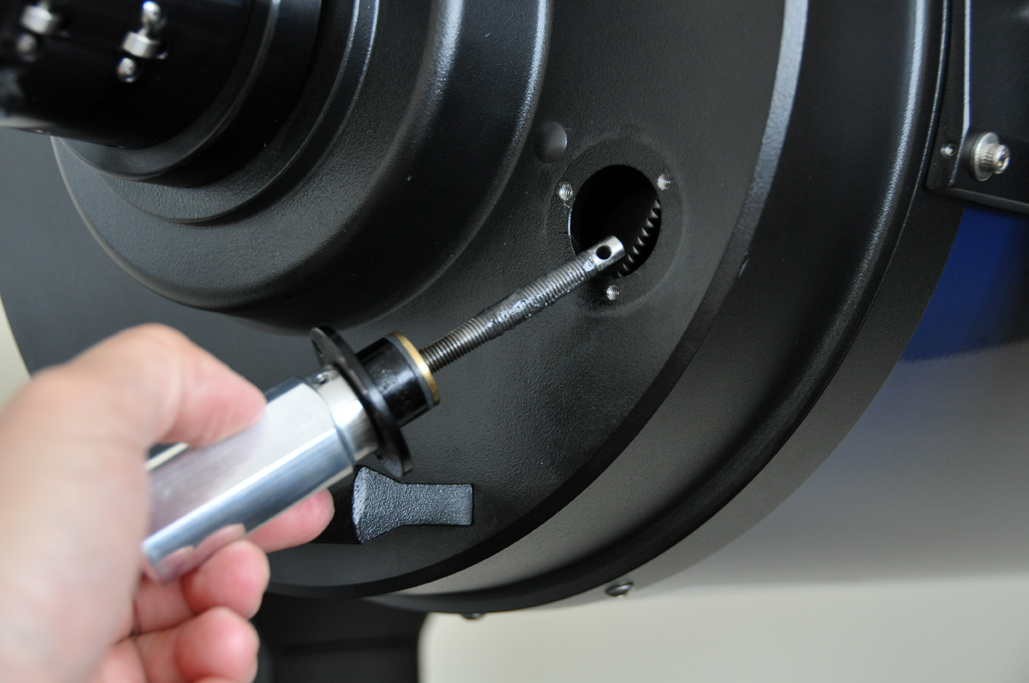
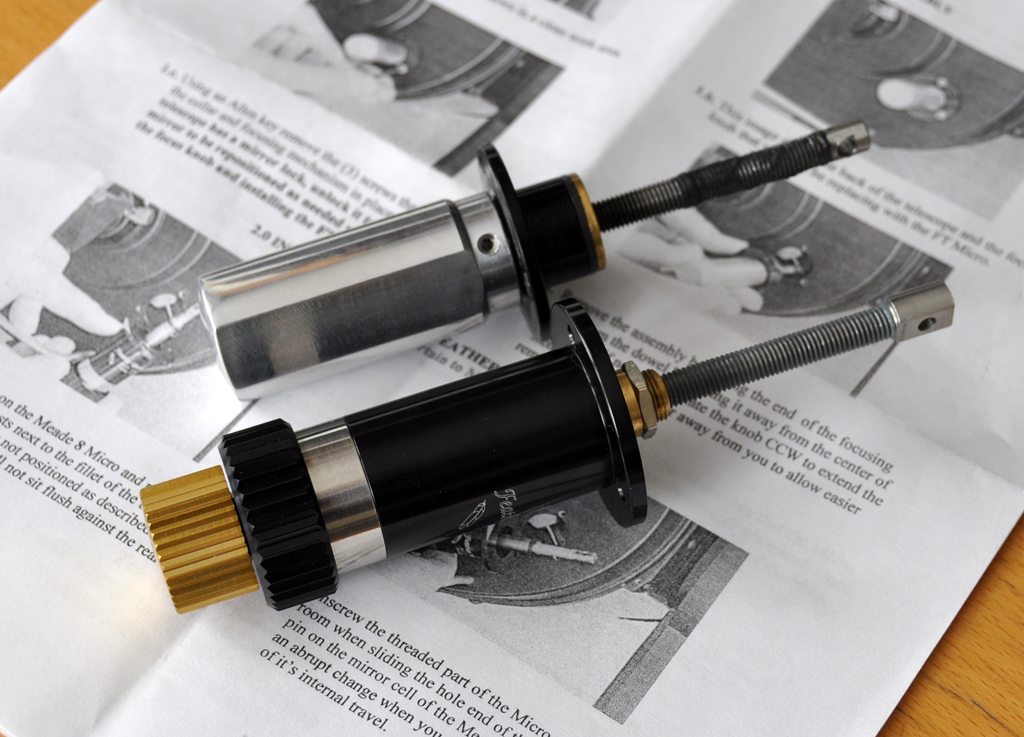
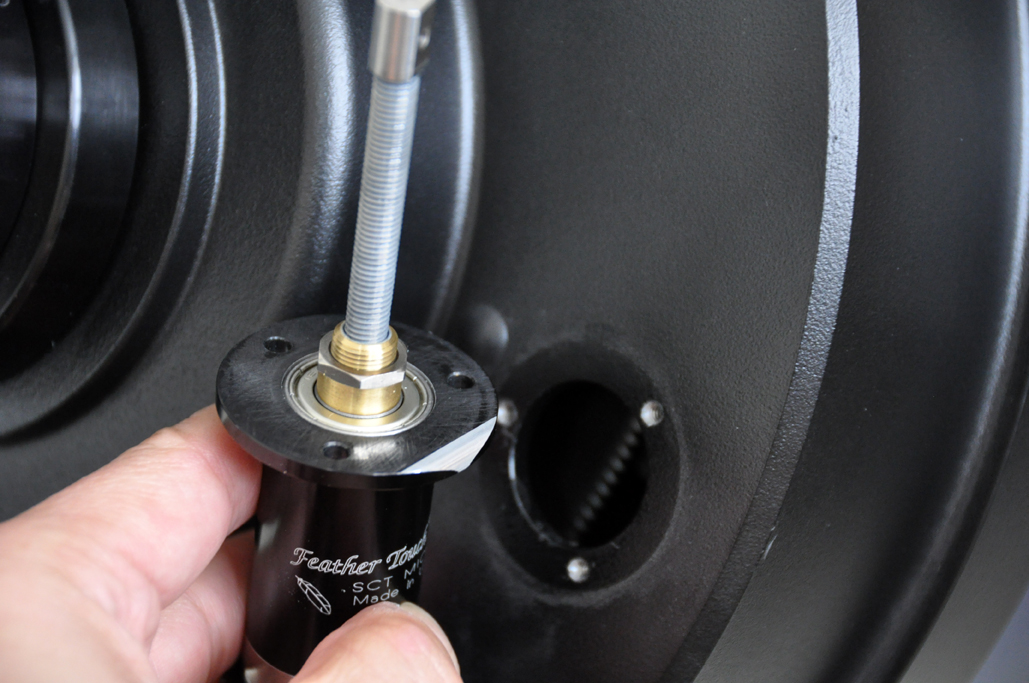
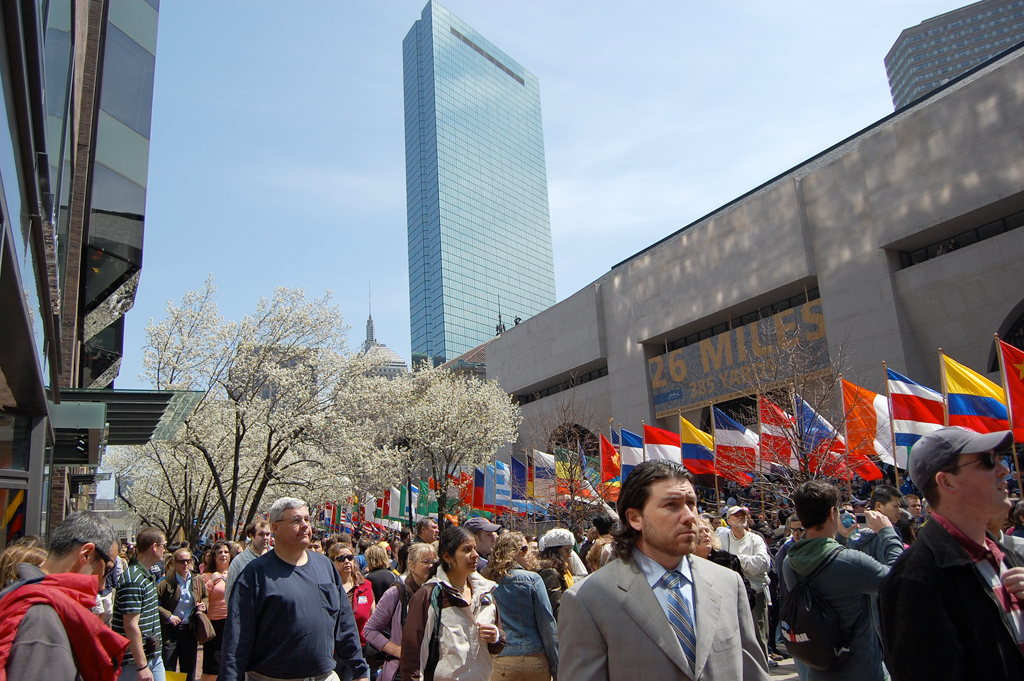
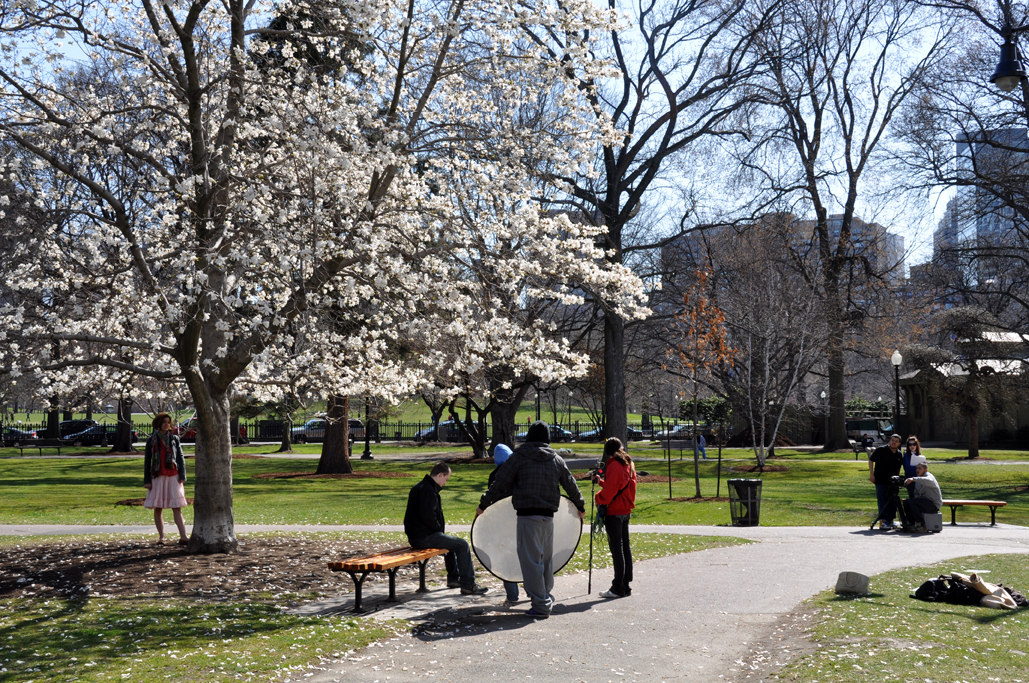
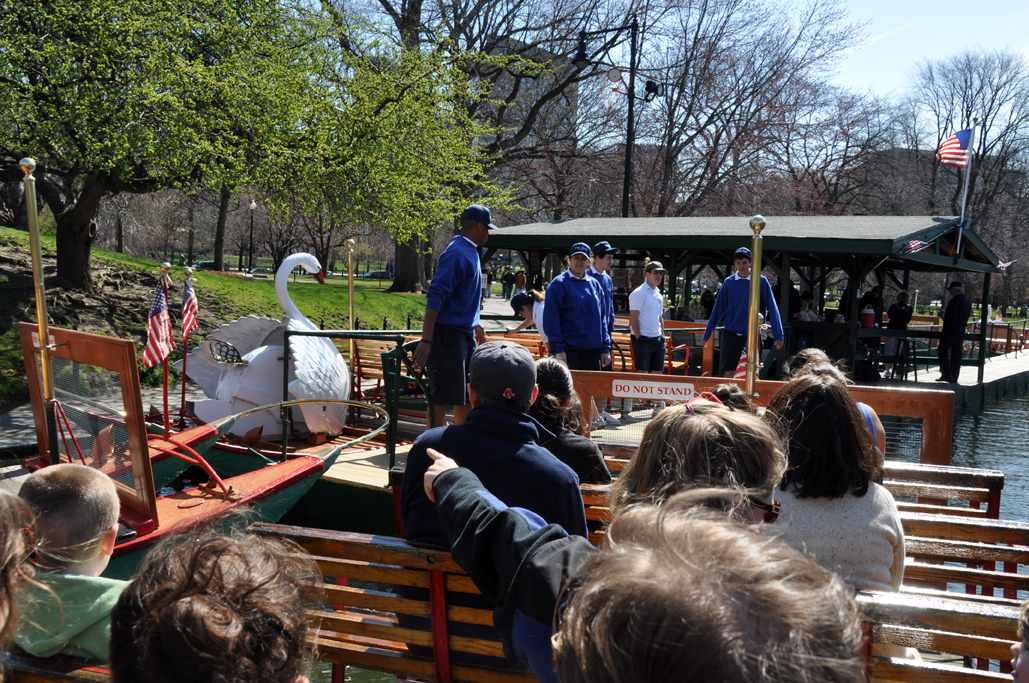
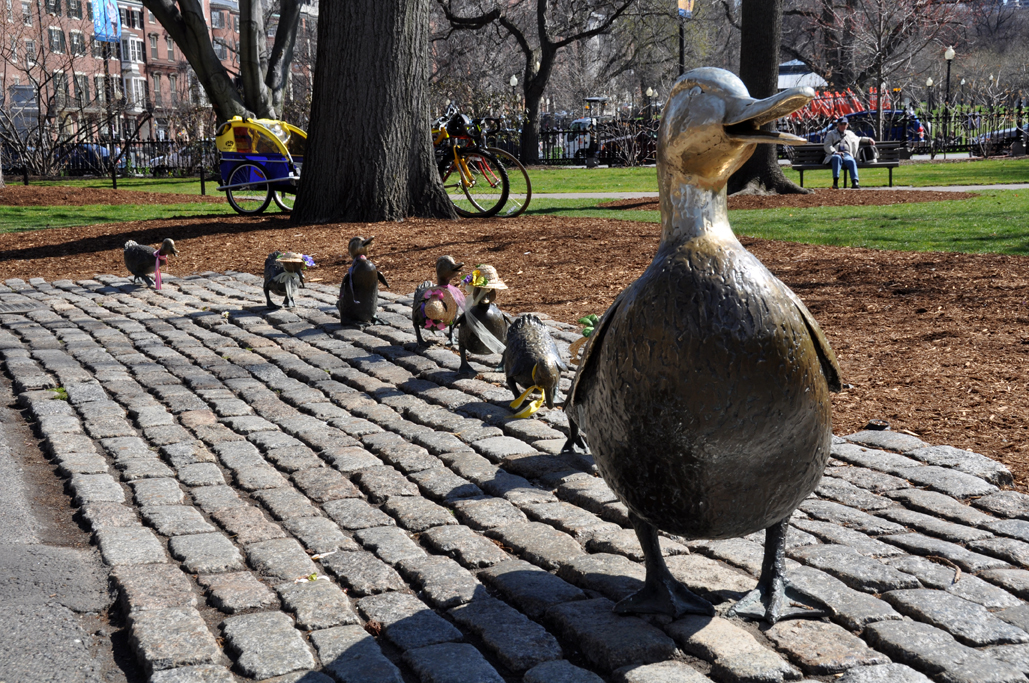
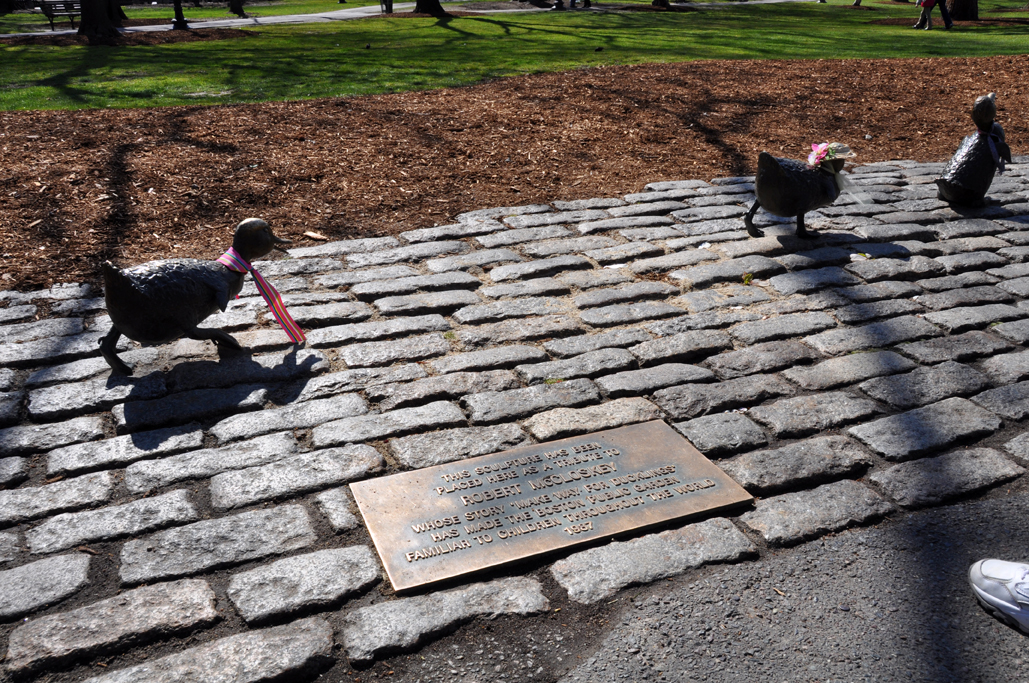
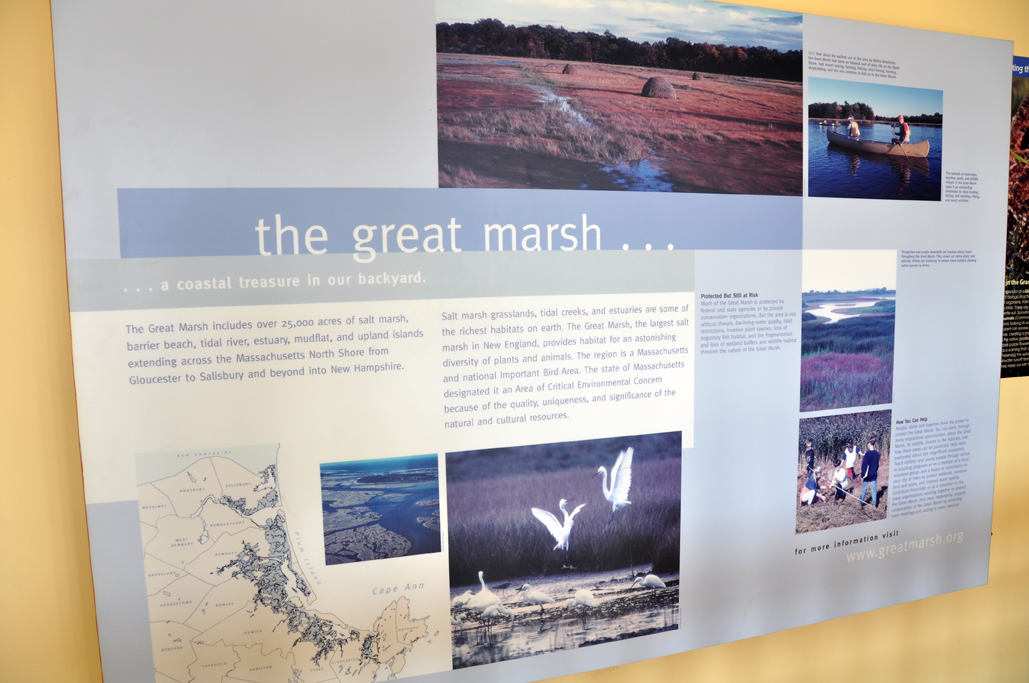
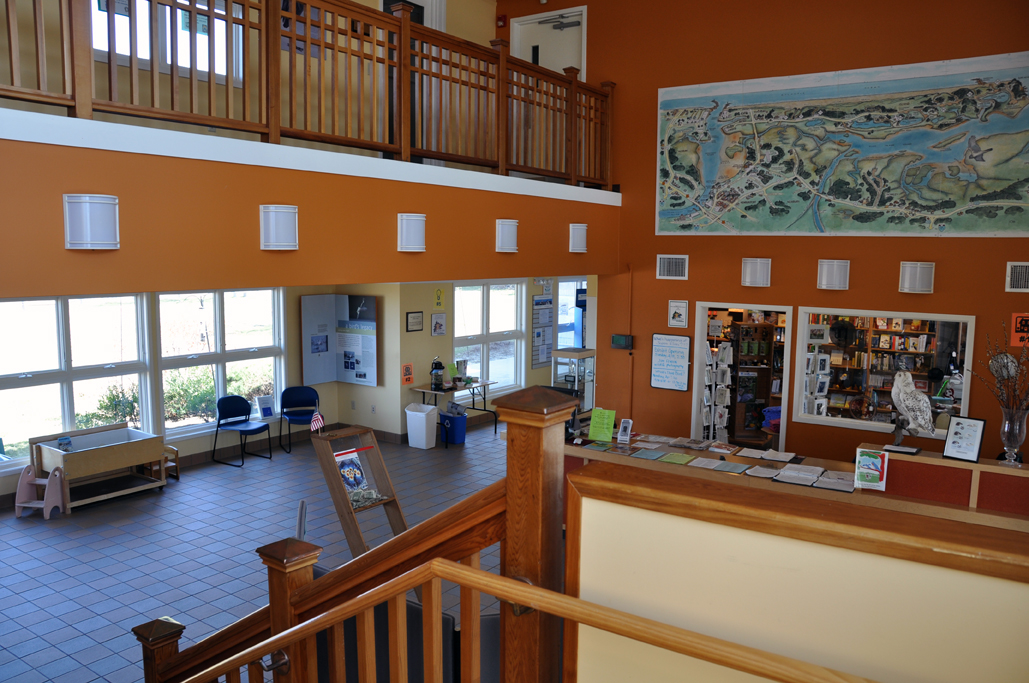
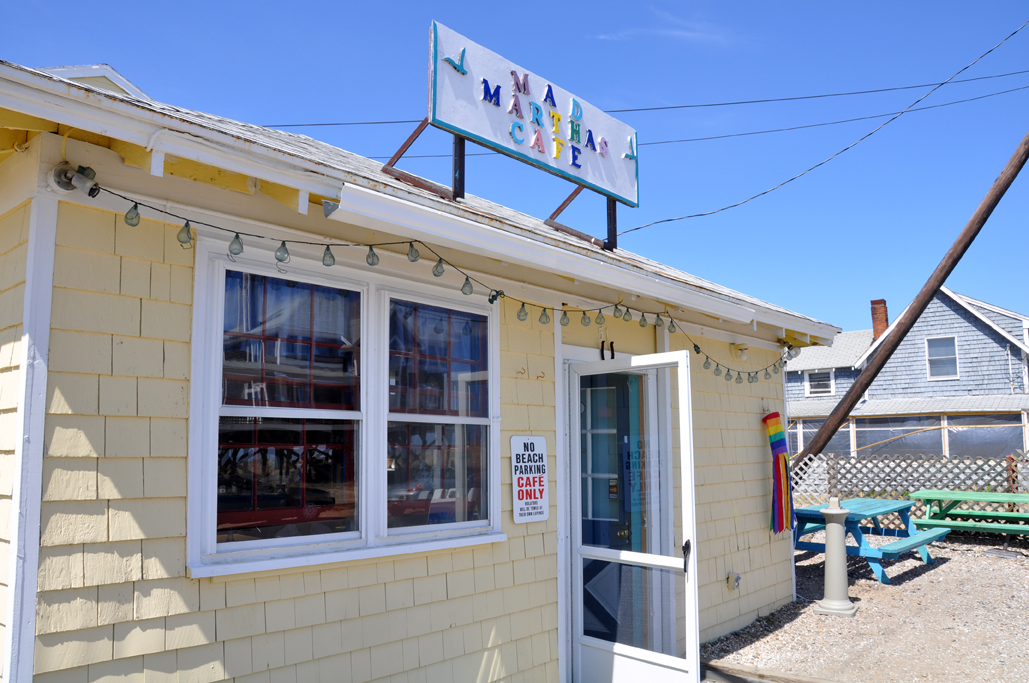
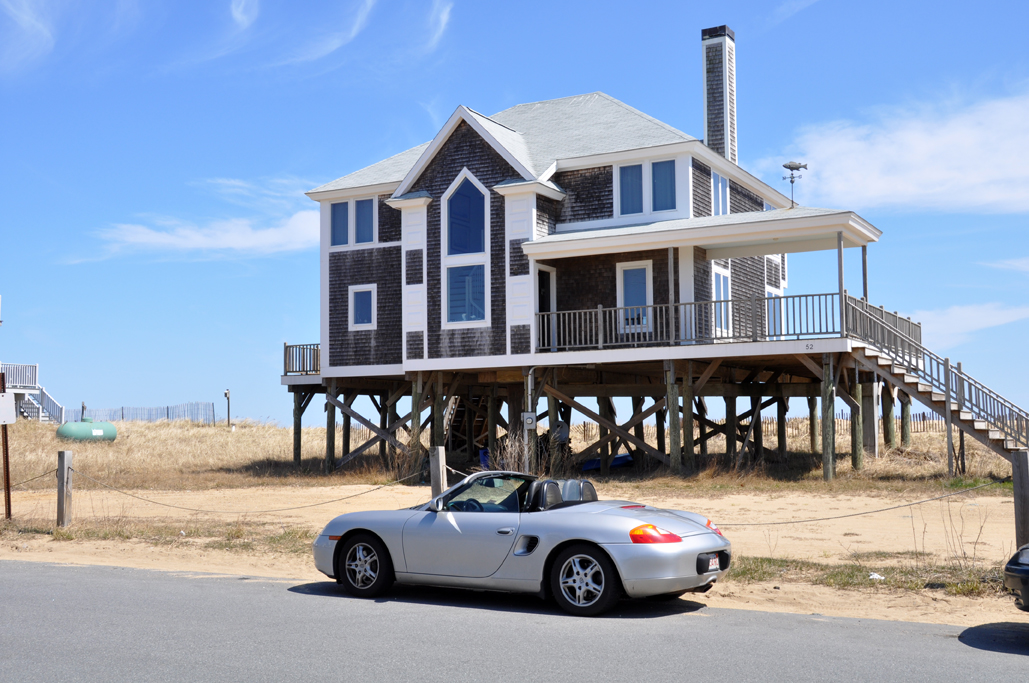
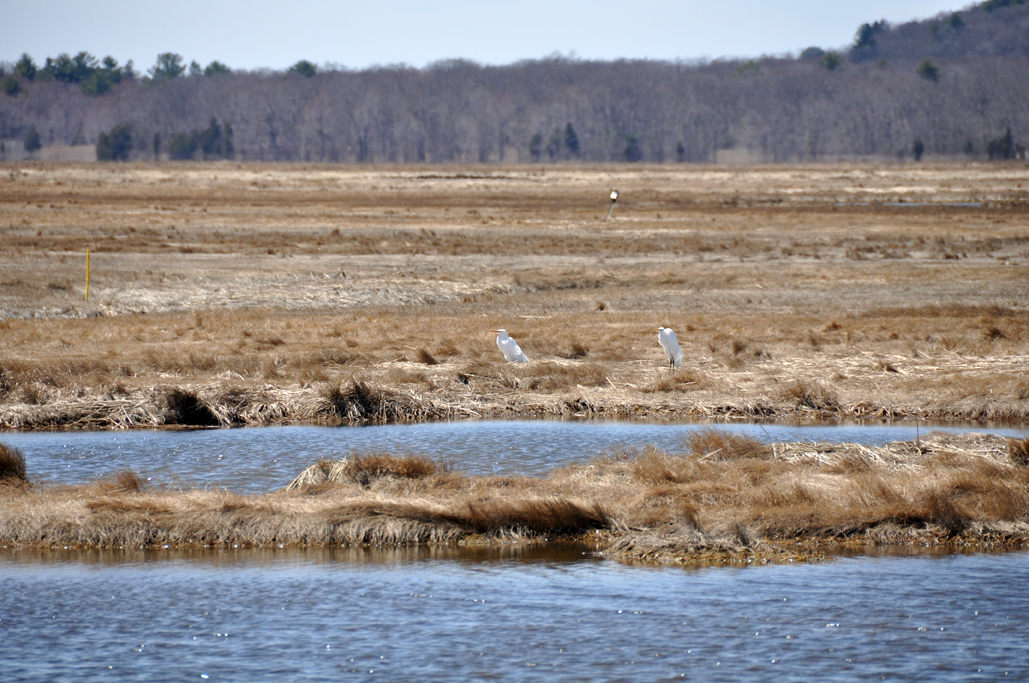
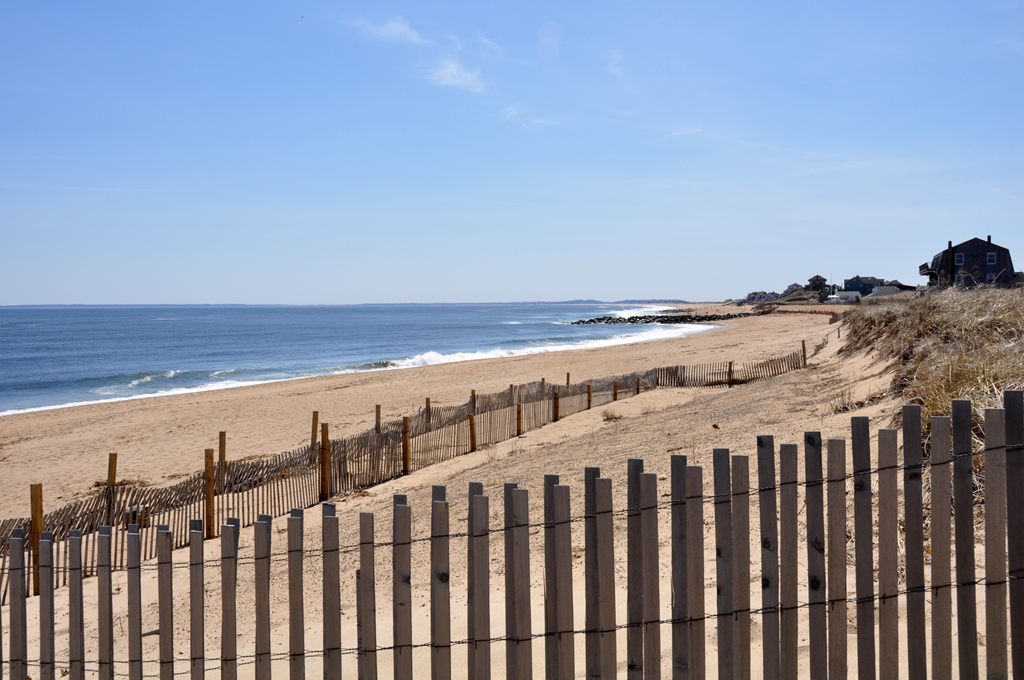
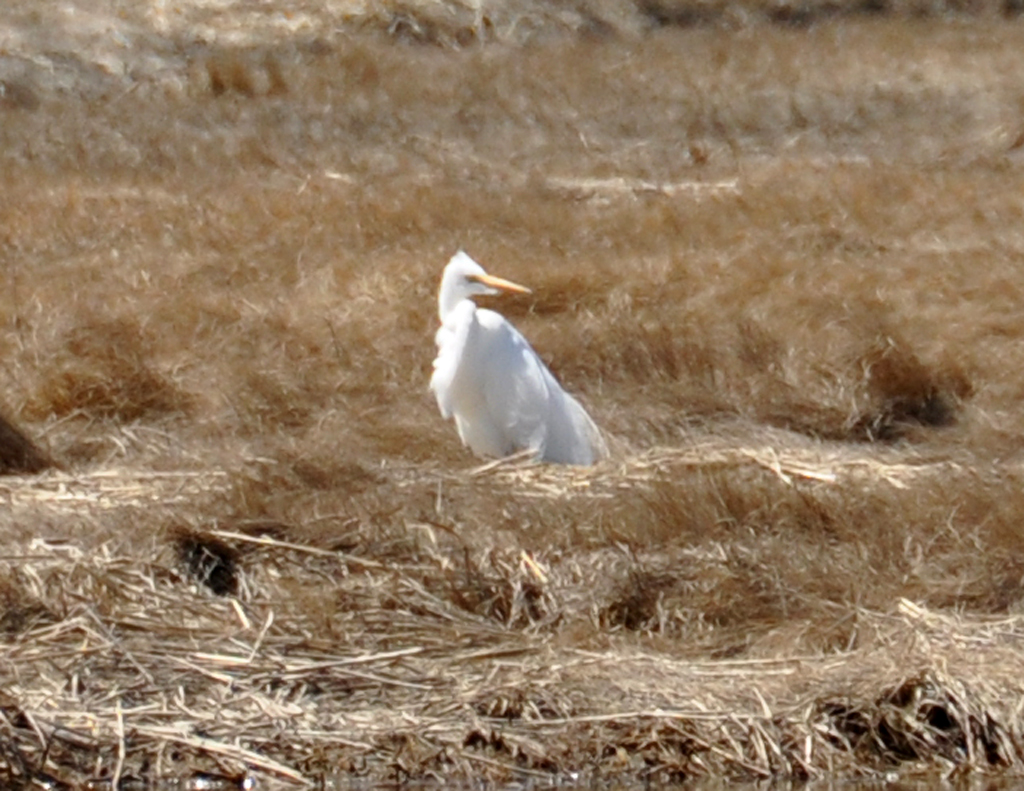
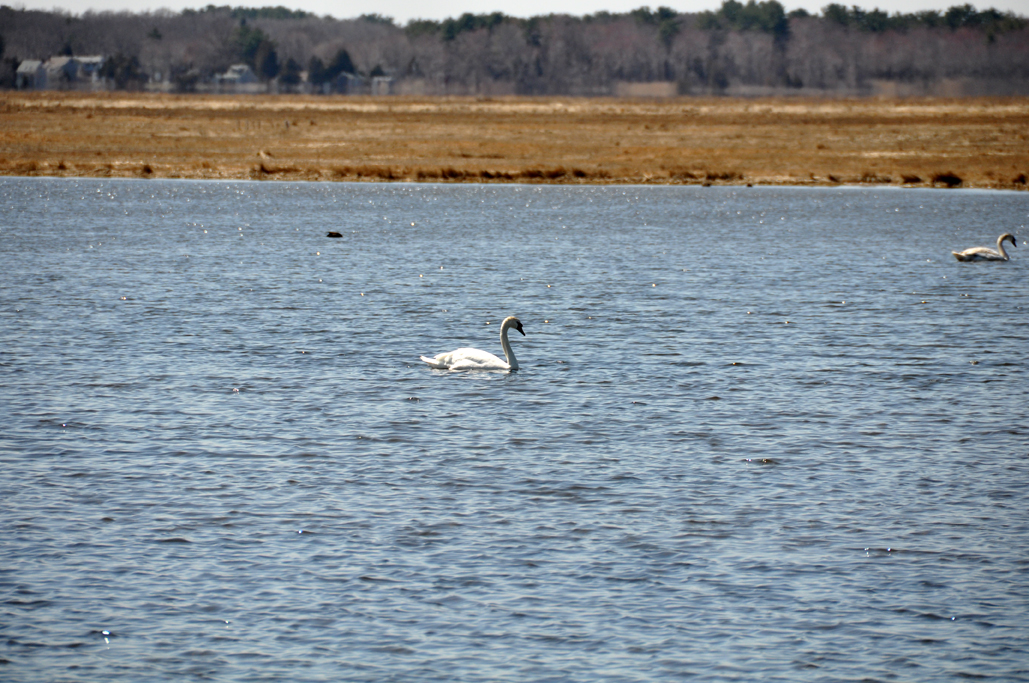
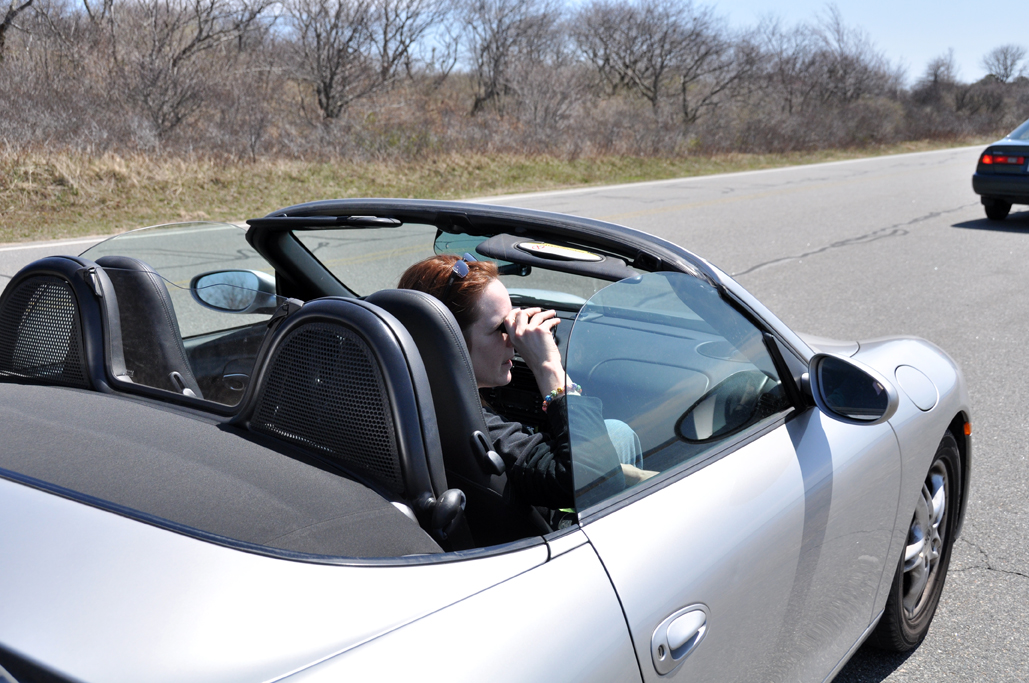
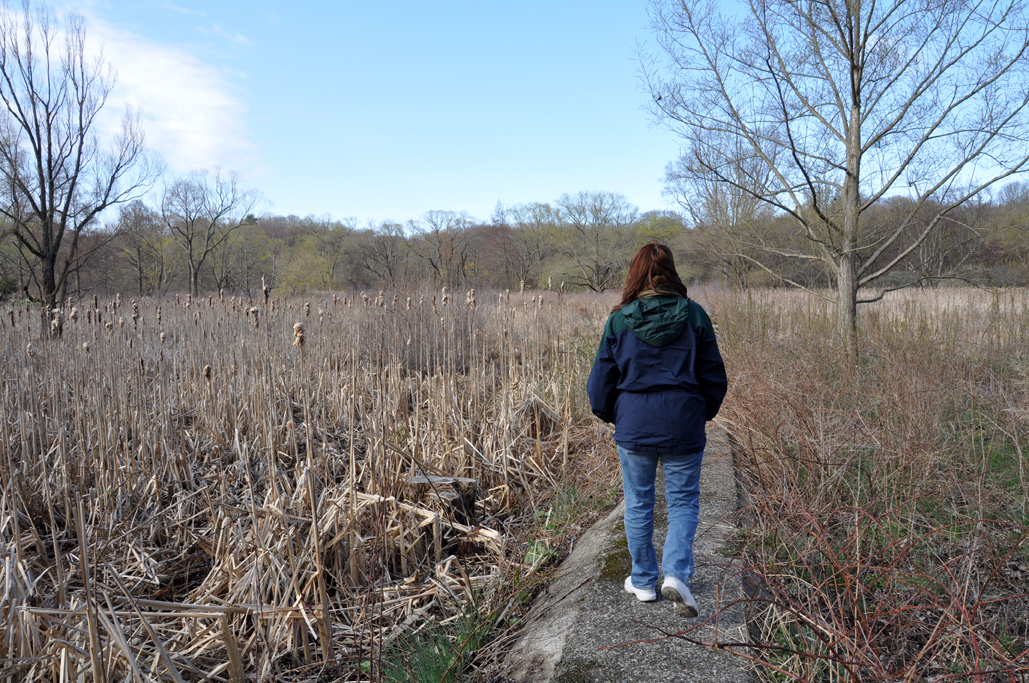
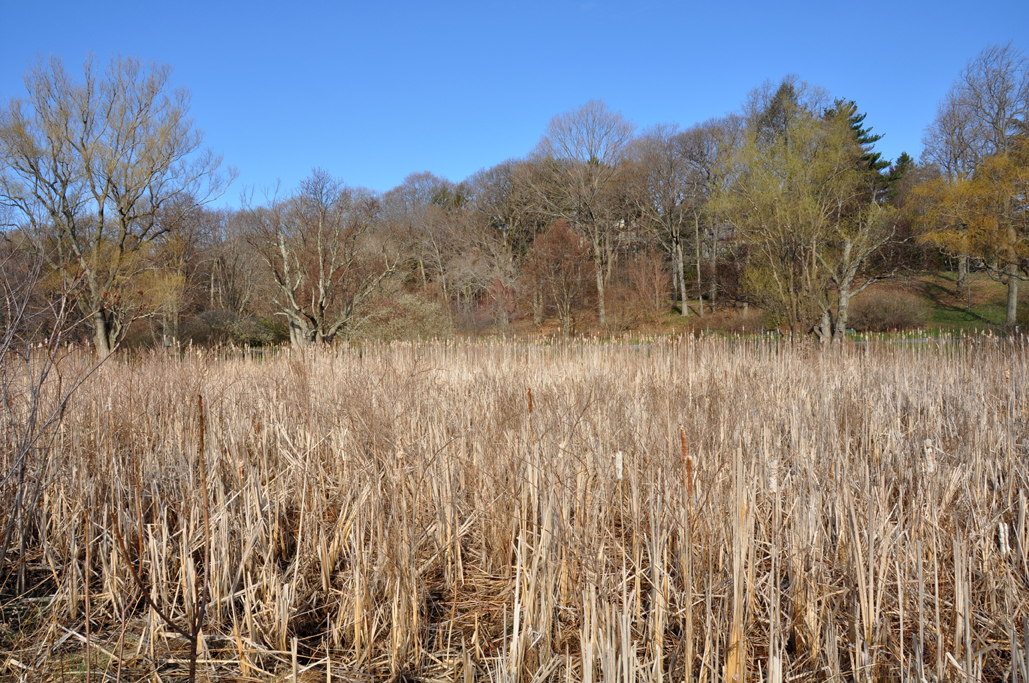
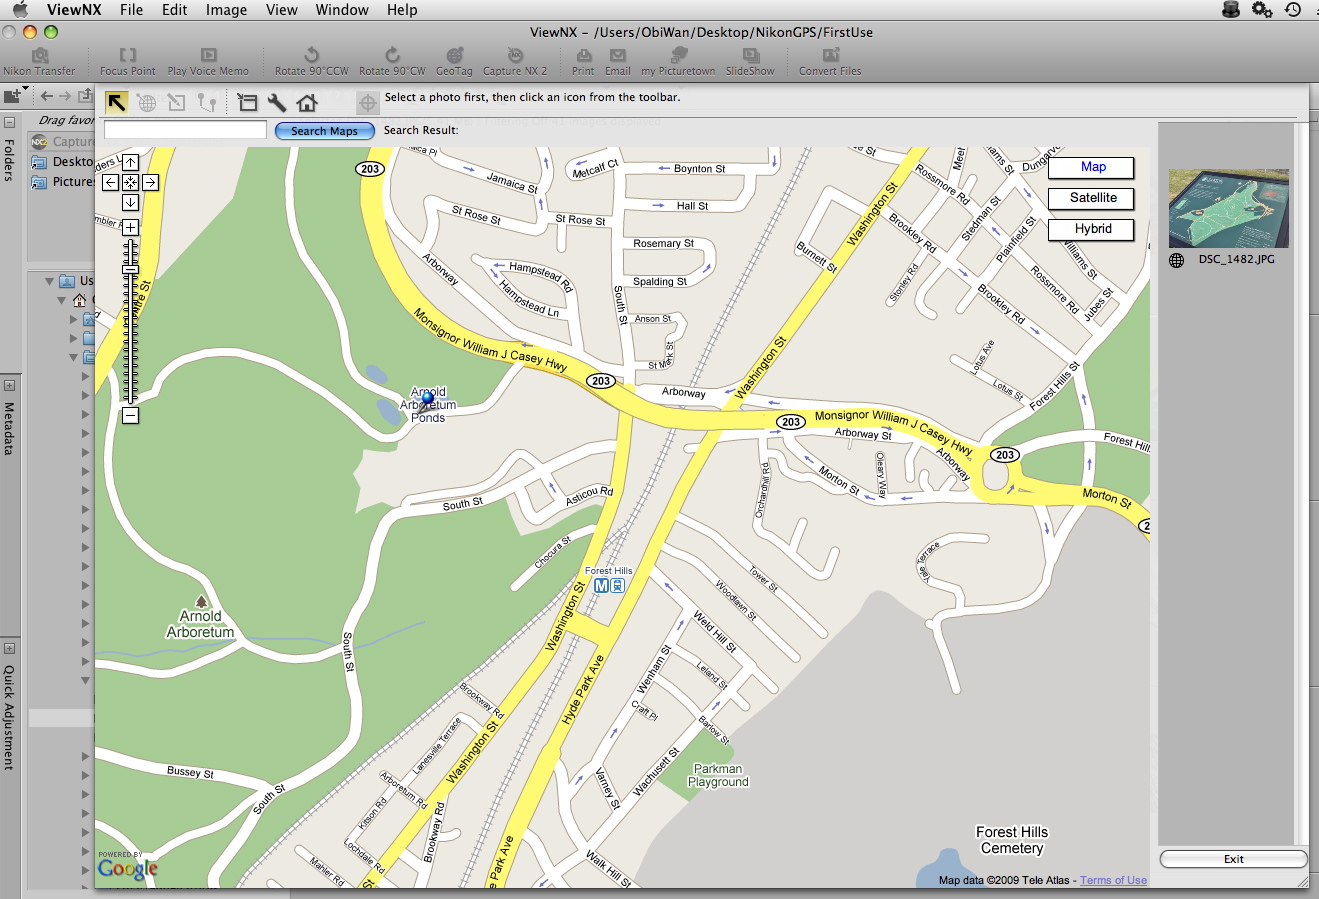
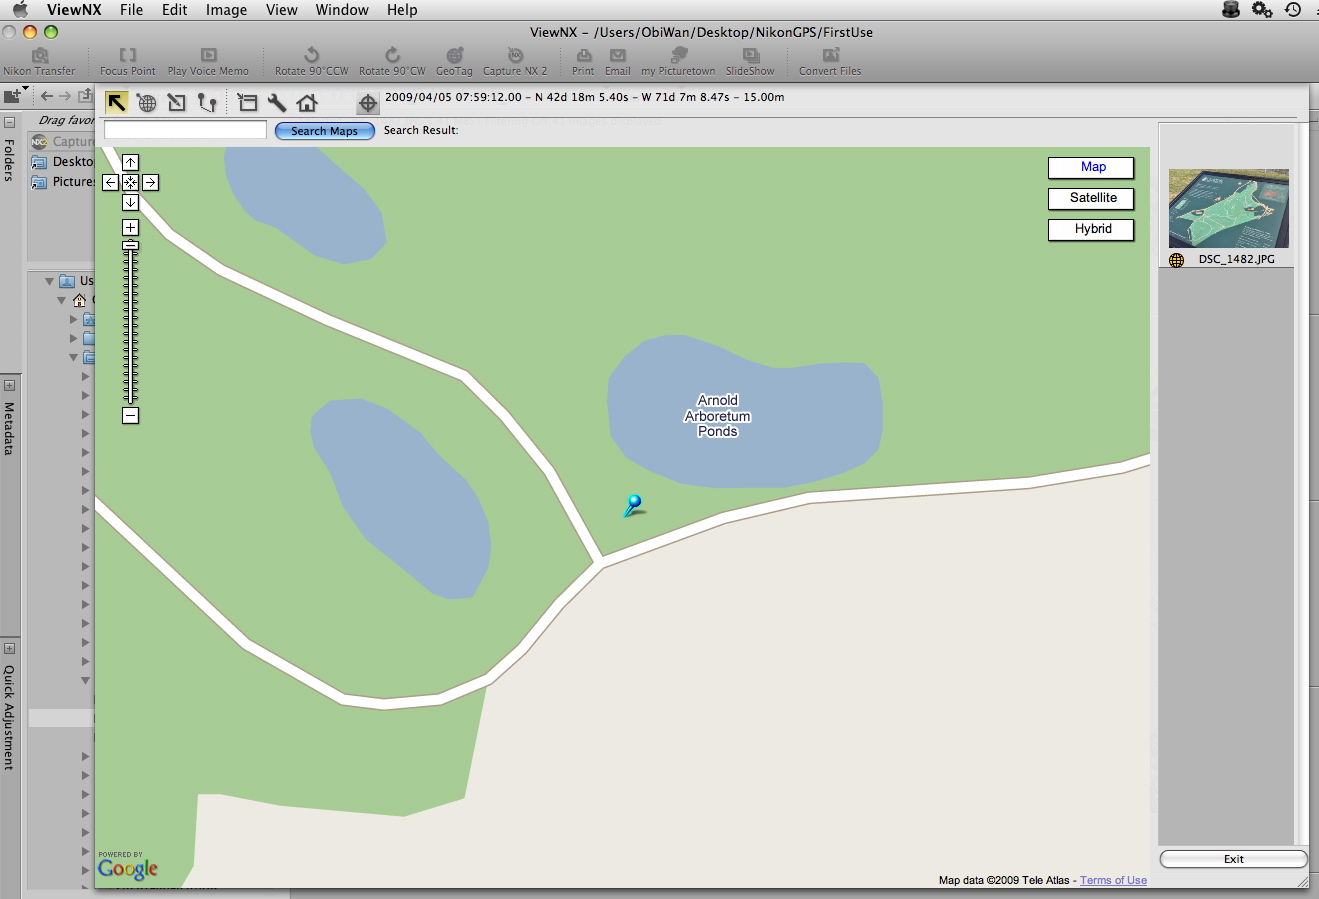
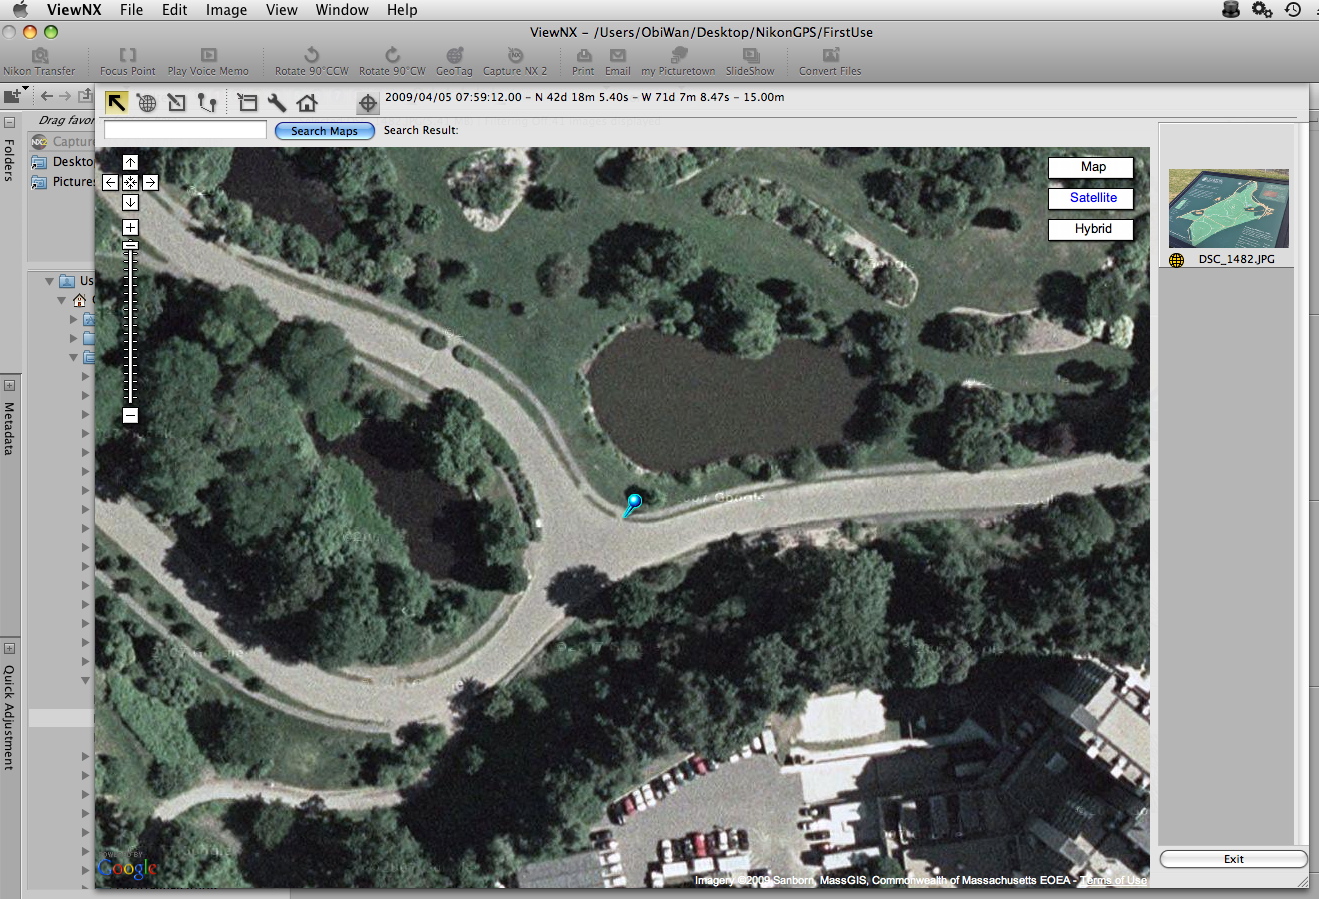
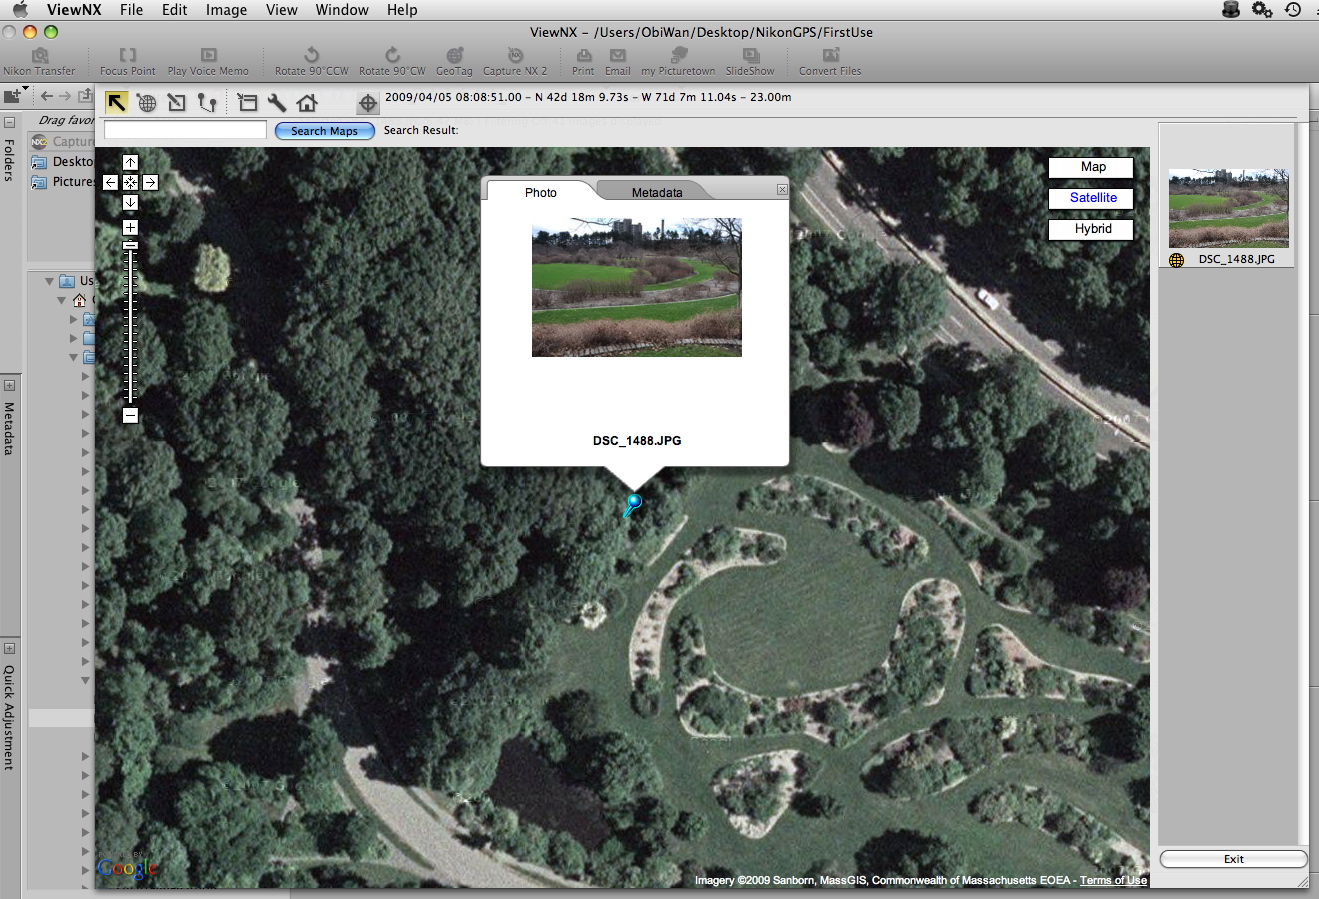
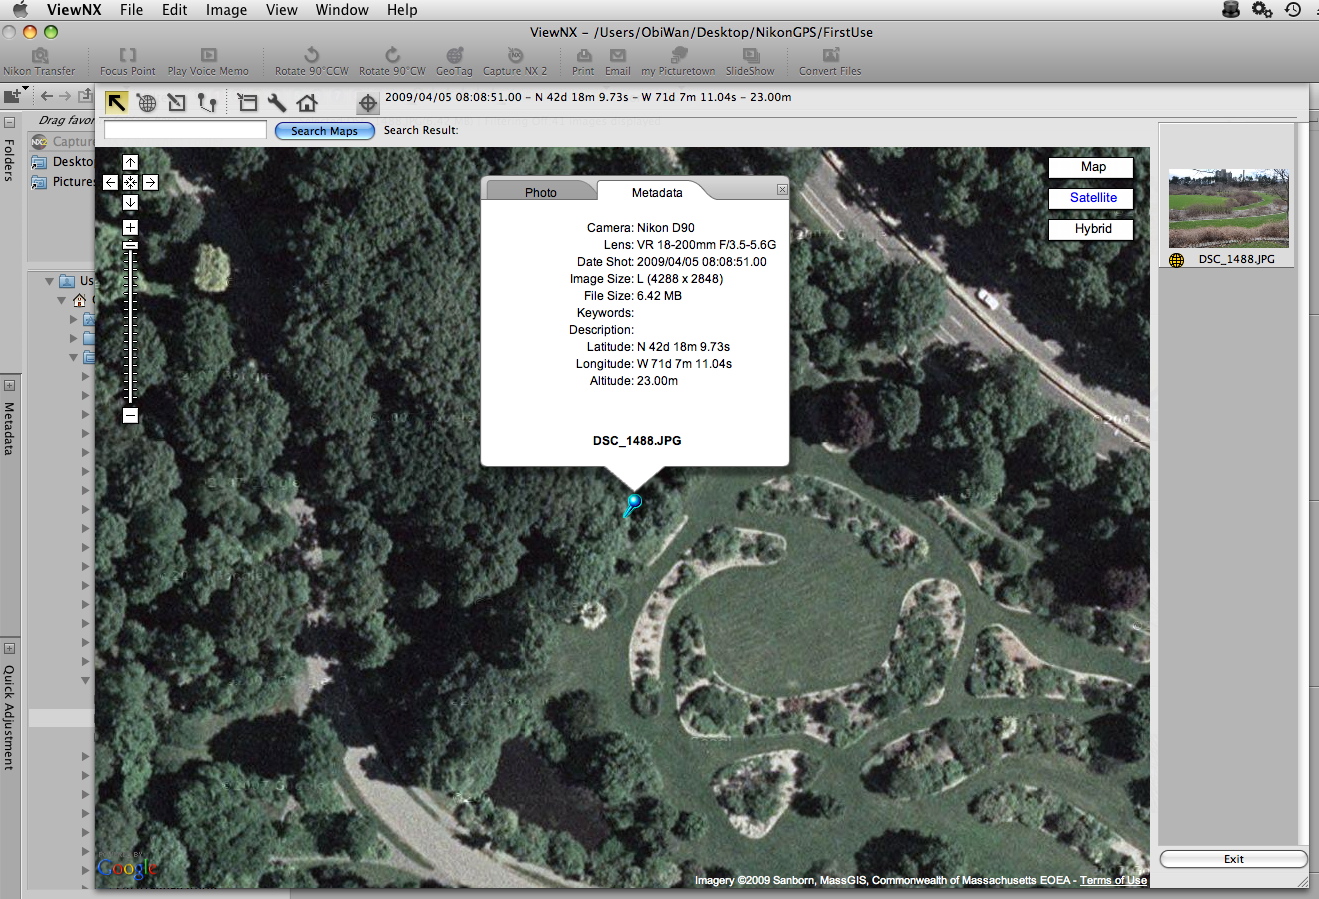
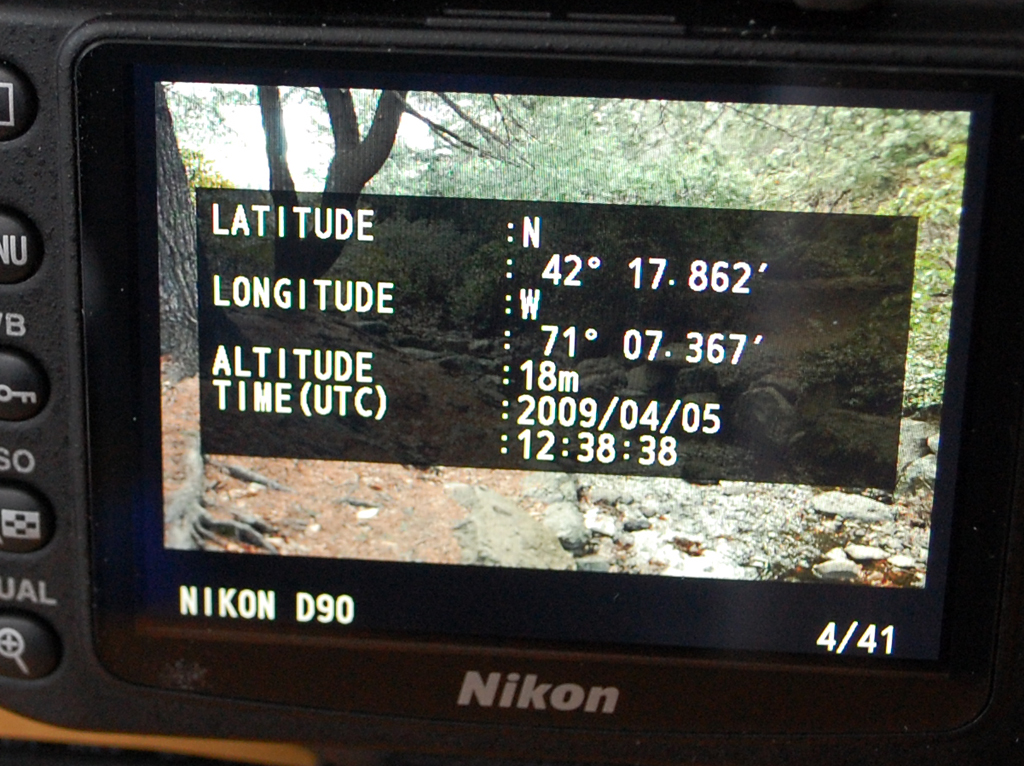
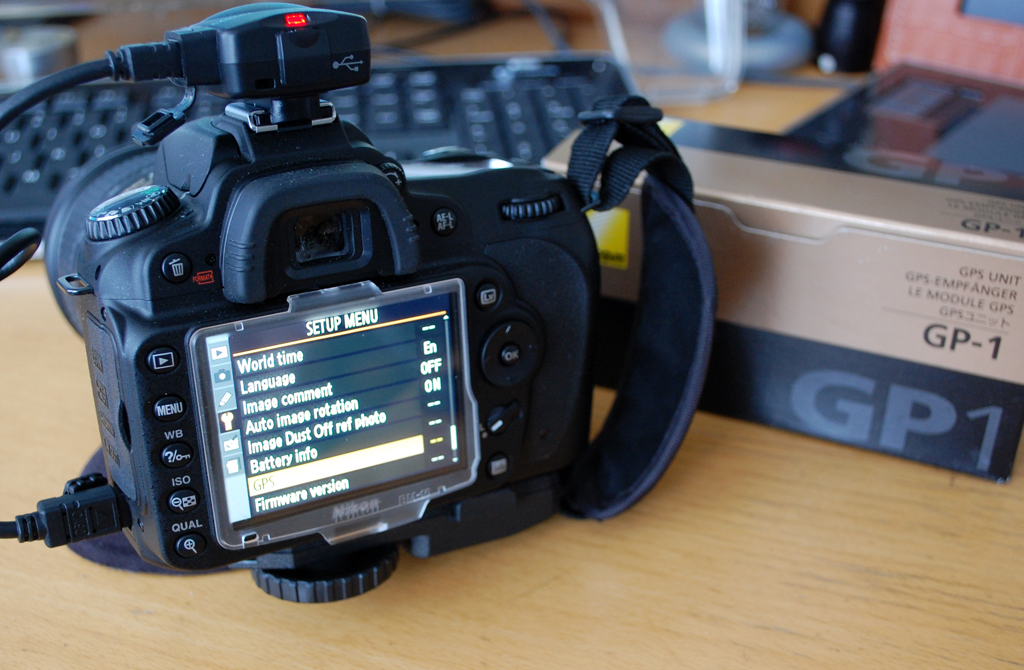
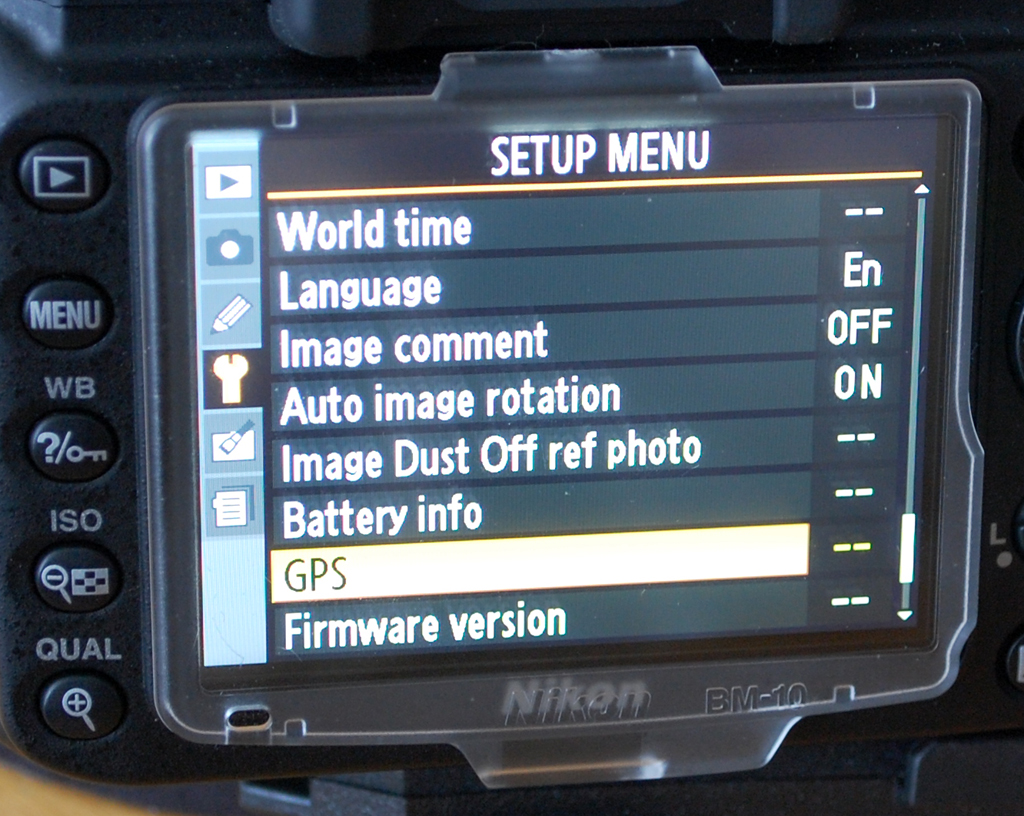
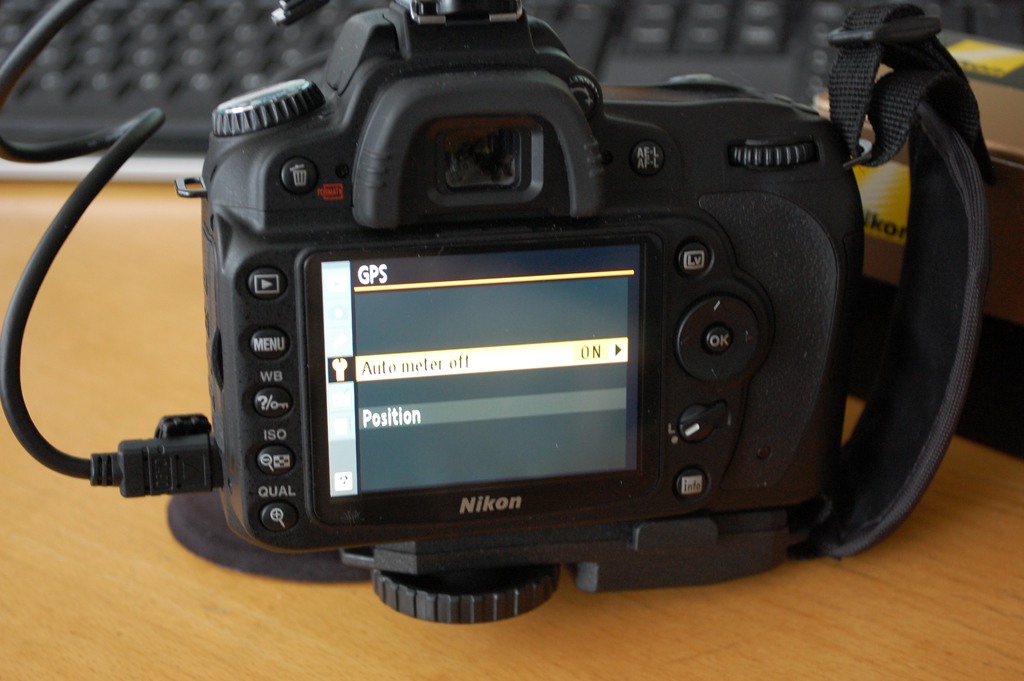
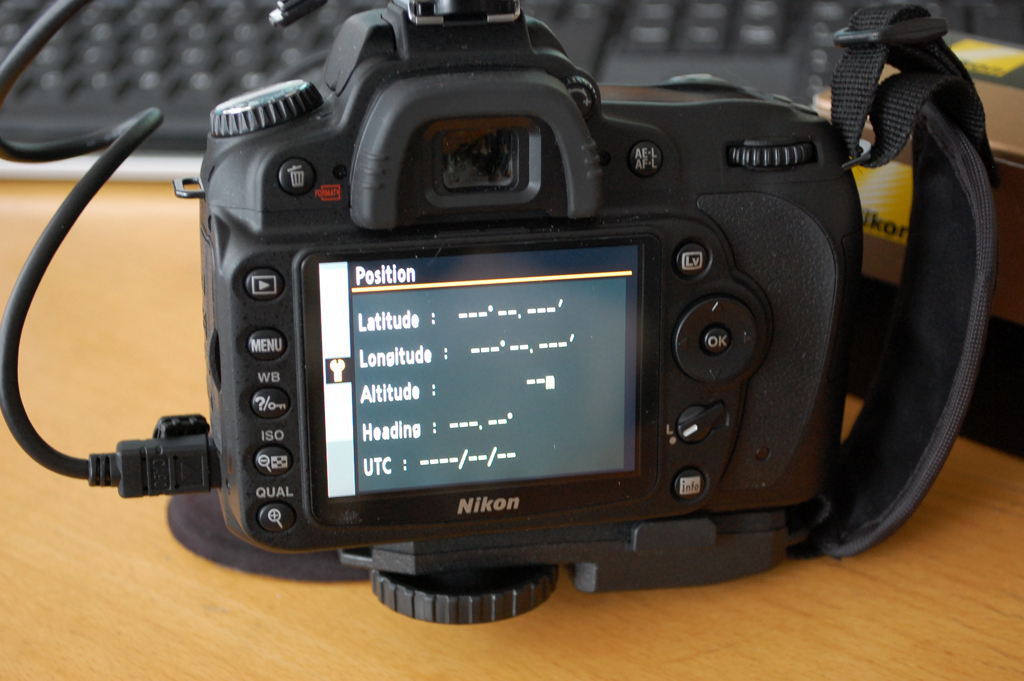
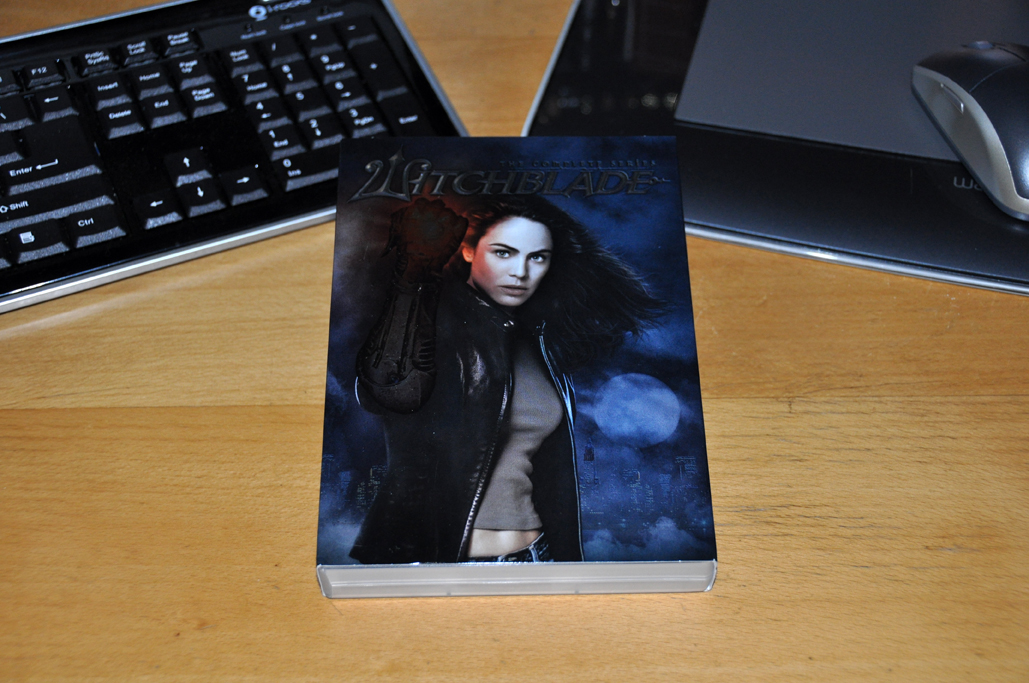
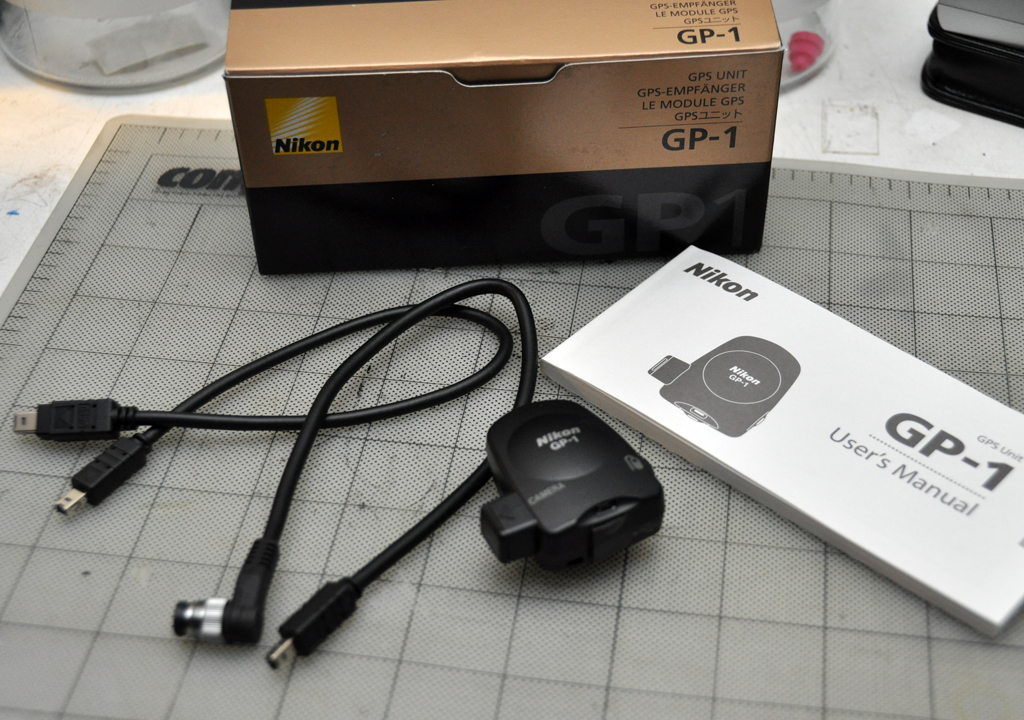
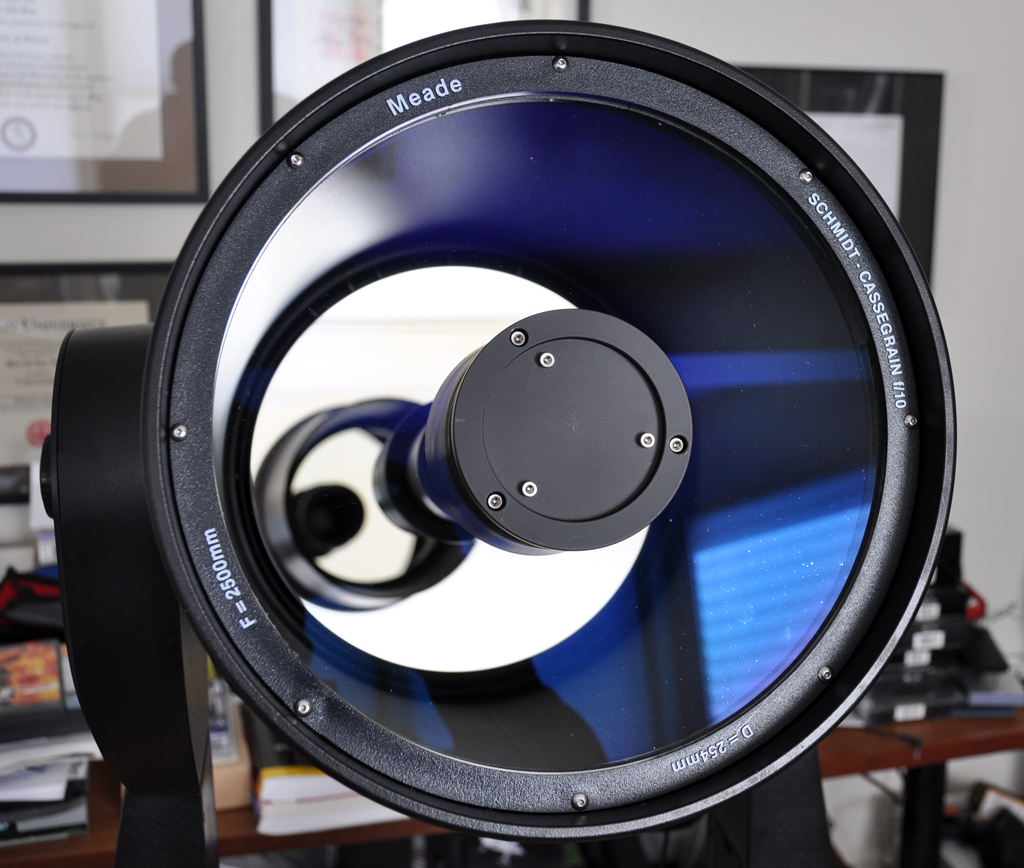
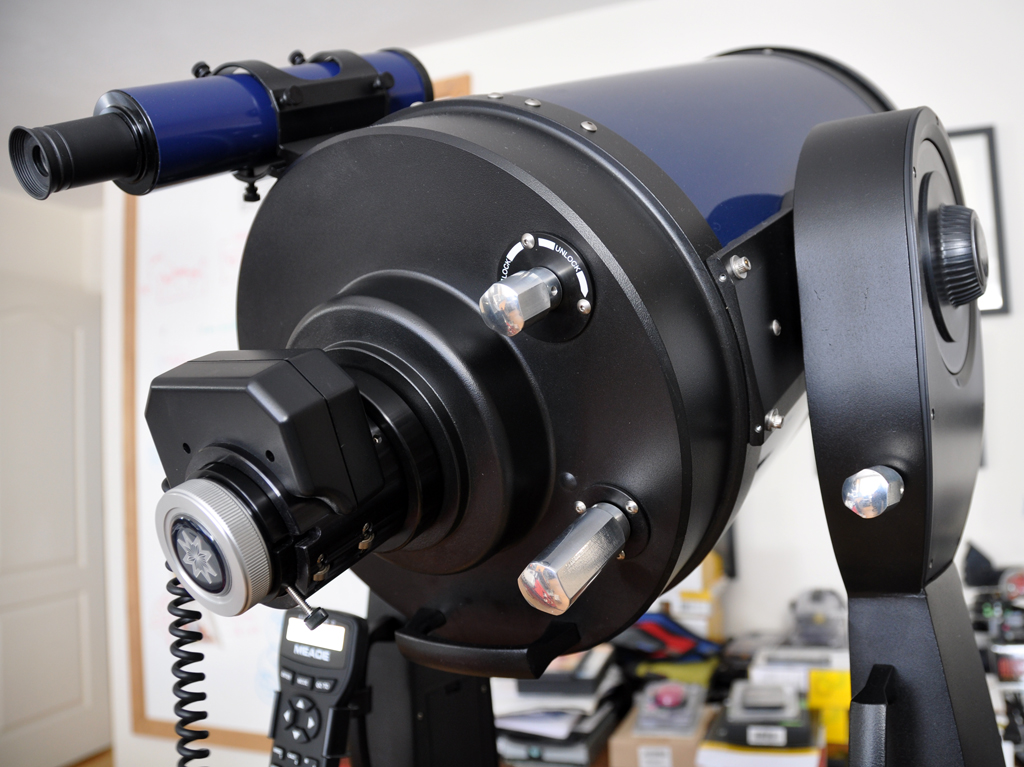
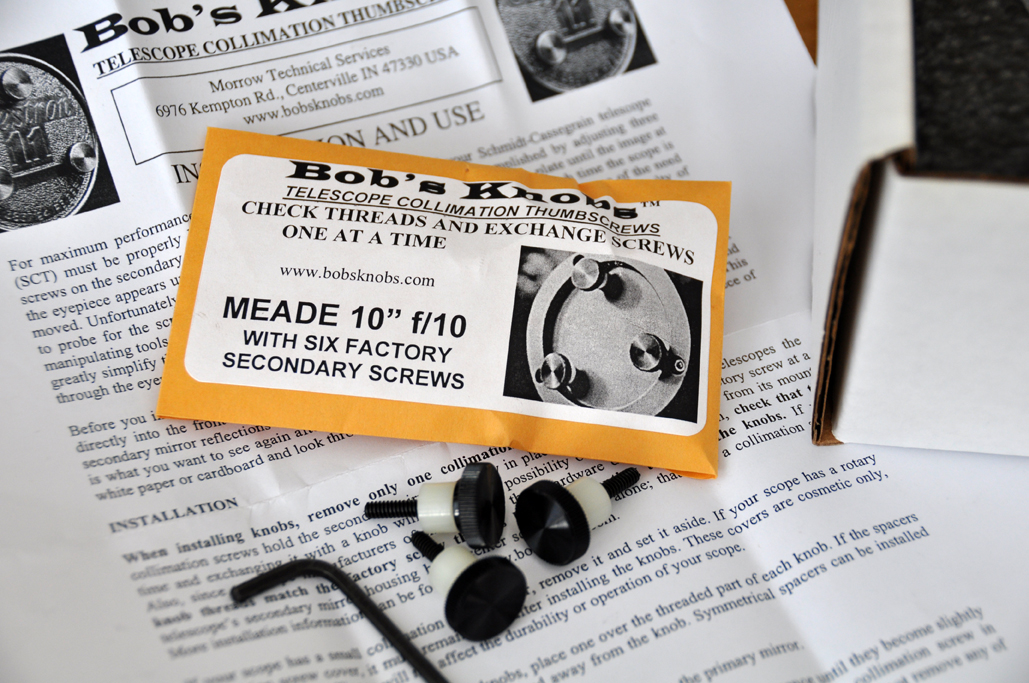
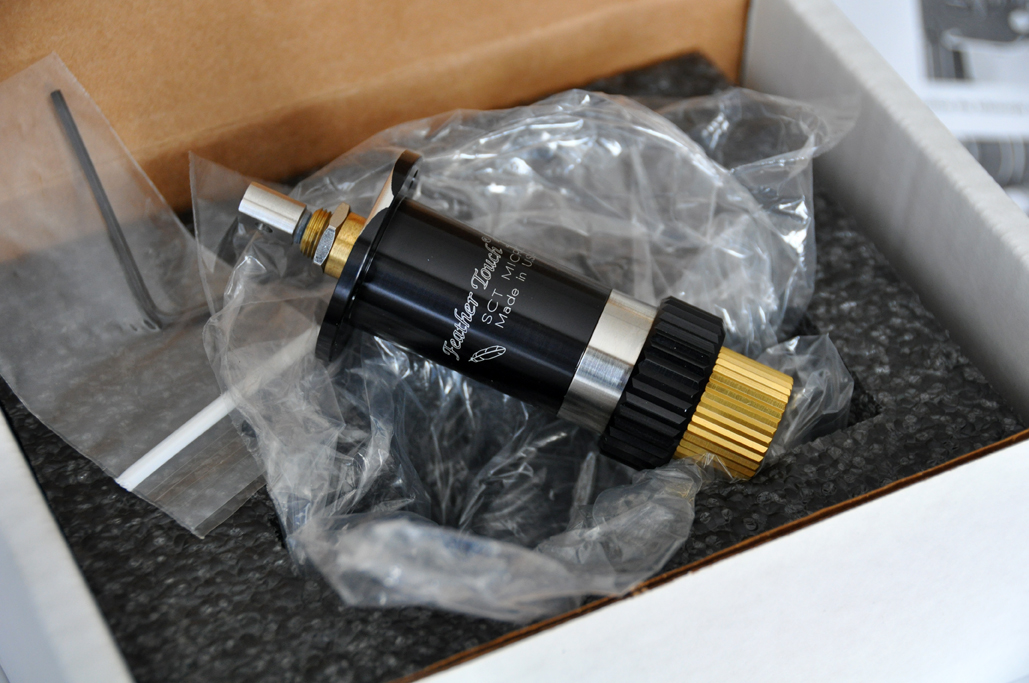
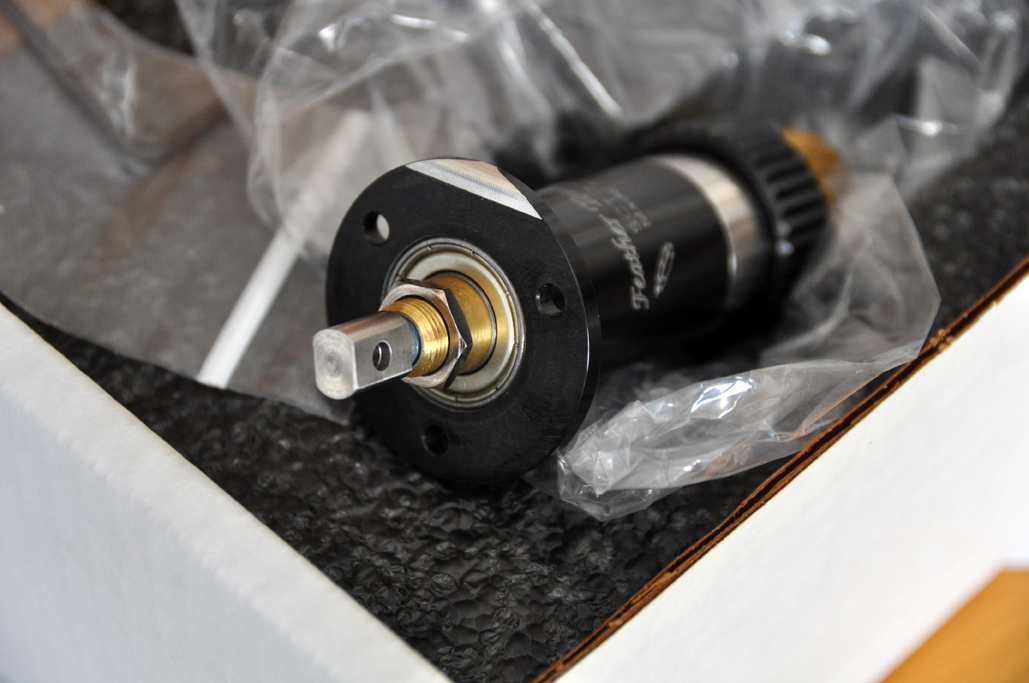
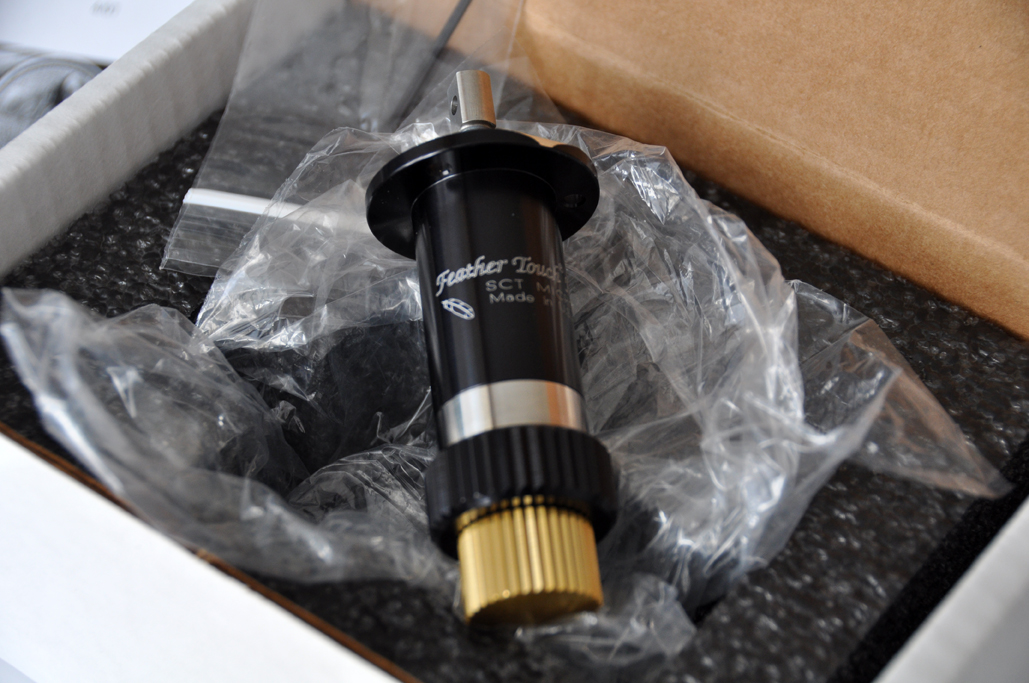
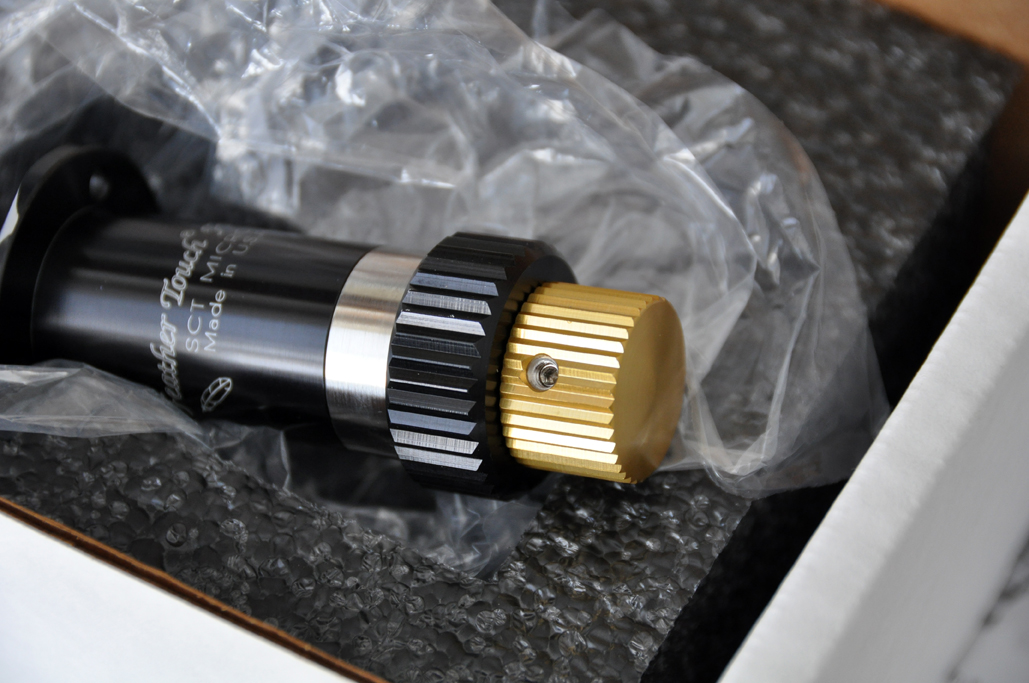
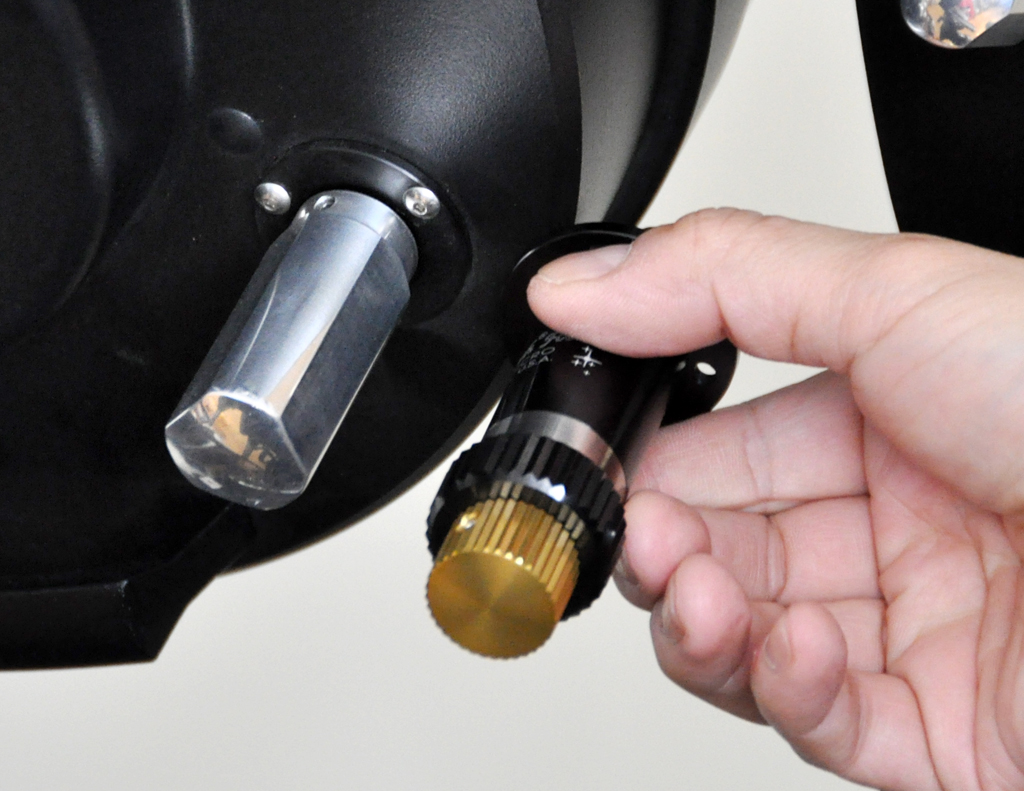
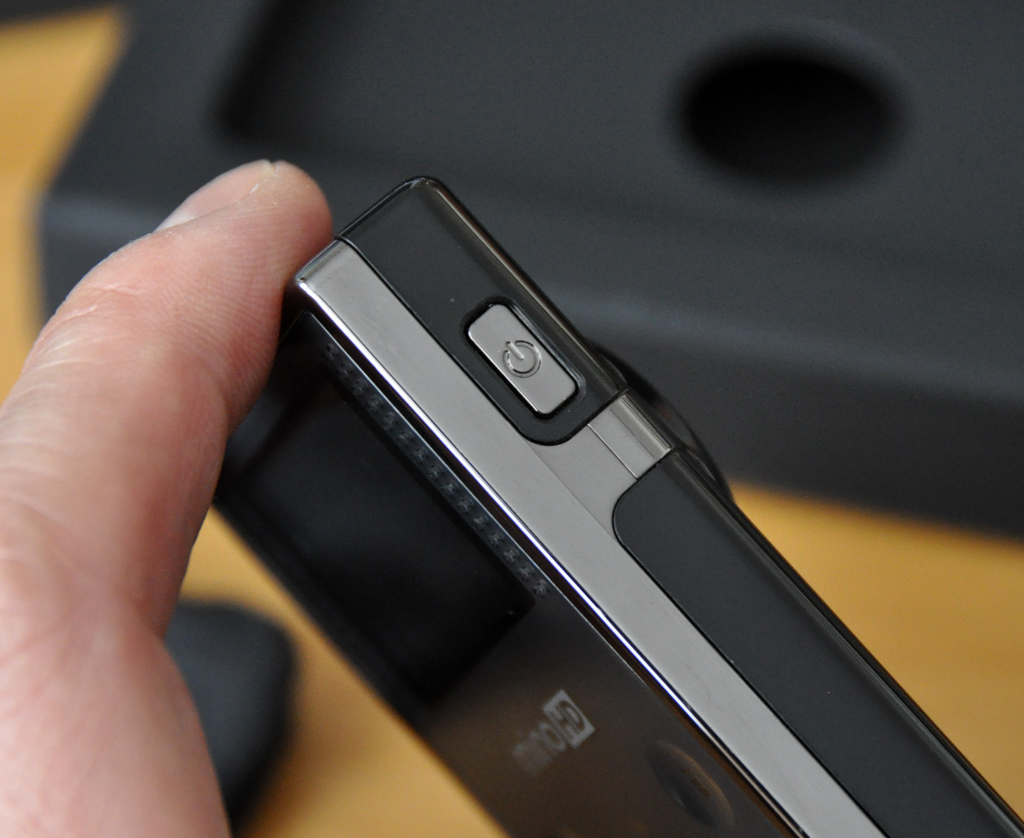
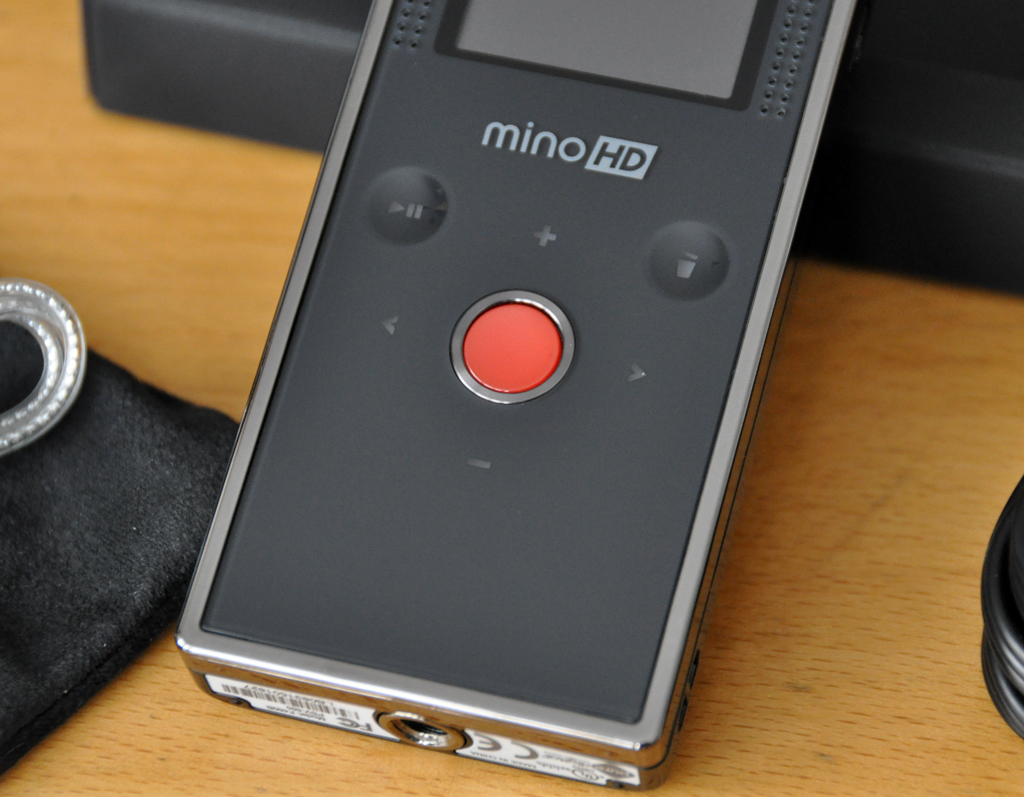
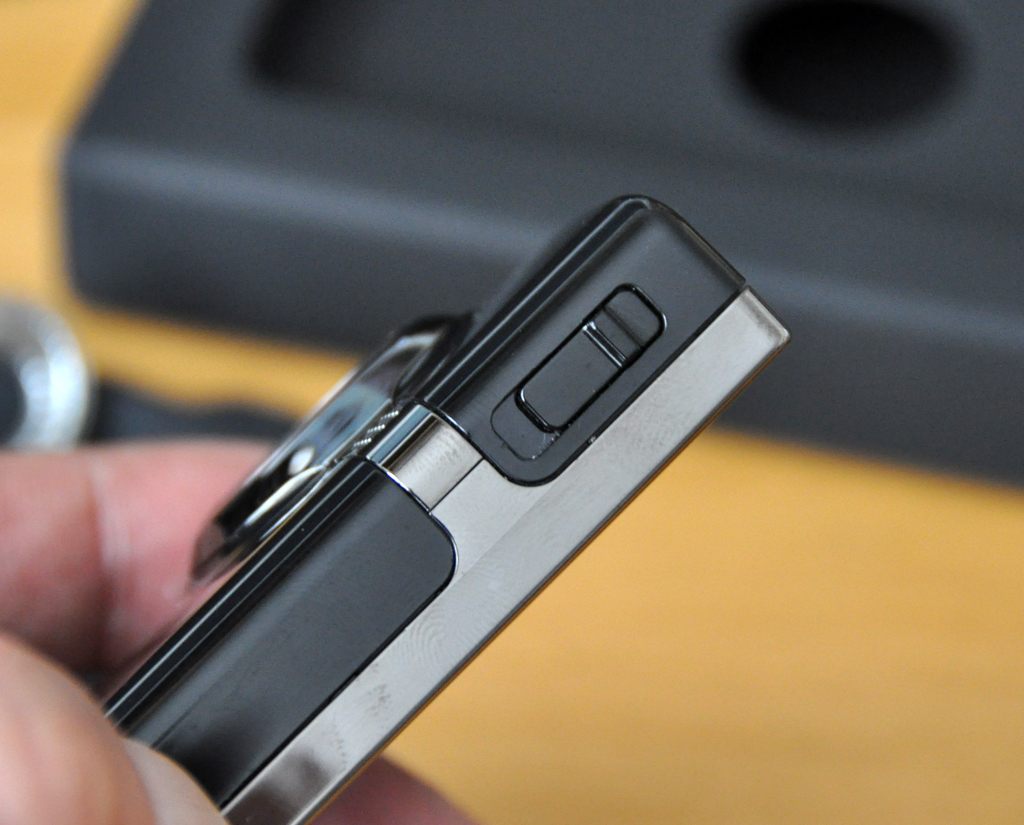
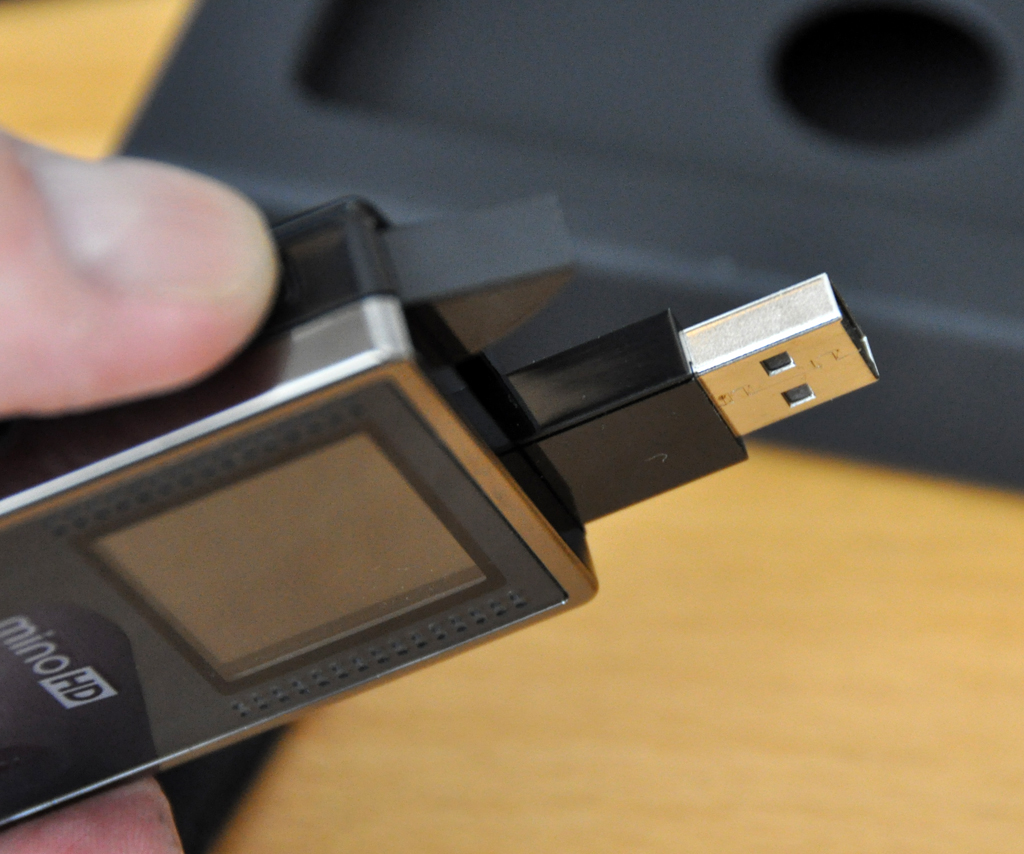
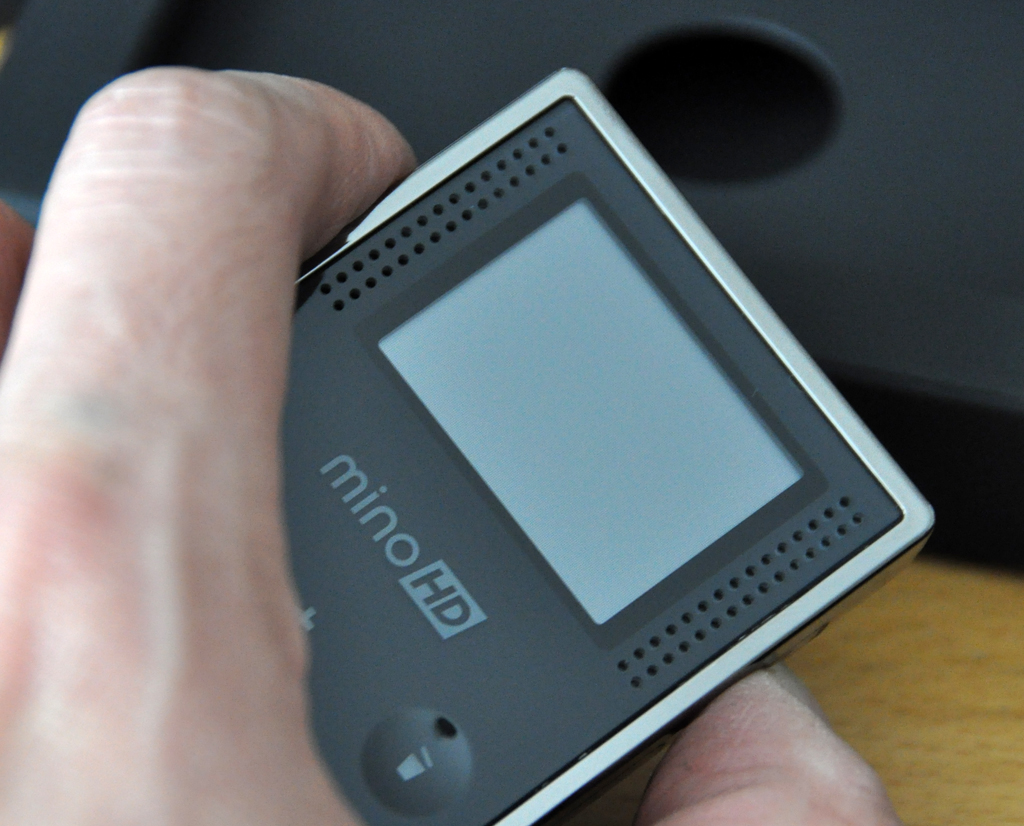
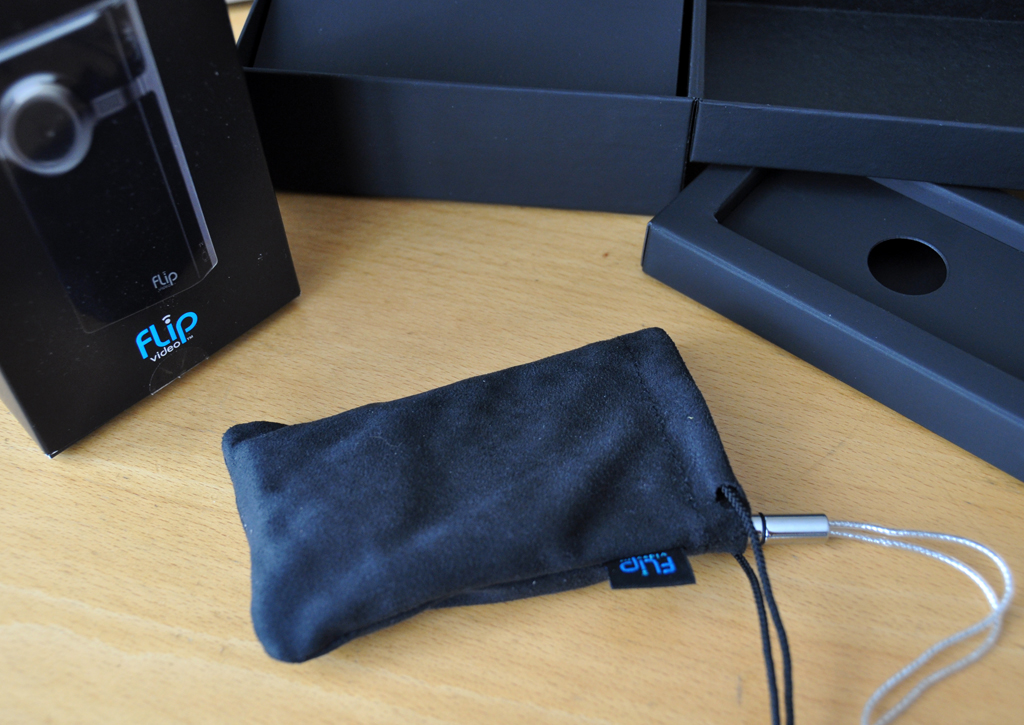
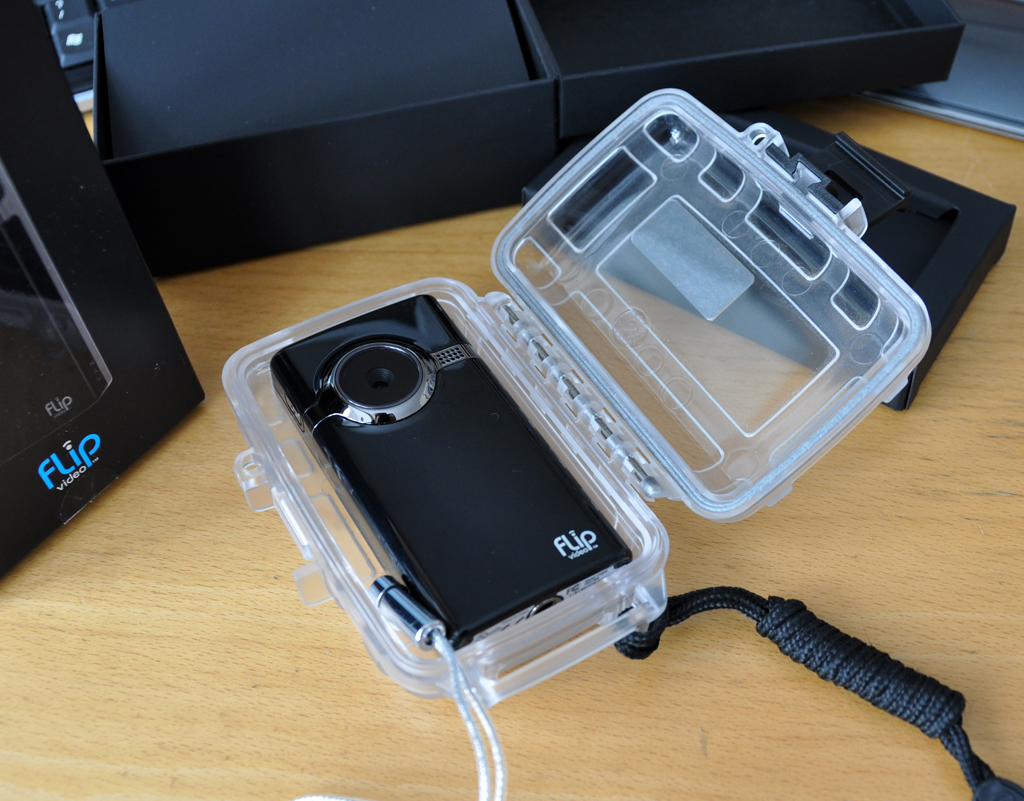
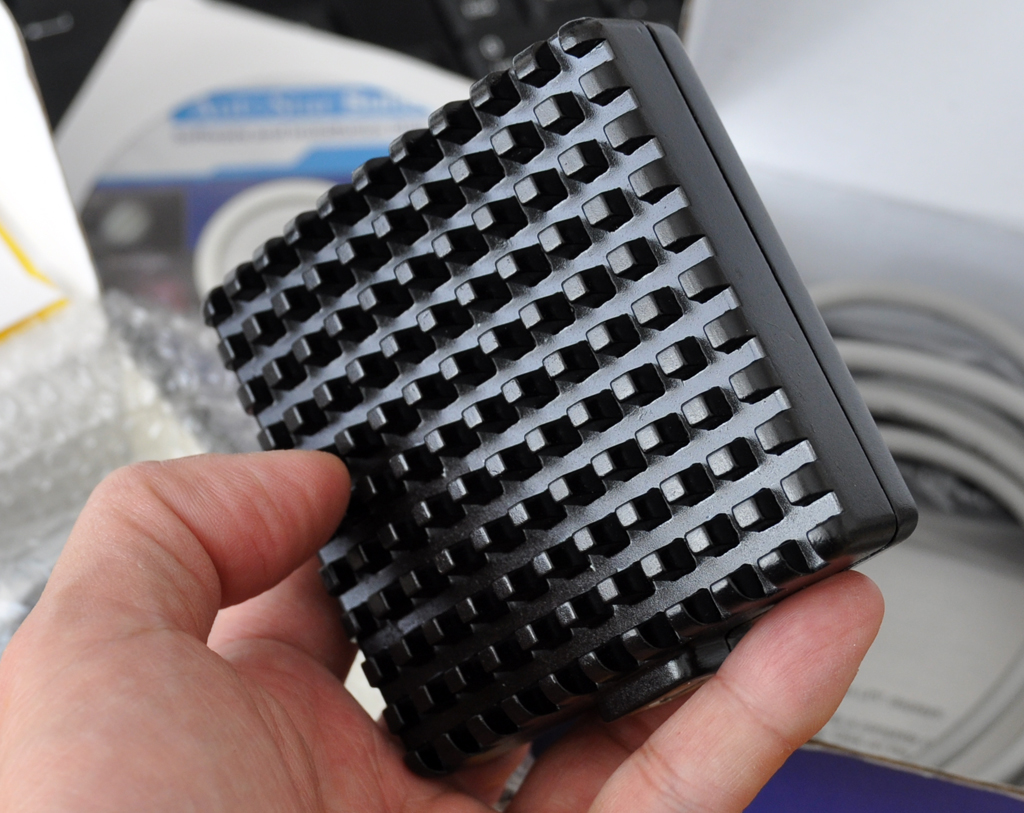
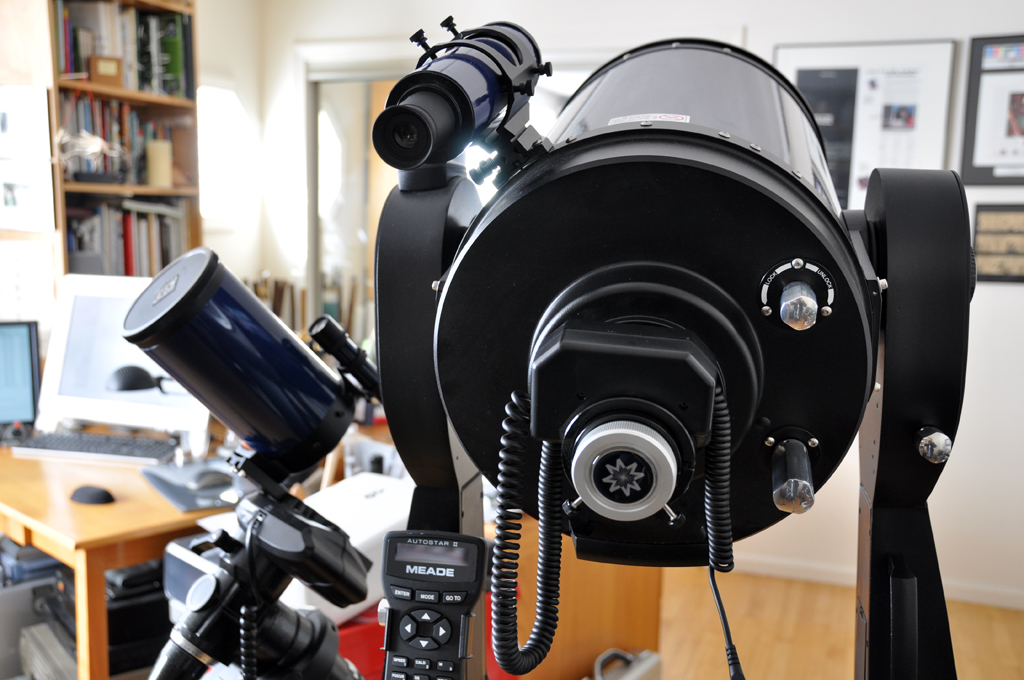
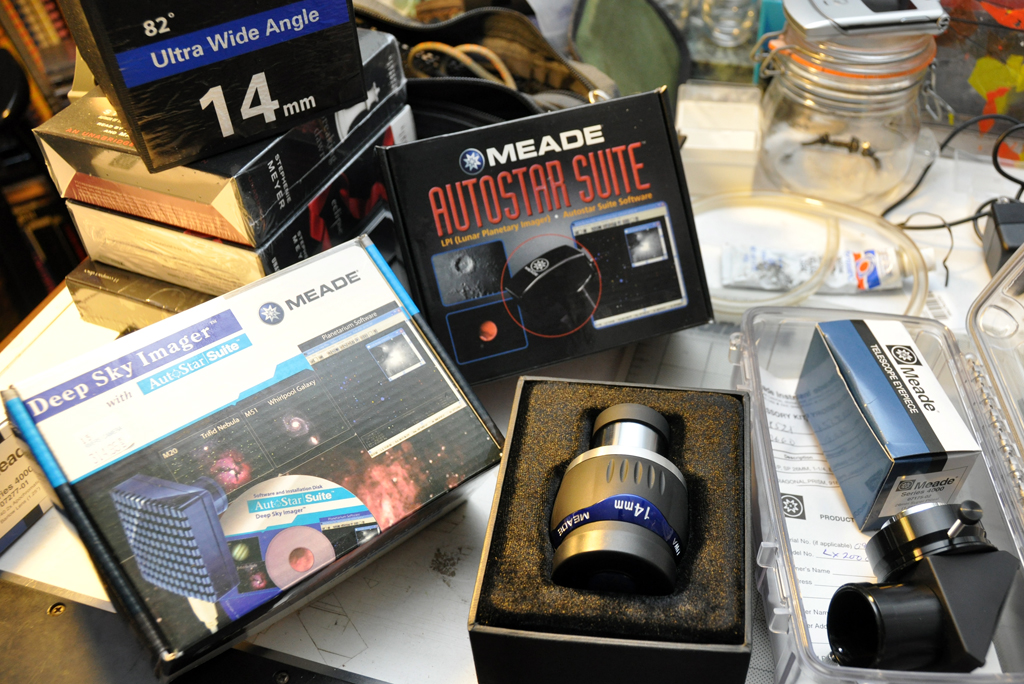
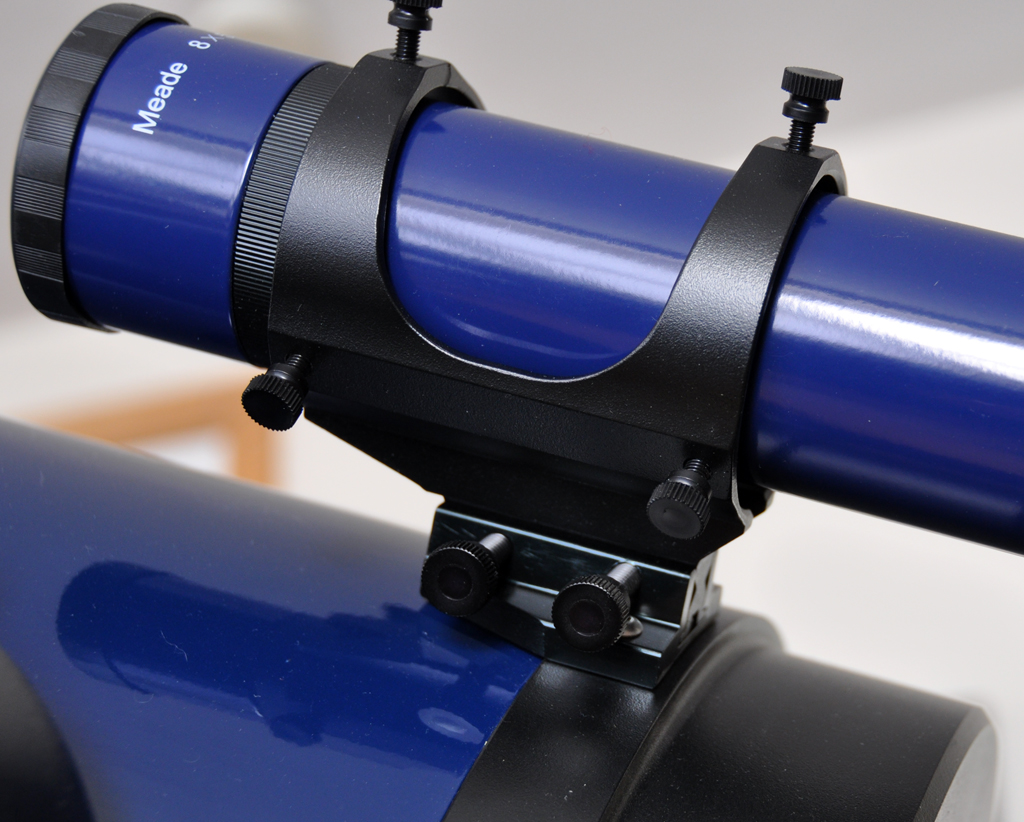
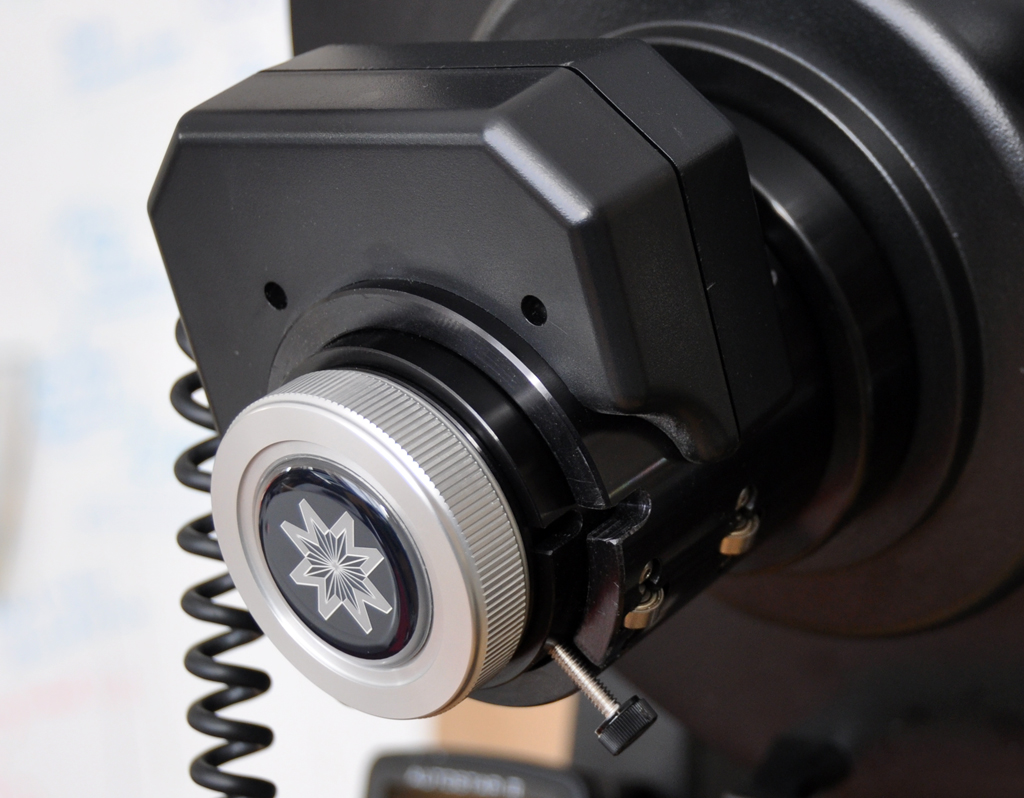
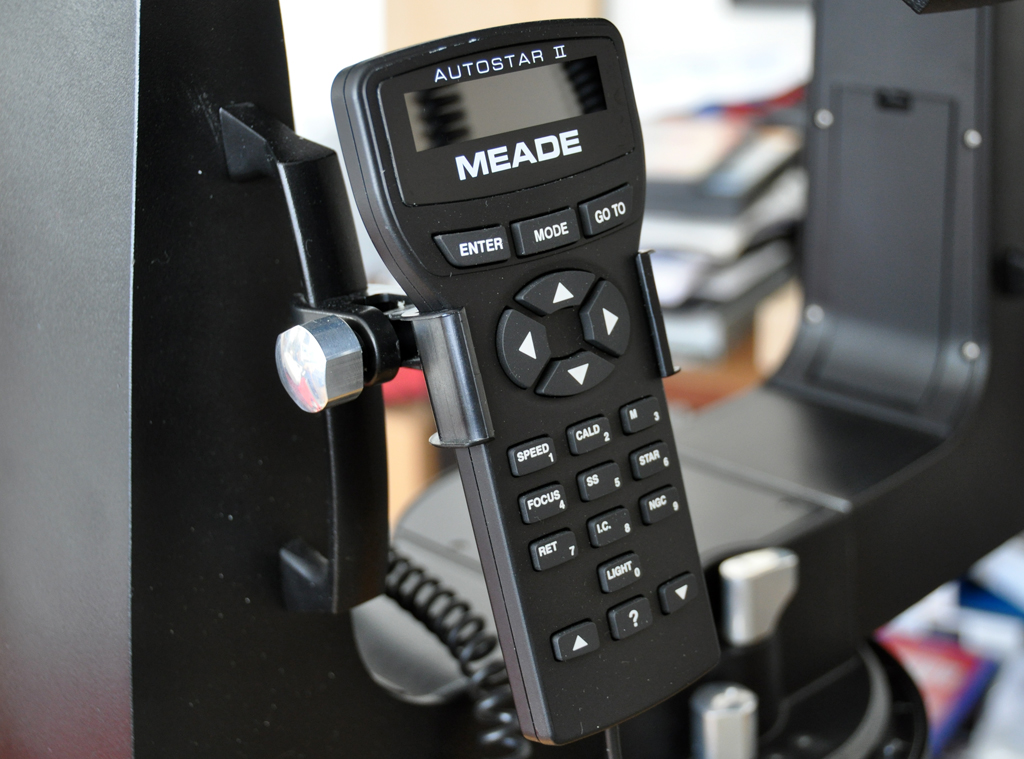
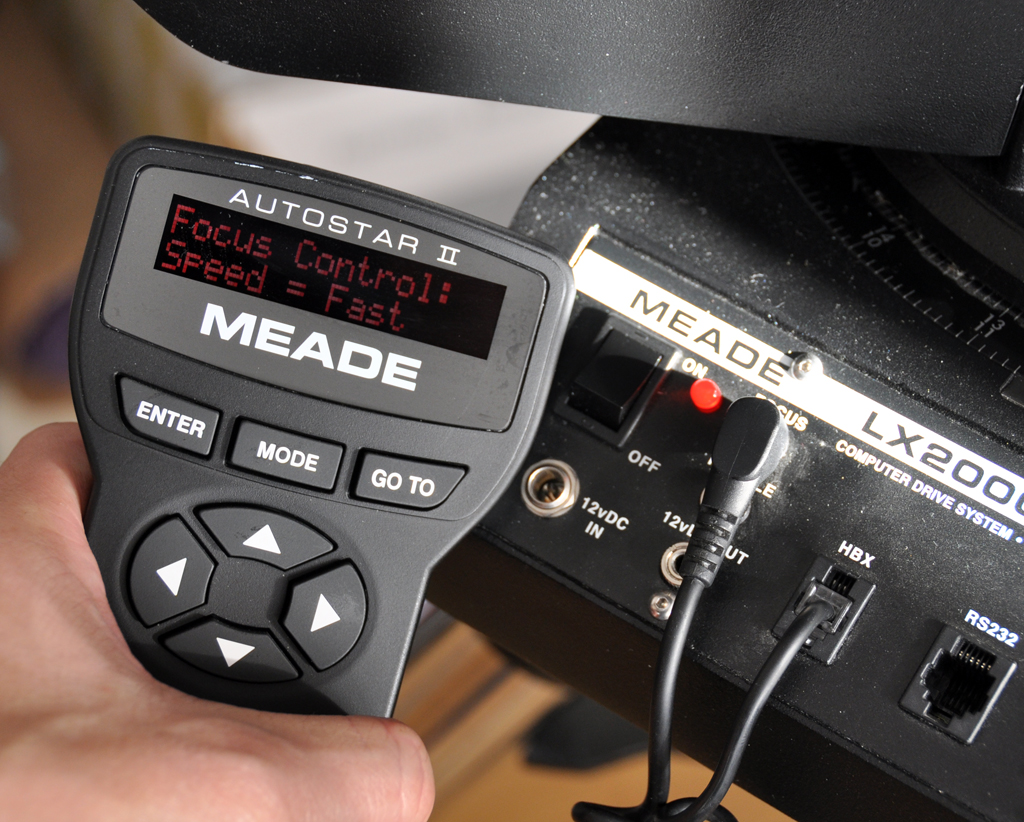
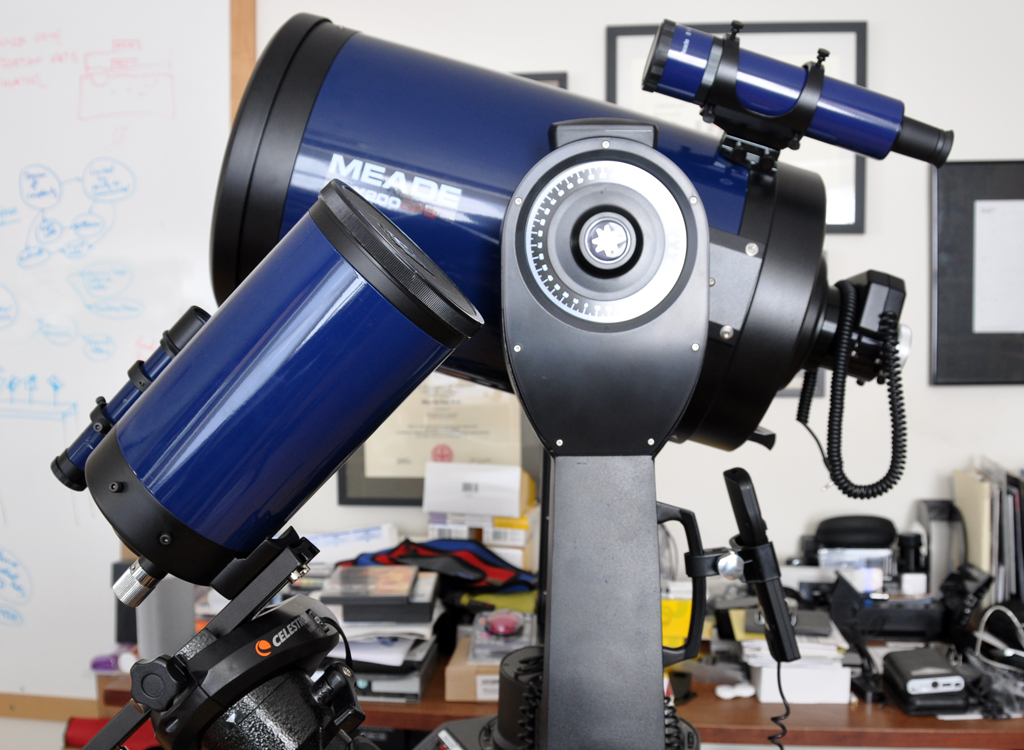
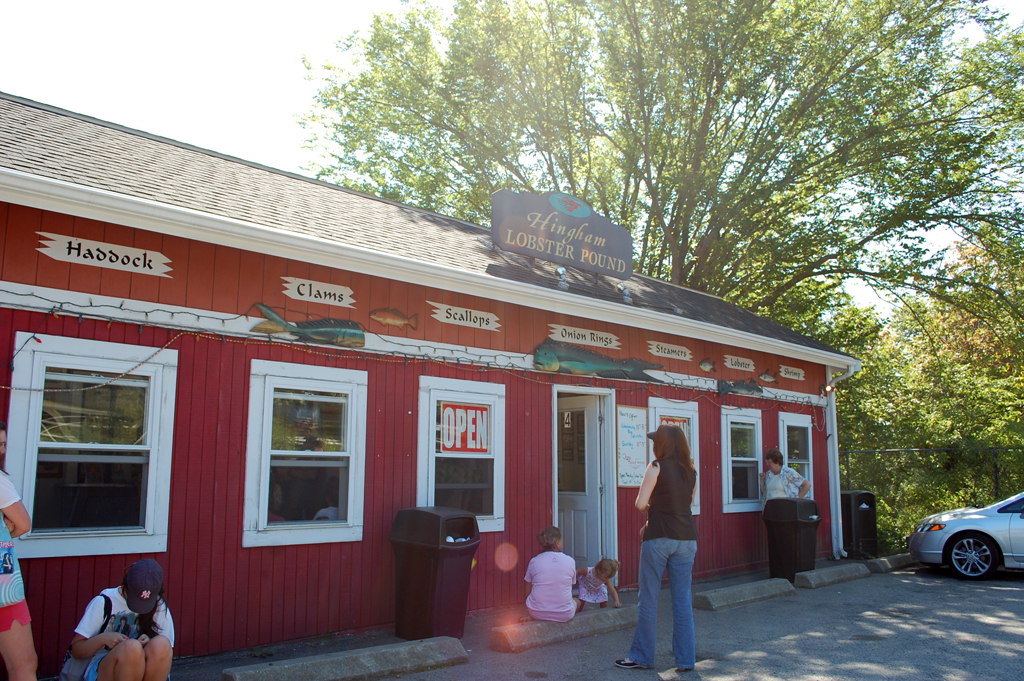
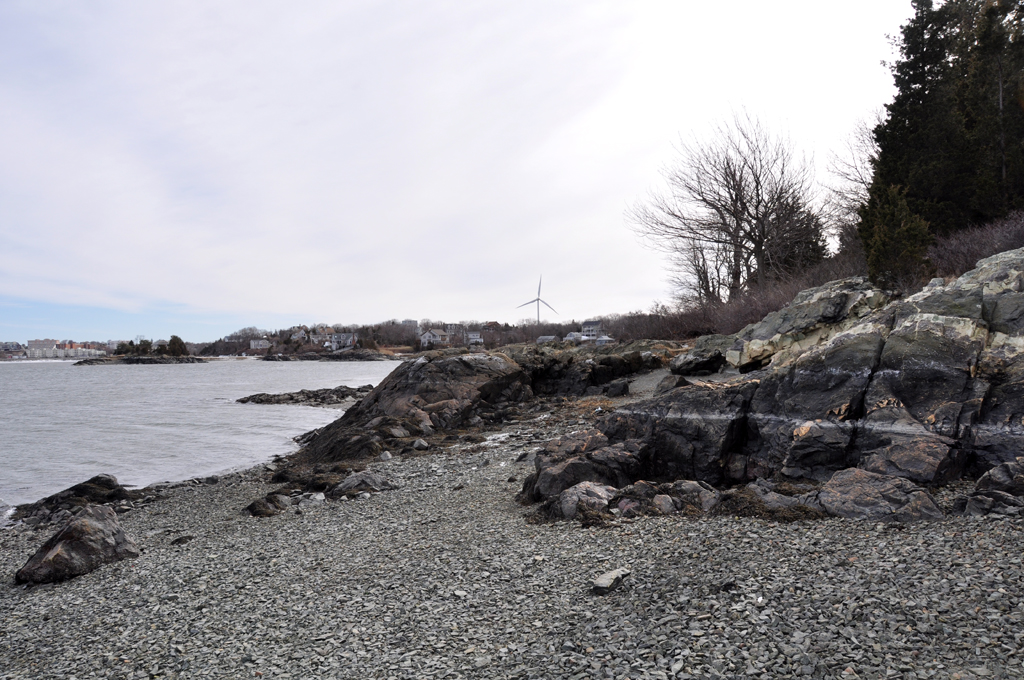
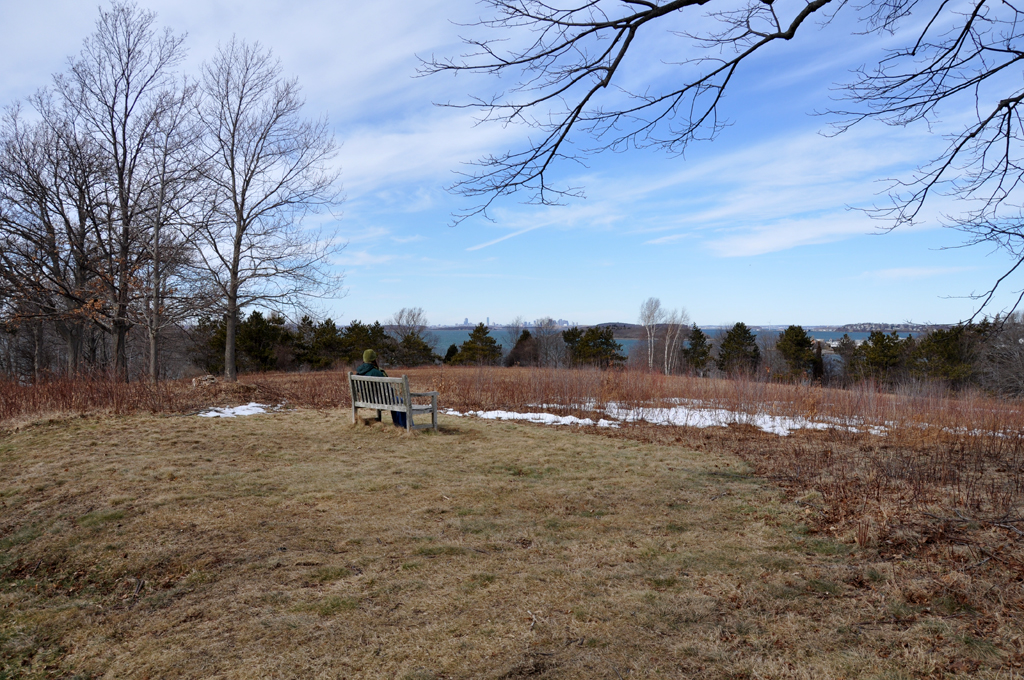
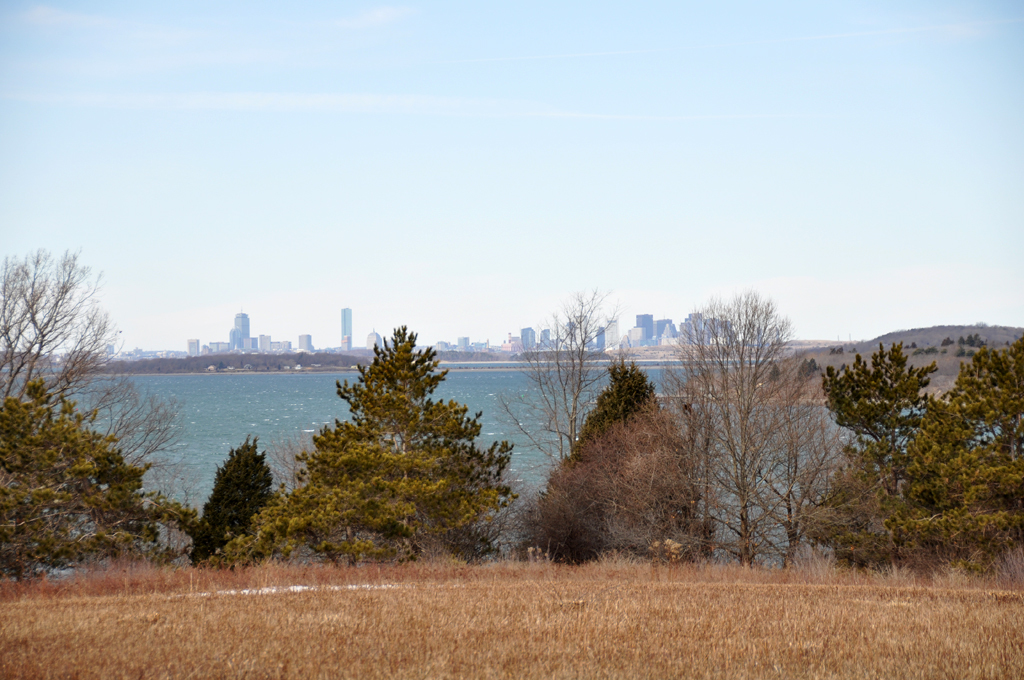
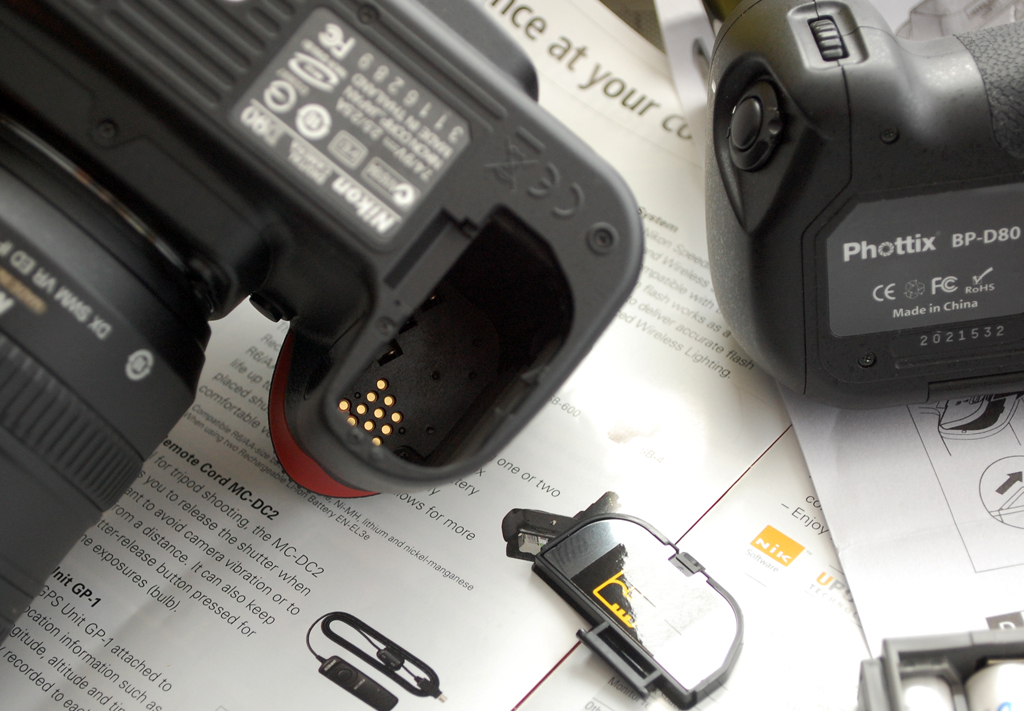
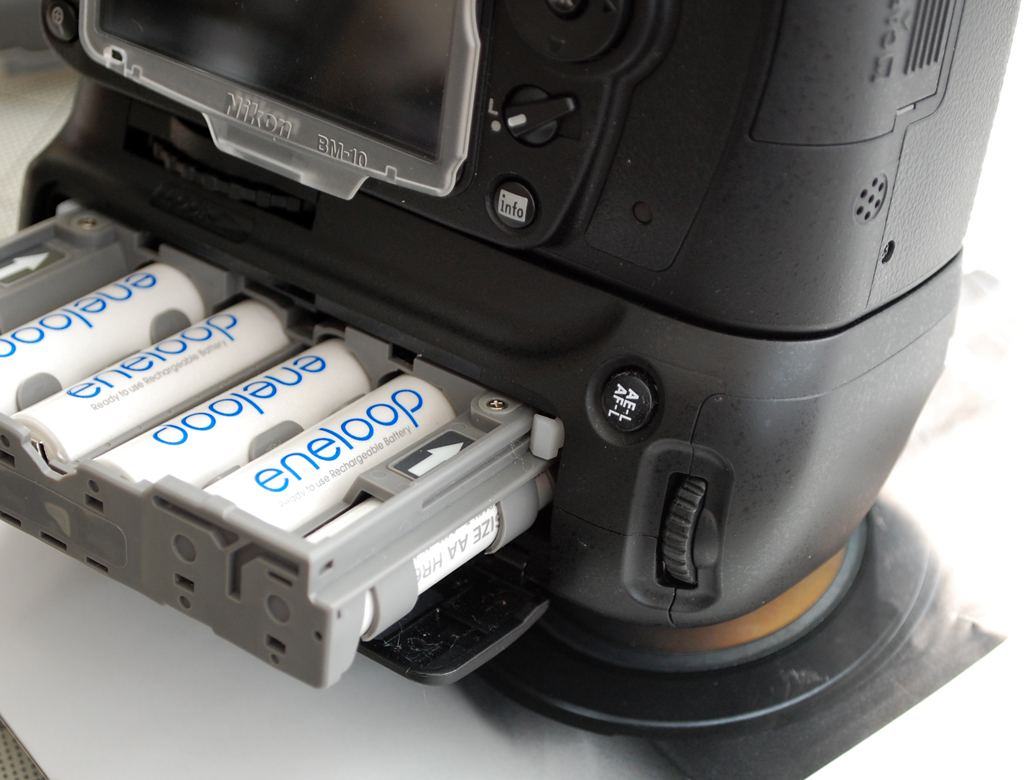
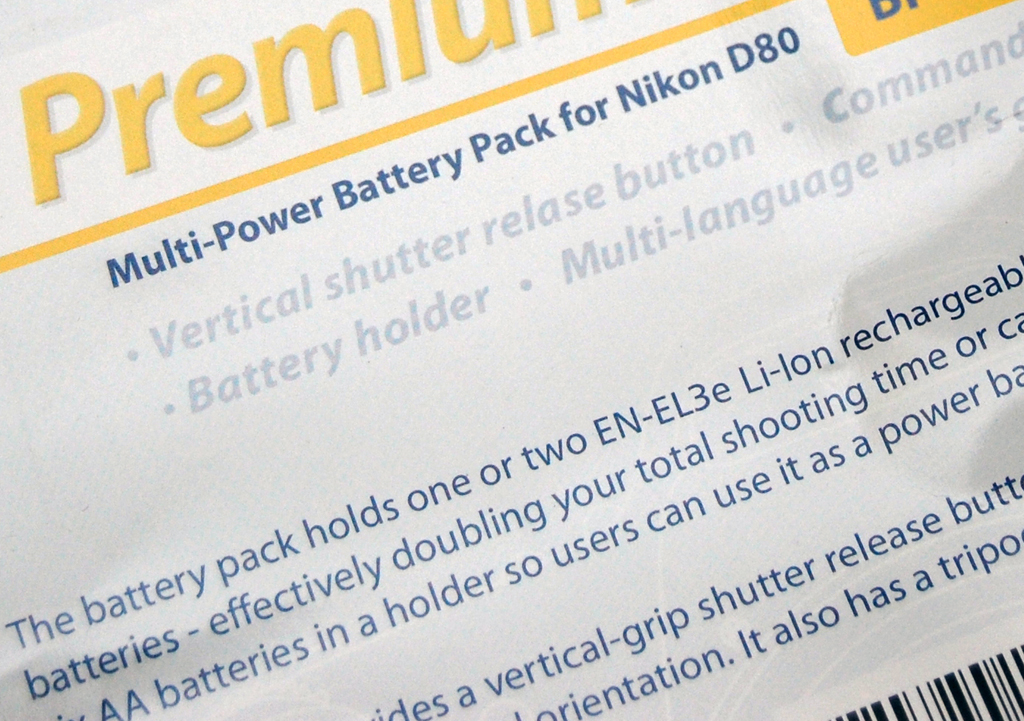
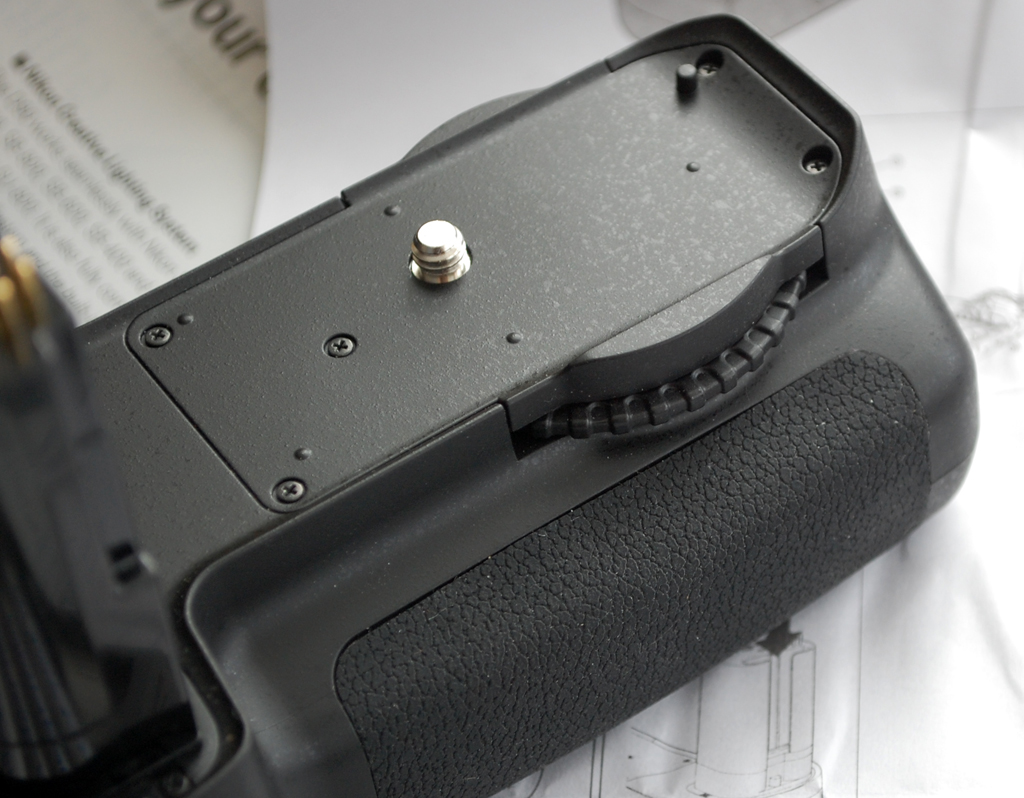
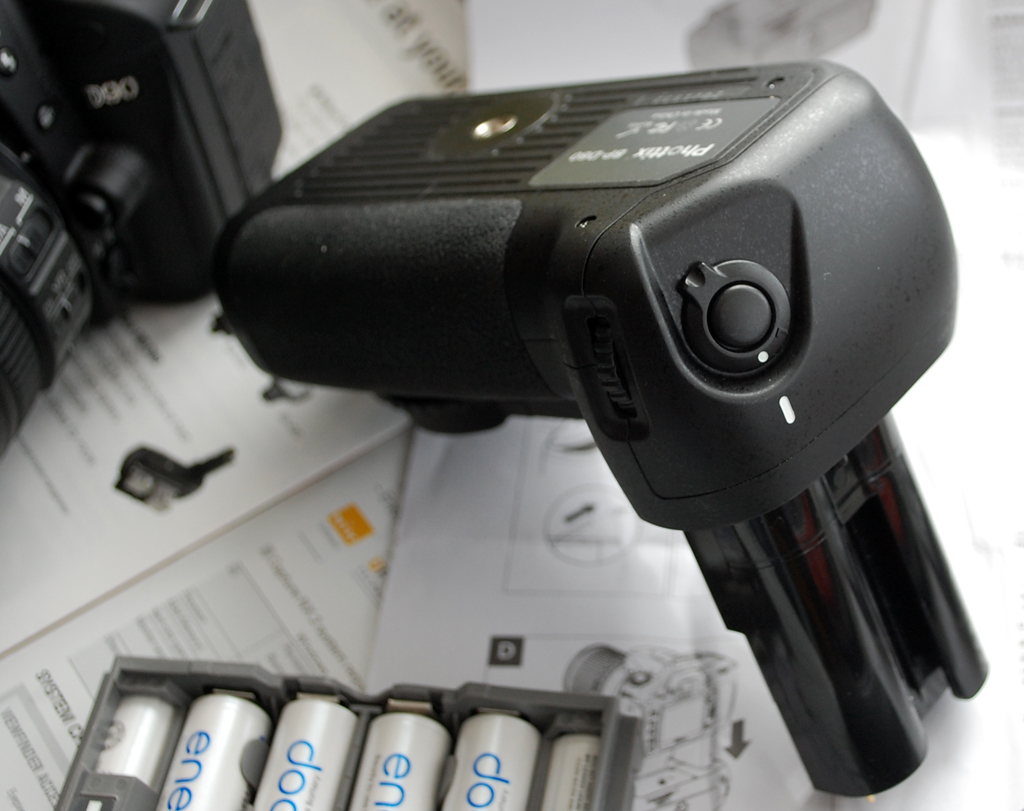
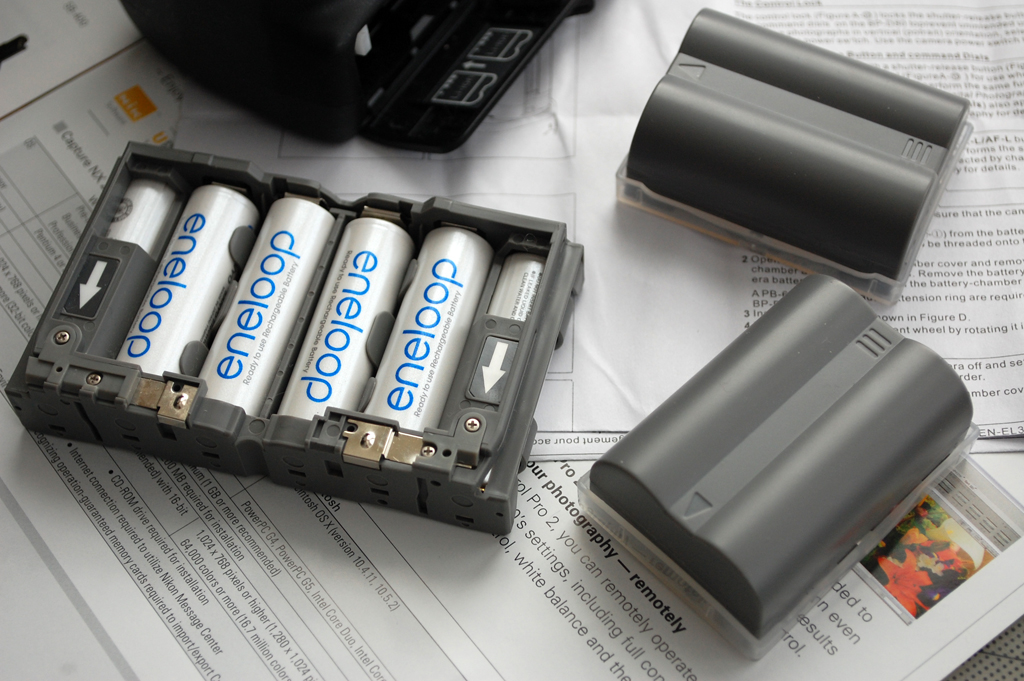
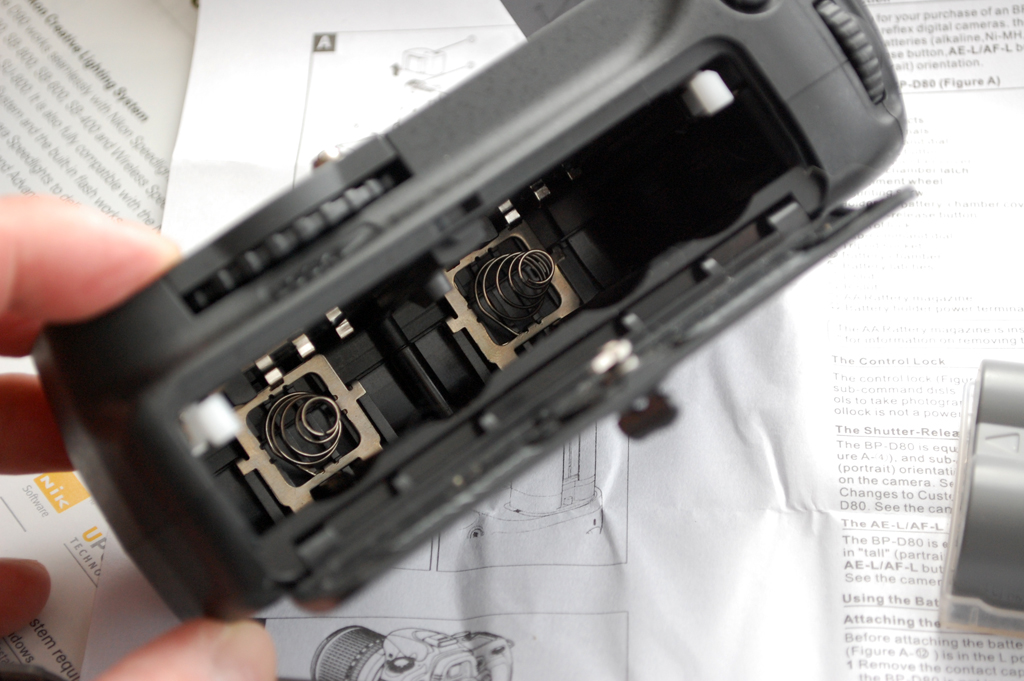
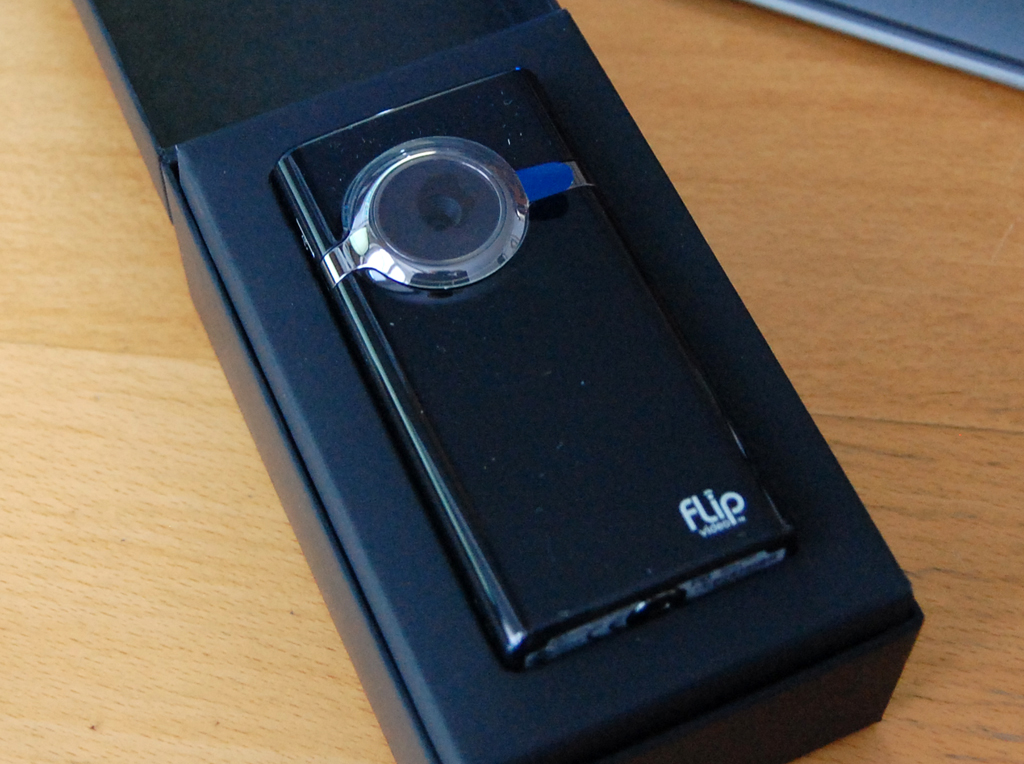
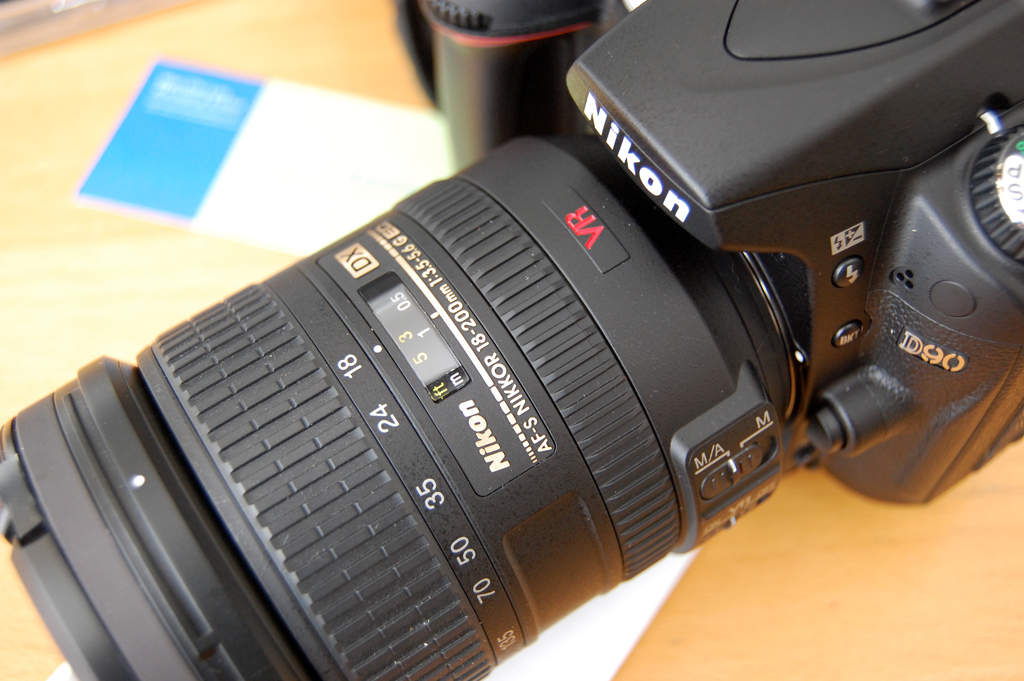
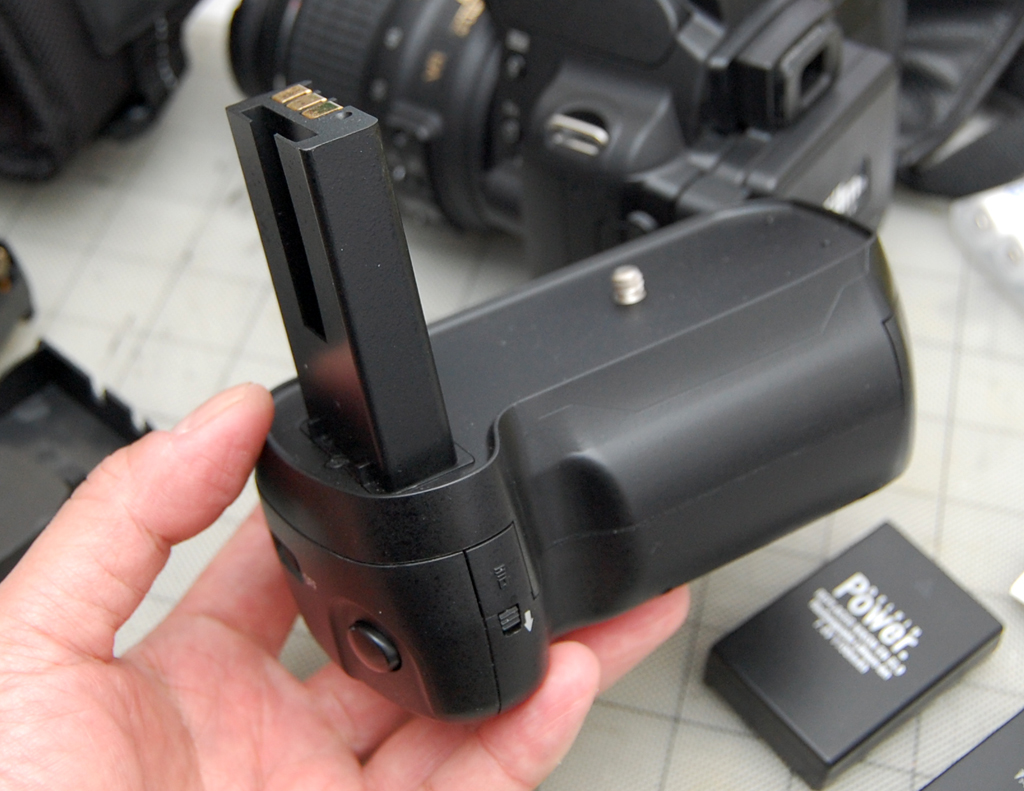
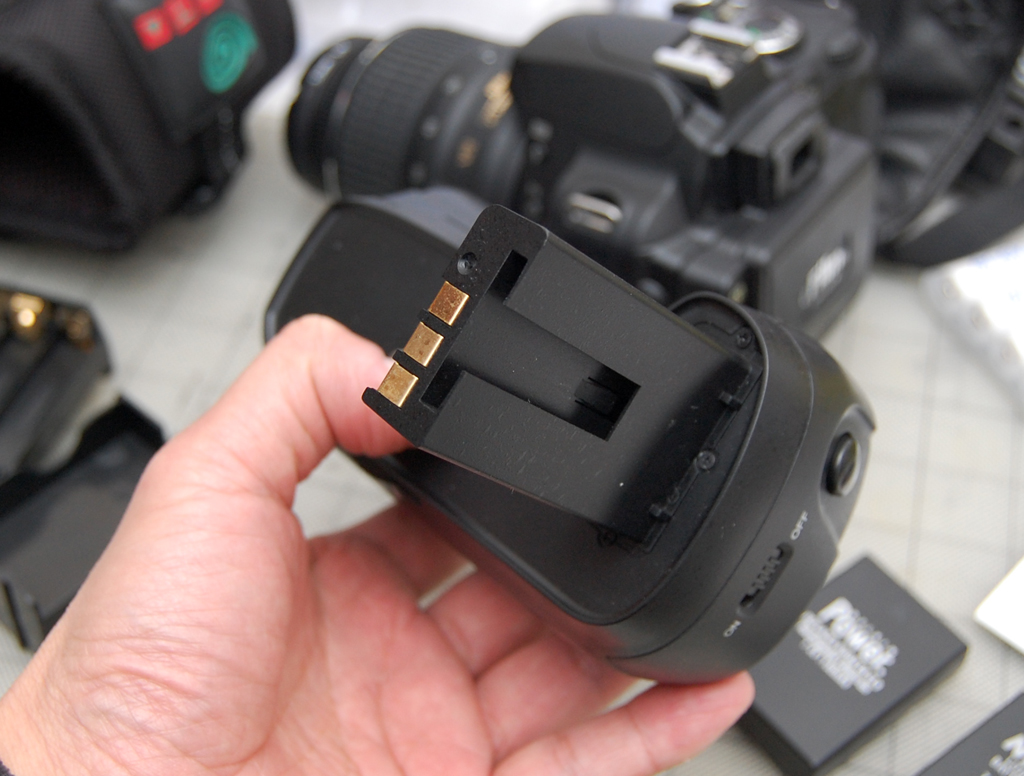
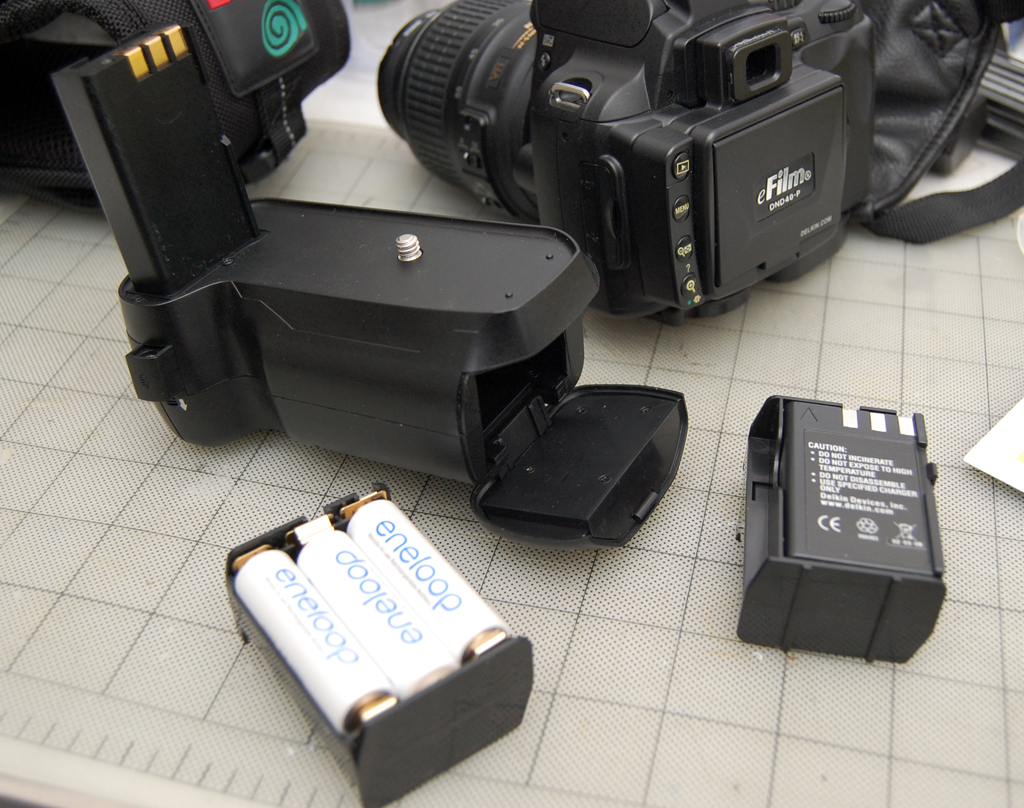
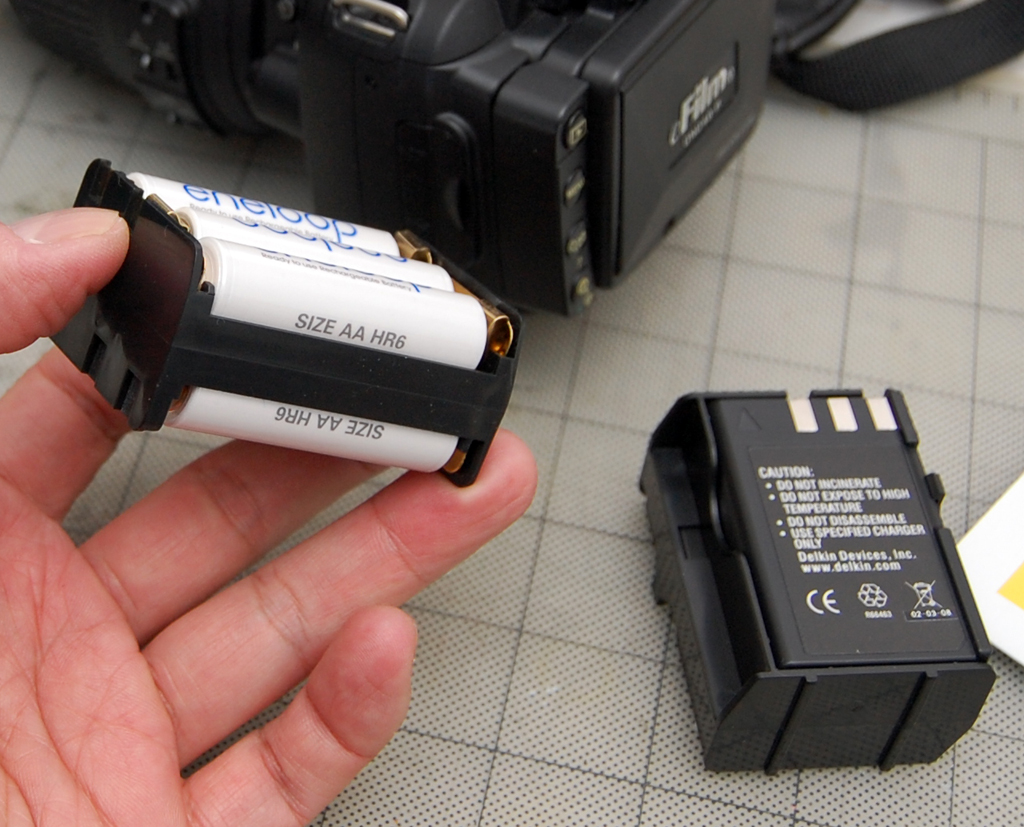
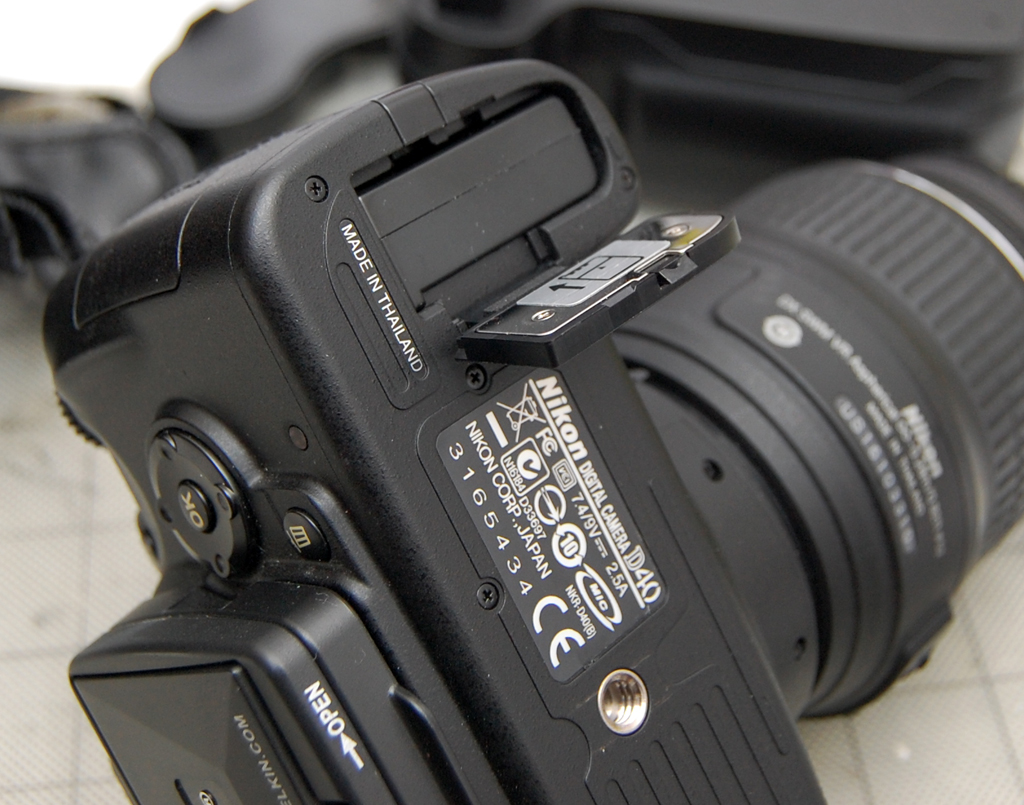
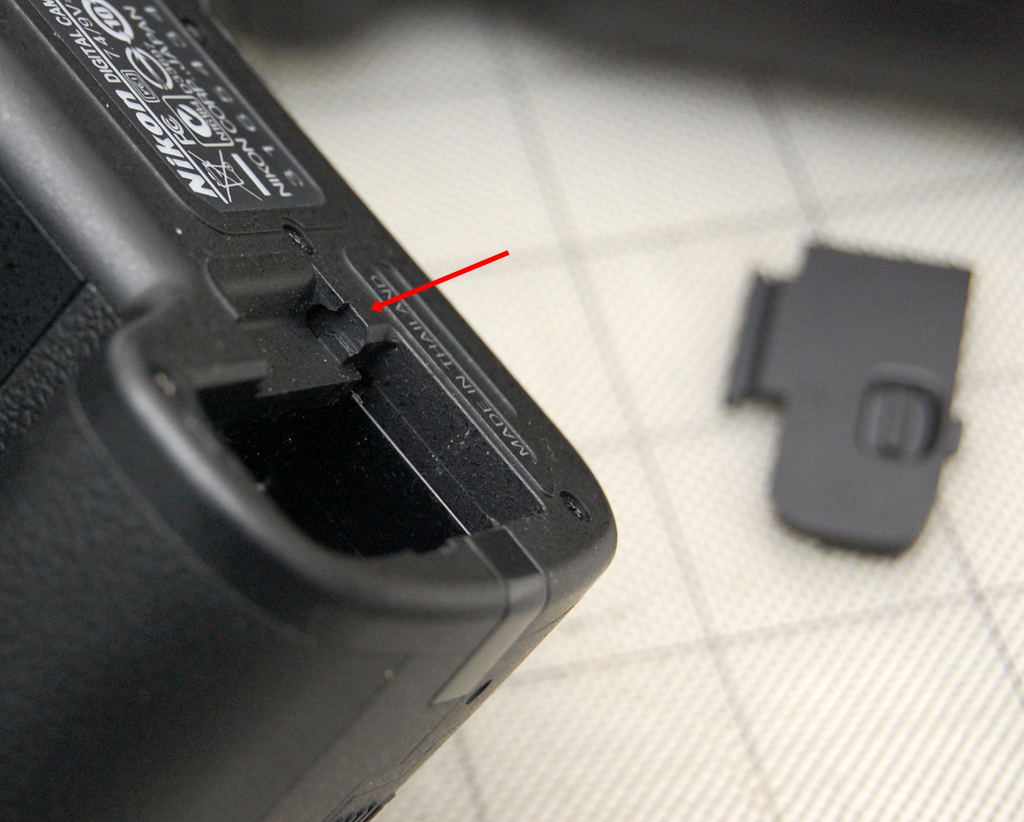
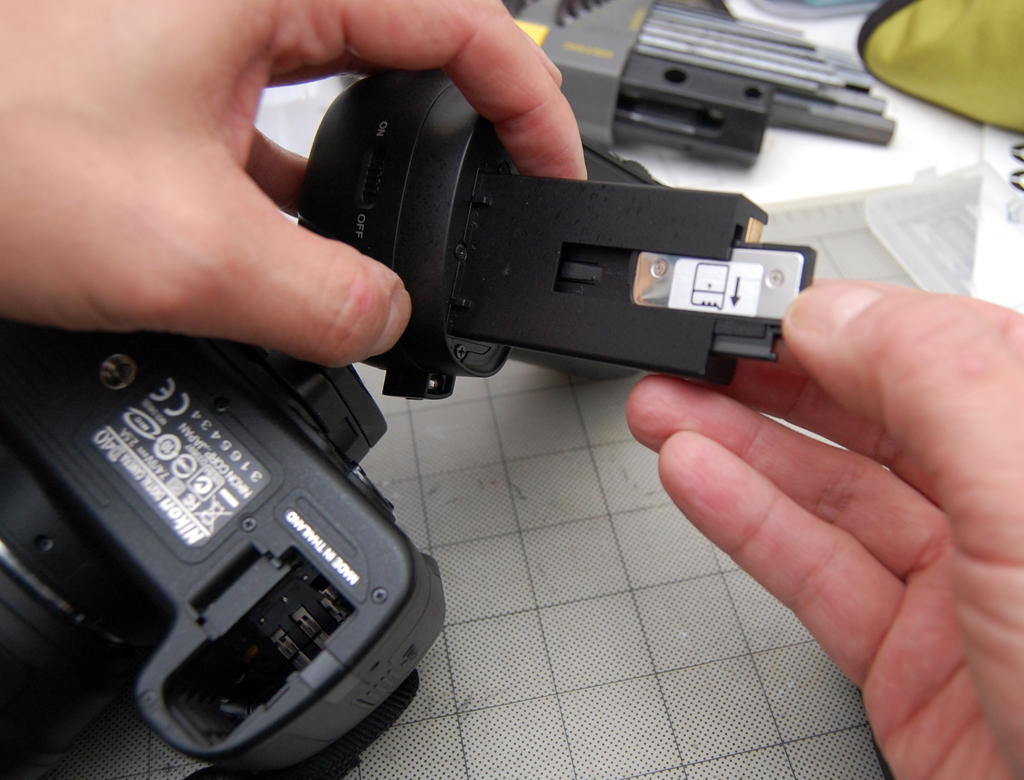
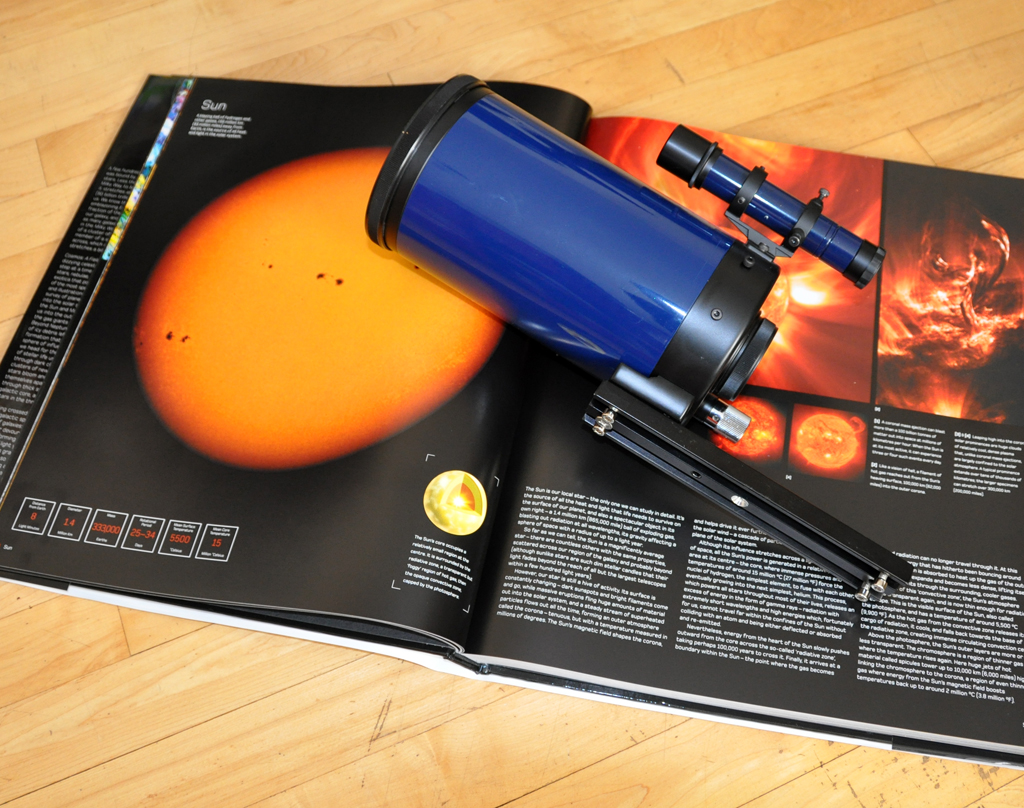
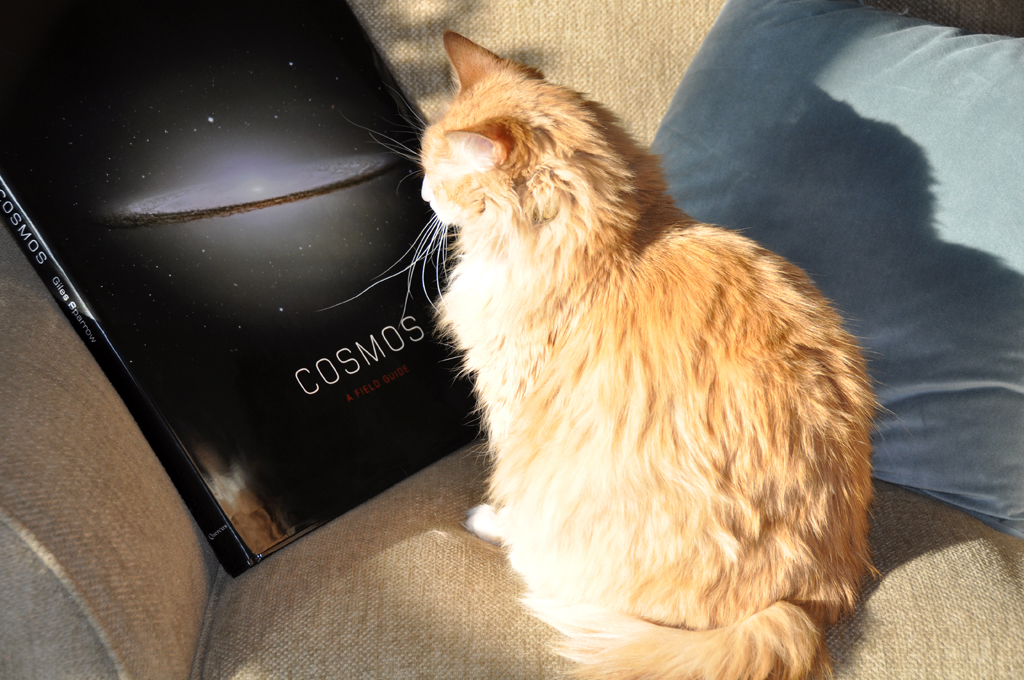
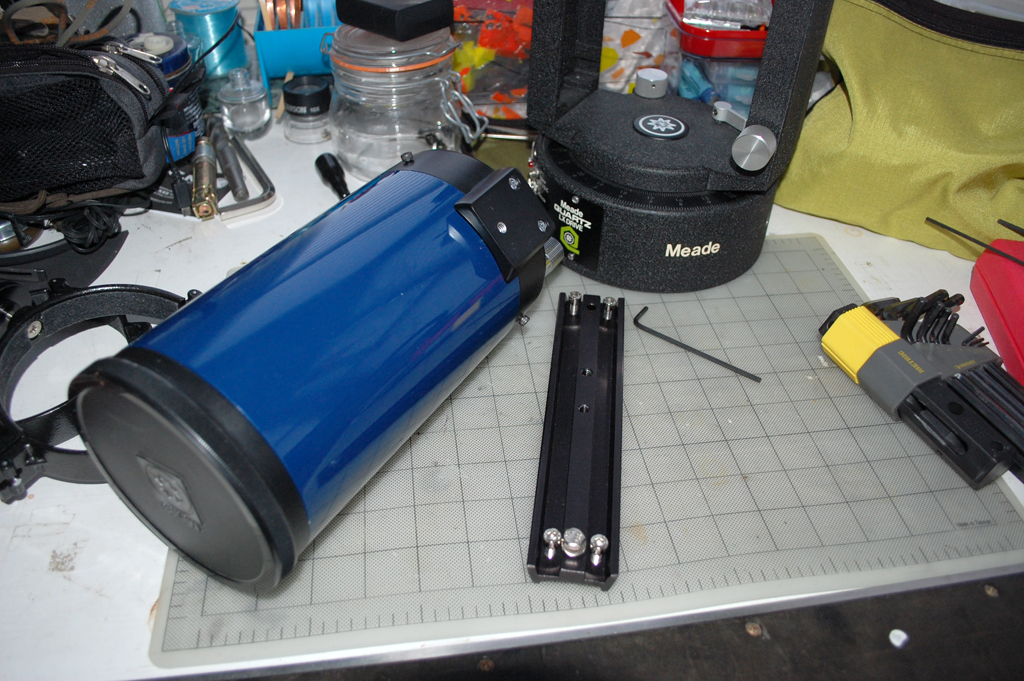
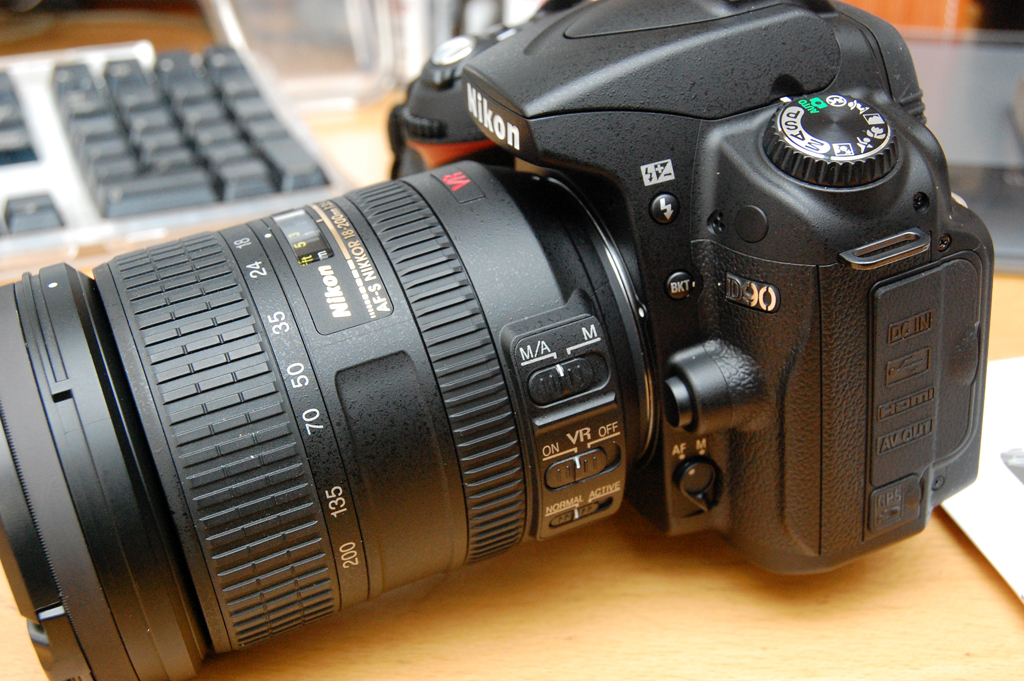
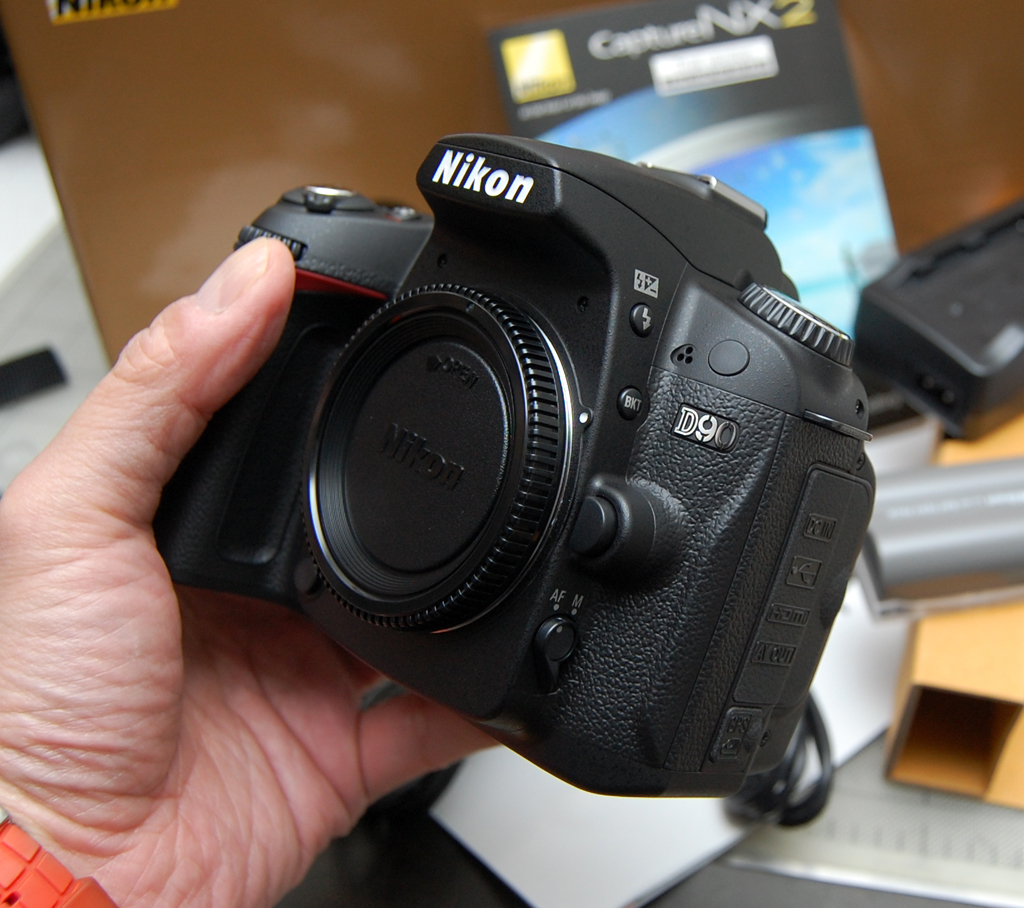
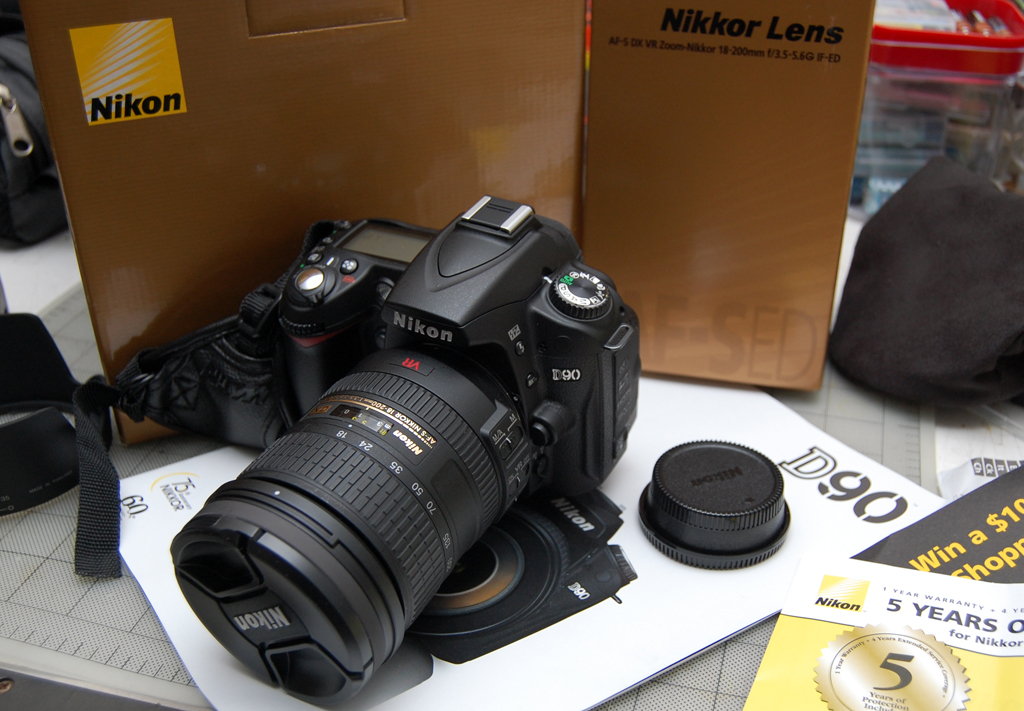
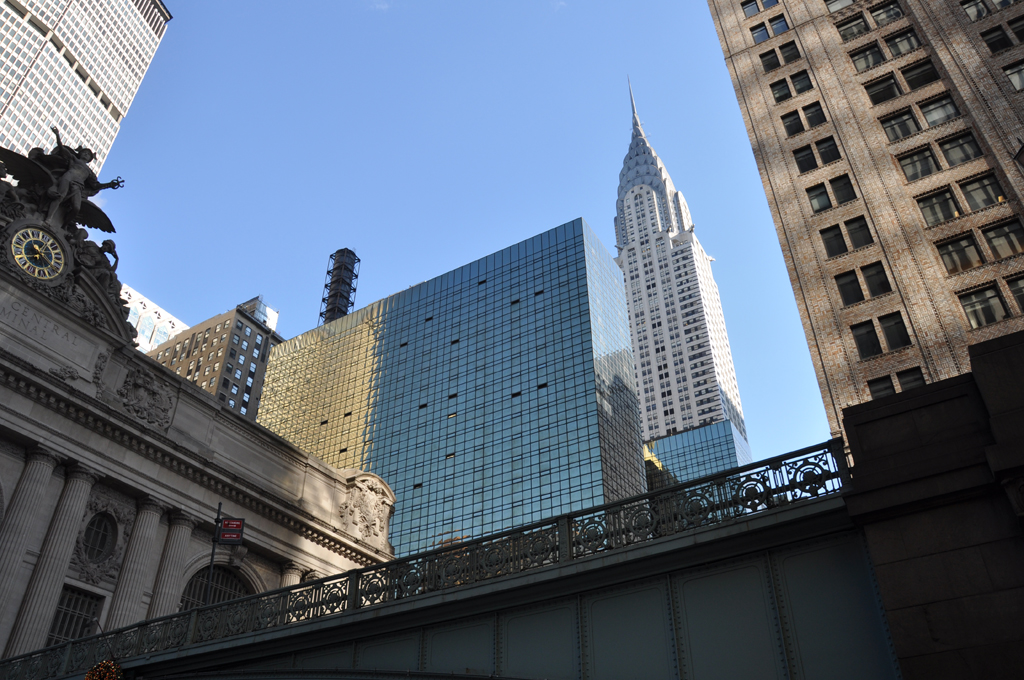
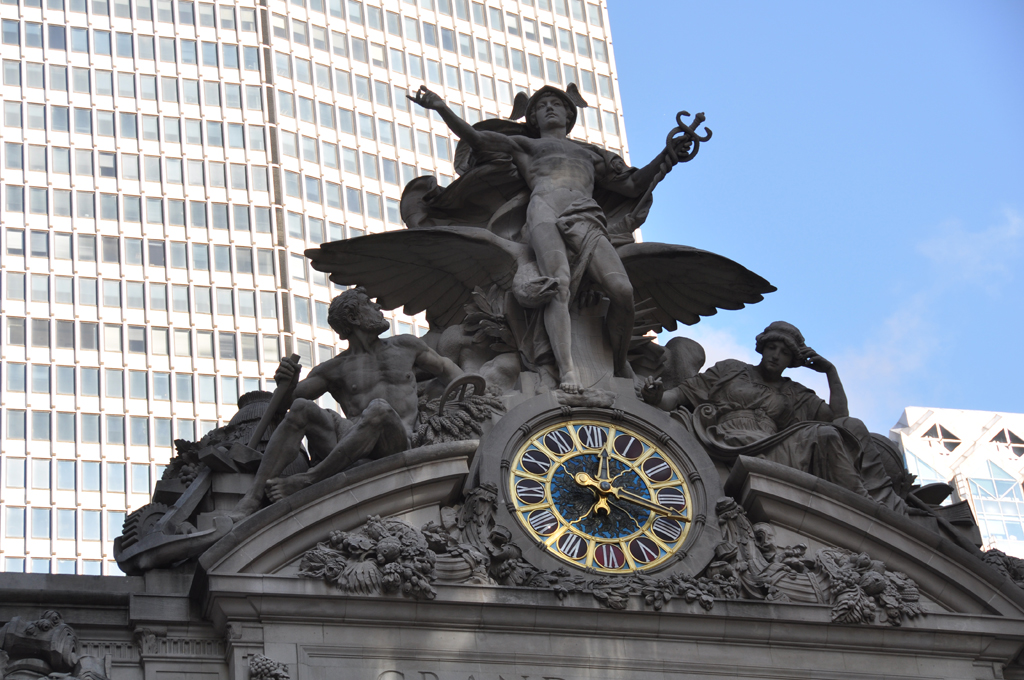
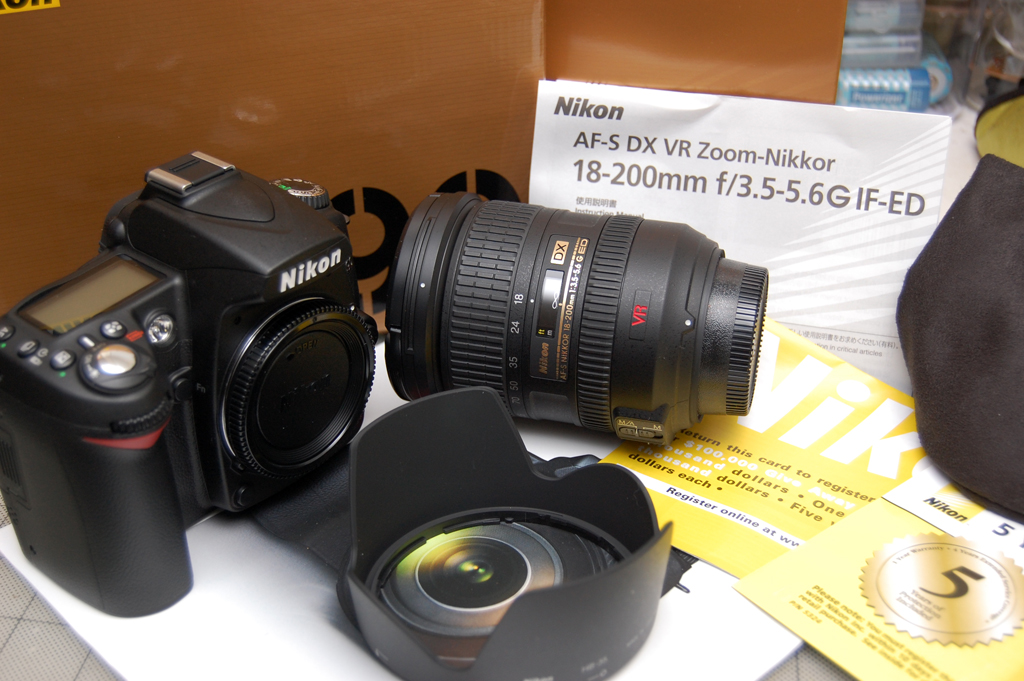
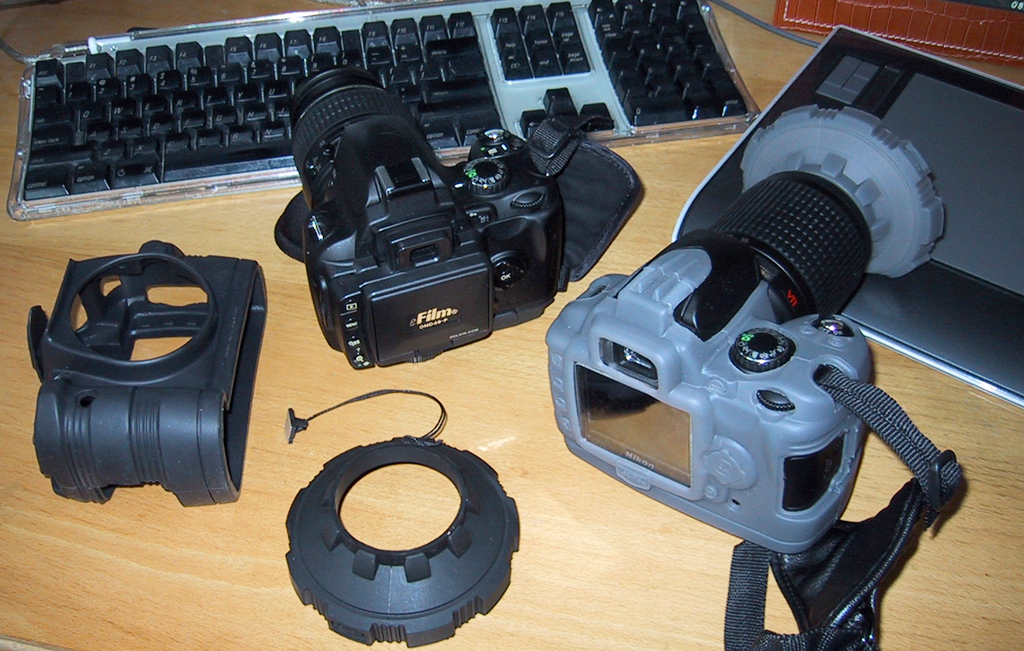