Alpine Labs Pulse: FirstUse
Camera remote, wireless trigger, and a whole lot more...
Life happens in “real” time. It is analog and continuous. How we choose to sample that flowing stream of information gives us our perception of reality. In video circles, “real” time means 30 frames per second (fps) samplings. Some of the reasons why 30 fps is a good sampling rate has to do with our biology, and some of it with practicality. For many events, 30 fps is a pretty good representation of the world. However, 30 fps is way too fast for things that happen over the course of years, days, or even minutes. To better “see” those events, we need to sample reality with a longer time interval.
Time lapse photography is a technique that enables us to see things from a different time perspective. When we use the term “time lapse,” we are referring to sampling at a rate slower than real time. For faster than real time, we will use the term “high speed” photography.
At RainyDayPhotography, we have had experiences with a LOT of different time-lapse gadgets (Yongnuo, Satechi, Cactus), but our current favorite is the Pulse from Alpine Labs. We posted a FirstLook of the Pulse back in the beginning of March and have been playing with it ever since. In this post, we are going to tell you about our FirstUse experience with this amazingly simple to use device.
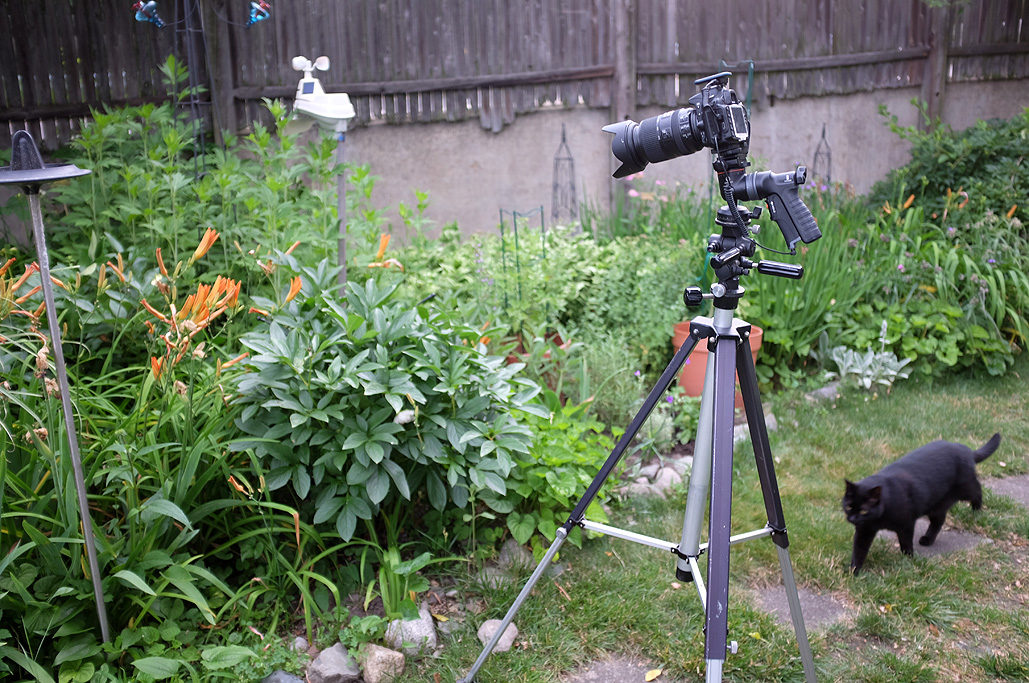
This is the setup we used:
- Alpine Labs Pulse, Pulse app on an iPhone 6+
- Nikon D90 with the 18-300mm zoom
- Vanguard GH300 Trigger grip
- Davis & Sanford tripod
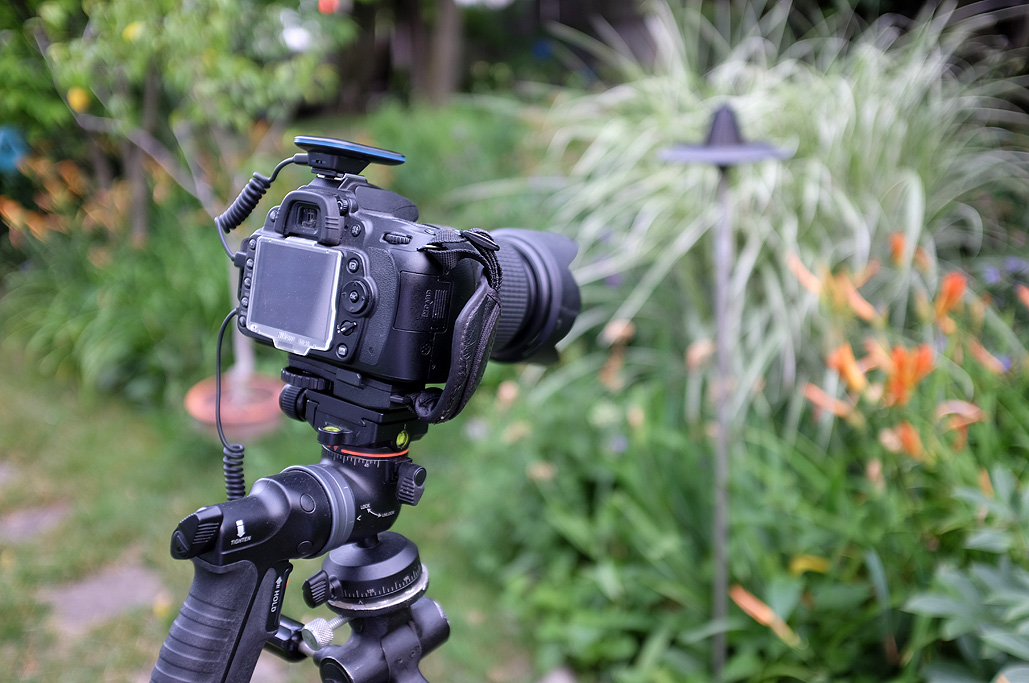
In the photo above, the Pulse is shown inserted into the hot-shoe of the Nikon D90 camera, but don’t let that fool you. The hot-shoe has nothing to do with the Pulse. It is just a convenient place to secure the Pulse. While some accessories do “talk” to the camera via the contacts in the hot-shoe, the Pulse actually communicates via the USB port. Connecting via the USB allows the Pulse to do more than just take photos. It lets it start and stop videos, and adjust shutter speed, aperture, and ISO…things which were not possible with our other time-lapse gadgets.
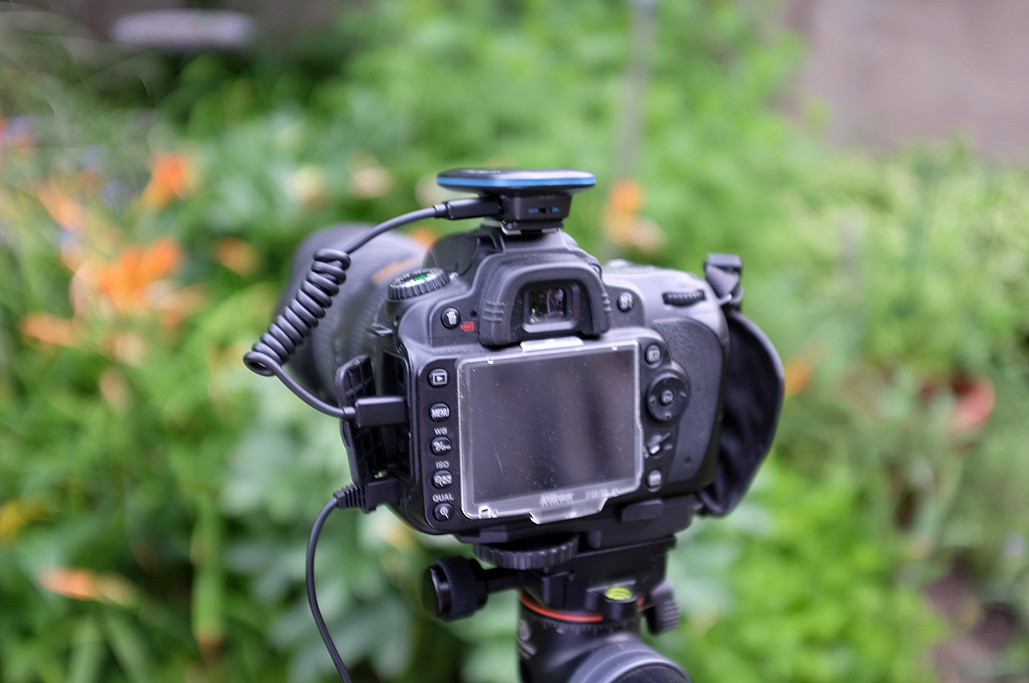
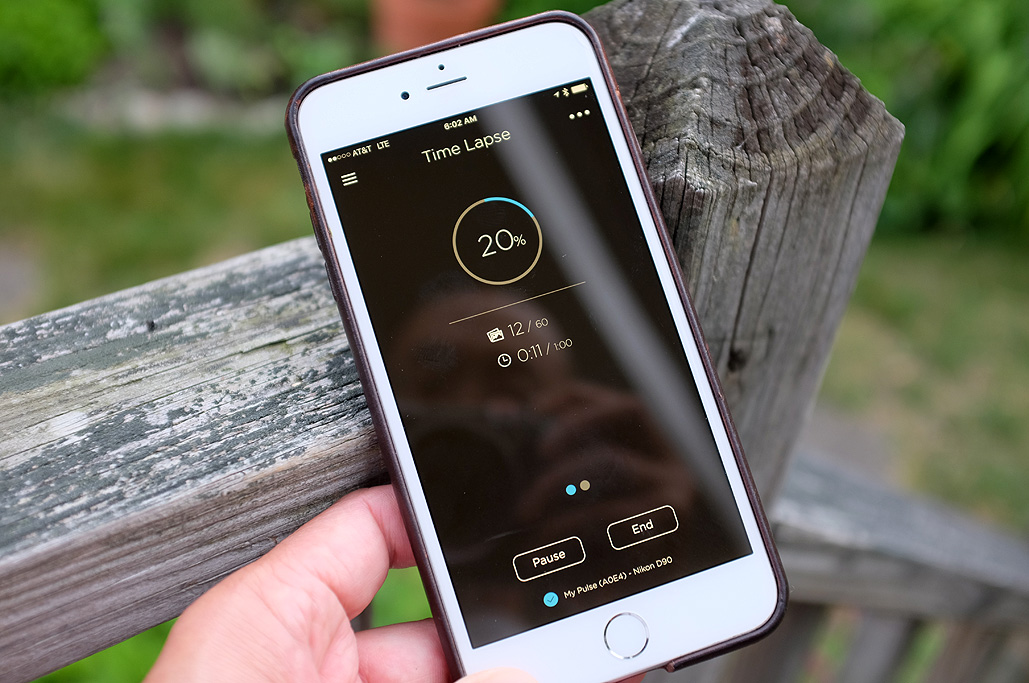
While the camera is controlled by the Pulse, the Pulse is configured and controlled the instructions sent to it via Bluetooth by an app (iOS and Android) on the smartphone. The app’s interface is clean and intuitive, and the status provided on the progress of the time-lapse sequence is easy to see and understand. We had no problems with either the Pulse, the app, or capturing a cool time-lapse sequence the first time out with the Pulse. Just set the image interval, the duration, and click OK. Now that’s pretty cool!
For our FirstUse, we decided to do a sequence of the opening of the day lilies in the RainyDayGarden. We took a bunch of different time-lapses so we could better understand the workflow of the Pulse. We will talk more about how we converted the hundreds of images into a time-lapse sequence in a future article.
We learned quite a bit about the Pulse in our FirstUse. We are eager to take it out InTheWild to see what else we can capture and “reveal :-)”
Group Shot: 2 Hours
The 1-minute time interval was a little too long and gave a “jumpy” quality to the sequence. For our next test, we cut the interval time in half and focused in on a cluster of blooms.
Cluster Shot: 90 minutes compressed to 30 seconds
The 30-second interval setting was better, but still not very smooth.
60-Minute time lapse: 1 image every 10 seconds = 360 images
The 10-second setting and shooting it inside gave us the smoothest sequence.
What was interesting was that while the interval was just 10 seconds between shots, the gaps of the continuous opening movement of the petals were noticeable!!!
Links to items mentioned:


Leave a comment