Dynaplug Pro Tubeless Tire Repair Kit: FirstUse
Push, Pull, Done...
There are few things more infuriating than having tire with a slow leak.
Because in that mystical Gandolf the White way of yours, you know that it will get worse and will leave you stranded with a sad and might I say deflated, flat.
And yet, in spite of all your Gandolfian insight, you push the parchment envelope by refilling said tire—over and over again—rather than facing it head on and bloody well fixing it.
Friend, the RainyDayGarage folks are here to tell you that you don’t HAVE to live this witless, worrisome life.
With the right tools, repairing a minor tire puncture is a simple DIY that is within your grasp.
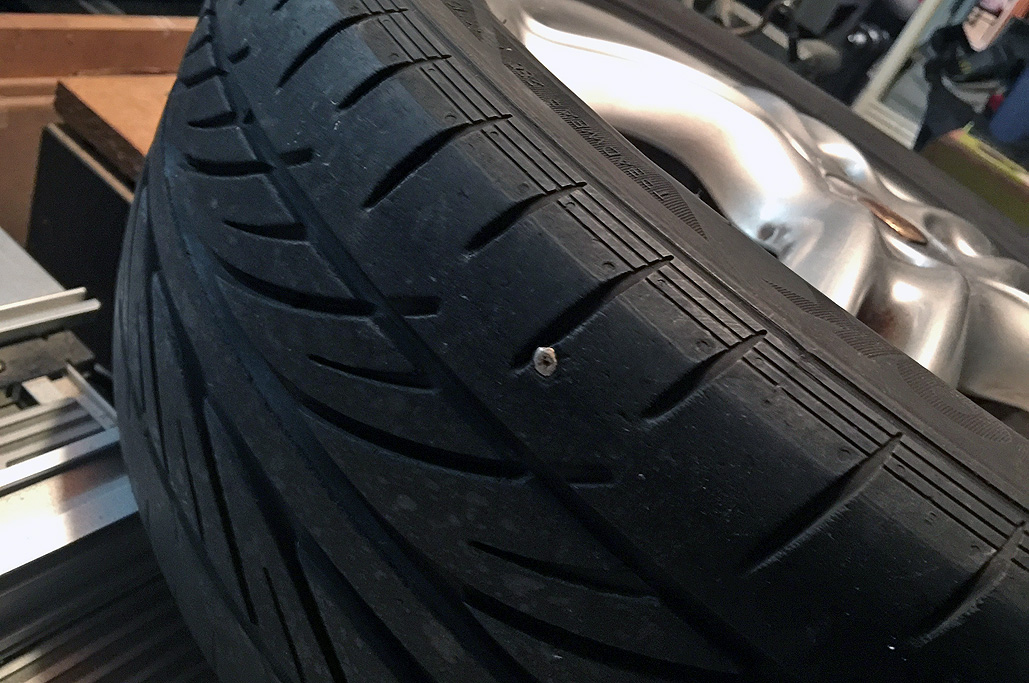
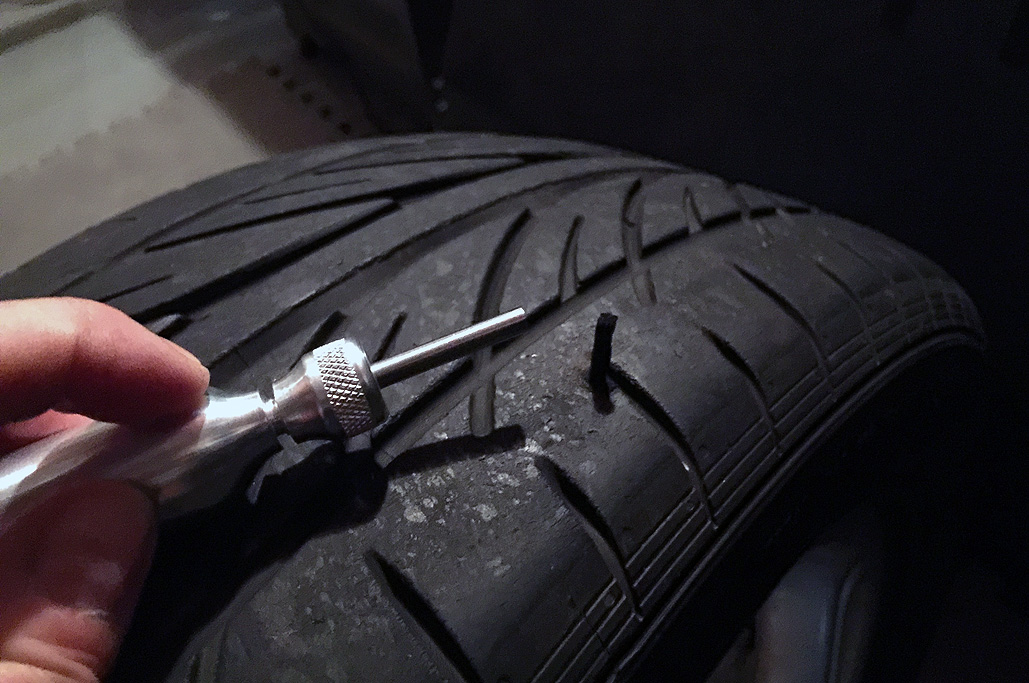
Find the leak.
The number of ways of locating an air leak in a tire could fill a small book. Some leaks are in-your-face obvious, like that shiny nail, polished by the I-can-still-drive-it mile-after-mile contact with the road. This may have been the cause of our, er, issue, but as this is not a confessional let me say that the afore description is merelydescriptive.
If your leak is not being in-your-face pointed to by something shiny, you may need to turn to the time-tested soapy bubble method, a clever-but-simple process (wry, even) which we will allow our gracious readers to Google and perhaps perform on their own time.

“I don’t know why it’s leaking, I really don’t.”
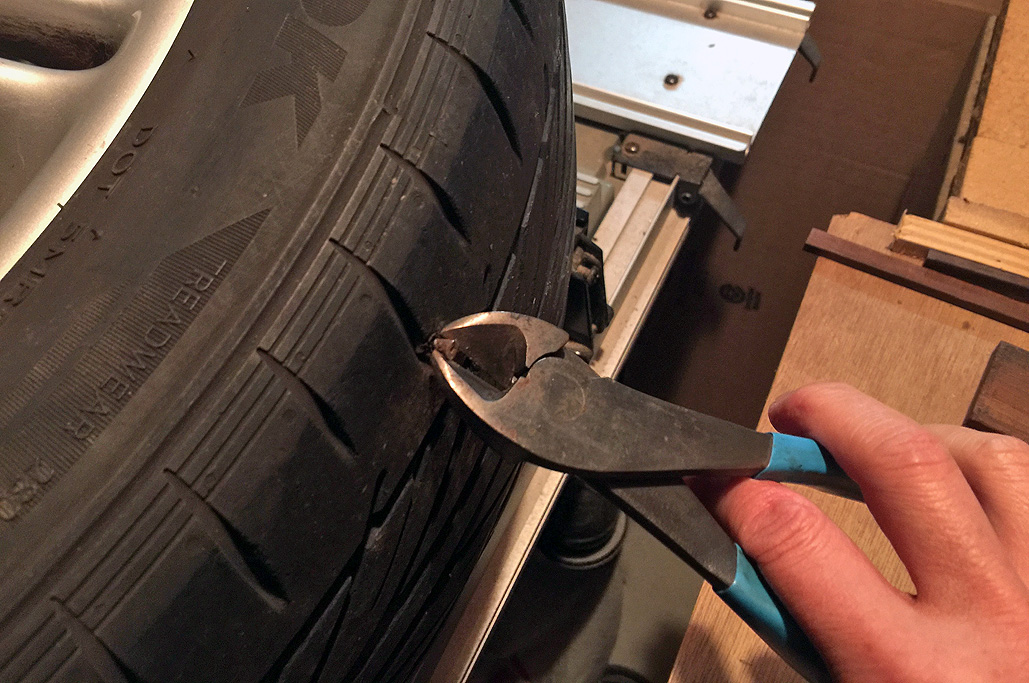
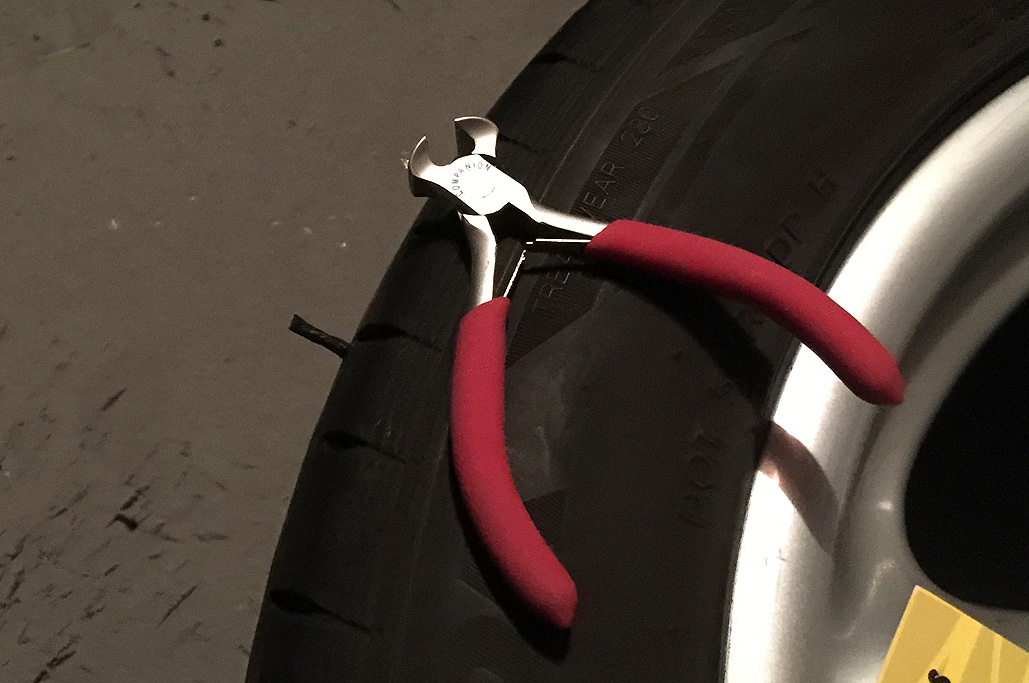
After one’s leak has been located—of air, sir, of air—the offending object must be removed prior to the leak being patched (because you can’t patch a leak with the thing causing the leak still, uh, causing the leak).
Depending on what the actual object causing the leak is, you may have a bit of a challenge on your hands.

“‘Ow.”
If the offender is a nail, removing it will be a simple matter of grabbing it and pulling. In our case, a pair of sturdy pliers and some elbow grease were required, as the object turned out to be a screw. To quote someone who does not wish to be quoted, it was one inch of “pain in the ass.”

“You! Cannot! Mess up my tire any more!!”
Dynaplug Pro : The “right” tool
Having a tire puncture is annoying enough without having the repair process contribute to the aggravation.
There is a HUUUUUGE variety of traditional patch kits on the market. However, they all look somewhat clumsy to use, probable effectiveness be damned.
Being all cloaky and White Wizardy and everything, we wanted a more “elegant” solution. A minion remembered that we have had something in-house since 2015 that fit the bill, but have not needed it until now!
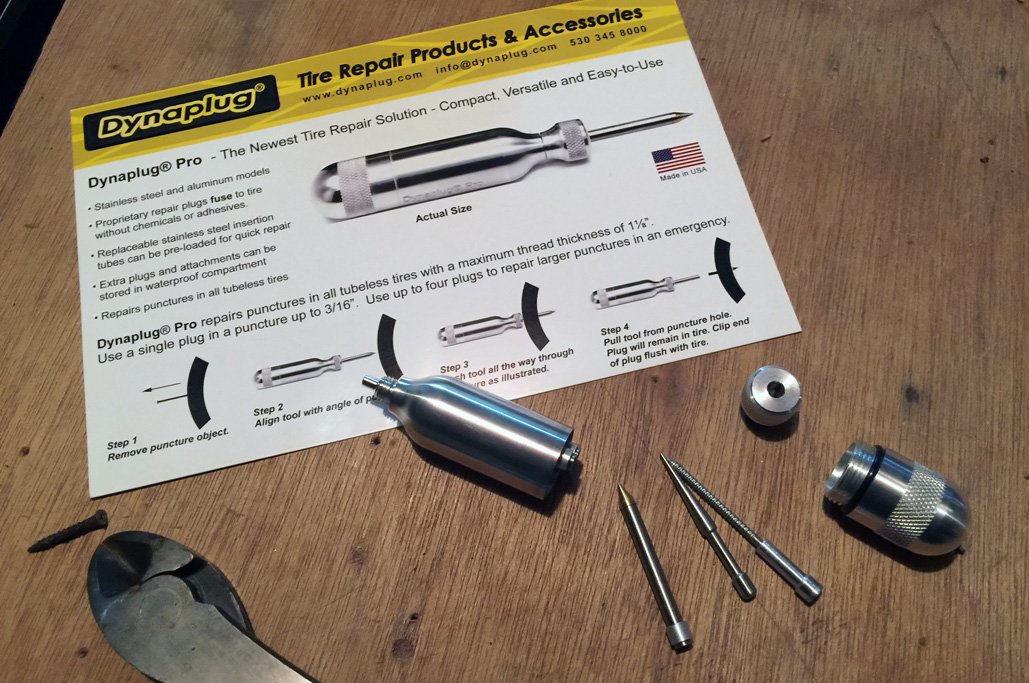
Halloo Dynaplug Pro, a puncture-repair tool that inserts a metal-tipped, pre-fitted plug about an inch long into the tire, sealing the hole. The inch-long plug is more than enough to plug the punctures in most tires.
It looked simple to use and perfect for our situation.

“Speak, friend, and enter.”
Founded in 1991, Dynaplug® was designed as an easy-to-use solution for DIY tubeless tire repair. The Dynaplug approach doesn’t require reaming, chemicals, adhesives, or waiting time. The steps are basically:
1. Remove the offending object, and
2. Insert the repair plug.
Dynaplug claims that their solution will make fast, permanent repairs on 98% of all tubeless punctures. Genius.
The Dynaplug® is not limited to fixing a particular type of tire. With the right kind of plug, the tool may be used to repair punctures on motorcycles, cars, trucks, SUVs, ATVs, scooters, trailers, garden tractors, wagons full of fireworks…as long as the wheel is tubeless.

“I learned Elvish when I was a school boy…”
The Dynaplug is self-contained and can be tossed into the glove compartment, where it will wait in quiet contemplation until called upon. All of the necessary tools are in the base of the inserter tube:
- 3 pre-loaded needles,
- air plugger,
- cleaning tool.
Pre-loaded needles means no futzing around. The air plugger is to temporarily plug the hole so that re-inflating the tire won’t take so long. The cleaning tool is to reload the needle for the next time.

“Mmm, very similar to my wizard’s staff repair kit…”
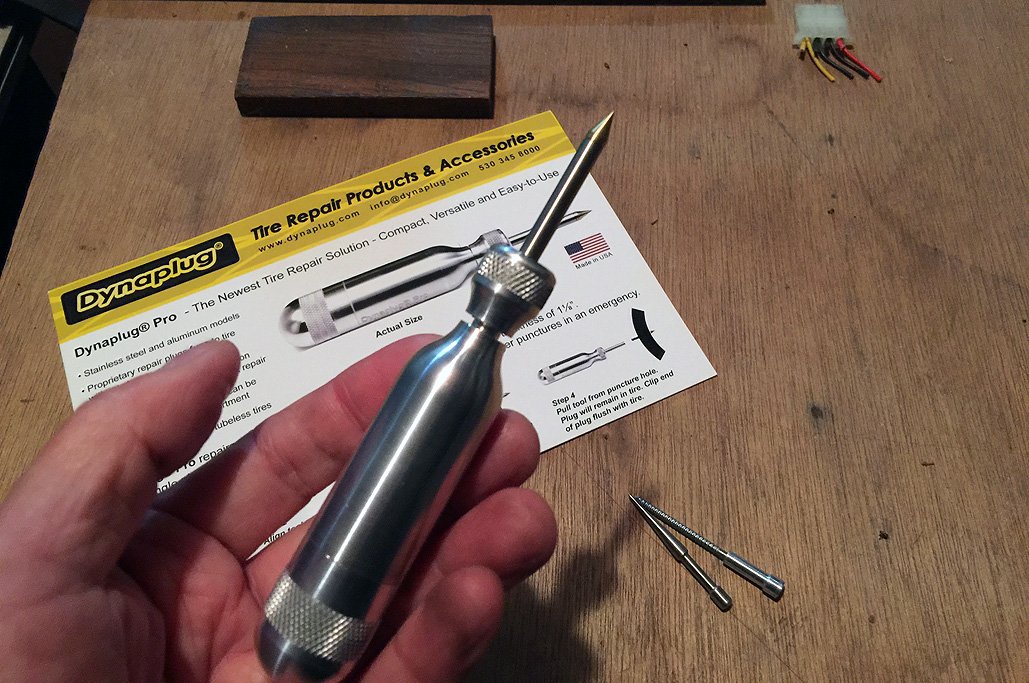
Getting the tool ready for use just takes a few seconds:
- load the pre-tipped needle,
- secure the needle to the base,
- use.

“Hefty, and nifty.”
FirstUse: Push, Pull, Done…
We had a completely different expectation of the amount of effort required to “penetrate” a tire, even when there is hole already there. This is a GOOD thing, as it should NOT be easy for things to poke holes in a tire!!!
Inserting the tool/plug combo all the way into the tire was A LOT harder than we expected. Additionally, we determined that we were not being successful because we were trying to insert the needle into the tire with the tire laying flat on the workbench. We finally realized that that was just stupid.

“This won’t hurt a bit…because you are an inanimate object.”
We finally came to our senses and put the tire on the ground like a normal tire, used our full body weight to to lean onto it, and got the needle completely pushed into the tire.
Getting the needle fully inserted was important, as the metal tip at the end of the plug must pass through to the inside side of the material so the plug cannot work its way out.
NOTE: We do not think we could have done the above with the tire still on the car, as we had to straddle the tire to get enough push-down leverage to jab shove get the needle completely into the tire. Perhaps with the just right angle and we can lean nonchalantly into it? Maybe.

“The field is mine. Unless you come back to life.”
Pulling the tool out was a LOT easier. As designed, it left the plug inserted with the excess sticking out. At this point, the tire is theoretically “repaired.” There is no need to wait for the glue to dry or anything. Of course, we still had to inflate it and check for leaks.

“Will no one rid me of this meddlesome leak?”
The tire was inflated to the proper pressure, and we left it sitting to see if there was any air leakage. All looked good after an hour had passed.

“‘Why can’t we be friends? Why can’t we be friends, why can’t we be friends, why can’t we be friends…”
A final check with a soapy solution around the stem confirmed our tire was leak-free. The excess was trimmed and we now consider the tire puncture repair DIY successfully completed!

“The world is gnawed by nameless things…”
We will provide an update after the Summer on how the repair fared. We may also do a quick post on how to clean and reload the Dynaplug for its next use. In any case, we are REALLY happy with our FirstUse experience with the Dynaplug and would absolutely recommend add this kit to anyone’s DIY toolkit, wizard or no.
Amazon links to items mentioned:


Leave a comment