| Today |
| Carolyn's World |
| Gear & Gadgets |
| Garage |
| Garden |
| Kitchen |
| Unaccompanied Minors |
| Workshops |
| Contact Us |
| Index |

| RainyDayProjects... |
||
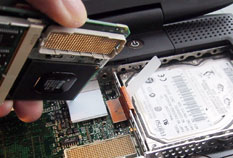
While we were in LA, we got a package from PowerBookMedic. It was a G4 processor for our Apple Pismo laptop. We have been wanting to do this 'brain transplant' for a few years now, but thought that the other upgrades would be easier projects to tackle first. Most of the companies offering processor upgrades required that we send in our laptop...which kind of defeats the purpose of a DIY project. Dan, one of our over caffeinated Aussie readers, suggested we check out the offerings from PowerBookMedic.com. According to Dan, they offer a G4 processor upgrade that is basically a plug-n-play solution.
The processor card is a direct swap with the one in the machine...no other changes are needed. These PowerBookMedic guys have EVERYTHING one would need to max out an Apple laptop. Go check 'em out here!
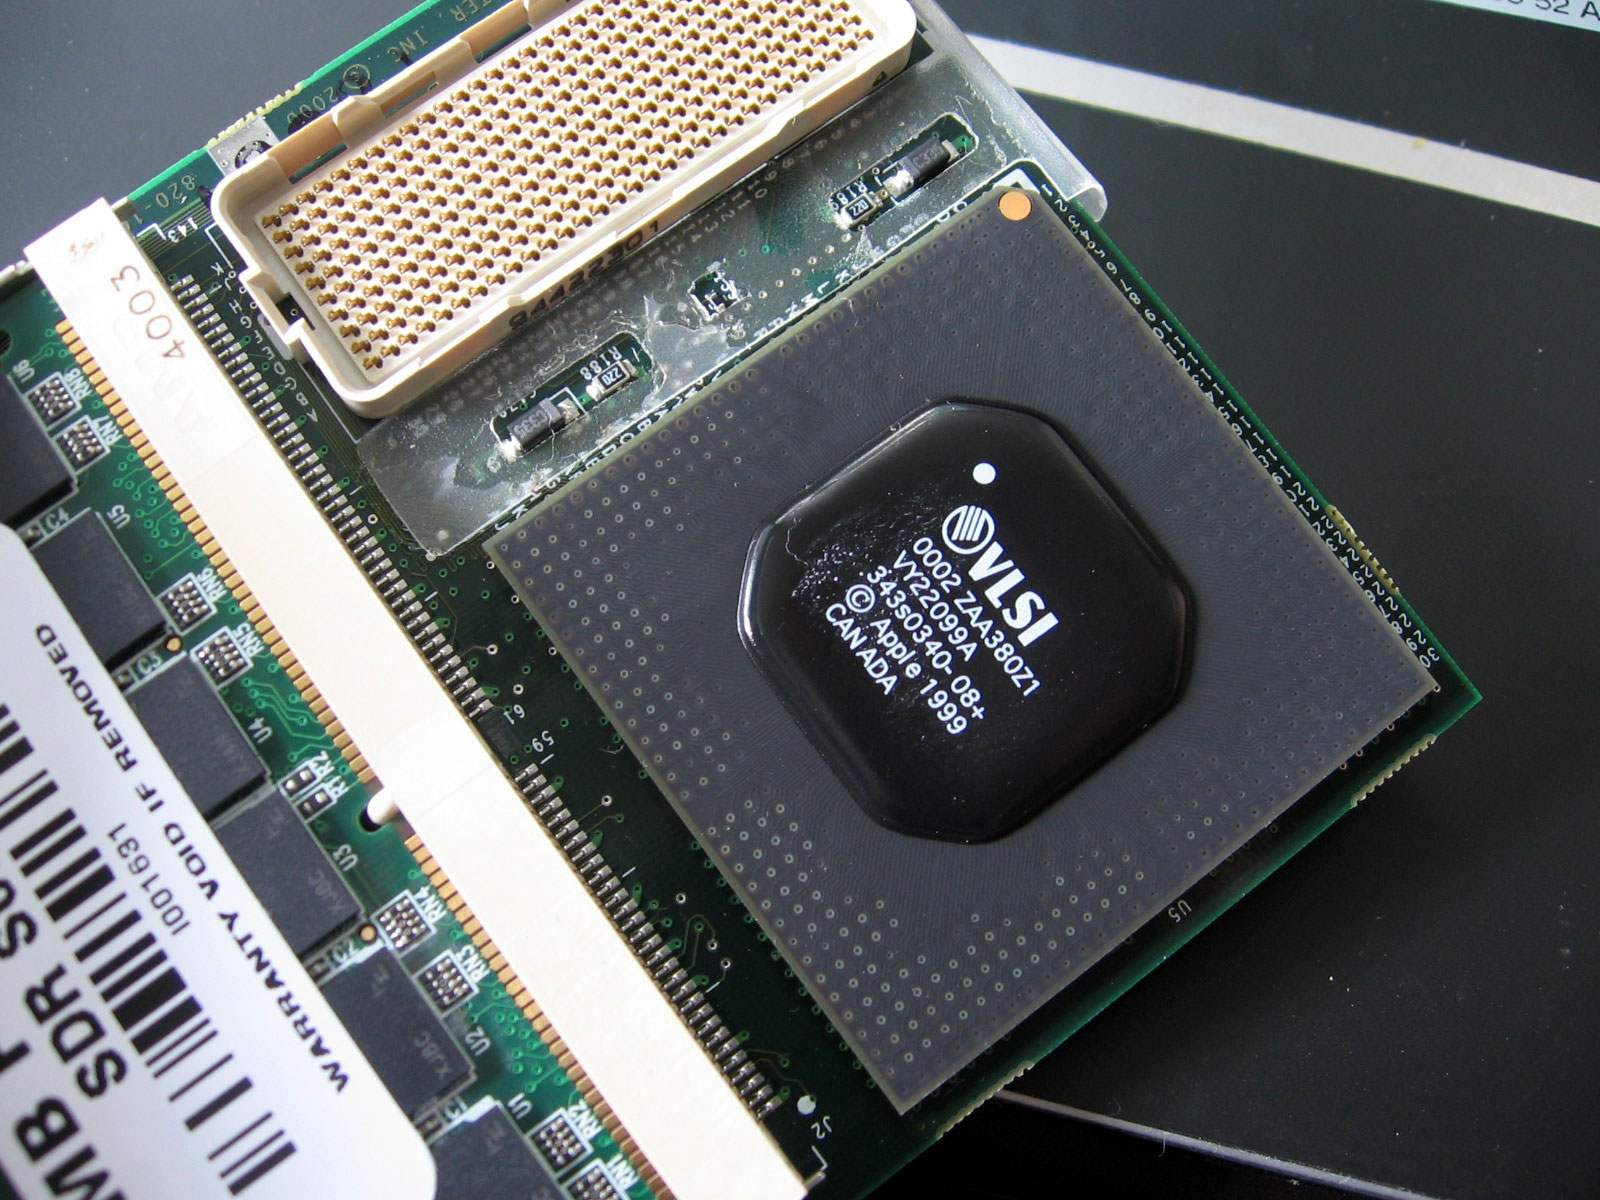
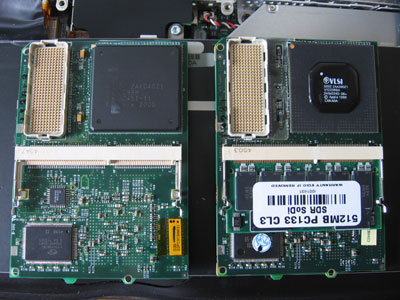
Above is a pic of the G3 (left) and G4 (right) processors. The processors are the only thing which looked obviously different between the two cards.
The only thing we had to do in this upgrade was to move a few things (memory cards, plastic tab) from one card to the other. We popped out the two 512 MB simms and moved them to the new card. Details for removing and installing the simms are here and here.
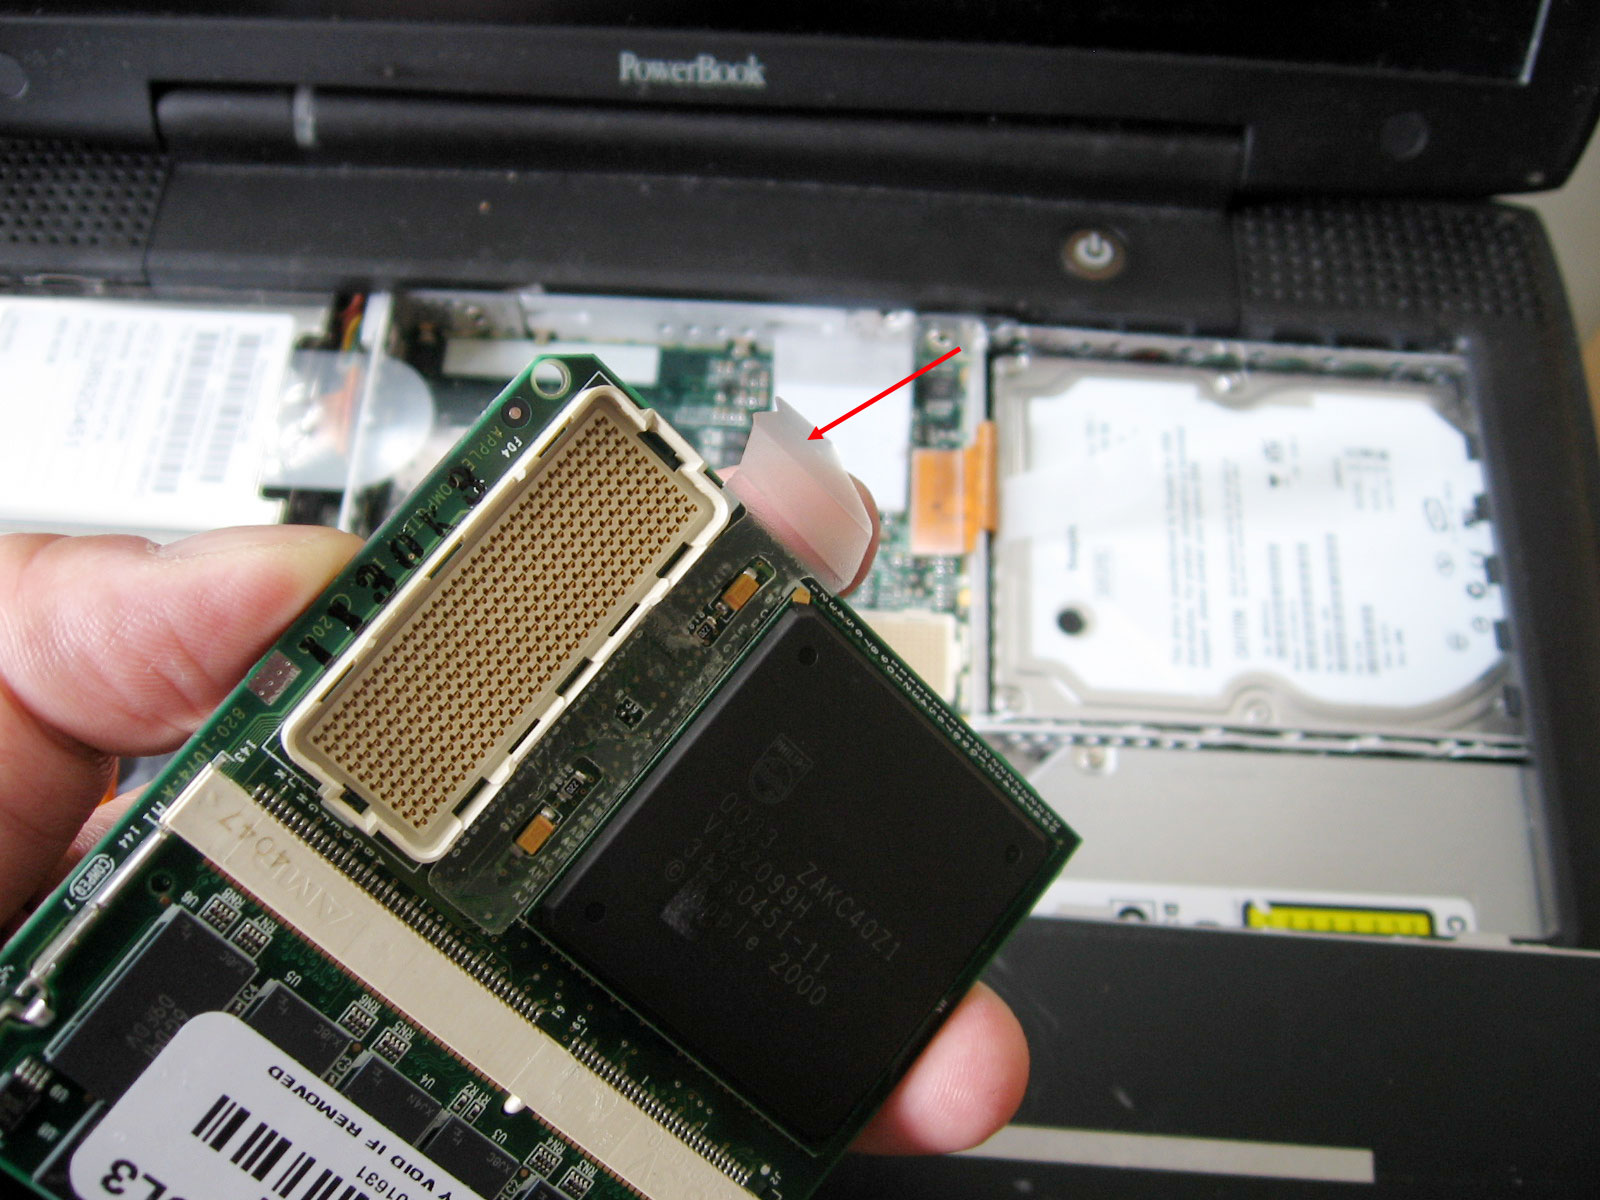
On the G3 card is a plastic tab (red arrow) for lifting the card from the socket. The G4 card did not have this tab, so we moved the one from the old card to the new. We thought it would be better to use the tab to lift the card than to try to wedge it up with something should we need to access the card in the future.
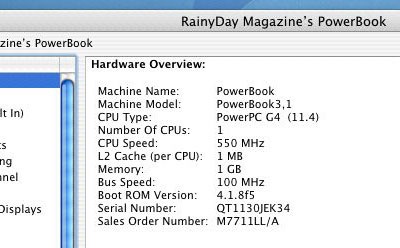
We did the G4 processor upgrade in a total of 10 minutes. The machine booted with no problems. The obvious advantage of this direct processor swap upgrade is if there are any problems, we could just swap back the old processor card and we are back in business. We'll run some tests to see what performance bumps we got with this new G4 processor. We can't think of any more hardware upgrades for this machine. If you can think of anything, let us know!
|
Apple G3 Upgrade G4 Processor |
|
Why do we here at RainyDay Magazine keep trying to make our old discontinued gear work with the new technologies? Well, we can think of plenty of reasons (too much time on our hands, not enough money, too cheap to upgrade, etc...) However, sometimes we do it just for the fun of it :-) Take the G3. Because upgradability was part of the G3's design, user access to it was engineered in. In this series we'll walk through the steps on how to do some upgrades (memory, hard drive, G4 processor) to an old Apple G3 laptop so it can run OS-X, edit iMovies, and god knows what else :-)
In this article, we'll take a look at the G3 laptop, its removable pieces, and how to upgrade the G3 processor to a G4. Accessing the inside : Drive Upgrade : Seagate Drive Specs: 1. General Info Software Upgrade : 12 GB External Drive: Memory Upgrade: 1. RamJet 512 MB module install
|
||