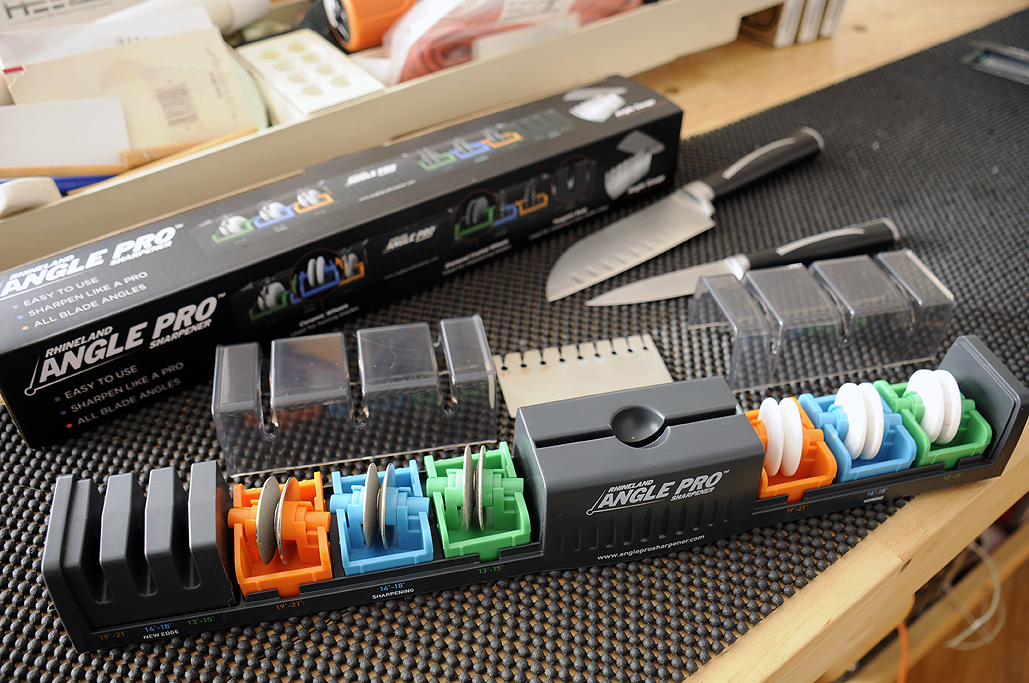
Angle Pro Sharpener: FirstUse
Dull is dangerous. Sharp is safe.
The knife motto in the RainyDayKitchen is: Be sharp and be safe.
Those who know knives know this to be true. Those who do not know this will learn it the hard way, likely from a slip of the knife and the slice of a finger.
A few months ago, we took a FirstLook at an ingenious sharpener called the Angle Pro. The maker of this sharpener—Rhineland—makes knives for a living, so they know their stuff.
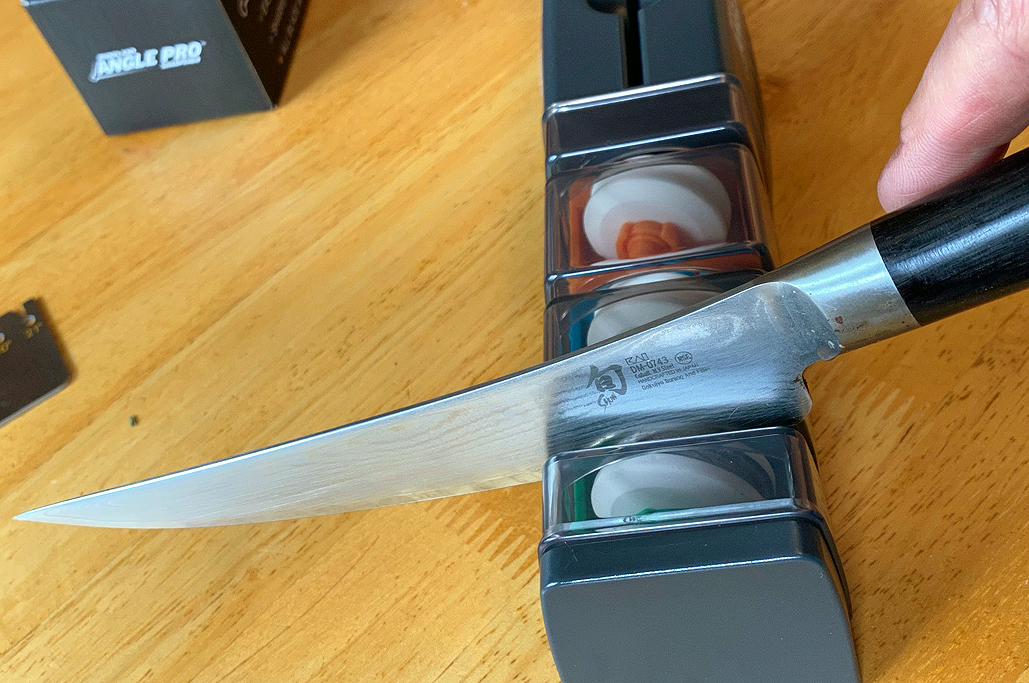
Angle Pro Sharpener
To effectively sharpen a knife, you need:
- an understanding of the angle of the original edge,
- the proper tools, and
- good technique.
Right out of the box the Angle Pro helps anyone sharpen their knives the way they are supposed to be sharpened.

You name it, we can cut it. If we’re sharp enough.
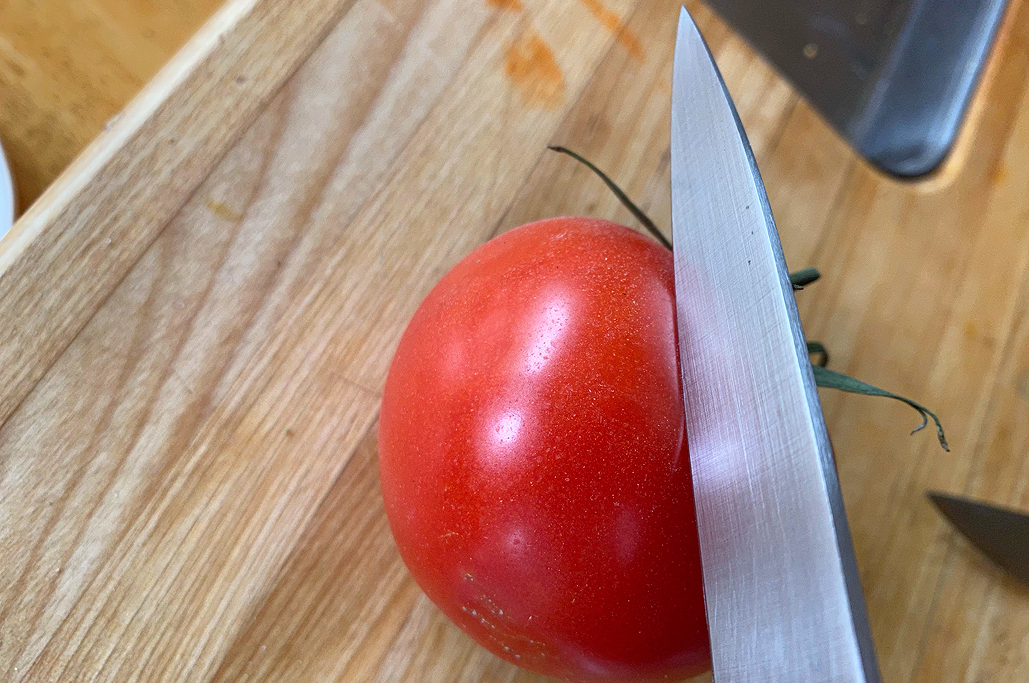
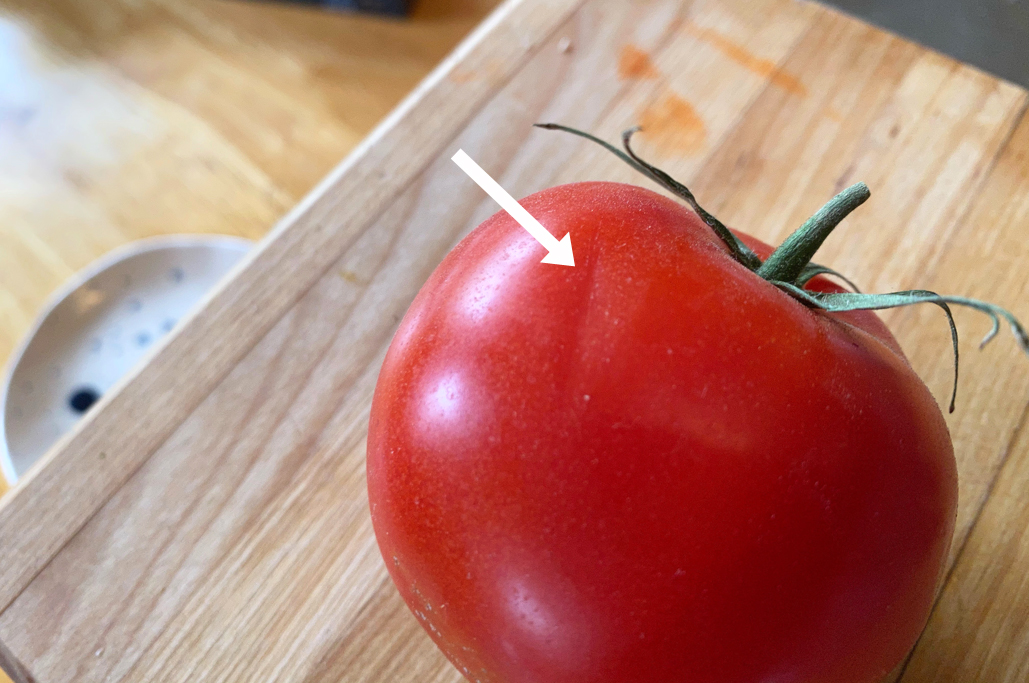
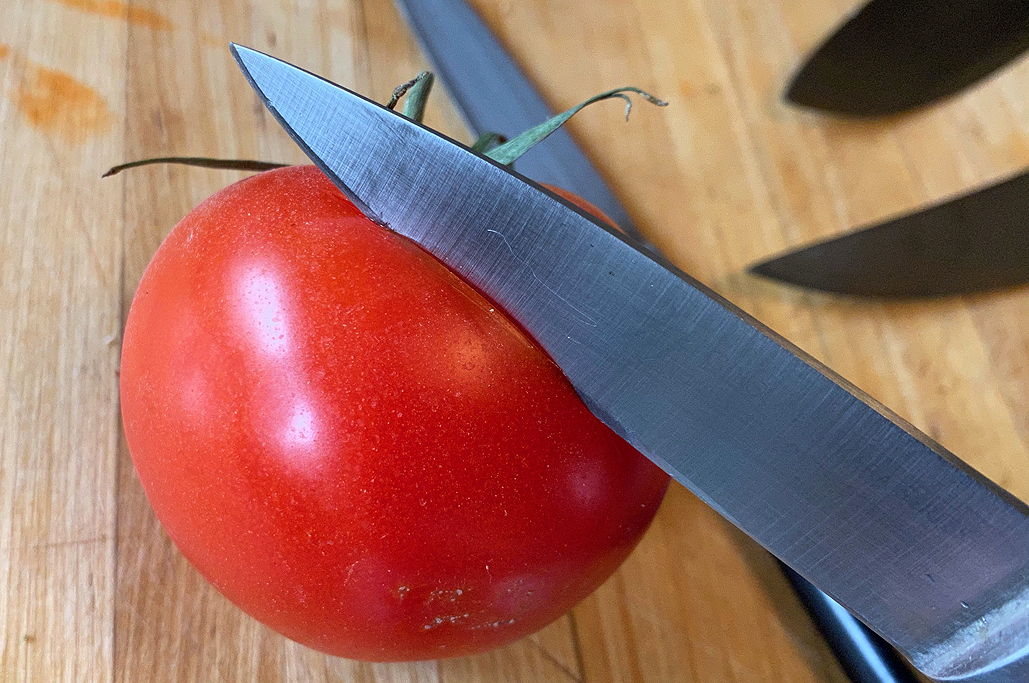
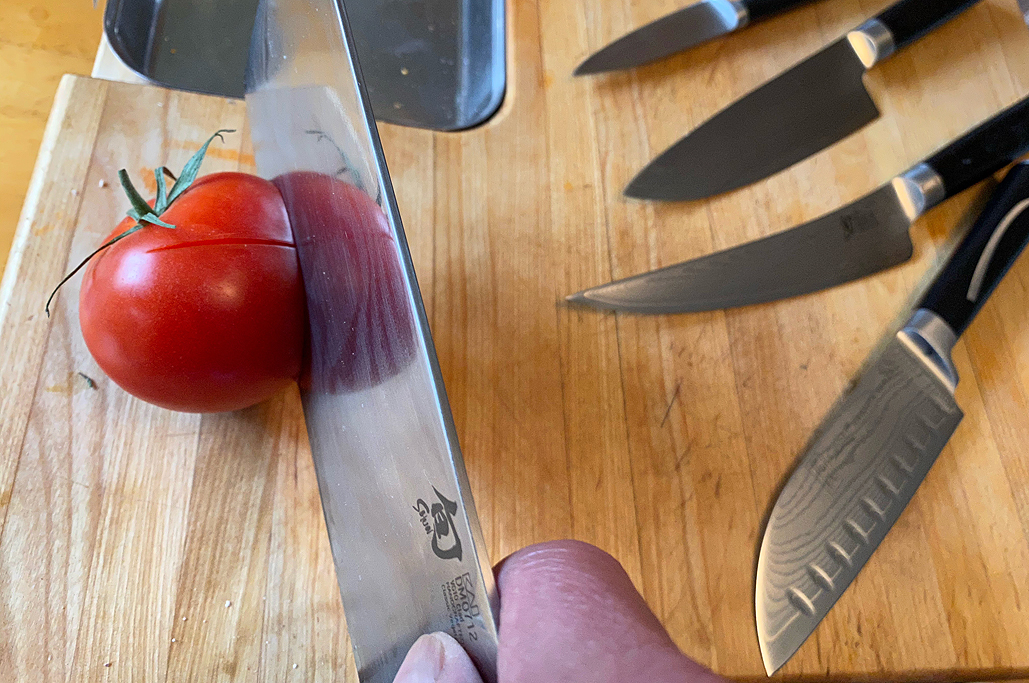
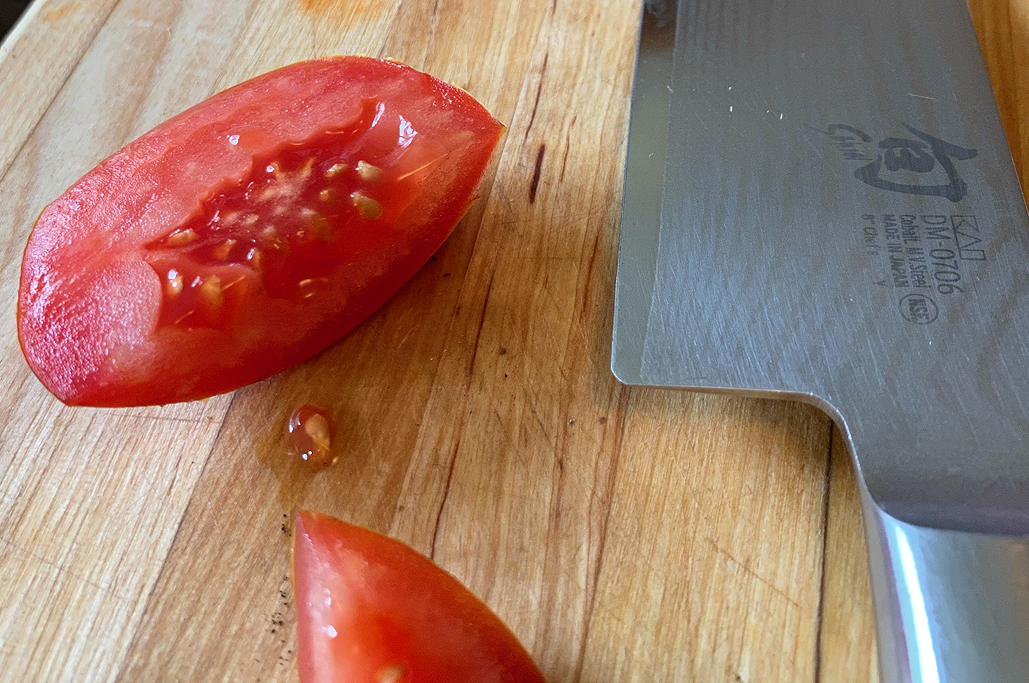
While most of our kitchen knives are in good cutting condition, we have an often-used paring knife that really needed a complete edge overhaul. The edge had gotten to the point where it was more “crusher” than “slicer,” and clearly was not up to the task of breaking the skin of a tomato.

A dull knife makes for a dented tomato.
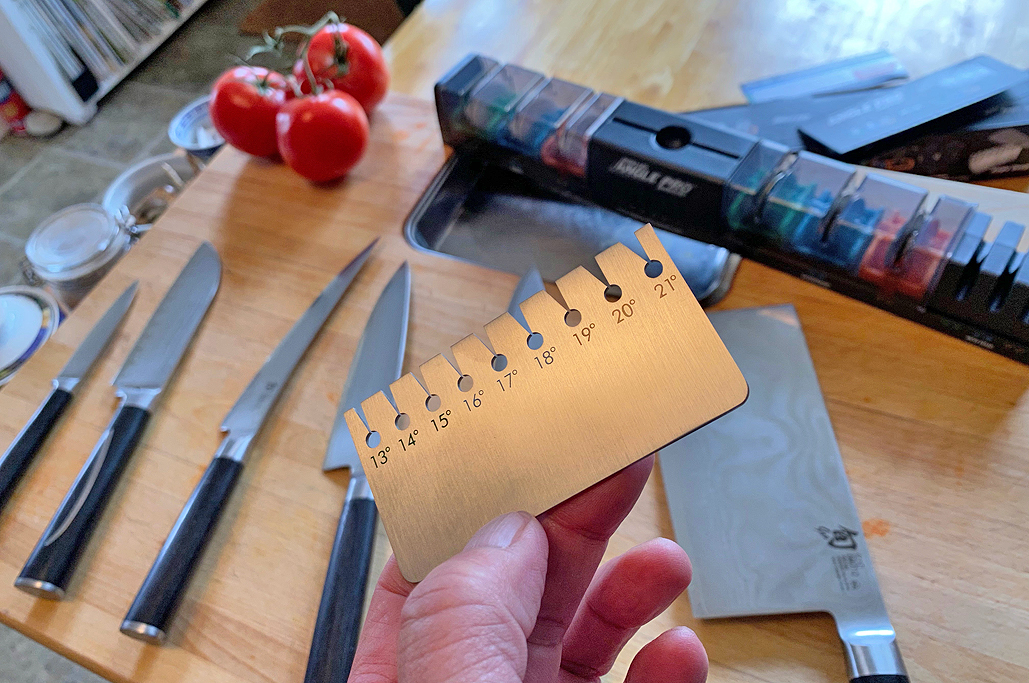
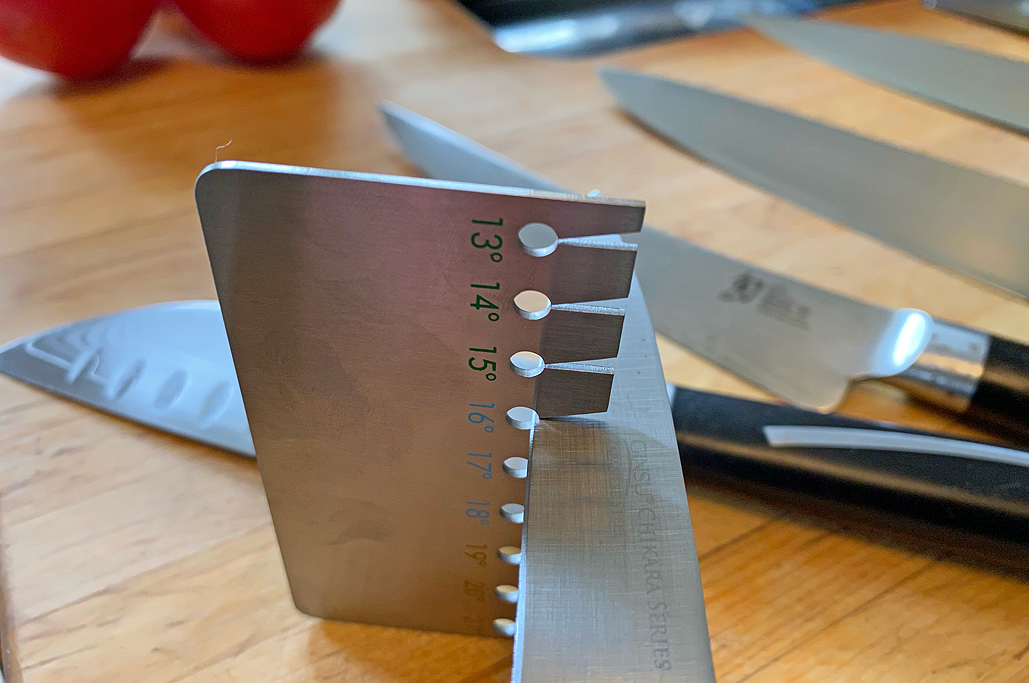
Blade angle
In general, Western knives have a larger blade angle (20º-22º) than Eastern knives (12º-15º). A larger angle gives a stronger edge, as there is more metal behind it; a narrower angle cuts easier and more precisely, but can be nicked and dulls quicker. It is a tradeoff between durability and control.

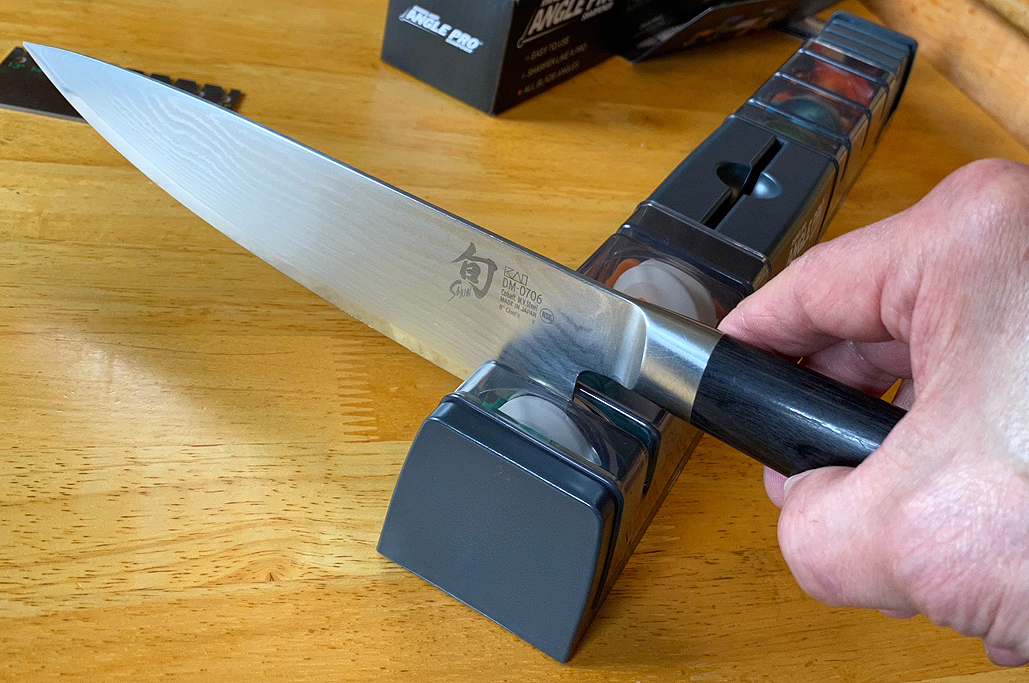
This one piece of metal can tell you a lot about every single knife you own.
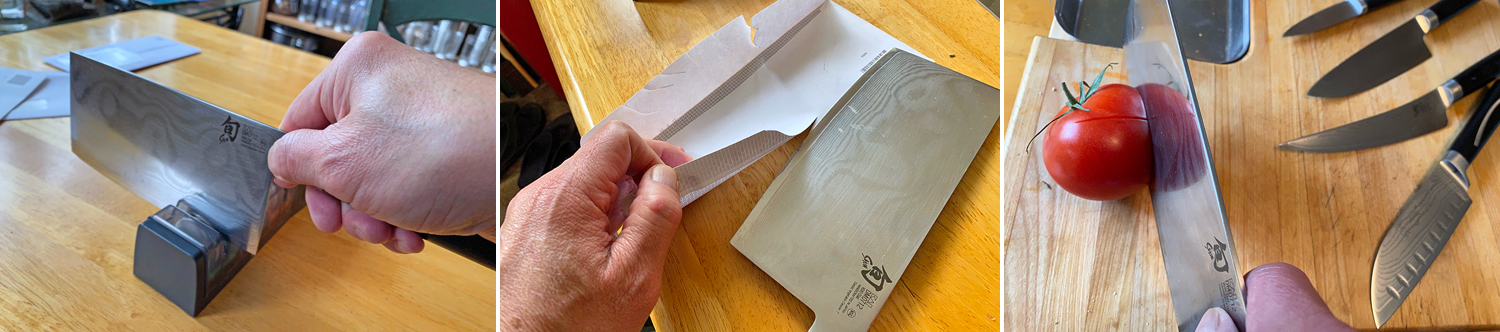
The angle gauge made the process of determining the proper angle absolutely fool-proof. We rested the gauge on one of its short sides, because we found it easier to use that way.
If you are somewhat leery of knives you might want to rest it on the long side (or just watch the instructional video).

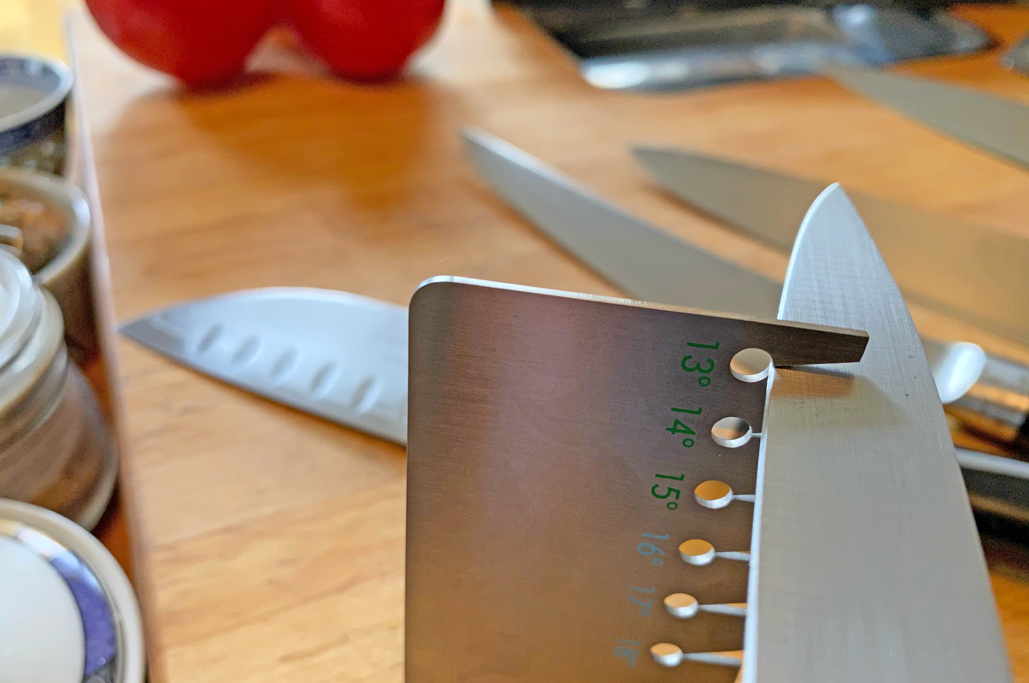
Not this one, that one.
As per the instructions, if the knife edge (aka the sharp part) falls inside a circle, that angle is not the the correct for that knife, and you should move on to a smaller angle.
The blade should be flush with the vertical edge of the gauge when determining the angle.

In other words, lean the knife against the straight side, not the angled side.
It takes a little getting used to—”Wait, the sharp pointy edge has to be outside the circle, and the blade needs to be resting against the straight side of the angle gauge?”—but if you let go of your preconceived notions of how to sharpen a knife and just follow the directions set out by Rhineland, the delights—and usefulness—of sharp, now fit-for-purpose knives await you.
Sharpening
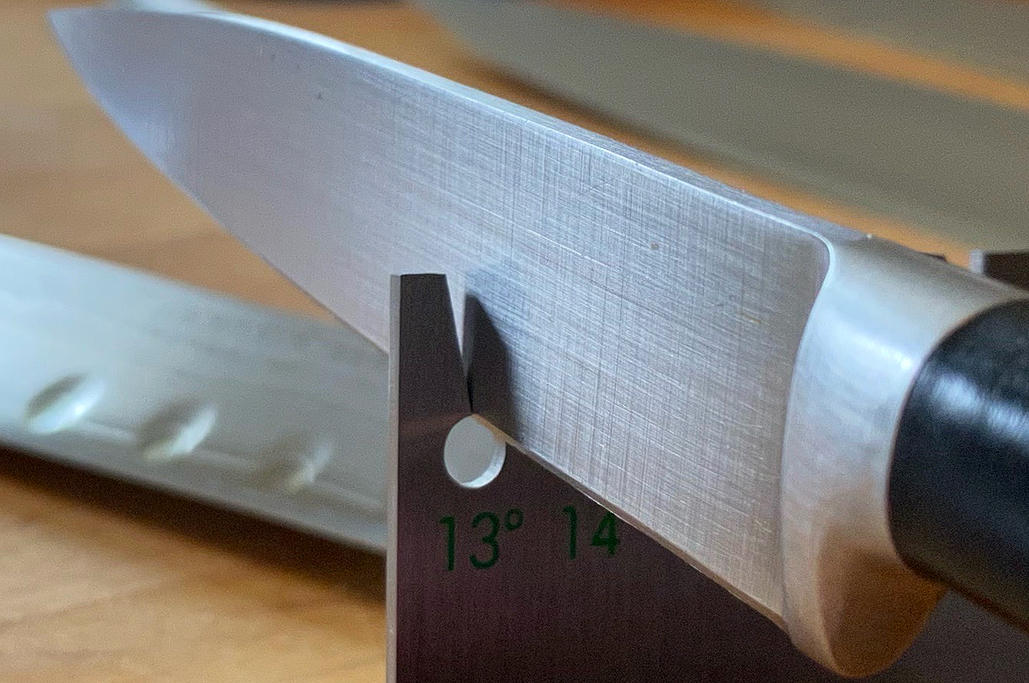
For our paring knife, we determined the blade angle to be 13º. The green sharpeners/honer is what we needed to use.
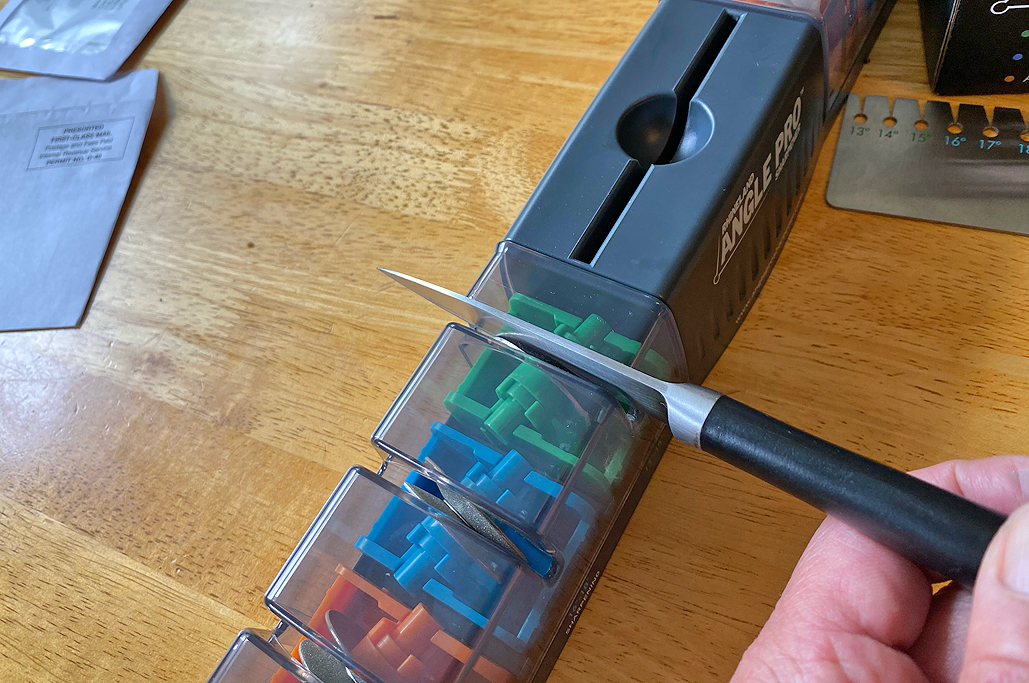
Generally, if your knife blade needs a lot of work to restore it to full use, you:
- Edge it (using a tungsten wheel), then you
- Sharpen it (using a diamond wheel), then you
- Straighten/Hone it (using a ceramic wheel).
As this paring knife was really dull, we first pulled it through the tungsten sharpener a half a dozen times (note the filings) before moving onto the diamond and finally ceramic wheel.

Tungsten, Diamond, Ceramic. Tungsten, Diamond, Ceramic. You don’t always need to use them all, but when you do, it’s Tungsten, Diamond, Ceramic.
The updated edge is now ready for test-cutting 🙂

Do not run your thumb against this edge to see if it’s sharp. DO NOT.
Test cuts
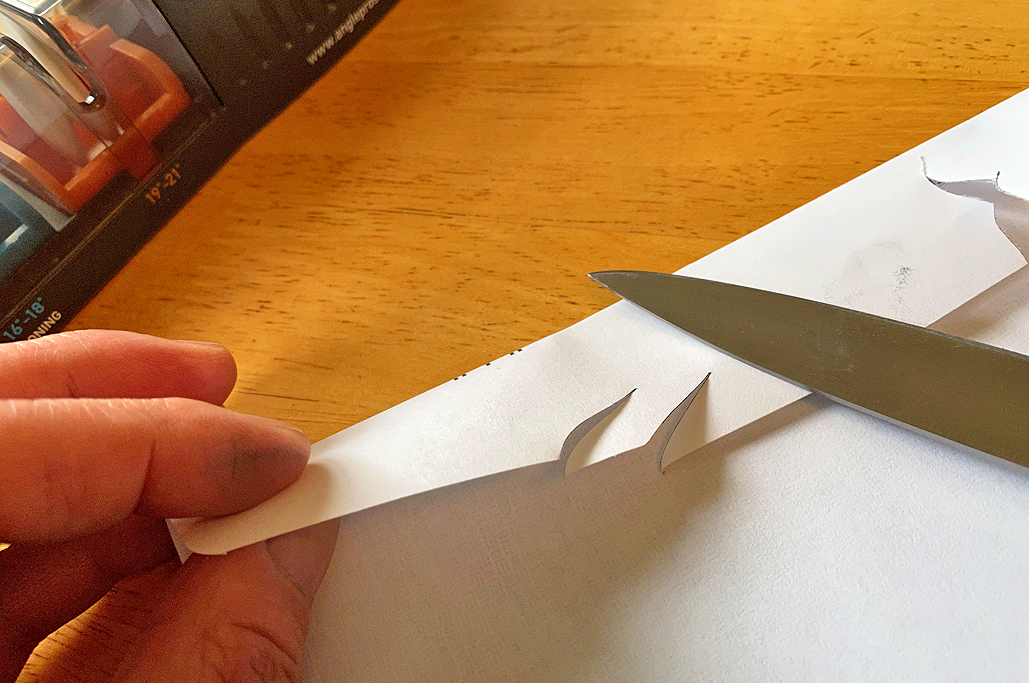
The re-edged and freshly honed paring knife was now able to make clean straight cuts with no tearing of paper, passing the first test with flying colors.

Or, as we like to call it, “Cheating at Origami.”
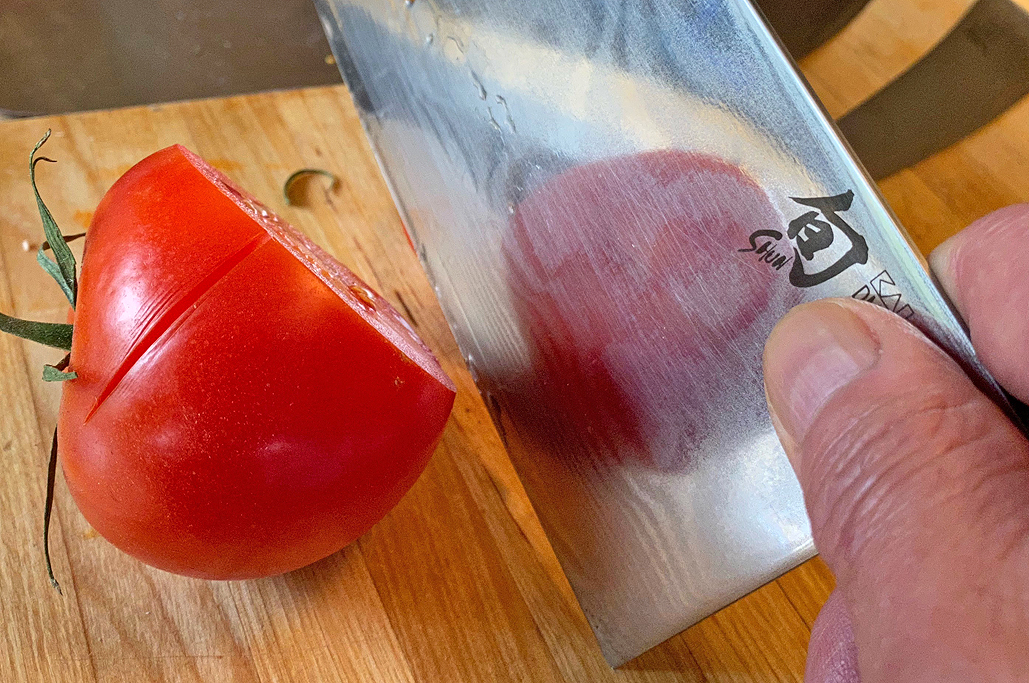
The next test was cutting that damnably-dented tomato. This time, the paring knife had no problem slicing into the skin. The cut was crisp and clean. In fact, we did not feel any resistance at all!

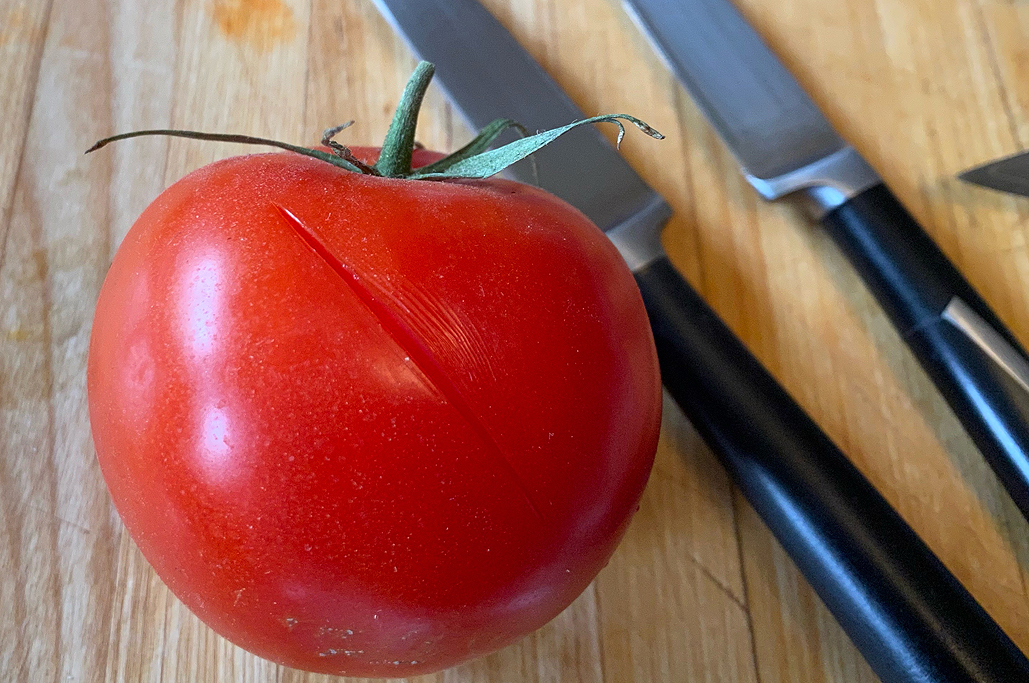
Proper tomato preparation at its best.
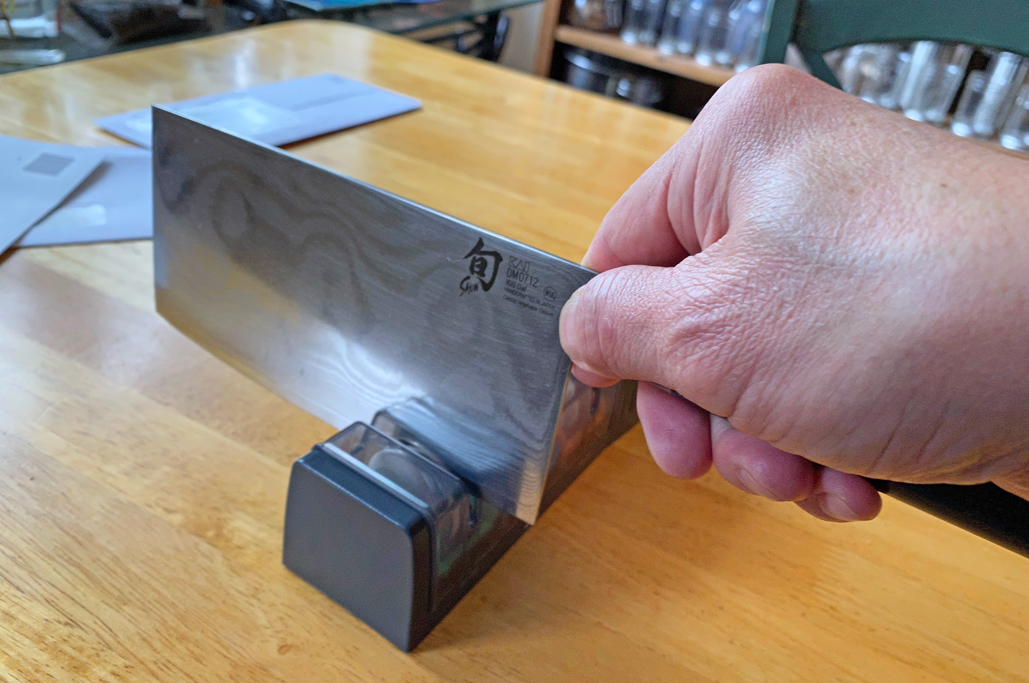
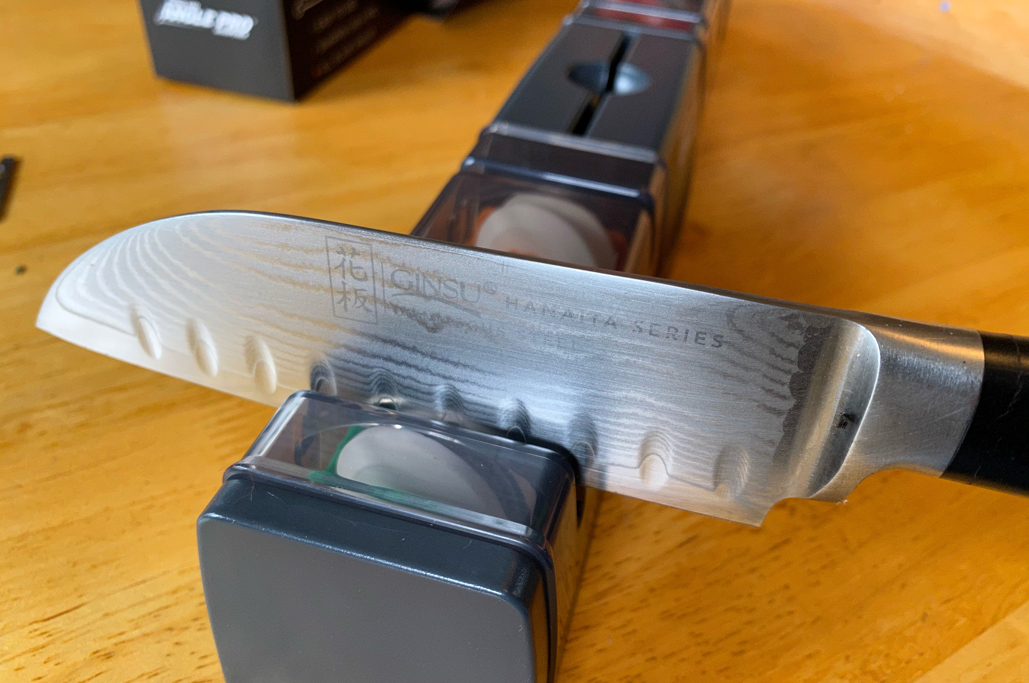
Honing
Most of the RainyDayKitchen blades just needed some “fine tuning” or honing. The ceramic disc made quick work of the task. A few strokes across (with the knife aligned with the vertical side) brought all the edges of our knives back to true.

Sort of like Rock/Scissors/Paper, but different.
Test-cutting both paper and tomato showed that the blades were able to slice effortlessly, and produced clean precise results with no tearing whatsoever.

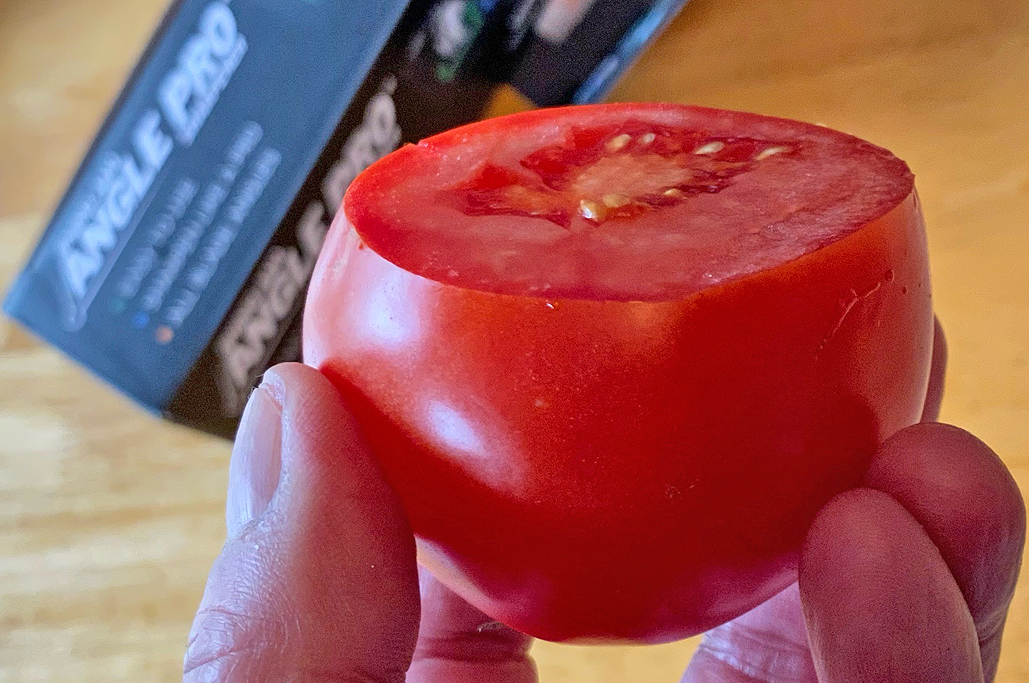
I don’t care what they say, I will put THIS tomato in a fruit salad if I want to!
Check out the “point” at the intersection of the two cuts! One can poke an eye out with the corner on that piece of tomato…LOL!!!

Do not try this at home. Poking your eye out with the sharp edge of a tomato is never advised.
We were able to bring the edges of our favorite kitchen blades back to “like new” sharpness. Cutting with them are once again effortless.

Public Service Announcement: sharp-edged knives are SHARP. SHAAAAAAAARP. Respect the sharp-edged knife.
Miscellaneous
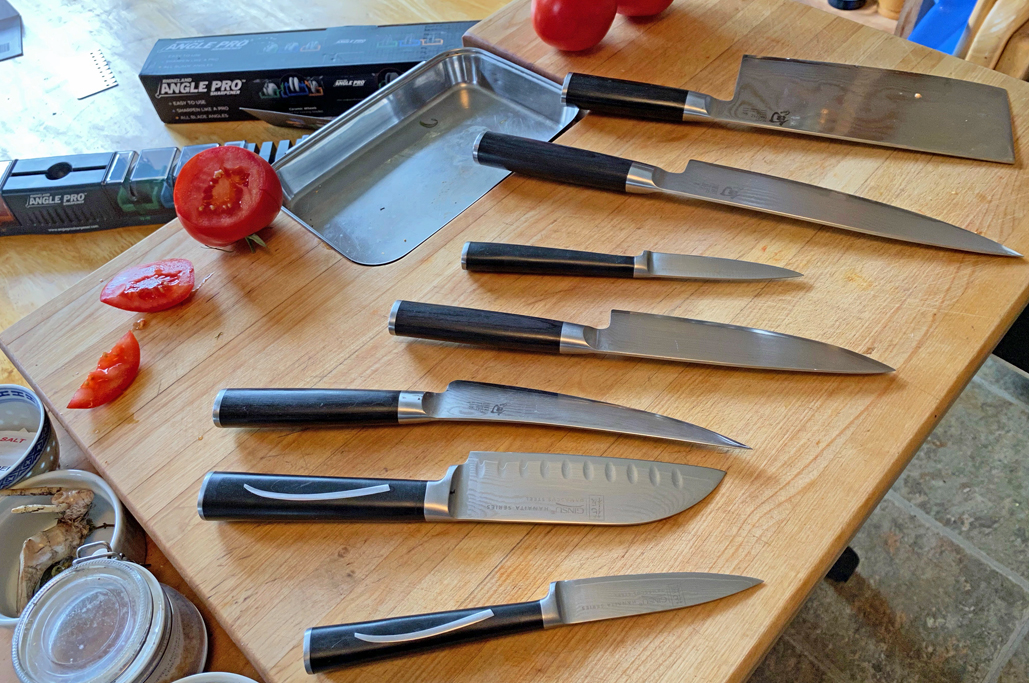
With the larger knives, we had no trouble sharpening the entire cutting edge (chef, Santoku, boning).

Large knives getting their edges sharpened in one go.
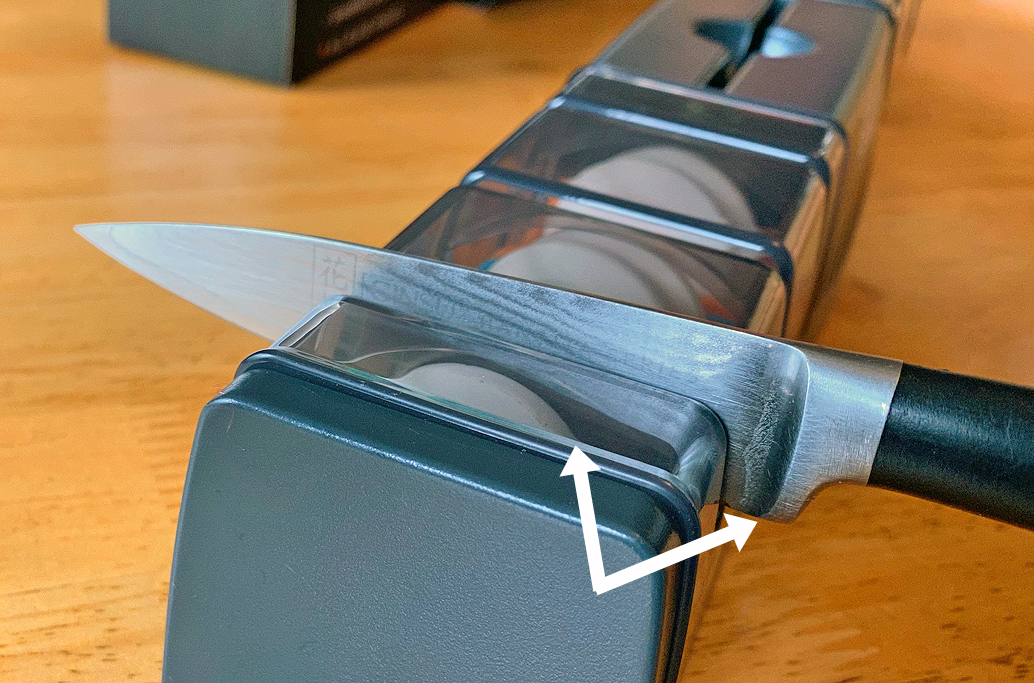
Sharpening the smaller paring knives, however, required a touch more thought.
The bottom of the tang of the paring knives are not high enough (white arrows) to clear the back of the transparent cover of the sharpening wheel. To sharpen the entire length of the cutting edge of smaller knives, the transparent cover must be removed.

One small adjustment, and even your small knives can be sharpened.
Amazon link to item mentioned:


Thanks for the thoughtful review. I got a great deal on the Angle Pro on Prime Day. I love my Shun knives and they do come with free lifetime sharpening. However, it takes around six weeks to get them back. The Angle Pro will keep me from longing for my favorite knives for 12 weeks each year. Thanks again!
Looks like a very easy way to sharpen your knives!