IKEA HJUVIK faucet Installation
Pro gear for home cooks
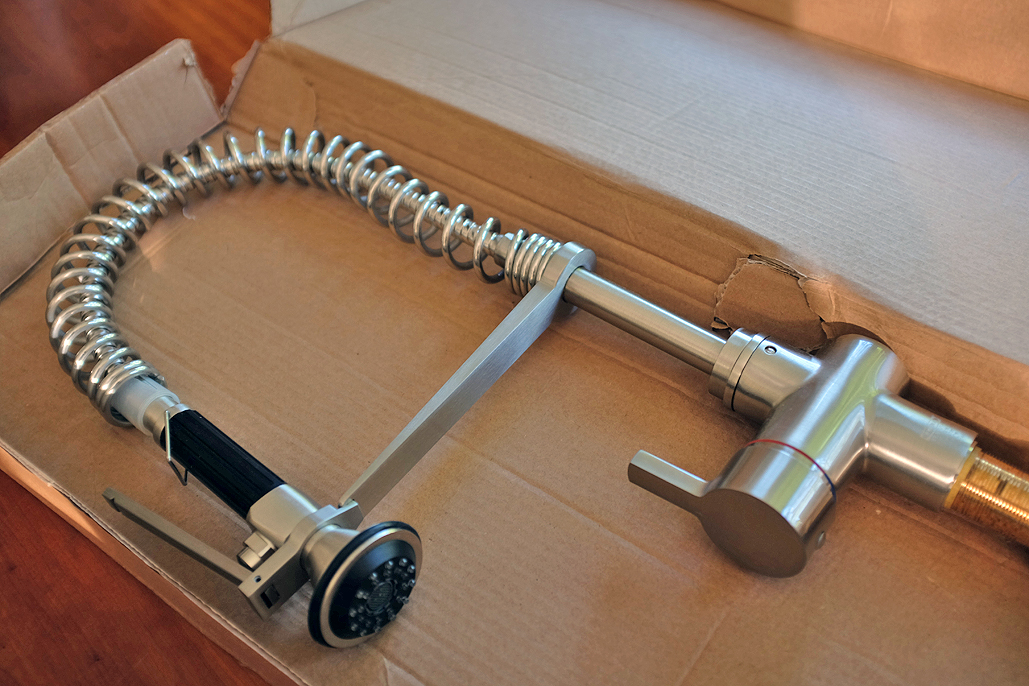
Last week we took a FirstLook of IKEA’s Hjuvik stainless steel faucet. Today’s post is a write-up of the installation of the Hjuvik faucet.
A faucet replacement is a pretty straight forward project and definitely within the skills of most DIY-inclined homeowners, provided they know where to turn off the water, have the right tools, and can fit in the space under the sink.

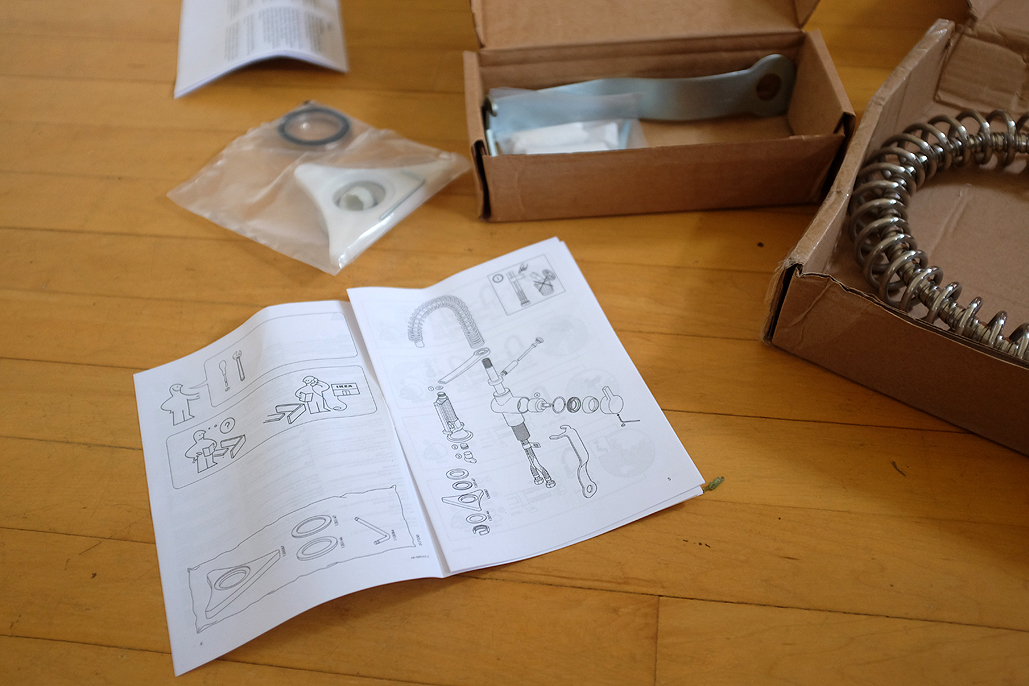
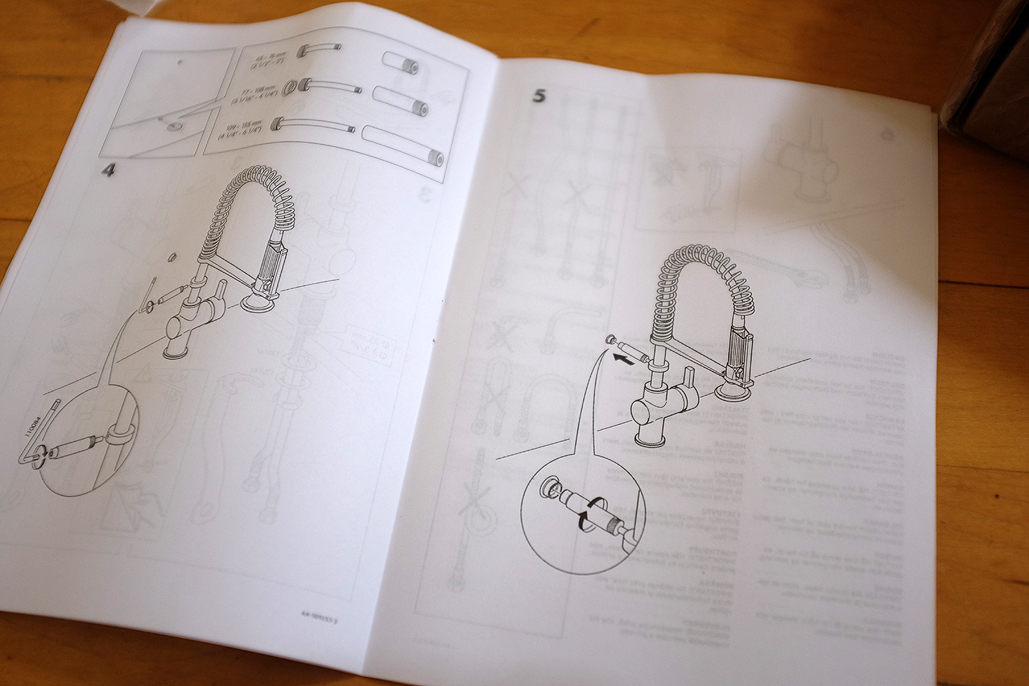
The IKEA box contained the directions and the tool needed to install the Hjuvik faucet. There were three basic steps:

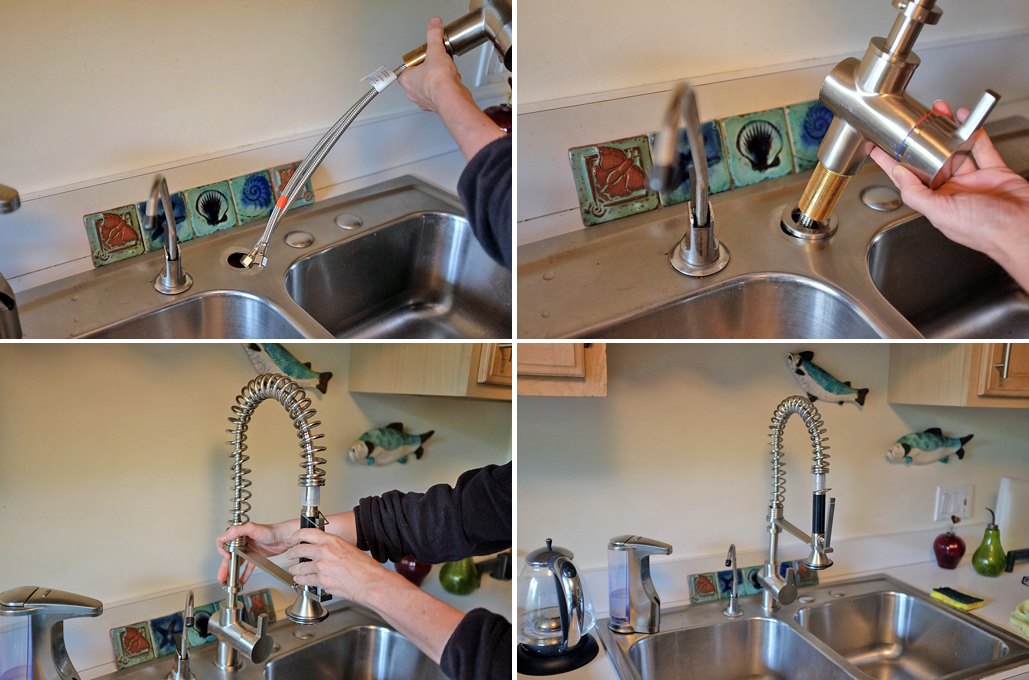
Step One: Attach the faucet to the sink
The faucet comes with the brackets needed to mount it on a variety of sinks (top-mount, under-mount, integral). The RainyDayKitchen sink is a top-mount variety. The sink is made of stainless steel, has two bowls, and several precut holes for installing the faucet and other accessories (filtered water, soap dispenser, etc).

The precut openings are standard size so the faucet may be placed in any one of them. We opted for the one between the bowls, but we could have favored one side if we were so inclined. However, before we actually tightened anything down, we did a test-fit just to make sure we didn’t leave out anything.

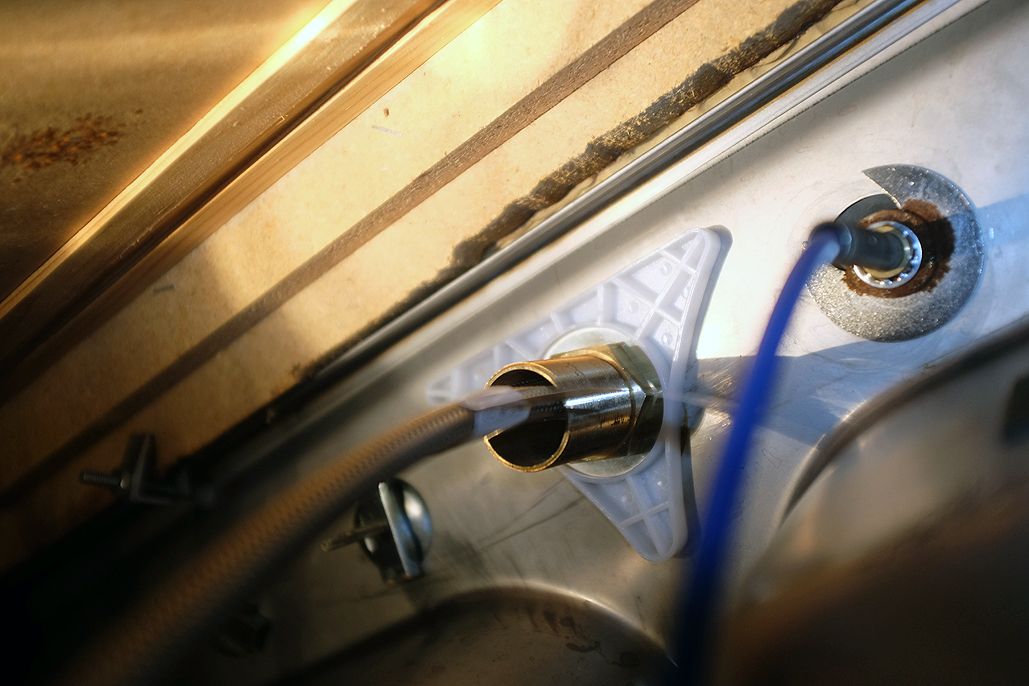
A stainless steel sink, while strong and durable, is relatively thin. Included in the package is a bracket, to be placed between the large brass nut and the sink, designed to prevent any unwanted/unexpected movement in the base. Note that this piece was necessary only because of the height of this particular faucet. Units which sit closer to the sink would not require any such additional reinforcement.

With everything above the sink ready, it was time for the hardest part of the project—working under the sink. Working our body underneath the sink and between the pipes, we looked up, found the stem, inserted the reinforcement bracket (rubber washer side towards the sink), threaded on the locking nut, and tightened the assembly with the provided tool.

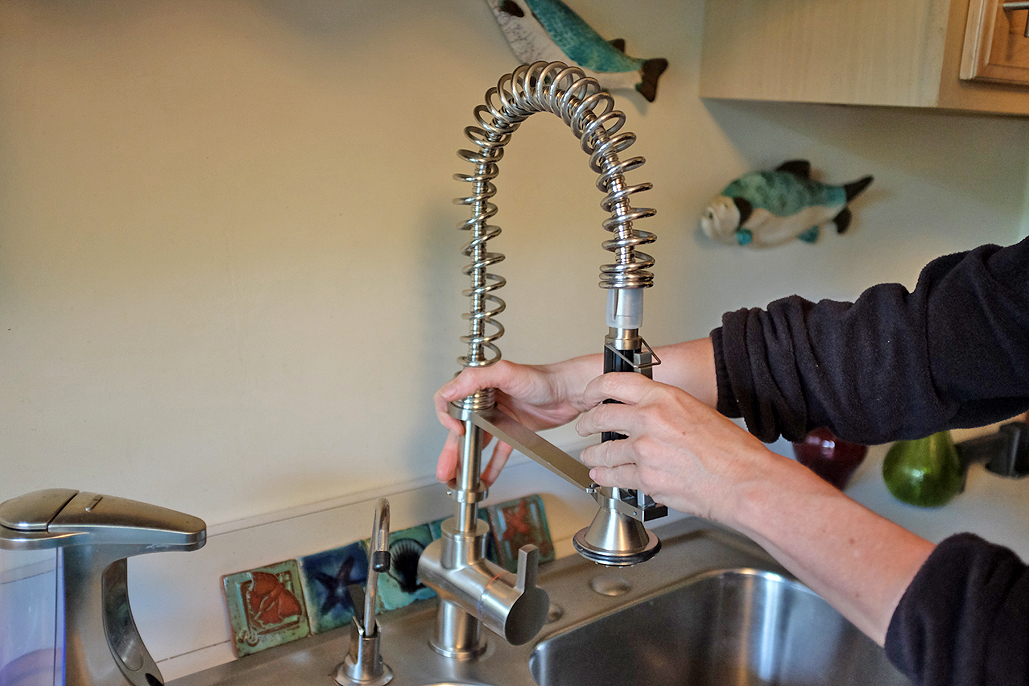
Step Two: Mount the wall-brace (optional)
Because the Hjuvik unit tall, it comes with an optional wall-brace for additional stability. Depending on what the actual sink is made of, you made not need it; we found that our sink’s thinness did not quite support the faucet the way we wanted. Bonus for us, the faucet was close enough to the wall in the RainyDayKitchen that we decided to install the brace to take advantage of the additional support.

In order to position the anchor exactly where needed, we dabbed a little silicone sealant on the back, attached the brace to the faucet, positioned it on the wall, and let it dry. Once dried, we backed off the brace from the anchor, secured the anchor to the wall with a screw, and remounted the brace. One can do it by measuring and marking the spot to attach the anchor, but this method will take all the guesswork/possible misalignment out of the step.

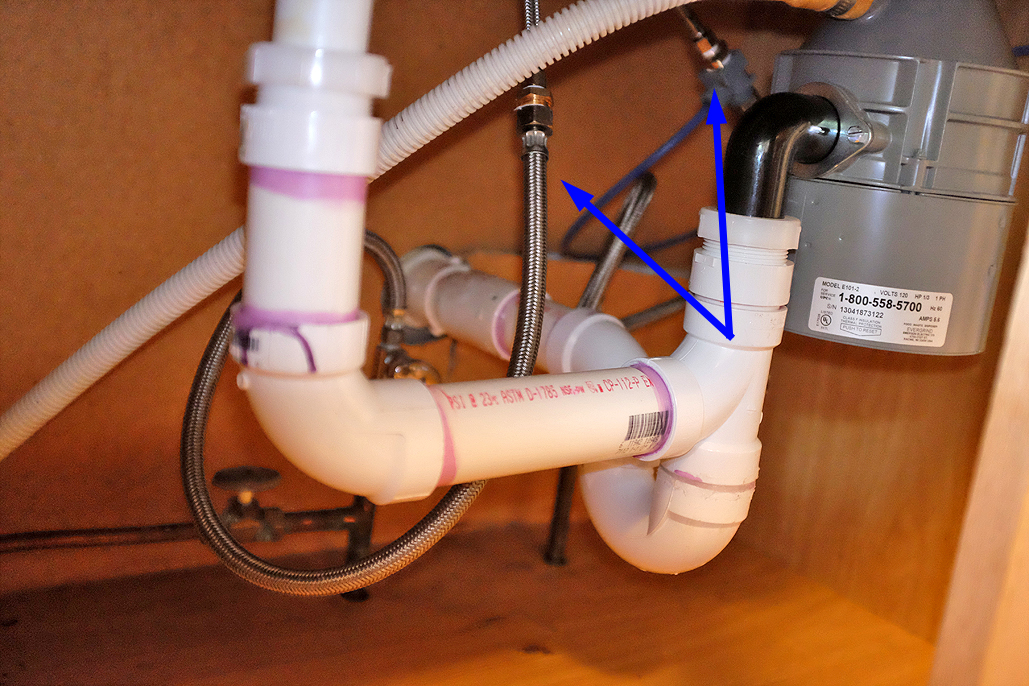
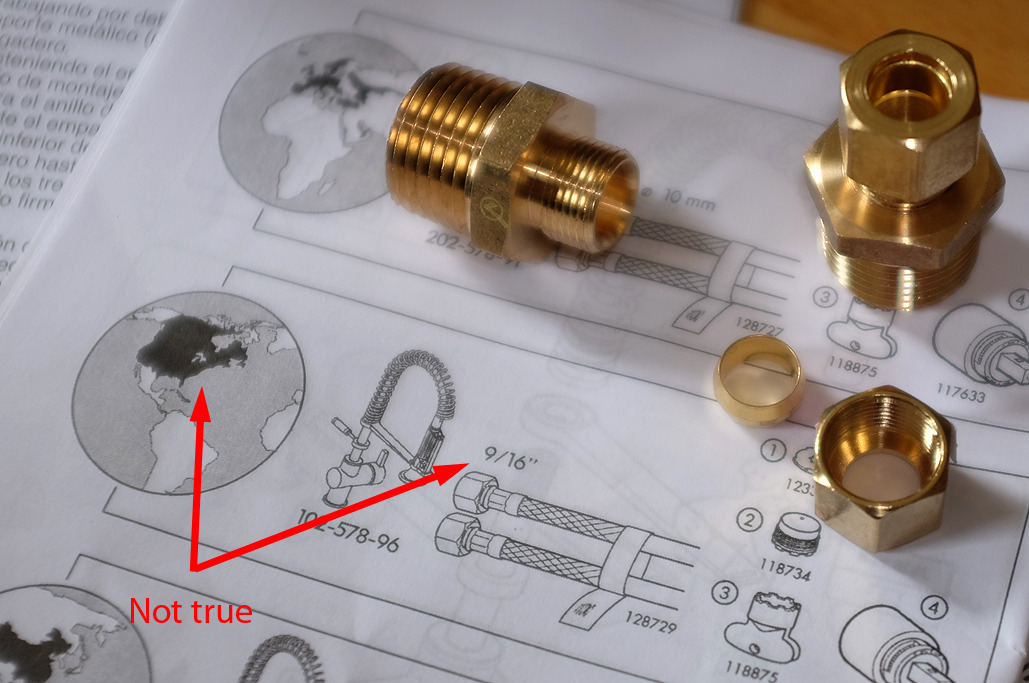
Step Three: Attach the hot/cold water lines to the faucet
A few readers who had done IKEA faucet installations wrote to give us the heads-up on a problem they ran into. Their advice would have been quite helpful had we received them prior to embarking on our project 🙂
The problem? IKEA faucets have female connectors (listed as 9/16″ in the directions). The typical US connectors from the water pipes are also female, but of size 1/2″. However, there is no such thing as a 9/16″ to 1/2″ male/male connector that would allow us to join the two lines!
Solution? Well, the IKEA connector is actually 3/8″, and there IS a 3/8″ to 1/2″ compression fitting, which if you remove the nut that comes with it, will leave you with a connector with two male ends…one for the IKEA faucet line and one for the water line!!!

Once we had the right adapter, attaching the water lines was a simple matter of teflon taping the fittings and screwing things togethers. Five minutes later, the water was flowing and we were done and done.
Here’s a shoutout to our local Ace Hardware store: When you need a thing to connect the thing to the other thing, the big box hardware store probably won’t know what you’re talking about (ours didn’t), but the guys at Ace, yup, they’ll know what you’re talking about AND will have the thing. Ace really IS the place with the helpful hardware man! And it is going to be our first stop from now on.

As readers can see, upgrading the kitchen faucet is not a complicated DIY project. With the right tools and adapters, it is a one-hour task. However, if you run into any problems, just ask the folks at Ace Hardware. They will set you straight 🙂


I measured the 9/16 female connectors on my Ikea faucet…it’s 9/16″ or at least 1/2″. I don’t see how a 3/8″ could fit it! Ikea is a pain.
Great tip, and yes, Ace seems to always have knowledgeable staff unlike other places.
You did something a little unusual in your install though, you left the standard US hoses on which are female both ends. That’s why you ended up needing male-to-male. No reason to use those unless the Ikea ones didn’t reach the shut-offs. Maybe so by the looks of the photo.
Does anyone know where we can get a replacement valve for this product? We have the version with both standard faucet and the overhead, but they seem to both be discontinued, and it’s leaking right at the valve next to the control handle(s).
Thanks for this! I also was installing an Ikea faucet and I read it on my phone standing in the aisle of the hardware store. Bought the same fittings as you and it all went smoothly.