| TODAY |
| Reviews |
| Gear & Gadgets |
| Computer |
| Furniture |
| Misc |
| Projects |
| Contact Us |
RainyDayMagazine's content can now be licensed for your print magazine or web site. Please contact us directly here. If you want to see something reviewed, then drop us a note with a link and we'll be happy to take a look.
|
|||
|
|||
|
|||
|
|||
|
|||
|
|||
|
|||
|
|||
|
|||
|
|||
|
|||
|
|||
|
|||
|
|||
|
|||
|
|||
|
|||
|
|||
The Altec Lansing T612 is a new breed of iPod speakers. They are designed to support the new iPod Touch and iPhone. If you have upgraded to either of these new iPods and want something which will complement their great looks, the T612 may be just what you have been looking for. In the photo above, we lit it so you can see the four speakers underneath the grill. The iPod Touch fits perfectly, but your older nano will look just as slick docked in the T612.
While the controls on your iPod will work, we would definitely recommend using the remote control. Pushing the iPod while it is docked would stress the connector. The blue LEDs volumn indicators are hidden underneath the grill. They light up when the controls are pressed, but will go dark after a few seconds. The sound was surprisingly rich given the size of the speakers. The sound from the T612 had no problems filling our 30x20 office. The real feature of the Altec Lansing T612 is not just its great sound and ability to support all of the dockable iPods, but its shielding from iPhone interference. We'll cover that in our next installment of the T612 FirstUse review. [Permalink] - Wan Chi Lau |
|||
Usually this time of the year we would be in South Beach "shooting" our annual Spring Break issue. However, we had to pass on it this year because there were just too many gadgets waiting to be reviewed for this Spring season. Hey, I thought we were in a recession! For a while we had stopped reviewing iPod docks, but with the introduction of the iPhone and iPod Touch, a whole new and more interesting series of docks began surfacing again. So we are now back in the game. First up for Spring is the Altec Lansing T612 iPod Speaker dock.
The Altec Lansing T612 system is designed to work with the iPhone, but will connect with any iPod which fits the standard iPod connector. It will also connect with MP3 players or external audio sources via the supplied 3.5mm stereo cable.
The design of the unit is simple and elegant. The controls are on top and the cable connections are in the back. It takes its design cues from the aluminum iMac series. We especially like the non-reflective rubberized surface...no fingerprints to clean! The docking adapter plate is not needed for use with the iPhone or iPod Touch. The T612 also comes with a remote control unit.
Since the unit is so thin, it will fit pretty much anywhere (desk, shelf) and look great do it. We'll give more details on the specs, usability, and sound quality of the Altec Lansing T612 in our FirstUse report. - Wan Chi Lau (permalink) |
|||
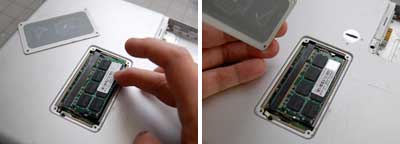
With the Mac open and the drives out of the way, we are FINALLY ready to upgrade the RAM modules :-) The old SIMMs are held in place by the spring clips on the side. To remove the old SIMMs just push the clips on the side and the modules will pop up.
Remove the old SIMMs and insert the new ones. Note and align the notch with the slot, push in the SIMM, and press down to lock it in place. Once both modules have been replaced, just reverse the steps to put the Mac mini back together. There are only two things to note in the reassembly process: align the top/bottom connector and press together firmly, reconnect the small connector.
When everything has been reassembled, reconnect the various external pieces (monitor, keyboard, mouse), and see if it boots. If it does, confirm the new memory size with the "About This Mac" menu selection. Even though we spread this project out over three days, the entire upgrade only took about 30 minutes. This upgrade is very easy to do and it will be the best money you can spend on speeding up your system. - Wan Chi Lau (permalink) |
|||
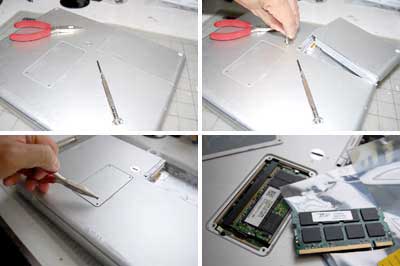
Yesterday we showed you how to open the Mac mini. Today we detail how to get the top layer out of the way so we can get at the SIMM slots. The only tool needed for this task is a Philips head jeweler's screwdriver. To get the top layer out of the way, four screws must be removed. The photos below show the location of the screws. Three of them are easily accessible. The forth one is underneath the WiFi antenna.
The WiFi antenna can be easily removed by pushing the two retaining pins in toward the center spring. The antenna will pop free when both pins are out of their notch. There is one last item which must be freed before the drives can be lifted free. If you look carefully, you will see a small two pin connector on one side. Once freed, the drives may be pulled up and hinged back out of the way, revealing the RAM slots. Now you are ready to put in the new memories.
Tomorrow we'll wrap this upgrade project up with the installation of the two 1GB RamJet SIMMs, putting eveything back together, and run some tests to make sure it still works. - Wan Chi Lau (permalink) |
|||
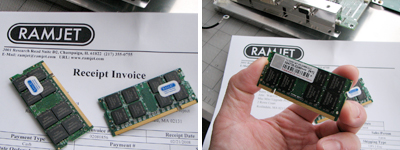
The interns spent the past few days upgrading the Mac mini to OSX 10.5.1, installing the iPhone SDK, and testing everything to make sure nothing has gone haywire. The only task left for them now is to make everything work FASTER. One sure way to make things go faster is to install more RAM! Last month got two 1GB modules from RamJet. Over the next few days, we'll show readers how to crack open the Mac mini, upgrade the memory, and put everything back together...all in less than 30 minutes.
To open the Mac mini's case, you MUST use a thin spring steel blade. A $3 putty knife is the ideal tool for this task. The first step is to turn the Mac onto its back.
Find a space on the edge between the plastic and the aluminum cover and slide in the knife as far as it will go. Press down on the knife until the plastic cage slides up. Work the knife around the edge and repeat until the entire cage is freed. Flip the Mac back over and lift the cover off, revealing the insides.
The SIMM slots are at the bottom of all of the electronics. Tomorrow we'll show you how to get the stuff on top out of the way, remove the old modules, and install the new RamJet memories. - Wan Chi Lau (permalink) |
|||
Originally we were going to do some work with the OBD units, but the weather was such that most of us stayed inside and played around with the copies of OSX Leopard
As with previous Apple software installations, upgrading from Tiger to Leopard was a simple process. A few clicks of the mouse, type in a password, and 40 minutes later (the installer's estimate was a tad pessimistic) the upgrade was finished.
There are quite a few benefits in upgrading from Tiger to Leopard, but our the main reason was so we could play with the new iPhone SDK. Over the next few days, we'll be doing all kinds of projects with the Mac mini (installing XCode, upgrading the RAM to 2GB, and playing with the iPhone SDK)...all kinds of geeky fun! - Wan Chi Lau (permalink) |
|||
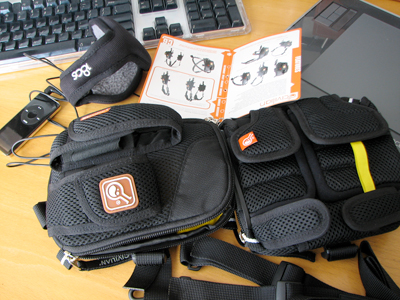
There are a variety of ways (jacket, packs, knapsack) to carry the gear we use everyday. This harness system from Civilian Lab may be the most unique amongst all of the methods we have reviewed to date. If you need to have easy access to lots of different gadgets, there is a Civilian Lab system which will suit your needs. If you want a system which is adaptable, Civilian Lab has a harnessing mode (chest, belt, thigh, etc...) which can accommodate the situation.
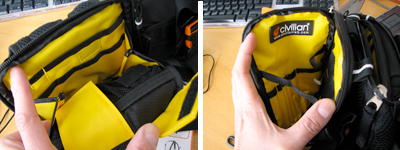
The construction and materials used are both very high quality. All of the external storage compartments have velcro closures for secure containment while still enabling quick access to the gear. The flaps are padded to give the contents bump protection.
The inside of the bags have even more pockets, slots, and openings for holding pens, probes, or whatever. The design is such that the contents are secure but accessible, a very important feature in bags for active users.
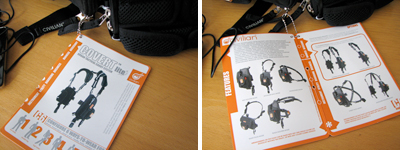
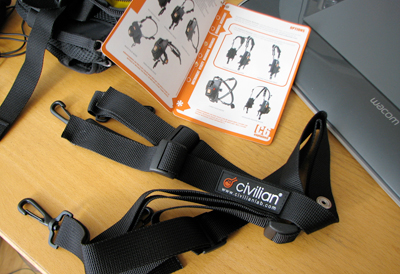
There are multiple ways to strap on these Civilian Lab harness bags. For extended use or when carrying a lot of weight, padded shoulder straps may be added to the harness to distribute the load. Some here are wondering just how much gear can be loaded into this harness system. You'll see when we fill it up and take it out for a FirstUse test in the Spring. - Wan Chi Lau (permalink) |
|||
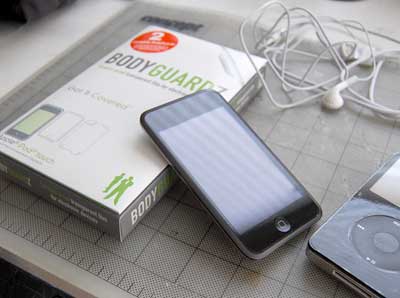
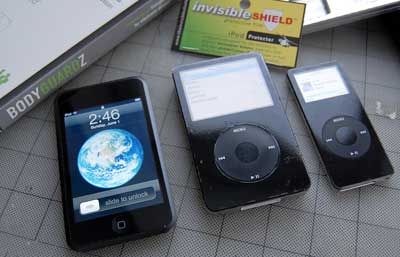
By now, everybody has heard Apple will be releasing the iPhone/iPod Touch SDK next week. For the past six months, we had been working on various iPod projects. Today we went out and picked up a few more iPods from our local Apple store. When the Apple clerk was ringing up the sale, we realized these iPods would get trashed pretty quickly if we didn't get some cases for them. The problem is, knowing the folks here, the iPods would be out of their cases more often than not.
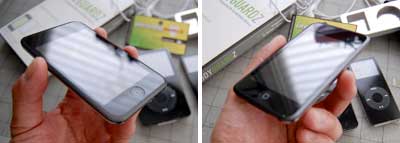
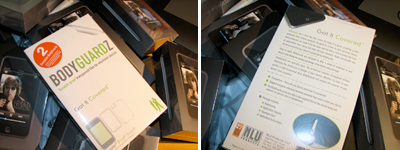
Remembering how well a protective film worked for our iPod nano, we decided to see what was available for the iPod Touch. We found a product called BodyGuardZ which claims to be the toughest film covering on the market today. Some readers may remember the early days of film protection. We are happy to report that things have come a long way since 2005. Back then we had to make our own soapy solution and dip the films into a tub of liquid. Today, products such as the BodyGuardZ comes with everything needed for applying the film to the gear.
Each package contains two sets of covers, a bottle of spray on application solution, a squeege card, and full instructions. Some users may want to use both the front and back films, but based on our experience with the nano, it is likely that most can get by with just covering the front. - Wan Chi Lau (permalink) |
|||
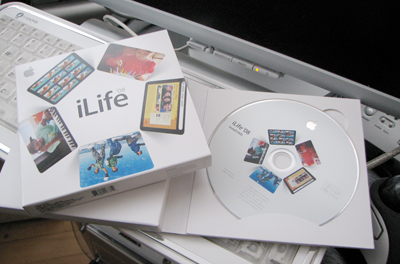
Recently we upgraded the Mac mini with the latest version of iLife. Getting the new iPhoto features was our reason for the upgrade. However, we soon realized that iMovie and iDVD also had some significant changes. However, when we ran those apps, we noticed the Mac mini ran a lot slower. We traced the problem to the fact that we only had 512MB of RAM in the machine. As most readers probably already know, upgrading a machine's memory is probably one of the most cost effective way to increase its performance.
There are a LOT of memory vendors out there. They are NOT all the same. When we needed memory, we head to a company called RamJet. Their site is easy to use. The "memory locator" on the site will make sure you get the EXACT type of memory you need for your machine. The RamJet service is great and their memory modules are guaranteed for life. What more can one ask for? This memory upgrade project is something that most readers should be able to do with no special tools. While opening the Mac Mini can be a bit of a challenge, the upgrade itself should be very simple. We'll show readers how to open it and upgrade the memory step by step. This is definitely a great project for a Spring rainy day. - Wan Chi Lau (permalink) |
|||
Here are some more FirstLook details reagarding the LapWorks Attache ergonomic laptop stand/cooler we mentioned on Friday. The stand is weighs 2.5lbs and is about 13"x12." It is a little more than 1.5" thick when laying flat but can be set at four different support angles. The Attache may work better on a desk, but in our FirstLook we'll be using it on top of a swing-away platform. In today's setup, we won't be hooking up any external keyboards or mouse to the stand. We just wanted to see how well it holds the various laptops (Pismo, Picturebook, ThinkPad, MacBookPro) we have around the office.
The 13"x12" surface easily accommodated all of the laptops we tested. The computers stayed in place securely. They did not slide around or move in any way. While most laptops vent from the side or the rear, the battery, hard drive, and processor all tend to give off a significant amount of heat which users can directly feel on the bottom of the laptop.
We had mentioned in the FirstLook that the surface is slightly curved for better air flow. Looking at the setup from the side, one can see the curve created an opening for plenty of flow regardless of the type of laptop.
After playing around with the various laptops on the Attache, we did notice a few potential problems. First issue was the tab at the base extended a bit high if the laptop was really thin like our Vaio 505VE. Fortunately, during actual use, the clearance was such that it was not an issue with any of the laptops. The second issue was that many of the screens tend to hit the tabs when we tried to close the laptops. We thought this would be a rather annoying problem when our interns casually pointed out that we were just too rigid in our thinking. They then made this small adjustment and said that was the reason why they should be making more money. Wise-asses :-) - Wan Chi Lau (permalink) |
|||
Today's laptops run hot, sometimes uncomfortably so. Keeping them running cool is probably one of the most important ways to extend the life of the machine. LapWorks has recently introduced a cooling stand which is designed to do just that. Long-time readers know we have looked at laptop coolers and stands (CushTop, Futura) in the past. What is unique about the LapWorks Attache is it has finally combined the two most desirable features, laptop cooling and good ergonomics, in one attactive and compact unit!
The entire surface of the LapWorks Attache is covered by a 2mm thick aluminum plate. There are two hinges at the base to keep the laptop from sliding off. There are also rubber feet at the bottom to keep the stand from sliding around on the desk.
The unit has two cooling fans and a slightly curved design to allow for adequate air flow between the stand and the back of the laptop. This dual approach, fan (air flow) and aluminum plate (heat sink), is designed to give efficient cooling of the laptop with a minimum of bulk.
Integrated into the body of the stand is a 4-port USB (3 rear, 1 side) 2.0 hub. This is a convenient feature for attaching an external keyboard and mouse to the laptop for "at desk" use. We will try out the LapWorks Attache with a few of the laptops in the office to see how well it does in keeping them running cool. We will also see whether it is practical to take it along with us when we take our laptops on the road. Based on this FirstLook, we are quite impressed with the overall build quality and thoughtful design of the LapWorks Attache. We are hopeful that we will be just as pleased with it performance in our FirstUse of the unit. - Wan Chi Lau (permalink) |
|||
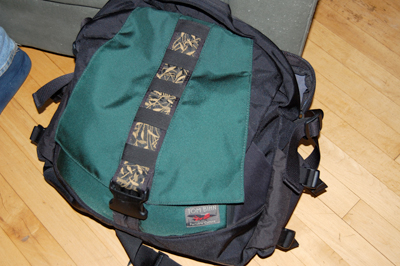
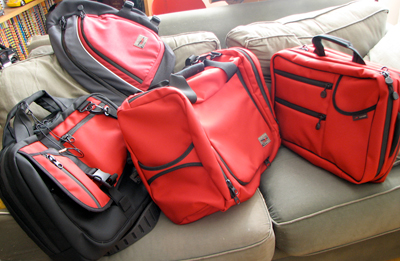
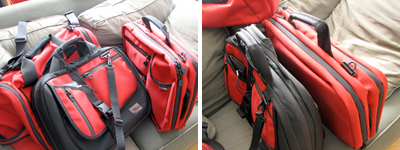
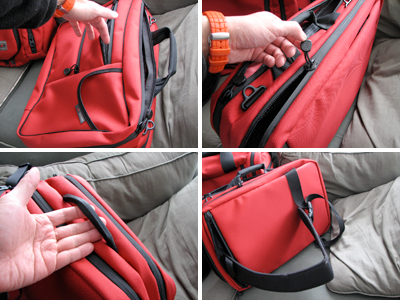
RainyDayMagazine readers are well aware of our penchant for Tom Bihn gear. Someone in an elevator once noticed we had a Tom Bihn case and said they had a few Bihn bags. His toughest problem was coming up with new reasons for continually purchasing the latest TB creations. We know EXACTLY how he feels :-) The newest in the Tom Bihn line is the Western Flyer. It is designed to be a blend of a business case and an overnight bag. Empty, it is a little thicker than the Zephyr briefcase, but much thinner than the Aeronaut.
If you take a lot of overnight trips but only want to travel with one bag, this Western Flyer was designed for you. The bag has plenty of room for the typical stuff (a laptop, some files, dress shirt, gadgets, etc...) you will likely pack for a short trip.
The Western Flyer has two compartments, both of which can open flat for easy packing of shirts and pants. There are also internal zippered compartments for separating out smaller travel items.
To make sure this bag is as easy to use as it is to pack, there are the usual easy access front pockets, rain resistant heavy duty zippers, convenient pulls, and multiple carrying options. We'll let you know how well these features perform when we get this Western Flyer out on it first trip! - Wan Chi Lau (permalink) |
|||
Our American Airlines flight took off and landed on time, which is exactly what we want from an airline. Flying is easier now that everyone is used to the ritual of the new "security" procedures. Like many, we are unclear whether making everyone take their shoes off at the security line does anything more than ensure everyone wear socks without holes when they fly, which I suppose is a good thing...at least for the seller of socks.
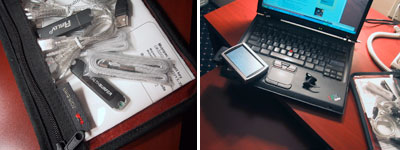
We are perplexed that TSA is more worried about shoes but not at all of the electronics many passengers take onboard. At last count, we have the following devices with us in our carry-on: Blackberry, GPS, Bluetooth headphone, security keys, laptop, and a digital camera. All of these devices have batteries of some sort and is potentially more problematic than a pair of shoes. Well, we are sure the TSA knows what they are doing.
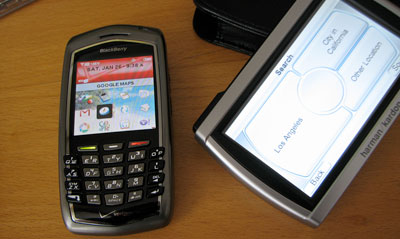
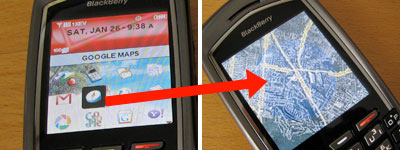
Yesterday, we mentioned we take the StealthSurfer with us when we travel. Another piece of gear we now also pack with us is one of our trusty GPS units. Driving around in a strange city is much easier when you don't have to worry about getting lost. If you don't have a GPS, you can still find out where you are by using your Blackberry and Google Maps.
By triangulating off cell phone towers and overlaying satellite images on the calculated position, Google Maps can give a fix of your Blackberry's approximate location in real time. It won't replace a dedicate GPS yet, but it is still a really fun application to play with in the while someone else is driving :-) - Wan Chi Lau (permalink) |
|||
This is the time of the year for tradeshows (CES, MacWorld, PMA). Many of us are on the road checking out the gear for 2008. Some of us are out visiting clients, reviewing the progress of last year, and discussing new initiatives for this year.
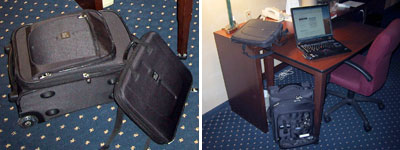
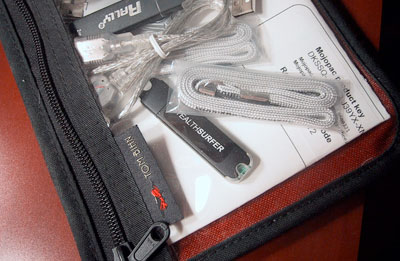
When the folks here go on short hops for business, they usually grab the Pacific Design roller and laptop case combo. These two pieces (Evolution, Nucleus) are well designed for a few key reasons: tough construction, lots of storage, and light weight. After a year of pulling them around various airports and hotels, this combo is still our first choice for business trips. One new piece of gear we now always take on the road with us is the StealthSurfer. While the availability of free WiFi everywhere is wonderful, hopping on an unknown network or hotel computer is like asking a stranger to pass along a personal message...you never know who you are talking to. StealthSurfer takes all of the risk out of logging on while on the road. Check out the details of this "must-have" piece of roadwarrior gear here. - Wan Chi Lau (permalink) |
|||
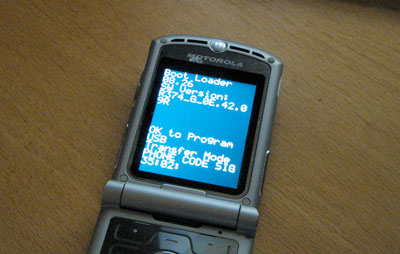
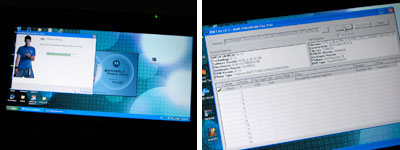
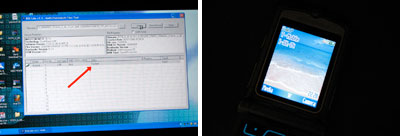
We turned off one of our Moto RAZR yesterday and got a very different "log on" screen when we tried turning it back on. It appears that the software on the phone somehow got corrupted and was not able to start up poperly. A service call to T-Mobile and visits to two T-Mobile stores convinced us that it was highly unlikely that anyone in those stores would be sufficently technical to help. We should have just Googled "Boot Loader" and saved ourselves a lot of running around. A quick search brought us up-to-date on the basics of RAZR phone flashing (MultiFlashFlex, Monster Packs, RSD Lite).
The basic steps to "re-flashing" a phone are: find the software drivers to enable the phone to be recognized by computer when connected via USB, obtain the appropriate upgrade pack(s) for the phone, use an uploading tool to install the upgrade software to the phone.
Once the "re-flashing" process completed the RAZR came back to life. The phone now functions perfectly. It responses faster, has a few more applications, and we think the photos taken with the camera may even have improved! If our success in repairing the RAZR has given you the inspiration to try it with your dead phone, then go poke around on the Net. You will eventually find what you need.
Just beware that we had to look in some pretty dodgy areas for some of the files and tools. However, if you have a phone which has crashed to the point of no recovery, then you don't have much to lose. It will be more fruitful than bringing it to the phone store and in the end at least you will have learned something. We can pretty much guarantee THAT :-) - Wan Chi Lau (permalink) |
|||
We are sure those interested in all things Apple have already heard about the supermodel thin MacBook Air announced at yesterday's MacWorld.
However, just in case you haven't, here is a summary: 3 lbs, 5 hr battery life, $1800. Features includes a multi-touch trackpad, built-in iSight camera, and the option for a 64GB SSD. What is an SSD?
SSD stands for Solid State Drive and is made of Flash memory. It is the same stuff used to store pictures in your digital camera packaged to work like a hard drive. Why use SSD? Flash memory chips has no moving parts. It uses no power unless data is being read from or written to it. It will not care if it is dropped. It is perfect for laptops. Why is it not used everywhere now? It is expensive. At today's prices, a 64GB SSD will cost around $1000 to $1500. Compare that to a regular 80GB hard drive costing around $150 and you see that it will be a few more years before SSDs can make it in the mass market. However, we are glad to see this option available even if it will only be a selected few who can afford it. Options such as SSD is a chicken and egg issue. The cost will go down when there is mass adoption. Mass adoption will only occur when it is cost competitive. Sony has had this option available in some of the UMPCs. Now with the introduction of the MacBook Air, that day is getting a little closer.- Wan Chi Lau (permalink)
|
|||
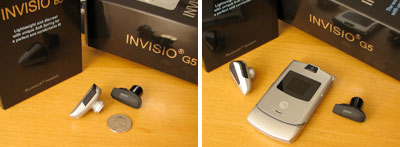
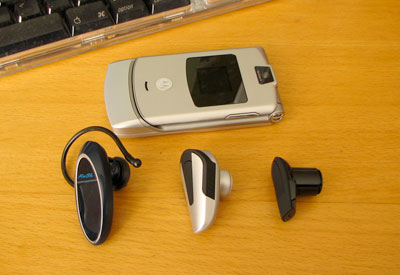
A LOT of Bluetooth headphones have passed through the RainyDayMagazine office over the years. We have tried units from Plantronics, ORokr, RazrWire, etc... They all worked well and are great to use while driving in the Boxster with the top down. However, none of them are ones we would wear any longer than necessary because they are just too big. This week two new units (Invisio B3, Invisio G5) from NextLink showed up at the office. They are incredibly small! So small that we may even be able to leave it in all the time :-)
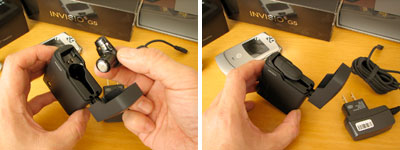
The Invisio G5 headphone is the smaller of the two. The G5 is so tiny that it cannot be charged using a mini USB plug. Instead, it comes with a separate carrying case which doubles as a charging unit.
The case has a built in battery so the G5 can be recharged when it is not plugged into an outlet. A very clever design!!!
To charge the headphone, just place it inside the case and close the top. The case and G5 may be charged simultaneously. We have a few different headsets to test this month. One of them is from FoneGear and two from NextLink. It looks like we'll be making a lot of calls this month! - Wan Chi Lau (permalink) |
|||
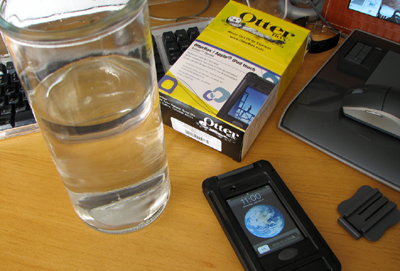
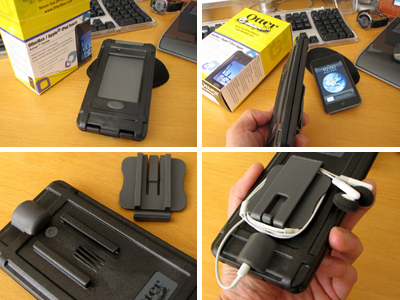
Just about everyone who covers consumer electronics is at the CES out in Las Vegas this week. We used to go, until we realized that most of what we saw at the show never made it on the market. So for the past four years, we have stayed home during the "crazy" season :-) When we want to see what is the latest, we just pop over to Gizmodo! It costs a lot less and gives us more time for testing gear that has actually made it on to the market! Today, we will be reporting on the results of our FirstLook of the OtterBox Armor case for the iPod Touch. This case, like all of the other cases in the Otter line are functional, tough, and great looking. The front of the case has a crystal clear window. The material is soft enough to allow the user to manipulate the screen, but feels tough enough to hold up to extended use. There is a removable clip on the back which doubles as a cord management system. The case does add some thickness to the iPod, but did we mention this case is part of Otter's Armor series?
The latch to the OtterBox case is on top. As expected, there is an O-ring around the perimeter of the case. On the bottom of the case is the watertight headphone socket.
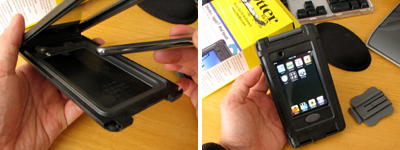
The lid of the case opens enough to insert the Touch. It was easy to seat the iPod in the case, especially with the headphone plug inside the case as the guide. The overall fit is perfect. The iPod does not move at all when inside the case.
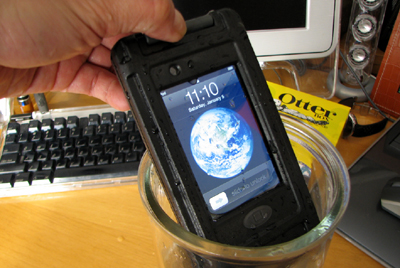
Since this is suppose to be a watertight case, we had to at least dunk it into the water to see if that were any leaks. Yes, we could have done it without the iPod, but what fun would that have been?
We left the iPod under water for about five minutes. During that time we saw no bubbles rising out of or any signs of seepage into the case. The moment of truth came when we reached in an pressed the button to turn the iPod on. No problems. While the case will protect the iPod if dropped in to water, it clearly does not float. So this case is good for protecting the iPod in rugged and dirty environments, but don't drop it overboard! Everyone here had full confidence that the OtterBox case would keep the Touch perfectly safe. The OtterBox Armor case is rated to 3 feet deep. However, we think this is a conservative estimate. If you want to see just how deep we can go with this case before water starts seeping in, just send us your iPod Touch and we'll be happy to test it out :-) - Wan Chi Lau (permalink) |
|||
| ||
| RainyDayBuzz* | ||
|
|
||
| GET MUSIC* | ||
 |
||
| GET GEAR* | ||
|
|
||
| RECENT TRIPS* | ||
|
|
||
| GO PLAY* | ||
|
|
||
