|
|
|
RainyDayMagazine's content can now be licensed for your print magazine or web site. Please contact us directly here. If you want to see something reviewed, then drop us a note with a link and we'll be happy to take a look.
|
| |
Mar 23,2008 (WeekendEdition) |
Now that we finally managed to put together a working LCD screen, it's time to take it apart and finish the DIY-Cintiq project. The disassembly of the Dell LCD panel was a lot easier than the NEC unit, mostly because the Dell had a much simplier layout.
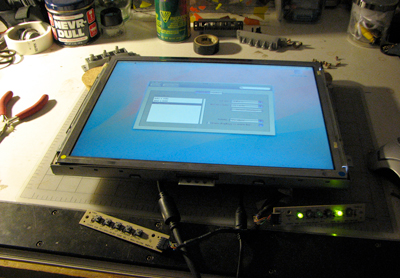
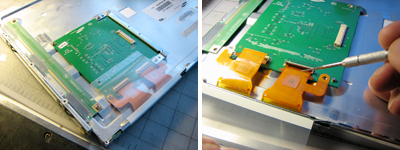
Unlike the NEC layout, the Dell's x-y flat cables are in parallel. This means it will not require any FFC extensions. We also noticed the joints of the flat cables on the Dell are reinforced. Care must still be taken, but the solder joints should be a lot sturdier.

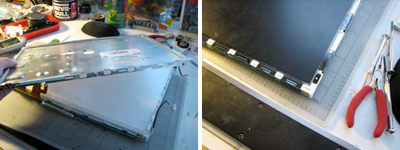
After some careful work, the LCD was freed and ready to be overlaid on the digitizing tablet. To see if we broke anything, we reattached all of the electronics, hooked up the Vaio, and powered it up.
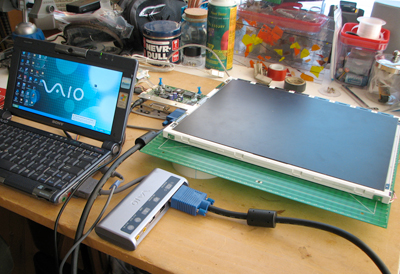
The Dell screen came on just fine. At this point, we are just happy it works, but we did noticed that the Dell's brightness was noticably dimmer than that of the Vaio. It may be a problem, but what we REALLY need to confirm is that the digitizer will work underneath the LCD.
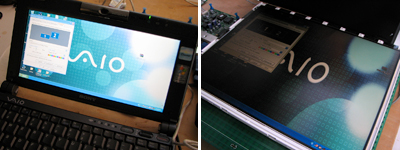
Unfornately, we ran into a problem with getting the mouse or the pen to be recognized by the tablet. After spending most of the day on it, we came to the conclusion that we will have to put this project aside once again. - Wan Chi Lau (permalink)
|
Mar 22,2008 (WeekendEdition) |
The April 2008 issue of Wired was delivered to the office today. One of our sharped-eyed editors said "Hey, didn't Wired use that cover before?"

Half an hour of work in the RainyDayArchives by our coffeed-up nimble-finger interns revealed that Wired had indeed used something similar back in June 1997.

Apple's polish was quite a bit less shiny then. In fact, most didn't expect Apple to survive to the end of the decade. Wired had written an article on "101 ways to save Apple."
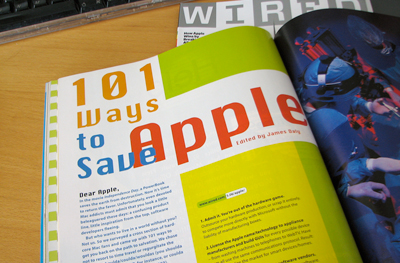

Some of the suggestions were tongue-in-cheek, some wrong, but many proved to be quite on-the-mark (Steve, iPhone, Air).

We have not had a chance to read much of the most recent issue yet, but we since we are such Apple fanboys we couldn't pass up an opportunity to express our delight in a brighter and shinier Apple 11 years later. - Wan Chi Lau (permalink)
|
|
|
Usually this time of the year we would be in South Beach "shooting" our annual Spring Break issue. However, we had to pass on it this year because there were just too many gadgets waiting to be reviewed for this Spring season. Hey, I thought we were in a recession!

For a while we had stopped reviewing iPod docks, but with the introduction of the iPhone and iPod Touch, a whole new and more interesting series of docks began surfacing again. So we are now back in the game. First up for Spring is the Altec Lansing T612 iPod Speaker dock.


The Altec Lansing T612 system is designed to work with the iPhone, but will connect with any iPod which fits the standard iPod connector. It will also connect with MP3 players or external audio sources via the supplied 3.5mm stereo cable.

The design of the unit is simple and elegant. The controls are on top and the cable connections are in the back. It takes its design cues from the aluminum iMac series. We especially like the non-reflective rubberized surface...no fingerprints to clean! The docking adapter plate is not needed for use with the iPhone or iPod Touch. The T612 also comes with a remote control unit.


Since the unit is so thin, it will fit pretty much anywhere (desk, shelf) and look great do it. We'll give more details on the specs, usability, and sound quality of the Altec Lansing T612 in our FirstUse report. - Wan Chi Lau (permalink)
|
|
Mar 20,2008 (ToolThursday) |
All the folks here in the office carry different pocket tools. One of the tools is single purpose, but most are multi-functional gadgets. We thought it would be interesting to take a quick look at the collection and ask, if we could only carry one...which one would it be???
The five tools (Gerber, Al Mar, Leatherman, LoggerHead) all have some functions in common. All but one can be used to tighten something. Three of them have a blade. Two have multiple bits for screws and nuts.
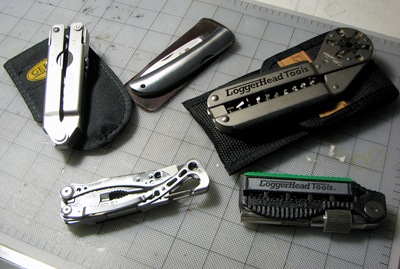
Four of the tools are approximately the same size when folded. All may be carried either on the belt or in the pocket of a pair of jeans. Everyone felt that the Loggerhead Tools, while useful in certain situations, is just not versatile enough to go solo.
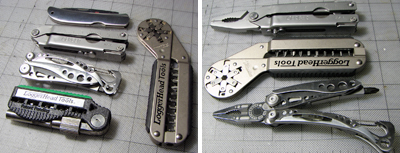
The Gerber, Loggerhead, and Skeletool either have pliers or a plier-like capability. The Al Mar, Gerber, and Skeletool all have a blade of about the same size, but the blade of the Skeletool is the most substantial of the three and is as comfortable to hold as the Al Mar Folder.
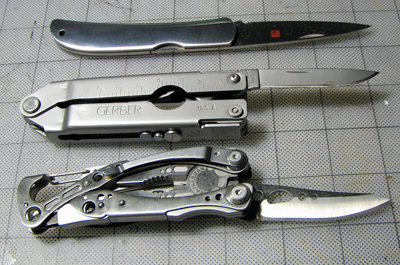
We also agreed that the Al Mar Folder, while a great looking pocket knife, just can't compete with the multi-purpose Gerber and Skeletool, especially if there is a need to open some beer bottles!
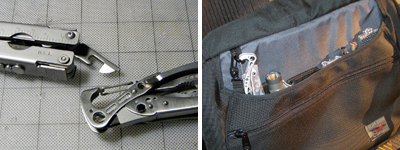
Given our criteria of having to carry just one, we all picked the Skeletool. Not because of its awesome looks but because of its "just right" set of tools. We think Leatherman was spot on in their picks of what to include in the Skeletool. We'll report back in a few months to let you know if we still feel the same way. - Wan Chi Lau (permalink)
|
|
Mar 19,2008 (WrapItUpWednesday) |
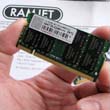
With the Mac open and the drives out of the way, we are FINALLY ready to upgrade the RAM modules :-) The old SIMMs are held in place by the spring clips on the side. To remove the old SIMMs just push the clips on the side and the modules will pop up.

Remove the old SIMMs and insert the new ones. Note and align the notch with the slot, push in the SIMM, and press down to lock it in place.

Once both modules have been replaced, just reverse the steps to put the Mac mini back together. There are only two things to note in the reassembly process: align the top/bottom connector and press together firmly, reconnect the small connector.

When everything has been reassembled, reconnect the various external pieces (monitor, keyboard, mouse), and see if it boots. If it does, confirm the new memory size with the "About This Mac" menu selection. Even though we spread this project out over three days, the entire upgrade only took about 30 minutes. This upgrade is very easy to do and it will be the best money you can spend on speeding up your system. - Wan Chi Lau (permalink)
|
|
Yesterday we showed you how to open the Mac mini. Today we detail how to get the top layer out of the way so we can get at the SIMM slots. The only tool needed for this task is a Philips head jeweler's screwdriver.

To get the top layer out of the way, four screws must be removed. The photos below show the location of the screws. Three of them are easily accessible. The forth one is underneath the WiFi antenna.

The WiFi antenna can be easily removed by pushing the two retaining pins in toward the center spring. The antenna will pop free when both pins are out of their notch.

There is one last item which must be freed before the drives can be lifted free. If you look carefully, you will see a small two pin connector on one side. Once freed, the drives may be pulled up and hinged back out of the way, revealing the RAM slots. Now you are ready to put in the new memories.

Tomorrow we'll wrap this upgrade project up with the installation of the two 1GB RamJet SIMMs, putting eveything back together, and run some tests to make sure it still works. - Wan Chi Lau (permalink)
|
Mar 17,2008 (MacMiniMonday) |
The interns spent the past few days upgrading the Mac mini to OSX 10.5.1, installing the iPhone SDK, and testing everything to make sure nothing has gone haywire. The only task left for them now is to make everything work FASTER.

One sure way to make things go faster is to install more RAM! Last month got two 1GB modules from RamJet. Over the next few days, we'll show readers how to crack open the Mac mini, upgrade the memory, and put everything back together...all in less than 30 minutes.

To open the Mac mini's case, you MUST use a thin spring steel blade. A $3 putty knife is the ideal tool for this task. The first step is to turn the Mac onto its back.

Find a space on the edge between the plastic and the aluminum cover and slide in the knife as far as it will go. Press down on the knife until the plastic cage slides up. Work the knife around the edge and repeat until the entire cage is freed. Flip the Mac back over and lift the cover off, revealing the insides.

The SIMM slots are at the bottom of all of the electronics. Tomorrow we'll show you how to get the stuff on top out of the way, remove the old modules, and install the new RamJet memories. - Wan Chi Lau (permalink)
|
|
|
[Dec] [Nov] [Oct] [Sep] [Aug] [Jul]
[Jun] [May] [Apr] [Mar] [Feb] [Jan]
....... 2007 ......
[Dec] [Nov] [Oct] [Sep] [Aug] [Jul]
[Jun] [May] [Apr] [Mar] [Feb] [Jan]
....... 2006 .......
[Dec] [Nov] [Oct] [Sep] [Aug] [Jul]
[Jun] [May] [Apr] [Mar] [Feb] [Jan]
....... 2005 .......
[Dec] [Nov] [Oct] [Sep] [Aug] [Jul]
[Jun] [May] [Apr] [Mar] [Feb] [Jan]
....... 2004 .......
[Dec] [Nov] [Oct] [Sep]
|
|
|


