| TODAY |
| RainyDayDestinations |
| RainyDayStores |
| Gear & Gadgets |
| RainyDayGarage |
| RainyDayGarden |
| RainyDayKitchen |
| RainyDayPhotography |
| RainyDayRenovations |
| RainyDaySOHO |
| RainyDaySports |
|
|
| Workshops |
| Contact Us |
| Index |
RainyDayMagazine's content can now be licensed for your print magazine or web site. Please contact us directly here. If you want to see something reviewed, then drop us a note with a link and we'll be happy to take a look.
|
|||
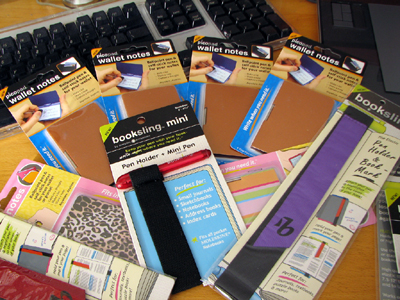
Looking for interesting stocking stuffers or unusual yet useful tech gifts for the folks on your list? Keep an eye out in December for the 2007 RainyDayMagazine Gift Guide.
The guide will be a collection of some the best of our past reviewed items and many products new for this season. Clever readers will find clues to fun little prizes hidden amongst the various gift suggestions! Happy hunting :-) - Wan Chi Lau (permalink)
|
|||
|
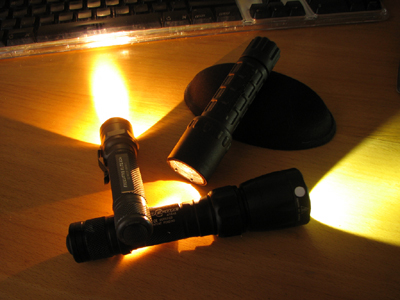
A flashlight bright enough to temporarily stun, yet small enough to carry with you every day? We didn't believe it until we got a few of the SureFire units in house. SureFire illumination tools ARE the finest in the world! We have been using three of the SureFires for the past few years and they have performed amazingly well. There are less expensive options out there, but when you want something you can depend on in all conditions, you can depend on SureFire. We do. - Wan Chi Lau (permalink)
|
|||
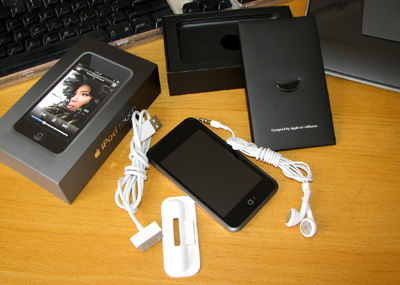
We finally broke down and got us an iTouch. Sure, we can play music, view photos, watch videos, etc. with the iTouch, but when it comes right down to it, we wanted one because it is the latest piece of Apple goodness.
We have no rational justification for replacing our perfectly fine iPod nano. So if you are like us, stop thinking about why you, too, want to "replace" your iPod and just go buy one
Some of you may be trying to compare it to the Zen, Zune, or some other piece of gear based on specs or price, but in the end you know the iTouch is the one everyone REALLY wants. So save yourself some time, take out your credit card, and just get one. - Wan Chi Lau (permalink)
|
|||
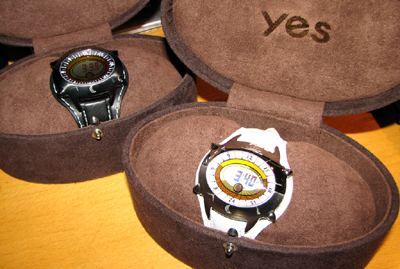
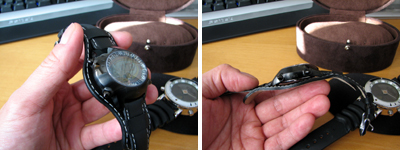
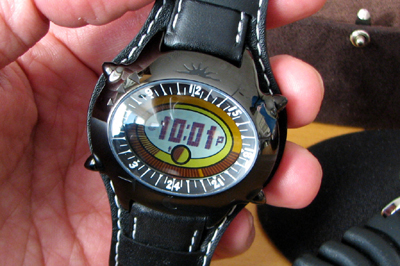
Yes is a watch company well known to readers of this magazine. We had reviewed the Yes Zulu and Cozmo last year and did some projects with them this year. At the beginning of 2007, Yes created a new watch called Tati for customers looking for a watch that is a bit smaller, but with the same collection of time functions. The Tati comes in a black and a silver finish. Both have the same sapphire crystal, a 10 ATM waterproof seal, and a custom leather band.
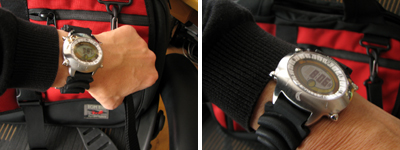
There are lots of nice little details on the case: gloss/matte split finish, embossed icons, bullet shaped knobs, special markers. After wearing the Tati for a while, we decide to take the Tati in a slightly different direction. We replaced the leather band with a YES diver's band from one of our other projects. It gave it a sportier feel, but still kept the Tati's unique look. Let us know what you think.
If you are looking for a watch that isn't run-of-the mill this holiday season, check out all of the offerings at Yes. You will not be disappointed. - Wan Chi Lau (permalink)
|
|||
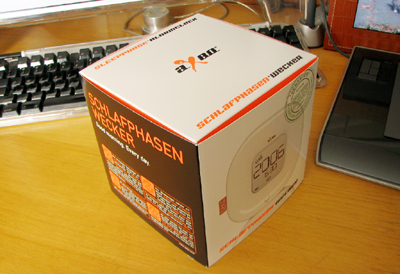
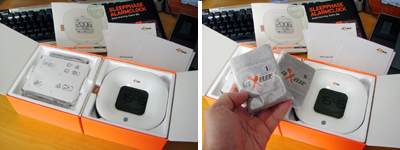
Sleep is important. Many of us spend a third of our lives doing it. But waking up is hard for some people. Waking up rested can be even harder. RainyDayMagazine has looked into some technological solutions (NeverLate, SleepTracker) over the years to help make waking up easier. In January, we'll be reporting our experiences with two products (SleepTrackerPro, aXbo) which promise to optimize the sleeping-to-waking transition. The approach of aXbo Sleep Phase Alarm Clock is very similar to that of the SleepTracker watch, which we reported on in 2005. While still relying on movement, aXbo's implementation is quite a bit different. Instead of a watch, the aXbo sensor is stored in a terrycloth-like sweatband. The alarm is a free standing unit which can function as a regular alarm clock.
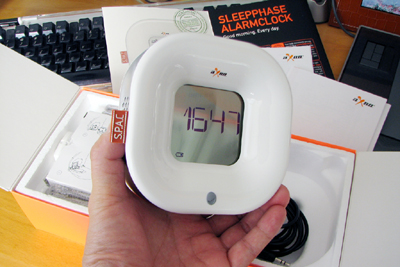
The aXbo comes with two wristbands enabling it to track two wearers separately. If a band is not worn, then the clock functions as a normal alarm for that person. The clock is great looking unit. It has a translucent LCD panel, shiny white frame, and a metalic silver finish on the side. The unit is wide enough to stand on its own. The controls and speaker are integrated into the curves and create a very clean look that will fit into most modern decor.
The aXbo SleepPhase Alarm Clock with its wristband sensor may be a great solution for those who are looking for a more comfortable solution than the SleepTracker. We can't really say which is better until we put the aXbo to the test. One thing is clear, the aXbo is more of a "home" solution. Even though aXbo has recommendations on traveling with the unit, we think the device is a little big to take on the road. However, having multiple sensors is a big advantage for those who have partners who want a different wake up time. - Wan Chi Lau (permalink)
|
|||
The Holiday Shopping Season has officially begun. Sales were everywhere this weekend. Many early bird shoppers were able to snag some amazing deals on electronics, appliances, and hard to find toys. However, if you are like us, you don't have the time to drive all over town to save a few bucks. However, we do love a deal! Lucky for those of us who do shop online, it is getting better all the time.
For the past year, we have shopped most of the major sites. They all have their strengths. Our question was, if we had to pick just one place to shop online, where would we go? Our answer was Amazon.com. We chose Amazon for two reasons: selection and ease. Amazon was the one place where we have had consistent "no-hassle" service. So, check and click on any of the three "Deals" in the Amazon panel and land yourselves a bargain everyday until the end of December. - Wan Chi Lau (permalink)
|
|||
We have a tradition here at the office tht we take a four-hour walk around the Charles River on Thanksgiving day before the big meal. The temperature on some years had been in the teens, but yesterday it was a balmy 50º!
We love the walk because we do it at a time when most people are either home cooking or have left town. The experience is unique because the city seems deserted and is eerily quiet. Definitely the "calm" before the BlackFriday storm!
We post these images for you to enjoy should you need a refuge from the day-after Thanksgiving shopping crowds. - Wan Chi Lau (permalink)
|
|||
|
The staff here at RainyDayMagazine would like to wish all of our readers a Happy Thanksgiving. To read a...re-interpretation of the history of the first Thanksgiving, our lovely co-editor Carolyn offers a short piece you might enjoy (ahem, you've been warned). Enjoy the pumpkin pies!!! - Carolyn Donovn (permalink)
|
|||
We were happy to see such a large response to November's RainyDayPuzzler. There were a wide range of answers. The most popular ones being fluorescent monoclonal antibodies on a neuronal cluster, internet traffic, and airplane flight patterns. Roughly 40% of the entries had the correct answer : Air Traffic/Flight Patterns over the US. The original image was generated by Aaron Koblin using published data from the FAA. For those interested, check out Aaron's site for videos of the data as seen over a 24 hour period. Congratulations goes to Darren M. for being the lucky winner of the Neuros OSD. The winner will be contacted directly by Neuros and will receive the Neuros OSD unit directly from them. Even though the shopping madness starts on Friday, we'll be off until Monday. RainyDayMagazine will be publishing our annual Holiday Shopping Guide starting on Monday. We'll also be giving away stuff all December. So have a great Thanksgiving holiday and come back "ready to shop!" - Wan Chi Lau (permalink)
|
|||
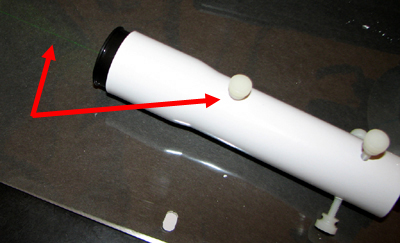
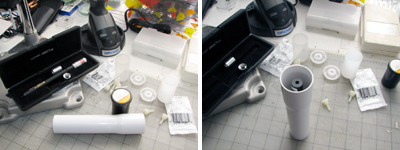
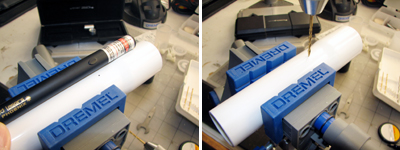
After a few revisions of the original design, we finished the laser sight project from this weekend. The changes simplified the construction and made the mount more stable.
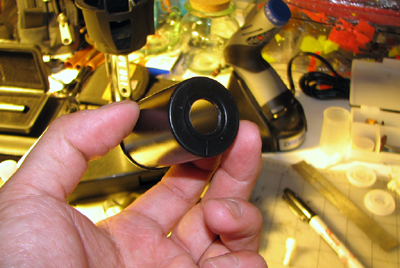
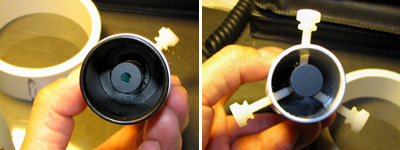
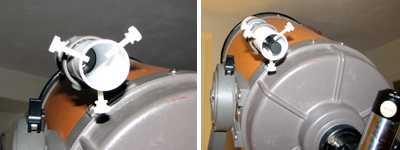
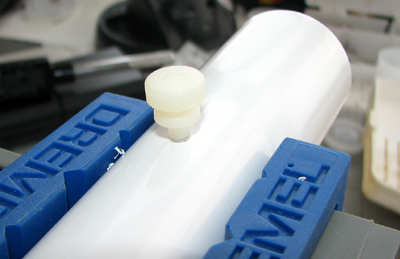
Instead of using thumbscrews in the front and the rear to hold the Phoenix, we made a 0.5" hole in the film canister and used it to support the front of the pointer. The rear is held in place by the three thumb screws.
The front thumb screw is positioned to hold the trigger down for continous pointing. According to the technical folks at Wicked Lasers, the Phoenix may be held in the "on" position for about 2 minutes with a 1 minute cool down before the next cycle.
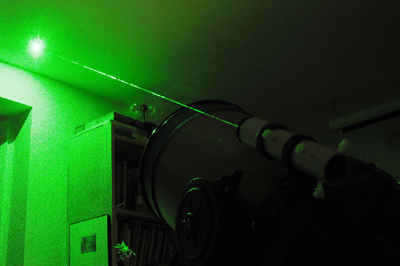
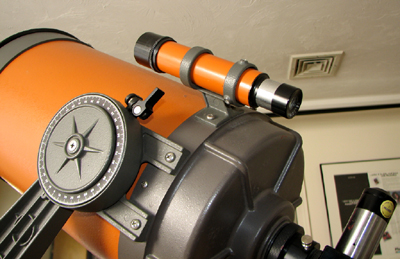
In this first mounting, we realized because of the position of the thumb screws, we would have to put the laser in AFTER we put the mount on the scope. While not a big deal when doing it inside, this is not practical out in the field. We will have to work on the overall design a bit more to make it easier to attach to the scope. With the pointer mounted on the Celestron, we are eager to get this rig outside on a clear night to see how it performs! Unfortunately, the forecast for the next few days does not look promising. Perhaps we'll have better luck over the weekend. In any case, this $3 Laser mount was a fun project. We hope it will inspire you to give it a try and perhaps improve upon our design. - Wan Chi Lau (permalink)
|
|||
|
|||
Yesterday we posted the series on unpacking the Eureka Capture+. Today, we'll show you how to put the vacuum cleaner together. The entire process is very simple. All that is needed is a Phillips screwdriver.
The handle is the first piece to be attached. It slides into the base and is secured by two screws in the back. Just make sure things have snapped into place before attaching the screws. The next piece is the holder (grey) for the power cord. Note that there is a tab at the bottom of the holder. Make sure the tab has been set into the back of the base before attaching the screws.
Once the handle and the power cord bracket have been attached, the remaining accessories can be placed into the various slots and compartments. The small brush has a storage space under the handle. The extension tubes should be stowed in the back next to the clear vacuum hose.
The PowerPaw has an integrated storage compartment in the front of the vacuum. Place the end in first and push the top into the handle until it snaps into place. With the unit assembled and all the accessories in their places, we are now ready to spend the rest of the week cleaning the office. The first job we'll tackle are the sofas. It is amazing how much hair the interns shed around this place! With the Eureka Capture+ around, maybe we can start wearing black again. - Wan Chi Lau (permalink)
|
|||
Many of you are busy cleaning and vacuuming before the guests arrive for your Thanksgiving celebration. We are not hosting any events this year, but we still like to tidy up a bit just because we are such neat freaks around here :-)
In mid-October, we got in the Eureka Capture+ bagless vacuum unit. This vacuum is designed for the home market, but is surprisingly heavy-duty. It comes with all of the usual accessories for stairs, sofa, floors, and carpets. The unit is shiped partially assembled for more efficient packing.
The vacuum base was heavier than we anticipated. To get it out of the box, we found it easier to lay it flat and pull the unit out. We will go through the features when we do the FirstUse report. However, there is one feature we thought worth mentioning as we have not see it in any other vacuum cleaners to date.
The Eureka Capture+ has an integrated duster with a self-cleaning option. The duster is stored on the side of the unit in its own housing. There is a lever on the bottom which when activated, will automatically clean the brush. Very clever! - Wan Chi Lau (permalink)
|
|||
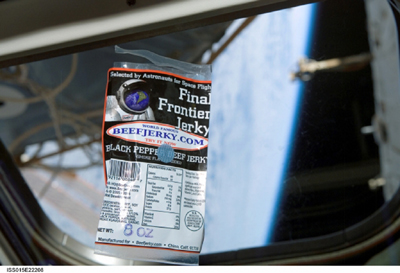
It is no secret that we/some of us at RainyDayMagazine love beef jerky. There is something about the flavor, texture, and convenience of a tasty piece of jerky. As any connoisseur of beef jerky will tell you, they are not all created equal. The best we have ever tasted is definitely from BeefJerky.com.
BeefJerky.com offers four flavors: black pepper, red hot pepper, teriyaki, and traditional hickory. We have tried some of the flavors before, but have never had the "Ring of Fire" and Hickory. When the crew of the Space Shuttle Endeavour took off on their mission to the Space Station, Commander Scott Kelly took with him his favorite snack. If you have a beef jerky lover on your gift list this holiday season, you will not find finer offerings from BeefJerky.com. Oh, the best part about ordering from these guys (aside from the great product) is that shipping is FREE! - Wan Chi Lau (permalink)
|
|||
As all of us here write for a living, so naturally we are in complete solidarity with the WGA picketing for a piece of the Internet pie. Most readers know we are big fans of The Daily Show and we do miss our daily dose. So we were more than thrilled to see that the writers of The Daily Show with Jon Stewart have posted a quick YouTube video explaining their side of the story.
We would have posted it earlier, but we were too busy rolling on the floor with laughter. What the big media execs never seem to quite understand is that the pie will just keep growing if you let it. Make a deal already and lets all get back to work making fun of things again... - Wan Chi Lau (permalink)
|
|||
We came across an image of an amazing pattern the other day and thought it would make a nice RainyDayPuzzler for November. Look closely at the image above. Take your best guess at what it is depicting. We will put the names of those with the right answer into a hat. If we pick you name, you will get one of these below directly from Neuros! To enter the contest, follow these directions: Send us an email with the subject line "I want my Neuros OSD." In the email, tell us what you think the pattern is and include a link from Neuros' website of the prize we are giving away. We'll announce the winner next Wednesday. Good Luck. - Wan Chi Lau (permalink)
|
|||
Tired of soggy microwaved pizza? Want a decent oven, but you live in a 400 square foot condo? Looking for a faster way to roast a chicken on the countertop? Well, the Cuisinart convection oven was designed with all of that in mind. For our FirstUse of this Cuisinart oven we wanted to see if the crust of our homemade pizza would really come out as crispy as that from a commercial brick oven.
We liked how easy this oven was to use. We love how the pizza tasted. We'll test the convection feature with our Rosemary Lemon Chicken in the next few weeks. - Wan Chi Lau (permalink)
|
|||
This summer we posted a little project on Leonardo's Last Supper showing a likeness of the genius himself hidden in the painting. That article generated a lot of emails...some interesting, some "way out there." Recently, we see all over the news that an Italian musician, Giovanni Maria Pala, has discovered a hidden musical score in the Last Supper. Coincidentally, this announcement is timed perfectly with Pala's upcoming book, "La Musica Celata", soon to be available :-)
Regardless of Pala's marketing motives, there may just be a real "Da Vinci's Code" embedded in this and other Da Vinci works. I guess we'll just have to read his book to find out. This "discovery" and the results from the examination of his other paintings will make for interesting discussions for some time to come!- Wan Chi Lau (permalink)
|
|||
We mentioned a while back in RainyDayGarage that we got some TireTotes and thought we would give them a try when it came time to swap out the Summer tires for the Winter ones. With the temperature dropping to the 30s at night, this was the weekend to make the switch. The usual ritual with getting the Boxster ready for Winter is: change the tires, put on the hardtop, do some routine maintenance. Moving the tires around can be a bit messy, especially if they are covered in brake dust. This is where the TireTotes really come in handy.
Each package contains two totes. The TireTote is made from heavy-duty materials (600 Denier Polyester, 70 Denier Nylon) and will fit tires from 22" to 31". When they need cleaning, just toss them into the washing machine.
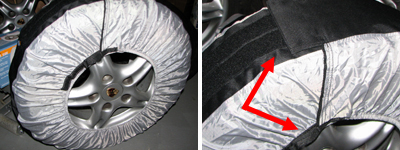
Using the TireTote is simple. The cover unrolls as a strip, which makes it a breeze to wrap around the tire. The elastic is self-adjusting and the velcro secures everything for a perfect fit.
The velcro attaches at two points: center, side. This allows the TireTote to fit snugly around the entire tire. Built into each TireTote is a heavy duty handle. With the velcro strips secured, the tire is easily carried using the strap.
We didn't have any expectations of the TireTotes when they first showed up, but after seeing how well constructed they are and how easy they are to use, we are sold on this product. We also like that the covers protect the wheels from each other when stacked for storage. If you change tires every Summer/Winter or carry a spare inside the SUV, consider getting some TireTotes to make moving and storing tires a hassle free task. - Wan Chi Lau (permalink)
|
|||
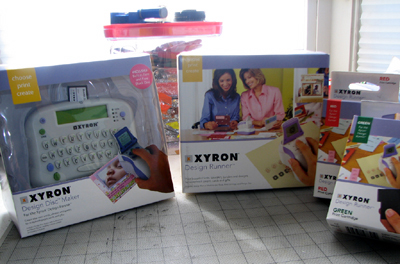
When RainyDayMagazine first reviewed the Xyron Design Runner, we recommened that a great improvement to the unit would be the ability to print a personalized message. Xyron's new Design Disc Maker takes it a big step closer to that goal. Ideally, we would like to be able to design a graphic on the computer, upload it to an SD memory card, and pop it into the Design Runner for printing. However, we understand that the Scrapbooking market has a different audience. The Design Disc Maker approach is a reasonable one for Xyron.
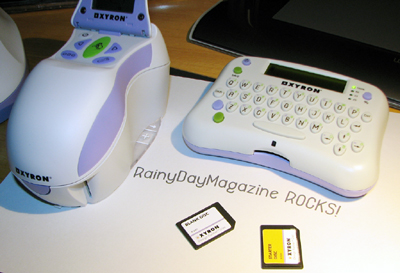
The unit has two slots (top, bottom) to accommodate various Design Discs. There is an integrated keyboard for input. However, there are no graphics creation capabilities in this unit. This is one of the capabilities Xyron can add to this line in the future.
As we had mentioned in our Design Runner review, the Xyron design discs are NOT a standard SD discs and cannot be read with anything else but these machines. This is really unfortunate because users cannot take advantage of the cheap prices of SD cards, the data cannot be backed up anywhere, and if you lose a card, you can't just go to a local computer store and get a replacement. If Xyron ever decides to open up this device, we expect there would be an explosion of creative fonts, graphics, and borders available from all kinds of sources. Imagine being able to purchase and download a design from the web and print it immediately... now that would seriously use up some ink! We are actually surprised that Kodak or Epson doesn't have a strong presence in this space. The entire package (Disc Maker, battery, blank disc, manual) comes ready to use. You will need the Design Runner in order to print out the message. If you do want graphics and different fonts, you will need to provide a fonts disc. We'll cover how all of this work together in the upcoming FirstUse article.
The size Design Disc Maker is about that of a standard labeler. It uses the same battery type (9 volts) as the Design Runner. We are not big fans of 9-volt batteries and have always found 9-volt battery connectors to be easy to break. There are also not as many (any?) rechargeable battery options available in the 9-volt form factor. In our FirstUse article, we will go through our experience with the setup, entering a message, and getting it printed. The short version is it is faster than you can spell "scrapbooking." We have a feeling this pair will be a lot of fun to use for the upcoming Holiday season!!! - Wan Chi Lau (permalink)
|
|||
Last month some of RainyDayKitchen folks attended the Boston Vegetarian Food Festival. They came back with a few offerings they particularly liked from vendors at the show. One product line which stood out was the meatless jerky and sticks from Primal Spirit Foods. All of us here have been busy these past few week "testing" them out.
The texture of these jerkys is amazingly close to that of the meat version. All of the flavors we tried were savory, strong, and quite satisfying. Some of us like the BBQ flavor the best. Others are more drawn to the Thai Peanut version. If you are looking for some healthy snacks with taste, we can heartily recommend these Meatless Jerky from Primal Spirit Foods. Give them try and tell us what's your favorite! - Wan Chi Lau (permalink)
|
|||
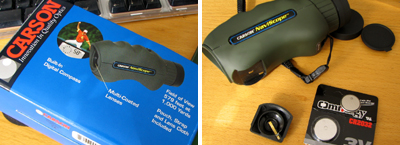
We have been using the Carson Spotting Scope quite a bit this Fall. It is a great scope that travels well, but sometimes we want a scope that fits in our pockets. The Naviscope is perfect pocket scope for all those times when you want to get close to the action without the bulk.
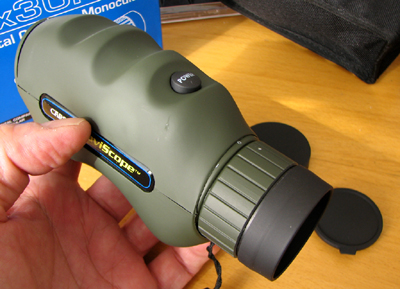
This Carson Monocular is a ruggedized, compact unit, with a form fitting grip. The mold is for a right hand fit, but it can be used with the left hand without any obstructions.
One additional feature of this Carson NaviScope is the built-in digital compass. The read-out is internal and is activated by the button on the top of the scope. When pressed, the direction is visible for a few seconds in the LCD display...a very cool and unique capability. You do have to give up some features: the focus is fixed, there is no zoom capability, and it cannot be used with a tripod. However, it is small enough that you can have it with you all the time.
If you had a view like this over Cambridge, wouldn't you want to check it occassionally? Well, the Carson monocular will not only bring the view in closer, but it will also tell you in what direction you are looking. - Wan Chi Lau (permalink)
|
|||
Some readers wrote that they are having trouble seeing Comet Holmes where they live because of all the light pollution from street lamps and other urban light sources. Others were complaining that it gets really cold just standing around at night. We can't help with the first problem (bb gun... cough, laser...cough cough), but we can pass along this "how-to" to help readers stay warmer when performing their nocturnal heavenly observatory activities.
Barry Armstead of Australia built this wonderful observatory in his backyard from locally available parts and a keen eye on budget, usability, and practicality. This project will "WowUs" any day of the week! - Wan Chi Lau (permalink)
|
|||
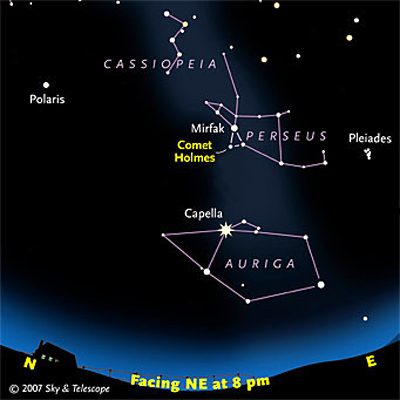
Comet Holmes was discovered by Edwin Holmes on October 6, 1892. This comet's orbit is about seven years. Because its orbit is relatively short, it has been well studied. In order to see it, you have to have a pretty good telescope. Even then, the view is fairly dim. This past October 24, Comet Holmes suddenly got about a million times brighter. So bright that, if you knew where to look, you could see it with the naked eye! Astronomers and night sky enthusiasts around the world have been buzzing with the news of this event.
The current theory of how this happened is that the comet must have had an interior with cavities filled with ice. When the comet got close enough to the Sun, the melting of the ice built up enough pressure to cause the comet to explode. It is unclear what the appearance of this comet will look like in the coming weeks as it continues to expand. If you have clear skies and want to get a peek at Comet Holmes over the next few weeks as its appearance changes, look toward the NE from around 8PM on. Truely a once in a lifetime event! - Wan Chi Lau (permalink)
|
|||
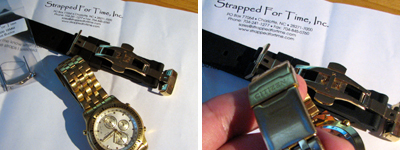
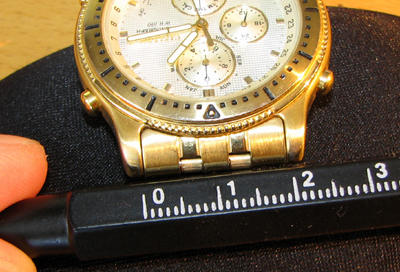
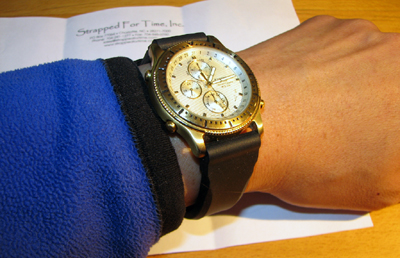
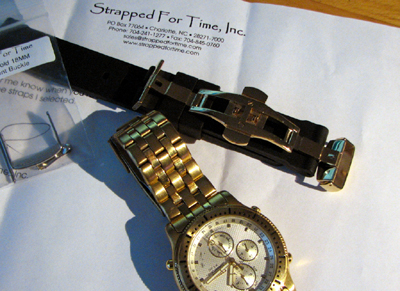
This Citizen chronograph is a really great timepiece. The original band is the "Breitling® Pilot" style, but the gold plating is showing quite a bit of wear. We like the gold. However, it can be a bit too much for weekend wear.
For this makeover, we decided that a black silicon band for a diver's watch would be a good replacement. It is comfortable enough for extended wear. A gold deployment clasp dresses up the silicon band so it will work with a suit but not so much that it would be out of place with a pair of jeans.
Adding a clasp to the diver band is very simple. You can follow the directions on the StrappedForTime site or ours from last July. Either way, it should take less than 5 minutes to install. The black diver band with the gold clasp made this fancy Citizen chronography suitable for both office and weekend wear. If you have a favorite watch you wish could pull double duty, consider doing a "makeover" with this StrappedForTime diver band/metal clasp combo.
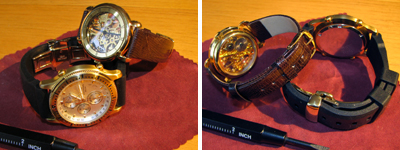
We end our "makeover" series with a few shots (front, back) of the two watches. The inexpensive skeleton watch can definitely hold its own in any outing. The Citizen chronograph is toned down, but sufficiently sophisticated for any occasion. We certainly are not going to try to talk you out of buying a new watch, but you may be pleasantly surprised by what a little "nip/tuck" can do for an old favorite! - Wan Chi Lau (permalink) BTW, Nicklas Abrahamsson of Stockholm is our winner of the "Outstanding in the Field" puzzler! Congrats !!! We'll be sending Nicklas his very own Halback Array kit for sending in the first correct answer. - Wan Chi Lau (permalink)
|
|||
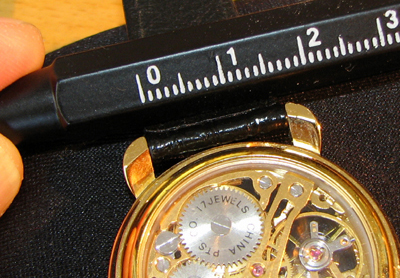
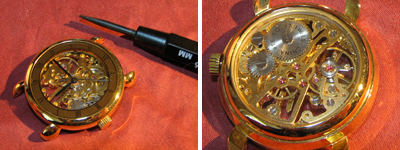
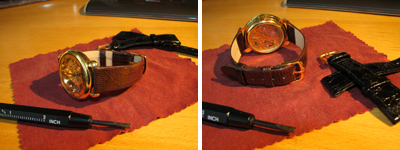
The size of a watch band is measured in either mm or inches. If you need to convert from one to the other, here is a handy chart from StrappedForTime. The size of the strap for the skeleton watch is 17mm. It is important to size it properly as not all straps are available in all sizes.
Removing the old band is easy. It can be done with a small screw driver, but it is much easier with the proper tools. The retaining pins are spring loaded and will probably pop out. Take care not to lose them during the removal process.
The strap we got from StrappedForTime is made with lizard skin on top of leather. The back is soft to the touch. All of the seams are smooth. The fit and workmanship is excellent. We think the grain and tone of the new strap complements the exposed works alot better than the cheap black leather one that came with the watch.
The upgrade of this inexpensive skeleton watch took less than 15 minutes to complete. If you have an inexpensive watch that you really love, consider upgrading it with something exotic from StrappedForTime. You may love it even more! Tomorrow, we'll completely change look of the gold Citizen watch using a black rubber diver band and a gold clasp. This upgrade is perfect for those who want double duties (sport, dress) from a chronograph. - Wan Chi Lau (permalink)
|
|||
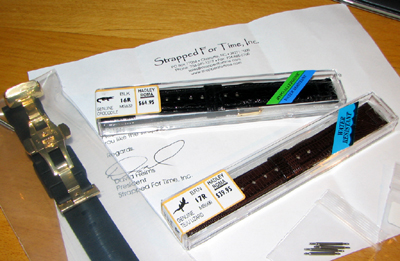
Over the summer we ran a series of RainyDayProject articles on how to replace a watch band. We have received quite a bit of mail asking about some of the more exotic options available from StrappedForTime. Since the Holiday season will soon be upon us, we thought it would be fun to do a follow-up project to give readers some Holiday Gift ideas. Instead of giving your significant other a new timepiece as a present, considering giving a set of high end straps so they can upgrade their favorite watch!
There are so many quality options available at StrappedForTime that receiving a new band may even be BETTER than receiving a new watch! Check out this weekend's project and see if you don't agree.
For our Holiday RainyDayProject, we have chosen three watches to upgrade: a high end Omega, a medium priced Citizen, and an inexpensive but exotic looking skeleton watch. We have selected a variety of straps to show how they can give a watch an entirely different character. We also took this opportunity to inteview David Helms, President of Strapped For Time, and asked about the various offerings available on the site: How long has Strapped For Time been in business? With all the watch parts sources available, how does Strapped For Time decide what to offer? Are there any products “exclusive” to Strapped For Time? What is Strapped For Time’s most popular product? What is your favorite item offered at Strapped For Time?
|
|||
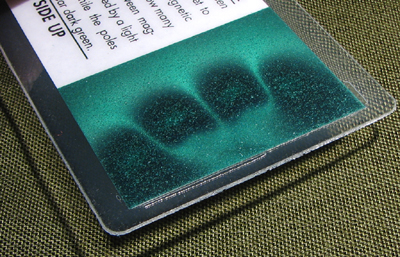
With the Halbach Array successfully assembled, it was time to... "Uhh...how do you know it was put together correctly?" asked one of our smart-ass interns. In truth, we don't know. The only way to know is to somehow "see" these invisible magnetic fields.
The kit came with "viewer." It is a thin layer of oil encased in plastic. In the oil, there are millions of magnetic particles which, when exposed to a magnetic field, will orient itself to reveal a pattern.
The contest is to match up the field with the orientation of the magnets. If you think you know, send us your answer in an email with the subject line "Outstanding in the field!" First reader with the correct sequence will get something from our pile of goodies. - Wan Chi Lau (permalink)
|
|||
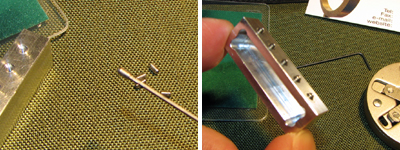
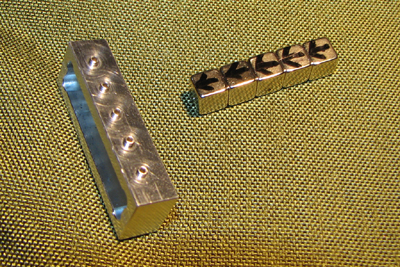
Assembling the Halbach Array was an interesting introduction to the strength of magnets and magnetic fields. We are not speaking in reference to the demostration of any scientific principles, but from experiencing directly the power of the fields themselves. The kit from Gyroscope.com came with all the parts needed to construct the Halbach Array: c-channel container, retaining screws, hex key.
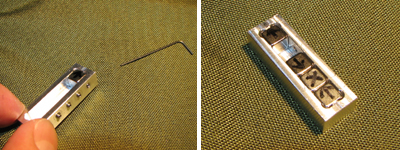
To properly orient the five magnetic fields, we marked the magnets with arrows. It is not important whether they are pointing North or South, just that they are all marked the same way. Because of the orientation of the magnetic fields, we found it EXTREMELY difficult to put in the last magnet. It felt as if we were trying to push on an invisible spring. The magnet kept popping out. While possible to do by hand, we found that it was much easier if we gripped the magnet with something and pushed it into the remaining spot.
The Immix was the perfect tool for the last and most difficult step of this project. The magnet attached itself to the teeth. We gripped it about midway so it protruded out. This allowed us to feel our way acros the top of the array for the opening. Once aligned, we pushed it home with a plastic pen and tightened the retaining screw. Tomorrow, we will post some pics of the magnetic fields generated by this Halbach Array. There will also be a contest to match up the field with the orientation of the magnets. We'll have something fun for the reader with the first correct answer. - Wan Chi Lau (permalink)
|
[Jun] [May] [Apr] [Mar] [Feb] [Jan]
....... 2006 .......
[Dec] [Nov] [Oct] [Sep] [Aug] [Jul]
[Jun] [May] [Apr] [Mar] [Feb] [Jan]
....... 2005 .......
[Dec] [Nov] [Oct] [Sep] [Aug] [Jul]
[Jun] [May] [Apr] [Mar] [Feb] [Jan]
....... 2004 .......
|
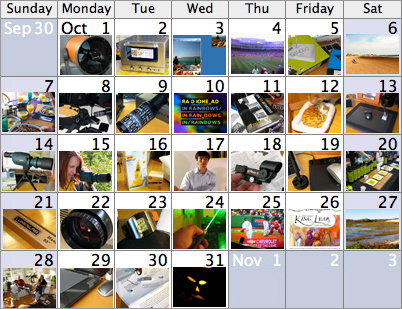
October's Gear
| ||
| RainyDayBuzz* | ||
|
||
| GET GEAR* | ||
|
||
| RECENT TRIPS* | ||
|
|
||
| GO PLAY* | ||
|
|
||

