|
|
 |
RainyDayMagazine's content can now be licensed for your print magazine or web site. Please contact us directly here. If you want to see something reviewed, then drop us a note with a link and we'll be happy to take a look.
NOTE: Click here to read more about our approach to product reviews. |
| |
| Dec 8, 2010- Rainy Day Gift Guide: Tools... |
Have someone on your Holiday Gift list who loves to make things, works on their car, or is a DIYer around the house? Give them something that will help them enjoy what they love to do even more.

The collection we have put together is a mix of stuff we have used for years and a few items which are brand new for 2010. As always, our guiding (ha...pun) principle is "We wouldn't put it in the gift guide if... [more]-Holiday Gift Guide: Tools
|
|
| Dec 1, 2010- Paradise City Arts Festival... |
With Thanksgiving over, the Holiday shopping season has officially started. We got an early jump when we spent a day at the Paradise City Arts Festival in Marlborough, Mass. We are not big on craft shows, but we have been to this show a few times over the years because this festival features works which are at a level of artistry and craftsmanship much higher than the typical fair.

We didn't have to go very far into the show before we happened upon something we really liked. Ken Salem of Salem Board & Beam (Northampton, MA) was talking about his line of furniture made form salvaged and reclaimed hardwoods. We listened and chatted with Ken for a while about what makes them different. We learned that 80% of the lumber used in the creation of his pieces is from reclaimed and salvaged wood sources. Because of that, every piece of furniture has a back story. How cool is that?

Of course, for those with a more modern bent, there are furniture makers at the show, like TrebbeModern, that will satisfy those cravings (we are partial to them because we love "making" pieces ourselves). We love the subtle curves, simple lines, and functional forms. Don't let the... [more]-Paradise City Arts Festival: Marlborough
|
| Nov 4,2010- Stainless Resurfacing Project... |
All of the new (to us) appliances in the RainyDayKitchen have a stainless steel finish. Stainless steel is a great material because it is easy to clean, durable, and requires minimal upkeep. One major appliance which has not been upgraded is the Jenn Air refrigerator.
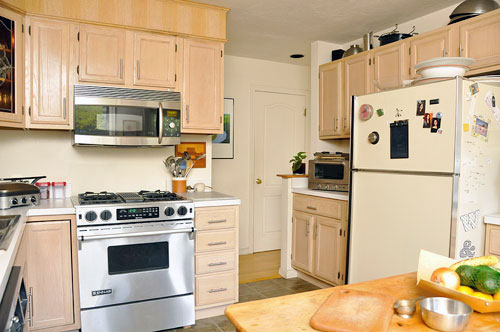
As there is nothing wrong with the refrigerator replacing it solely for cosmetic reasons just seemed ridiculous. The solution we came up with (to solve the dilema of having all stainless steel appliances except the fridge) was to refinish the front panels with stainless steel FXSheeting from Alsa. Yesterday we posted a write-up of the Alsa Stainless Steel FXSheeting. Today we'll show you how we used the sheets to resurface the... [more]-Stainless Resurfacing Project
|
|
| Nov 3,2010- Alsa Stainless Steel FXSheeting... |
Stainless steel is a great material for the kitchen. We have been slowly replacing the major appliances with items we find on Craigslist (microwave, stove, sink, etc...). Buying things on Craigslist saved us a LOT of money and doing it ourselves gave us a chance to have some hands-on fun. However, not all of the appliances in the RainyDayKitchen needed to be replaced. Sometimes all that is needed is a facelift. We had considered refinishing some of the surfaces with stainless steel paint, but before we use the paint on a project such as a large appliance, we would want to see how it looked on something smaller. Someone then suggested we consider using stainless steel film.

Many of the films and foils are faux finishes which only mimic the look of stainless steel. They are quite thin, and it is unlikely that those materials will stand up to the daily wear and tear of an active kitchen. After a bit of research, the interns decided that the Brushed Stainless FXSheeting from Alsa Corporation was what we needed. The FXSheeting appeared to be heads above anything else that is on the market. There is nothing "faux" about them. FXSheeting is made using real stainless steel. The difference is... [more]-Alsa Stainless FXSheeting
|
| Sep 30,2010 AquaPure:Installation... |
Originally, we had the Aqua-Pure faucet installation scheduled for later in the month. Our plans got shuffled a bit and a slot opened up unexpectedly. Never wanting to let an opportunity to get their hands dirty pass by, the interns convinced us to move the Aqua-Pure project up the queue and get it done.

We decided to install the Aqua-Pure AP Easy because it was both the more advanced of the two systems and its appeared simpler to set up. There were three basic steps to the installation: mount the filter head, attach the cold water feed, affix the faucet. The kit was designed to minimize the tools required for installation. In fact, all we needed was a... [more]-AquaPure: Installation
|
|
| Sep 29,2010 AquaPure:Water Filtration Systems... |
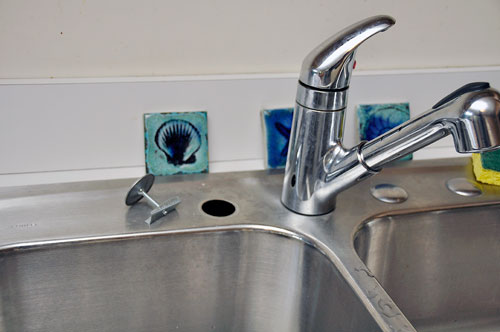
The "new" sink we installed in the RainyDayKitchen at the beginning of the month is working out great. Unlike the old porcelain sink, the stainless steel sink had three pre-cut openings for things like a soap, instant hot water, or a filtered-water dispenser. We had asked RainyDay readers which project would be of the most interest. The installation of an under-sink water filtration/purification system was the clear preference and the systems mentioned most often by name was Aqua-Pure by 3M. So today, we are going to take a FirstLook at the AP-DWS1000 and AP Easy from Aqua-Pure. Later in October, we'll show you how easy it is to install one of these under-sink systems.
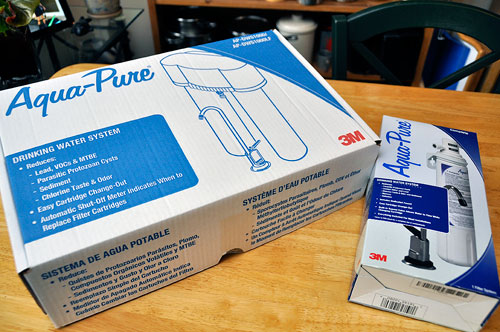
While many may recognize 3M as the maker of Scotch Tape and Post-it Notes, they are actually much bigger than just those two brands. 3M is a hugely diversified technology company with a global presence in electronic, health care, home, office, and many other sectors. With 100+ years of history and over $20B in annual sales, when 3M purchased CUNO in 2005, they acquired a company with a leadership position in water filtration and purification. CUNO's (now 3M) Aqua-Pure Water System is typically used in the kitchen to... [more]-AquaPure: FirstLook
|
| Sep 28,2010 - Front Porch: Painting... |
While some of us were busy cleaning up the garden, others were busy putting the finishing touches on the front porch. The weather was mostly cooperative. Saturday got a bit warm (high 80's), but that was helpful because everything dried really quickly. We managed to get two coats on the porch floor before the day was through.

We did all of the painting with just brushes (two 4" brushes, one 2" brush, one 1" brush). At first we thought it would be slow, but it was actually a lot quicker than expected. Rollers are great for flat walls and ceiling, but a brush is much better for surfaces with gaps (decks) and... [more]-Front Porch: Painting
|
|
| Sep 23,2010 - Front Porch... |
The front steps to the RainyDayMagazine office was repaired a few years ago. We probably should have repainted the entire front porch at that time, but other projects took precedent. Three years later, things have gotten to a state where we could not put it off any longer. Fall is an excellent time for painting. The temperature is cooler, the air drier, but there's still plenty of daylight. We checked the weather forecast. As rain was not on the horizon for the week, we pulled the trigger on the project.


As anyone who has taken on a painting project knows, much of the hard work is in the preparation step: cleaning, scraping, priming. To quickly remove the paint from the already peeling spots, we used a... [more]-Front Porch :Scrape and Prime
|
|
| Sep 16,2010 - Fein MultiMaster FirstLook... |
Our 2010 Fall project will be to repair and paint the trim, deck, and stairs of the front entryway to the RainyDayMagazine office. We have been putting off the project because nobody wanted to do all of the work (sanding, scraping, etc...) needed to prep the exterior. To get the interns excited (or just out of their chairs), we decided to entice them with a tried and true motivator ...labor-saving power tools!

At the end of Spring, we made a quick mention of these oscillating tools. We are new to the multi-tool category. Apparently, this is true for quite a few readers as well. Judging by the emails, many were eager to learn more about the Fein MultiMaster. There are a few different configurations to the MultiMaster line. The tool is the same. The only difference is... [more]-Fein MultiMaster: FirstLook
|
|
| Sep 15,2010 - Stainless steel pulls... |
The handles on the doors and drawers in the RainyDayKitchen have always been a bit too "antique-ish" for our taste. As handles never wear out there was never a good excuse to get rid of them, other than just aesthetics. Stainless steel handles are typically around $6.50 online and can cost up to $13 in stores. Even though it would only cost a few hundred dollars to change them out, it just seemed frivolous to spend money on handles when there are other more important things we could use it for. However, when the interns (who seem to spend more time surfing Craigslist than actually doing their job...or IS that their job?) found an ad from someone selling thirty stainless steel handles for $40, our interest got piqued.

The ad had just posted that day, but a deal this good would not last for long. We did a quick count of how many we needed ...thirty-two, including the pulls in the two bathrooms. Hmmm...could work. The only thing we needed to check was... [more]-Stainless Steel Drawer Pulls
|
|
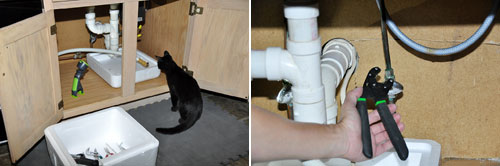
| Sep 9,2010 - Installation and plumbing... |
The stainless steel sink we got weighs around ten pounds, much lighter than the iron/porcelain sink it replaced. The edge of the sink has a bit of a bow so when it's locked down, the lip will be flat against the countertop. When we removed the old sink and fitted the new one, we figured it would be a simple matter of installing the clips to lock down the sink.

We, of course, had not thought at all about how the clips work. We knew they must clip onto the edges of the countertop, but did not appreciate (until we actually tried to install the clips) that if the anchor rail of the sink is inserted into a groove in the countertop, the clips would not be able to grab onto it. Doh!!! This realization meant we had to remove the offending particle board instead of just... [more]-Sink Upgrade: installation and plumbing
|
|
| Sep 8,2010 - Cutting and fitting... |
When we removed the old sink the extent of the damage from the rust was plain. We also understood why the rust problem had developed in the first place: the original installer never bothered to seal the rim of the sink (which would have prevented water from seeping underneath the sink).
There was no caulking under the lip of the sink at all. Over time, the lip gradually rusted from the moisture and crumbled. We are not sure if the installer forgot or was just too lazy to bother. Either way it caused a lot of damage to the surface and to the exposed particle board.

We cleaned it the best we could, but some of the stains might be permanent. Most of it will be covered by the lip of the stainless-steel sink, but some of it may be visible. BTW, if you were wondering why we had the Rockwell JawHorse in the kitchen, it was because we needed a sturdy platform to rest the original sink on after we lifted it out from the counter. The JawHorse was the only thing we had which was heavy-duty enough to hold up the sink. It is a compact and handy "third-hand" when you need one.
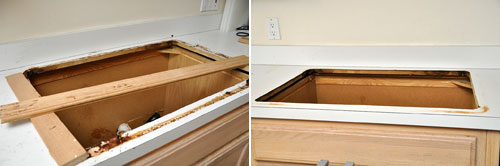
Removing the heavy, rusty, sink was the most difficult part of this DIY project so far. However, when we dropped in the stainless-steel sink, we realized immediately that we had a new problem on our hands. The opening in the counter was not large enough to accommodate the new sink. It was about 3/4" too small all around. The problem is that stainless-steel sinks have a mount around the lip for the pull-down clips, something which we had completely overlooked.

To make the cut, we turned to our RotoZip SpiralSaw. We last used this saw to make the circular cut in the floor beneath the stove for vent. For this job, we will be using the jigsaw attachment. Changing attachments is a simple process with the RotoZip: detach the handle, add attachment (the attachments have their own handles). If you are planning on doing your own home-renovation projects, consider getting yourself one of these cutters. They come in corded and cordless version. We like the cordless version for its portability. If you do get the cordless unit, get an extra battery. The battery ran out a few times during this job and we had to wait for it to recharge. If we had an extra battery, we could have saved ourselves some time.

No matter how careful one seals the area, dust is going to get in the air and settle on things. The trick for minimizing dust dispersion is to clean as you go. The ShopVac HangUp Pro is a great all around heavy duty wet/dry vacuum cleaner. Its slim vertical profile was designed for hanging, but we have found that it works just fine on the ground. Don't try to pull the unit by the hose as it is a bit top heavy and may tip over.

"Let the tool do the work." This is the typical advice from anyone who has used power tools. If you overwork the tool, something is going to give. It will either be the motor or the cutter. In our case, it was the cutting bit. We realized that trying to make a 1" deep cut in high-density particle board with one pass was not the right approach. Making multiple cuts at increasing depths using the RotoZip plunging-router attachment was the better way to go. It took longer, but it did not stress the tool nor create any burning odor from the particle board. "Slow is smooth, smooth is fast"...at least that is what they teach at sniper school. Apparently, it is true for a lot of other things as well :-)

The RotoZip tool gets more of our respect every time we use it. Its way of cutting (using a cutting bit instead of a spinning blade) is so much more precise and maneuverable that once you have used it, you may not want to use anything else.

Now that we got the sink to fit, we can finally move on to the plumbing portion of our sink upgrade project. Tomorrow, we will wrap up this DIY project with a discussion on our experience in securing the sink, reworking the drainage pipes, and hooking everything back up. Something ALWAYS manages to pop up just when you think you are home free. Check back tomorrow to see what we ran into that had us scratching our heads, and how we eventually got around it. [Permalink] -Sink Upgrade: cutting and fitting
|
|
|
| Sep 7,2010 - Sink removal |
The sink in the RainyDayKitchen has been looking worse and worse these last few months. We have been saying since March "We NEED to replace the sink," but we did not get around to this project until now. We first thought this was a "drop-in" job, but then realized it would be a LITTLE more complicated than that. So we kept putting it off in favor of easier tasks. Finally, we could not put it off any longer and had to get in there and JUST DO IT.

The interns cleared off the counter and emptied out the cabinet underneath. We thought the project would not take longer than a day (six hours), but blocked out two days just in case we ran into any problems. The project had the following tasks:
- Turn off the water to the sink
- Turn off the electricity to the disposal
- Removal of the old sink (disconnect disposal, disconnect hot/cold pipes, lift out sink): time estimate - 1 hour
- Install new sink (apply caulking, insert sink, install sink clips): time estimate - 1 hour
- Install new PVC pipes (measure, cut, fit): time estimate - 2 hours
- Reconnect disposal: time estimate - 1 hour
- Reconnect hot/cold pipes: time estimate - 1 hour
The first task was to remove the sink. Milo took a look and said, "Disconnecting the disposal, the hot/cold water pipes, and the drainage pipes from the sink all seem pretty straightforward, but Dude, there is no way I'm going to be of any help lifting this giant hunk of iron." Well, we'll have to deal with that later.

Getting the disposal disconnected was pretty easy. There were four points (to sink, to dishwasher, to drainage, to electrical) where with things connected. Disconnectingthem took about 20 minutes. The only difficult part was disconnecting the very stiff electrical wire from the body of the disposal. Once that was accomplished, we were able to lift the disposal free and put it aside.

The next step was to disconnect the hot and cold water feeds from the faucet. The ClampLight and the Bionic Wrench were both a big help in getting the task accomplished in less than the allotted time. We were now about 30 minutes ahead of schedule!
With things disconnected, we were only able to get the sink out after expending some serious effort. The problem was not just that the sink was heavy and unwieldy. It was difficult to lift it up and out over the counter with just two people (especially if neither one could bench press 300 lbs). After some thought and some interesting use of leverage, we did manage to free the sink. Any time previously saved was used up (and then some) getting the sink out.

The replacement sink is a stainless steel unit made by Kohler. The faucet/sprayer is made by Moen. We found it on Craigslist, negotiated a great deal for it, and got it back to the office thinking it would be a simple matter to swap the sinks. Unfortunately, two unanticipated snags complicated our project. One of the problems we realized as soon as we got the sink back to the office. The second problem only became evident after we got the old sink out and tried fitting the new sink in its place.

Both bowls of the new sink were 8" deep. The right bowl in the old sink was just 4" deep. This meant that the plumbing underneath was 4" too tall for the new sink. Judging by the look of things, it didn't look like there was 4" of pipe we could remove to make everything fit. We would have to put in new pipes if we wanted to accommodate the disposal underneath the 8" sink. This was the first problem. As for the second problem, we'll show that to you tomorrow. [Permalink] -Sink upgrade: Removing the old sink
|
|
|
| Sep 1,2010 - Vacuum Belt Replacement |
The Eureka Capture+ vacuum cleaner served us flawlessly for almost three years. The vacuum cleaner is excellent on furniture, rugs, and bare floor. We use it weekly to clean up after our interns. The other day, a groaning noise started emanating from the front sweeper/roller. Since no smoke was coming from the unit, we kept using it. However, the noise got louder and louder. Something was clearly straining to do something. We switched off the unit, unplugged it from the wall, and gave it a once over. Nothing seemed to be the matter visually. So, we plugged it back in, turned it on, and heard a loud snap. OK...now we did it.

We switched off the vacuum and back on. The noise was gone, the motor appeared to be running, but it just wasn't vacuuming up anything. It turns out the belt connecting the sweeper to the drive wheel had broken and the sweeper was no longer spinning. The spinning of the sweeper apparently was integral to the effectiveness of the whole vacuuming process :-)

Fortunately, replacing a belt in our Eureka Capture+ vacuum cleaner was a very simple process. We removed the four retaining screws from the bottom of the unit and lifted off the cover. With the top off, we had full access to the front sweeper/roller assembly.

To replace the belt, just lift out the sweeper/roller assembly, slide the new belt on the roller, loop the other end of the belt onto the drive gear, and place the end of the assembly back into the slots on the sides.

With the new belt in place, replace the top and give it a test run. If the vacuum or the roll is not working, press the reset button on the side. Vacuum cleaners have a motor-burnout prevention circuit in place to prevent damage should the sweeper get entangled with a string or something. Once tripped, it needs to be reset before the brush will turn on again.

Belts are rubber and will stretch and wear out. The belt turns the brushroll at thousands of revolutions per minute. The tighter or newer the belt, the better the vacuum will perform. So, it is important to check the belt periodically for any signs of wear that can result from normal use over time. We just wait until it breaks. Those who like their vacuum cleaner to work at peak capacity should plan to change the belt every six months.
Replacement belts are inexpensive ($3-$5/pr) and easy to find online. We received excellent service and fast shipping from VacBelts.com, TotalVac.com, and Filtrete. The first two sites have pretty much everything needed to get whatever vacuum cleaner you have back up and running. In the event that your vacuum cleaner is no longer serviceable, they also have great prices on brand new unit. So if your vacuum cleaner stopped working, take a look to see if it is the belt...before you take it out to the trash! [Permalink] -Vacuum Belt Replacement
|
|
|
| Aug 6,2010 - Ceiva InTheWild |
In May, we did a FirstLook and FirstUse of a few digital photo frames from Ceiva. We have both the CeivaShare and CeivaPro models. The CeivaShare frame is in our office in Boston and the CeivaPro was sent to one of the editors' parents in New York. After using them for a month, we felt we were ready to file the InTheWild report. Three months later, we are happy to report our initial enthusiasm with the Ceiva frames has not diminish in any way. In fact, one of the guests at FirstGrill 2010 told us she purchased one for her dad after seeing ours.

Displaying photos using digital photo frames are better than using a traditional frame in many ways. In the image above, the room was brightly lit. The print hanging on the wall is difficult to see, but the image on the digital frame sitting under the stained glass window is clearly visible from across the room. A digital frame can automatically rotate its display amongst a large number of photos. We expect to see frames capable of showing videos with sound in the near future.
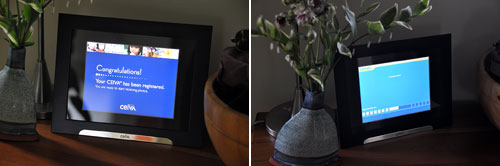
There are a LOT of digital photo frames on the market. So what makes the Ceiva frames different? If we were to compare the Ceiva frames on the basis of display quality, styling, and ease of use, they would definitely be up there near the top. It is the ultra convenience of being able to send a photo to the photo frame without having to go through a computer on either end that makes the Ceiva unique. Ceiva is the only digital photo frame that we know of with the ability to receive images via email. Each Ceiva frame has its own email address. Anyone can send an image to the frame via email from anywhere in the world. This feature is what sets the Ceiva apart from all others, and in our opinion, makes it superior to all other frames. With cell phone camera resolution getting higher all the time, more and more people will want the convenience of this feature.

Some readers have expressed concern that they will have to continue to pay for a membership in order to use their Ceiva frame. Since the frames can cost up to $150, we agree that the frames should work without any monthly fees. However, if you want "just email it to the frame" convenience (we feel that it is a superior feature and worth paying for), Ceiva is the only game in town. To help convince those who may be on the fence about the value of the service, a free one-year membership is included with every frame. After using it for three months, we know we are hooked. [Permalink] - Ceiva InTheWild
|
|
|
| July 21,2010 - Water water everywhere... |
Most folks in the US don't think about the quality of the water they get when they turn on the tap. Drinkable water from the faucet is expected. Earlier this Spring, a huge pipe which brings clean water into Boston burst and plunged the city into a water emergency. For a few days, residents had to pay a little more attention to their water. As it turned out, the water supply was fine and no one was really at risk during that period. However, we did field a bunch of questions about water filtration and the like. As the weather now hovers in the 90's more often than not, we thought it timely to talk a little about proper hydration and water-related topics.

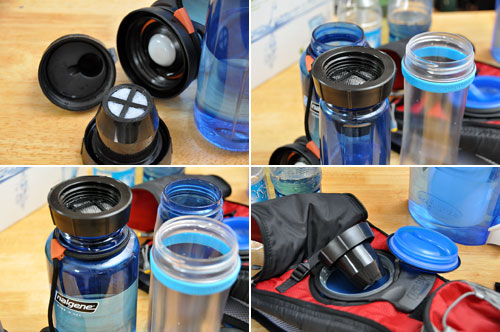
While the water from the tap is usually very clean, it might not be very tasty. Sometimes it is because the pipes are rusty. Other times it may be due to the clorination or other processing residues. None of it is particularly harmful, but it can alter the "character" of the water. For great tasting water, running it through activated charcoal will usually take out any odor or odd taste. One convenient way to do that is to put a filter on the faucet. While this is possible at home, you can't do tht when you are out an about. This is where something like the Hydros portable filter comes in handy.
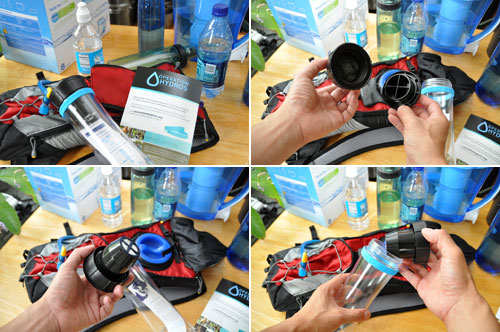
Hydros is a BPA-free plastic water bottle that has an antimicrobial FastFlow filter as a cap. The reusable filter water bottle is made from Eastman’s Tritan™ plastic, which is chemical and heat-resistant. Dropped it? It won’t break. Dishwasher safe? Of course. When the Hydros people say the filter is fast flowing, they are not exaggerating. Hydros' Fast Flow Filter™ technology reduces contaminants from tap water quicker than the typical pitcher filter. The filter uses IonArmour's natural, triclosan-free antimicrobial technology, which actively defends against odor-causing bacteria.

IonArmour®-enhanced products work by using an infusion process that durably embeds microscopic active particles into surfaces, the very places where microbes normally flourish. An untreated water filters can start to smell a little funky after a while. Surfaces of the Hydros filter are infused with these antimicrobial particles and are protected against microbes for the natural life of the product.
Having a fast flowing filter is great. We wished it would fit some of our other plastic bottles. Even though the Hydros' filter will not screw onto any of our Nalgene bottle, it will fit the openings. If we are careful, we could even use it with our CamelBak pack.
Buying and using a Hydros bottle does more than just reduce the plastic waste associated with disposable bottles. One dollar from each Hydros bottle goes toward a water infrastructure project designed to be socially, economically, and environmentally sustainable. An example is Gundom, Cameroon, where 2 in 5 children drink unsafe water from tiny streams or ponds. Operation Hydros has teamed up with Engineers Without Borders (EWB) to bring clean water to this village.
By donating $1 ($1=2,000 gallons) from every bottle sale, Hydros helps EWB provide potable water that will be available year-round. You can find out more about the Gundom project here.

After we posted our FirstLook of the ZeroWater unit in March, we got a few of emails from readers who said we should check out a water purification system from HoMedics called Restore. It should be noted that neither the ZeroWater or the Hydros filters will make microbiologically unsafe water SAFE to drink. The Restore system's difference to the other two is that it cleans the water by combining germ-killing UV technology with a water filter. So in addition to removing chemicals and particulate matter from the water, it also actively kills bacteria & viruses which may be too small to filter out using the standard passive methods.
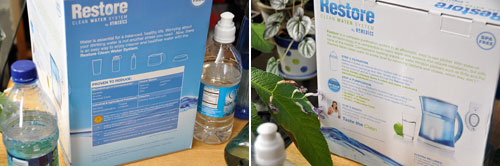
All of this water talk is making us thirsty. We'll go hydrate and will come back and take a FirstLook at the Homedics Restore filtration system next week. There are some difference with the ZeroWater unit which we'll highlight in the FirstLook. In the meantime, don't forget to drink plenty of water and stay cool. It's hot out there. [Permalink] - Water water everywhere...
|
|
|
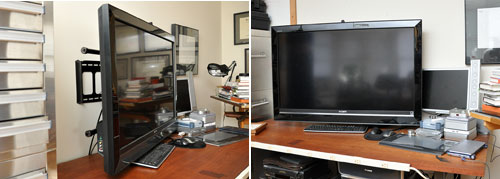
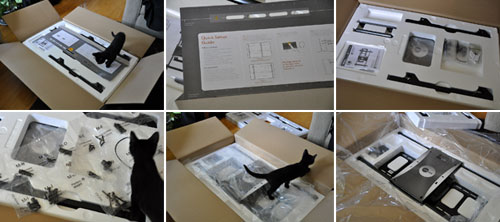
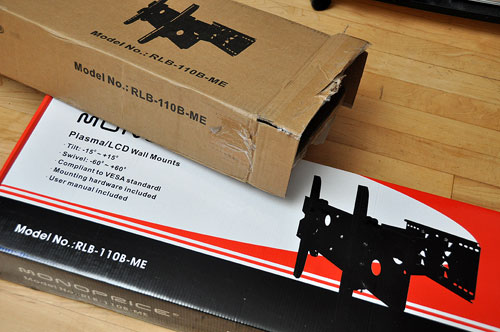
| July 20,2010 - OmniMount Power55 Installation... |
When we started looking at wall mounts for our Sony LCD panel, we thought a low profile one would be best because we wanted the TV to be close to the wall. The more we thought about it, the clearer it became that we needed an adjustable one. A manually adjustable mount would work, but constantly having to loosen and tighten the knobs would be a problem. We then came upon the OmniMount Power55. The Power55 has all of the angle, tilt, and extension adjustments we wanted, plus all of those can be made via a remote control.

We took a FirstLook at the Power55 earlier in the month. Our goal was to have it installed in time for the Finals of the FIFA World Cup. A few weather-related events (95º and no air conditioning) made it questionable whether we would get it up on the wall before the big game. Thanks to an intern's suggestion that we do the installation after sundown so folks would not be sweating over each other, we managed to complete both the installation and the photo shoot without anyone fainting.

The installation was actually quite simple: install the brackets on the LCD panel, attach the mount on the wall, hook the panel on the mount. The first and last steps were simple enough. It was the middle step which, while not diffult, required a little bit of planning and measuring.
Mounting the brackets on the back of the LCD panel was just a matter of using the right size screws. The kit came with a large selection and one of the sets fit the Sony. The only caution here is to not over-tighten the screws as that could cause damage to the back of the TV.

A template was included with the kit. The template takes almost all of the measuring out of putting up the mount. Not everyone has to do this next step, but as we had to make sure the bottom of the LCD panel cleared the desk, we had to take a few measurements (hook offset, rail offset) to make sure we placed the template high enough on the wall. A stud finder helped us locate the 2x4 supports behind the sheetrock. We marked the spots, computed the center of the TV, and taped the template into place. It was then easy to see how much we needed to shift the template so we could line up an available holes in the template with the studs in the wall.

Once the template has been leveled and the calculations double-checked, we drilled the pilot holes for the mounting screws. The drilling the pilot holes is an important step as it will make it easier to screw in the bolts AND it will prevent any excessive cracking of the plaster and/or splintering of wooden stud. Note the convenient dust-catcher built into the supplied template. Nice touch curtesy of the OmniMount people :-)

Once the four pilot holes had been drilled, installation of the mount was straightforward. Our only suggestion here is to not tighten down any of the bolts until you are satisfied with the horizontal placement. We also did level measurements just as a sanity check. If it was grossly misaligned, then some corrective action now would be easier to do than when the LCD panel was mounted.

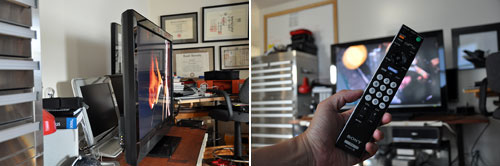
Once we were satisfied with the position of the mount, we tightened all of the bolts and hooked the LCD panel onto the mount. This mount is SOLID. There is no bouncing, shifting, or play in any of the joints what-so-ever. We rechecked and reconfirmed that everything was still level. Commands to the Power55 mount is sent via IR to the included sensor, which we placed on top of the LCD panel. It can actually be placed anywhere with a direct line of sight from the remote control.

Once everything was hooked up, we powered on the unit and calibrated the mount. The first thing we noticed how smooth and quiet the mount was in operation. We could not hear the motor at all standing at the edge of the desk. We confirmed that all of the tilt and angle functions were operating properly. We won't go into detail regarding the operation of the Power55 mount at this time but we will say that it is very intuitive. Anyone can operate this mount.
We ran into no problems with the installation of the mount. It was made easier by the full-size template and the clear instructions. While it is possible to install the mount by yourself, this job is best done by two people. It took us a little longer to do the installation than necessary as we were constantly stopping for photos. We would estimate the job probably would take less than an hour from start to finish. If you are anything like us, most of that time would be spent measuring, double checking, and measuring again :-) [Permalink] - OmniMount Power55 Installation
|
|
|
| July 15,2010 - RDG update ... |
The weather in Boston at the end of June and the beginning of July was brutally hot. There wasn't any rain for two weeks and things were starting to droop. We resisted watering the vegetable garden for as long as we could, but finally gave in on the long July 4th holiday weekend.

Most of the plants in the GrowBed are doing great. The herbs have established themselves nicely. The basils seem to have something going on with the leaves. We are not sure what it is, but it does not appear to be the downy mildew issue which has been plaguing many of the local growers.

The zucchini plants have been flowering for a while, but we have not seen any zucchini yet. All of the tomato plants have flowered and many of them have fruits on the vine. Some of the cherry tomatoes are even starting to turn color. The only plant which has not taken off is the Winter Melon. Maybe it is the lack of water or maybe it takes a while for it to get going. As this is the first year for us with this vegetable, we are not sure what to expect.

The one plant which is loving the hot dry weather is the Passiflora. Over the past few weeks, it has really started to climb. There are multiple buds on the vine and some look ready to open. The same is true of the Gladiolus. A few red spikes have already started blooming, but the majority of them were still in the process of budding. All of the shade plants (Hostas, Astilbes) flowered in early July. The ferns got really big from the rain in May, but suffered a bit from the heat wave.

Fortunately, the rain finally came this past weekend. It rained so hard that part of Somerville was under 3' of water! The heat and the heavy watering kicked the plants into high gear. Since the down pour, the garden has taken on an entirely different look. It seems like all of the plants are flowering at the same time.


The trumpet vine and the bamboo have both bounced back from the drought. Most of the Echinacea, Black Eye Susan, and Day Lilies have also recovered nicely. The Zebra grass, which is pretty drought-tolerant, did not seem to notice the lack of water. We moved it a year ago as it was not doing very well next to the bamboo. This is the first year in its new spot and it appears to prefer the sunnier and less competitive location.


In the Spring, we planted around 120 Gladious bulbs. The plants started to flower at the beginning of the month and we noticed that some of the spikes had fallen over. Since there was nothing to lose, we cut them and brought them inside. We were pleased to discover that Gladious will continue to grow and bloom even when just sitting in water. This is our first year planting Gladious and we found it very easy and rewarding to grow. It is definitely a flower which we'll continue to cultivate.

We are looking at a few different ideas for the RainyDayGarden for 2011. We would like to bring in more varieties of plants, especially ones with medicinal or other useful properties. One of the ways we are going to do that is to organize a a plant exchange in the Fall: bring a plant, take a plant. It may or may not be a part of the annual SausageFest. We'll see :-) [Permalink] - RDG July update
|
|
|
| July 9,2010 - OmniMount Power55 ... |
The RainyDayInterns have done a lot of research over the past three months on the different types of LCD TV mounts. They have looked at basic mounts, low profile mounts, mounts that can be angled, and even mounts with variable positioning. All of them will work well for their specific mounting situations. After our FirstLook review of the articulated mount, we got some comments that if an LCD panel was placed above a fireplace, higher on the wall, or in front of other pieces of furniture, it would be difficult or inconvenient to have to manually move the TV into position in order to watch it. A remote-controlled, motorized LCD TV mount would be better for these types of applications.


We gave this some thought and agreed. Today, we are going to take a FirstLook at the OmniMount Power55. This mount incorporates many of the features (tilt, angle, etc...) of the mounts we have looked at previously but with the added convenience of being adjustable via a wireless remote control. The Power55 is large enough the handle panels up to 55" and and heavy as 110 lbs. It may be mounted anywhere there are good solid wall studs and access to a power outlet.
Unlike the other mounts, the Power55 mount came pretty much fully assembled, which was why the box it came in was so BIG. As expected, there were two brackets for the back of the LCD panel. The brackets hook and secure the tv onto the frame of the mount. Like other mounts, the Power55 came with a varieties of screws for the different types of walls. Unlike other mounts, the Power55 mount came with a full-size drilling template. This template has double-stick tape on the back so you can put it up exactly where you are planning on putting the mount. The template has markings for where to drill the holes, eliminating all of the measuring, confusion, and potential headaches. Brilliant!
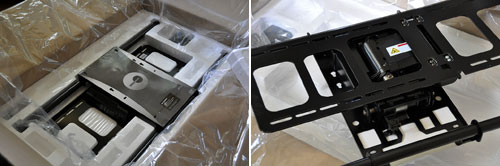
Since being motorized is the major difference between this and all of the other mounts we have looked at previously, we wanted to take a closer look at the mechanism. There are two motors in a Z-configuration. One motor adjusts the tilt, the other adjusts the pan. The operation is controlled by an IR remote. The basic range of movements of the Power55 is as follows:
- Tilt: up to +15º
- Pan: up to 20º left and right
- Mounting profile: 2.9” (74mm)
- Maximum usable extension: 7.6” (193mm)
- Universal & VESA compliant: 100x200 to 400x800

The Power55 mount's extension and angling mechanism is a cantilever design similar to that of the non-motorized articulated mount we looked at in June. The big structural difference is that the Power55 has one arm instead of two. The Power55's hinges are beefier and houses the motors. With the Power55, the brackets hook onto two long rods instead of a flat panel. The rods makes the mount lighter, the back of the TV more accessible, and the LCD panel easier to slide into position.

The 46" Sony LCD panel is currently sitting on the interns' desk. We were hoping to get this mount installed and the TV off their desk before this weekend's World Cup final. However, the heat wave has made the interns somewhat reluctant to do anything requiring movement. So once there is a break in the heat, we'll get the installation project underway. Until then, the interns will just have to put up with having a big-ass LCD panel taking up their entire work space in the office. [Permalink] -OmniMount Power55 FirstLook
|
|
|
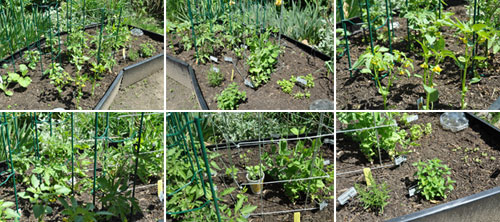
| June 09,2010 - Container Garden Update ... |
We had a couple of really hot days in May, which we thought might be too much for our new plantlings out in the garden, but the amount of May rain kept the plants happy and thriving (with just a few additional waterings from the hose). Currently, all the early tulips have bloomed, as have the Japonica, Forcythia, and most of the irises. The day lilies and lamb's ears have started sending up their flowering stalks. They should start to flower in another week or so. The peonies popped a week ago, but were battered around a bit by a thunderstorm. We harvested as many as we could and brought them inside to enjoy.

The new raised-bed vegetable garden really took off last month. The tomatillos and tomatoes flowered in mid-May and have started to fruit. The early peas were true to their name. The pods formed and we have already had our first harvest (ie, standing in the garden and eating them right out of the pod). The zucchinis have flowered but the fruit has yet to form. We have learned that zucchinis, while often thought of as a vegetable, is actually an immature fruit.

We acquired some winter melon seedlings when we were last in NY. They have been planted and are getting acclimated to their new home. Hopefully, they will establish themselves and provide us with a few good size gourds. If they do take, we'll try to grow them every year as Winter melons are great for use in soups and curry dishes.

The herb section has really done well. The basil and parsley we started from seed are doing great. We also added a few other (rosemary, oregano, lavender) plants to fill out the area. At the far left end of the bed, we dug up a rogue strawberry plant from another part of the garden and dropped it in to see how it would do. To our amazement, it took immediately and have already fruited.

We did notice that our neighbor's large maple tree does shade most of our grow bed in the late afternoon. Next year we'll move the grow bed forward a few feet to give it a few more hours of direct sunlight. All in all, we are really happy with the progress of the container garden. This is definitely the best vegetable garden we've had ever. If we had known it was so easy, we would started a container garden years ago. [Permalink] -Container Garden Update
|
|
|
| June 03,2010 - Hang&Level FirstUse ... |
When we brought a 46" screen in to the office, we realized the logical place to put it was on the wall. The only suitable wall already had a bunch of frames on it. Relocating the frames would not be a difficult DIY project, but re-aligning them would be a chore. Getting the frames just so had always been a lot of trial and error. Fortunately, we got a Hang&Level picture hanger a few months back, and this is the perfect opportunity to give it a FirstUse test.
To properly hang a group of frames, we used to measure, mark, nail, and readjust the frames many times before we were satisfied with how they looked. The issue was two-fold: the right spot for the nail was located behind the frame, so centering the frame and marking the spot was difficult. There was usually slack in the wire in the back of the frame, and that made aligning and spacing of the frames difficult.
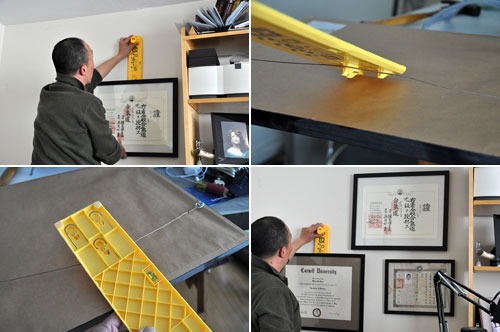
The Hang & Level tool was invented to address these problems. The steps were simple and intuitive. The frame to be hung is placed on the tool. The frame/tool is placed against the wall. Once we were satisfied with the frame's placement, we removed the picture from the tool but... [more] -Hang&Level FirstUse
|
|
| |
| June 1,2010- Articulated LCD Mount ... |
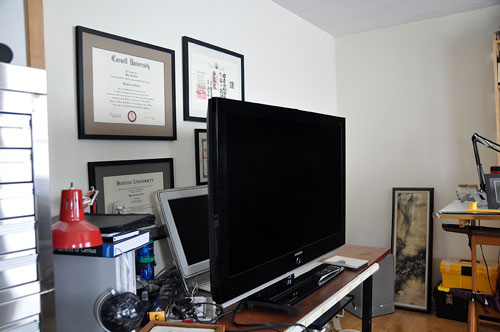
We used to have a huge projection TV screen in our office. While it was great to watch movies on it, it weighed over 200 lbs and took up an entire corner of the room. When it stopped working, we had to take it apart in the room in order to get it out to the trash. A week ago, we got ourselves a nice 46" LCD panel television via Craigslist. The great thing about LCD TVs--even with larger ones--is that they are relatively thin (less than 2" thick) and comparative light (less than 50 lbs). Even though they are thin, they still take up quite a bit of room on the desk.
One solution to the problem is to mount the LCD panel on the wall, something which was not be possible with CRTs and projection TVs. We reviewed a few different types of LCD mounts last month, but we needed something a little more adjustable for the 46" Sony Bravia screen. Because we plan on putting the tv above the desk, we need an articulated mount with tilt, angle, and extension adjustments. The one we got was this one from DIY Home Theater Supply. Their web site is a great one-stop shop for all things audio and video.

The mount is ruggedly constructed from heavy-gauge (2.5mm) cold steel with a black power-coat finish. Its dimensions and range of motion are as follow:
- Front plate: 32" x 9 3/8"
- Wall plate: 19 11/16" x 11"
- Tilt: -15 to +15 degree up and down.
- Swivel: -60 to +60 degree side to side
- Extension from wall: 5" to 20"
The unit came with everything (mount, brackets, screws) needed for mounting the LCD panel on most types of walls (sheet rock, cement, etc.). As with attaching anything heavy to a wall, the mount must be anchored directly into the studs.
Note: While this mount will fit most large flat panel plasma and LCD TVs with mounting patterns up to VESA 750x450, it is not compatible with certain LG , Pioneer, and Sharp brand TVs. Mounting holes on the back should be 30" or less apart horizontally and 18.75" or less apart vertically.

The adjustability of this mount is achieved via tiltable braces and the extendable bracket. The ability to tilt allows the panel to be mounted higher on the wall and angled down for more comfortable viewing. The extension adjustment allows the panel to be moved out and angled horizontally. We wanted the extension feature because when we are not using the TV, we would like it to be pushed flat against the wall. When in use, we would like to angle it for the best possible viewing angle depending on where we are in the room.

Not every mounting situation requires this kind of flexibility. However, if you are going to go through the effort of putting a mount on the wall, we would recommend considering using a mount like this. Even if your current television setup does not require all of the adjustability, if you are anything like us, it is unlikely you will replace your current screen with something smaller in the future :-) At DIY Home Theater Supply prices, you can get this mount for less than what you would pay for a lesser mount in the stores. So, why not get this more flexible mount and do the job just once?

We have read through the installation instructions. They look pretty straight forward. Since we are always short on desk space around here, this is one DIY project we need to get completed soon. The only thing we need to do now is to schedule the project and rearrange some of the current stuff on the walls. We hope to have the mount-installation write-up posted by the end of the month. So many projects, so little time. [Permalink] - Articulated LCD Mount FirstLook
|
|
| May 25,2010- LCD TV Hunting... |
Last month we purchased a broken 46" Samsung LCD TV for a DIY repair project. When we realized that fixing the screen was cost prohibitive (i.e., way, way too expensive), we managed to sell it for parts (at a profit, no less) to someone looking to swap out some boards in another unit that had a working screen. This past month, the interns have been scanning Craigslist looking for another unit for a repair project and they started seeing something interesting: more and more working LCD units were showing up at very reasonable prices. The sizes ranged from 40" to 52" with prices from $400 to $750. The LCDs for sale were not off-brands neither. They were Sony, Samsung, Sharp, etc...

We found another surprise when we emailed many of the sellers. Most of them were open to further price negotiations. And then it dawned on us: it was the end of the university school year and many of the students realized that moving a large-screen TV would be both costly and awkward. The screens are prone to breakage, prices for new LCD TVs are dropping, and there are many used ones for sale on Craigslist. It was the "perfect storm" for buyers looking to snag a used one at a very attractive price.
After a bit of wheeling-and-dealing, we got this 46" Sony Bravia at about 75% off the list price from a local college student. This Sony Bravia comes with all of the features we were looking for in an LCD TV. It has two HDMI ports, a computer port, and a bunch of the component inputs. There is even one on the side to make it convenient to attach a video camera or a video iPod.


Craigslist is a great marketplace. The majority of people selling and buying on Craigslist are honest. However, as with anything where cash changes hands, there will be good and bad people. It is important to be smart to be safe. Whenever possible, we like to do our Craigslist transactions at a coffee shop. Obviously, this is not practical for a large-screen TV or any big item. In those instances, go with your gut feeling, bring one or two friends, and do the transactions early in the day. If you are in the market for a used large-screen LCD, this is the best time to find one. The "deals" will likely last until the end of June. Good luck LCD TV hunting!

BTW, it's pretty clear we are not going to get around doing a DIY LCD repair article any time soon. We will, instead, be showing readers how to mount our new 46" Sony Bravia screen onto the wall. We reviewed a bunch of LCD mounts last month. We have one more mount to look at before we decide which one we will use for the project. This last mount is a fully articulated one that can both tilt and swivel. We got ours from DIY Home Theater Supply. If you are doing a home theater installation or needs anything related to audio or video (cables, wall plates, etc...), save yourself some time and make them your first and last stop. They certainly had the best prices we've found for LCD mounts. If you want to check out the mount before the write-up, go here. We will have the FirstLook posted by the beginning of June. The DIY installation article should be ready by the end of that month. [Permalink] -LCD TV Hunting
|
|
|
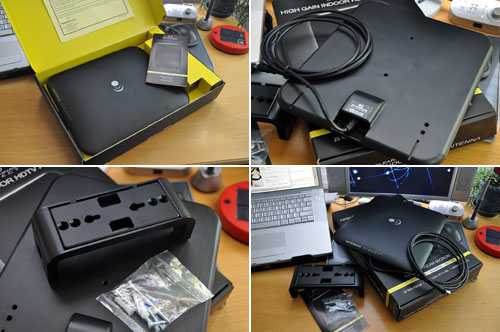
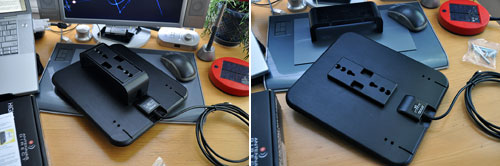
| May 20,2010- ClearSteam Micron FirstUse ... |
On Monday we did a FirstLook of the ClearStream Micron indoor antenna. In that write-up we discussed a few of the advantages of pulling TV signals directly from the air, the most obvious being that they are free. We do recognize that most people who watch TV probably have either a cable or satellite subscription. So in today's Micron FirstUse review, we thought we would show another reason why one would want a ClearStream indoor antenna.

Adding TV capability to a computer used to be a bit of a hassle, but the digital TV conversion has made it a much simpler task. We have done a few articles in the past on this topic (Plextor, EyeTV, ClearStream C1). While the plug-n-play EyeTV tuner module made it easy to watch TV on a laptop, but it was still a pain to actually hook it up to the signal source. The C1 antenna was pretty small and could pull in a signal fairly well, but it was designed for outdoor use and looked like the outdoor antenna that it was. The newer ClearStream Micron, however, with its slim profile and sleek looks, was designed with displayable aesthetics in mind. What we wanted to know was, will the Micron work as well as the C1?
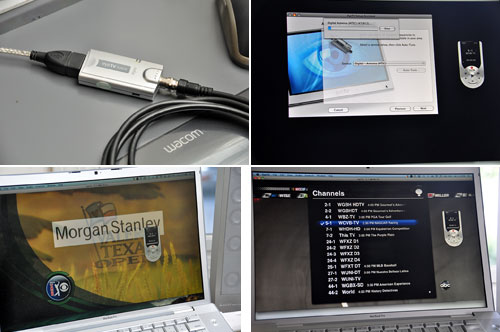
Granted, our office is in Boston, and we are a stone's throw away from many TV signal towers. Even so, can a flat square panel really be all that effective when it comes to local digital broadcast reception? Happily, the answer is "YES!" With the Micron, the EyeTV tuner was able to pull in every station found by the bigger C1 antenna. Also, we were impressed with the Micron's ability to pull in a clean signal regardless of how or where we positioned the antenna. This placement flexibility made it much easier to fit the Micron into our limited space. Even though the Micron is quite attractive, we found a hidden spot for it behind the laptop on a sliver of space. We can now watch TV on the second monitor while "working" on the main screen. We can also resize the TV screen at any point if we need more screen desktop space.

Some condos and co-ops do not allow the mounting of an outside antenna. Even if they do, you should consider getting a Micron. Not having to mount an antenna outside is not only much more convenient, it is a lot more practical. The antenna is not exposed to the elements. You will not have to run coax cables everywhere. You will not be missing anything but the hassles. [Permalink] -ClearStrem Micron FirstUse
|
|
|
| May 19,2010- MultiTools ... |
The front steps of our office are really starting to show their age. The interns had promised they were going to scrape and paint them last year, but managed to wiggle out of it by doing "work" instead. We can appreciate their reluctance because painting is preceded by priming and priming can't occur without scraping. Scraping is a hands-on task. It is manual, time consuming, and messy. If we have any chance of "enticing" the interns into helping out, we thought we had better come up with an easier way to accomplish the tasks. In order to do that, we need some motorized options.

After a bit of research, we have determined that the easiest way to get the front porch prepped for painting is with the aid of a multi-tool. What is a multi-tool? It is a handheld power tool capable of cutting, sanding, and scraping. It operates by vibrating like a pad sander instead of spinning like a circular saw. The two we will be testing are the Craftsman 12V Compact Multi-tool and the Fein MultiMaster.
Most in the USA are familiar with the Craftsman brand. Fein is a premium brand in Germany and they are starting to get some traction here in the States. Some people even know that that the first electrical power tool was an invention of the C. & E. Fein Company. Wilhelm Emil Fein founded the company in 1867. His son Emil Fein developed the first electric handheld drilling machine in 1895.

The Fein MultiMaster is a heavy-duty unit built for professional contractors. It is corded for continuous power and sized for maneuverability. Sanding and scraping is a power-intensive task. Fein made the decision to go with a corded design to maximize the power without adding bulk to the tool.
Craftsman made a different choice in the design of their multi-tool. They created a compact yet cordless unit powered by a 12v lithium battery pack with a 30 minute quick charge capability. It is designed for cutting, scraping, sanding, grinding, removing grout, etc...basically all those annoying but extremely important prep tasks involved in any DIY project.

Both the Fein and Craftsman kits come with their own carrying case. The Fein case is a sturdy molded unit with separate internal boxes. The compact Craftsman case is made of durable cordura and has a zip-in lid. Both cases have room for the tool, accessories, and the various bits.

The Fein MultiMaster Top comes with the following:
- FEIN MultiMaster FMM 250 Q
- sanding pad
- 5 of each type of sanding sheet--grain 80, 120 and 180
- universal E-CUT saw blade (44mm)
- HSS segment saw blade
- carbide-tipped segment saw blade
- rigid stopping knife
- profile sanding set
- dust extraction device
- sanding pad, perforated
- 5 of each type of sanding sheet--grain 80, 120 and 180, perforated
- carbide rasp (triangular), perforated
- plastic carrying case
The Crafsman Multi-tool comes with the following:
- 12 Volt battery
- 30-minute quick charger
- accessory mount
- flush cut blade
- carbide rasp
- sandpaper kit
- circular blade
- carrying case

We will be taking a closer FirstLook at each of these multi-tool kits next week. We will then put them to work on the prep for getting the front porch and steps ready for painting. It will be interesting to see how the two stack up against each other in the 'battle of the multi-tools." [Permalink] -Battle of the MultiTools
|
|
|
| May 18,2010- SoWa Open Market ... |
South of Washington Street (SoWa) Open Market got off to a great start this weekend. The market hosts a nice variety of vendors. We found plenty of original art from painters, sculptors, and photographers. There were artisans of hand-crafted jewelry, clothing, and handbags. Sprinkled amongst all of the creative types were also a few florists, bakers, and local farmers with fresh produce and tasty treats! The weather was perfect all weekend and the shoppers responded by packing the market on both days.

The organizers of SoWa know how difficult it can be to park in the city, which is why they have arranged for free parking at two large open lots close to the market. It completely eliminated the parking hassle. The personal nature of open market offers the opportunity to meet the artists, vendors, and those behind the work. It is fast becoming part of the South End's well-known artist's community.

One of the artist we met was Robert Rossel of Symmetry Tile Works. STW kilns are fired by propane to a temperature of 2300ºF. The intense heat and flames, as well as their special glazes, are responsible for the brilliant colors and unique variations in the tiles. We, and apparently plenty of others, were pulled in by the tiles' amazing colors and nature-inspired designs. They were also heavily discounted. The pieces for sale at SoWa were reminders from various projects and customer orders. They are perfect for small projects such as a backsplash or as accents. We picked up three of the small 3"x3" tiles for the RainyDayKitchen. Not exactly sure how we'll use them, but we will figure out something! They were just too amazing to pass up.
The SoWa Open Market is surrounded by lots of interesting businesses and galleries. One of them is the Bromfield Gallery on Harrison Ave. The wall of tubes which caught our eye reminded us briefly of dots and dashes of Morse Code. We then thought maybe they were some kind of horizontal wind chimes. Upon closer inspection, we saw the tubes had patterns and etched markings reminiscent of those used in print making.


The work on display at the Bromfield Gallery were 3-D creations by local artist Randy Garber. The common theme of these works is communication: sound, print, etc... Her efforts were inspired by theories of evolutionary language development and neuro-biological linguistics. These pieces will be at the Bromfield Gallery until the end of the month. The gallery is open during the week from Wed to Sat between the hours of 12-5.

The SoWa area of Boston has undergone quite a bit of change since we last visited. The SoWa Open Market is not your typical outdoor vendor-fest. Don't go expecting to find the usual wares at this Summer open markets. After you have spent an hour or two wandering round, there are plenty of inviting cafes just a few steps away serving iced-coffee or double espresso. Word is spreading. So hop on your Vespa and scoot down and check out the SoWa Open Market before things get totally out of control. [Permalink] -SoWa Open Market
|
|
| May 17,2010- RainyDayGarden Update ... |
The weather in Boston was all over the place at the beginning of May, but it has finally settled down. Everything we planted in mid-April survived the frost-warnings and 30º temperature gyrations in day/night temperatures. We also got some nice stretches of rain. The precipitation really helped get everything nice and green.

The tulips and the other early bloomers have mostly faded. Their blooms were replaced by the clematis, azaleas, and alliums. Many of the plants have started to fill out, but some of them are not quite ready to flower. It will be another week or two before the warmer temperature hangs around for keeps. That is when the day lilies and the peonies will kick into gear.


Our new raised-bed vegetable garden is in full swing. Most of the 1'x1' squares have been filled. Everything we planted took. The tomatillos have already started to flower. The herb section is coming along quite well. When we were last in NY, we got some winter melon seedlings. Half of them were planted last week, but the seedlings hadn't been sufficiently acclimated to the sun and got a little burnt. We hardened the rest and planted them this weekend. Hopefully, they will fare better.

Maintaining a garden in the city is really very easy. We only plant perennials, propagate what we have, and don't bother with the grass. We love tending (pruning, weeding, etc.) the garden, but don't believe in watering the plants or the lawn. These simple rules minimize the amount of work needed while giving us plenty of time to enjoy the greenery. We are going to look into some rain barrels for catching storm run-offs that we'll use in watering the vegetable garden, but that will probably be a project for next year. [Permalink] -RainyDayGarden Update
|
|
|
| May 14,2010- ClearStream Micron ... |
All US television broadcasts went digital on June 12, 2009. While cable and satellite TV subscribers did not have to do anything to make the switch, those with analog TVs had to either add an adapter box to convert the signal or get a new TV with a digital tuner/receiver. We did a few articles last year about Antennas Direct's ClearSteam line (C1, C4) of antennas specifically designed for over-the-air reception of digital TV signals. Eleven months post-digitalization, we are here to update readers with a new addition to the ClearStream family of DTV antennas. Gone are the "rabbit ears" of old. The ClearStream Micron is a compact antenna engineered and optimized for indoor use.
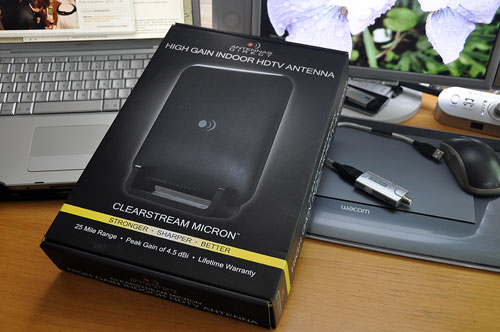
Cable and satellite signals are compressed so they can cram more data over the same pipe, but local broadcast signals typically are not. By using an antenna to pull the local broadcast signals directly out of the air, one can avoid the loss of picture quality from the compression/decompression that is inevitable with signals from subscription services. The ClearStream Micron has very forgiving aiming characteristics. It has more than a 70º of beamwidth across the main area of sensitivity. It also has a relatively large secondary rear sensitivity area. This
means the Micron is able to receive signals from multiple directions from a fixed position.
The Micron delivers TV signals from widely located (spaced) broadcast towers, negating the need for an antenna rotator in most cases.
- Range: up to 30 miles
- Beamwidth (Horizontal Plane): 470 to 700 MHz: 70 degrees
- Front to Back Ratio: Typical 15 dBi
- Directivity: Typical 8.1 dBi Max 8.25dBi @ Channel 35
- Size Assembled: 10”h x 11”w x 4.5”d
The Micron was designed and optimized for the core UHF DTV band. The 10"x11" face and slim profile is suitable for desktop or wall-mounted use. The stand may be used to mount the Micron flat against the wall or raised away from it.

"Many people didn't realize how much the popularity of antennas would surge after the DTV conversion," said Richard Schneider, president of Antennas Direct. "We're seeing in our own sales data, however, that close to 50% of the 114 million TV-watching households are using an antenna to either supplement pay TV on the primary television in the home, or to get reception on secondary TV's in the home which are not hooked up to cable or satellite." Well, we saw it coming. [Permalink] -ClearStream Micron
|
|
|
| May 5,2010- CeivaPro Digital Photo Frame... |
We have always been fans of the digital photo frame (DPF). Images look nicer than their printed counterparts because they are brighter even if their resolution is not as high. DPFs have and additional advantage in that they can display more than one image. Of course, the analog frames still have a few features not yet matched by the DPFs: they can be wall-mounted, do not require any power, and their size can be greater than 8x10. However, with the huge in-roads LCD TV has made into the home, those advantages may not exist in a few years.

Yesterday, we took a FirstLook at the CeivaPro Digital Photo Fram. Today, we are going to take a closer look at the PicturePlan service that separates the Ceiva apart from all the other digital photo frames in the market. Both the CeivaPro and CeivaShare frames require the Cieva PicturePlan service to work. The frames are not functional without an active account. This may rub some people the wrong way, but if one sees the frame as a service rather than a... [more] -CeivaPro Digital Photo Frame
|
|
| |
| May 4,2010- CeivaPro Digital Photo Frame... |
Mother's Day is this weekend. A call, a card, or a nice flower arrangement for mom are the typical gifts for this occassion. In recent years, digital photo frames have been a big seller for this event. However, some are realizing that some moms just were not all that into all of the steps needed (hooking up the USB cable, organizing the images, uploading them from the computer) to get images into these devices.

The folks at Ceiva, those clever cats, have always known this. Their ten-year-old business is not just about the selling of digital photo frames. They provide a convenient, easy to use, end-to-end photo sharing capability. No other digital frame company offers both the frame and a service like this.
The early Ceivas service did allow folks to send images to "mom" remotely, but it had limitations: low resolution; restrictive placement options; bulky frames. Their latest offering, however, is fully "mom-friendly," assuming mom has... [more] -CeivaPro Digital Photo Frame
|
|
| |
| April 28,2010- Energy Savers... |
We can all do things to reduce our carbon foot print. We can use use less energy; we can use it more efficiently. Today we have a FirstLook at two items which will help us use less energy and to use it more efficently.

We have floor vents for both the heating and AC systems. This never made much sense to us. A heating vent in the ceiling meant all the hot air stayed at the ceiling. An air conditioning vent on the floor meant the cold air stayed around our ankles. These systems should be done as two separate systems: AC vents only from the ceiling, heat only from the floor registers. However, we can still do something after the fact with a product such as the AirFlow Breeze Ultra.

The AirFlow Breeze is a remote-controlled fan sized to fit the typical vent opening. It can be mounted in the ceiling or just dropped into the 6″x10″ or 6″x12″ floor register opening. The remote allows the easy control of the unit when mounted overhead. The unit has two fans with three different speed settings and a combined output of 115-150 CFM. This is more than sufficent to raise or lower the temperature of a typical room by 3-5 °F, enough to solve the majority of problems in both winter and summer.


The power connector is in the back, but an access opening in the front allows the cable to be routed to the rear. Being able to route the cable from the front is a nice touch. It gives the option of moving the AirFlow from room to room, or when permanent installation is not possible. With a fan like the AirFlow Breeze, there’s no need to adjust the temperature of the whole house and waste energy when we can solve our “problem room” just with better air flow.
Using energy efficiently is one thing, but sometimes we are using energy even if we don't think we are. Many of today's devices are on "standby" even when we think they have been turned off. This is so they can turn on faster when needed. Newer energy-efficient equipment is better at managing the amount of "standby" energy used, but still...it adds up.
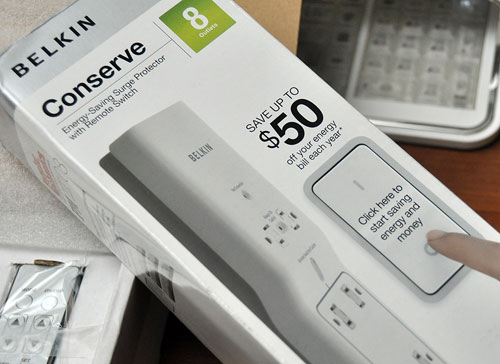
One way to make sure devices are actually "off" is to disconnect them from the outlet. Of course, nobody is going to actually pull the plug of every connected device when not in use. Belkin's Conserve power strip was designed to make that task as simple as clicking a button. Standby Power impacts both the environment and the electricity bill. It can account for up to 10% of a household's power consumption. The savings can add up quickly over the course of a year.

The Belkin Conserve is a different from other power strips. It has both Always-On and Switchable outlets. Devices requiring a continuous power (routers, DVR, etc...) can be plugged into the two Always-On outlets. The six Switchable outlets are for any device (TV, computer monitor, etc...) that does not have unattended, timed, or automated functions. Power to the Switchable outlets is controlled by a remote switch, which can be wall mounted or used as a portable control button. The remote switch is battery powered and has a 60ft range. It is based on RF technology and unlike the typical TV remote control, it will work even if the Conserve is in another room.

A register booster fan like the AirFlow Breeze costs only about $5.00 per year to operate. It helps circulate heat and air conditioning more efficiently and eliminates the need for space heaters or room air conditioners. The Belkin Conserve cuts off the power-using devices at the source and will pay for itself in the first year. There are lots of ways to be "green," but these suggestions are painless, saves money, and reduces energy use. A win-win for everybody. [Permalink] -Energy Savers
|
|
|
| April 27,2010- LCD TV Repair... |
The TV screens we watched as a child almost never broke. Why? They were thick, heavy, and things were almost never thrown at them. The new LCD screens are thin, light, and very easy to break...especially if you love playing with your Wii. Our editor Carolyn has termed the break-your-tv-by-mistake condition "Wii woes." LCD screens are being damaged in sufficient numbers that an emerging business is, uh, emerging, in LCD television repair fueled by parts from all the broken sets available on Craigslist.

We thought fixing one would make for an interesting DIY repair article. So we found a broken 47" Samsung on Craigslist a few days ago and bought it for less than $100. The unit clearly had something wrong with the LCD screen. Apparently, LCD screen are very expensive to replace and it is not really cost-effective to replace a broken one, the main reason being that most of the TV manufacturers use screens manufactured to their specification. So it is next to impossible to take one maker's LCD screen and use it with another maker's electronics unless one REALLY knows what one is doing. For folks with a non-functional LCD TV, especially if it is a cracked screen, often the only realistic option is to junk the set and buy a new one.

Now that LCDs have been around for a few years, other problems have started to surface, problems often not related to the LCD screen at all. Some of the problems are due to poor or unreliable circuit designs. Others can be traced back to cheap capacitors used by the makers in an effort to reduce cost. This is especially true for ones used in the power supplies. When the capacitors die, the TV will typically not power on reliably or at all. The fix is often to find and replace a $1 part with a more reliable $3 part. The problem is locating the defective $1 part. For DIY-ers, the simpler approach is to localize the problem to a general area (tuner, power supply, sound, etc...) and start swapping modules.
This is where LCD TV parts scavengers can make a few bucks or even create an online parts business. A broken $1000 LCD TV can contain up to $2000 in resellable logic boards, power supply, and other miscellaneous components. The interesting thing is that even though the LCD panel is theoretically worth more, a set with working electronics (like ours) will actually fetch a higher resale price because the boards are easier to ship than a large LCD panel. The situation is exactly like parting out a car. A $20,000 car can contain $60,000 worth of parts if sold individually. That is assuming one can resell EVERYTHING, which of course, is never the case.

When we posted on Craigslist asking if anyone had the same broken model but with a good LCD screen to donate to the project, we got a ton of email (80% SPAM) offering to buy the busted unit. After sorting out the crap, a few serious offers did emerge. We negotiated with the willing buyers and sold the set a few days later for 3X what we paid for it. This was not because we didn't want to do the DIY project, but because it was just too good of a return on investment that we couldn't let it pass:-) We'll keep our eyes out for another potential "fixer-upper." This time, we'll look for one with a good screen but bad electronics.
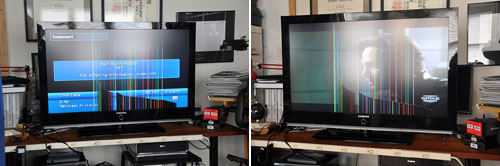
So, if you have an LCD TV that is not working, you don't have to throw it into the trash. If you have the patience and are willing to put some work into finding the right parts, you might be able to get it working again for a lot less than you might think. List your LCD TV's exact make and model number on Craigslist, sit back, and wait. You may find that someone may have that exact model and is ready to drop it off at the dump. If you do decide to sell the bum TV, a realistic expectation is about $0.10 to the dollar of a set's current street price (ie: $500 used = $50 not working). Hey... it was money you were going to toss into the trash anyway. [Permalink] -LCD TV Repair
|
|
|
| April 23,2010- Planting tomatoes in April... |
| One of the advantages of a raised-bed garden is that the above-ground soil has an opportunity to heat up during the day. The warmer soil allows vegetables to be planted earlier than would be possible otherwise. We sprouted beans in March and planted them on April 8th. They have been in the ground a few weeks now, have clearly established themselves, and have begun sending out climbers. This encouraged us to think about getting some tomatoes and other plants into the GrowBed.

April 13th was another above-65º day. We didn't have much on our schedule and thought it would be a good time to make a Home Depot run. Fortunately for us, it was also the day of their first delivery of vegetable plants from their supplier. We had "first pick" of plants as they were being unloaded from the truck onto the shelf. Home Depot's supplier is Bonnie Plants of Union Springs Al. All of the seedlings looked vigorous and were shipped in biodegradable pots. We purchased two indeterminate and one determinate variety of tomatoes. We used zinc garden markers to label everything once we got them planted. The metal markers are helpful because we mark the date of planting as well as the type of plant. Unlike the short plastic labels, the metal markers have long stems so they stay put in the garden.

The nice thing about biodegradable pots is that they are better for the environment and the plant. Being able to plant the tomatoes without having to take them out of the pots meant no "root shock" or accidental damage to the main stem. All that was needed was to give the pots a good soaking, dig a hole, and put in the plant. The two indeterminate ones (Husky Cherry Red, Beefmaster) will get the taller cages and the determinate (Celebrity) one will be planted in front and supported by the short cage.

All the photos above were from at least a week ago. The photos below were taken on April 22nd. The irises in the back of the GrowBed have started to bloom. The average daytime temperature last week was around 65º, but some nights still went below 50º. The rule of thumb for planting tomatoes is to do it when the ground stays above 50º. We were able to "violate" this rule because the GrowBed's soil temperature is warmed by the sun during the day and dissipates slowly at night. This has enabled our tomato plants to get almost a three-week head start compared to last year.
The rest of the RainyDayGarden has also started to fill in nicely. The tulips have been popping up for weeks and many of the early bloomers have already dropped their petals. The hostas, alliums, and daylilies are all coming along well. They should be starting to bud in another couple of weeks.


We have been slowly spreading the violets and japonicas around the garden. This year was the first year where we really notice a nice healthy growth of both in several spots around the grounds. The japonicas have these wonderful yellow flowers which bloom the length of the branch. They are easy to get established, are very hardy, and make a great separator between properties. They are an especially good plant to use if your neighbor's property is not all that well kept, as they enhance the view very nicely.

While many of the early bloomers have started to fade, the next in the sequence are beginning to unfurl. The best part of planting a perennial garden is seeing the plants come and go each year. They are much like friends who come to visit year after year. They bring a smile, help us mark the seasons, but never overstay their welcome. [Permalink] -Planting tomatoes in April
|
|
|
| April 21,2010- LCD TV Wall Mounts... |
LCD televisions that are 50 inches and larger have become affordable in recent years. Televisions 40 inches and smaller are now available for under $500. Unlike projection TVs and the first crop of 50-inch LCD TVs, which weighed over 200 pounds and dominated an entire corner of a room, the current crop of 50-inch LCD TVs weigh no more than 70 pounds. This means that if the user does not want to put the TV on a stand, they can safely mount it on a wall. A heavier unit can also be mounted on a wall provided the bracket is secured to the studs in the wall. We have received quite a few questions regarding types of mount and how to put one up. We thought this was a general enough question that we would cover it in a DIY series.

We took a look at what was available in stores, on Craigslist, and EBay. What we found was a wide variety of styles, options, and qualities. Fortunately, they television wall mounts group into a few categories: thin profile, fixed, angle-adjustible, and articulated. We will take a look at the first three types in this write-up and save the articulated type for a later date. All of the mounts have a few things in common. There is usually a wall plate, two brackets, and an assortment of screws. The wall plate is typically slotted for cable runs and thru-wall access.
The angle-adjustible mount was made by Kanex. It is available on EBay, and we got it from the seller Abacus24-7. This mount is rated for LCD panels from 30"- 63" wide and up to 165 lbs.
The thin-profile mount was from VideoBasics. This mount is also available via EBay, and we got it from the seller 5star_cellular. The VideoBasic mount is rated for LCD panels up to 63" wide and up to 150 lbs. The key feature of this mount is, when mounted, the back of the LCD panel will only be 19 mm (3/4") from the wall!
The VideoBasics Thin-Profile mount is very straight forward. The kit came with a wall rail, two vertical brackets, a collection of screws/bolts/anchors for most conceivable mounting situations (cement, plaster, etc...). The included directions were clear, concise, and fully illustrated. We think most folks will find this a simple DIY project.

The fixed mount is the most basic and widely available style. We got this used unit on Craigslist. While the mount is used, it is in like-new condition. Like the thin-profile mount, it has two brackets and a wall plate. The brackets attach to the back of the LCD panel and hook on to the wall plate.
The most flexible mount of the three is the angle-adjustible mount from Kanex. This Kanex bracket is useful for mounting an LCD panel higher up on the wall and tilting it at an angle for more comfortable viewing. Like the other two, the Kanex mount came with a large bag of screws, bolts, and anchors.
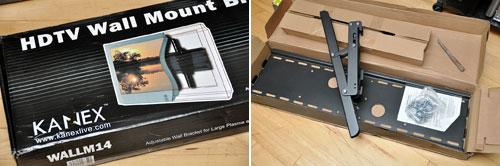
The wall plate is almost identical to the generic mount with the exception of the level-bubble. It is a nice extra, but perhaps not necessary because with this type of installation, we would always check alignment using a more accurate tool.

As expected, the Kanex bracket is more complex due to its adjustability. The angle of the brackets are individually adjustable up to 15º by means of the knobs at the top of each rail. The brackets hook onto the wall plate and lock in the same way as the other two mounts.

The thickness of the steel plates relate directly to mount's weight and rigidity. Kanex, the most complicated of the three, was the thinnest at just over 2mm. The generic mount plates were 2.29mm thick and the VideoBasics thin-profile plates were the thickest at 3.36mm. The fact that Kanex used thinner plates was not surprising as thicker plates would have made the entire mount heavier without any functional benefits for holding panels under 150 lbs.

In this overview, we did not include any mounts in "articulated" category because they are more complicated. We expect to have a full write-up on a few articulated units by the end of Spring/beginning of Summer. If you know of one which you think would be of general interest, drop us a note. We will check it out and include it as appropriate. As always, we'll send you something "fun" for the tip! [Permalink] -LCD Wall Mounts
|
|
|
| April 13,2010- RainyDayGarden's MarchMadness... |
March was a very odd month this year. It started out dry, but got very wet very fast. Record-breaking rains (twice in two weeks) turned the Northeast into a giant puddle the old timers said they haven’t seen for more than a 50 years. Staggering amounts of rain fell in Connecticut, Massachusetts, and New Hampshire. Rhode Island suffered the most with some areas recording 10 inches in just a few days.

On March 6, the weather folks announced that rain was on its way. Newer technology has made their predictions a lot more accurate, so the interns heeded the warning and got things cleaned up before the storm. It was a good thing they did because the rain did come, and it seemed like it would never leave. For all the trouble the rain caused, we hope it gave the tulips, irises, and the other early bloomers a nice head start.

The rain got really serious from March 17th to the 25th. We stopped emptying our rain gauge outside. Some locations got over 8 inches in a few days. By the end of the month, the total for some areas exceeded 16 inches.

On the 20th, we got a little break from the downpour and the sun peeked out for a few hours. Eliot took the opportunity to get his paws dirty and check out the some of the first blooms. We went and saw that most of the buds made significant progress and were now growing quite vigorously. Knowing that more rain was still on its way, we decided that now was the time to get the GrowBed set. It was a risk, but we also took a chance and planted the passifora we had growing inside all Winter long.


Eliot was not the only one happy with the temporary sunshine. The blue jays also took the opportunity to dry out and to renew the game of "catch me if you can." Eliot can't seem to figure out why he can't get close enough to make the "tag." The bell on his collar may have something to do with it.


Even though we could not work on the garden because of the rain, we didn't just sit around. We started some of the seeds inside. It is now the middle of April and things have dried out a lot. The benefits of the extra precipitation have started to show. Plants are bigger, greener, and blooming earlier. We are excited about all the new things we are doing this year in the RainyDayGarden and are especially eager to see how the new vegetable garden works out this season. [Permalink] -RDG's MarchMadness
|
|
|
| April 12,2010- Paradise City Craft Show... |
With Spring time comes some top rated Arts and Crafts Festivals along with open studios and markets. This weekend is CraftBoston the Society of Arts and Crafts event at Seaport World Trade Center, 200 Seaport Boulevard Boston, Massachusetts 02210. It runs 10-6pm on Friday and Saturday and then 11-5 on Sunday. Go here for more info.

Last month was The Paradise City Arts (PCA) Festival. It remains one of Rainy Day's favorites arts events for several reasons. First the 175 os so artist-exhibitors who are there are top caliber. A number who we chatted with had completed MFA's or rigorous apprenticeships. Many had pieces in noted galleries or musuems. Second the show's sponsors attend to the details with food that is a cut above (this year's deserts, especially the chocolate eclairs, had our endorphins buzzing) alongside a jazz quartet ambience. As well the variety of media has something for every taste including jewelry, clothing/accessories, paintings, art glass, ceramics, sculpture and furniture.

We sent two of our gadabout writers, Lisa and Jay, to report back on the Marlboro Ma. event. If you're intrigued by some of our profiles from this year's show you can note on your calendar the remaining Paradise City Arts shows this year. The next PCA show will be in Philadelphia April 30-May 2. Their al fresco Northampton, Ma. shows will be May 29-31 and again October 9-11. Information on additional shows and exhibitors is at http://www.paradisecityarts.com/ Some of the artists below will be at future shows or have their own websites with virtual art displays. Upcoming open studios and weekend markets are also options for some of the artists. We'll profile two artists today and then over the next several weeks we'll post additional artist profiles from this week that we think you will enjoy checking out.
When Whitmore Boogaerts came up for air after working on the Big Dig's third Harbor Tunnel he was ready for a change of pace. Although he has a Civil Engineering degree from Tulane he has long had an interest in the arts, including being an Art Director in the NYC public city schools. While he was there in the mid 70's he gave Andy Warhol a tour of the school and perhaps Warhol's bon mot ("Art is Anything You Can Get Away With") planted a seed. Not much goes to waste or gets away in his Providence RI sculpture and welding studio. The larger than life metal totems have faces whimsical and menacing in a "Where the Wild Things Are" sort of way. Many of the metal cut outs from these faces end up in some of his heavy metal but light hearted sculpture. These pieces may have burnished metal circles along with abstract or geometric forms that would be at home in a Kandinsky work while Alexander Calder is an inspiration for some of his kinetic pieces.
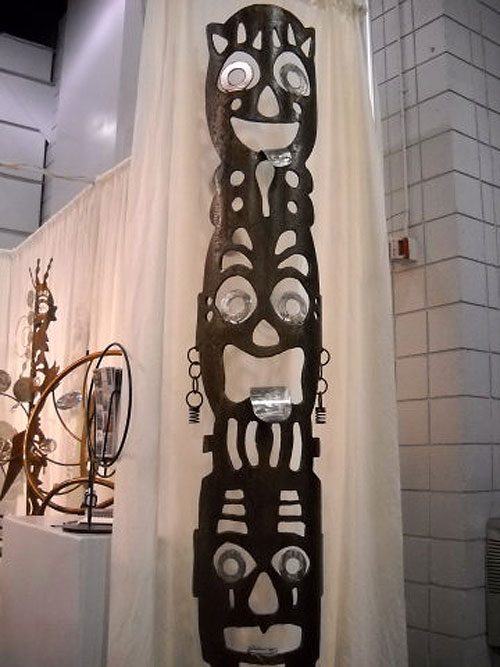
The figurative is not foreign to Whitmore though. This year The PCA sponsors have asked artists to contribute works for a central display on "The Art of Love" that greets visitors to all their shows. Whitmore's wall hung mobile has some rosy copper hearts that his daughters are hoping return home after the PCA exhibits draw down. Fish and flying dogs are also subjects for his work. As well functional lamps, tables and chairs round out his portfolio of welded metal. Whitmore will be having a studio sale April 24 and 25 at his 7500 square food studio in Providence RI. and he will be in Boston's South End Open Market several times beginning May 23. For more information and examples of pieces visit see www.wb-sculpture.com

Denishé Hats makes some of the most beautiful and fun hats I’ve seen. Denise Shea was inspired by her grandfather, who wore a hat every day when he left the house. She remembers fondly watching him open his hat box and put on his fedora before walking out the door. Denise has a background in graphics art and illustration, and she brings these skills and perspective to her work. She makes hats for children, women and men from a variety of materials including felted wool and straw. From small pill box hats designed to perch on top of your head to wide brimmed hats adorned with feathers, rhinestones and veils, Denise’s hats will make you and those around you smile. [Permalink] -Paradise City Craft Show: by Jay Rogers
|
| |
| April 8,2010- Garden prep... |
The release of the iPad on Saturday sucked everyone into a digital black hole. After a few marathon review sessions of all things iPad, we defied known physical laws, climbed our way back up to the event horizon, and managed to extricate ourselves from the gravitational field-distorting pull of our shiny new iPad. The unseasonably warm 90º weather helped. To make sure that the "real" world was indeed still analog and to help us regain our bearings, we
decided to do some gardening.

When we last left the RainyDayGarden, we had assembled the GrowBed from our friends at the Gardener's Supply Company. We were trying out various shapes for the bed and decided a chevron configuration was the best fit for our existing garden layout.
The next step was to fill the GrowBed with garden soil. The size of the GrowBed is 3'x6'x10", so 18 cubic feet (CF) should be sufficient. To help us keep our cost down, we decided to get 12 CF of top soil ($1.50/CF) and 6 CF of gardening soil from MiracleGro ($4/CF).

The MiracleGro's claim is that stuff grows twice as big if planted in it. We didn't set up a double-blind test bed (next season) so we won't be able to say. However, it is more than twice as expensive as regular top soil, so let's hope they are at least a little better:-) Also, instead of mixing the different soil together, it would be best to put the MiracleGrow on top. This way, the seedlings will benefit from the "better" soil.

With the help of a few extra hands, we made short work of
filling the GrowBed. We unpacked the vegetable ladders and bean cages and determined how best to arrange the garden.
We will be using the GrowBed planner from Gardener's Supply Company.
For now, we just wanted to get a feel for the sturdiness of the ladders. We will likely reposition them when we are ready to plant.
It is important to have the ladders in place before the plants get established (i.e., are bigger than your hand). Putting the cages in early prevents damage to the root systems, because it allows the roots to grow around them and not be damaged by jamming the suports through an established root system.


We have already said that these ladders and cages are more substantial than the ones from our local gardening center.
That was immediately apparent when we put them side by side with the ones we used last season.
The new ladders differ from the old ones in a couple of ways as well. Their rounded-V shape is designed to protect plants from wind and accidental breakage. The cradle-shaped cross-members makes it easier to set the ladders into the ground and provides multiple places for vines to rest. The taller Tomato Ladders will let us make the most of our 3'x6' garden space.
The only flaw we found in one of our six ladders was that a weld was broken. It should not affect the overall integrity of the frame, but we may see if can solder it back together anyway.

Next up was the Bean Tower.
The tower comes in two pieces, is made of galvanized steel wire, and requires only 1.5 square feet of space. The lower piece has longer legs (10") for in-ground stability. It also has tubes at the top to mate with the upper portion to form one tall structure.
When assembled, the tower is over 65".
For folks living in extra windy locations, there are anchors available to further secure the structure.
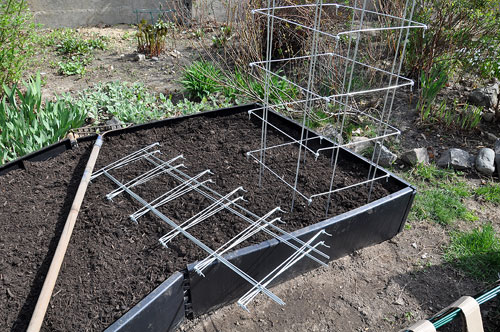
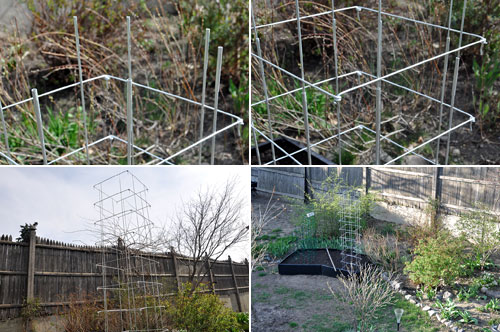
The seeds we planted have sprouted and are growing happily in their egg-carton incubators. We have been moving them outside during the day to harden them for planting. The bean seedlings should be ready in a week or so and the herb seedlings should be ready by late April. We expect to purchase the rest from our local sources.

Getting the above-ground garden set up was very simple. The amount of space required was very small, certainly a size available to most folks in the suburbs and to many city-dwellers. We are excited by the possibility of being able to grow a lot of vegetables by using the vertical ladders and frames and are looking forward to a very productive RainyDayGarden. [Permalink] -Garden prep
|
|
|
| March 26,2010 |
At the beginning of the month, we mentioned that one of the projects we hopes to complete was the installation of the IKEA Capita braces for the conference/dining room table.
As we had delayed our 2010 Chinese New Year celebration to this weekend,
we thought we had better take care of this project before the guests showed up.

The biggest unknown with installing the Capita brackets was how difficult it would be to drill a 1/2" hole through the stainless steel top. We used the rubber pad as a template to mark where to drill. In order to drill through and install the bolt, we needed to disassemble the top panel from the base.
The mounting screws were underneath, but easily accessible.

When we got the top freed, we were happy to see a nice deep space in the leg, certainly deep enough for the steel bolt that would hold the brace to the table top.
The steel bolt required a 7/16" hole. The closest bit we had was a 1/2", but decided it should work just fine. Drilling throught the top was not too difficult. It tooks us about 4 different size bits to work our way up to the 1/2" hole.


Once we had the holes drilled, the rest of the work was easy. The supplied nuts were self-locking so they won't work loose over time. This was important
as they will not be easily accessible once the top has been remounted.
With the plates and the braces properly positioned,
we moved the everything back into place.

The cherry table top fits perfectly on top of the braces
and the look was exactly as we had envisioned. Having the two shelves underneath the top makes this piece of furniture a lot more functional than the typical dining room table.
The lockable casters will come in handy when we have to move it out of the way. As our space is limited, we like it when things are flexible or do double-duty.
This table is now both!

We'll live with this table for awhile and see whether we need to make any adjustments. One problem we noticed was we may not be able to pull the chairs close enough to the table during use. As we don't really eat around the table all that often, it may not be something we'll have to address immediately, but then again...some here may disagree.
[Permalink] -IKEA Brace Installation
|
|
| March 23,2010 |
Digital photo frames (DPFs) are one of those items which seems like an obvious "killer app" when they first came on the market. We were early adopters but were disappointed with both the image quality and ease-of-use. So much so that we decided that we would not review any until they had 24bit color, displays that were bigger then 3"x5", and a better user interface. It was several more years before we found one which satisfied all of those requirement.

Ceiva started making digital photo frames in 2000. For the past 10 years, they have
continued to invent, refine, and redefine the capabilities of DPFs. The main difference between Ceiva and all of the other makers is that Ceiva's approach is from the "how do the images get into the frame" standpoint. When they started, the phone line was the only viable option. Today, CeivaShare will support all of the obvious routes: phone, Broadband, WiFi. In this write-up, we'll take a look at the frame itself. In the next article, we'll do the setup and show how it all works.

The CeivaShare Digital Photo Frame is 8"x10" overall. It is matted in the same manner as a typical high-end frame. Under the mat is a 4.5"x6.25" (8" diagonal) LCD display. The package also contains a remote, an AC power supply, and various connectors/adapters.
The thing that we expected to see but didn't was a software CD. It was not there because no software or drivers are needed.

The CeivaShare's design is very clean. Its appearance from the front is like any high-quality photo frame. The controls and the ports are in the back and the sides of the unit. The CF and SD slots are on the left side and the remote holder on the right. Lifting the back coverreveals the AC and USB ports are
hidden underneath.

The unit came with the WiFi adapter already installed.
For those who don't have WiFi
but still have POTS service, the accessories packet includes a phone line modem with a USB connector. There is also a twist on
connector for the frame stand in the back of the unit.
The stand is not adjustable, but the view angle appears to be well chosen.

We really like the look of this CeivaShare digital frame and are eager to see how the quality of the display compares to that of the Parrot. We are also eager to check out the photo sharing and other capabilities of the Ceiva PicturePlan.
[Permalink] -CeivaShare FirstLook
|
|
|
One of the easiest ways to decorate a wall is with pictures and photos. While hanging them up is easy, aligning them can be a bit more challenging. If you have tried to align more than one photo on a wall, you know first-hand how frustrating this seemingly simple task can be. Even the slightest mis-alignment will be glaringly obvious and an annoying reminder of your miscalculation every time you look at it.

The process of alignment doe not have to be an exact measurement. Sometimes it is quicker done by visual inspection. The folks at Under The Roof created a tool to simplify the task of hanging pictures on a wall.
The Hand&Level is a visual positioning tool designed to mark exactly where to place the nail or hook.
The utility of this tool will be immediately evident to anyone who has ever tried to hang multiple frames along side each other. The Hand&Level will save time, frustrations, and quite possibly a few walls :-)

The Hang&Level is deceptively easy to use. Integrated into the tool are the horizontal and vertical bubble levels, a ruler, and
steel-tipped markers. To keep the tool from slipping, the corners on the back have been fitted with silicone pads.
A summary of how to use the Hang&Level is printed on the body of the tool. A detailed set of printed directions are also included and can be helpful for attempting some of the more complicated hanging projects.
If you still need more info, there are short videos at the Under-The-Roof site of their "hanging experts" showing how to use the tool.

We have a few "hanging projects" we need to do around the office. We'll report back with a FirstUse write-up when we have had a chance to give the Hang&Level a go. We are pretty sure the maintenance guy will be happy to know that, with the Hand&Level, at least he won't have so much patching and painting follow up work after one of our "redecorating benders."
[Permalink] -Hang&Level FirstLook
|
|
| March 5,2010 |
March can be a difficult month because it is no longer Winter, but Spring is not yet here. We use it as a "transition month" where we look at gear which we'll use in the Spring, finish a few indoor projects, and start some others that will give us a jump on the upcoming longer and warmer days. Judging from the gear and gadgets queued up in our review pipeline, we are going to have a lot of fun this month. Folks here have been kicking around quite a few project ideas. Today, we thought we would give readers a preview of what's on deck for Spring 2010.

When we looked at the Handpresso portable espresso maker a few years ago, more than a few readers commented that it would be a great item for the picnic basket. We knew the Handpresso people were thinking in the same direction. This Spring, we are going to give you a closer look at their luxurious Outdoor Set.
Great tasting espresso starts with good clean water. ZeroWater is looking to raise the bar on home water filtration with their new filter/pitcher system. To back up their "zero contaminants" claim, they have included a meter to let users monitor the particulate levels for themselves. We'll take that challenge and put ZeroWater to the test.
One of the more satisfying DIY projects you can do is
to print and hang a group of your favorite photos to liven up a wall or a room. However, getting them to all line up can be an exercise in frustration. The great news is we may have found a simple-to-use tool called Hang&Level to turn that hit-or-miss task into a "sure thing." We'll take a closer look at it in a few weeks.

Remember a little while back we had
purchased a large industrial cart via Craigslist? And we hinted that we had some ideas on how to raise the top to the proper "dining height?" We squeezed in a stop at IKEA and found some stainless steel brackets ($10/pair) which may be perfect solution for the problem.
It will involve some drilling...very exciting!!!
Another recent Craigslist find was this excellent, practically brand new, Moen faucet/stainless steel sink
combo. At first we thought it would be a simple "drop in" job, but then realized that the right sink is four inches deeper than our current one. As the disposal is on the right, we don't have a lot of room to maneuver and will have to configure some of the pipes to fit. It will be our first PVC plumbing project!

We also have a whole bunch of RainyDayGarden project ideas that are still in the formulation stage. Once we have them firmed up, we'll tell you all about them. There is a lot to do before Spring, but fortunately for us, our interns will work for food. [Permalink] -What else is coming in Spring
|
|
| February 23,2010 |
One of the daily functions of our interns is to scan Craigslist for "deals" which match items on our "want list." About six weeks ago, a seller had listed this steel cart for sale. We haggled on the price, but were unable to finalize the deal. Last weekend, the seller contacted us and offered it to us at half-price if we would come pick it up ASAP. Not one to walk away from a great deal, we agreed to the terms and arranged to pick it up the next day.

When we got there we realized the cart was not only long, but way more cart than we needed. It was built like a tank. The welds on it are so beefy that the cart could probably hold 1000 lbs! Comparable units can cost up to $3000. If the deal wasn't so awesome, we probably would have passed on it.
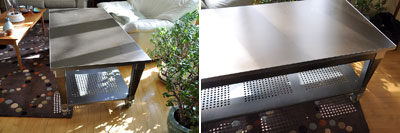
The cart measures a full 60" long, 30" wide, and 24" off the ground. Even though the cart has wheels, it was not an easy piece to maneuver, as it likely weighs over 100 lbs. Good thing the seller lived on the first floor and that we had borrowed a van to use for the pick-up. When we got the cart back to the office, it wasn't going anywhere but the first floor.

We were looking for a utility cart for a specific reason, but when we got it back to the office we realized that it was way too large for our original purpose. As the cart was so well constructed, we wanted to see if we could find a different way to utilize it.

A few years ago, we built a
base for a board made of cherry and made ourselves a conference/dining table. The base was very sturdy, but had a few problems which made it uncomfortable to use with more than four chairs. We went to IKEA for some new legs but none of them fitted our office's vibe. One of the editors suggested using the cart as a base. We took a look and thought if nothing else, it would be a good place to park the cart until we could sell it.
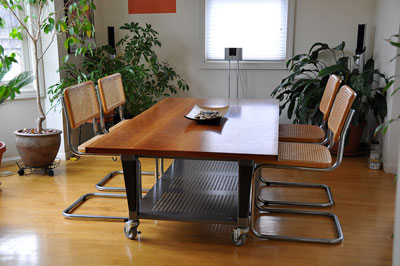
"Shopping" on Craigslist is a funny thing. One never knows what one will find. We went there looking for a utility cart and ended up creating a table which is both functional and unique. The cart with the cherry top on it does look pretty nice and will serve as the base for our conference/dining room table, but it is about 6" too low. We have some ideas on how to get everything to the proper height. (Hint: it involves IKEA), but will save that for another day. [Permalink] -Cart To Table
BTW, we would love to know the background/history of this cart. If you have any information on the manufacturer or any other tidbit related to this piece of equipment, drop us a note. We would really appreciate it!
|
|
| February 18,2010 |
Most house plants die because they are over-watered or forgotten. For our interns, the task is made easier because we made it into a routine: once a week for plants in small pots, once
a month for plants in large pots. However, if you don't have cheap labor available, then you might want to consider the Eva Solo self-watering containers. We posted a FirstLook on these containers a few years ago.
We have
been using the Eva Solo planter mainly as a way to arrange cut flowers or to root cuttings.
This high-quality planter is comprised of three parts: a thick glass container, a stainless steel cone, and a saucer with nylon wicks.
The system is both attractive and functional.
They are perfect for water-loving plants that you don't want to go thirsty.
A great thing about using the Eva Solo container to root cuttings is that the tall conical shape of the stainless steel sleeve makes it easy to arrange the cuttings for display, and adding water to the container will not disturb the arrangement.


Another thing about the Eva Solo planter is that once the cuttings have rooted, they may be planted directly in the container.
The
limitation is that some plants will quickly outgrow the relatively small size. Still, growing the plants in this container will ensure a great start and a healthy root system
for many types of plants.

Rooting plants in water is a simple and low effort way to turn one plant into many. You can do it with any normal glass container or with something a little more specialized. Either way, it is a great way to decorate as well as propagate. Best of all, it is free :-) [Permalink] -Eva Solo Planters InTheWild
|
|
| January 13,2010 |
Remember those plastic protractors from geometry class?
We had to dig up ours when we needed to set the platform angle on our Mettler wedge.
That got us to wondering whether there had been any advances in "angle-setting technology" since
our trusty half-moon tool.
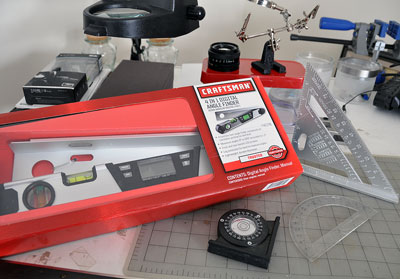
In the analog space, we found two other (square, bubble) angle-finders which were easy to use and
effective. The metal speed square was designed for use in roof and stairway construction.
The bubble
angle finder has a magnetic base, a full-view acrylic vial protractor dial, and is graduated in 5-degree increments.
The bubble tool is great for any situation where one needs to determine an existing angle, but not that convenient for setting one.

On the digital
side, we found the Craftsman 4-in-1 Digital Angle Finder. This tool is a compound-cut calculator, a protractor, a level, AND an angle finder. The unit has a folding leg, horizontal and vertical bubble levels, and LCD displays on both sides of the base. Its range is from 0º to 220º and is accurate to +/- 0.1º. The tool is powered by two AA batteries. While we like to work when it is a comfortable 65º and dry, the Digital Angle Finder will operate in temperatures from freezing to 104ºF.

This
tool, like all Craftsman tools, is well built. The main housing and arm are constructed with
aluminum, so even thought the unit is sizable it is actually quite light in weight. The dual LCD is play is backlit. The numbers are large and very easy to read.
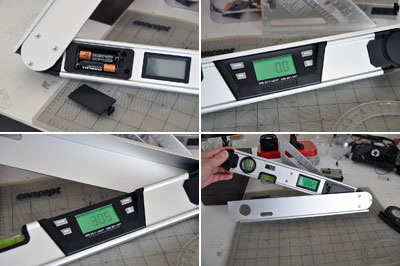
The panels have buttons for computing miter and bevel angles based on the Spring Angle, but it is not a full-fledged calculator (and we don't understand why not). There are two bubble vials (vertical, horizontal) which are accurate to 0.029º for determining level and plumb.
There is a cushioned end cap to take up some of the shock from the inevitable bumps and knocks.


The designers incorporated lots of nice features to make the angle finder convenient to use in real life. The leg extension slides out on either end to allow
for easier angle measurement. There are buttons to freeze, flip, and turn on/off the display. The only suggestion we have would be to have some
stuff etched on the back (formulas, conversions, etc...). If nothing else, some markings on the extension arm to make it a ruler would be helpful.
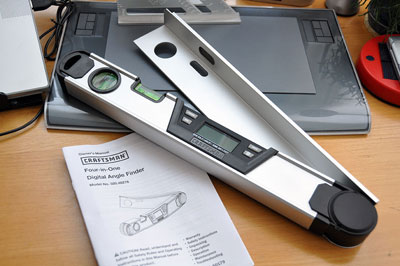
The only thing odd with this Craftsman Digital Angle Finder is that it emits a rather loud buzz. Apparently this is just something Craftsman does not feel is a problem, as the noise was noted in the user manual and listed as "normal." We are going to check out some other brands to see if they also have this "peculiarity.". [Permalink] -Craftsman Digital Angle Finder
|
|
|
|
|
|


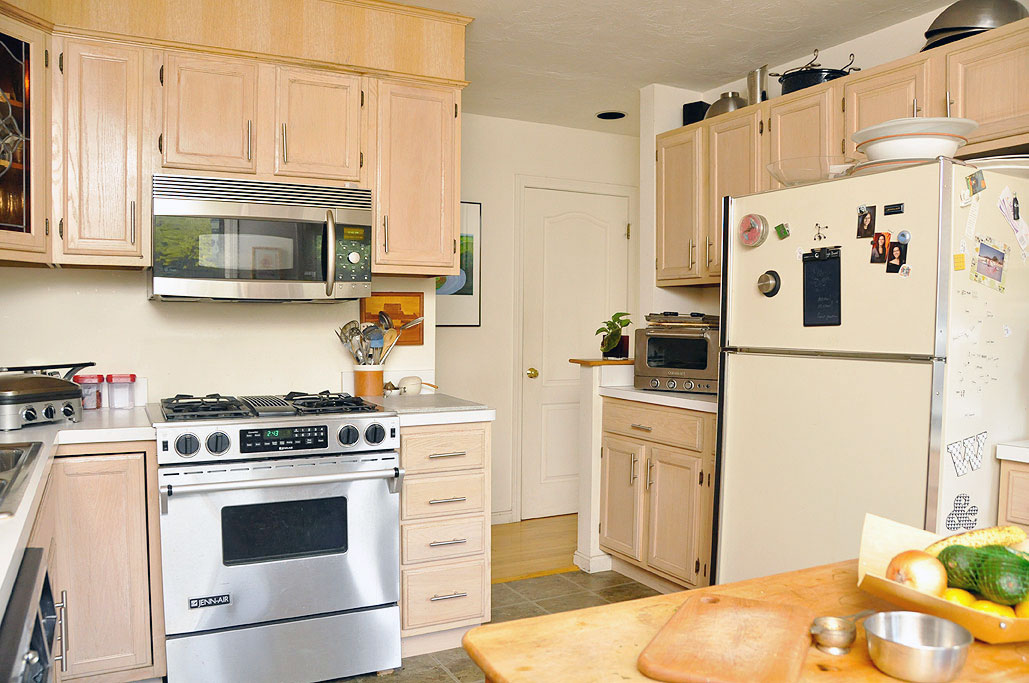


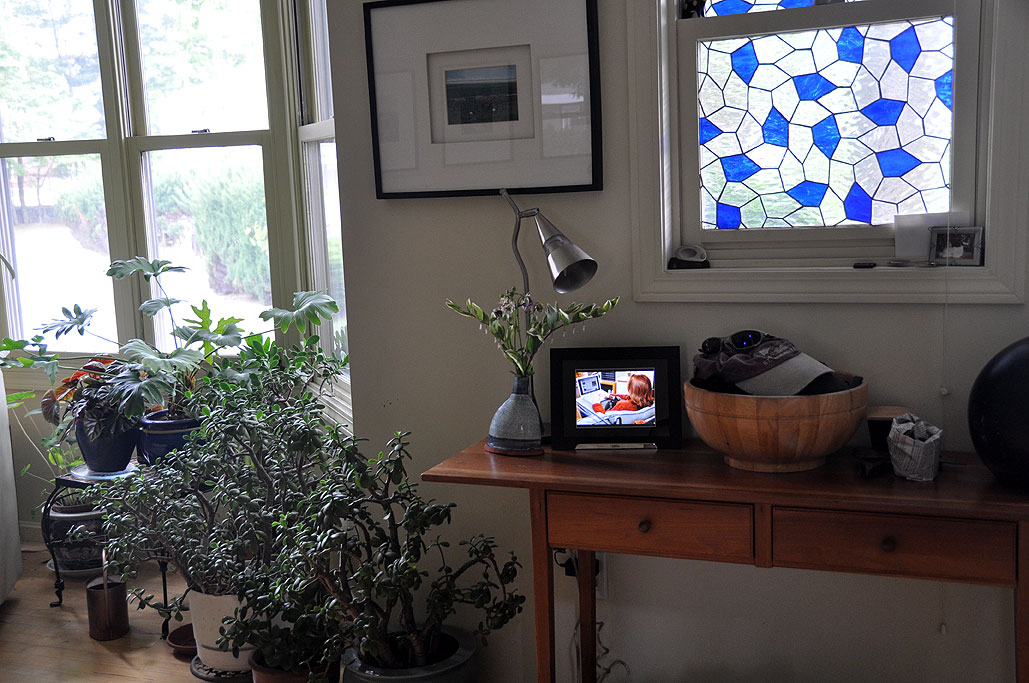
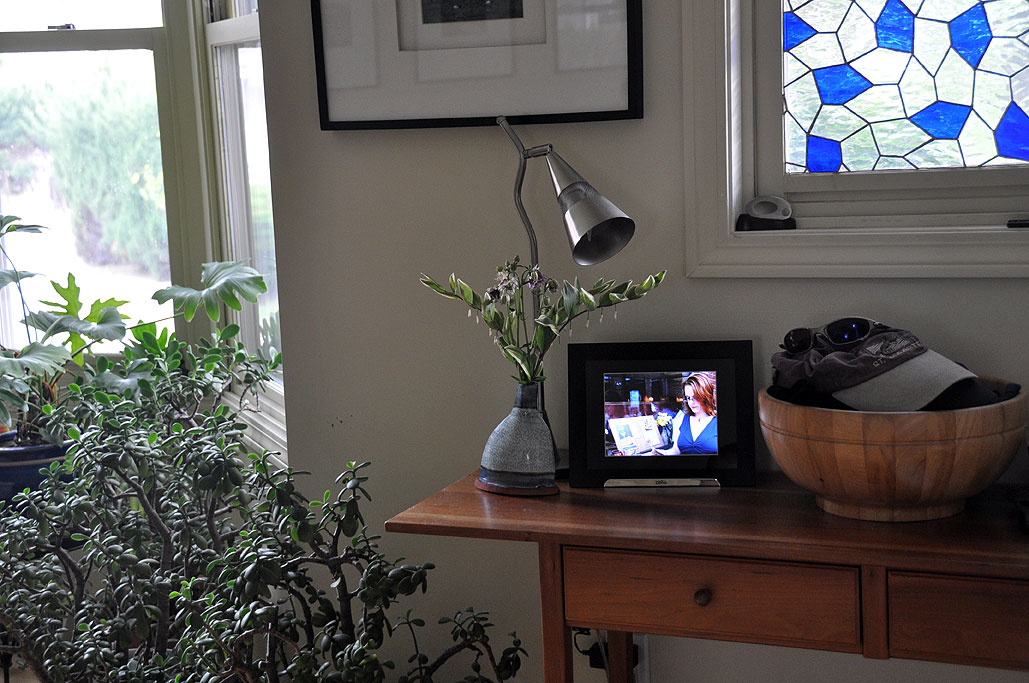


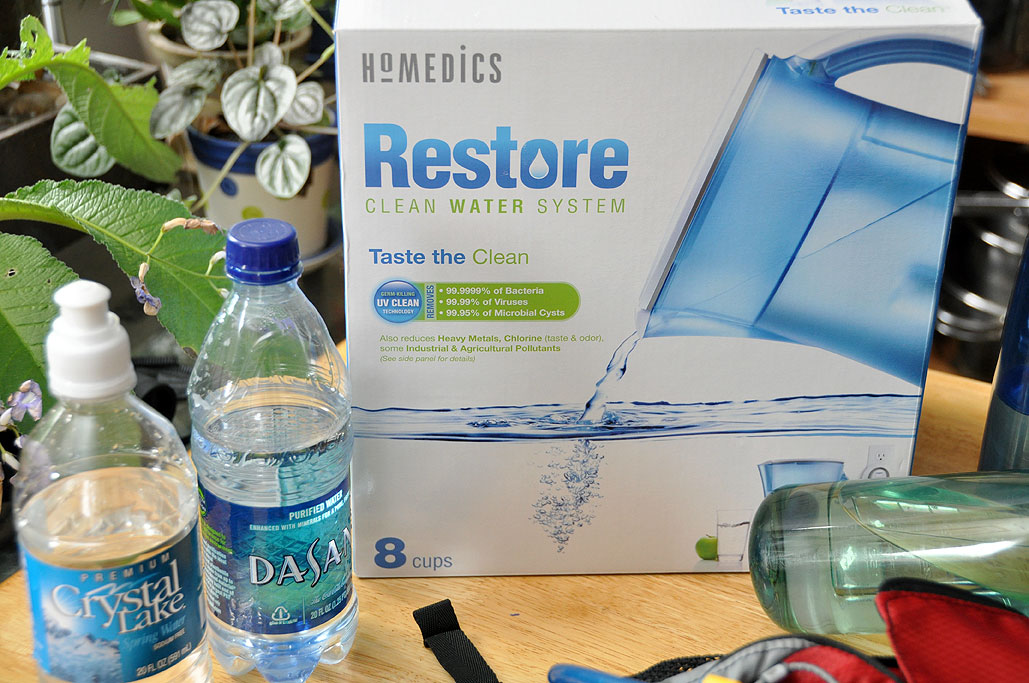

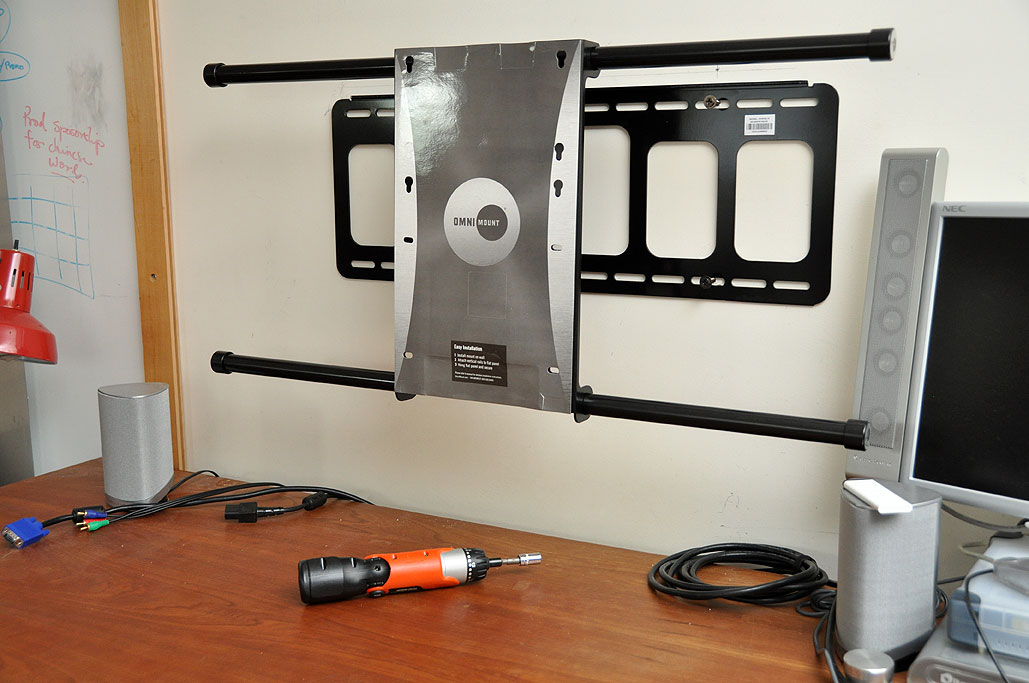


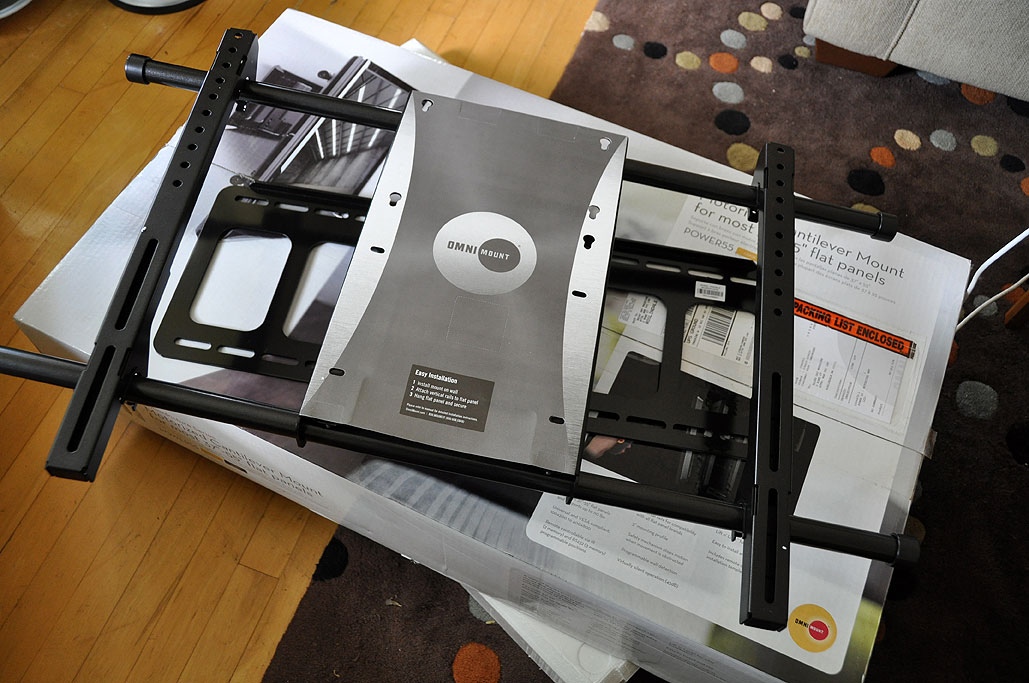


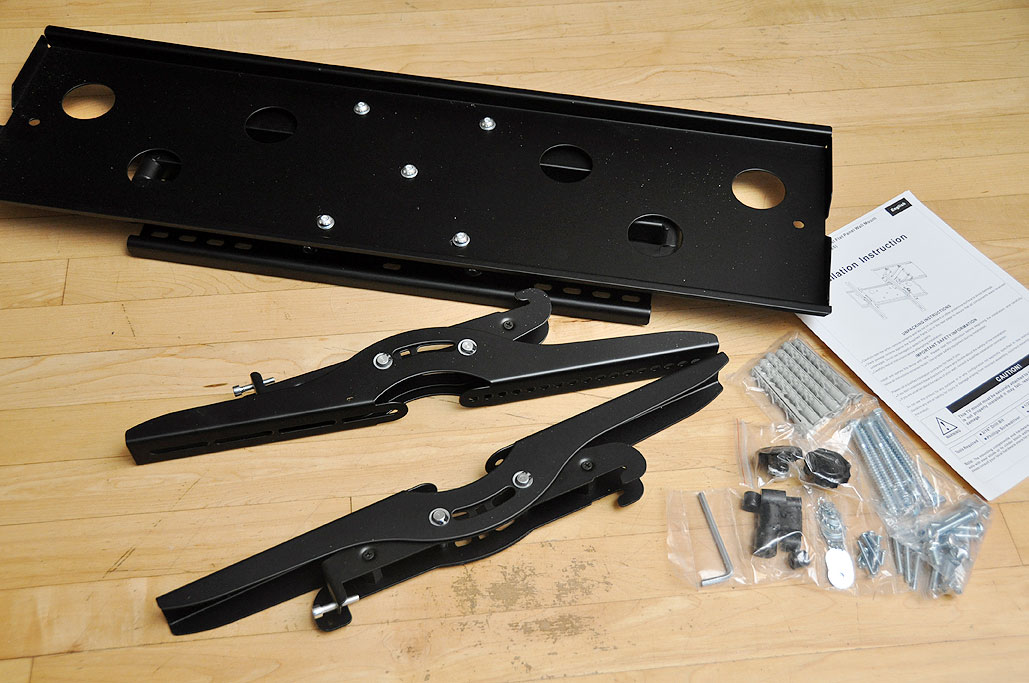
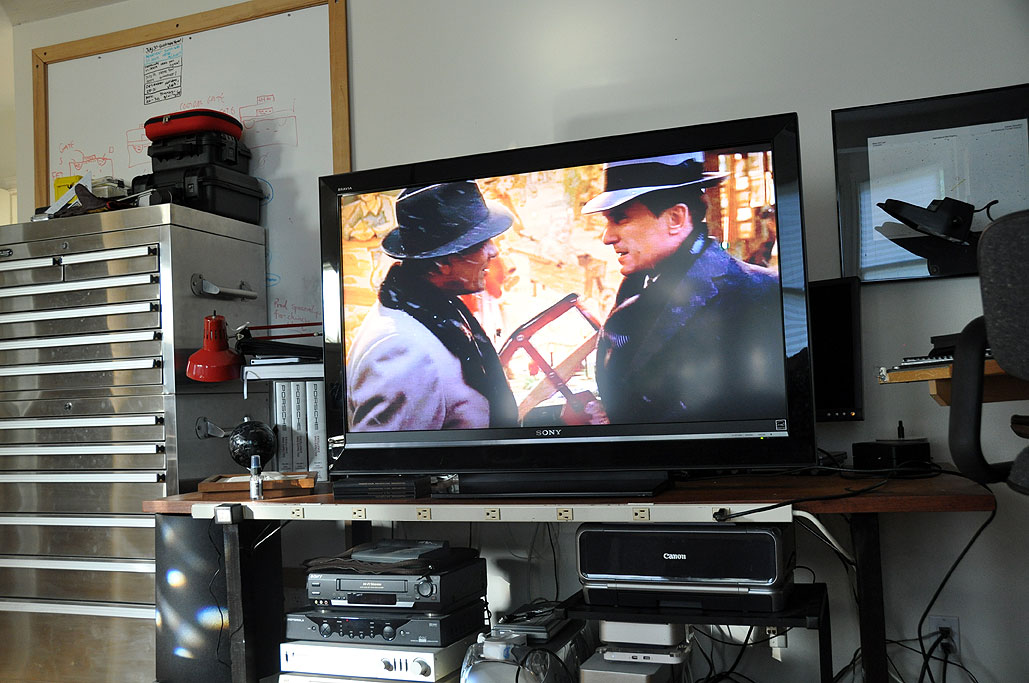


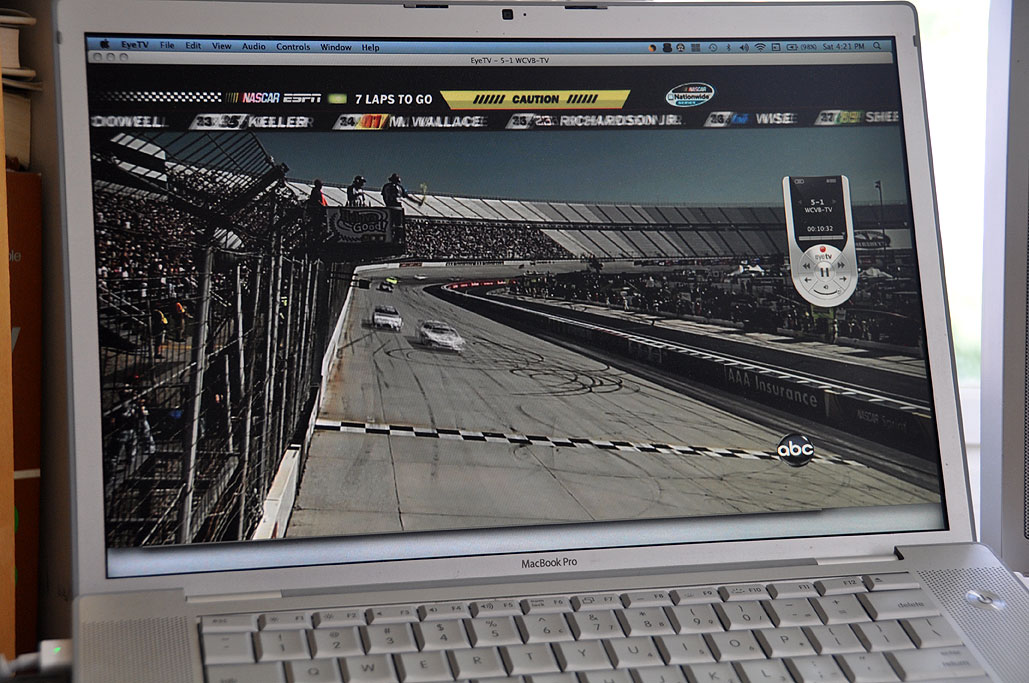
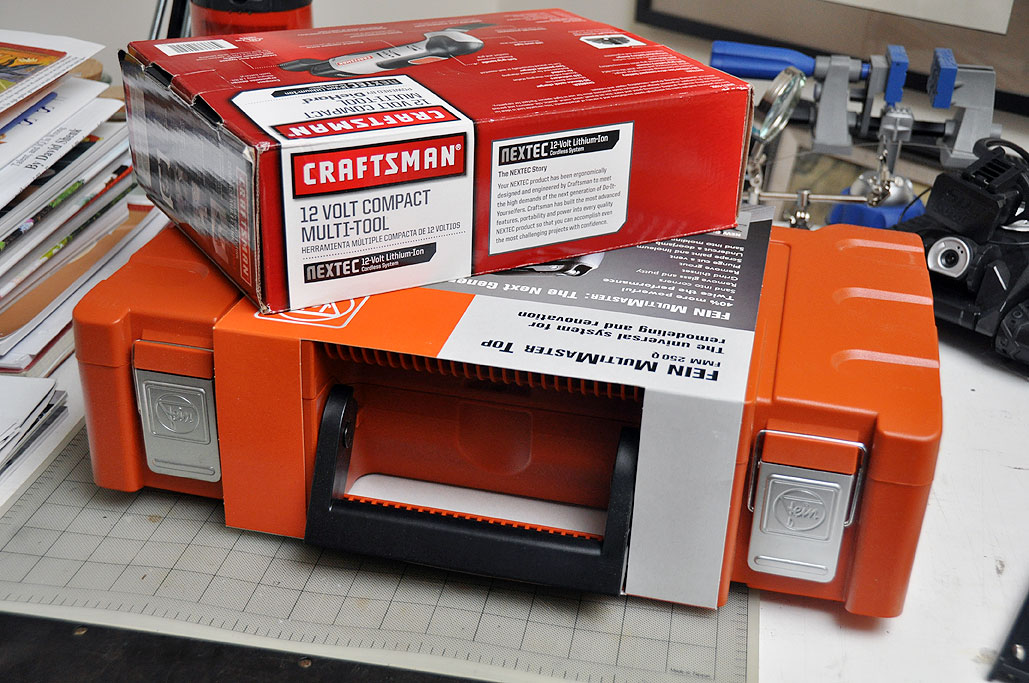
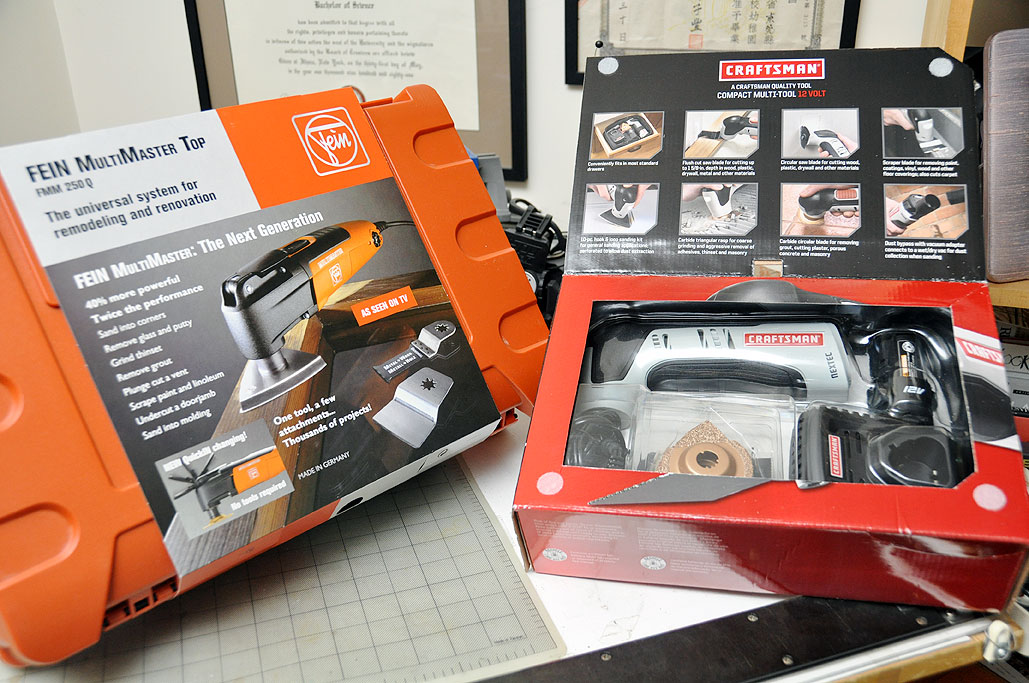
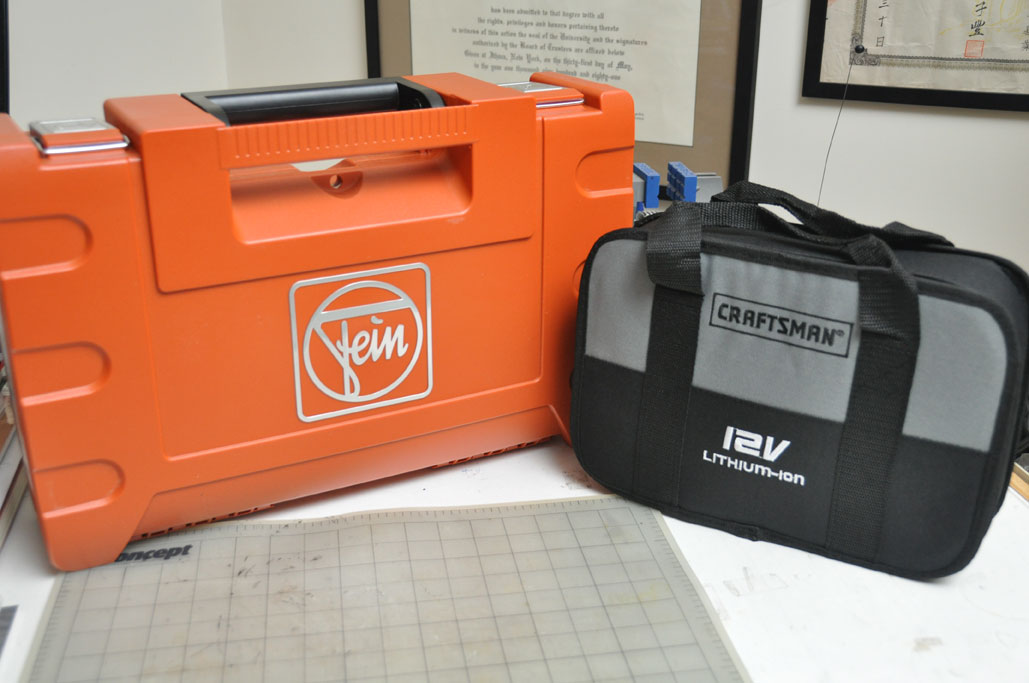


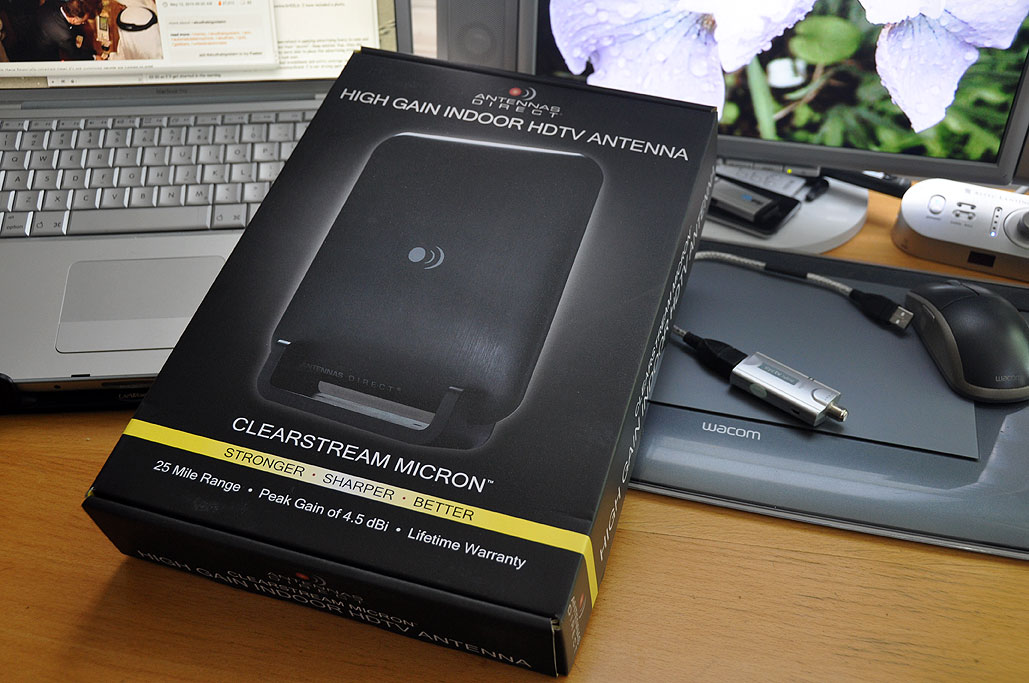

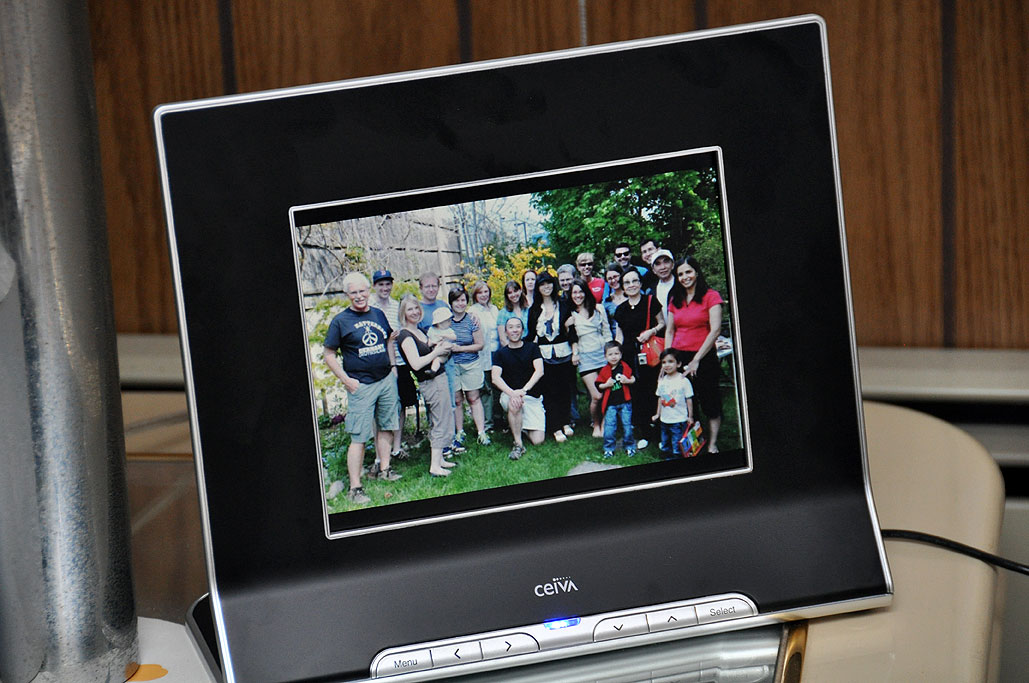

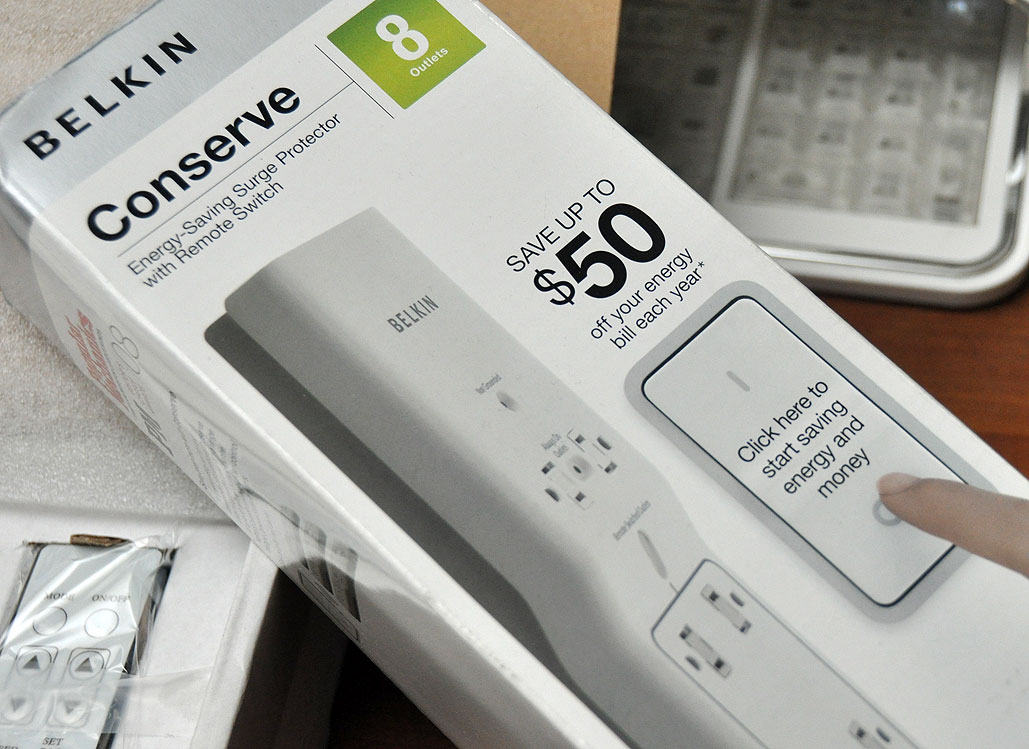
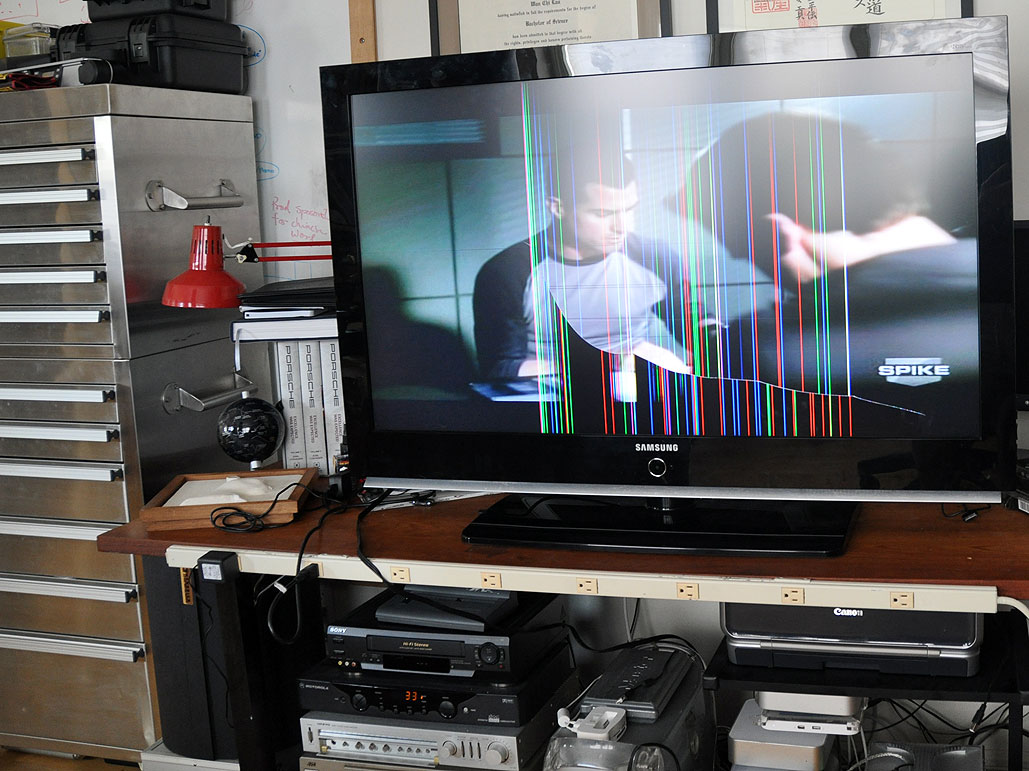

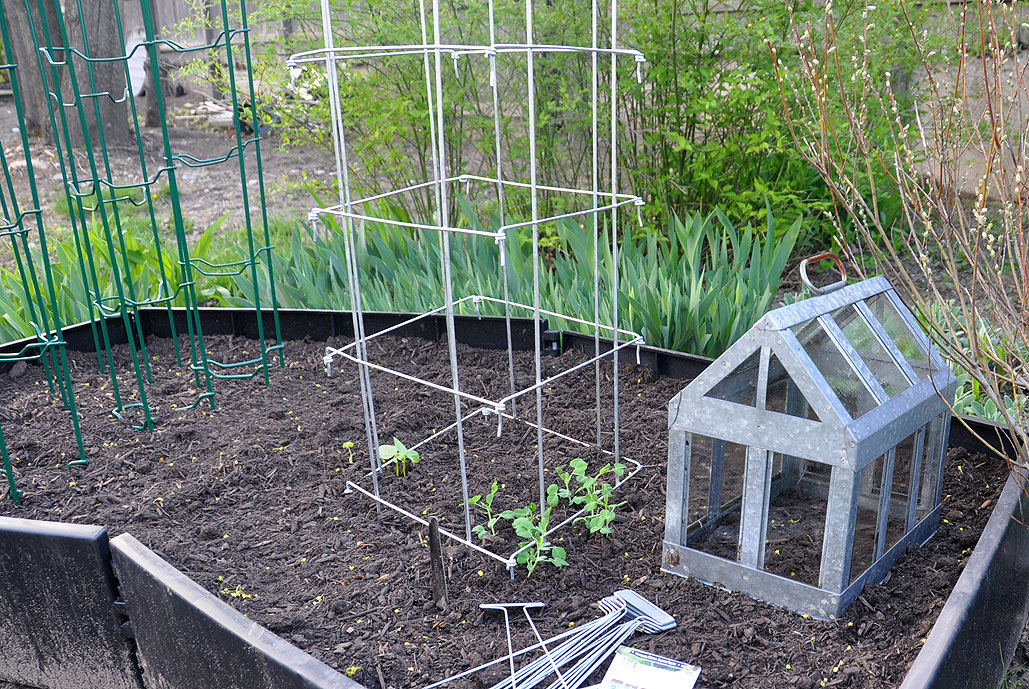

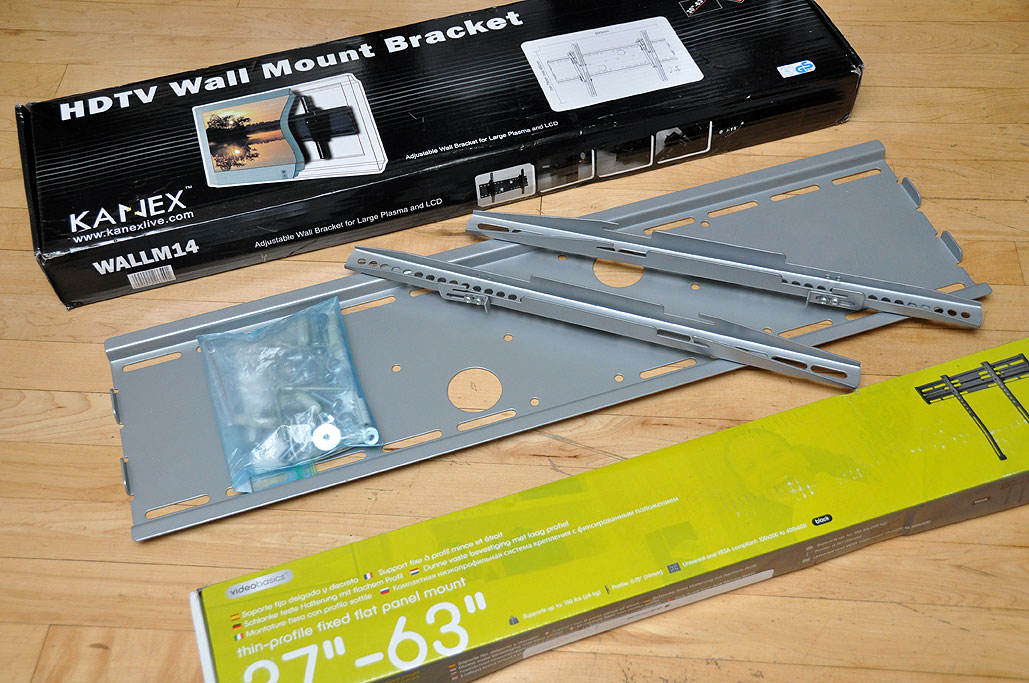


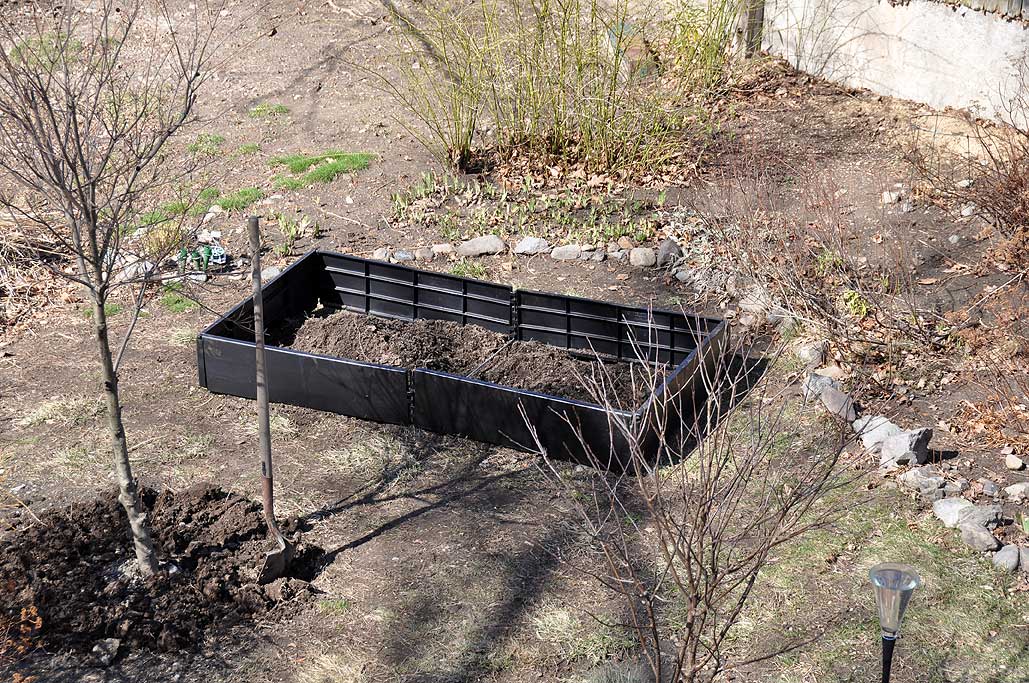


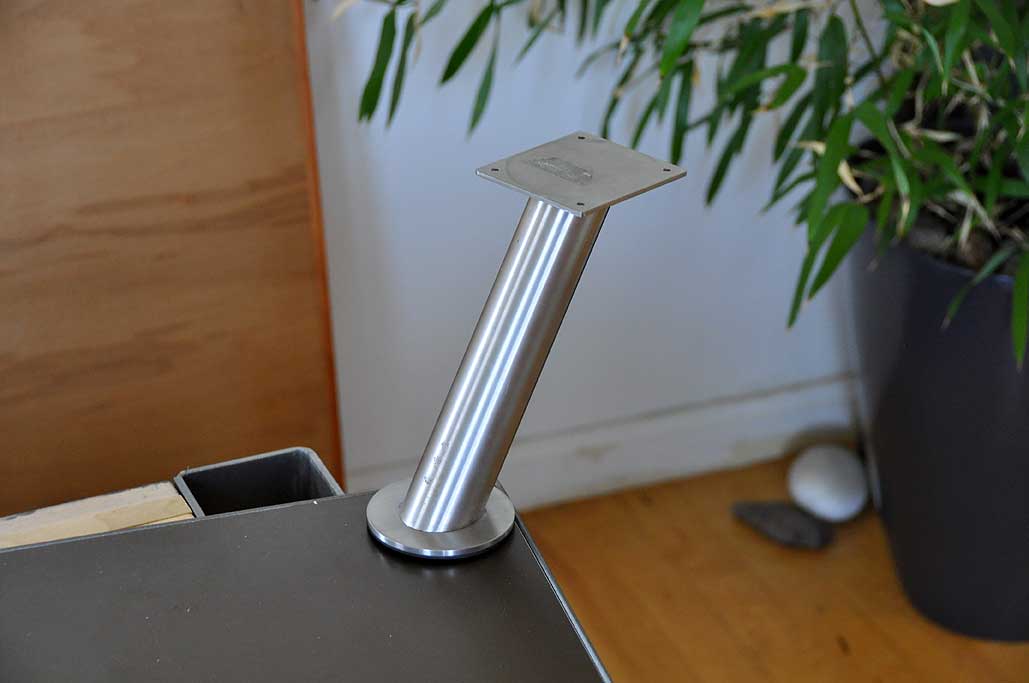
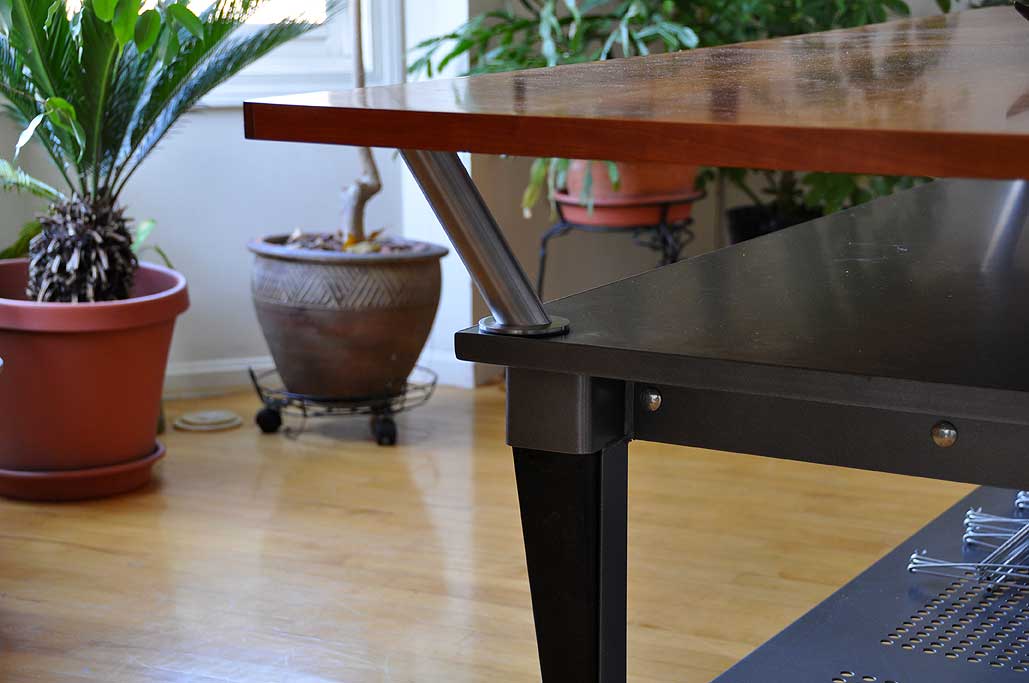
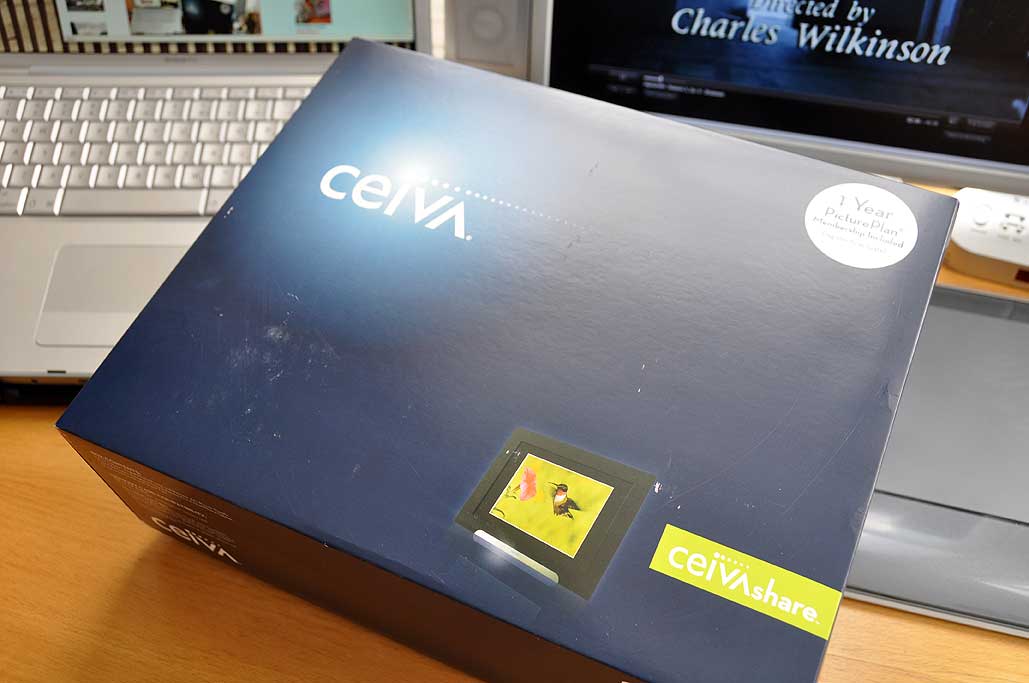
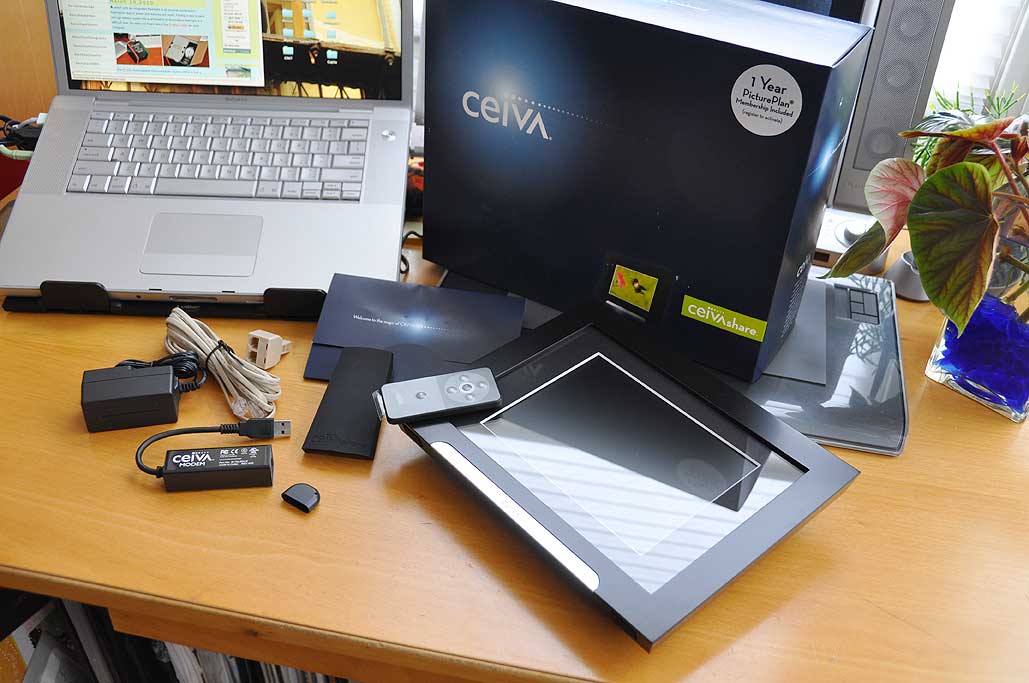
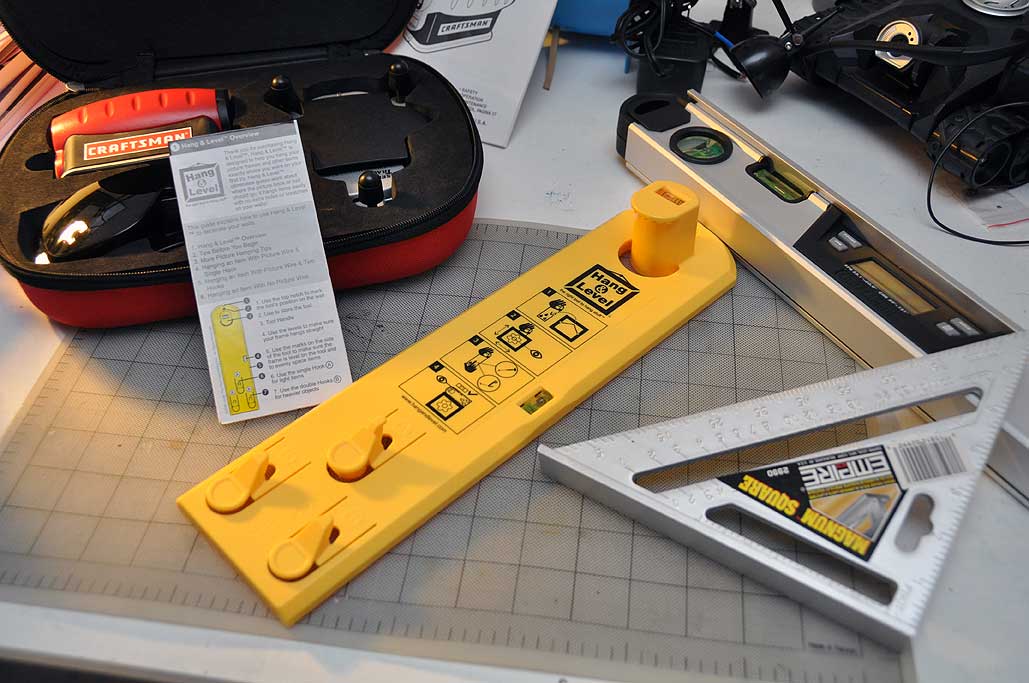

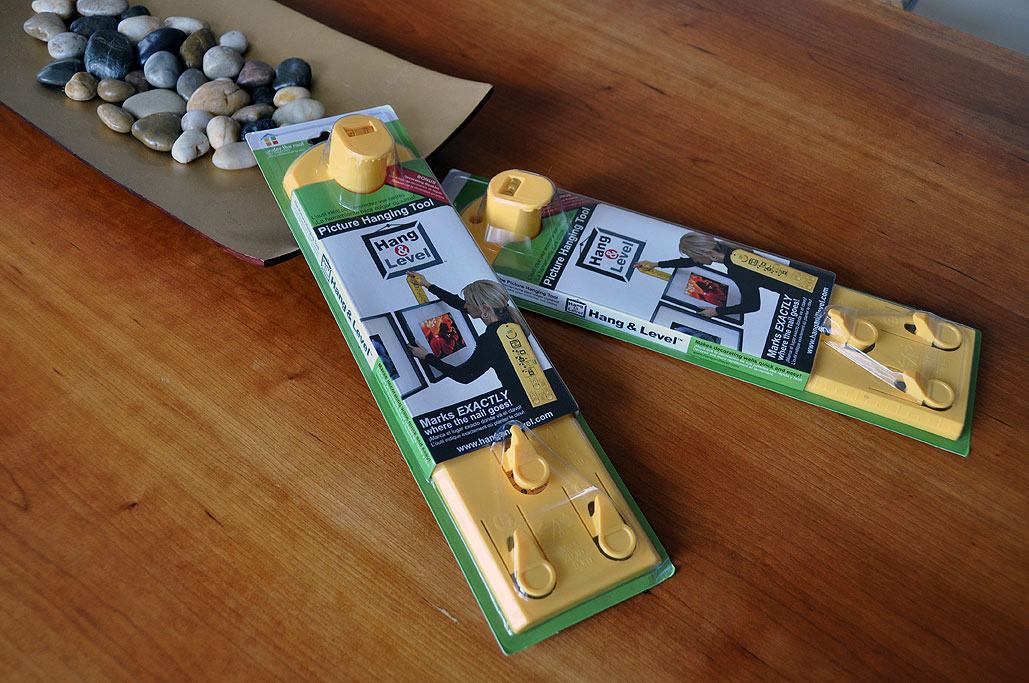
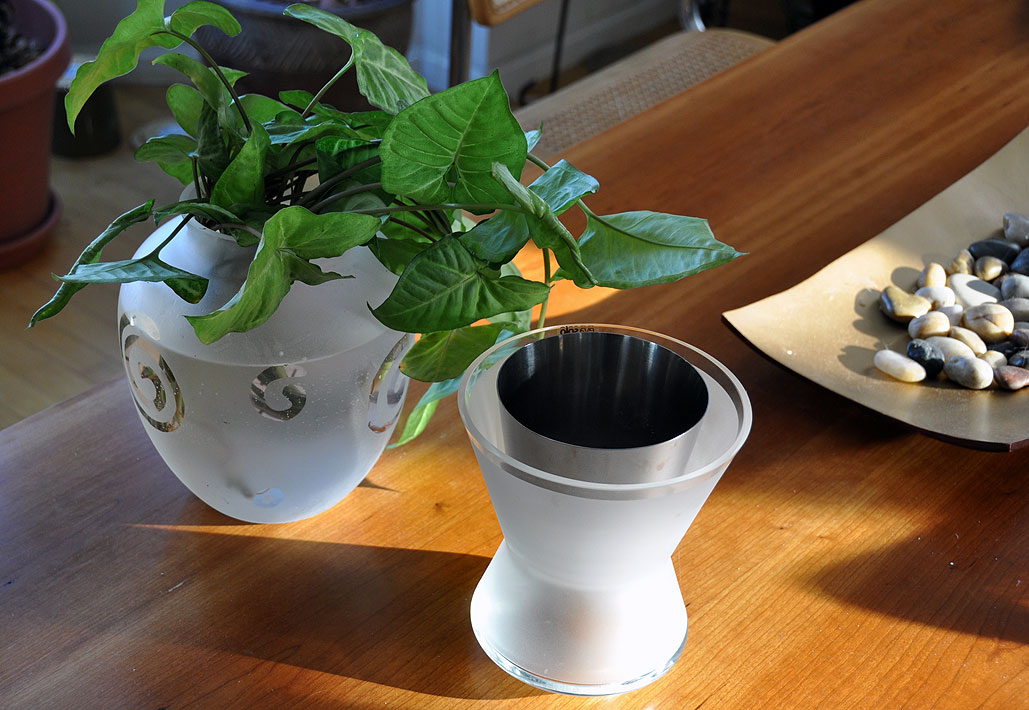


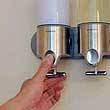
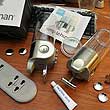


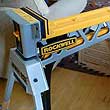


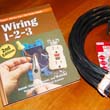
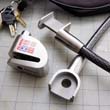


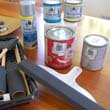

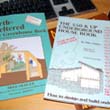


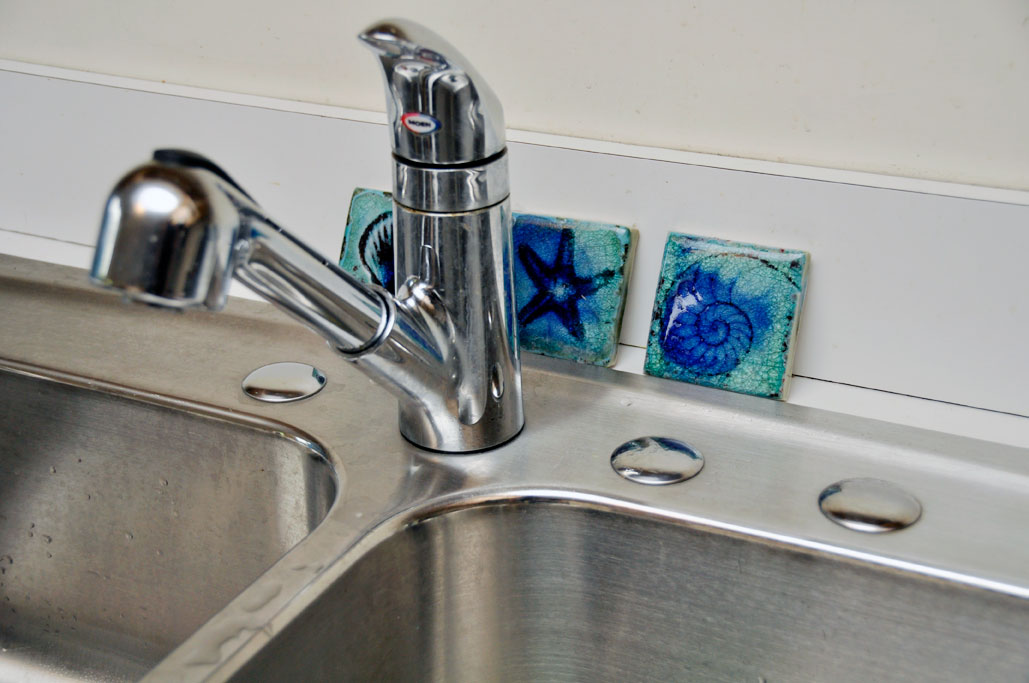
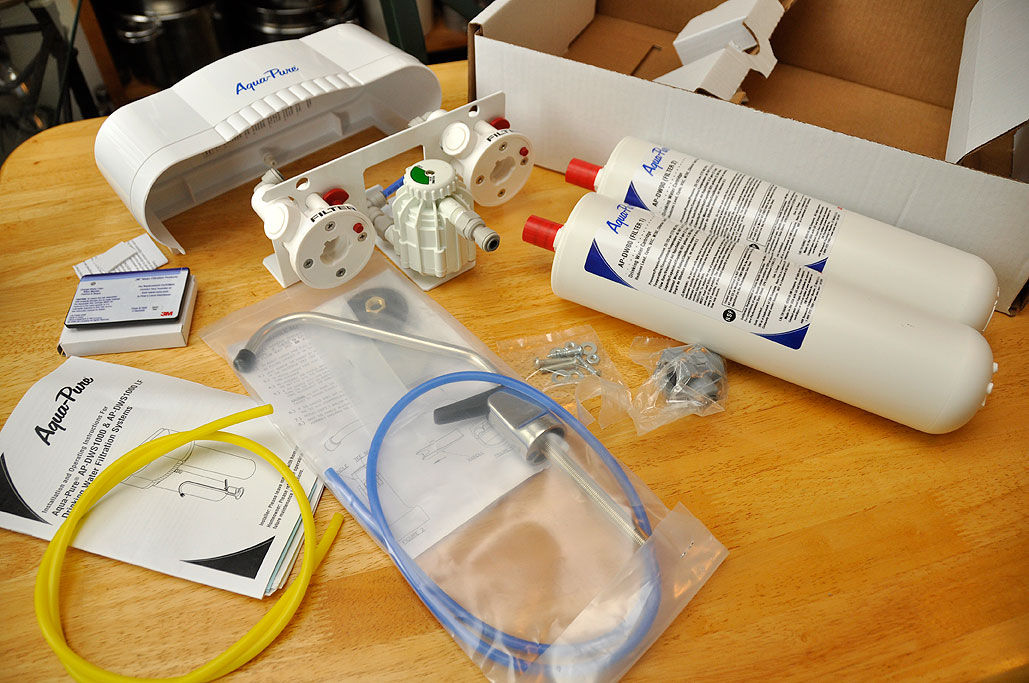
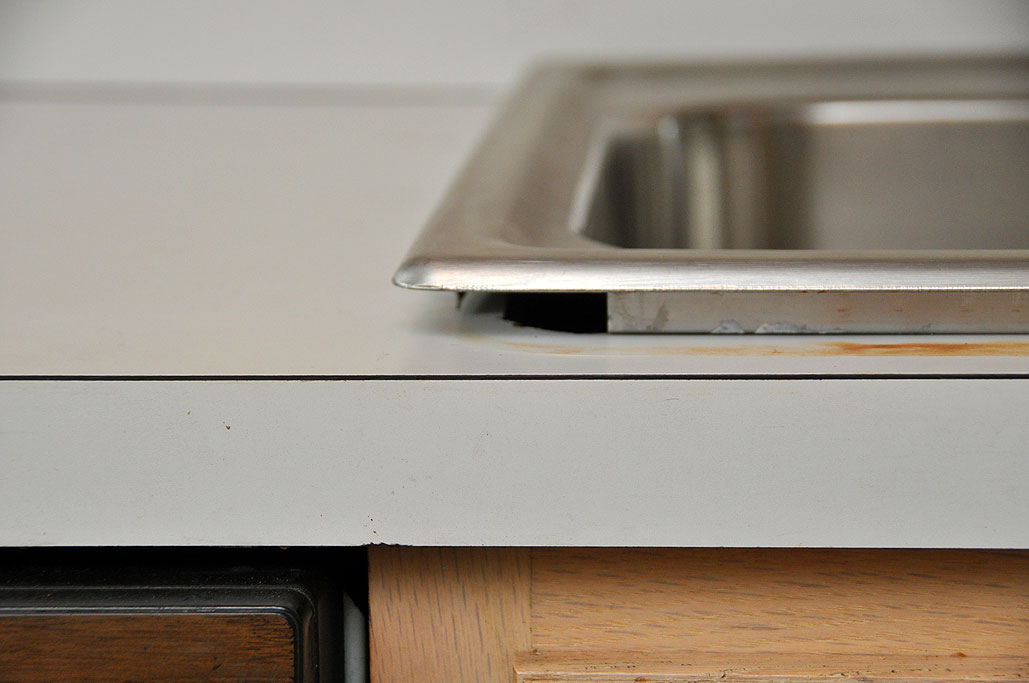
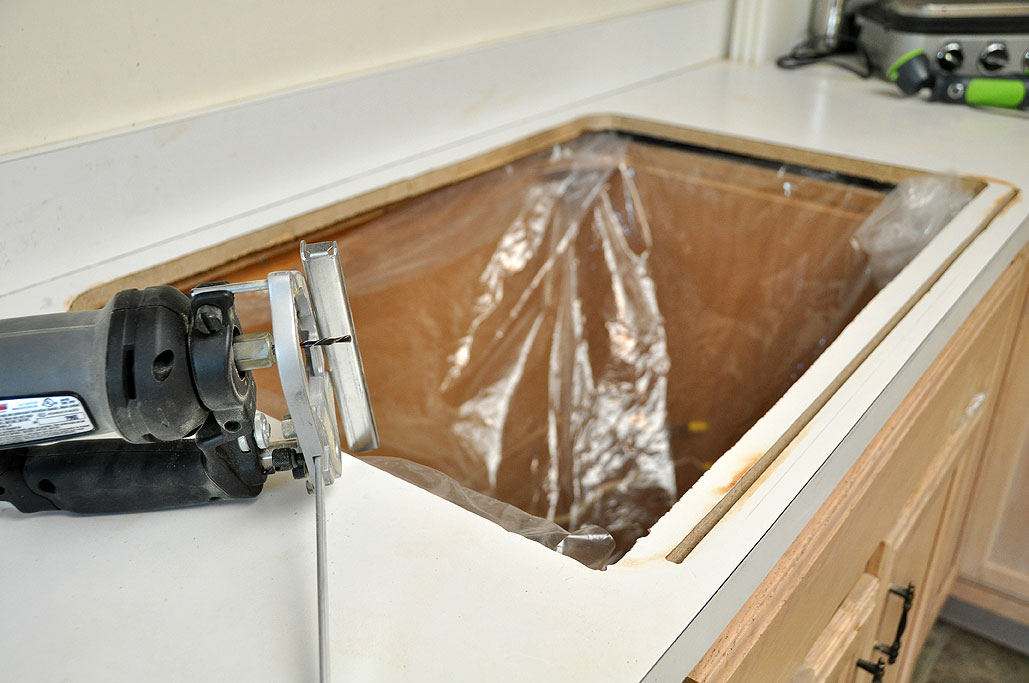
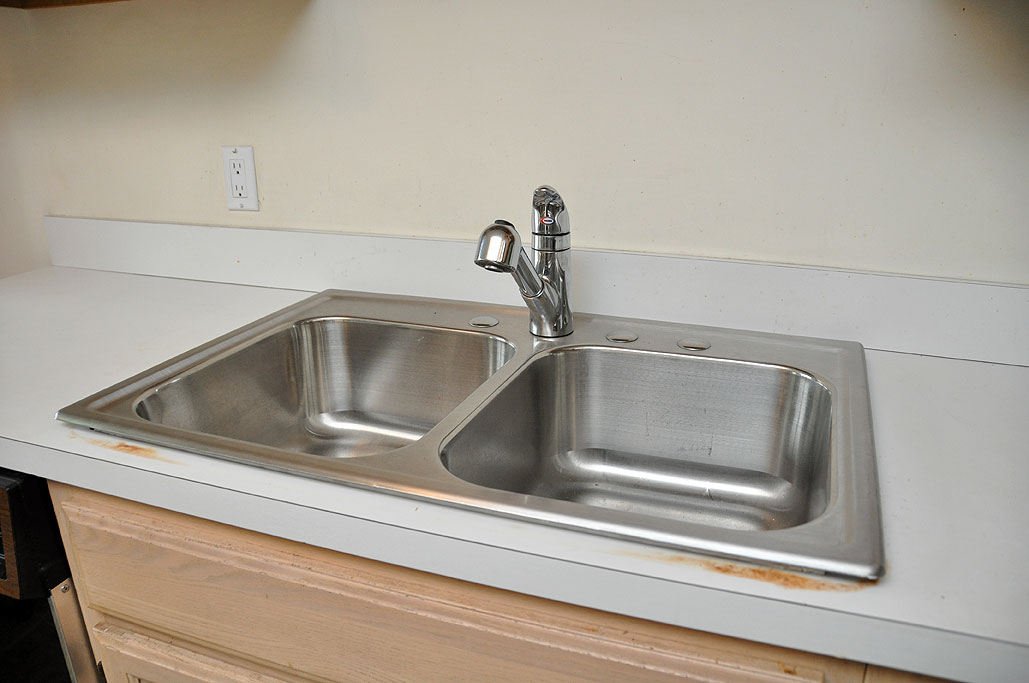
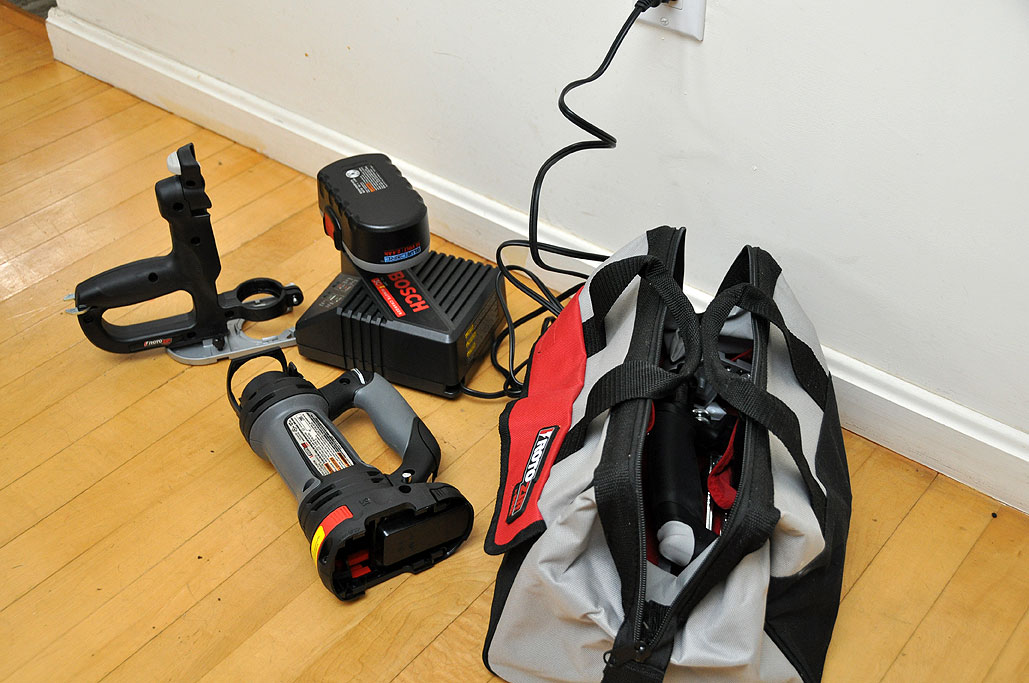
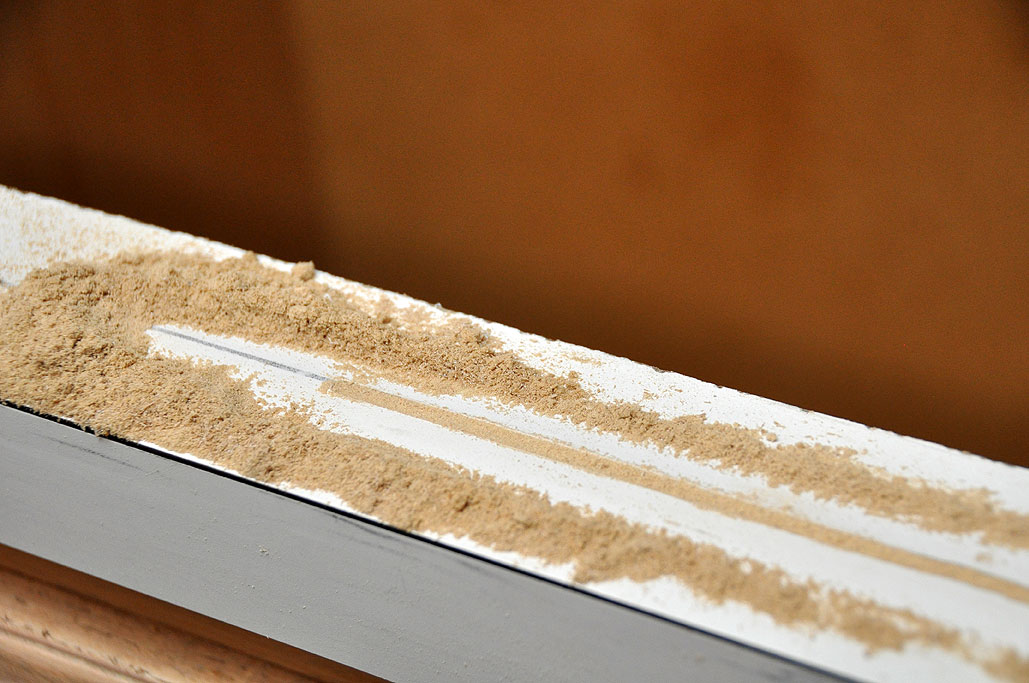
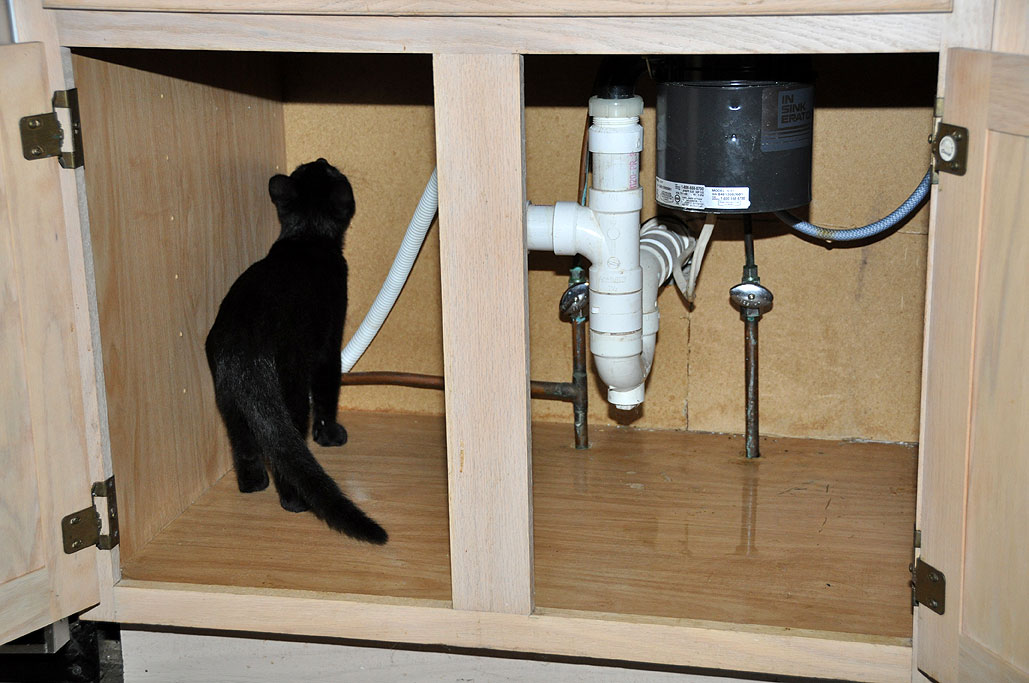
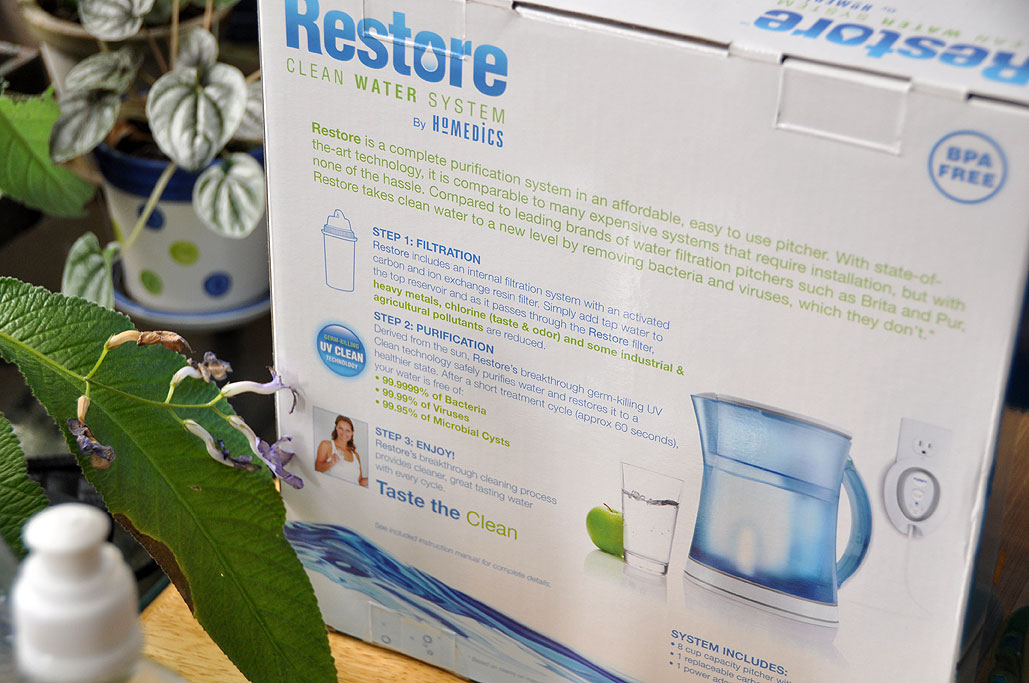
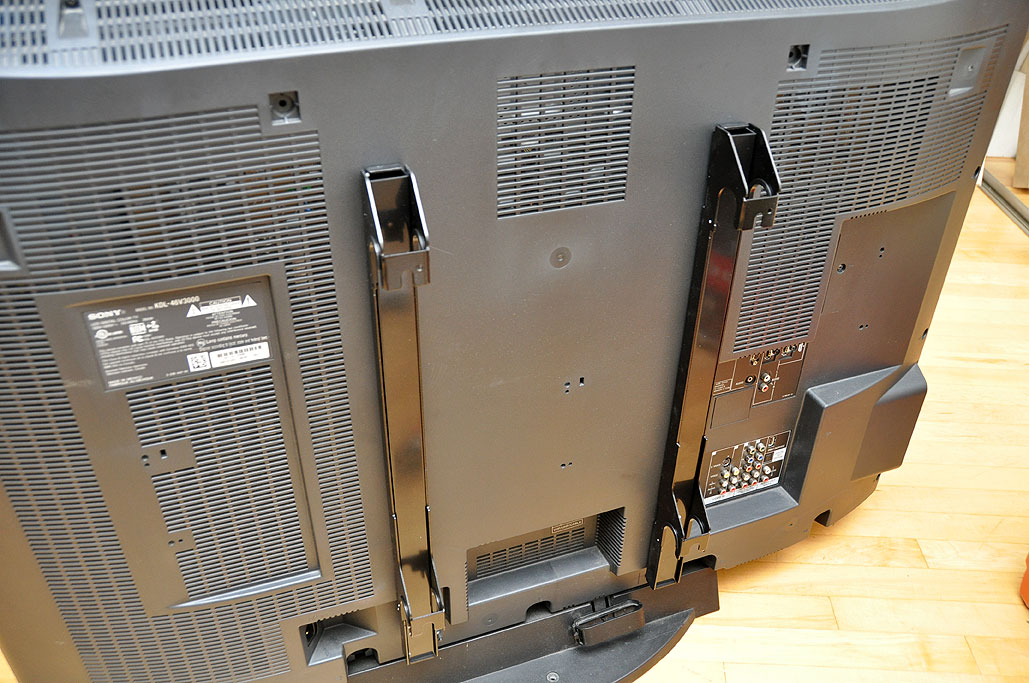
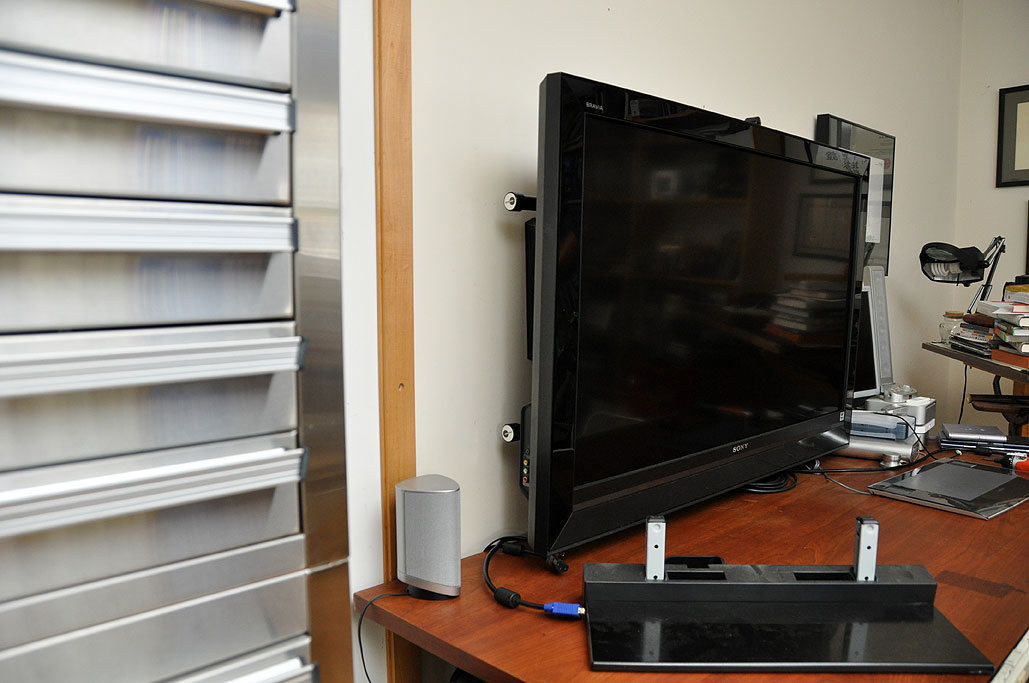
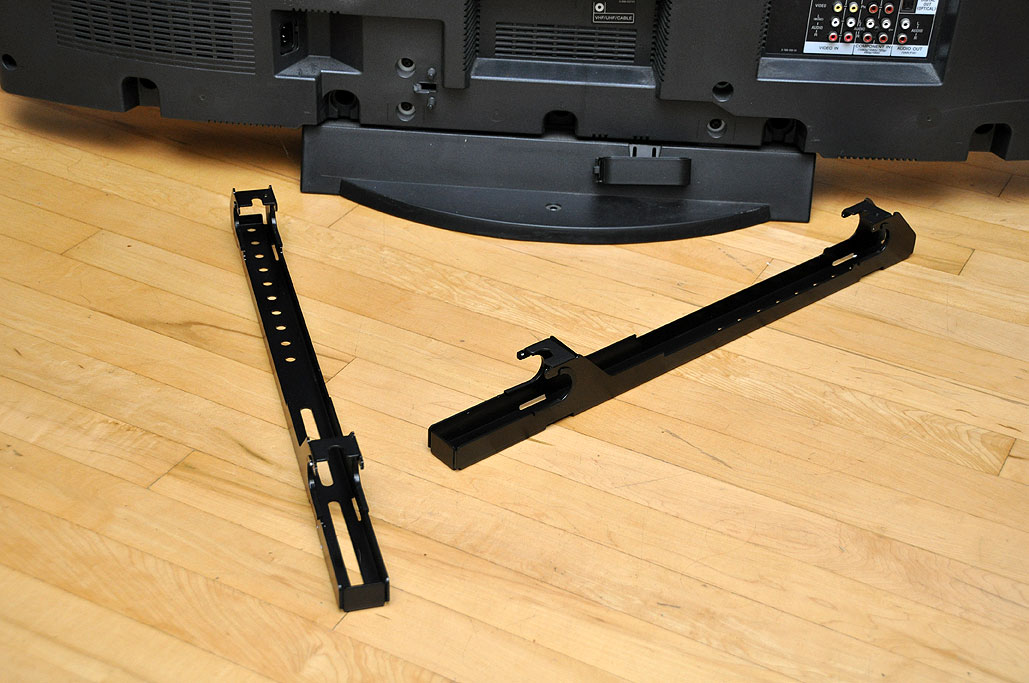
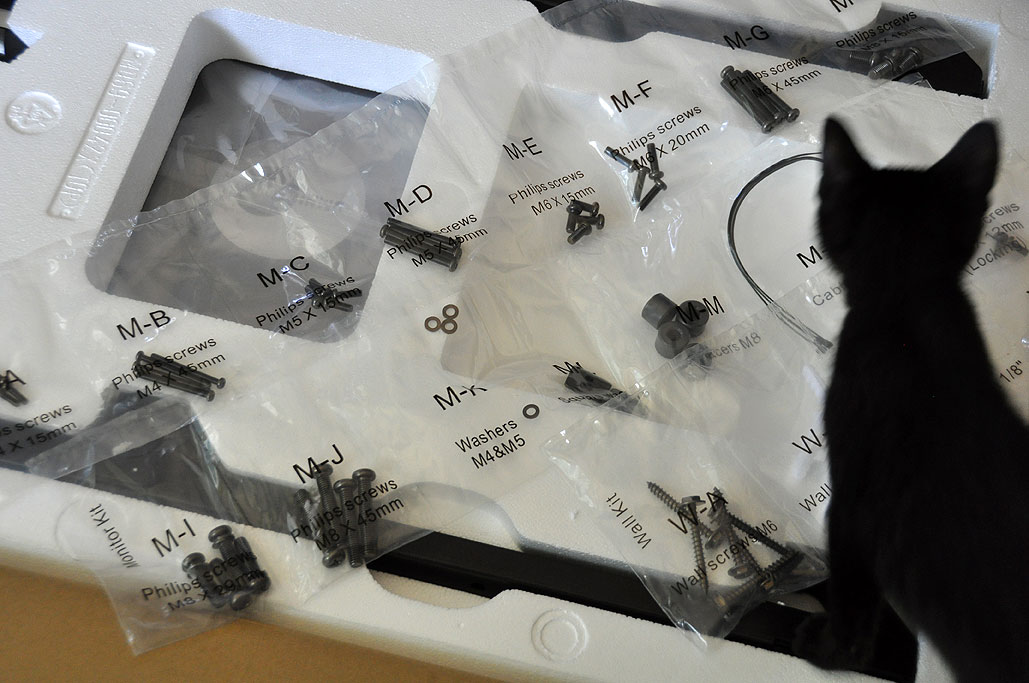
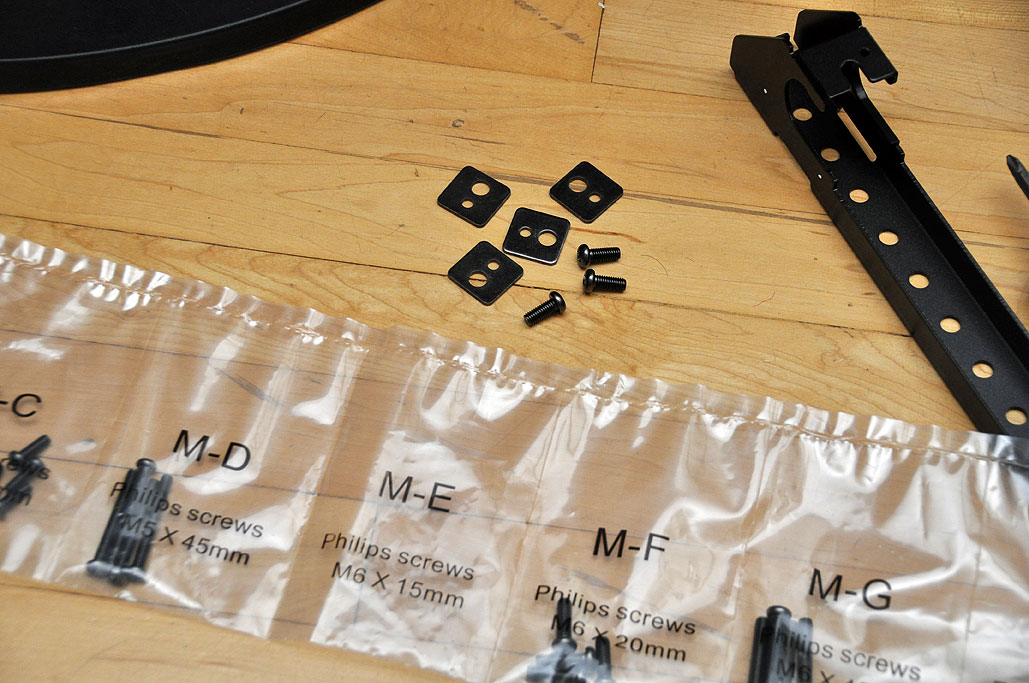
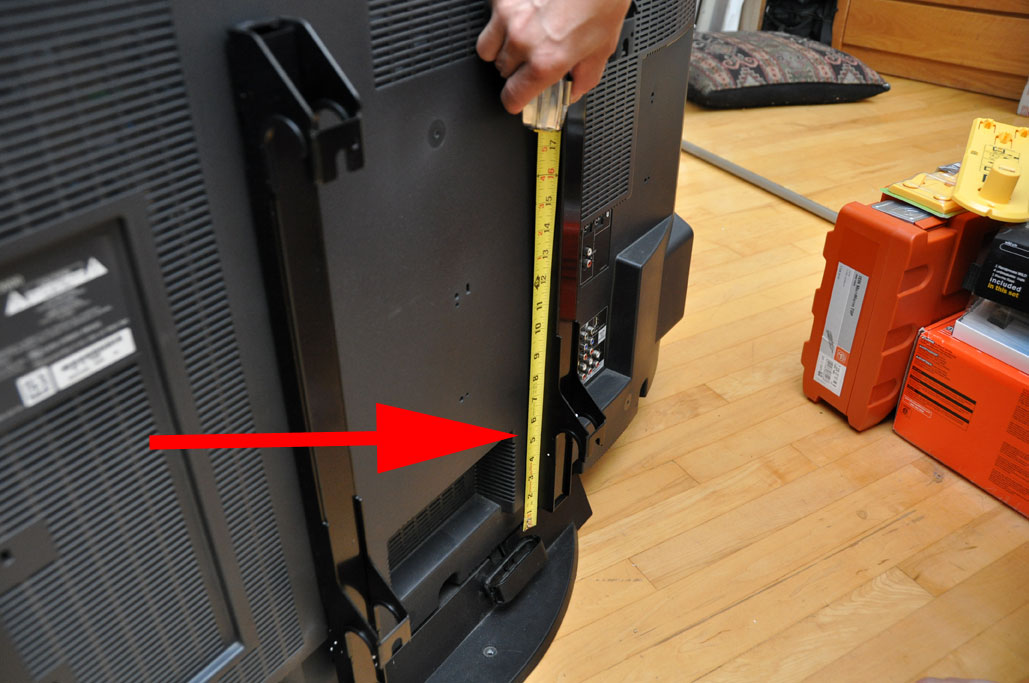
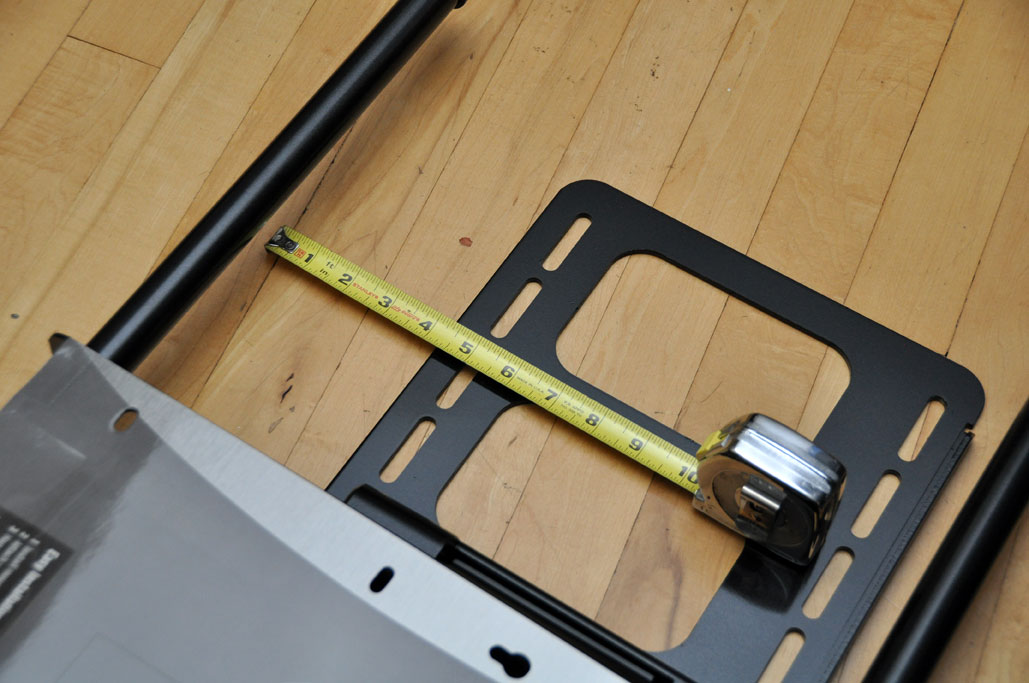
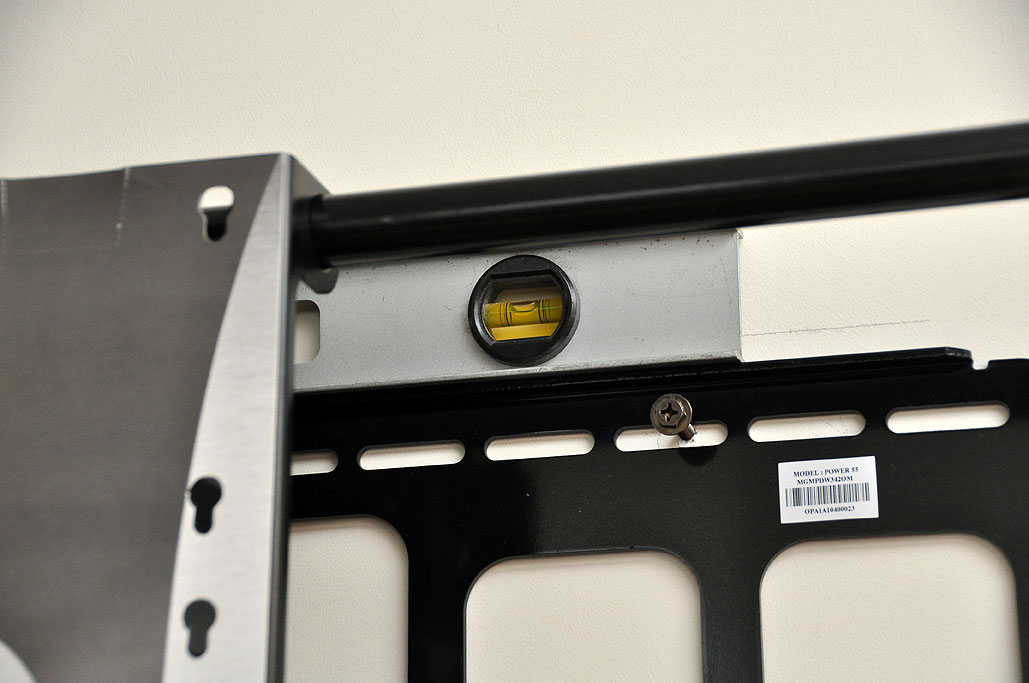
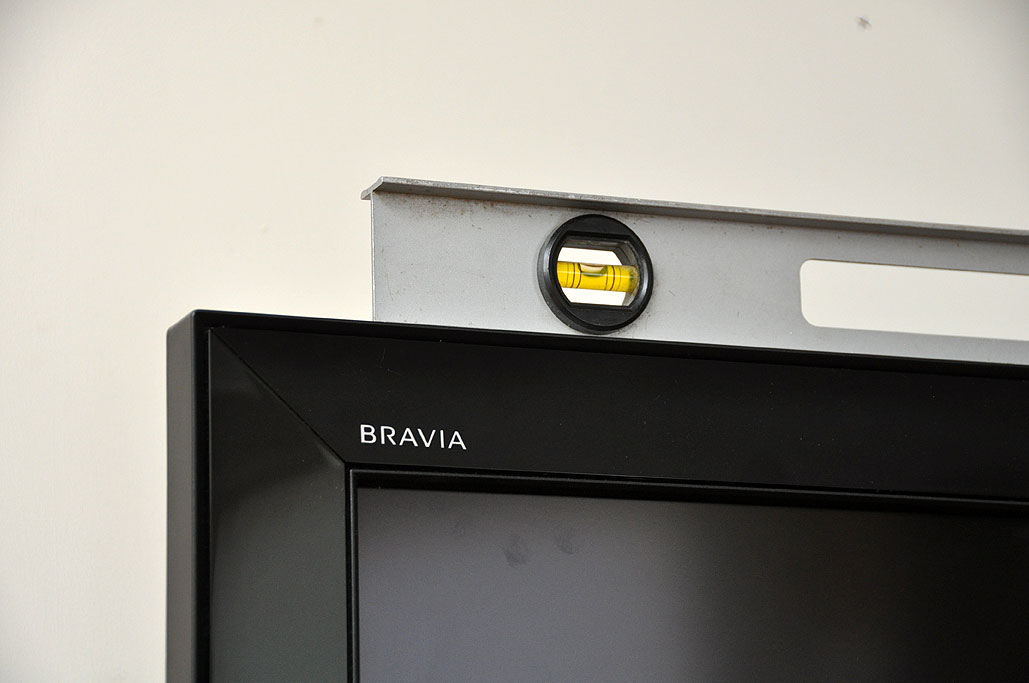
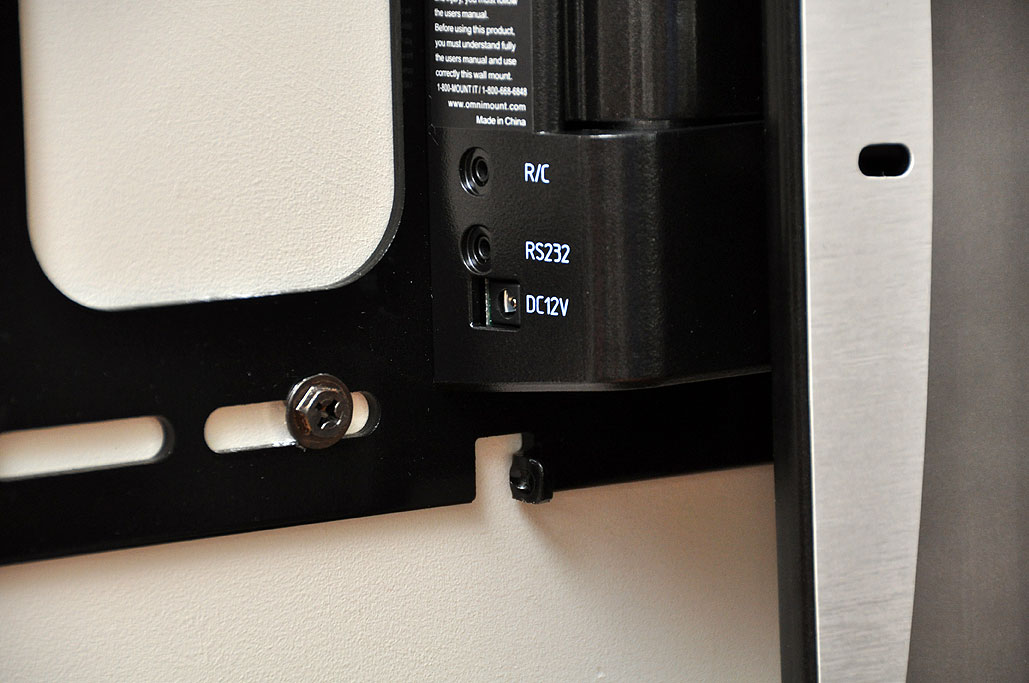
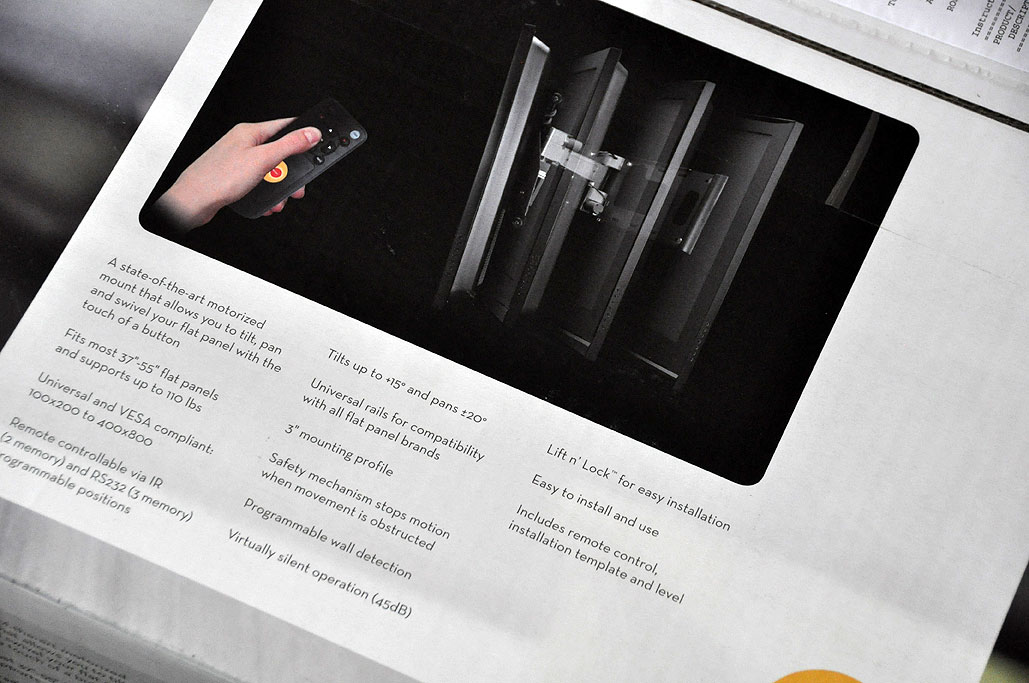
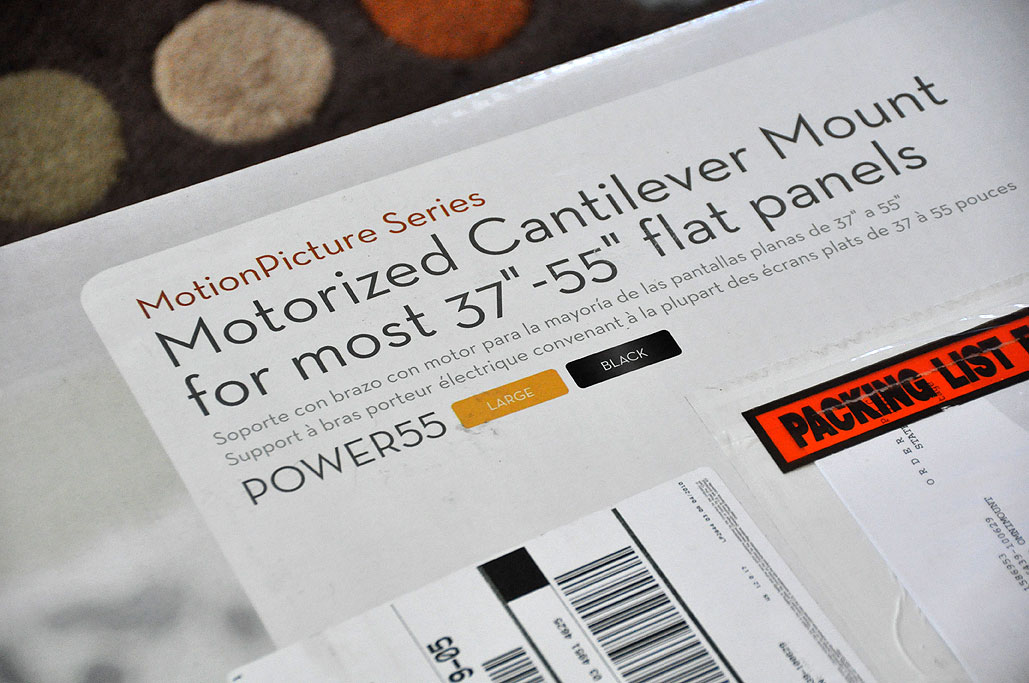
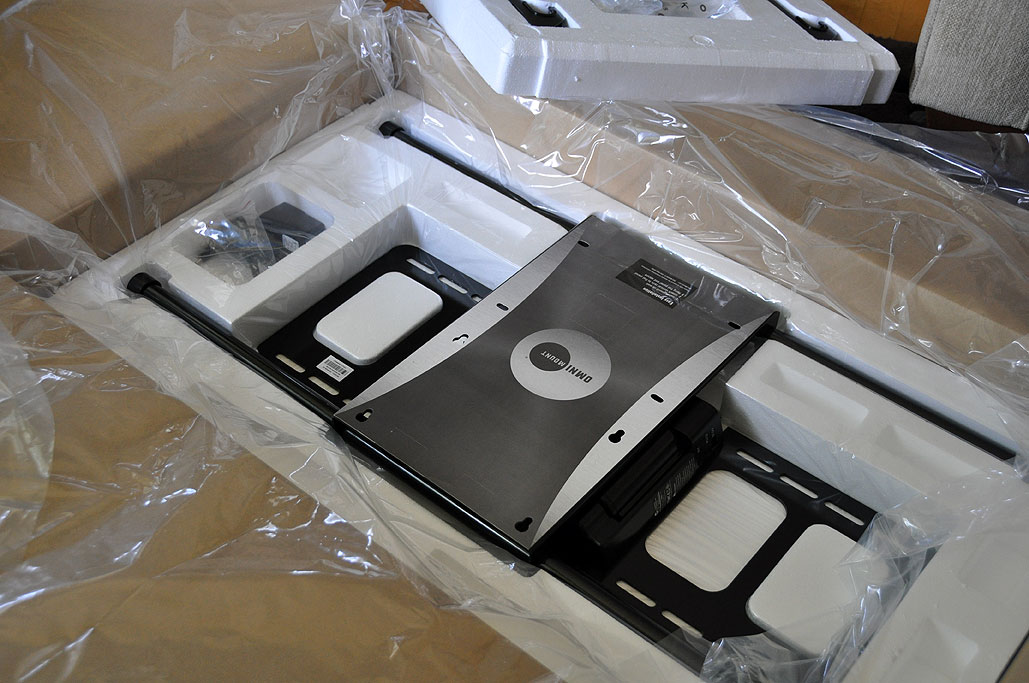
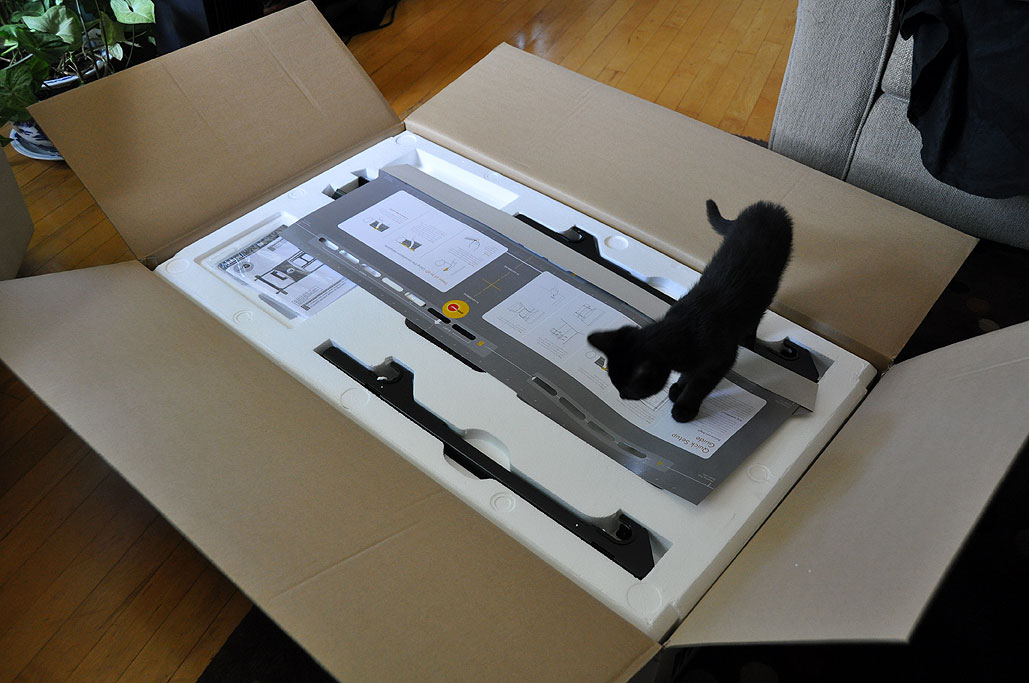
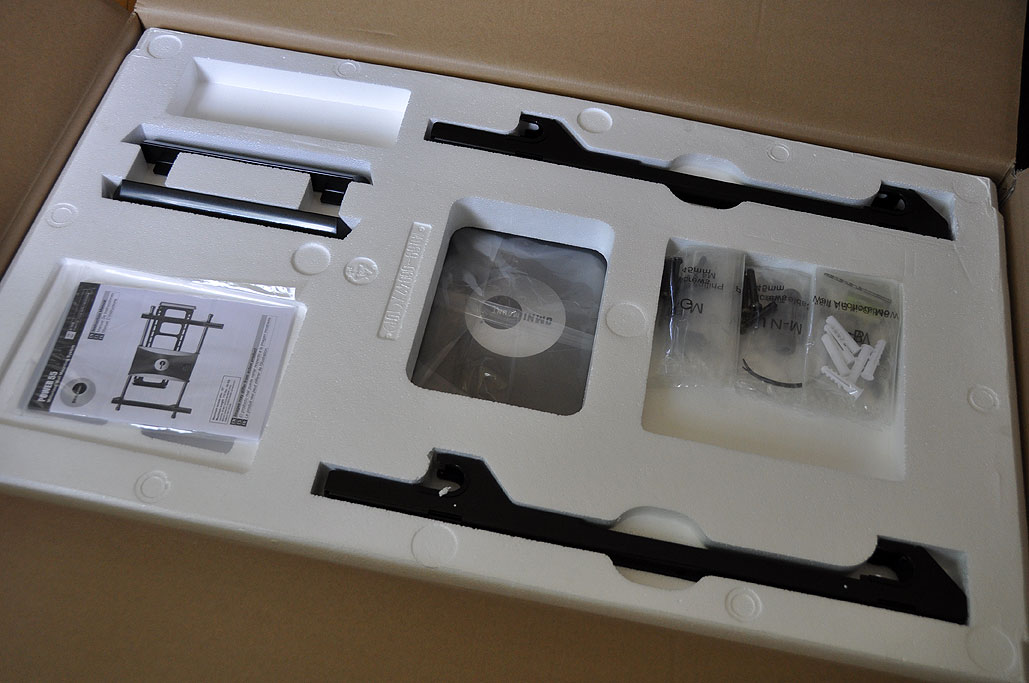
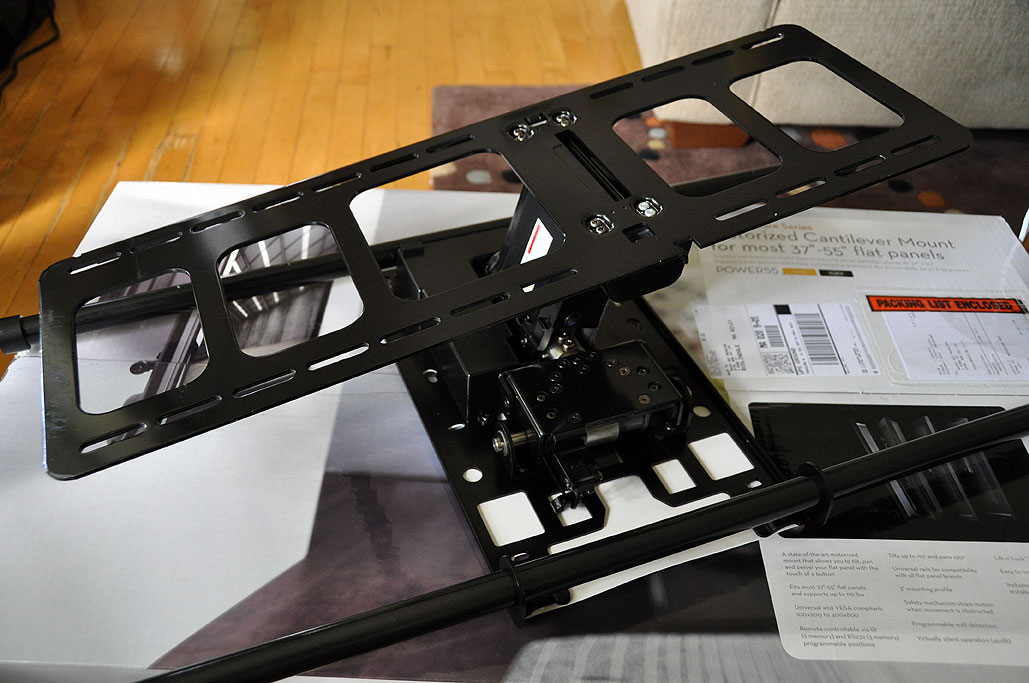
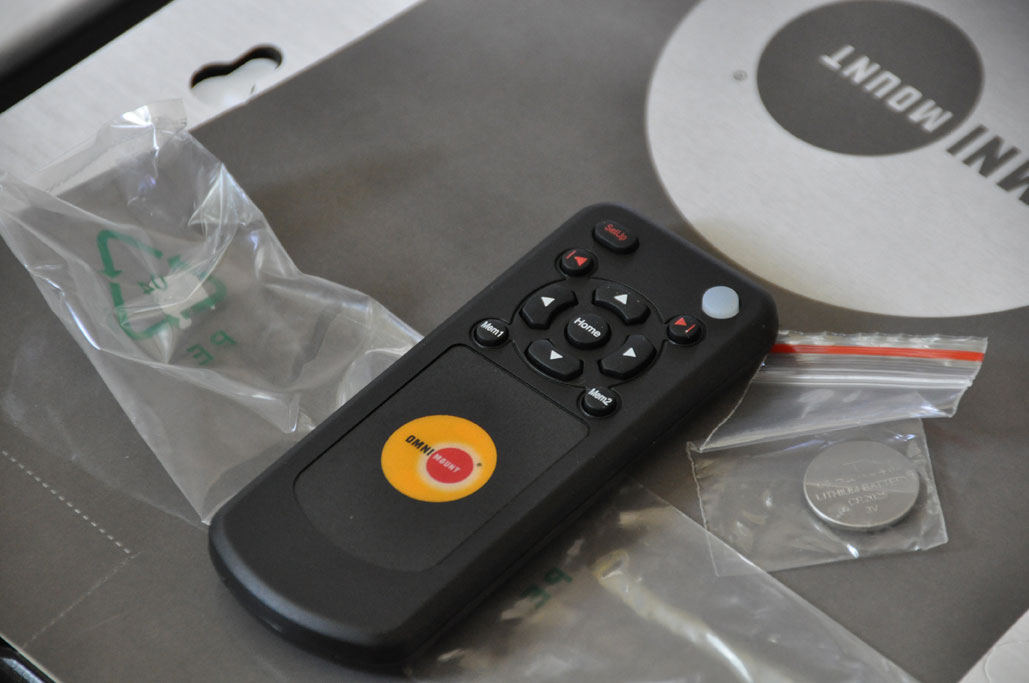
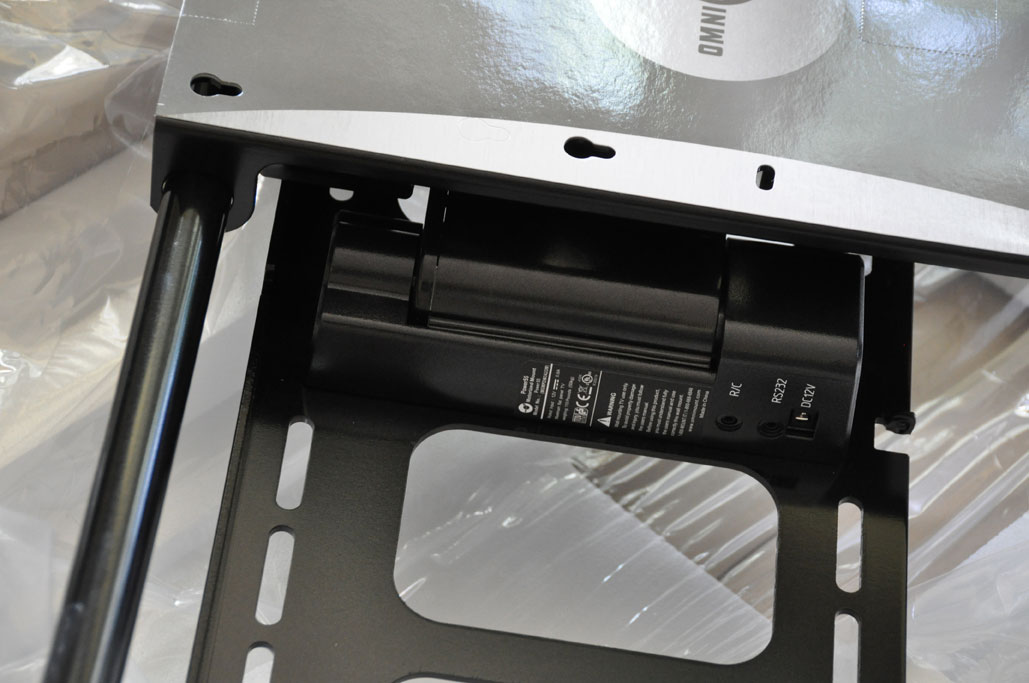
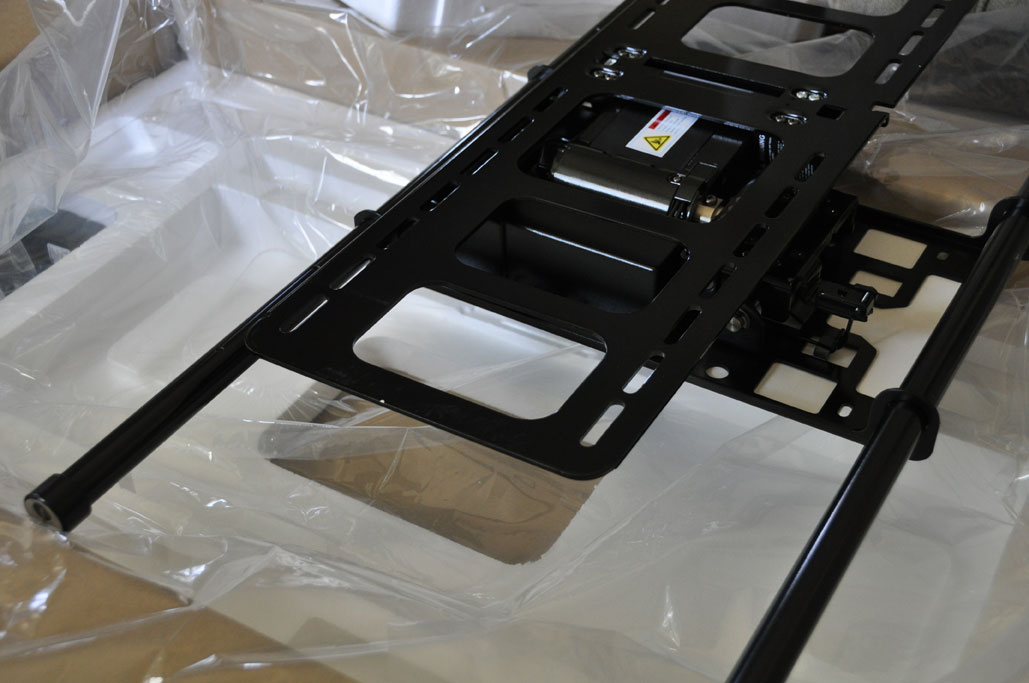
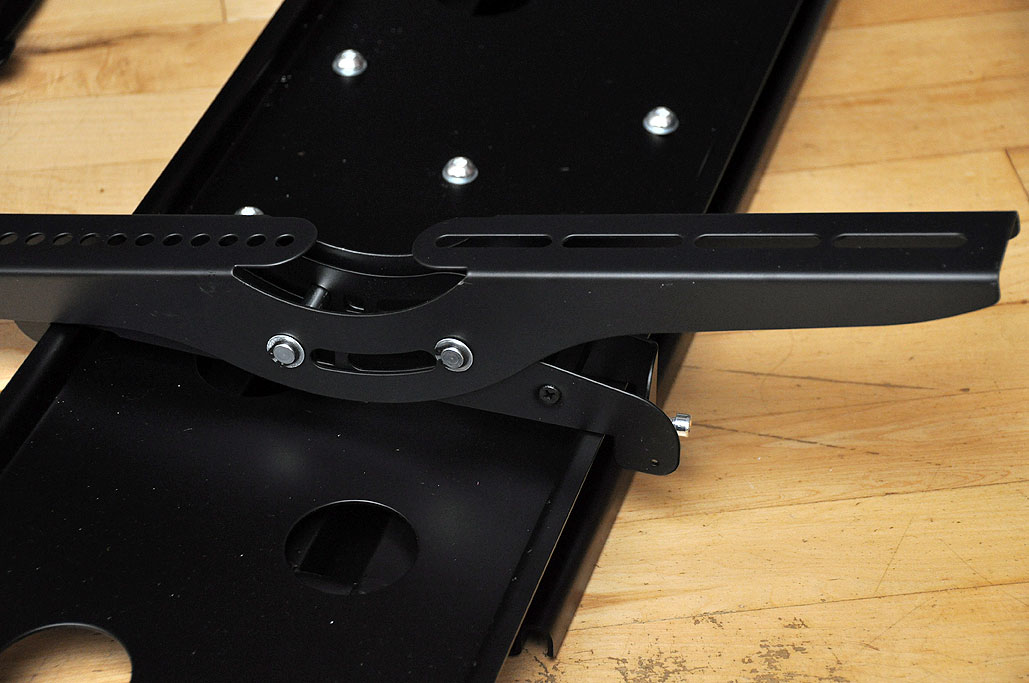
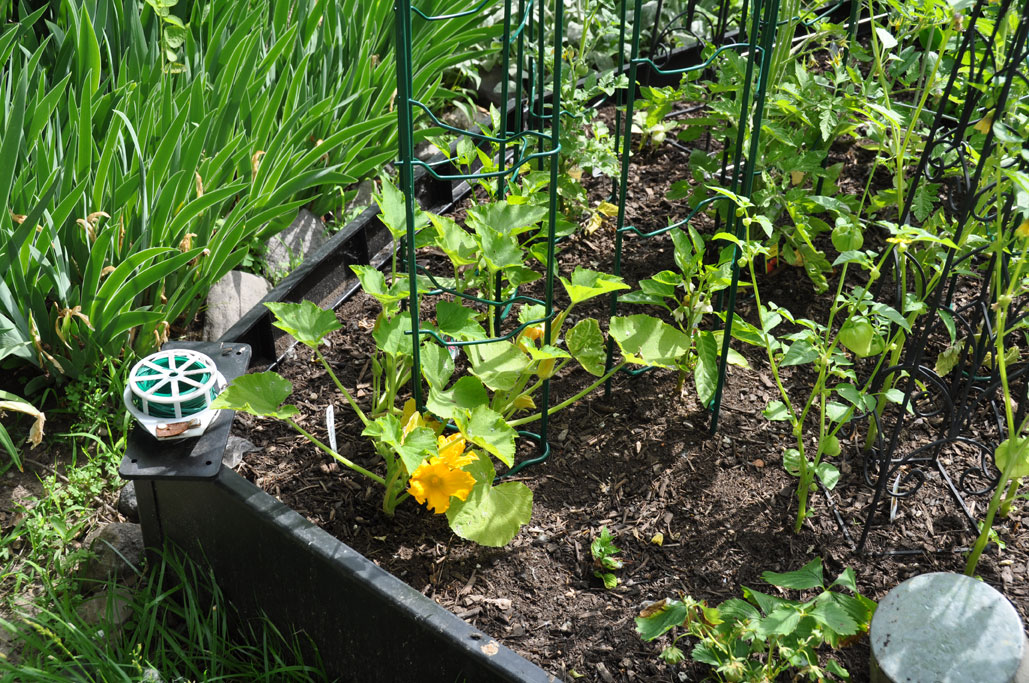
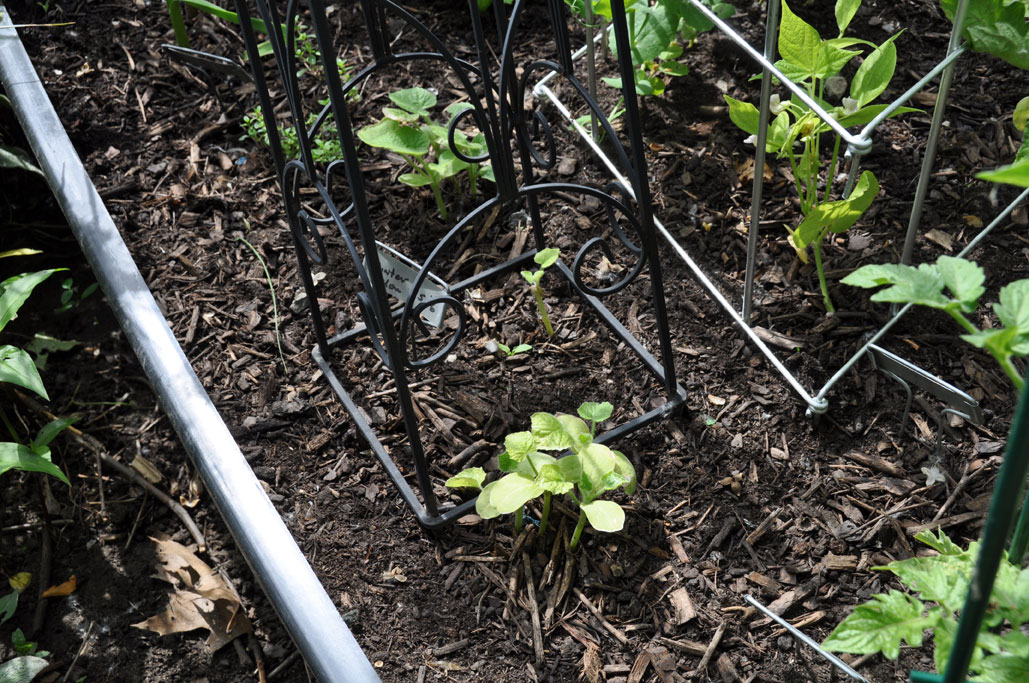
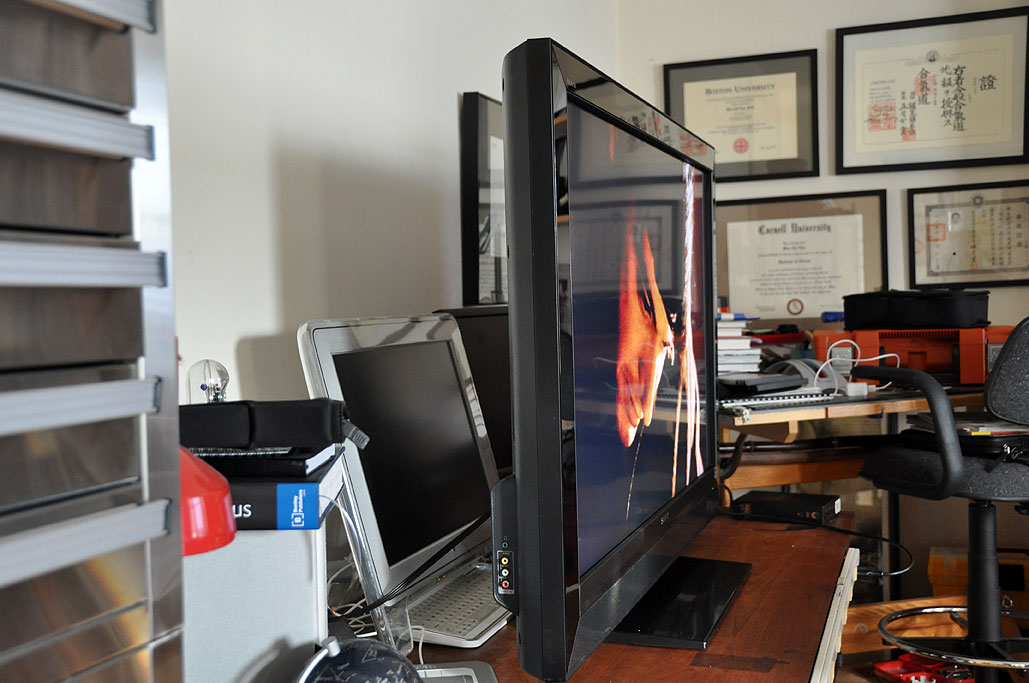
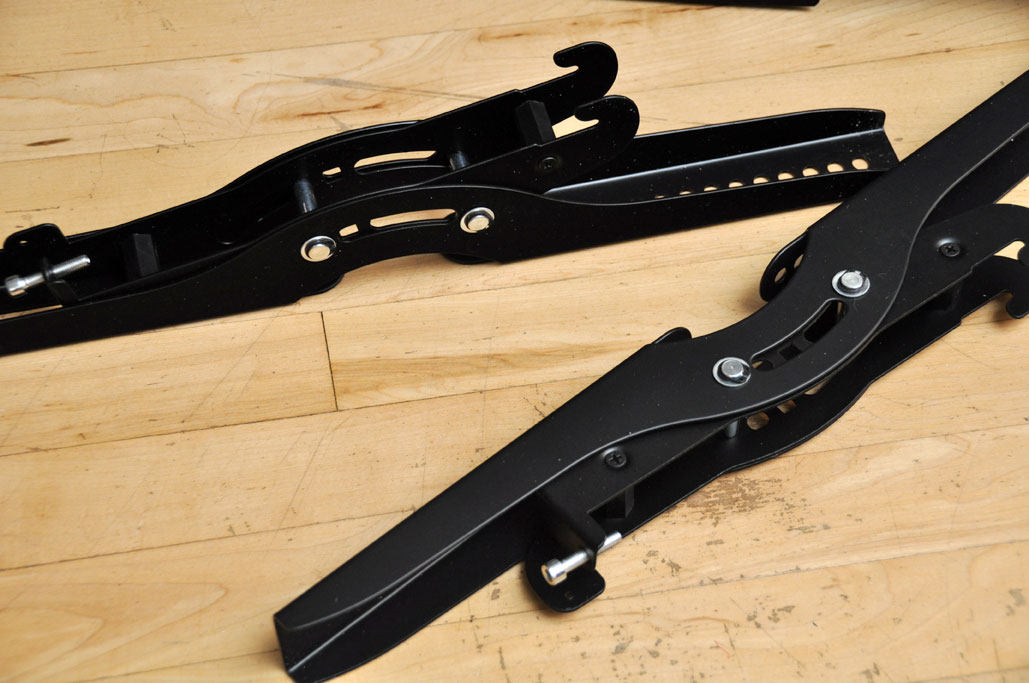
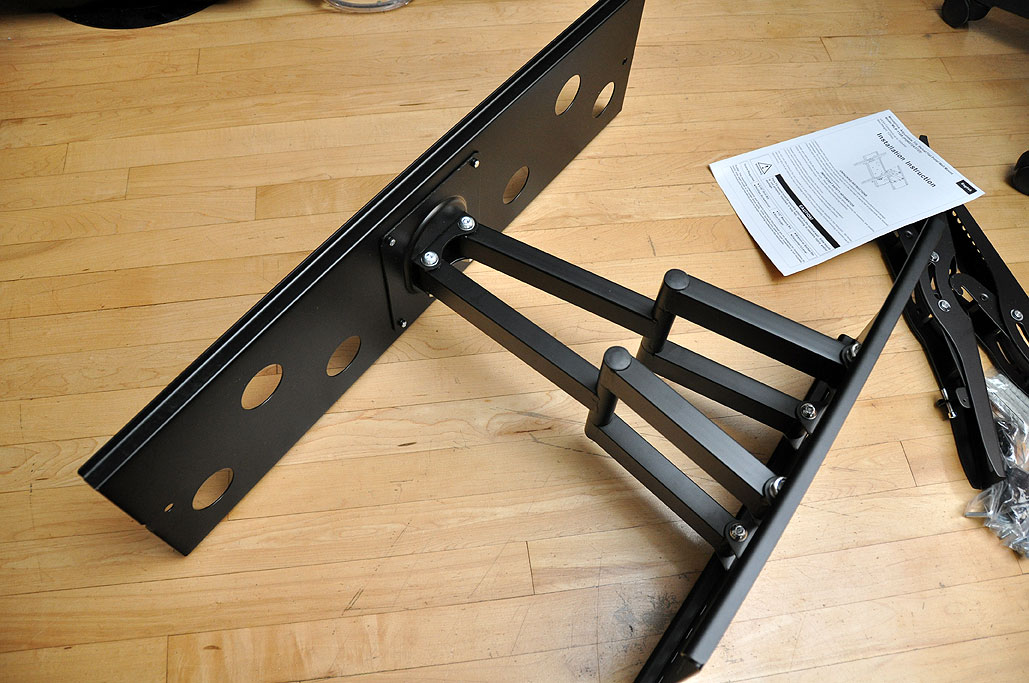
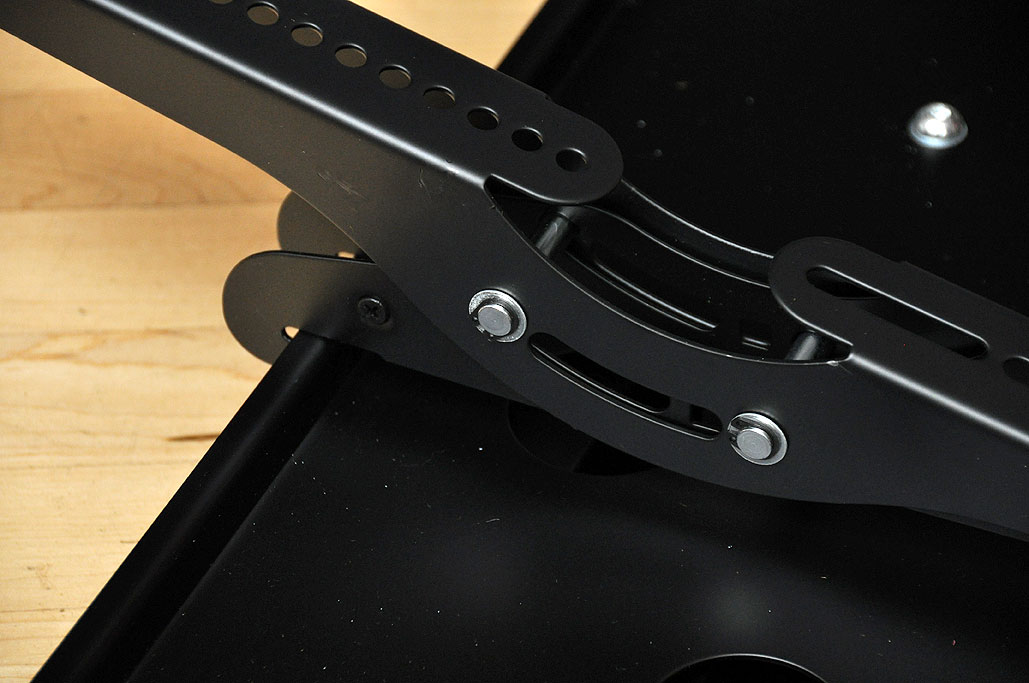
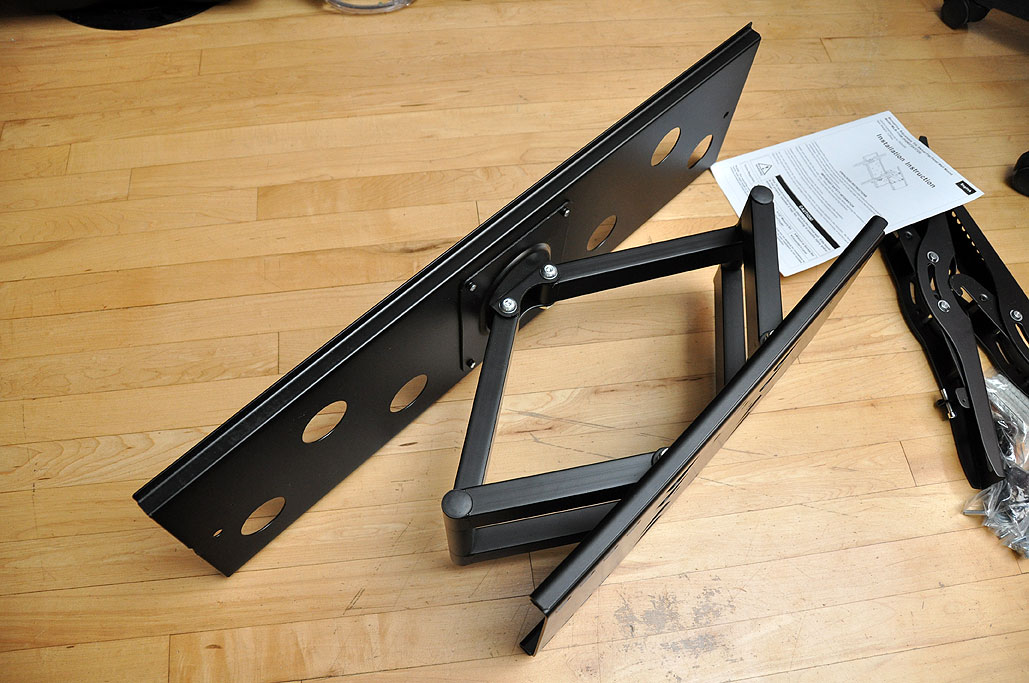
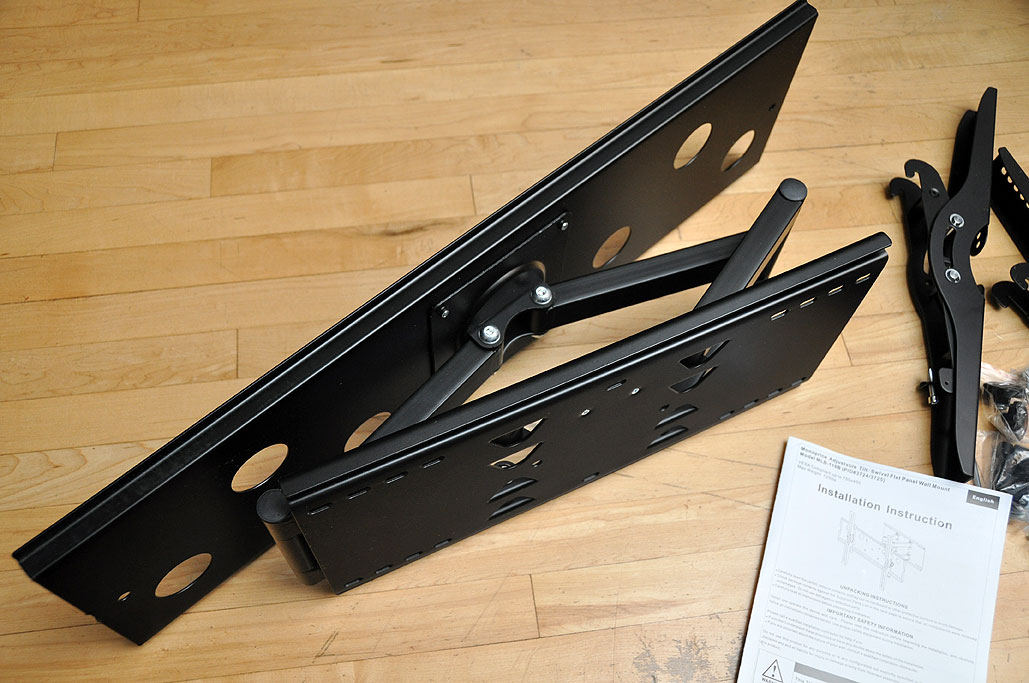
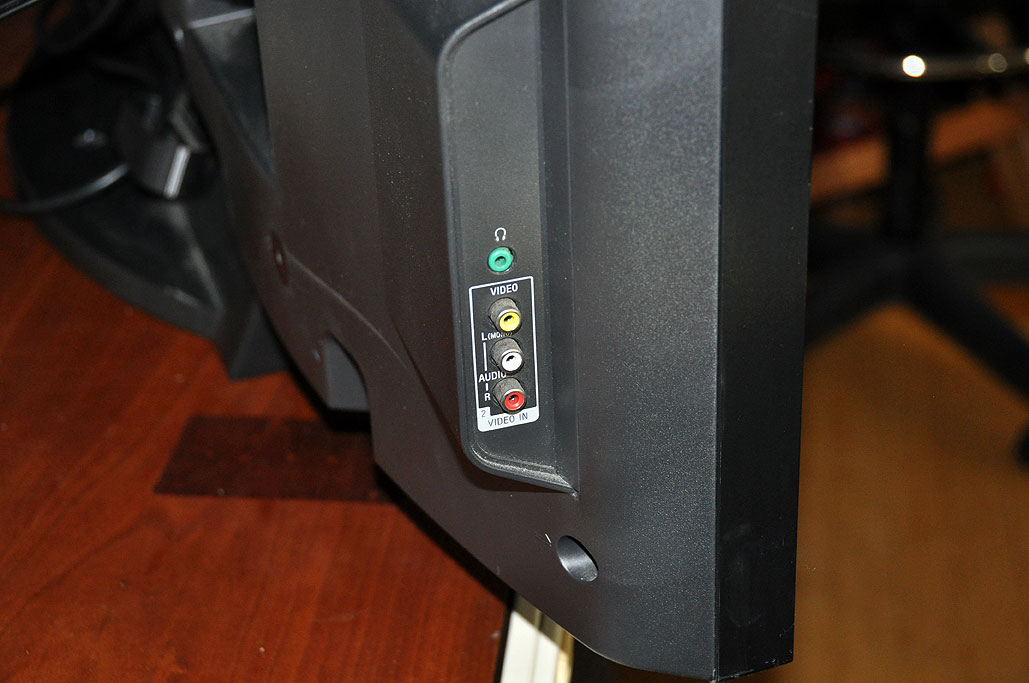
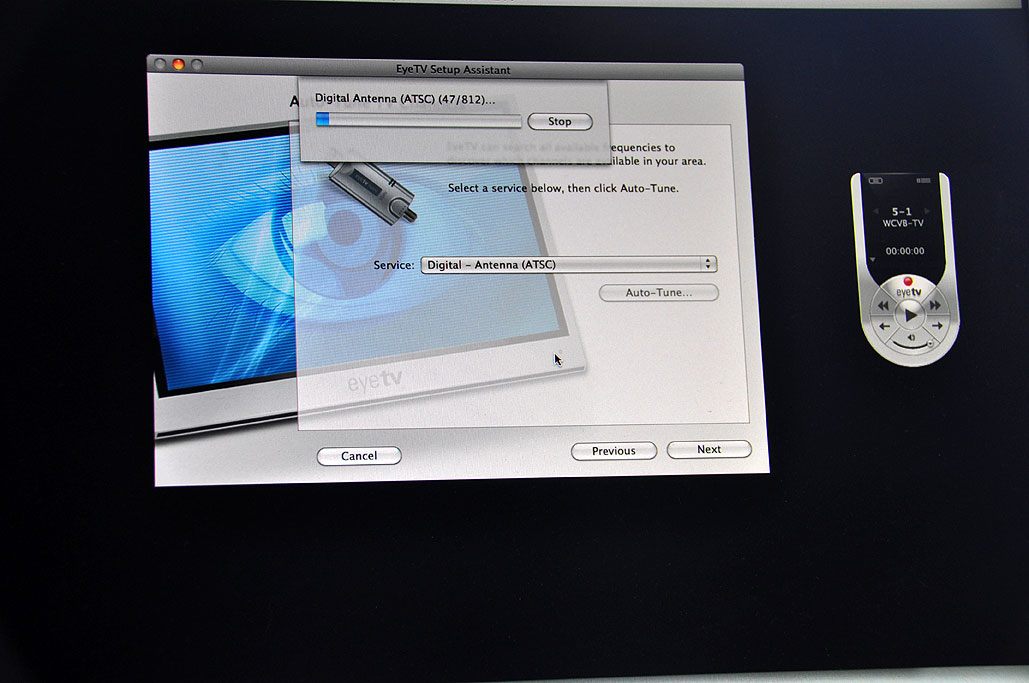
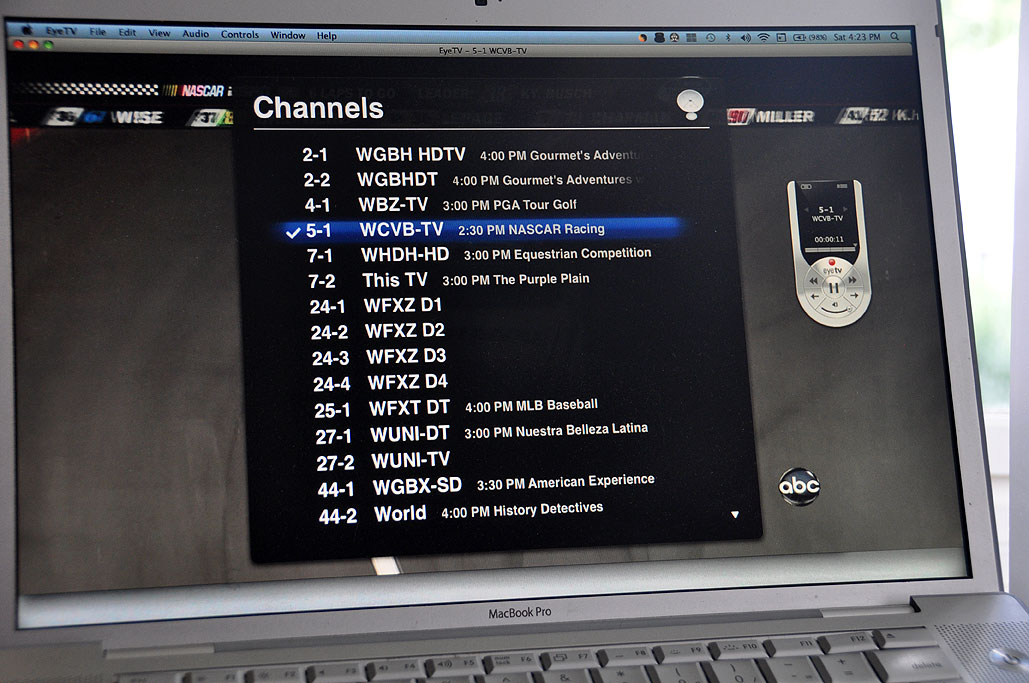
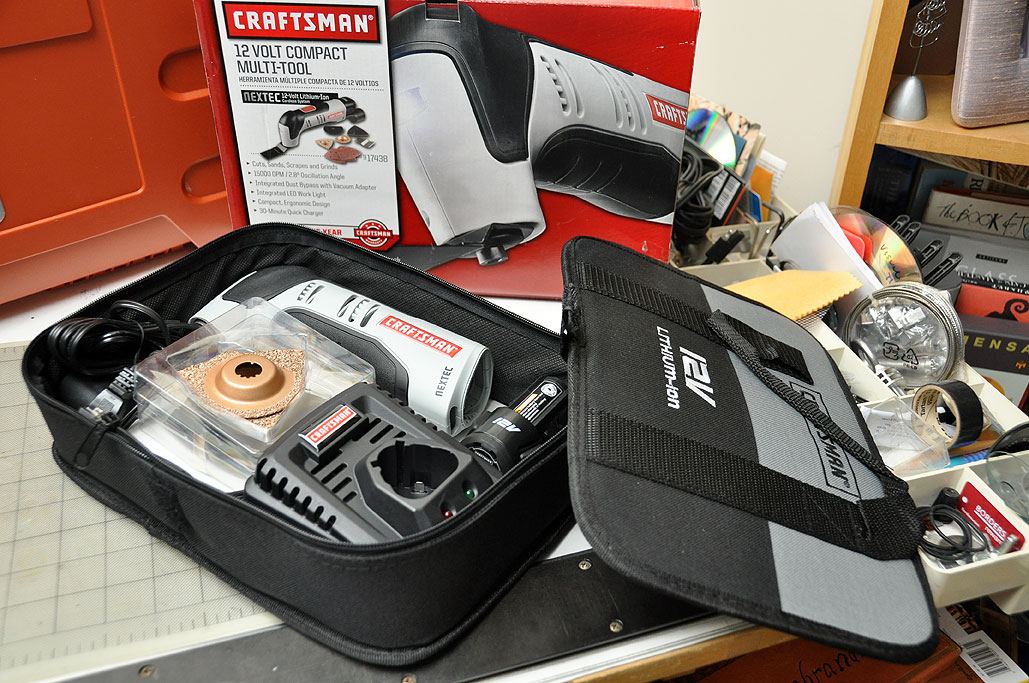
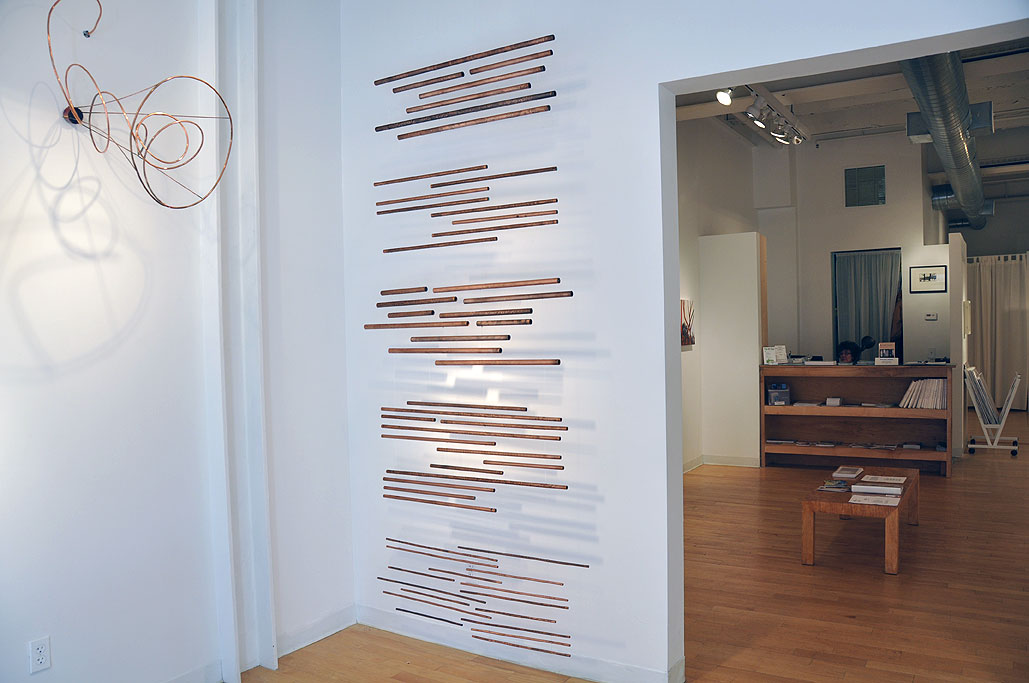
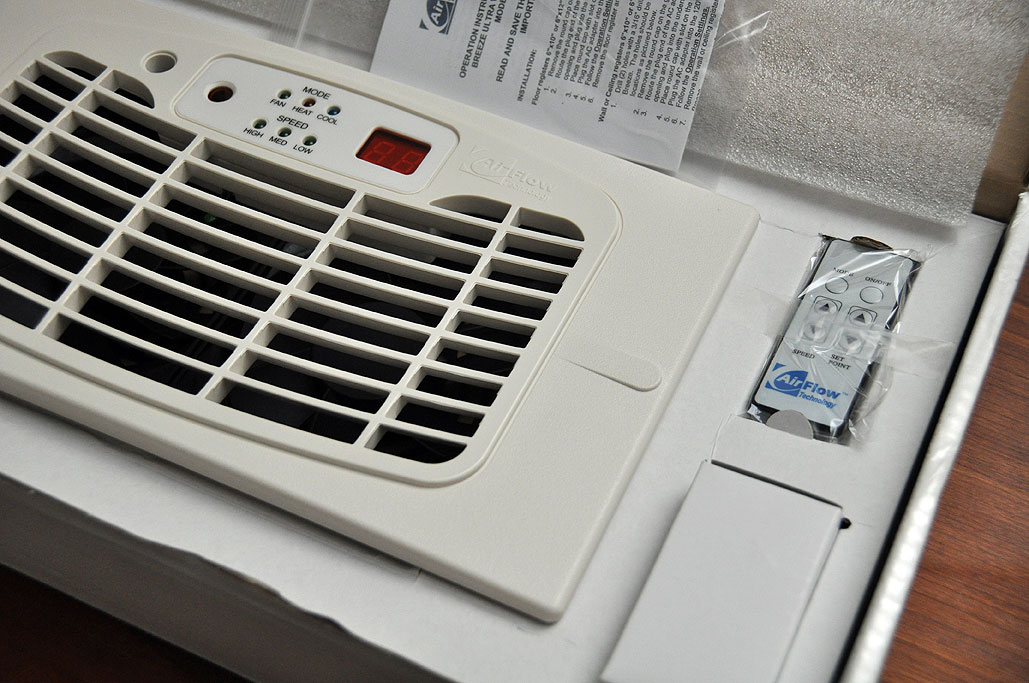
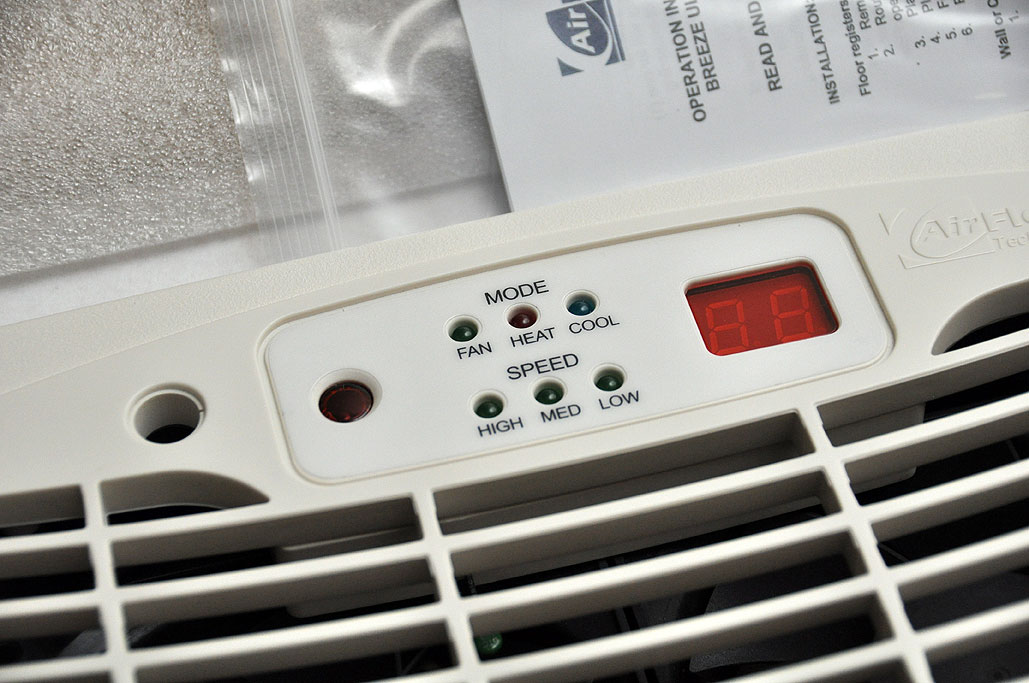
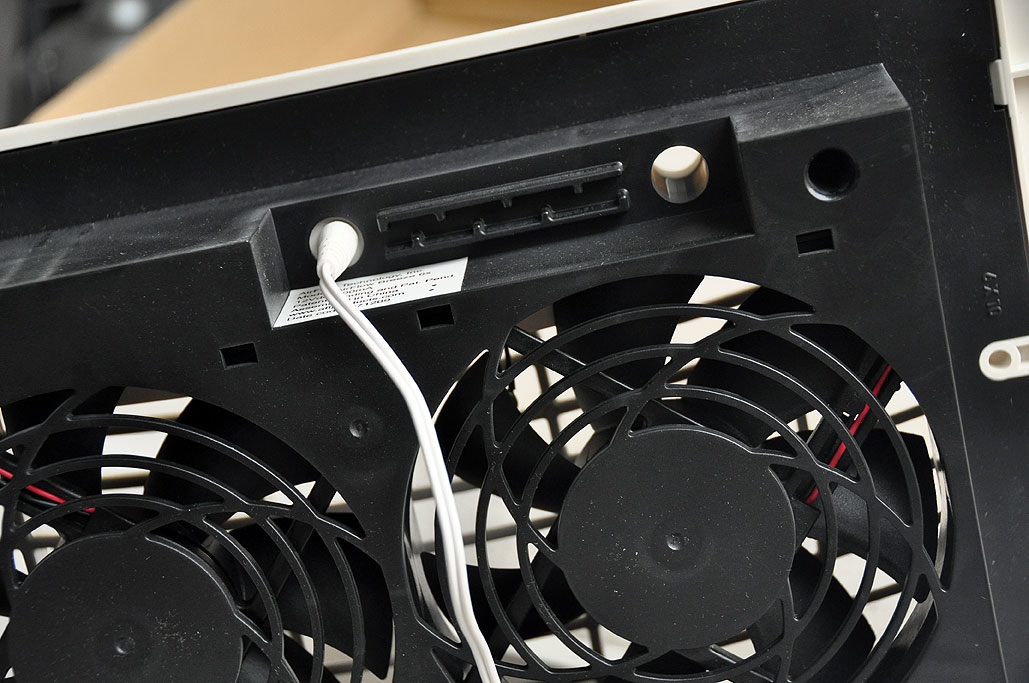
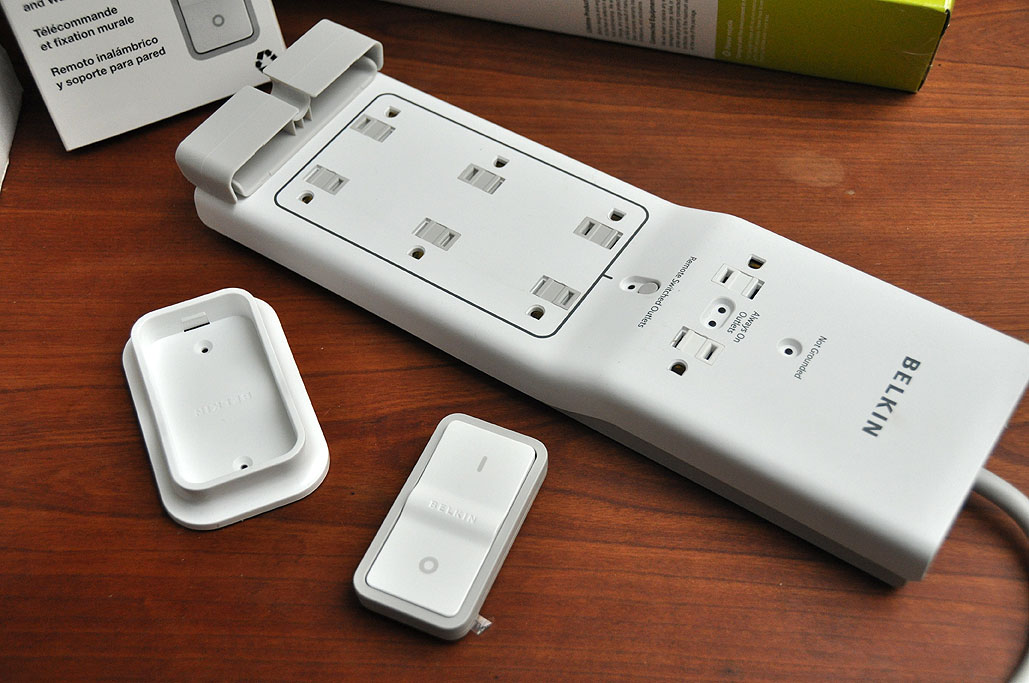
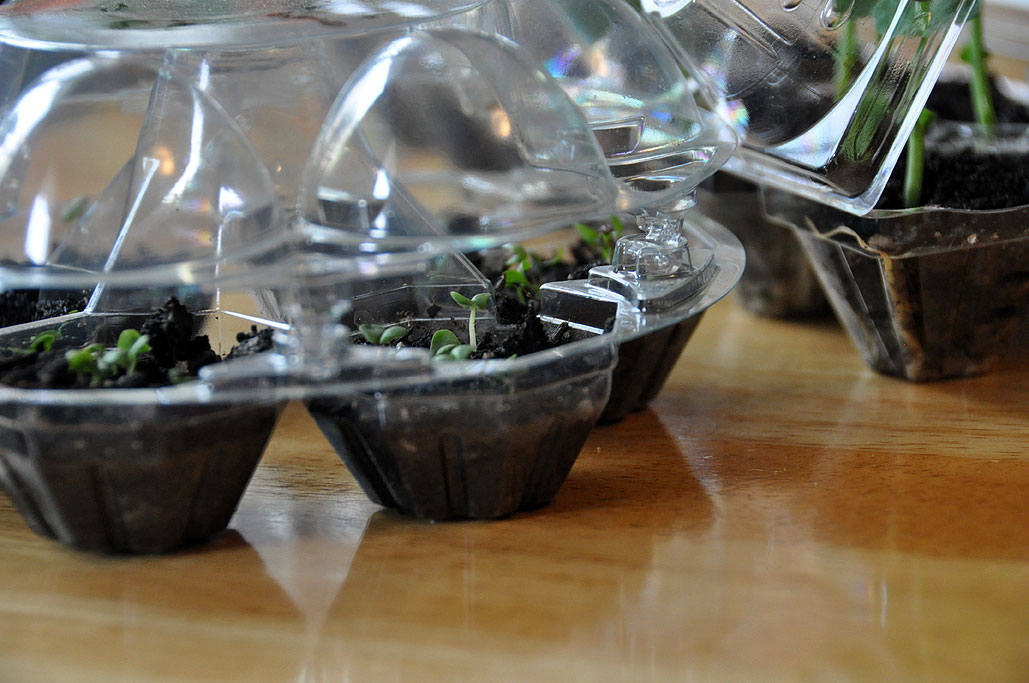
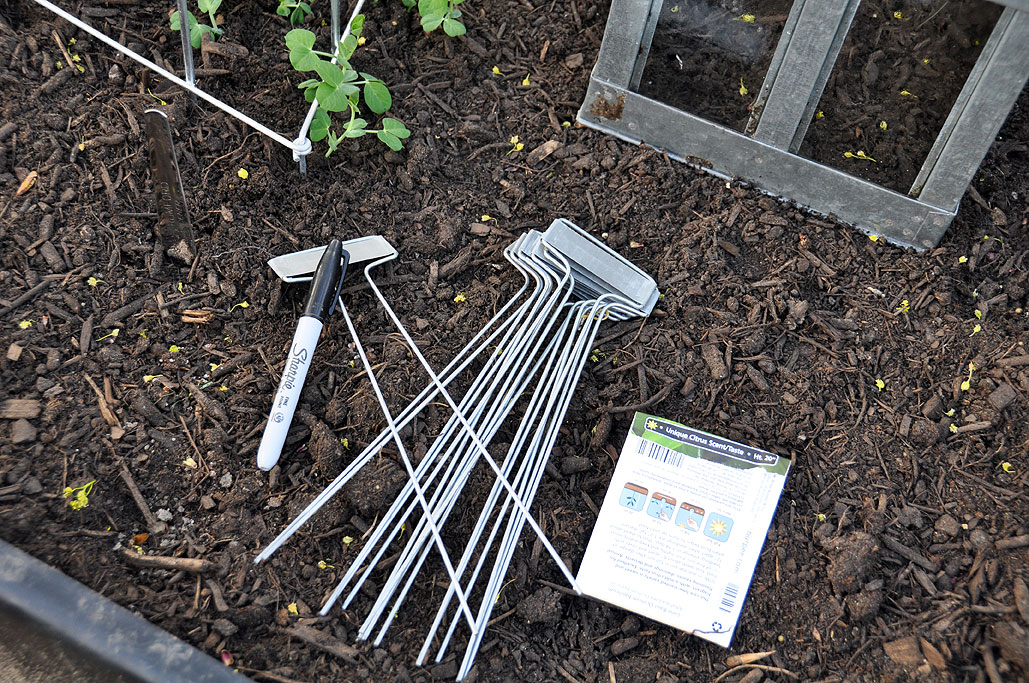
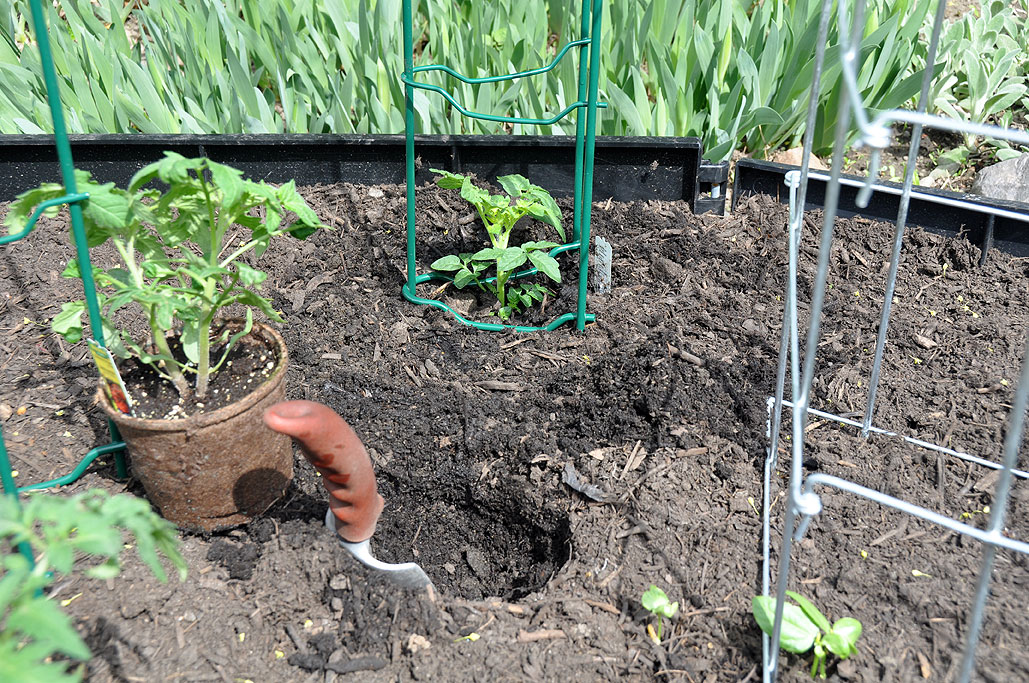
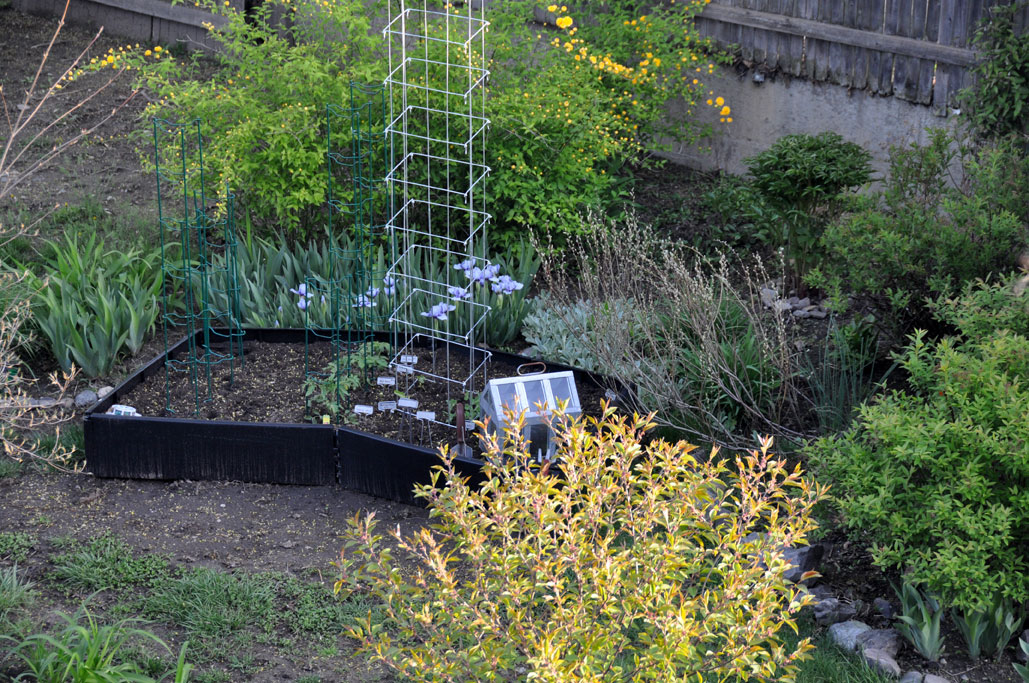
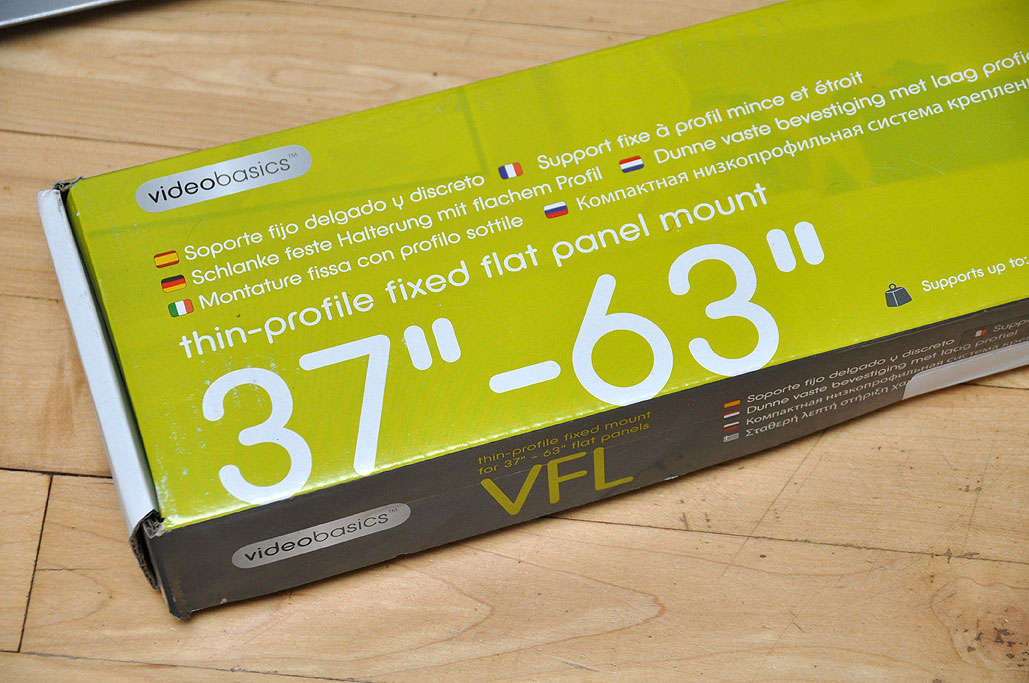
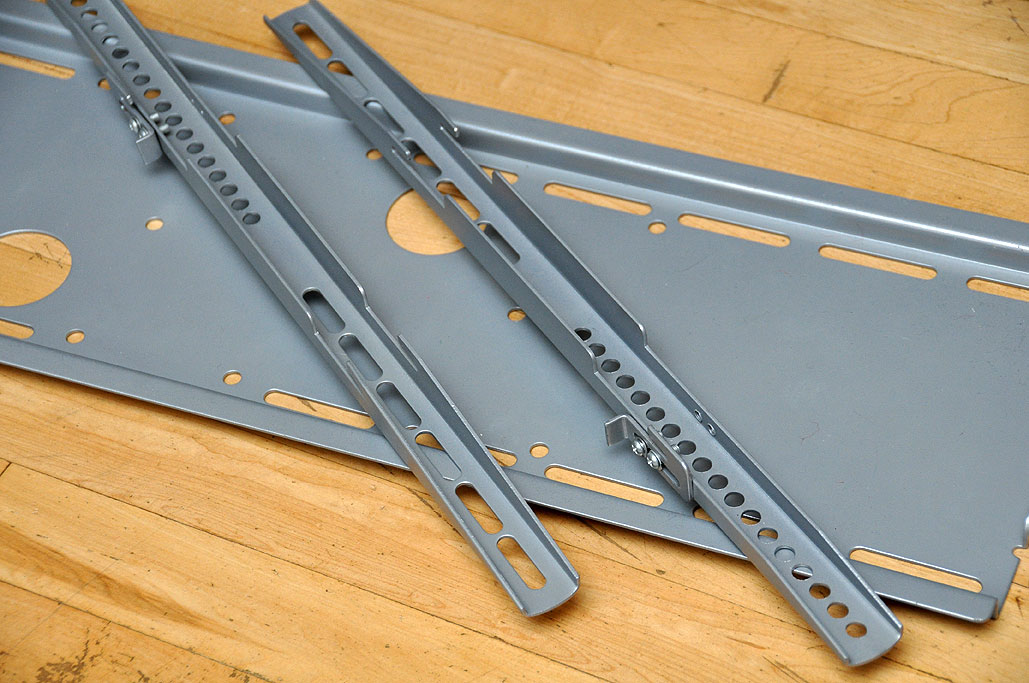
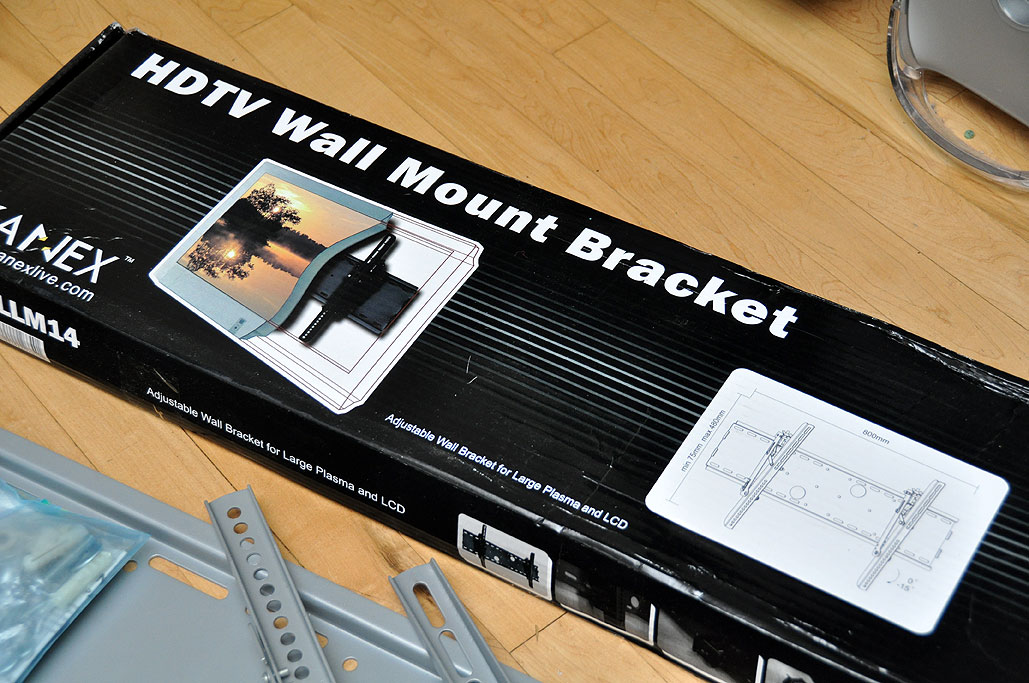
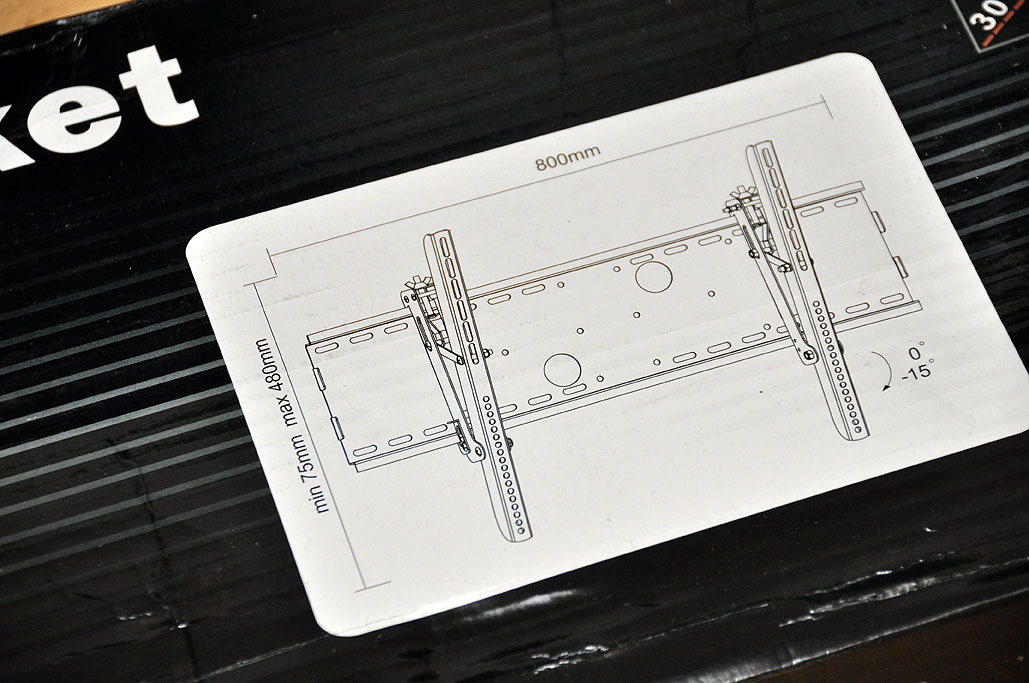
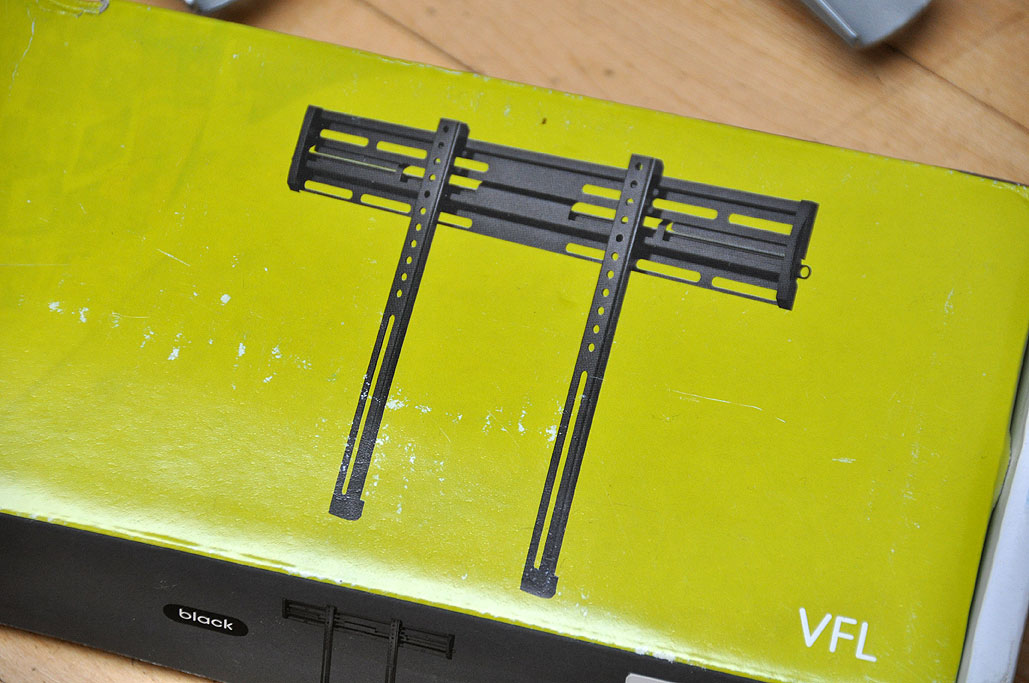
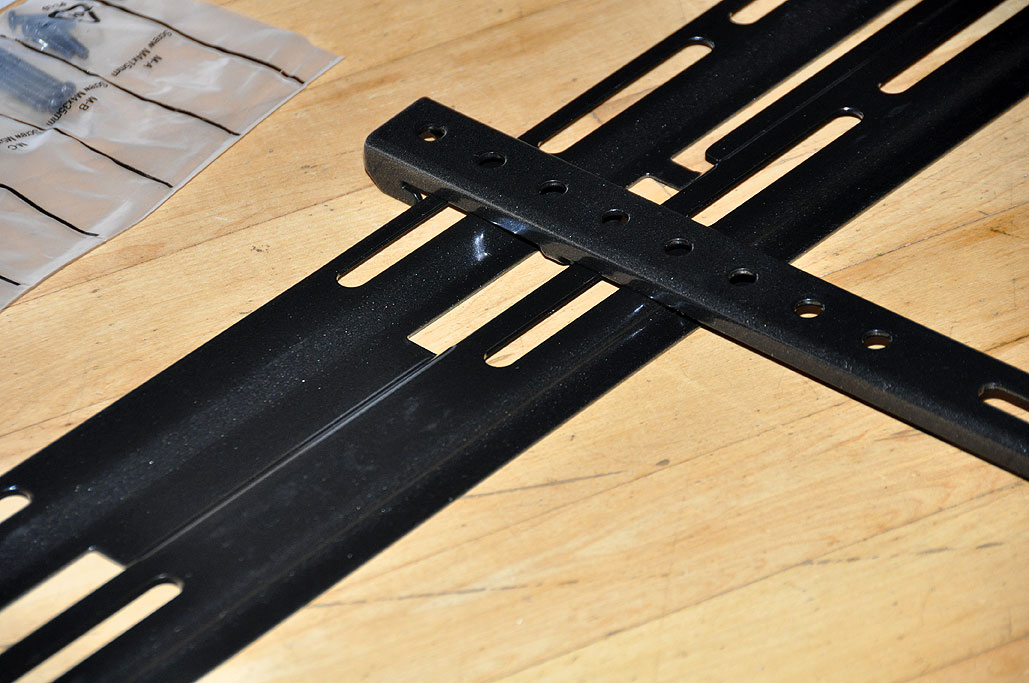
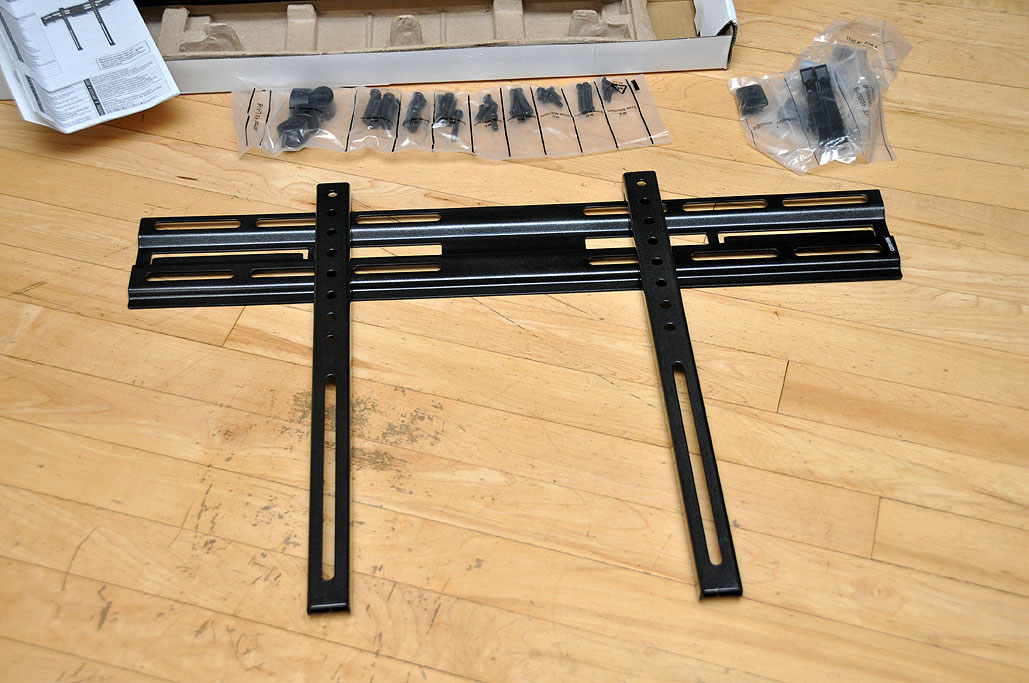
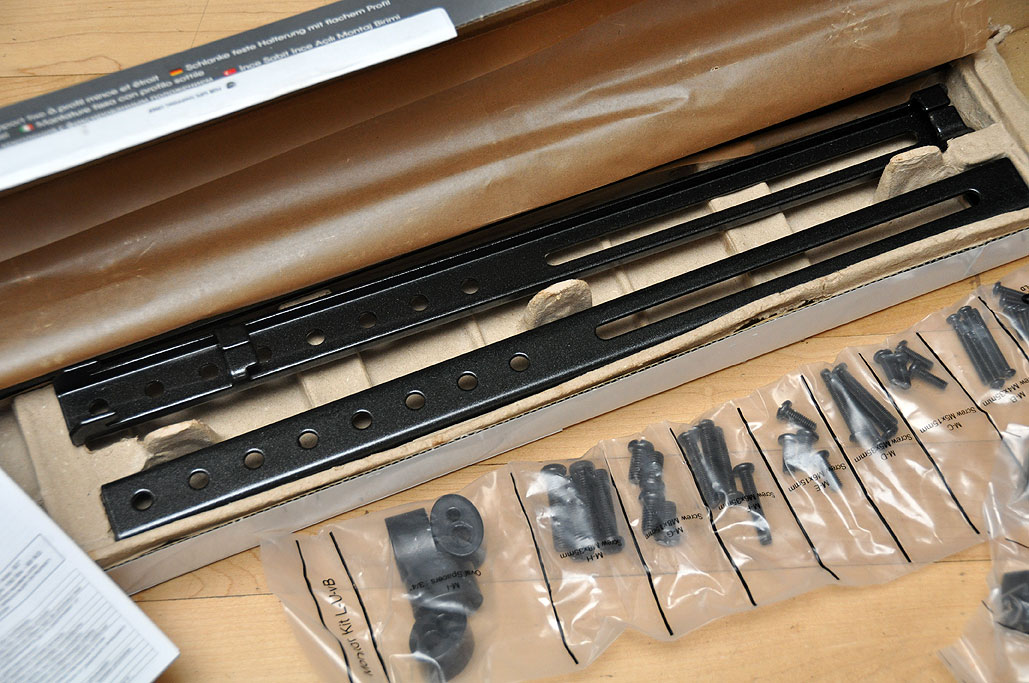
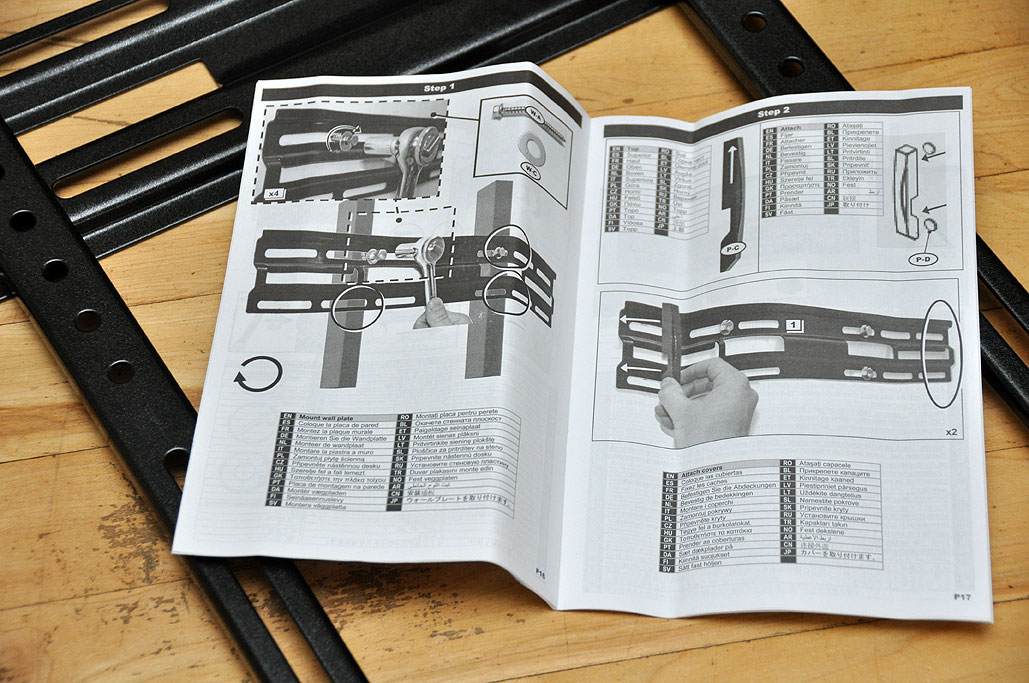
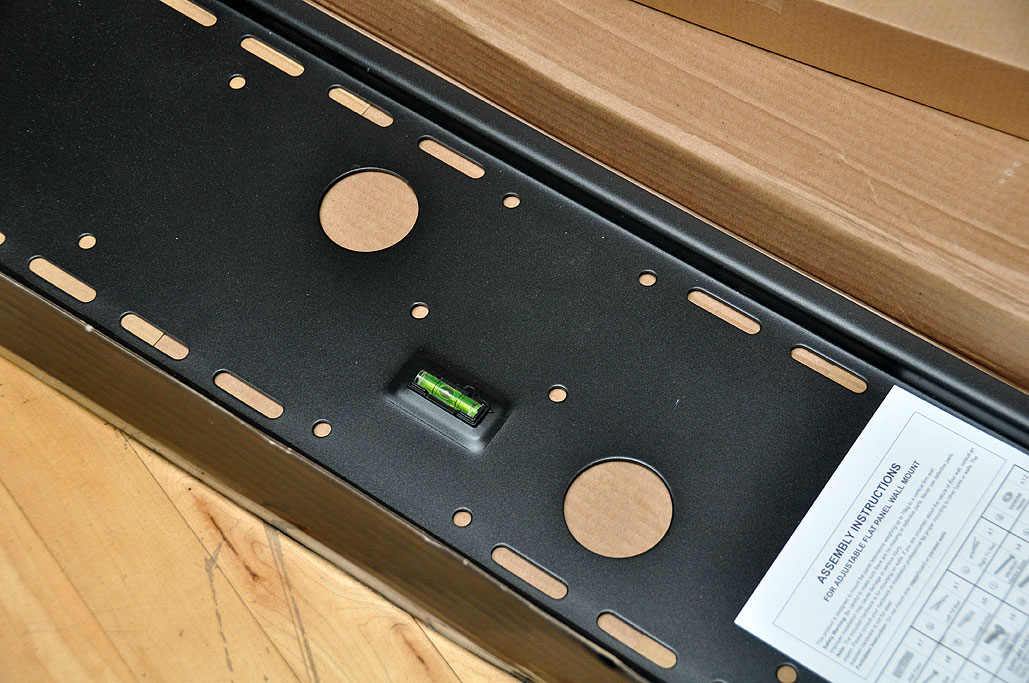
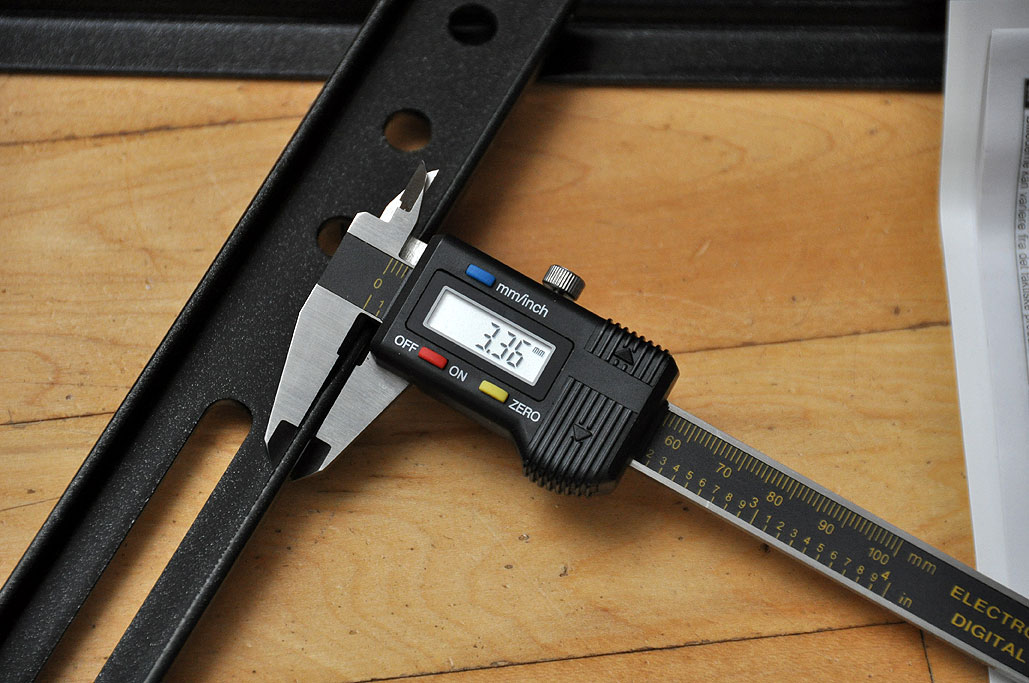
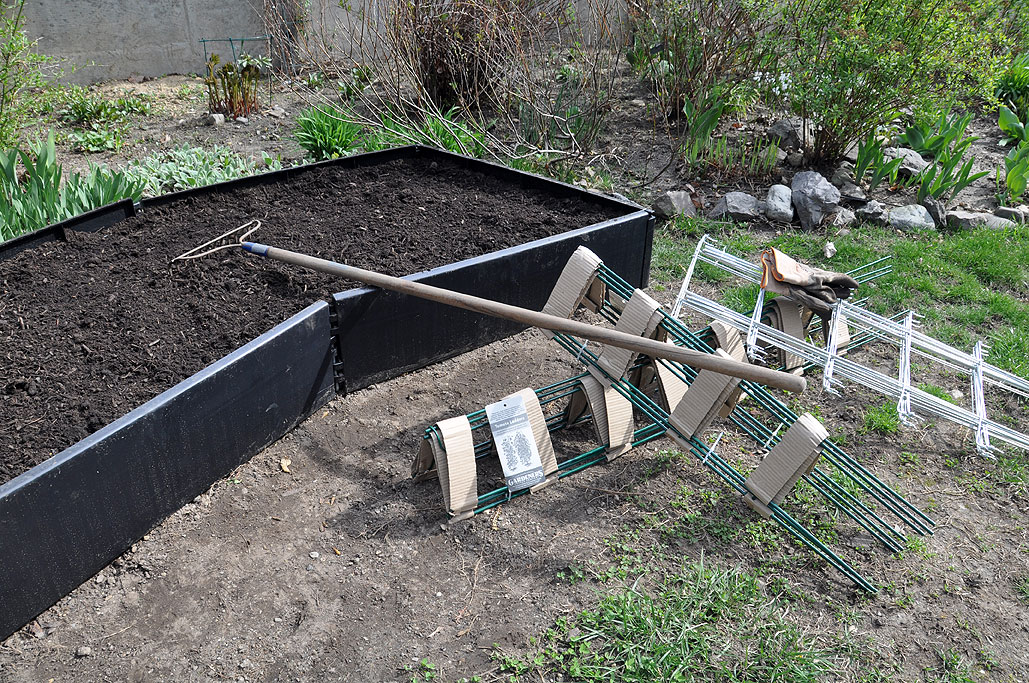
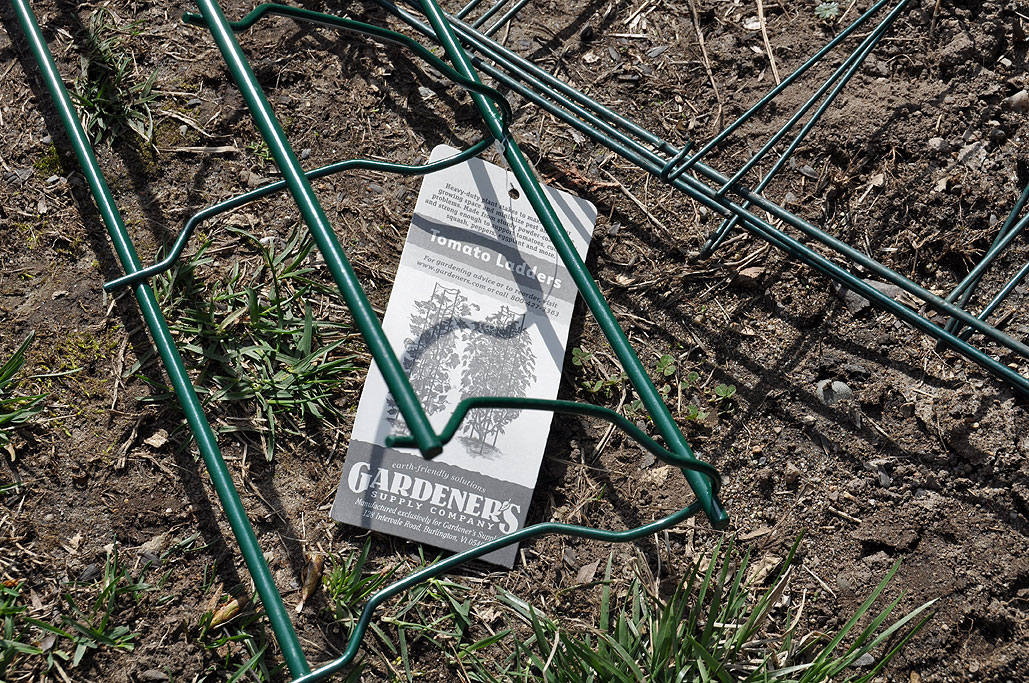
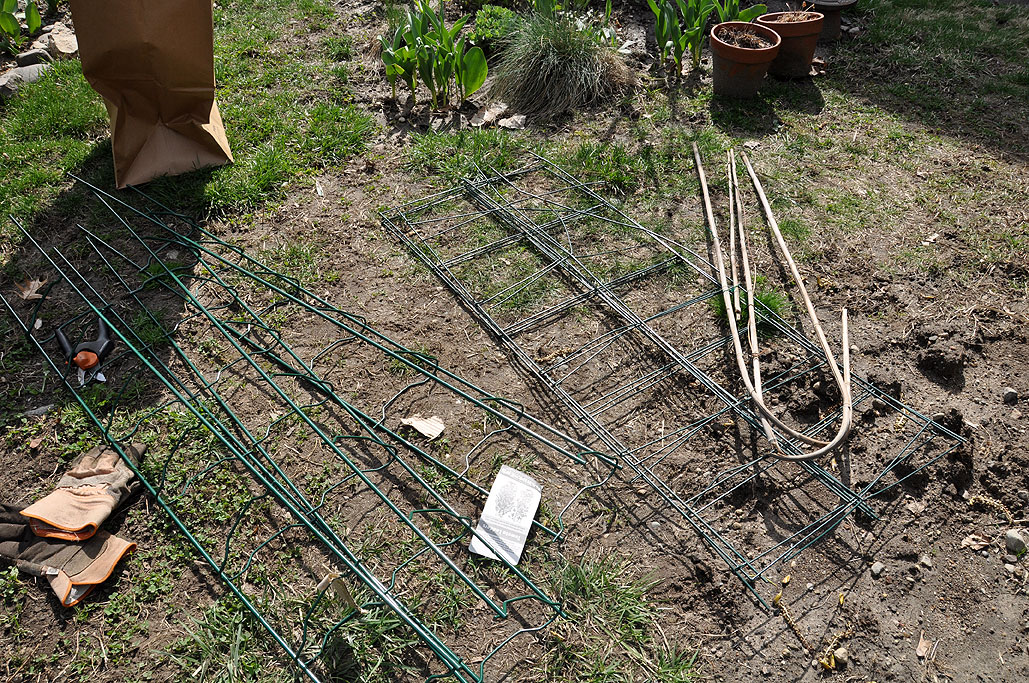
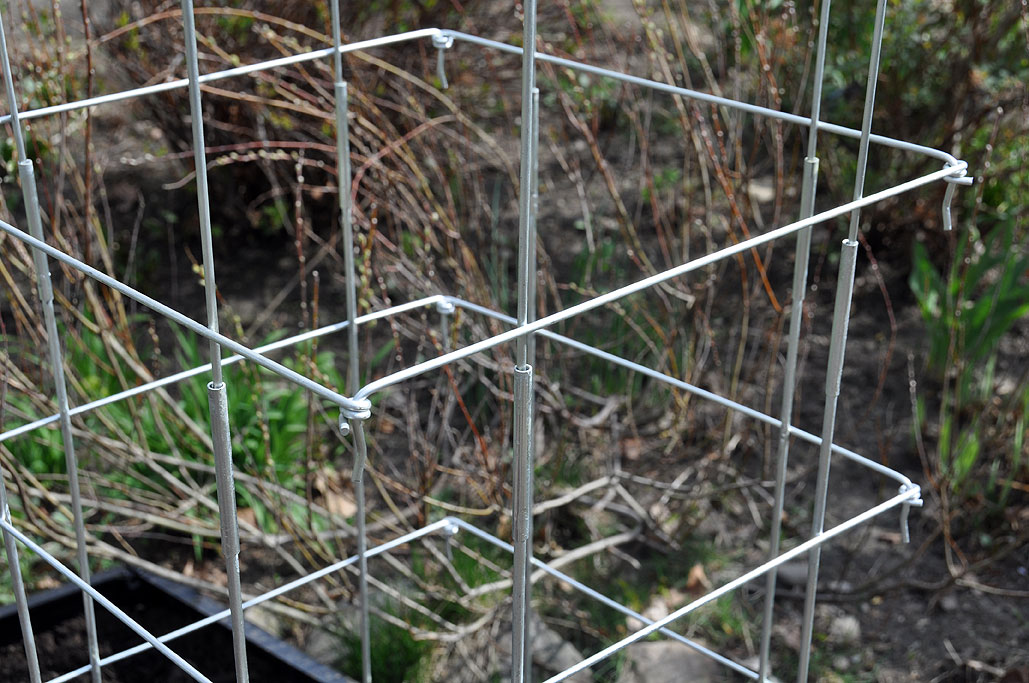
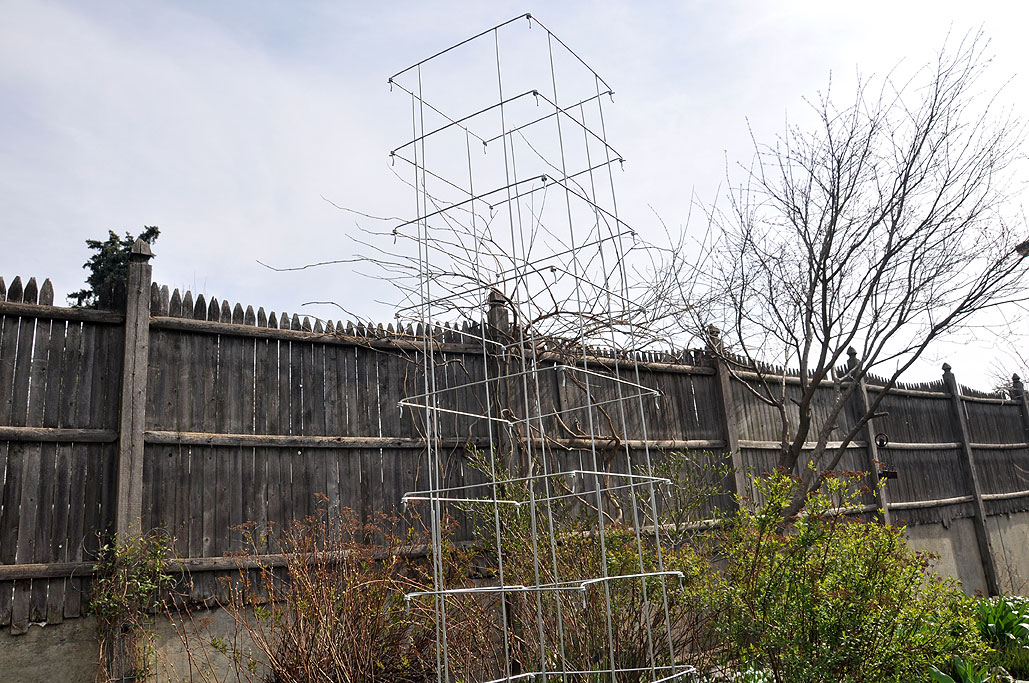
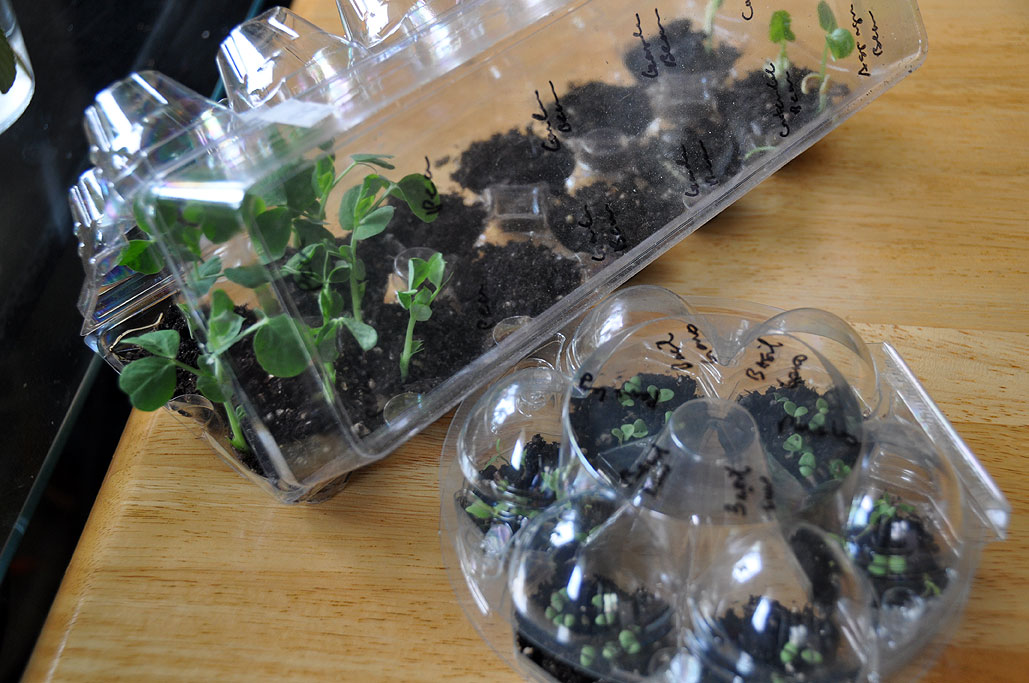
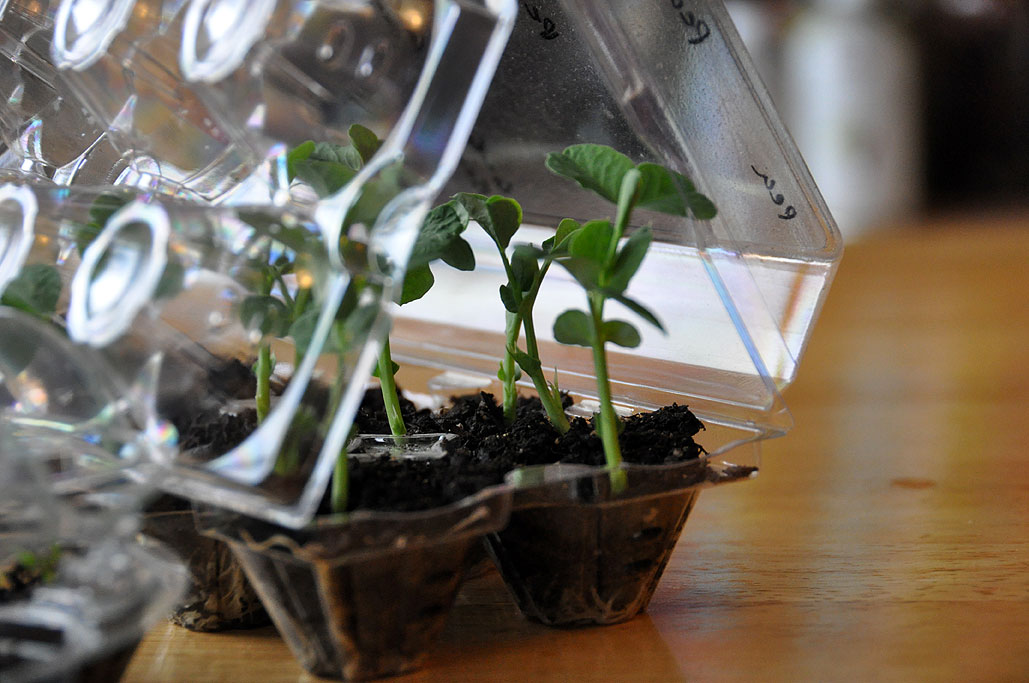
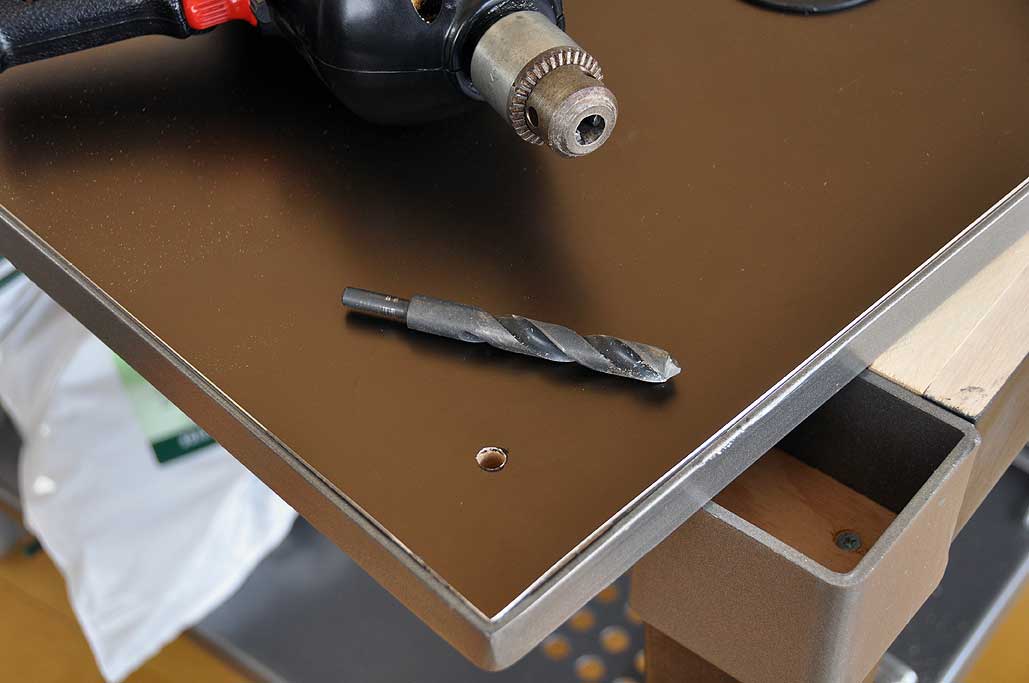
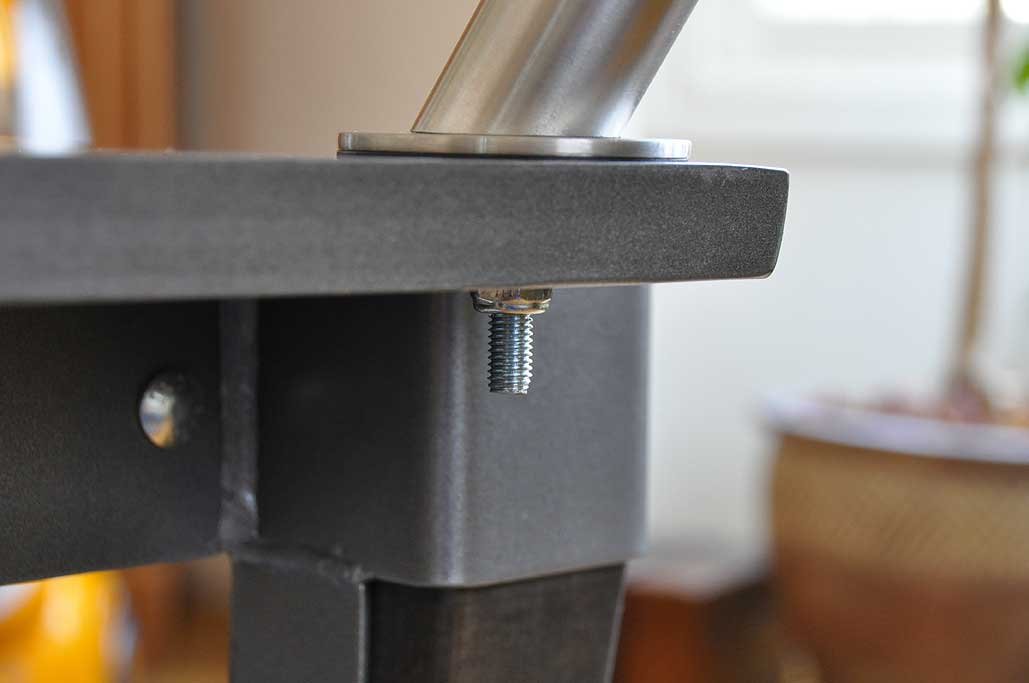
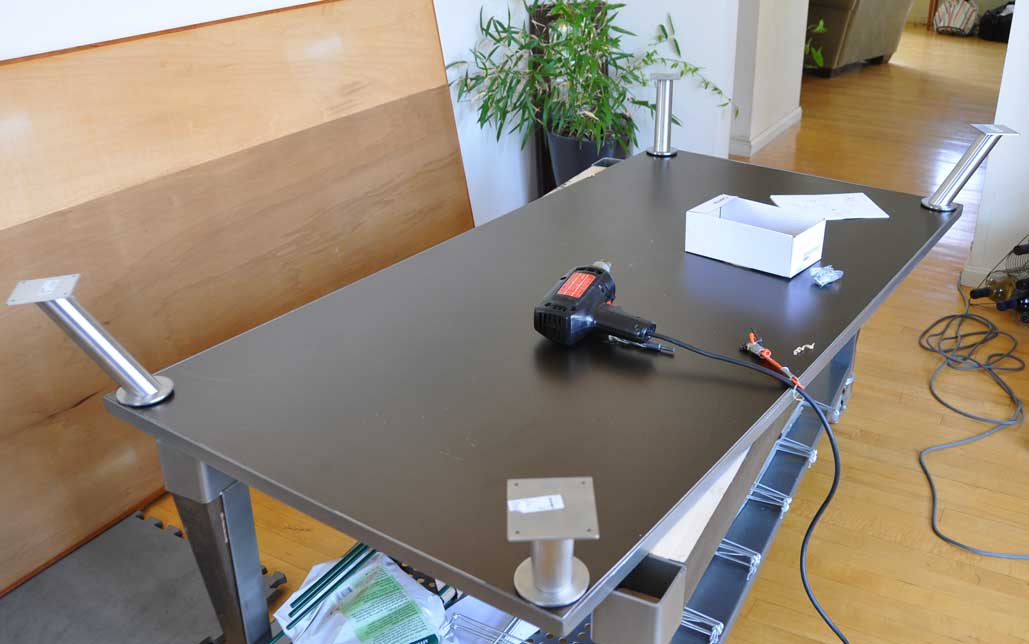
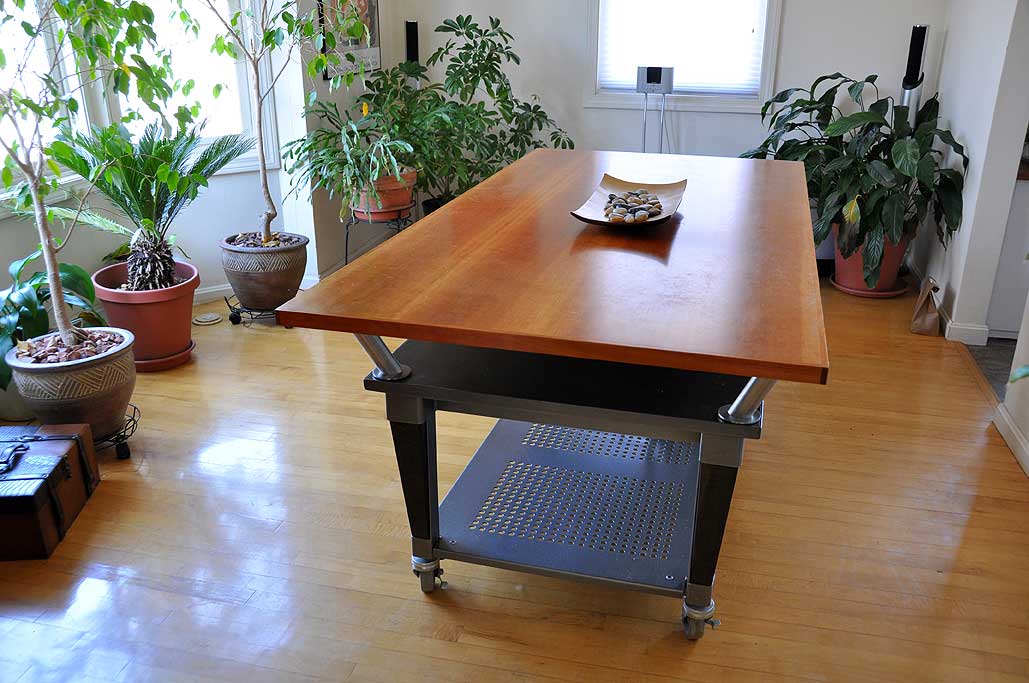
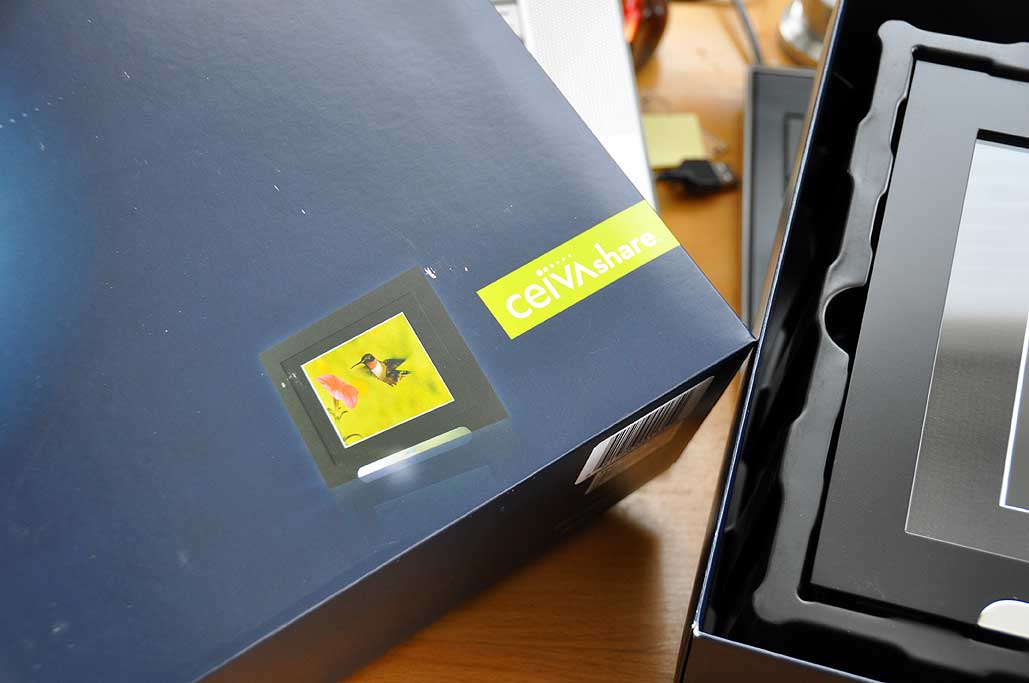
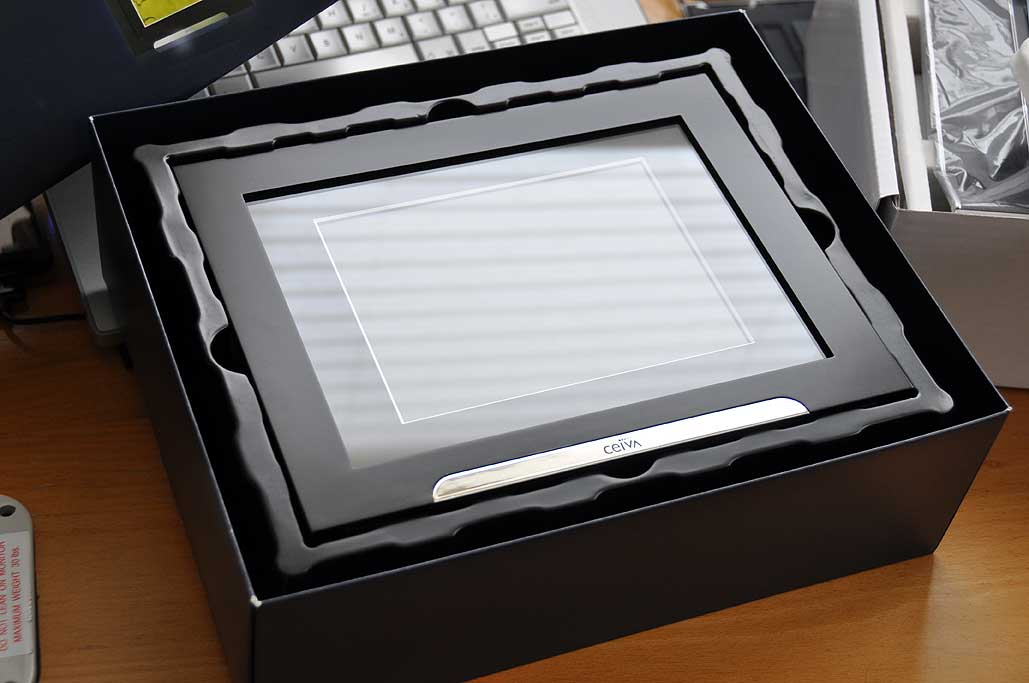
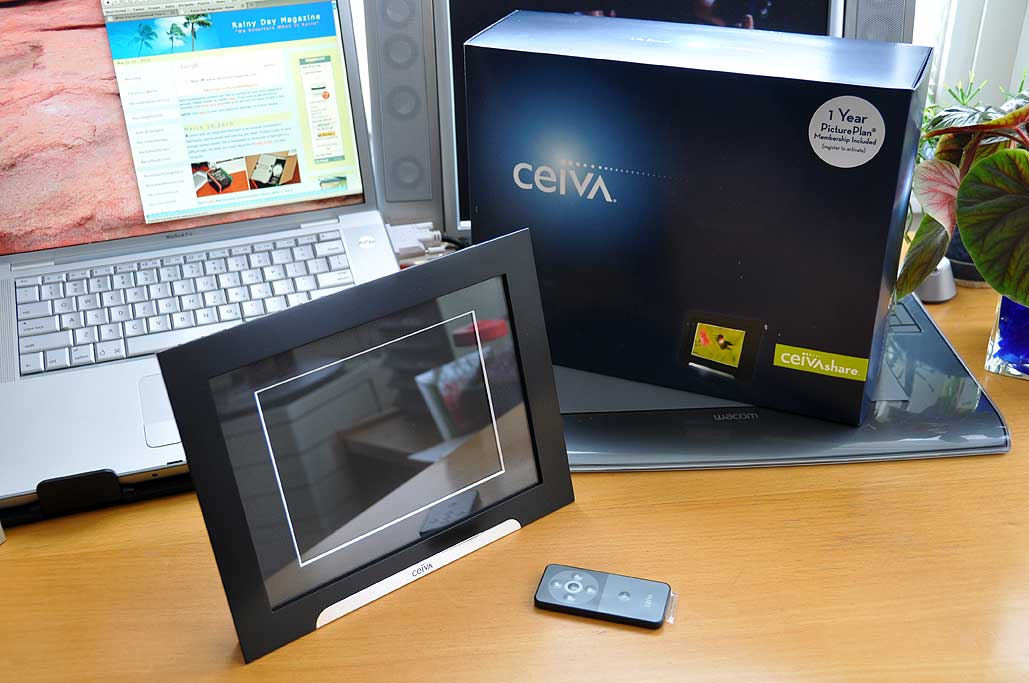
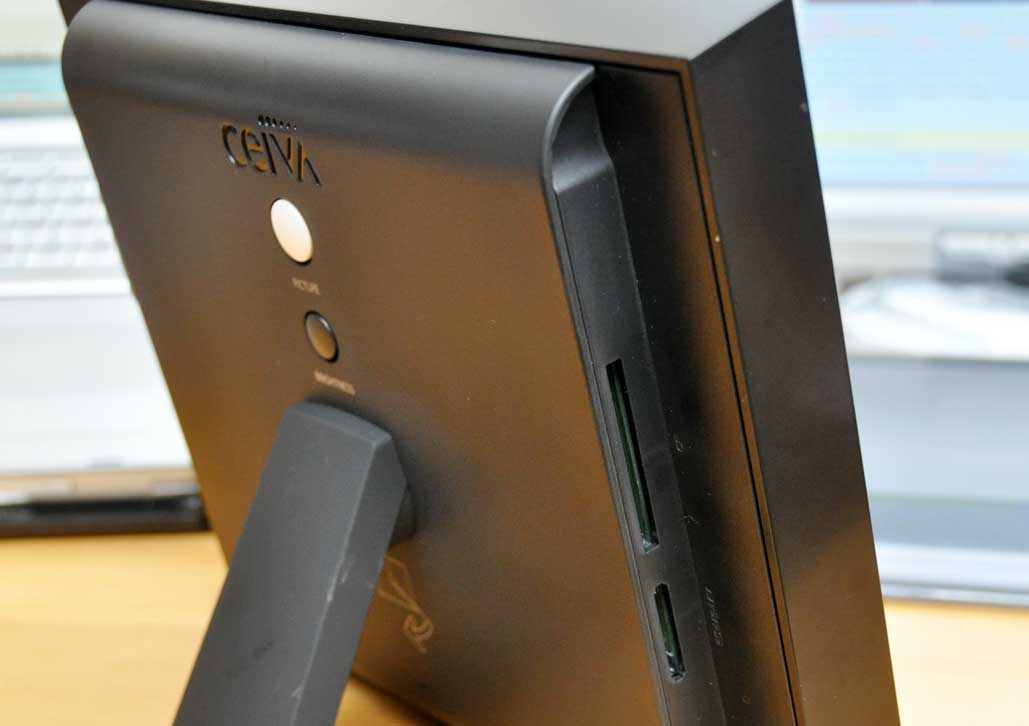
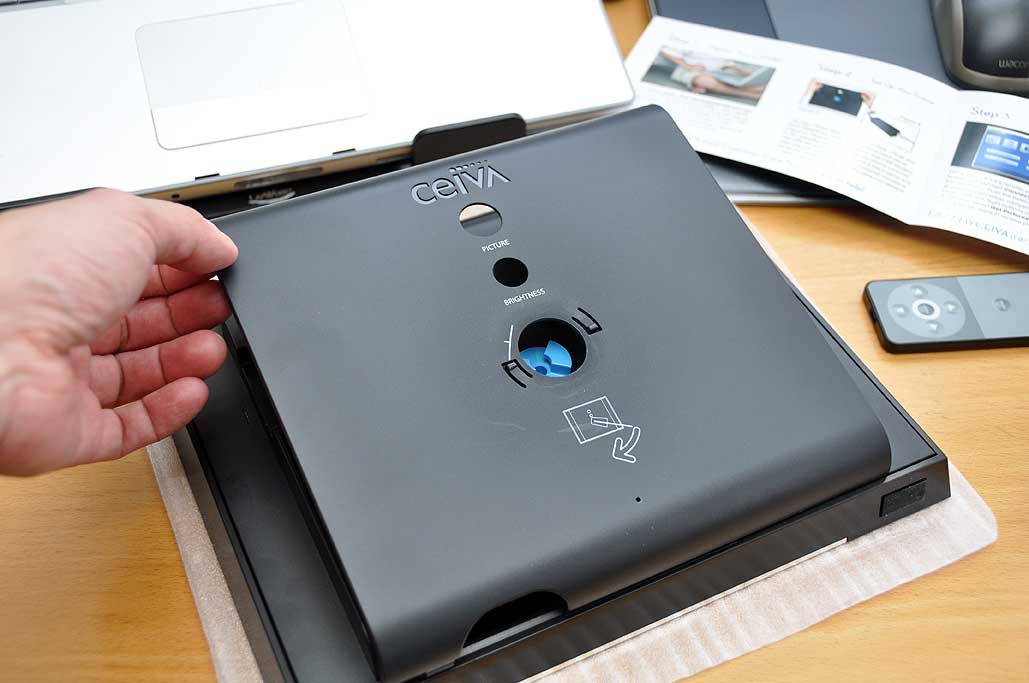
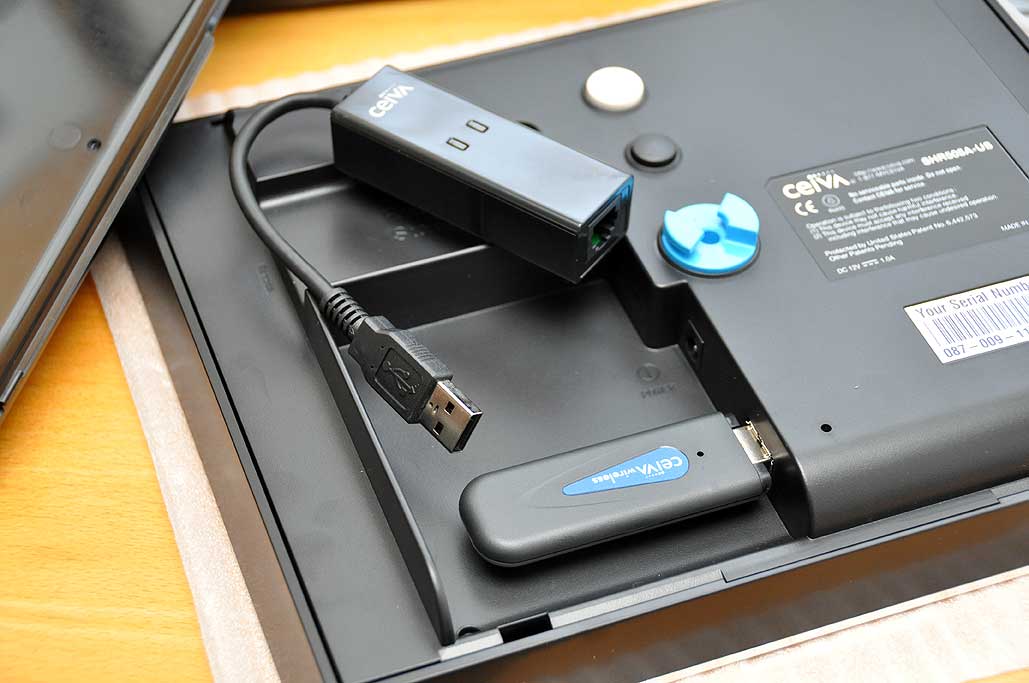
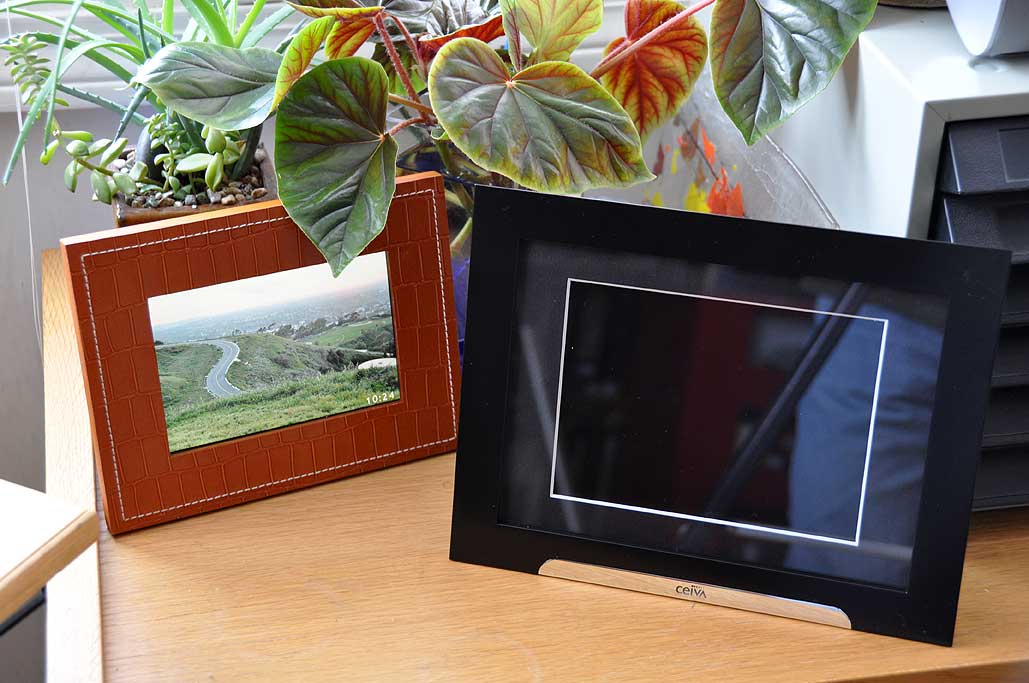
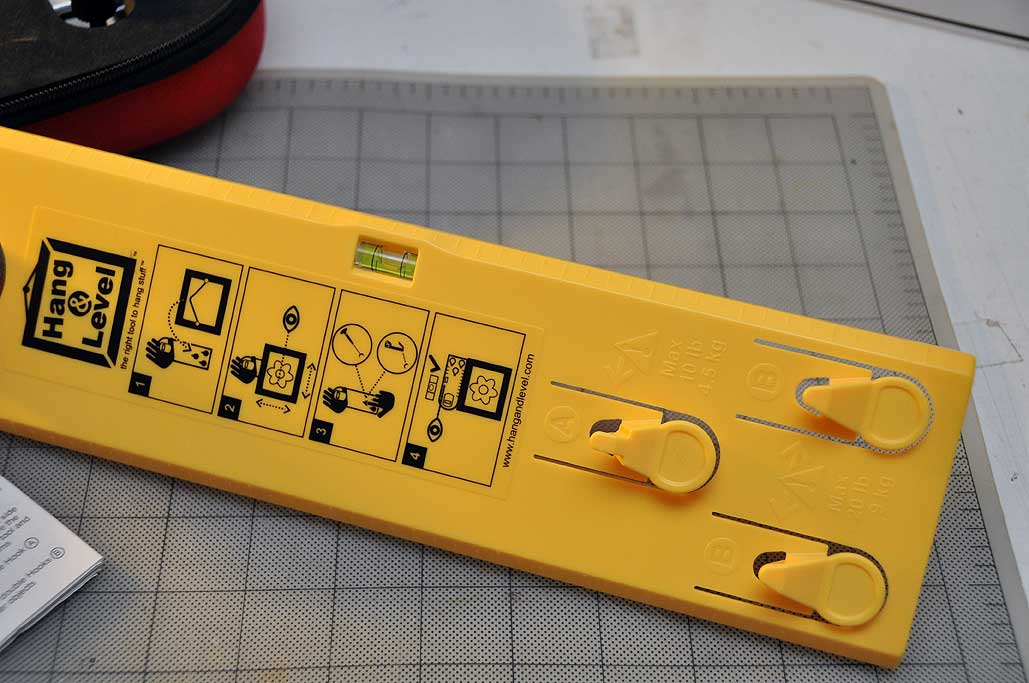
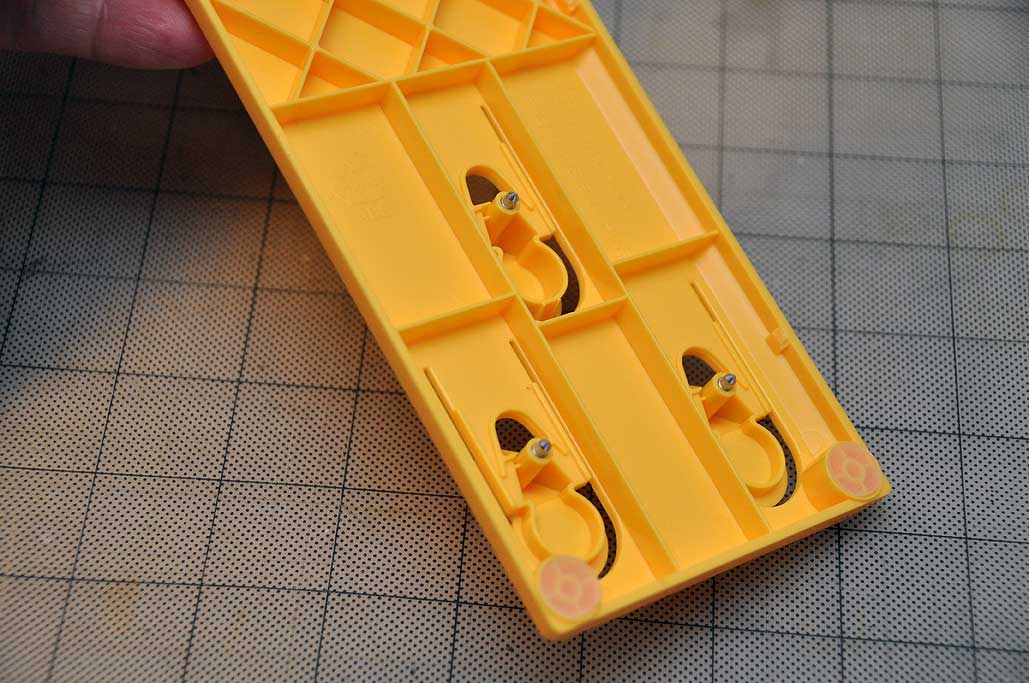
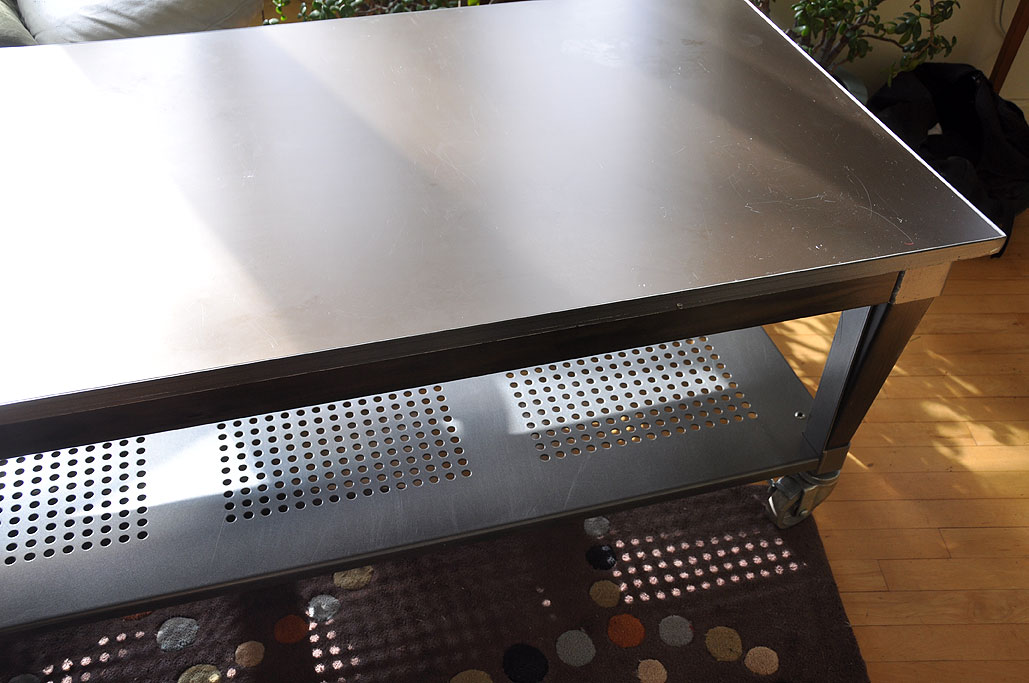
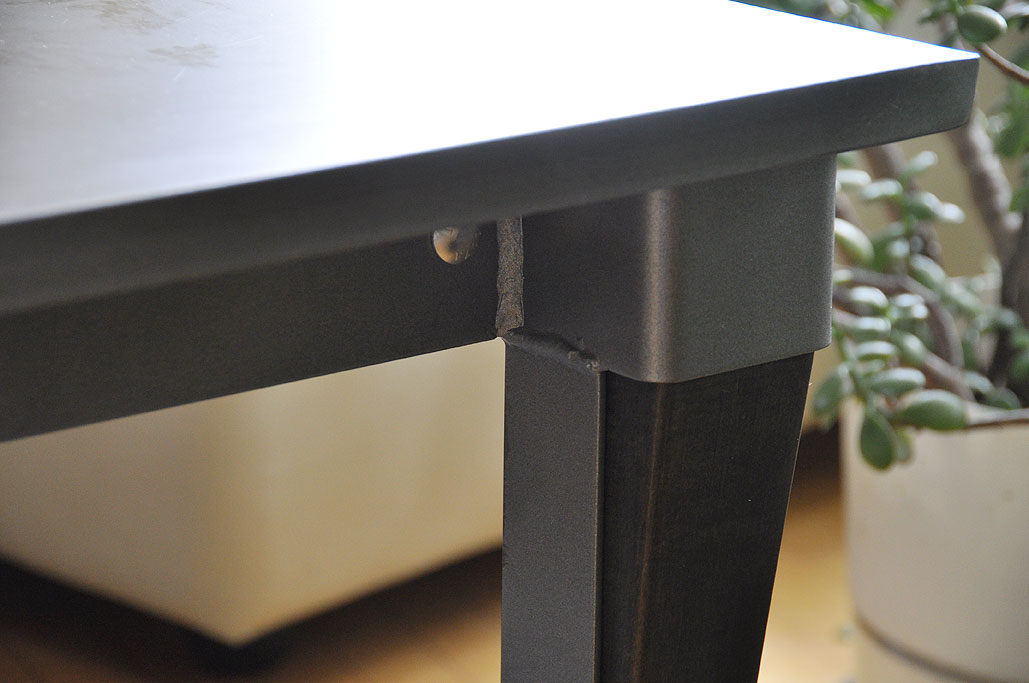
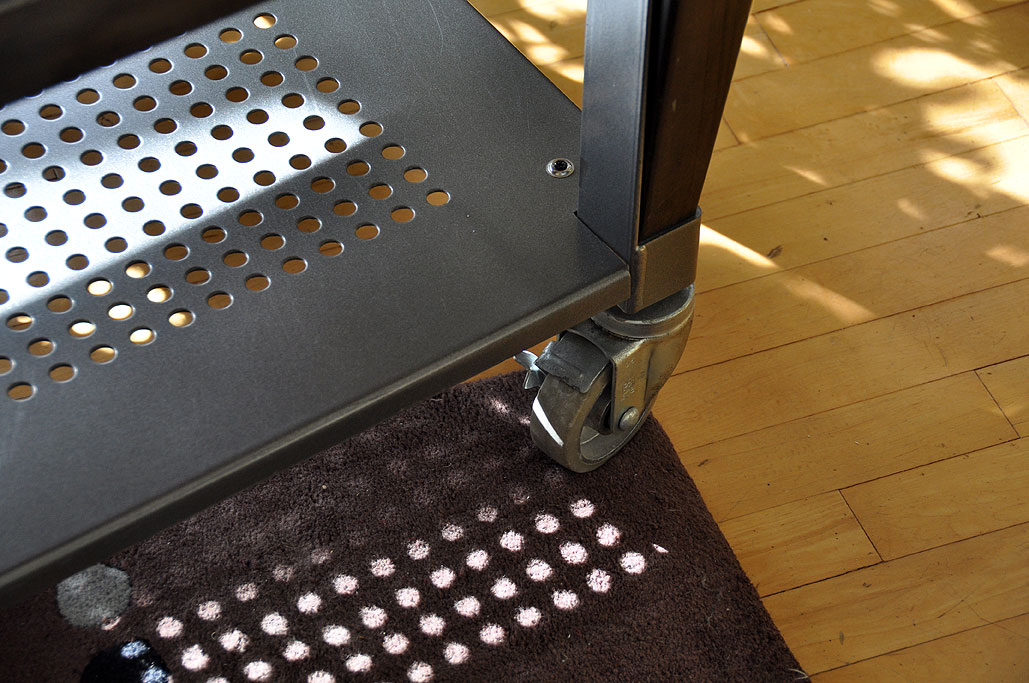
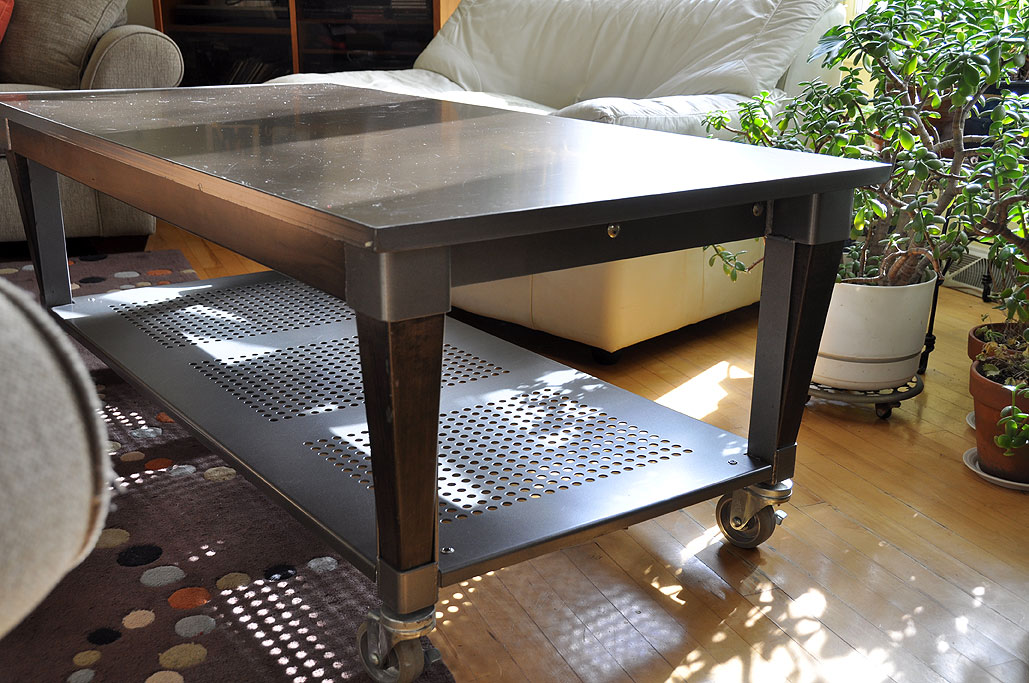
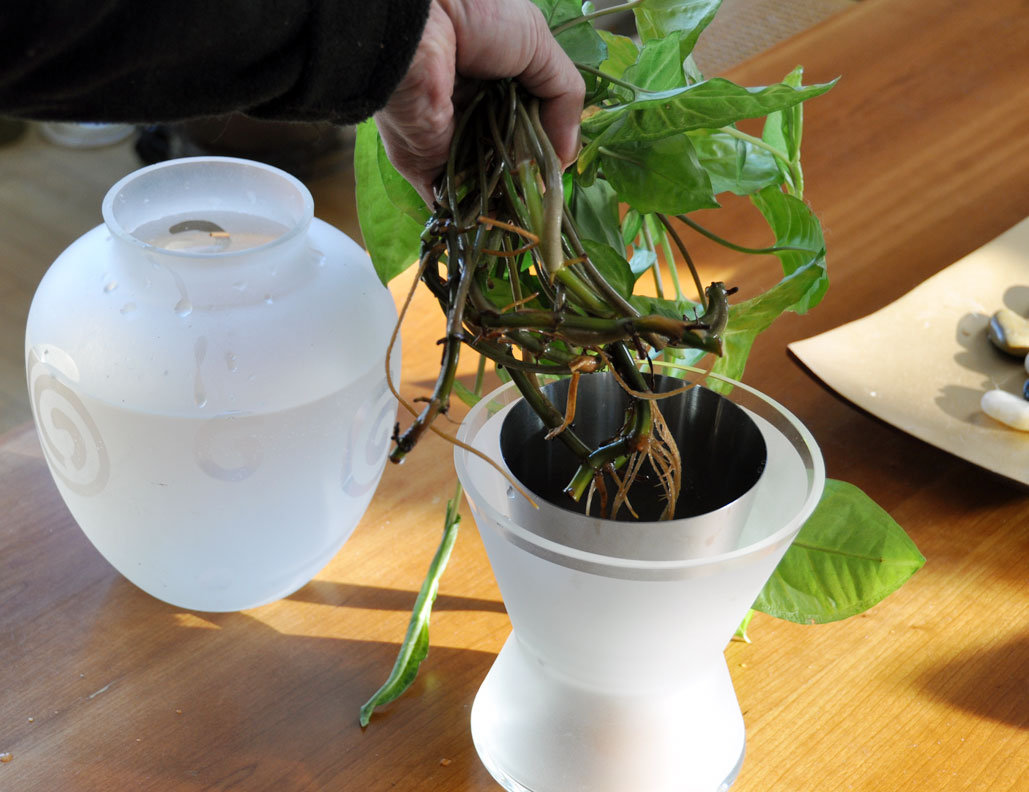
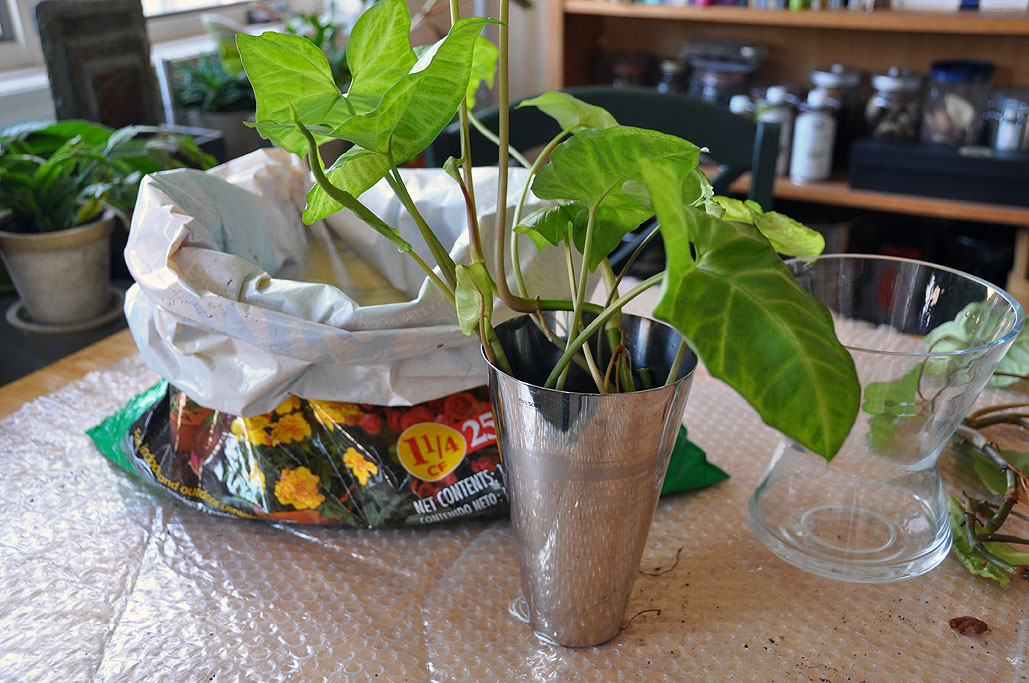
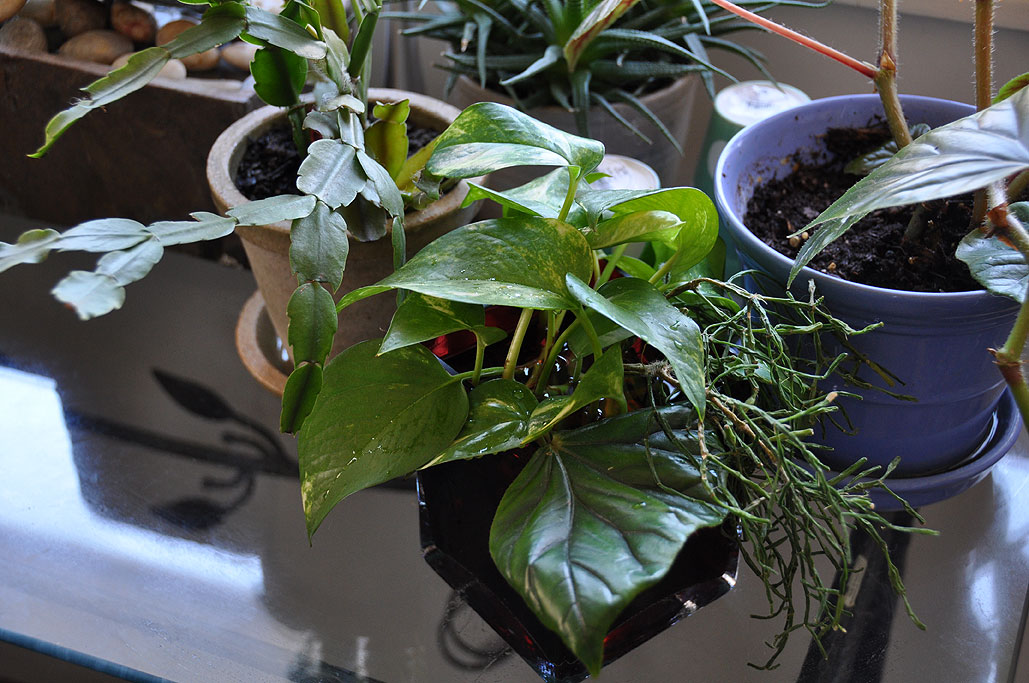
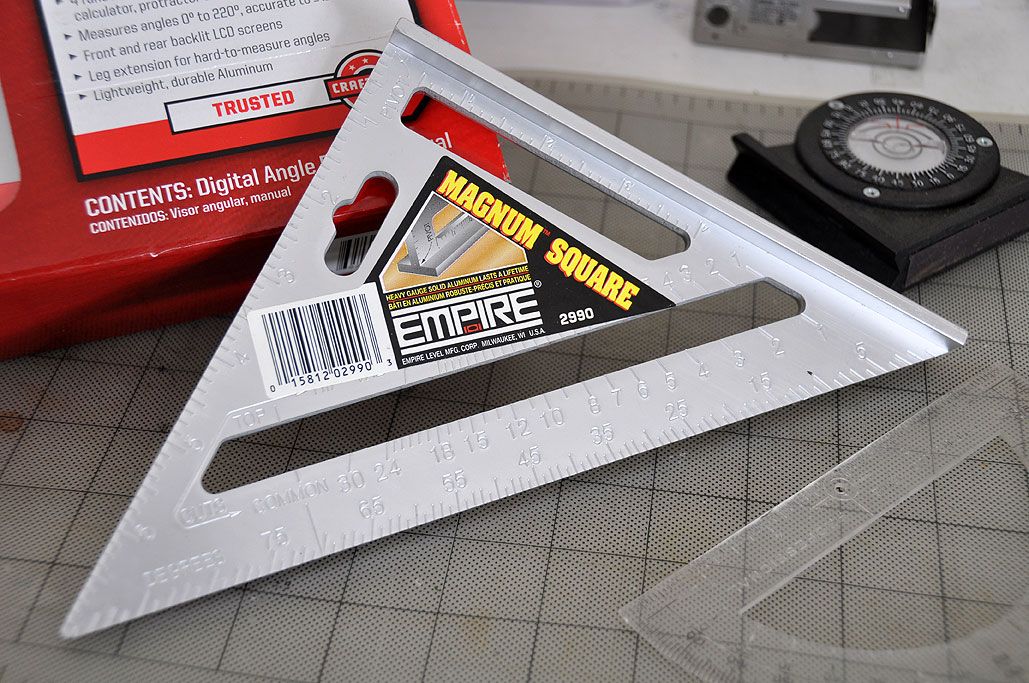
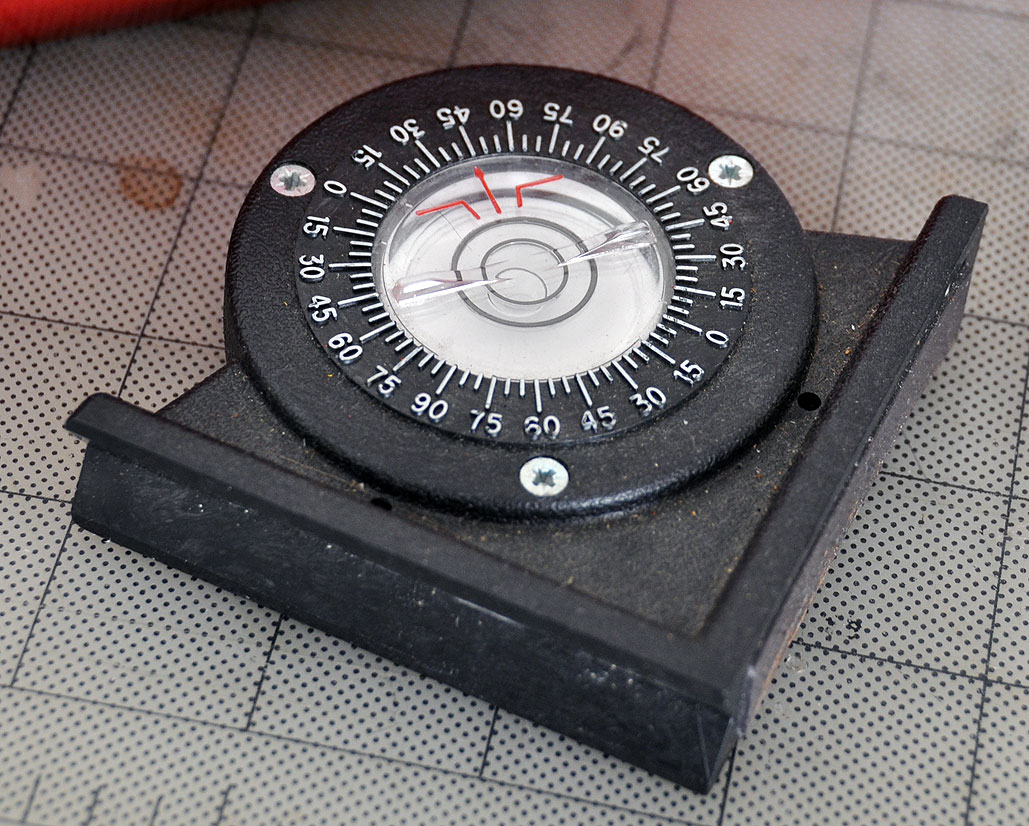
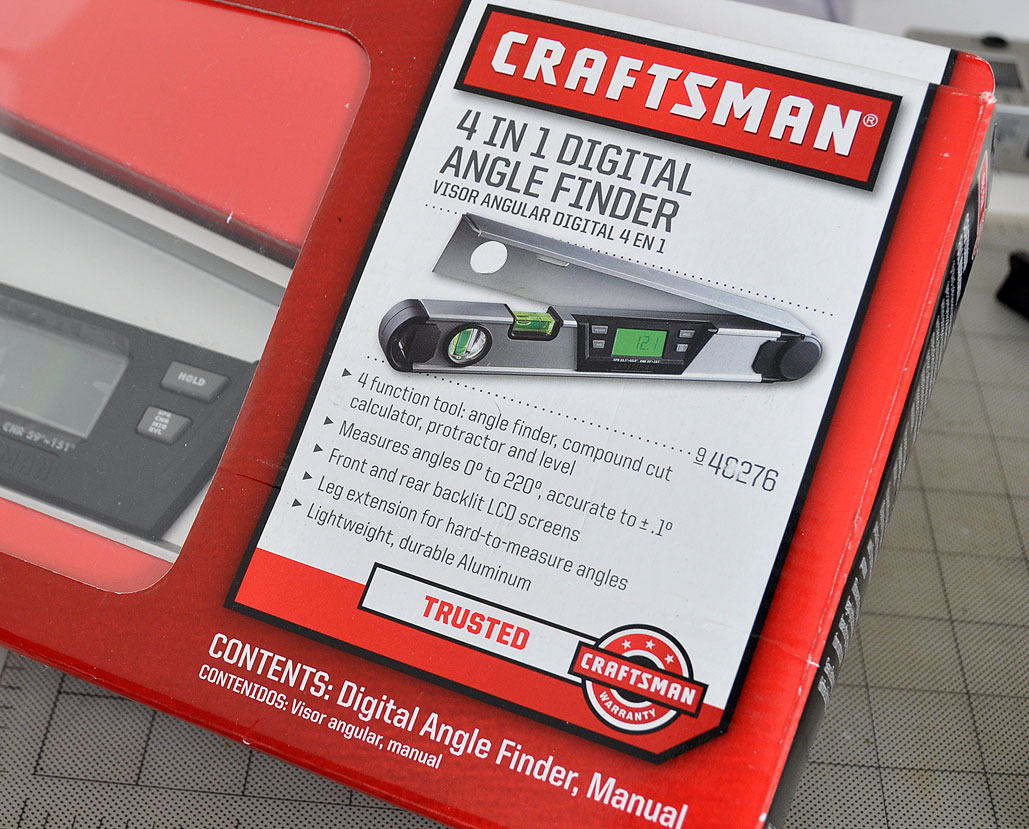
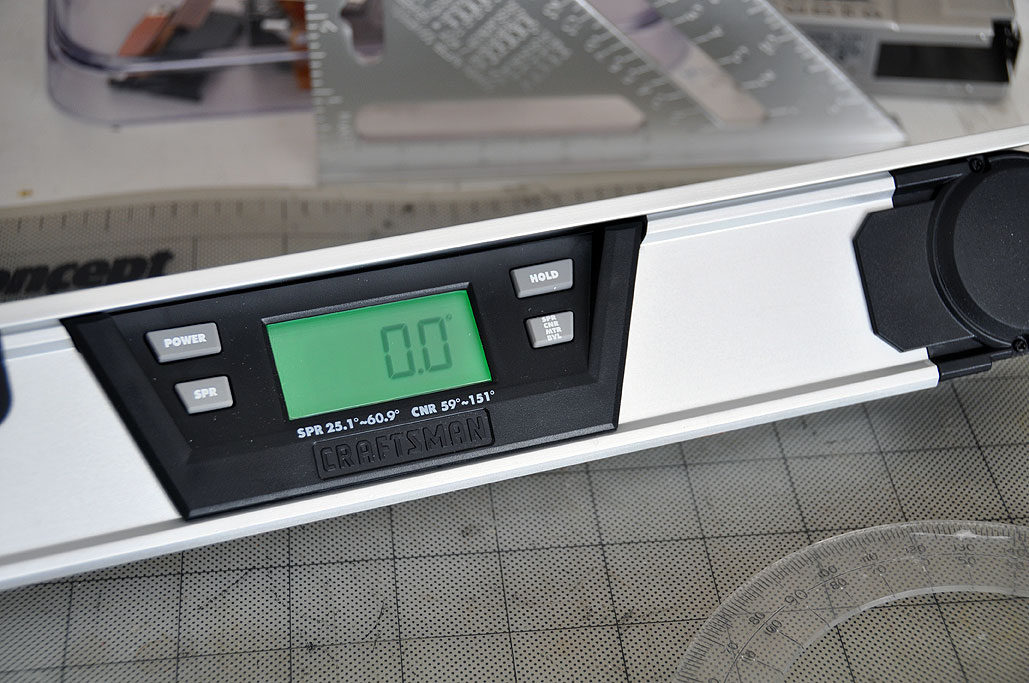
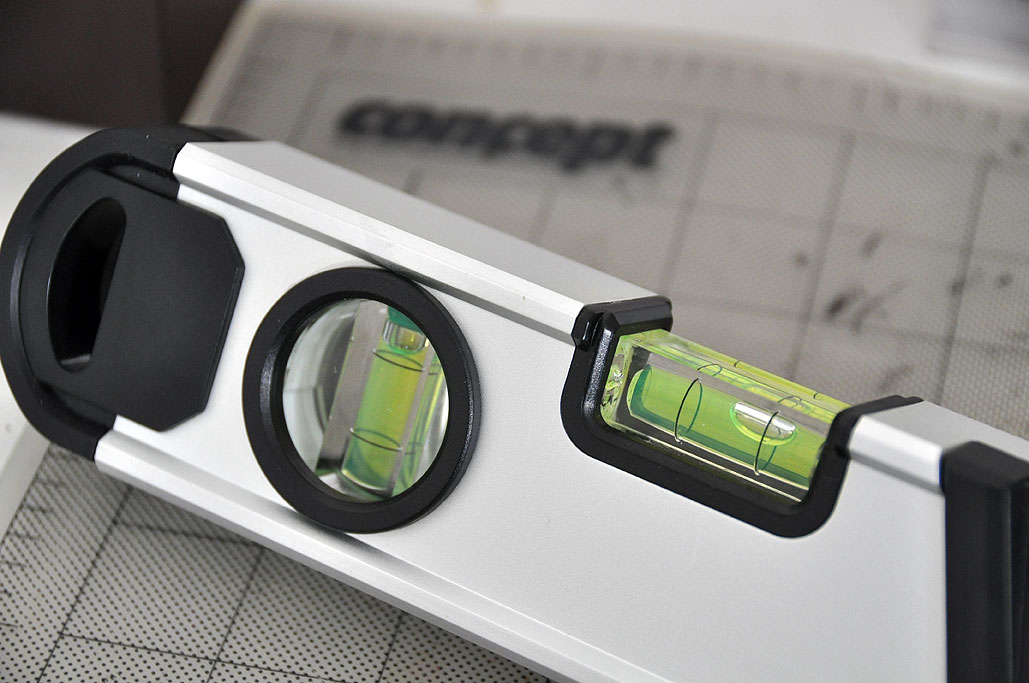
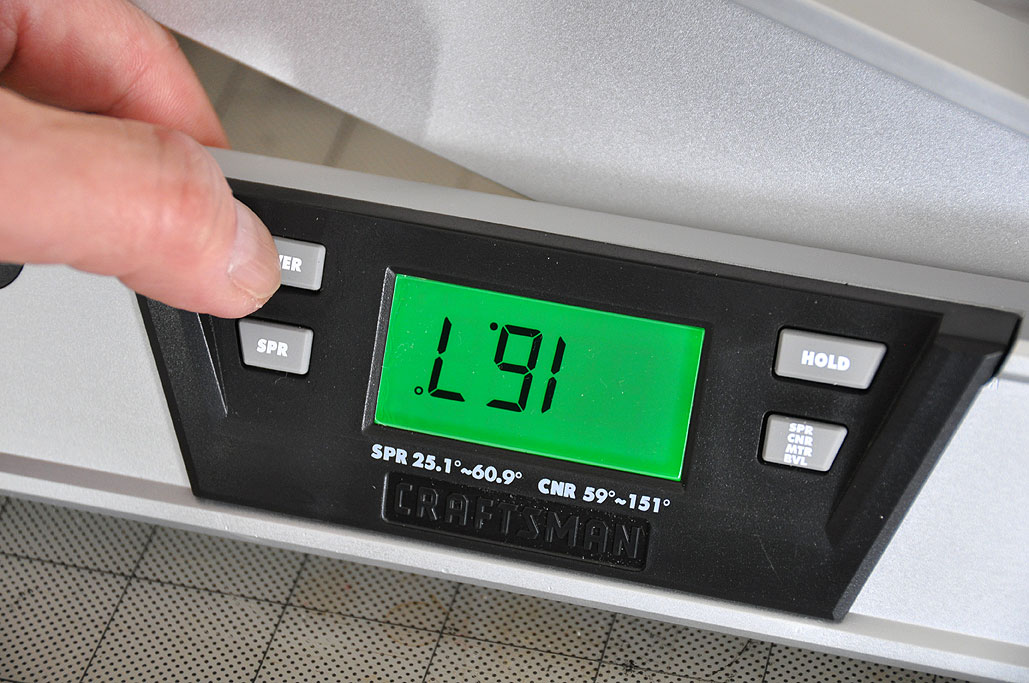
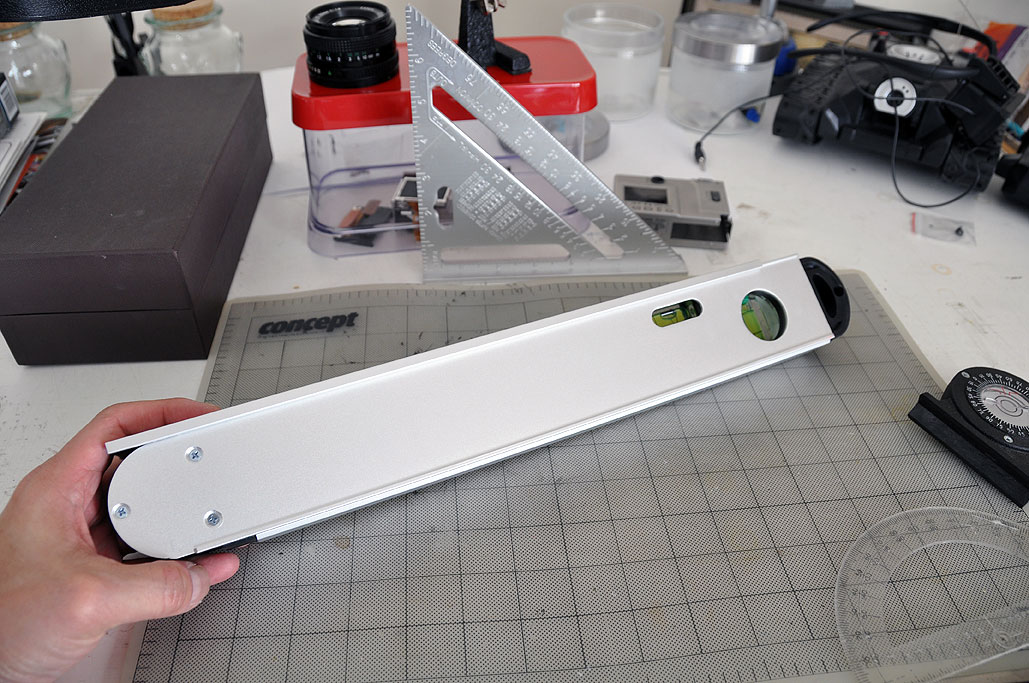
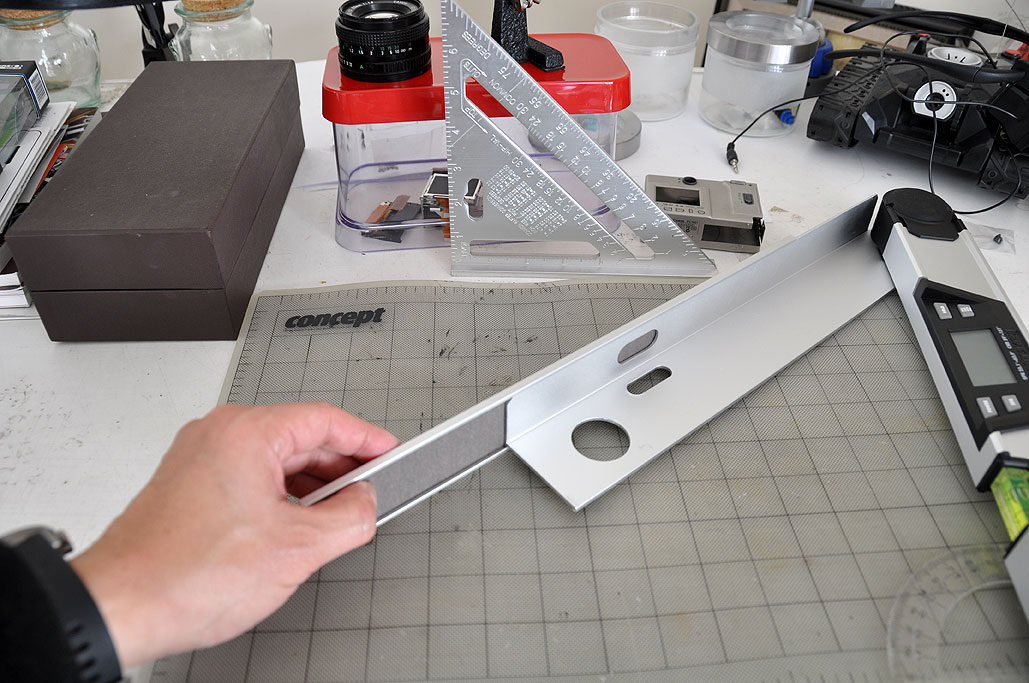