|
|
 |
RainyDayGarage's content can now be licensed for your print magazine or web site. Please contact us directly here. If you want to see something reviewed, then drop us a note with a link and we'll be happy to take a look.
|
| |
|
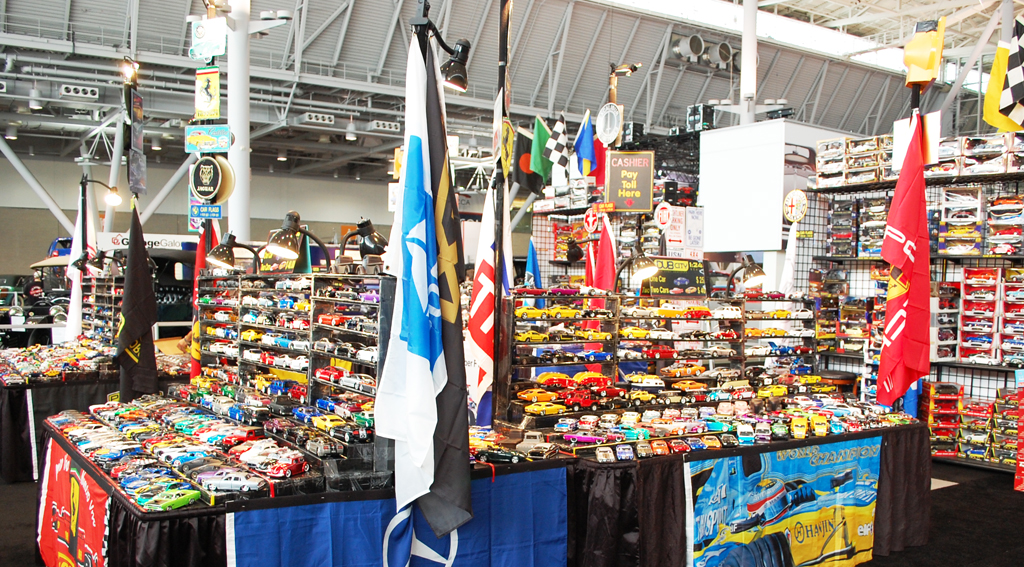
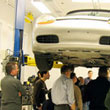
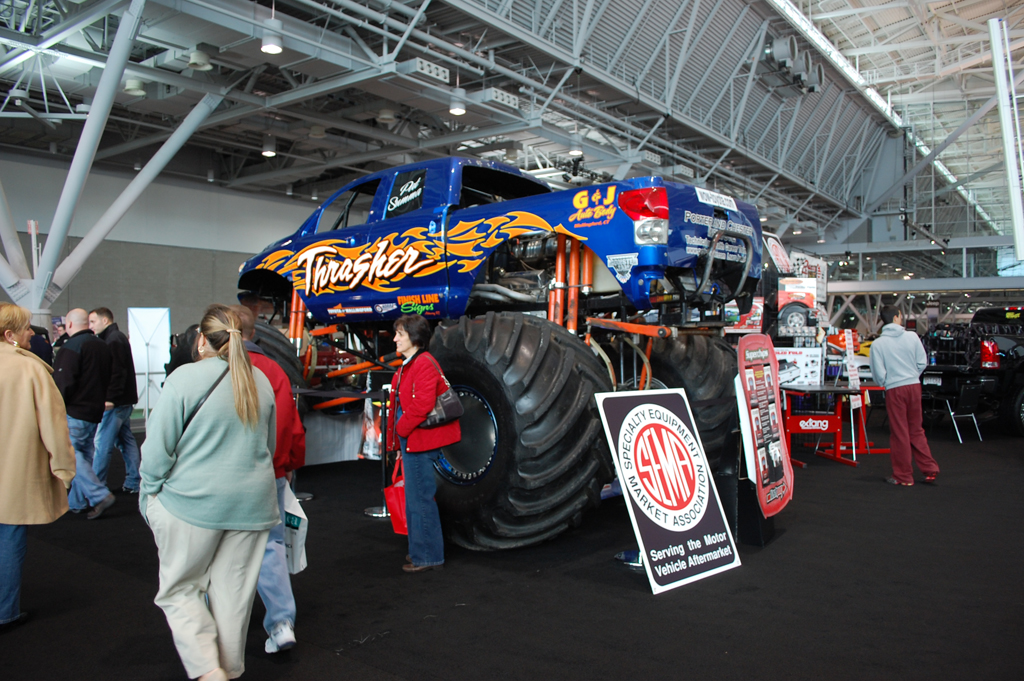
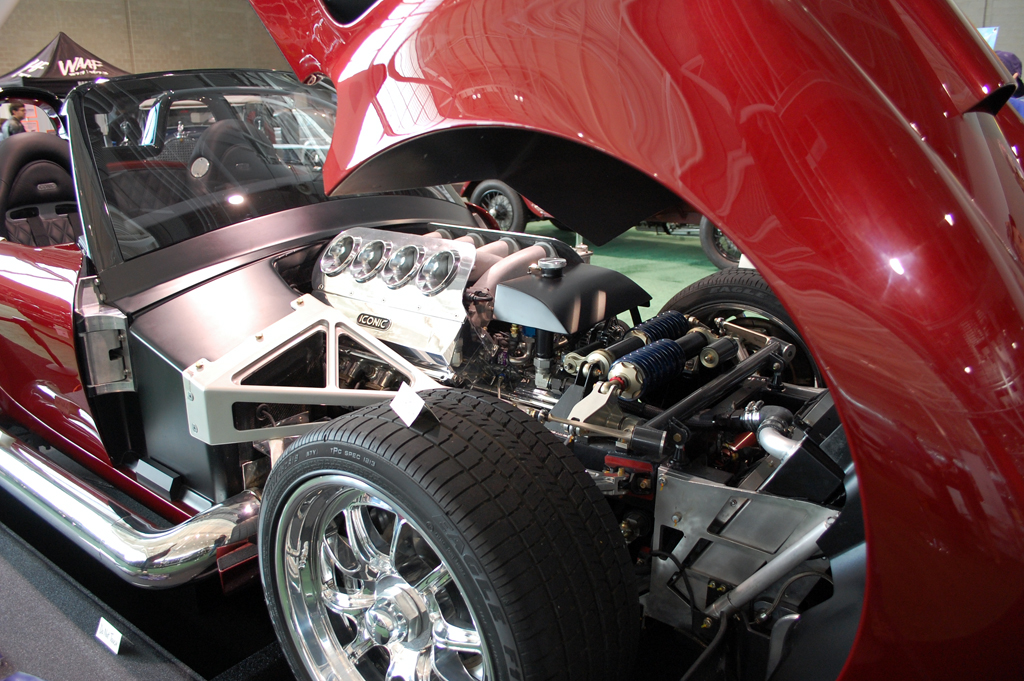
The NEIAS caters to all different types of car enthusiasts. While most of the floor space showed conventional cars from the major makers, there is always some area off to one side reserved for the smaller vendors, customizers, and merchandizers. It is there that one finds the odd, the exotic, and the strange.
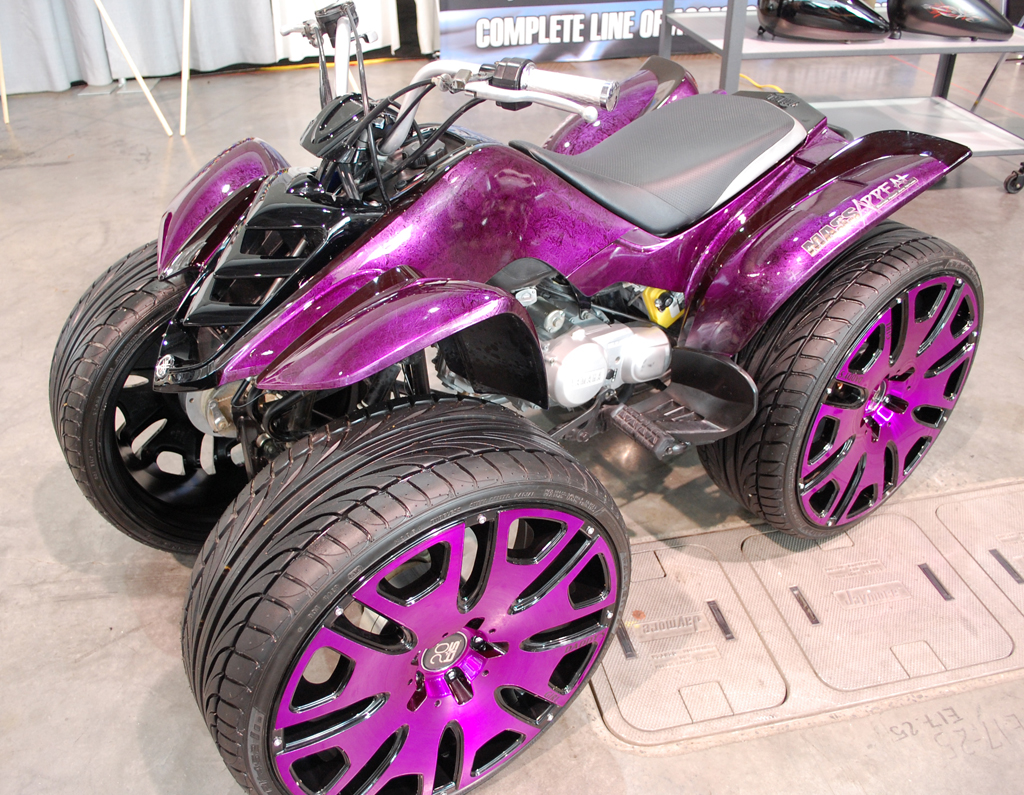
The gamut of vehicles and aftermarket works on display was pretty wide. Not all of them were our cup of tea, but that is exactly the point; anything goes in this section of the show.

The booth that always brings a smile is the model-car vendor's table. You can just see the kids' (and a few dads' as well) eyes widen when they come upon this display. As our Boxster model collection is up-to-date, we were not tempted. That much.

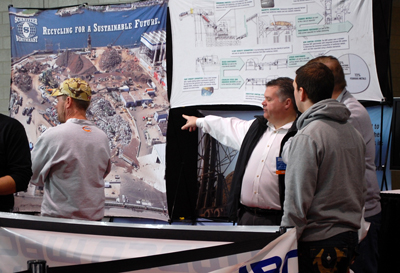
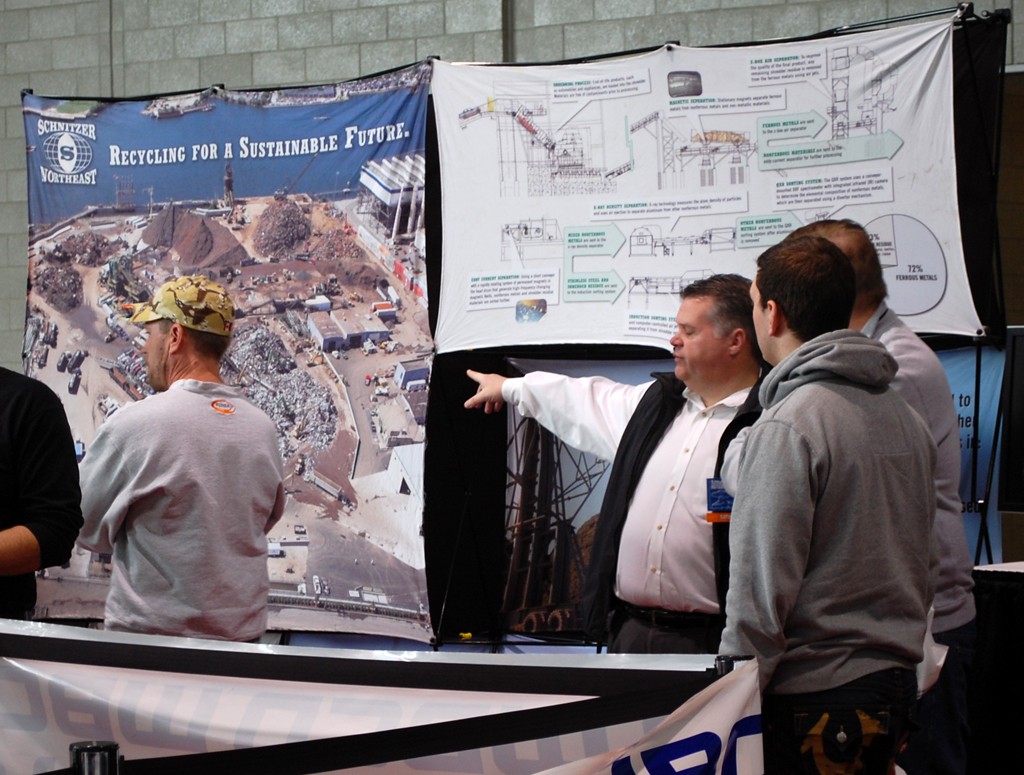
In the same area was a booth with a large crushed vehicle. We first thought it was some kind of message about Drunk Driving. It turned out to be Schnitzer Steel Industries' booth about recycling.
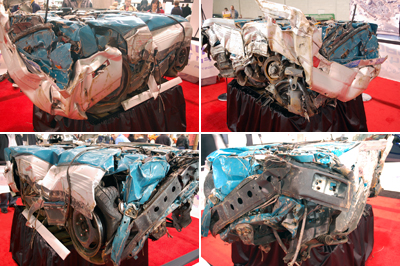
The large crushed car was a contest. If you can correctly name the car, you could win a trip to Florida. The contest was opened to show attendees only so you had to be present to drop off an entry. We guessed it was a Pontiac Gran Prix.
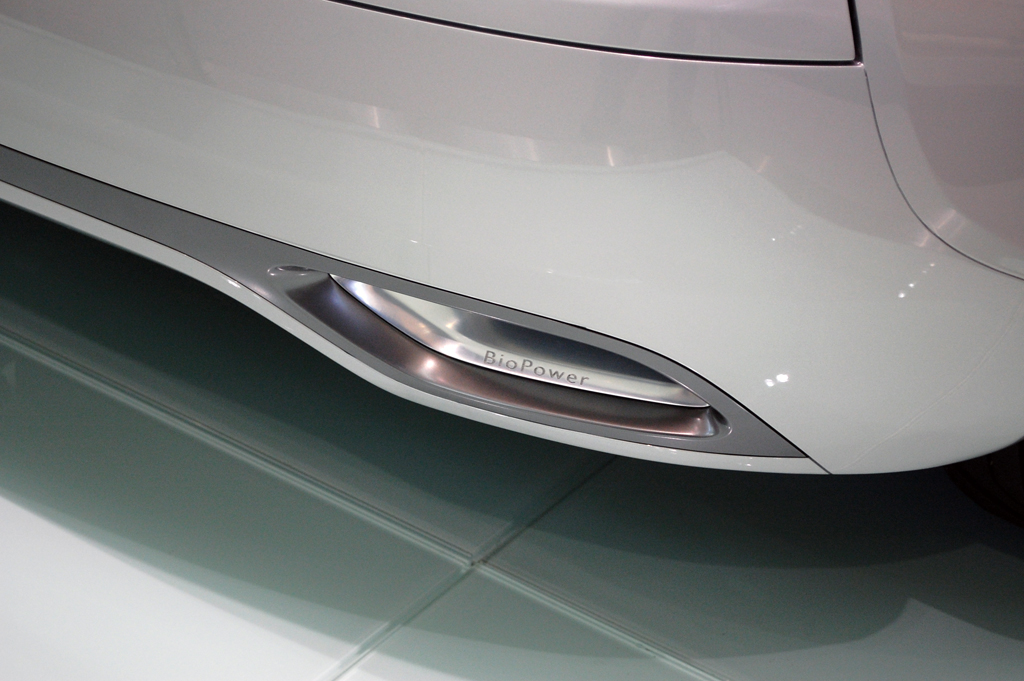
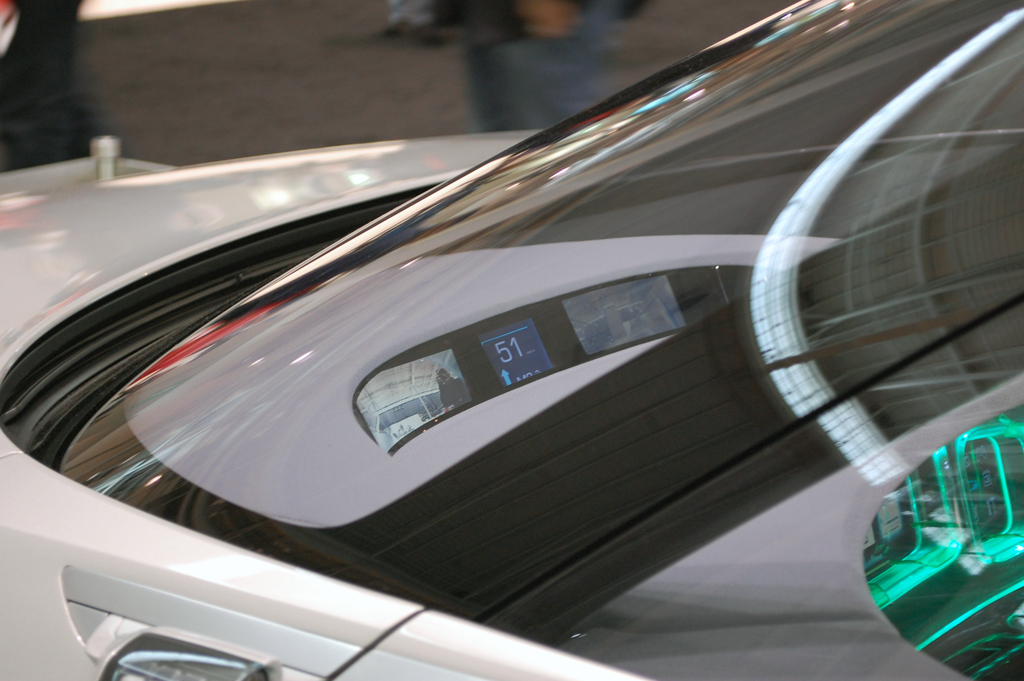
A car show is not complete without a few "concept cars." We have always liked the ones from Saab. This year, Saab was showing off the 9-X Air, a BioFuel (gas-electric flex-fuel) Hybrid convertible concept vehicle. This Saab concept car was debuted in Paris.
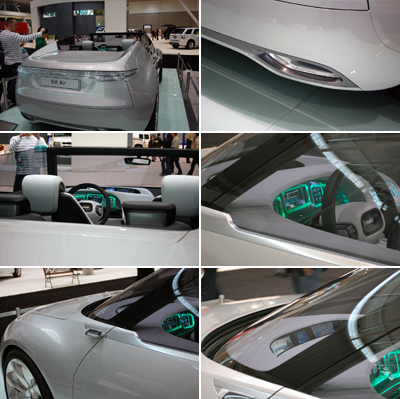
More info on the car and its features are available here on the Saab site. However, seeing it in person was much more satisfying. If you look carefully, you can spot the RainyDayMagazine photographer as captured by the X-9's side mirror-cam. This feature might seem to be overkill for some, but consider that once the video stream is available, all kinds of things can be done with/to it (recording, processing for feature extraction, object tracking, etc...). The folks here do live in a fantastical future, so we LOVE this stuff :-) [Permalink] - NEIAS Exotics
|
|
The auto industry has been feeling the brunt of the credit logjam. Sales have dropped off a cliff, partly because people don't want to buy new cars and partly because those who want to buy are having a tougher time getting financing for the purchase.
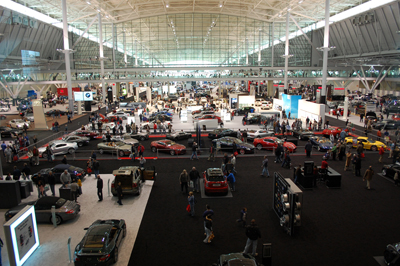
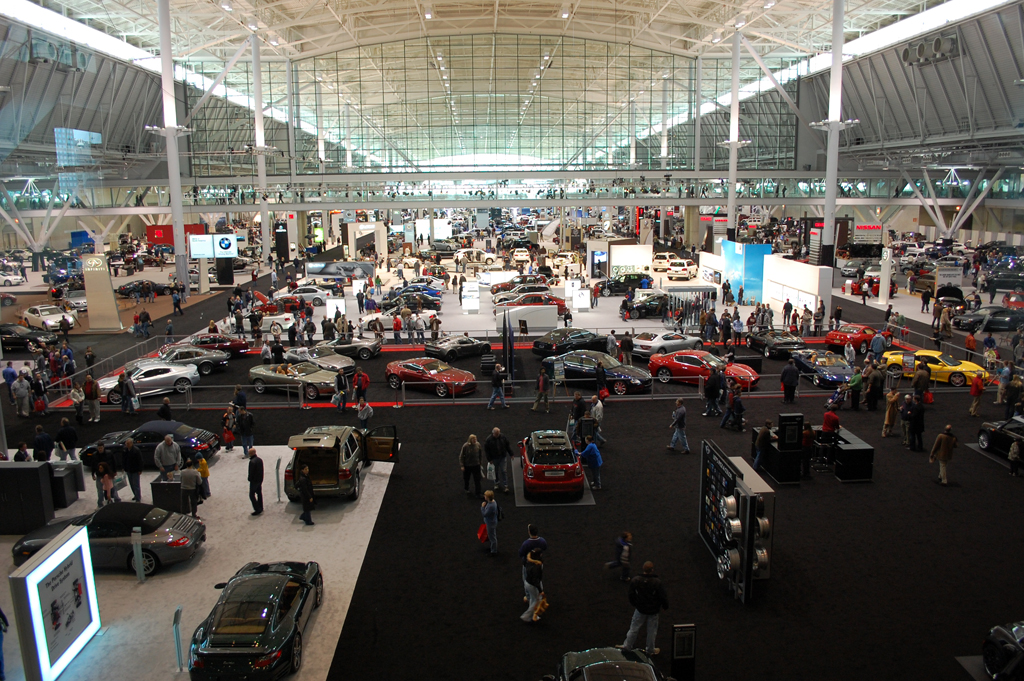
We were going pass on this year's New England International Auto Show, but decided to go because it has been a few years since we covered this event. The show used to be at the Bayside Expo Center, but has since moved to the newer Seaport Convention Center down by the waterfront.
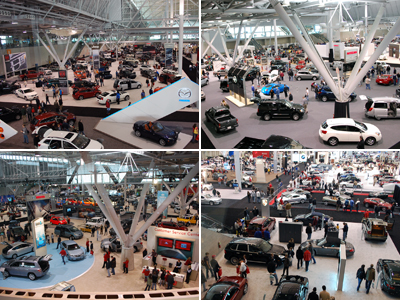
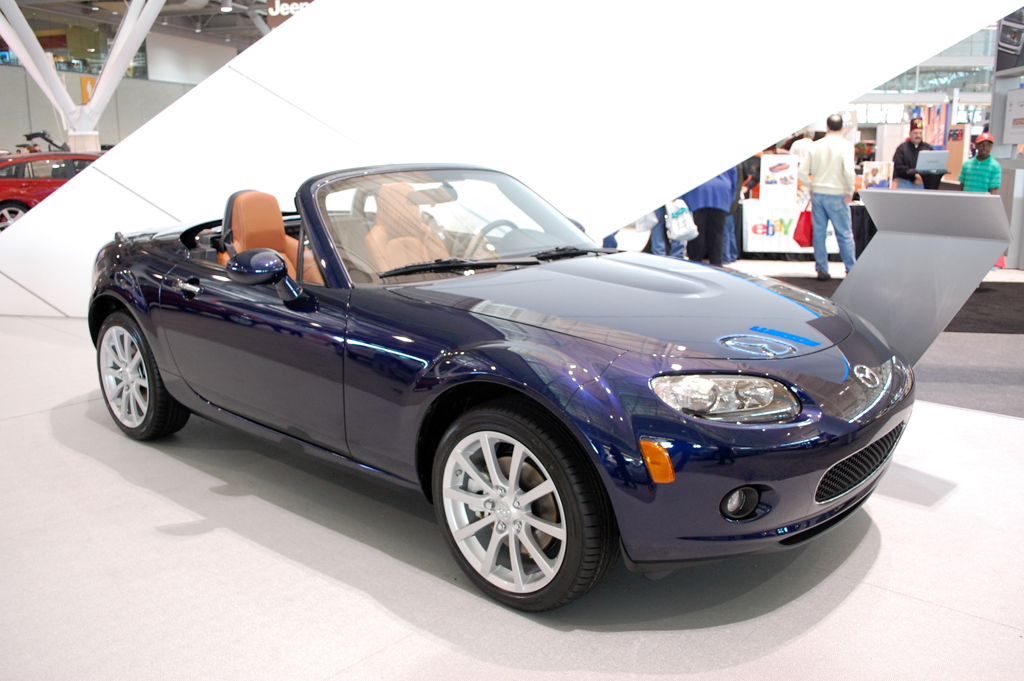
Attendance at the show was light in the early hours, but picked up around noon. All of the major players were there with their 2009 offerings.

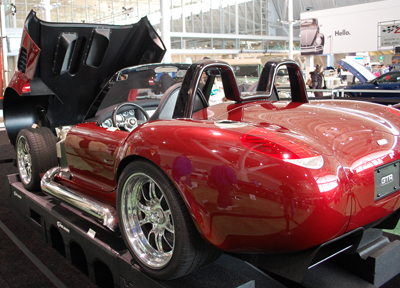
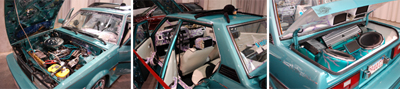
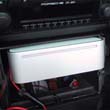
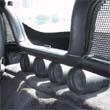
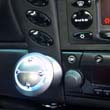
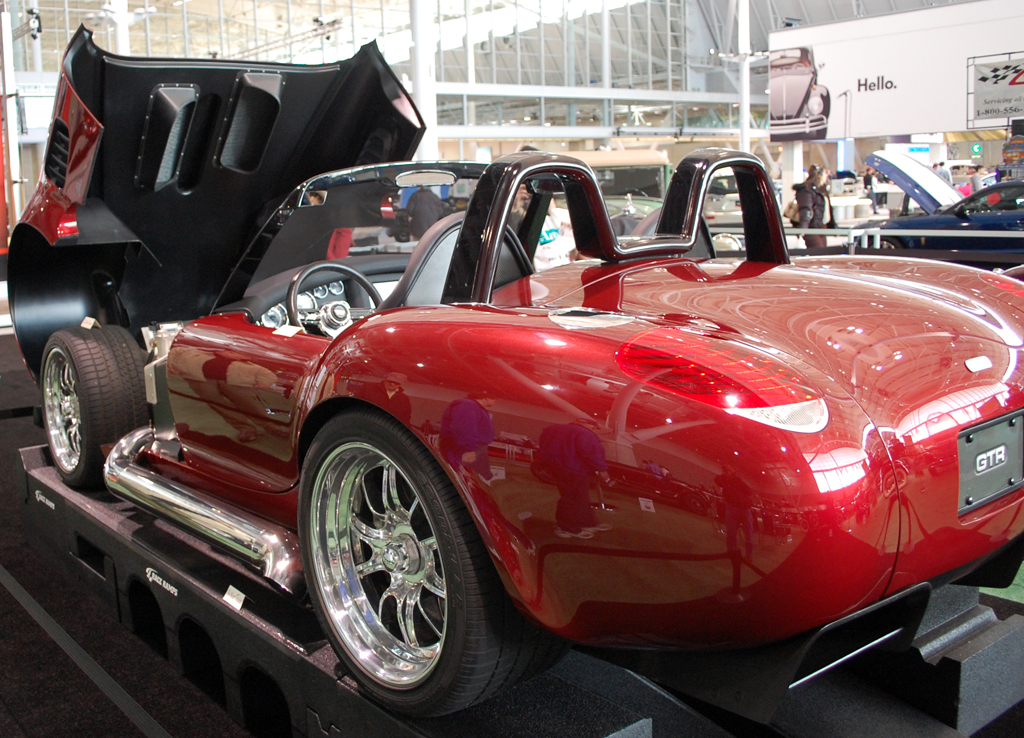
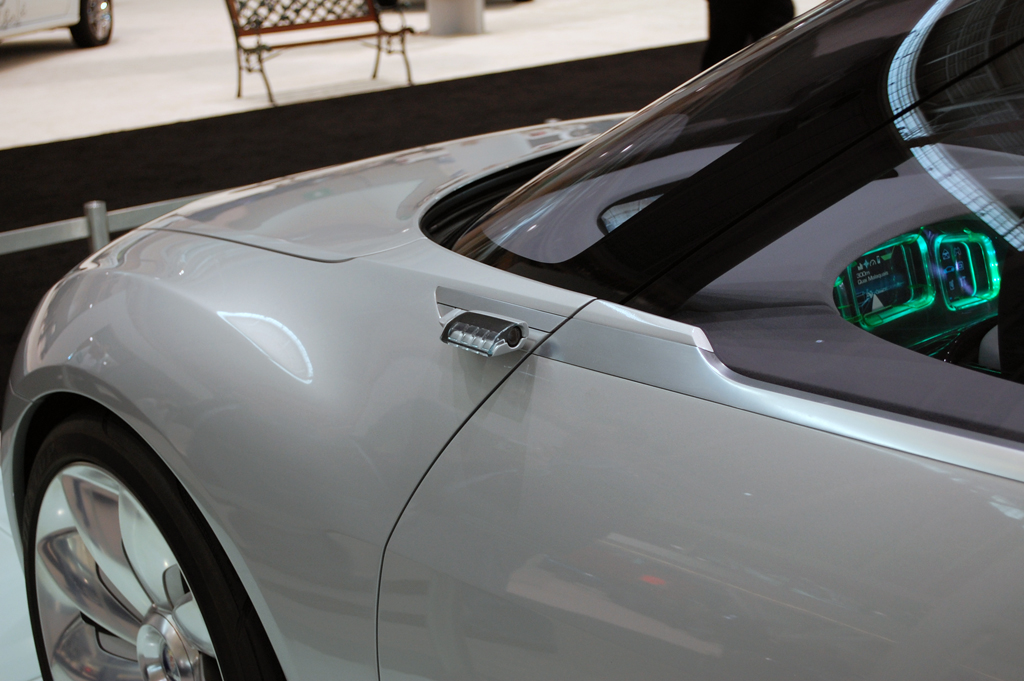
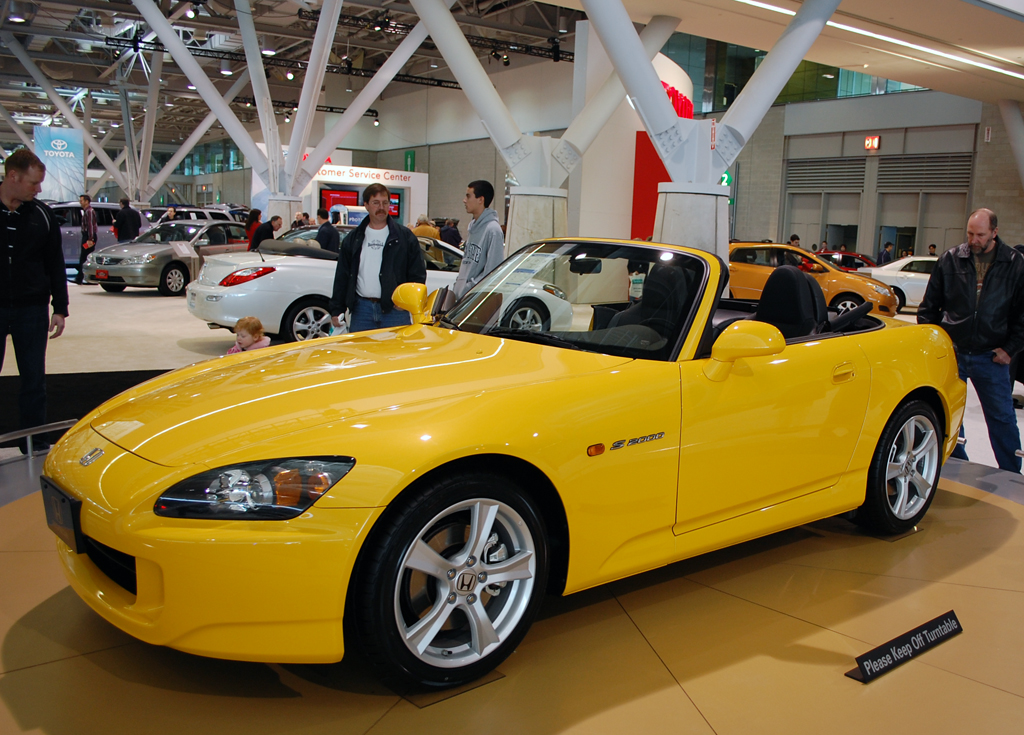
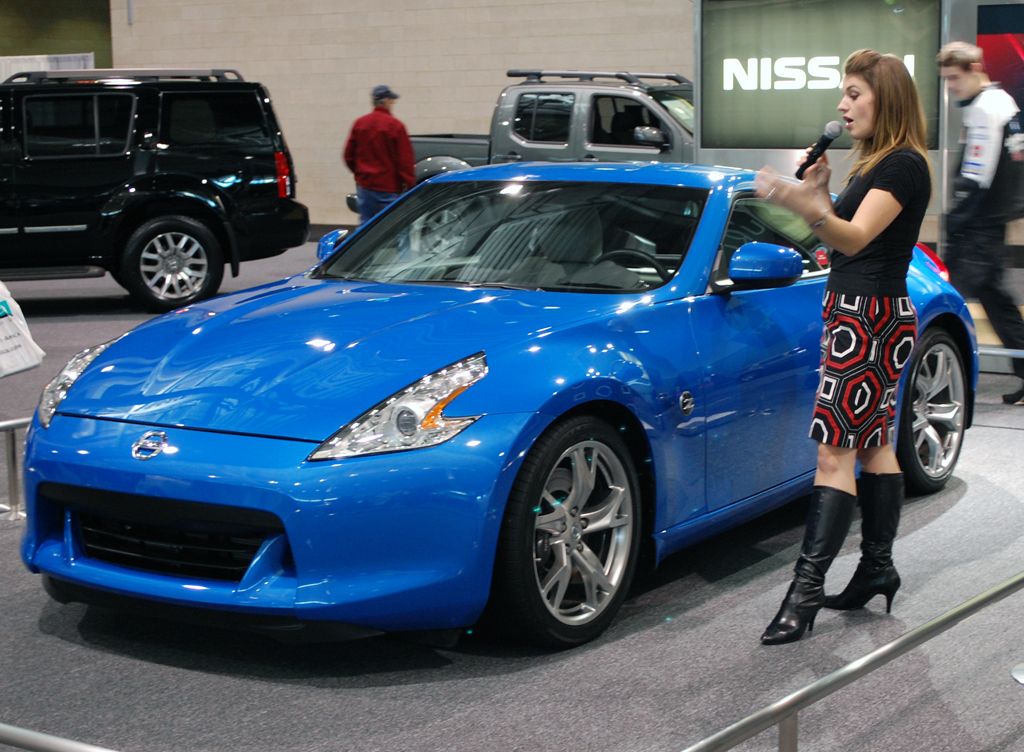
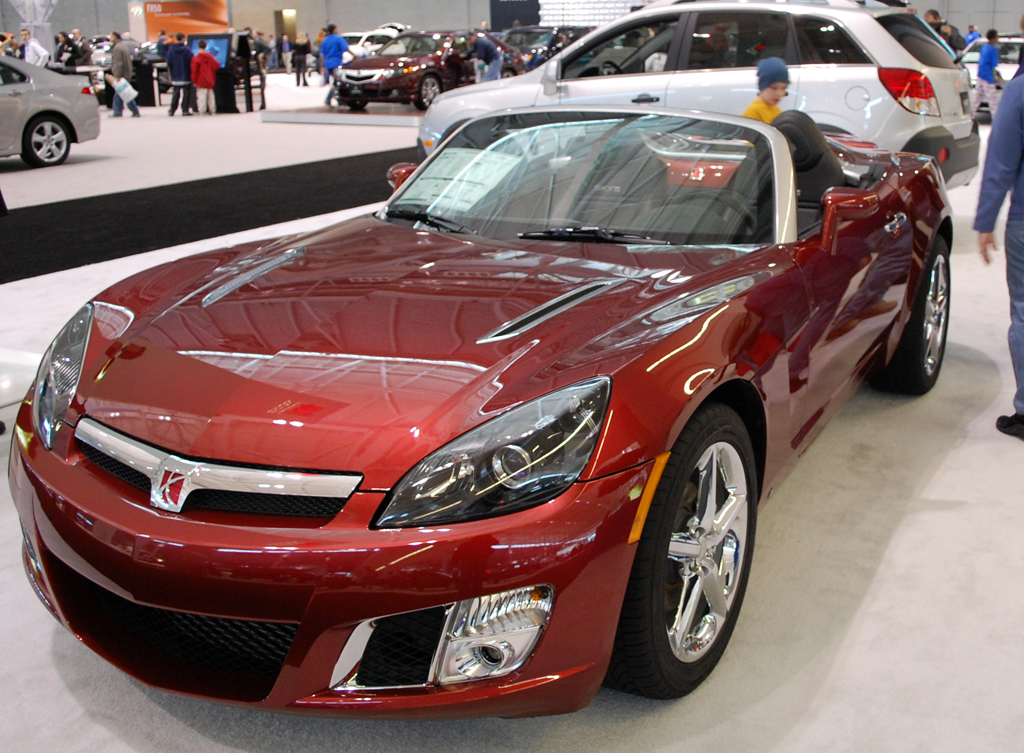
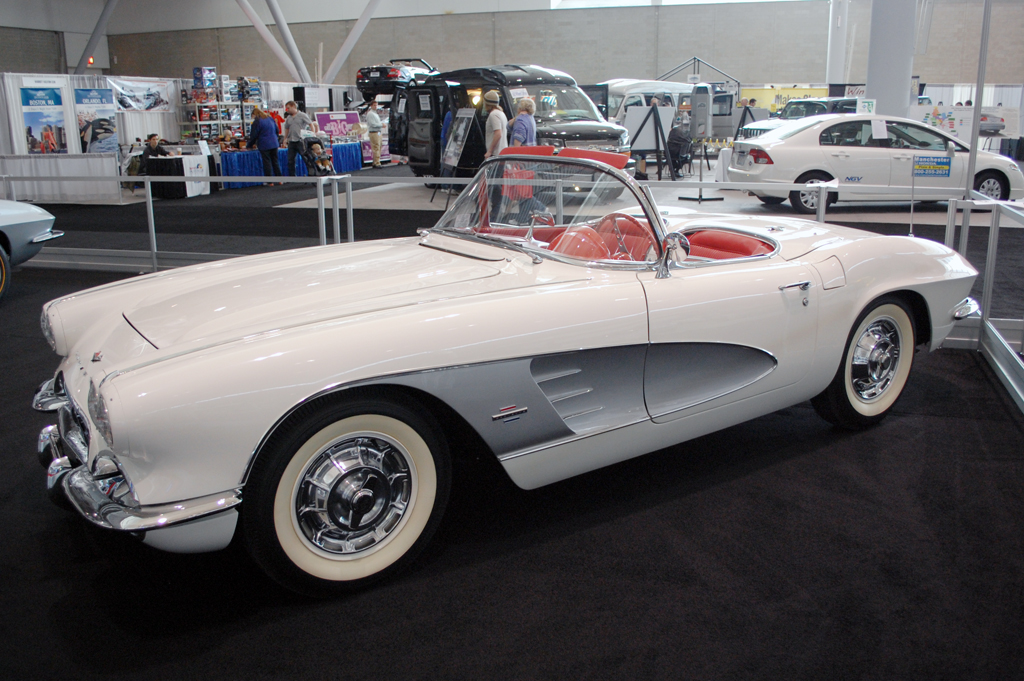
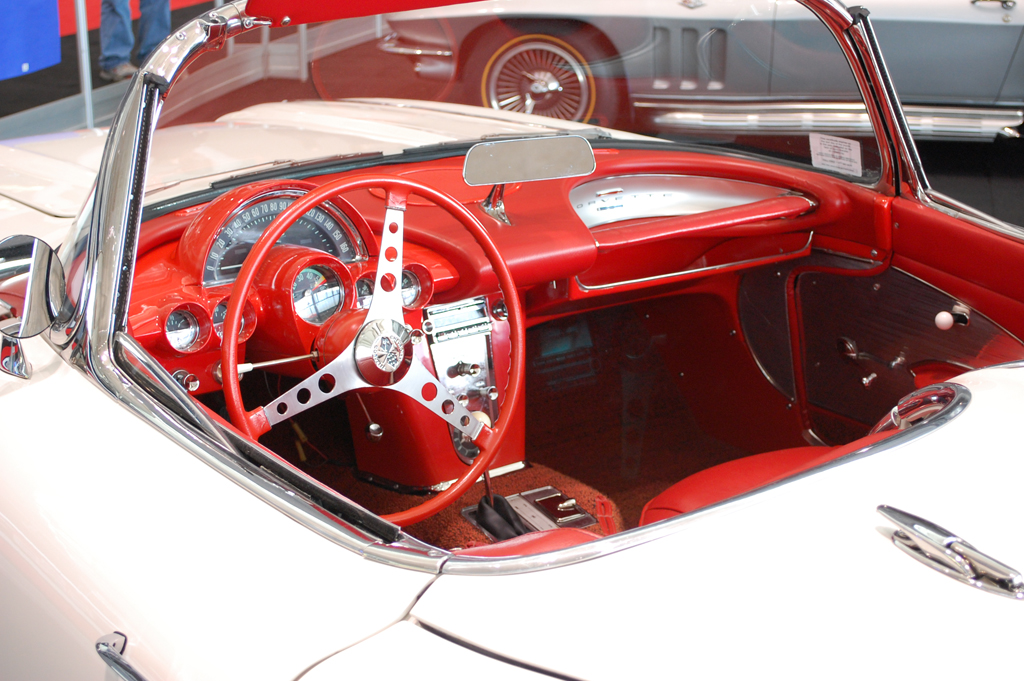
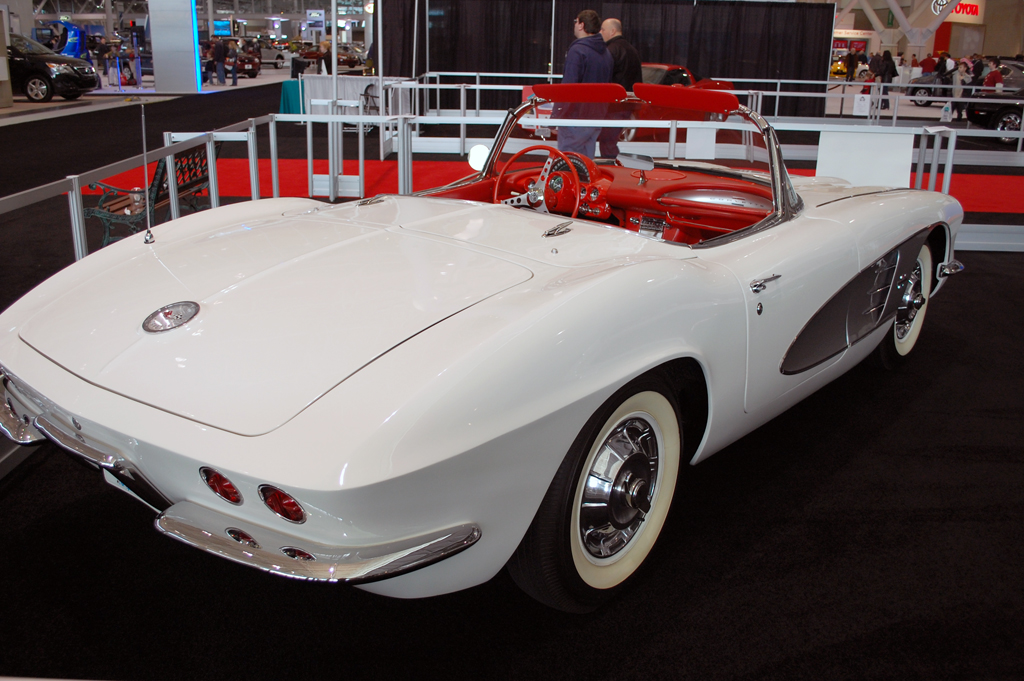
As always, what caught our eye were the two-seater roadsters. Honda, Nissan, and Saturn all had some nice vehicles for next Spring. However, if we were to trade in our 2000 Boxster, we would do it only for a Vette like this one. Just check out the dash and the huge trunk!

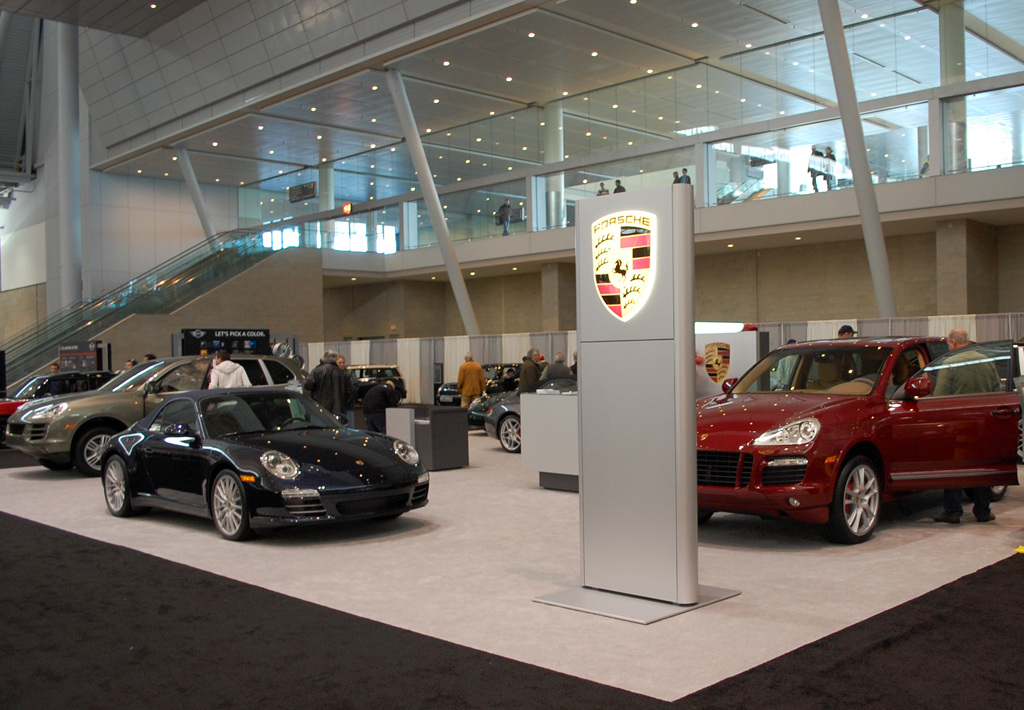
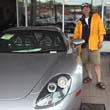
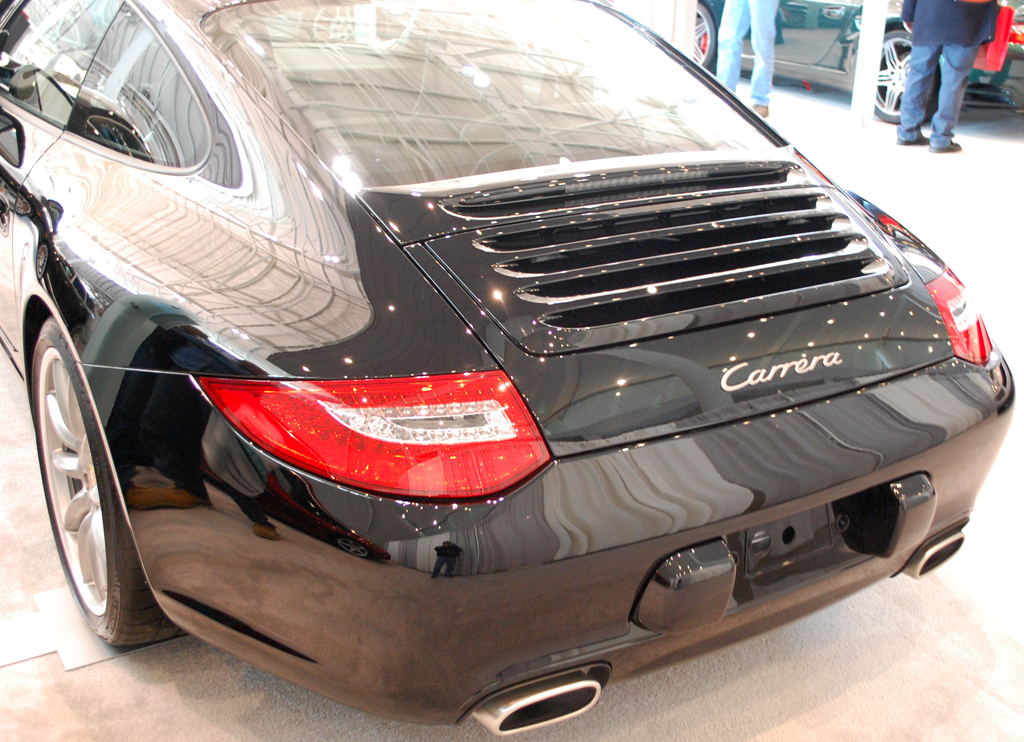
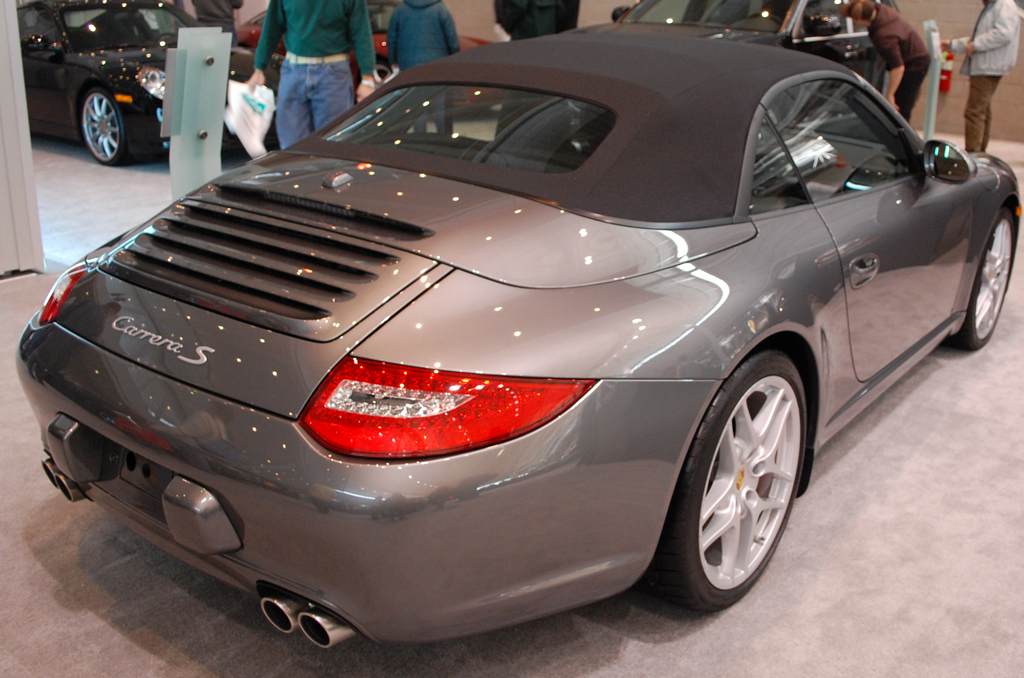
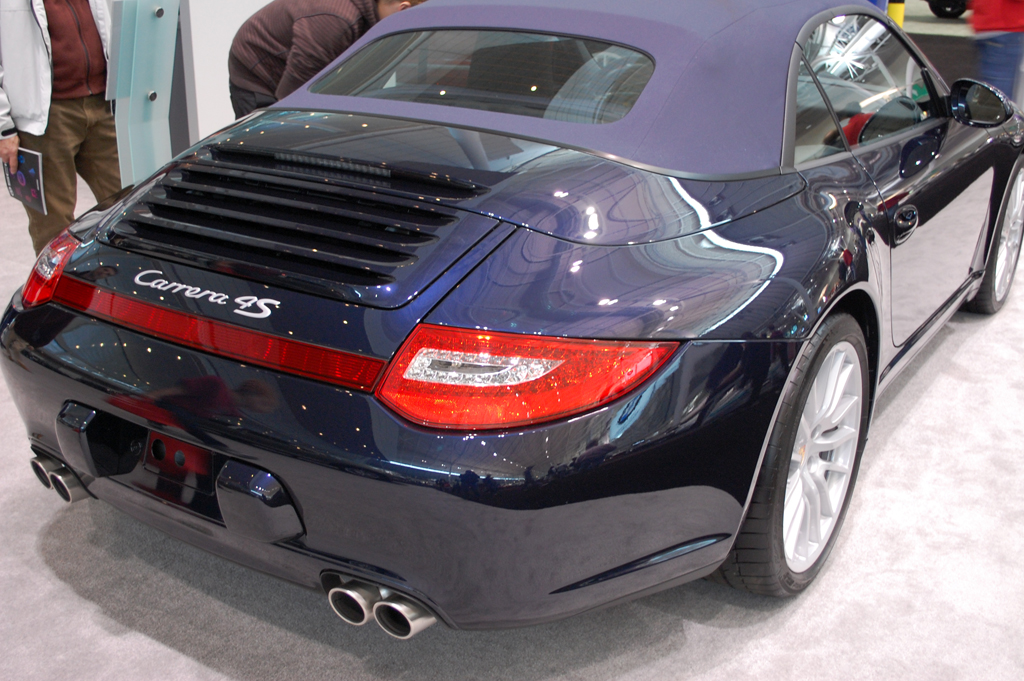
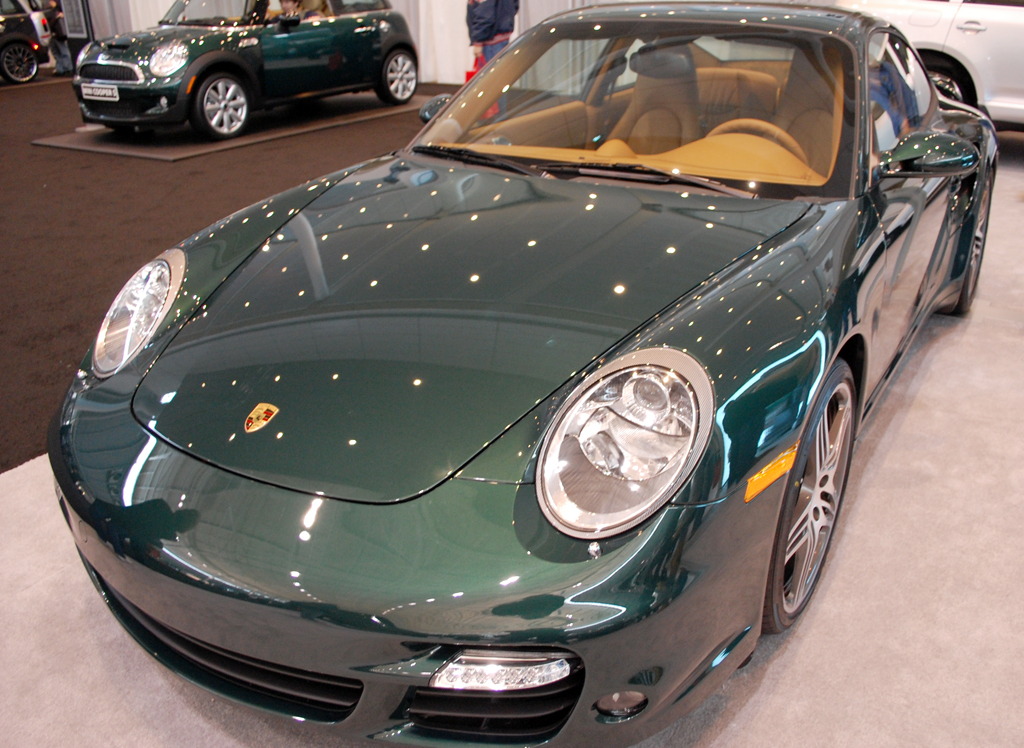
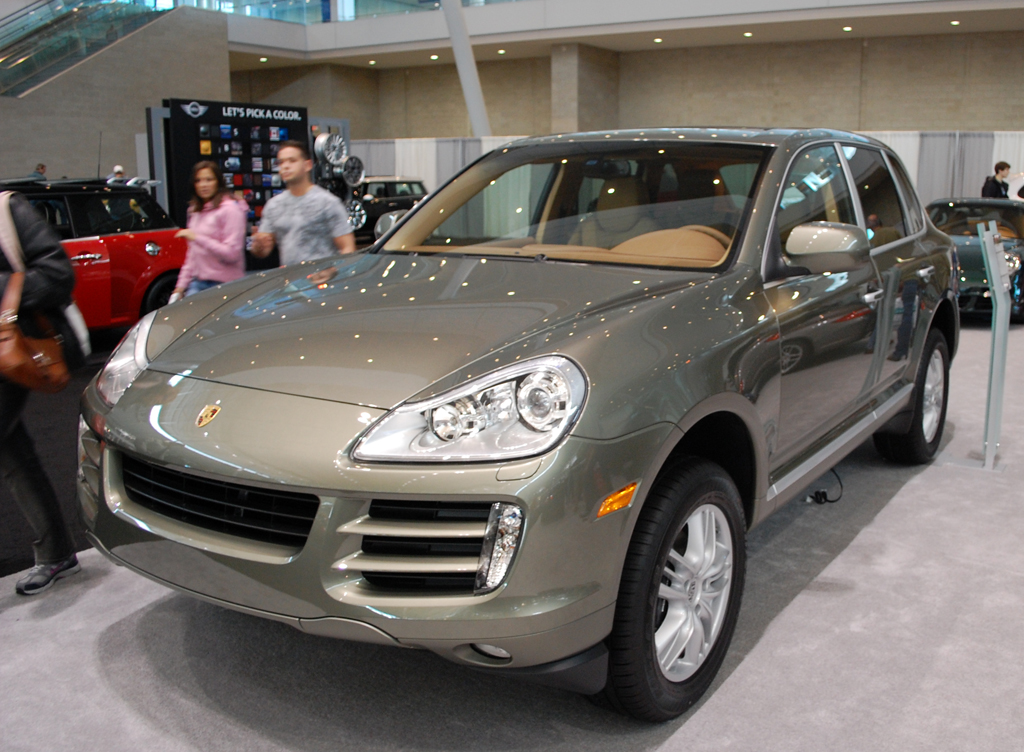
One nice side effect of the light foot traffic was that we had plenty of time to get close to all of the cars, even the Porsches. Most of the Carrera models (base, S, 4S) were on the floor. Some were being checked out by the next generation of buyers.

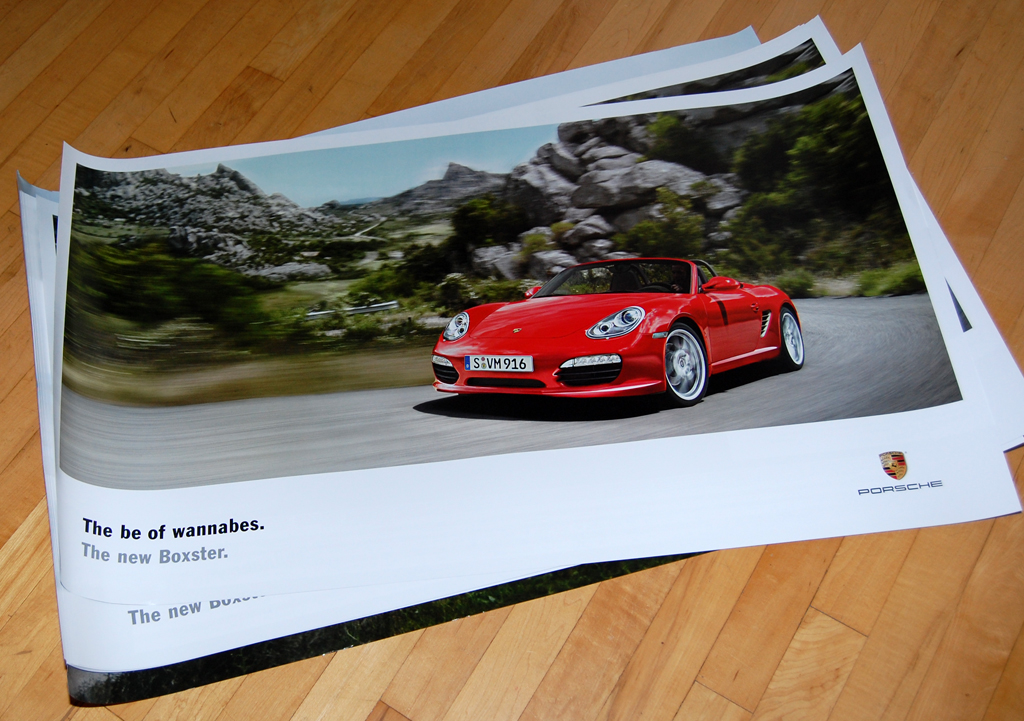
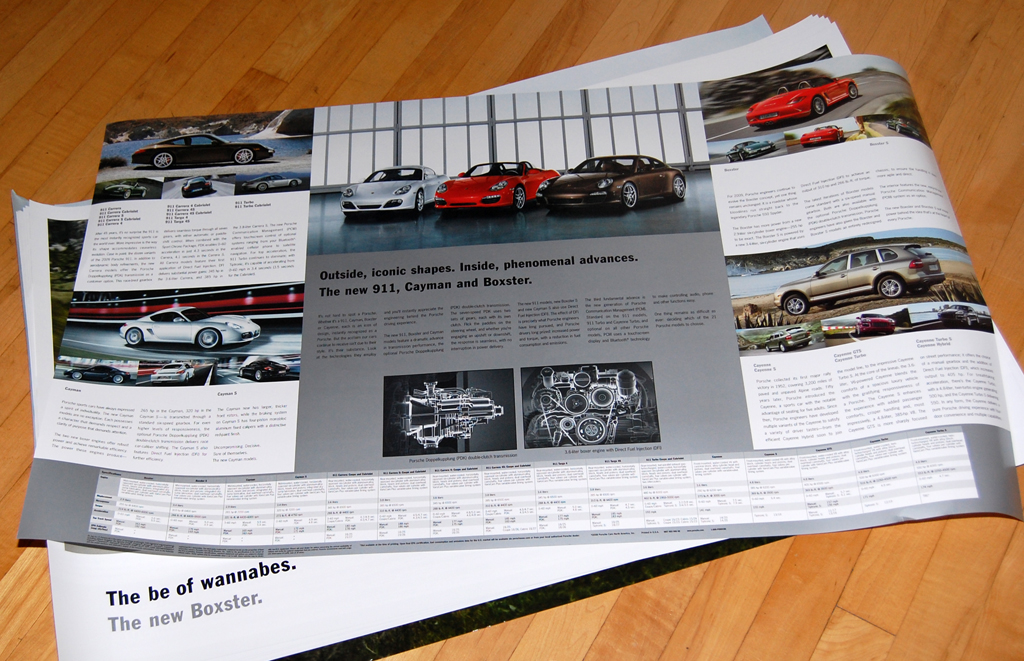
None of Carrera doors were unlocked so we did not get to sit and check out their interiors. However, the Cayman and the Cayenne were available for closer examination. What we did not see were Boxsters. What we did see were Boxster posters.
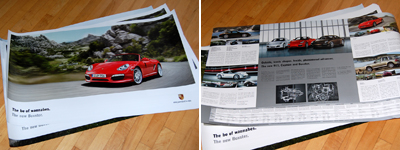
Want a copy of the Porsche poster? Pair the Porsche headlights with the proper model and send us the answers. Put "We need something for the wall" in the subject line of the email so our email filters will process it properly. We'll pick a winner on Monday amongst the entries with the correct answers.

Sunday is the last day of the NEIAS. If you have no plans and are looking to kill a few hours, head on down to the Seaport Convention Center and kick some tires. Do note that snow is in the forecast for tomorrow. [Permalink] - NEIAS
|
|
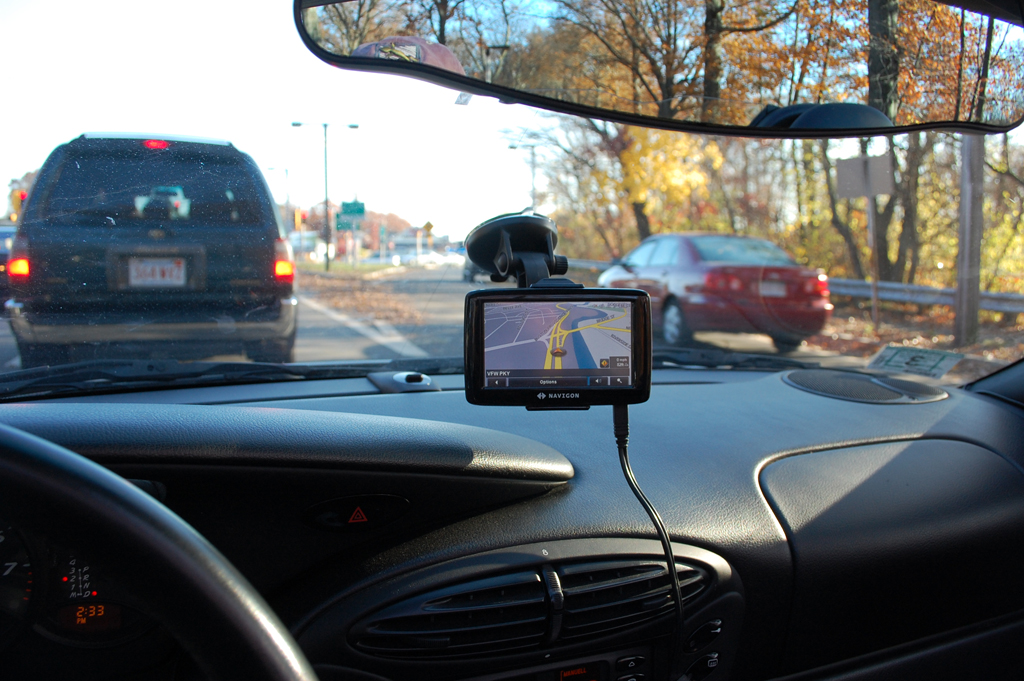
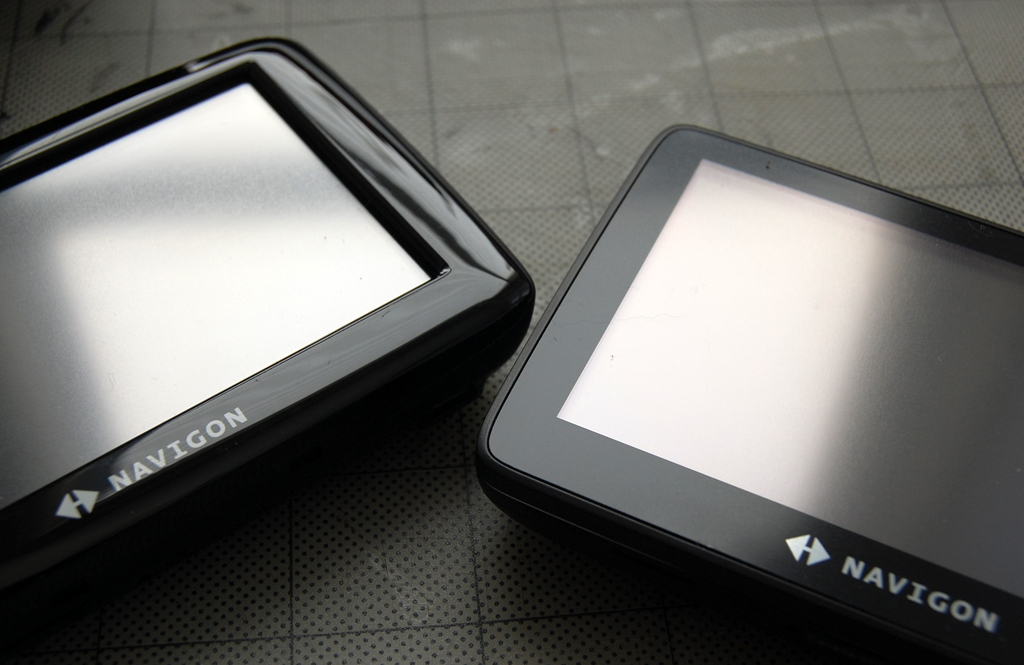
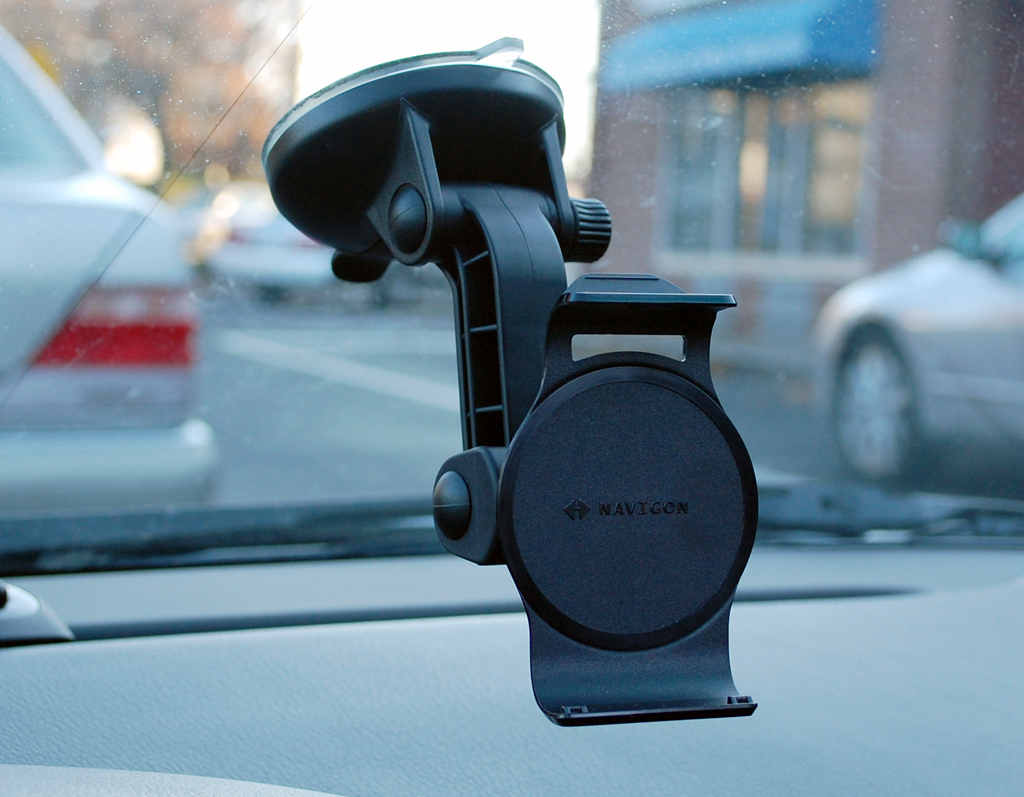
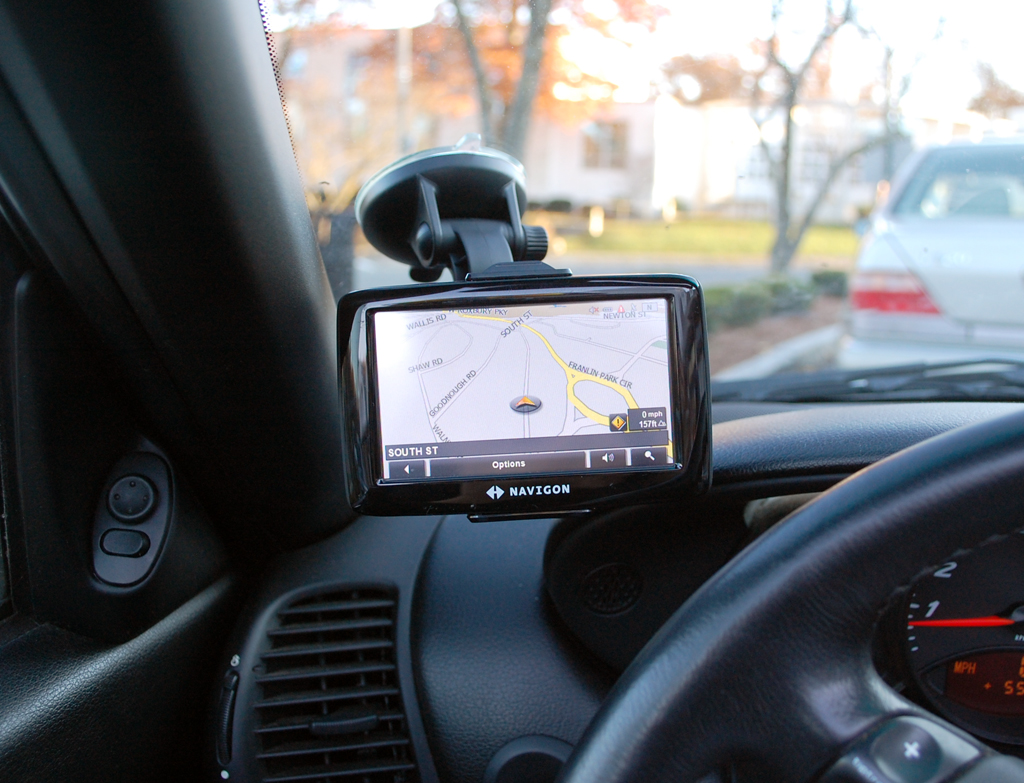
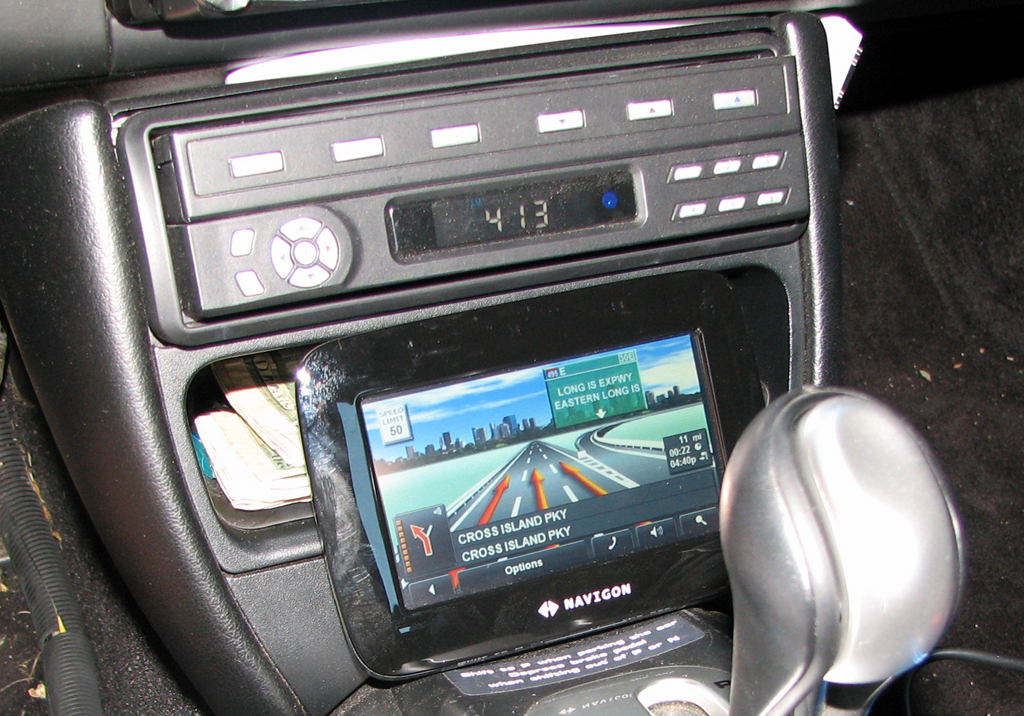
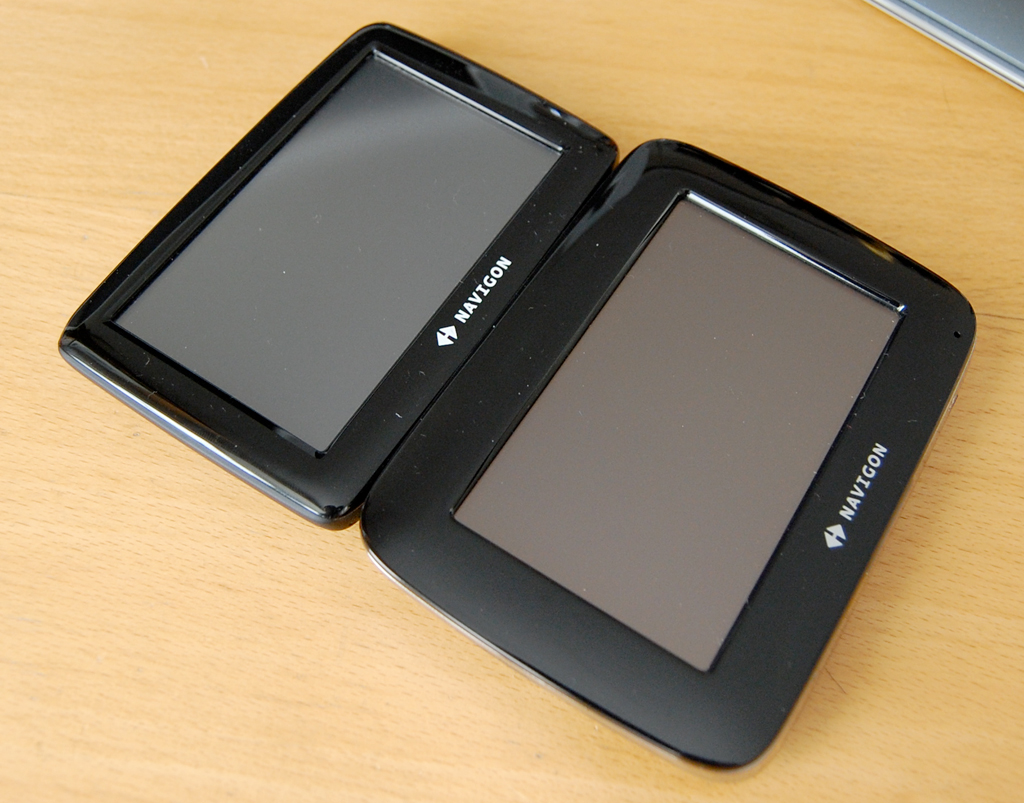
These days, most GPS will guide you to where you want to go. The difference between and within various brands have more to do with ease of use than technology. As most readers know, we have looked at a few GPS units over the years. Navigon first caught our attention with their "reality view" feature.
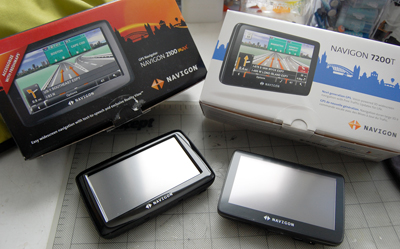
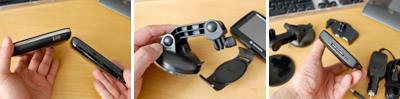
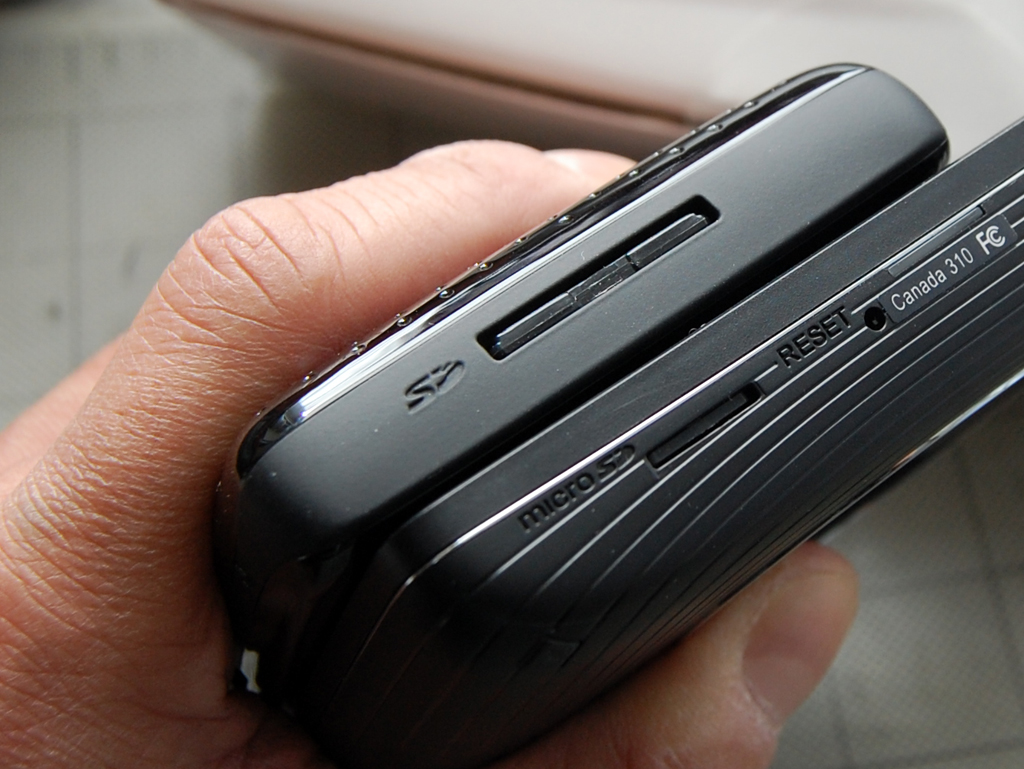
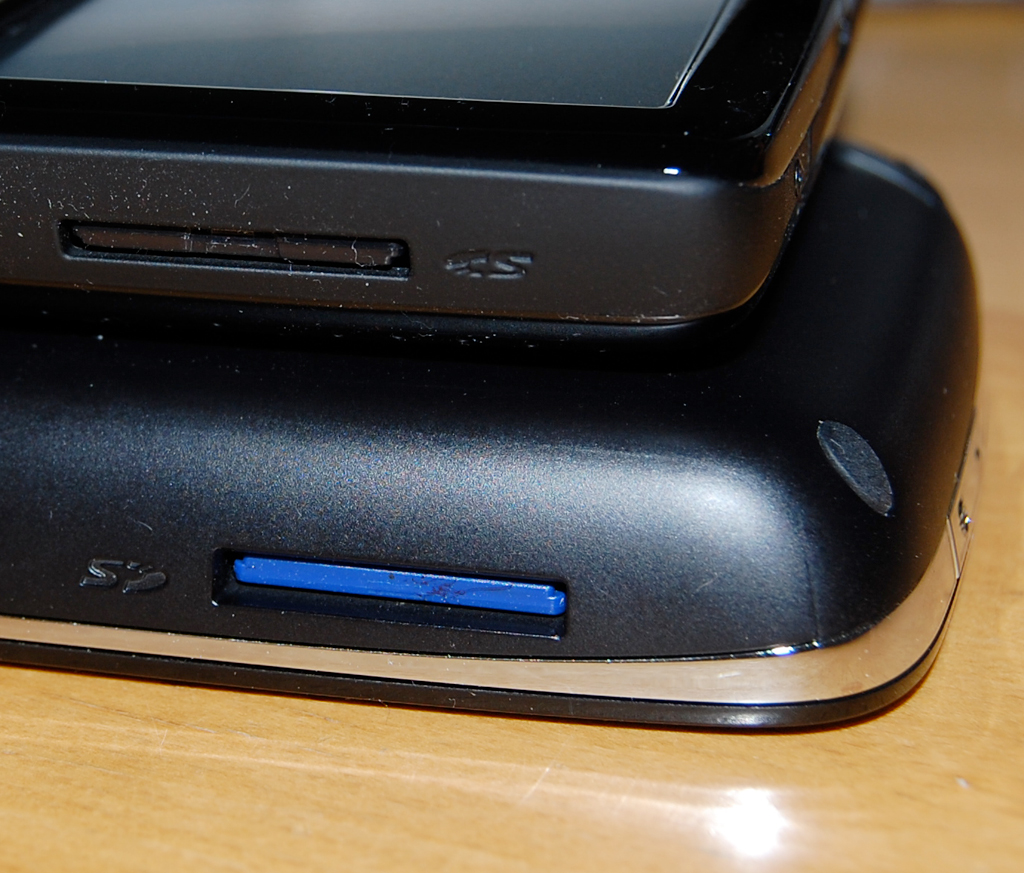
Navigon has continued to innovate. Features such as glare-reducing screens, free traffic updates, and removable flash (SD: 2100Max, MicroSD:7200T) are part of every Navigon unit. The 2100Max mount grips the unit from top and bottom. The 7200T's mount grips from the back.
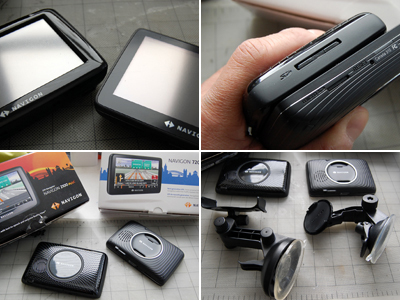
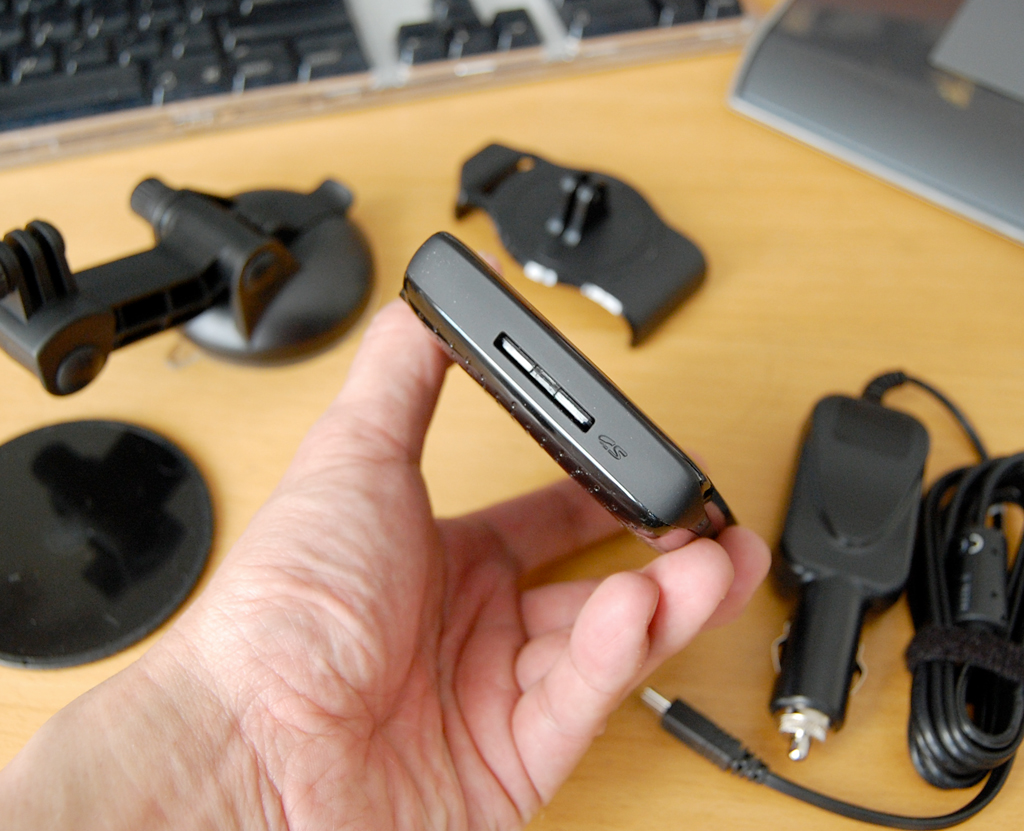
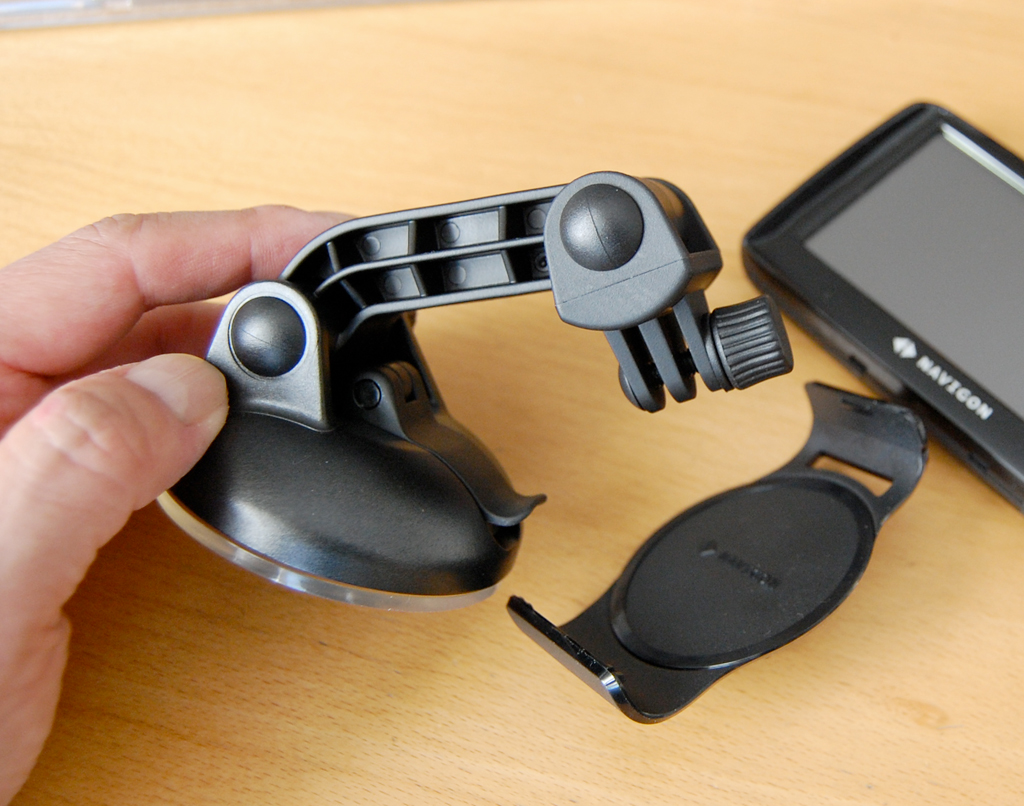
The GPS mount is one feature which does not get much coverage in most reviews. This item is actually quite important in the overall usability of the GPS. A mount should be easily affixable and removable from the windshield, flexible in its adjustments, and secure in its grip on the GPS unit.
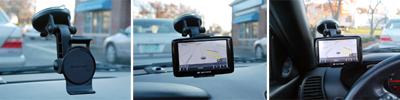
The mounts for Navigon's 2100Max and the 7200T are well designed. Both mounts have multiple joints that accommodate any angle. The large soft rubber suction cups provide excellent grip on glass.

The only problem we've encountered in the placement of the window mount is that we had to be cognizant of the added space required by the power plug. In the next installment of this series, we'll take a look at one popular aftermarket mounting option. We'll see if it is better than our low cost Home Depot hack. [Permalink] - Navigon Mounts
|
|
|
|
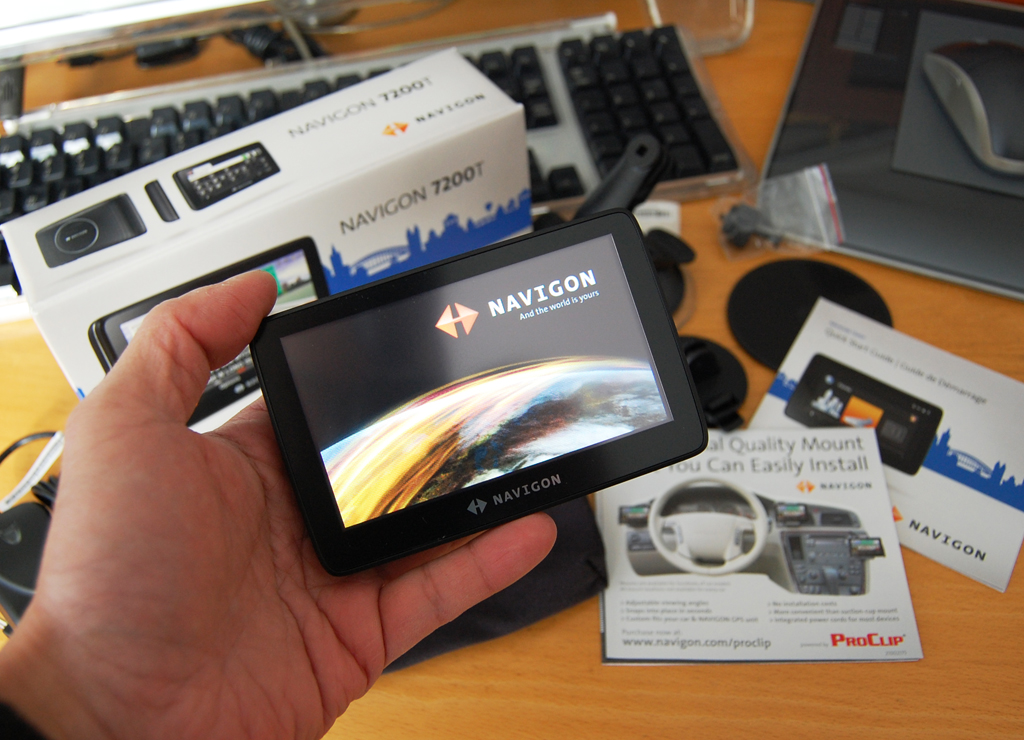
If you are always saying "where the f' are we?" May we suggest that you drop some not so subtle hints this Holiday Season for a decent GPS unit? There are quite a few good ones on the market these days. We have reviewed quite a few of them (NavMan, US GlobaSat, CoPilot, HK Guide+Play, Magellan, Navigon, etc...) over the years.
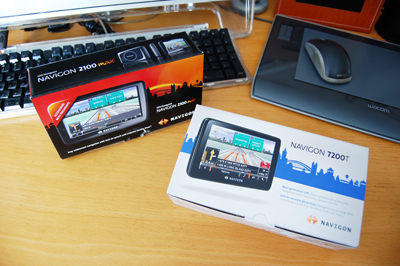
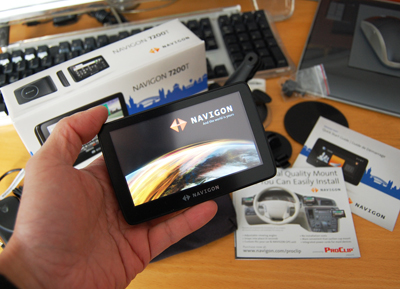
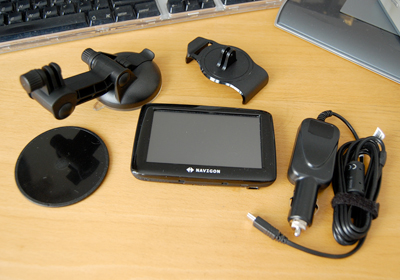
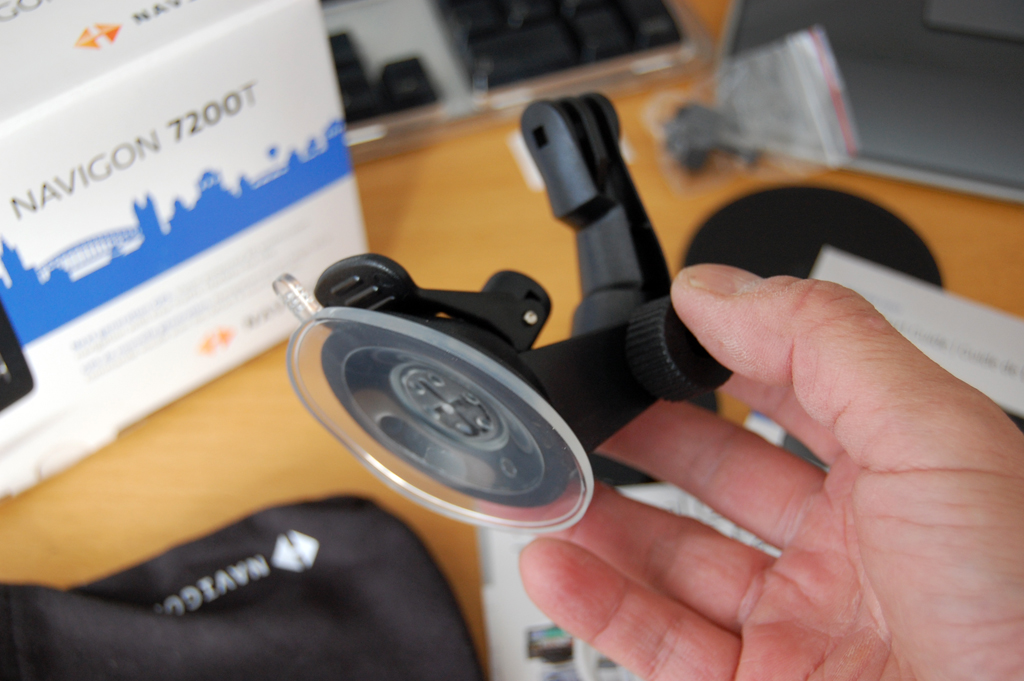
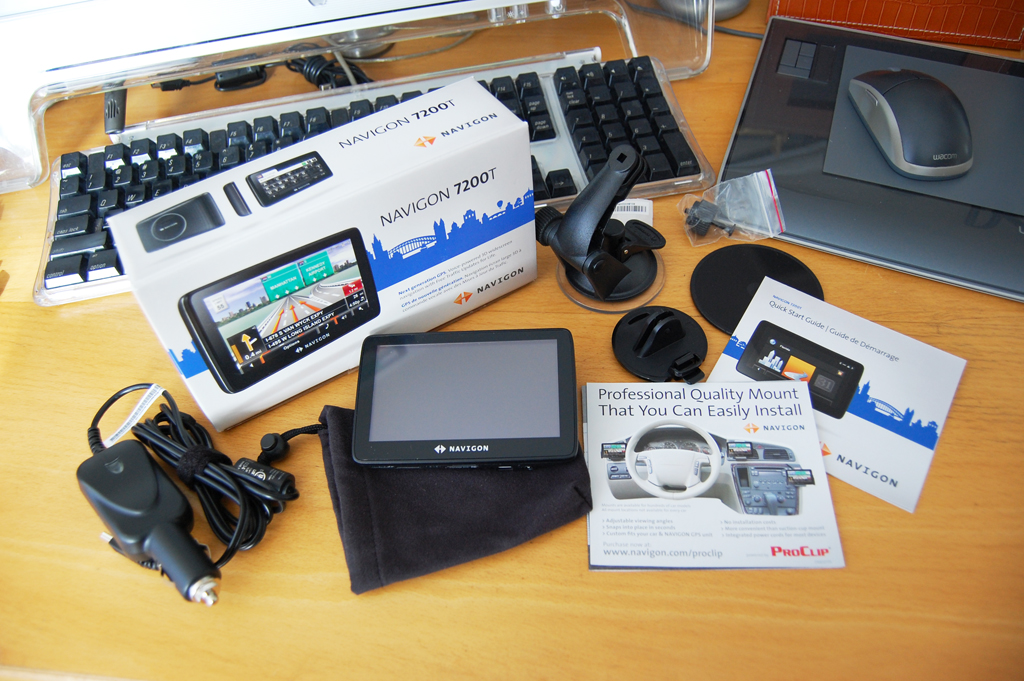
The Navigon units (7100, 2100Max) are our current favorites. The latest in the Navigon line is the 7200T. Here is a quick FirstLook at the unit and what comes in the box. The GPS unit comes with a car charger, pouch, and a suction cup mount. The maps are pre-loaded but can be updated via the microSD card.
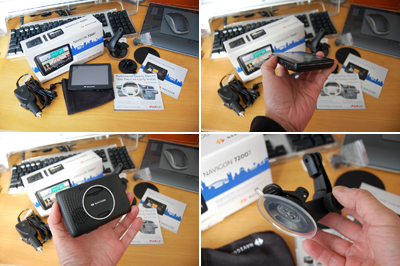
Each generation is a bit better than the last. The improvements are features which are more than just bells & tweaks. They make the device more functional and easier to use. The highlights of the 7200T are voice input, 3D views, free real-time traffic info, and Bluetooth cell phone support. We'll have a complete run down on them in our next write-up.
So if you see a great deal on the Navigon 7200T this Black Friday. Grab one for yourself and maybe one as a gift. This is one GPS you will not quickly outgrow. [Permalink] - Navigon 7200T
|
|
|
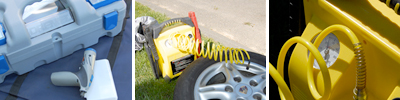
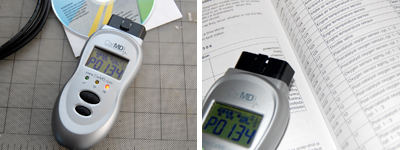
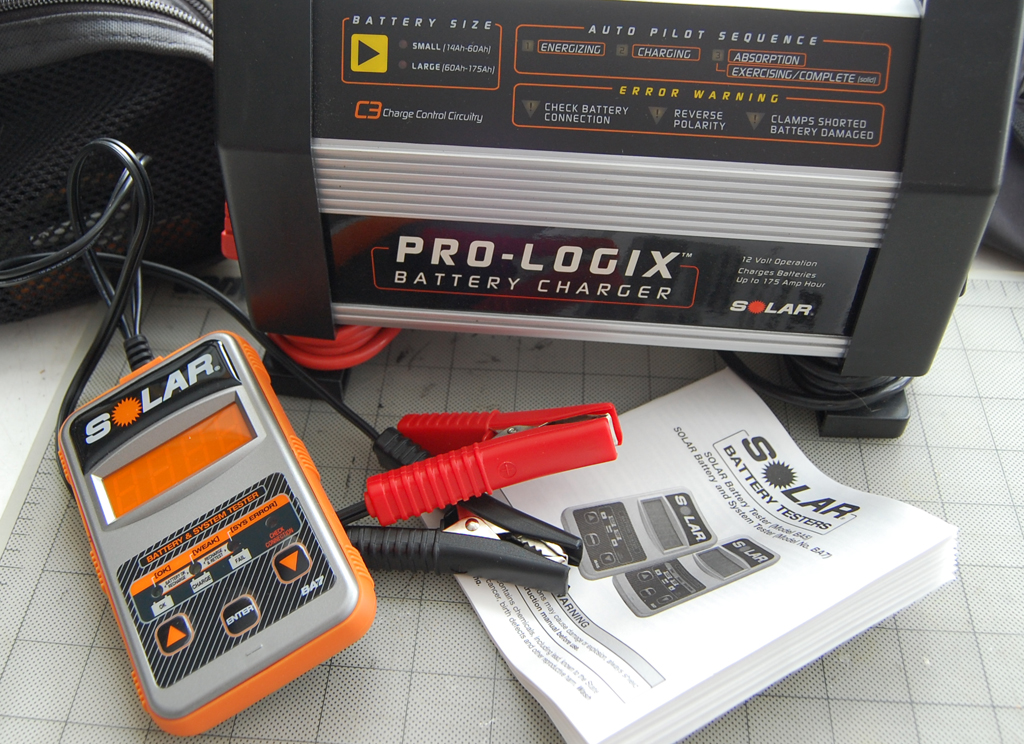
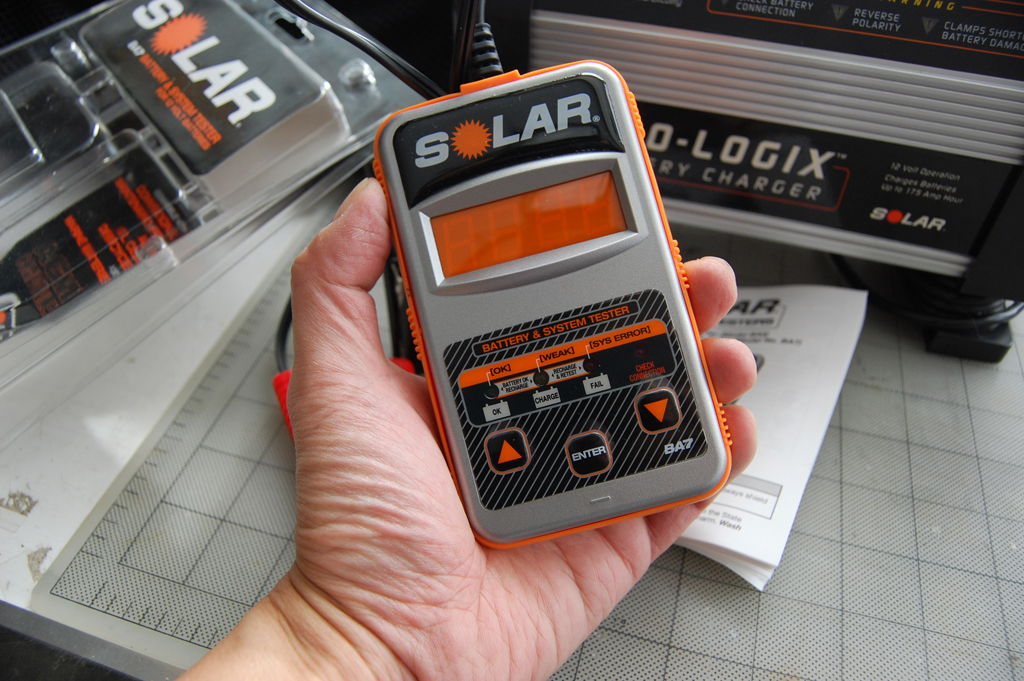
This past weekend we switched out the Summer tires for our Winter Blizzaks. In the collection was a new piece of gear still in its plastic packaging. Readers who were curious and clicked on the image of the item (Clore Automotive's Solar Battery Tester - BA7) found the hidden link to this month's RainyDayContest. We have reviewed some Clore Automotive gears (JNC Air, Pro-Logix Battery Charger) in the past and are always eager to check out their new offerings.
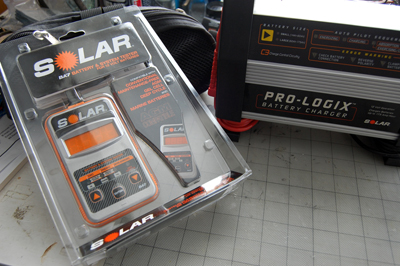
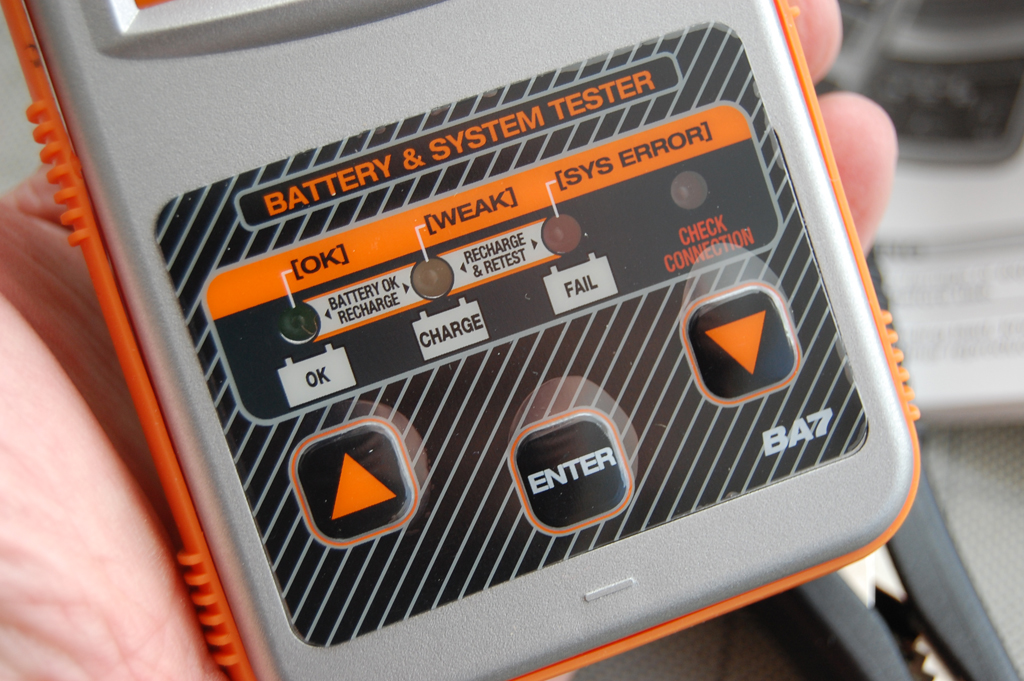
The new item is the Solar Battery and Systerm Tester. This handy little device is designed for testing a wide variety of batteries (marine, Gel Cell, regular car, etc...).
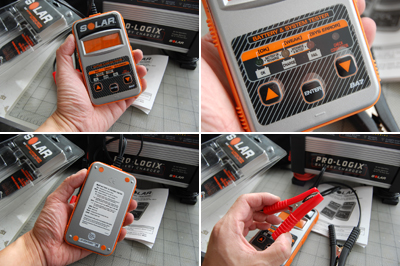
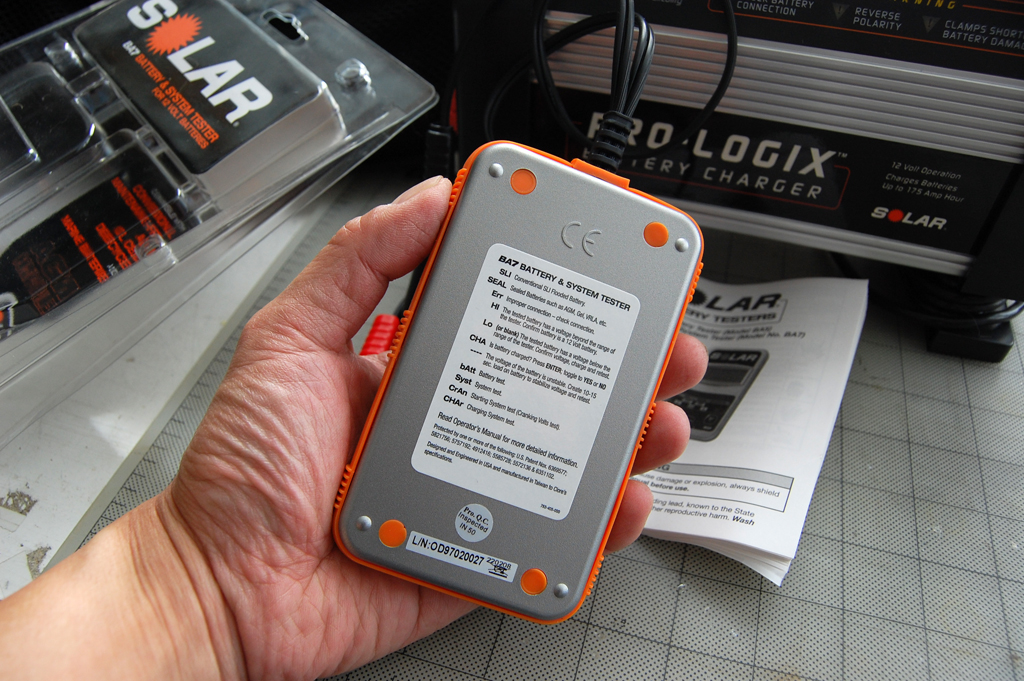
We took the unit out of its packaging for a quick FirstLook. The device has a solid feel. The LED display is large. All of the buttons are sealed against dirt and moisture. The directions are integrated into the back of the unit. We'll give it a FirstUse once over soon.

BTW, congratulations goes out to Steve M. Steve's name was picked out of the hat amongst all of the email entries recieved since Sunday. We'll send Steve the Solar Battery Tester once we are done with our review of the Solar BA7. For readers who want one under their tree this Holiday Season, drop the appropriate hints by leaving this page up around your significant other. We'll make sure they get the hint :-) [Permalink] - Solar Battery Tester
|
|
|
|
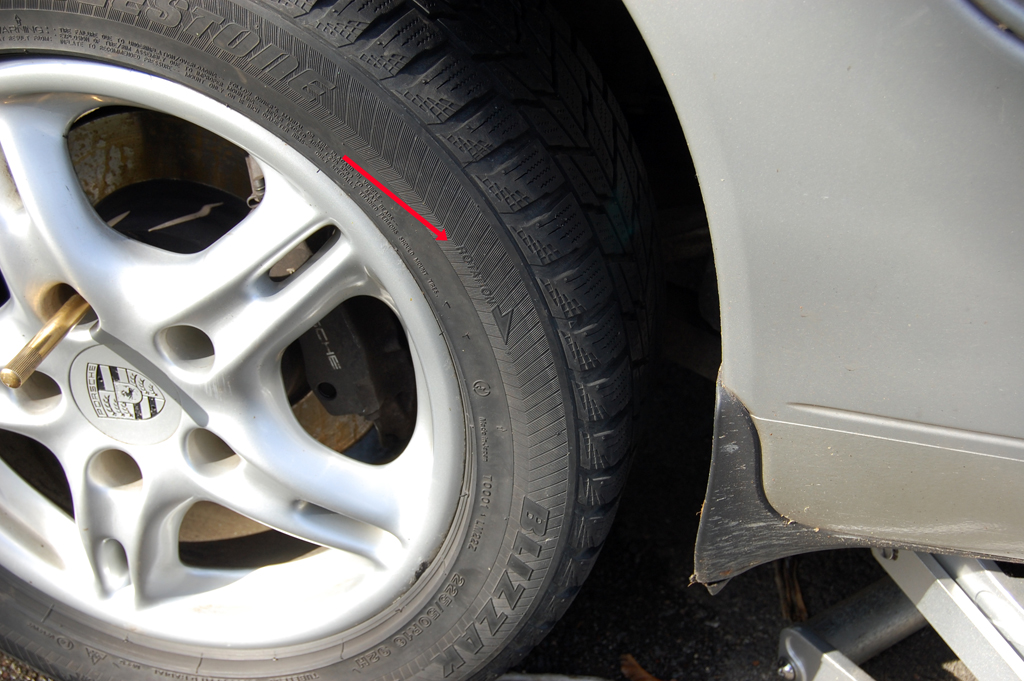
The weather was nice this weekend, but we know that the colder temperatures are on their way. A surprise snow storm is always just around the corner. Summer tires get pretty hard and do not function optimally when the temperature drops below 45º. Brakes and tires are two things we never take for granted.
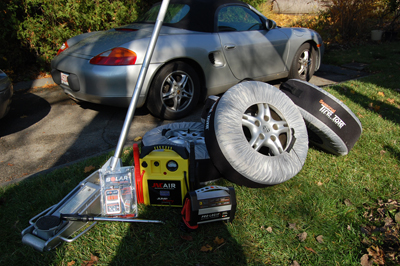
Frequent readers already know about the virtues of many of the items in the collection above. Sharp eye readers will notice something new which we have not yet reviewed. We'll get to it soon enough.
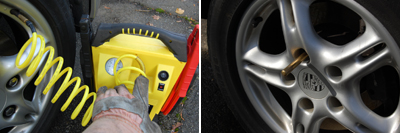
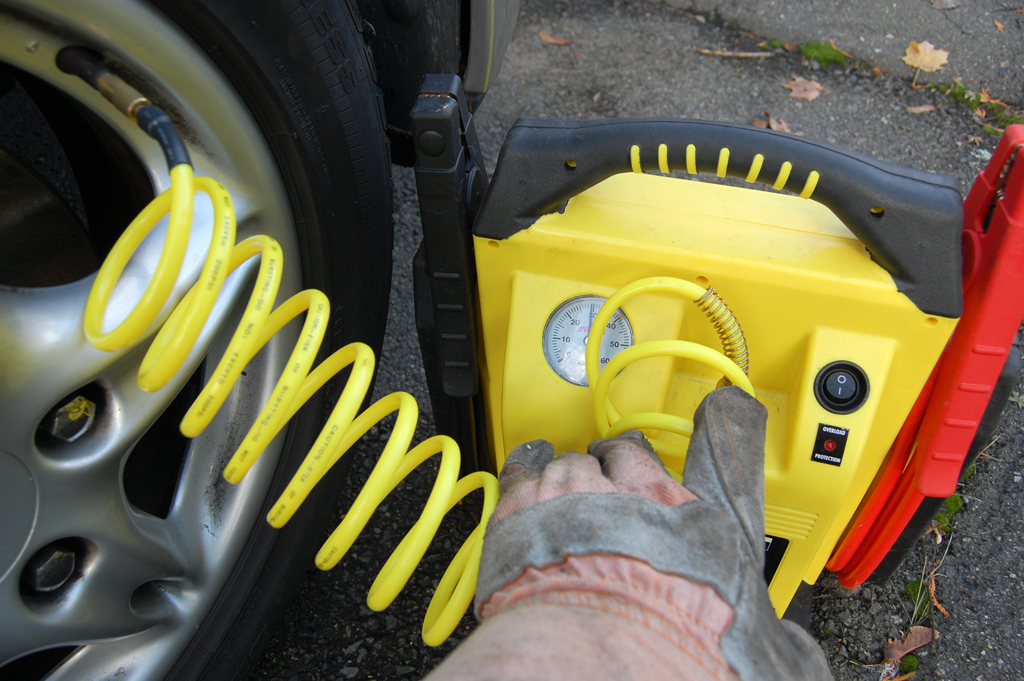
We have talked about the bi-annual tire exchange ritual quite a few times, but we want to point out a few reminders. The tires are always a few pounds short, so we always have the JNC Air on hand to bring the pressure back up to the proper level. To make changing the tires easier, we always use a wheel hanger to help us align the bolt holes.
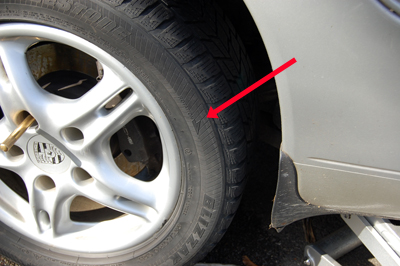
The other important thing we always check is the direction of rotation of the tires before mounting. We are not sure if it makes a big difference, but since there is an indicated orientation , we thought it would make sense to follow it and mount it properly. The forecast is for another week of sunny weather, so we did not put on the hard top...hoping we'll get a few more "convertible days" before the Winter. [Permalink] - Snow Tire installation
|
|
|
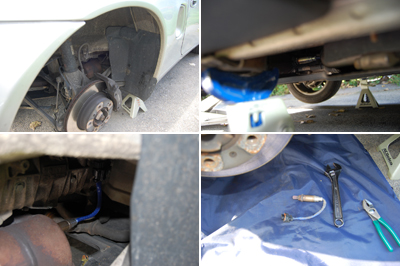
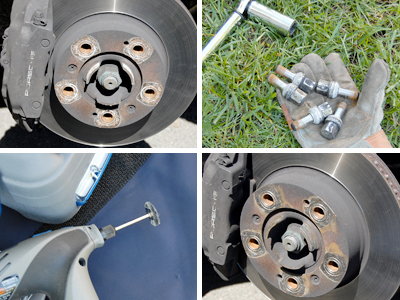
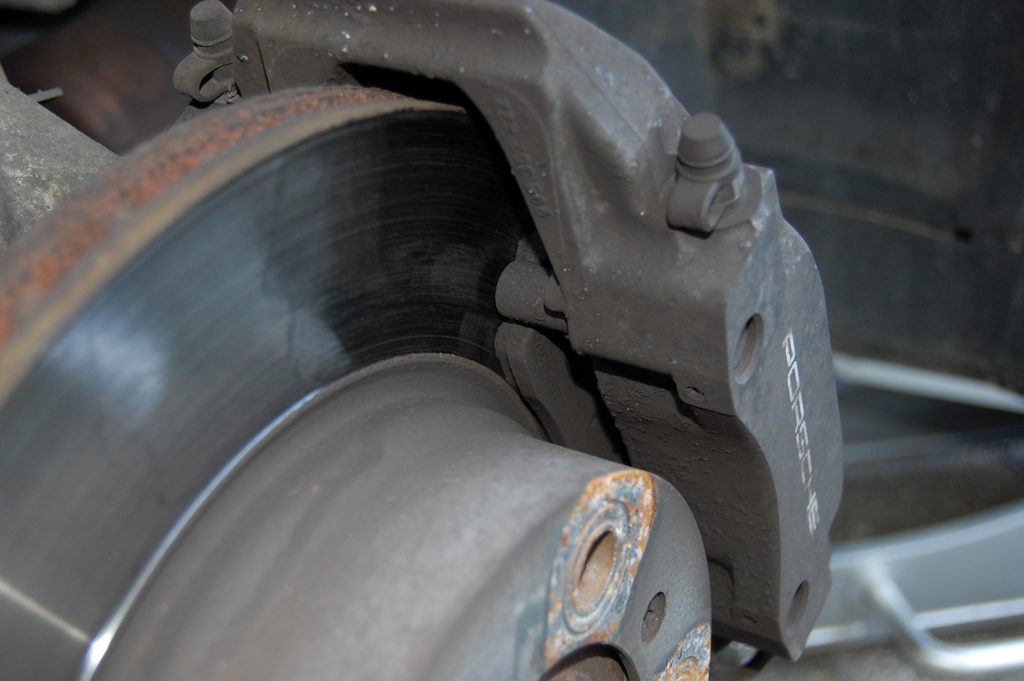
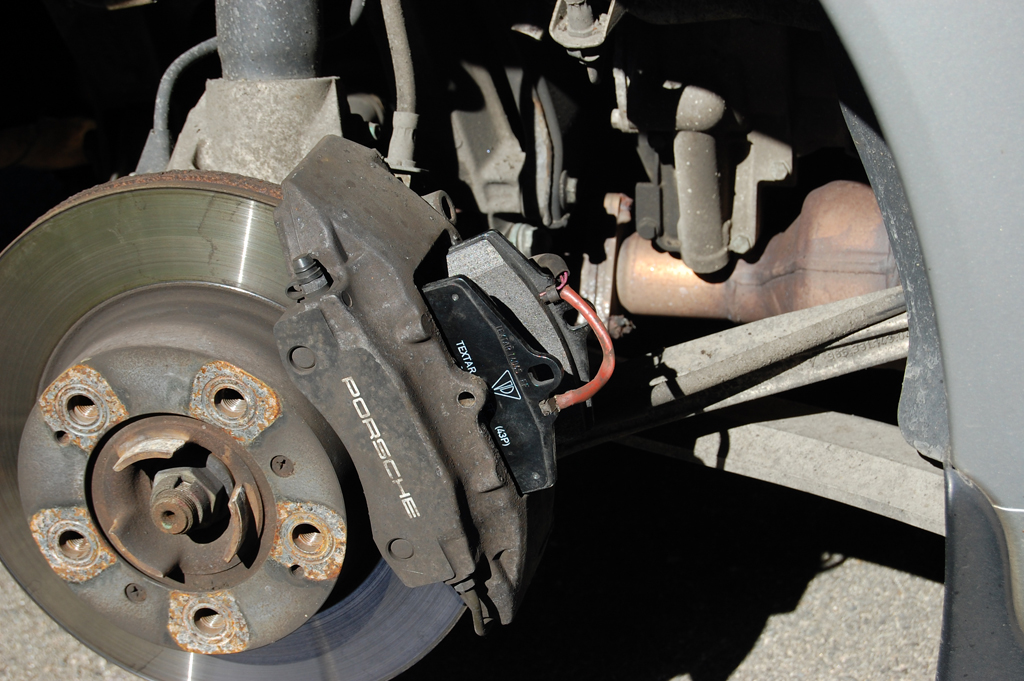
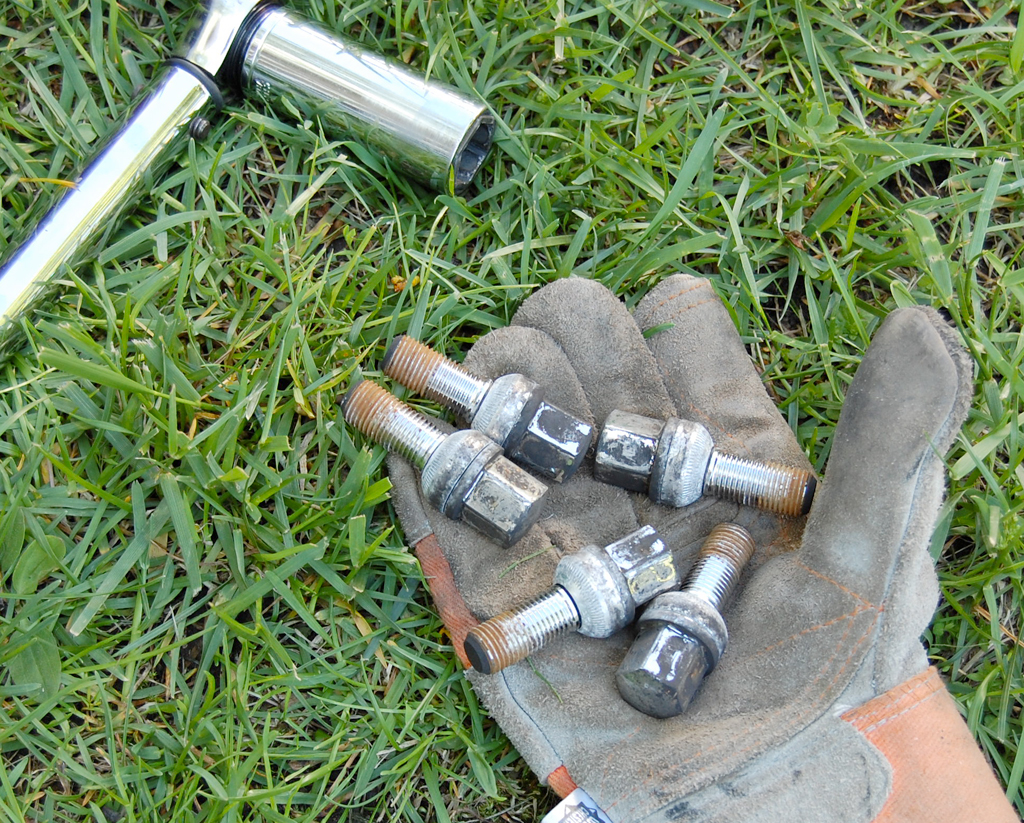
A few hundred miles ago, our brake-wear sensor light went on. Since we had just changed the front pads, we knew it was time to replace the rear ones. It has been a while since we replaced the rear brake pads. Our ratio over the years has been about 3:1 front/rear in terms of frequency of replacement.
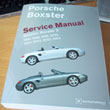
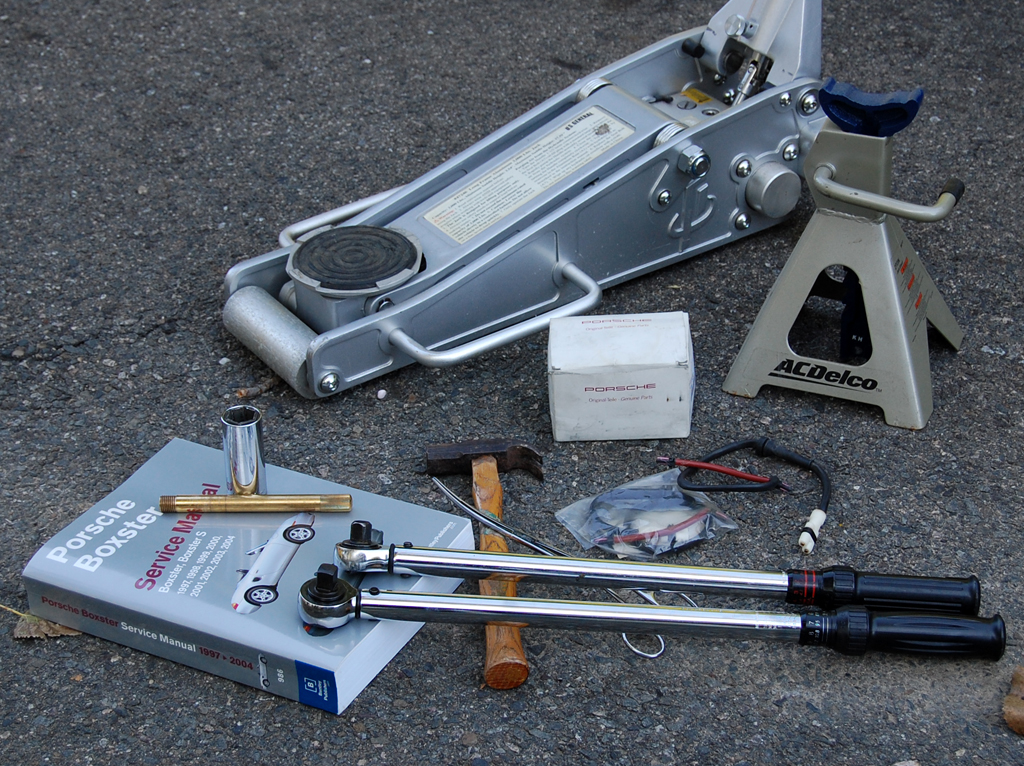
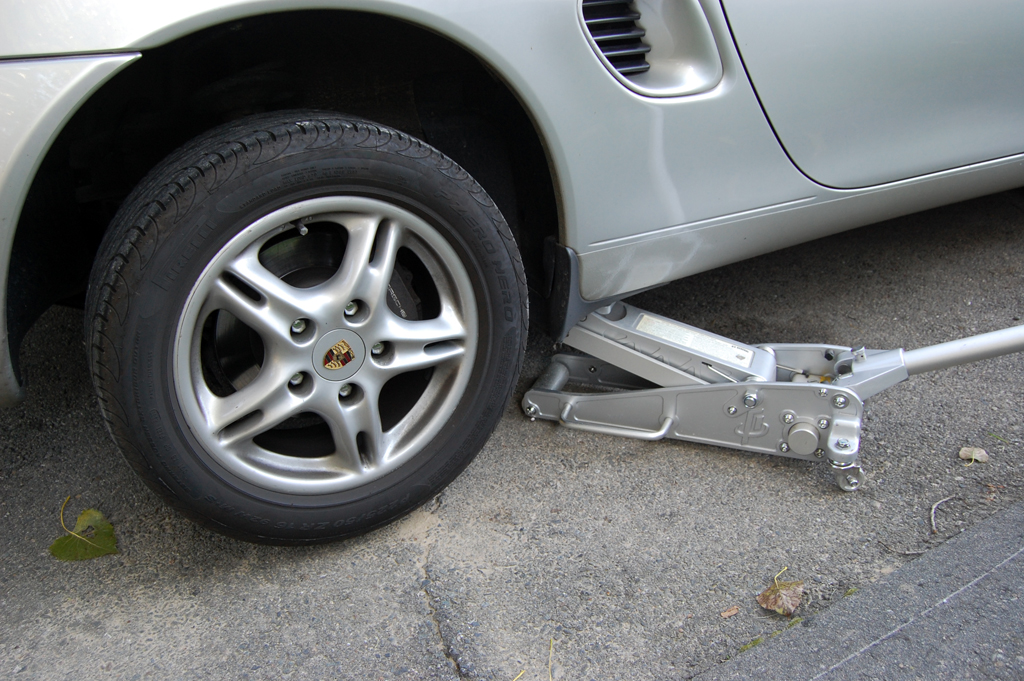
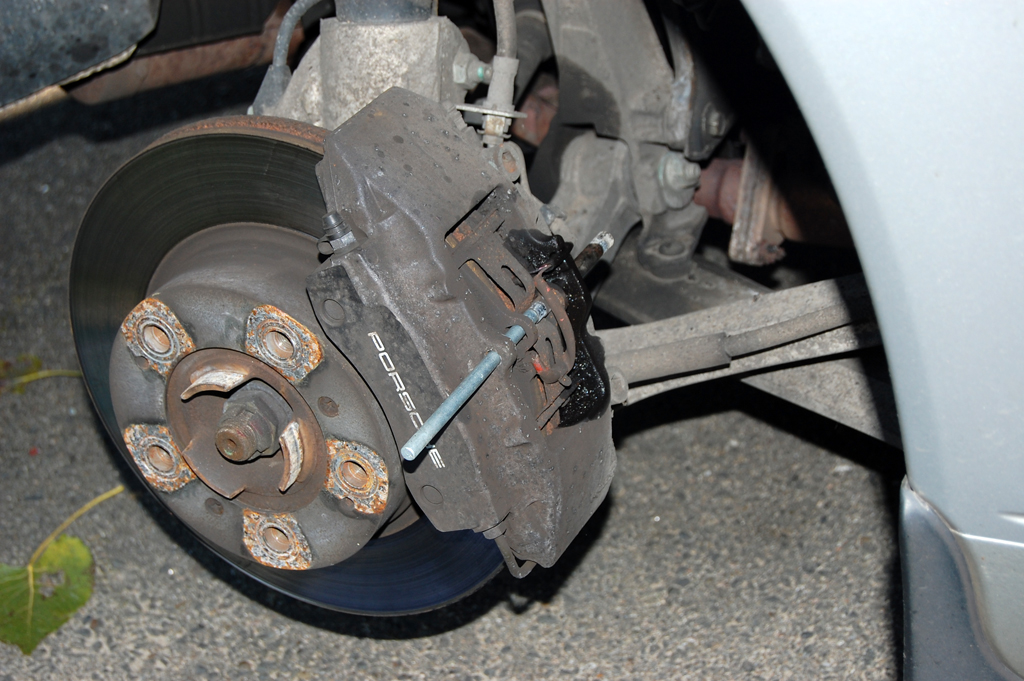
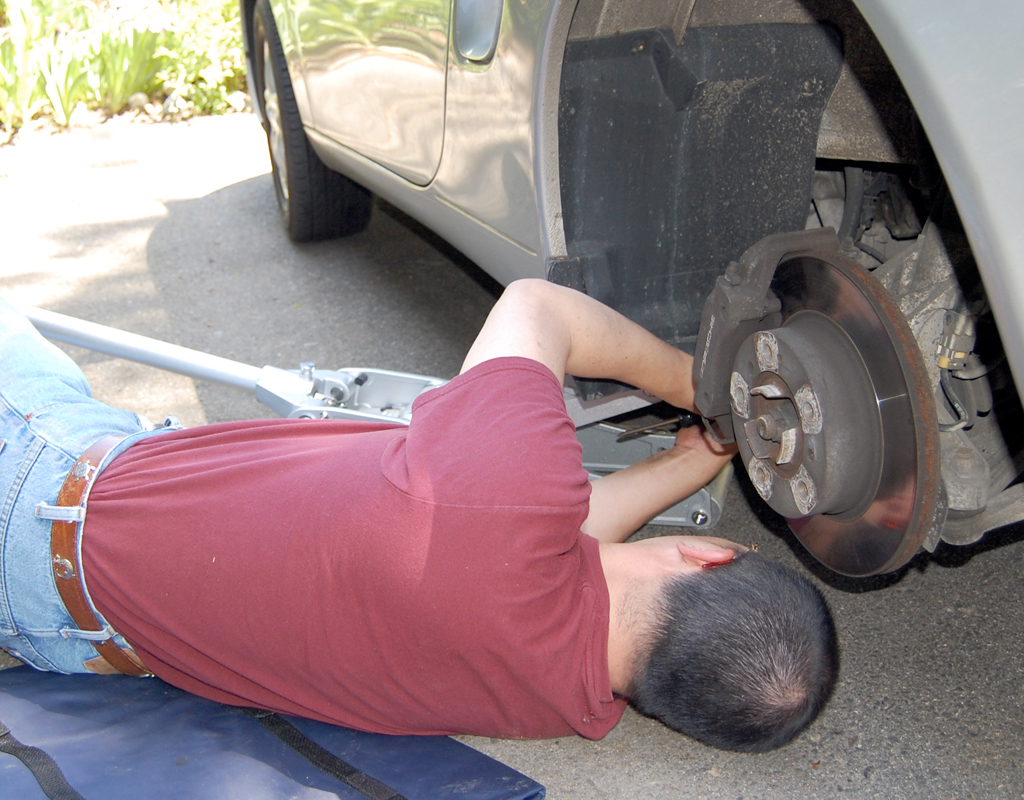
The tools are pretty standard: racing jack, torque wrench, hammer, wheel hanger, and the boxster repair manual from Bentley Publishing. Once we had the car raised and the wheel off, we could see that the old pad was pretty well worn.
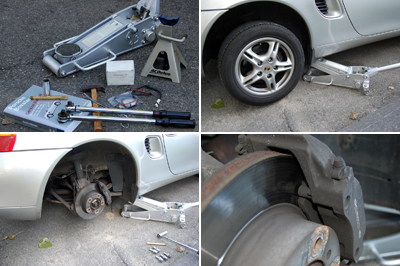
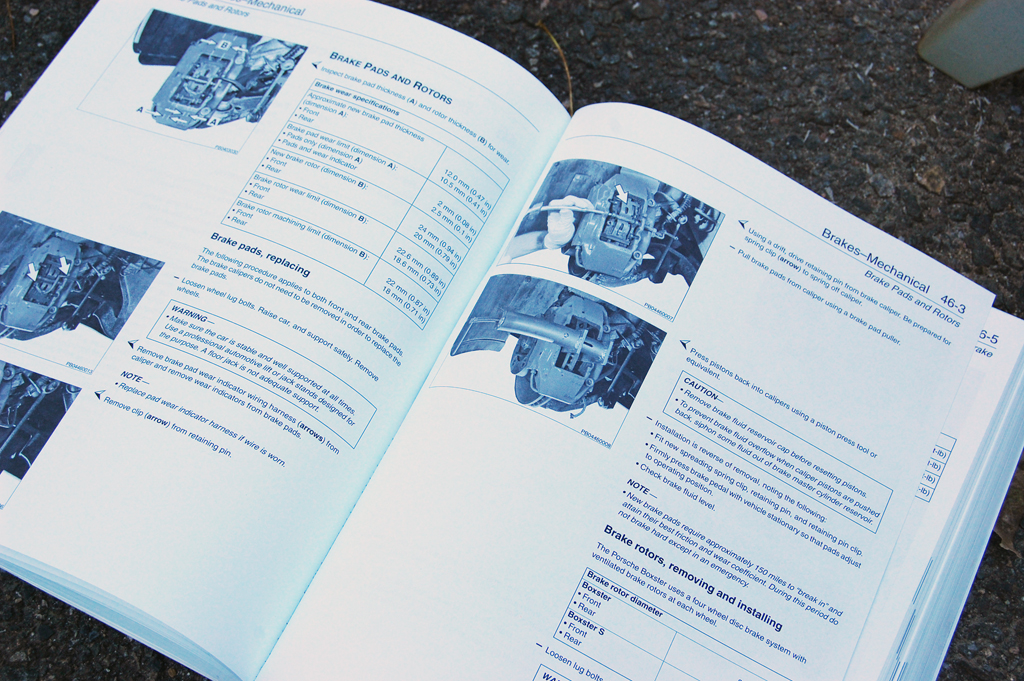
The Bentley Manual had the best directions. We always break out the manual eventhough we have done this many times, as sometimes we like to review a step just to make sure.
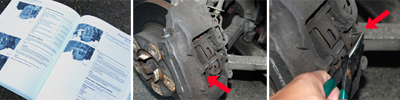
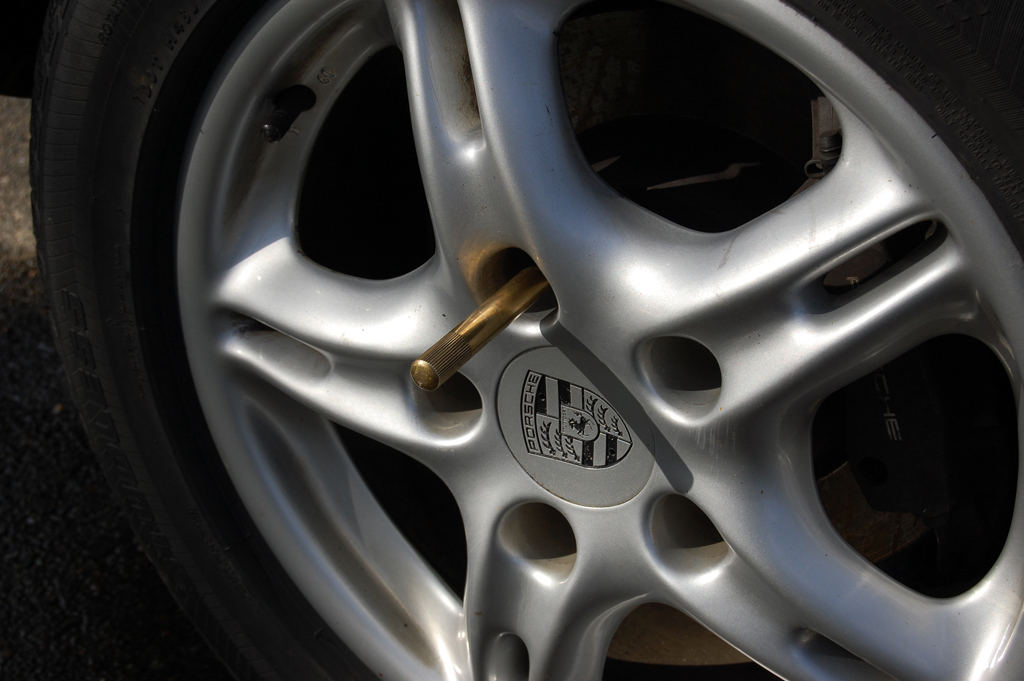
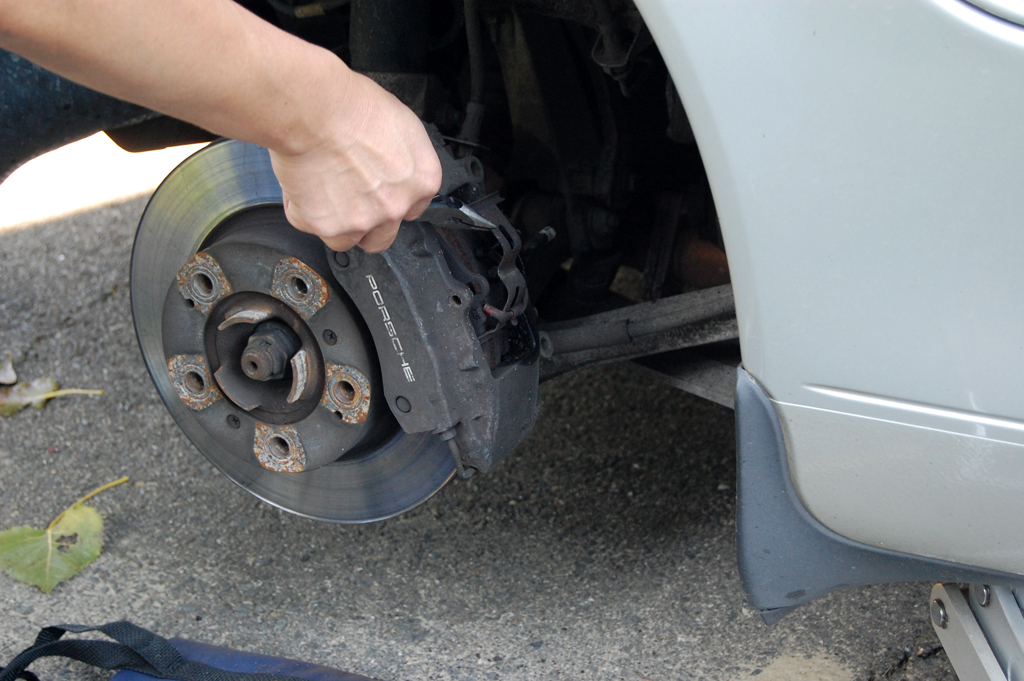
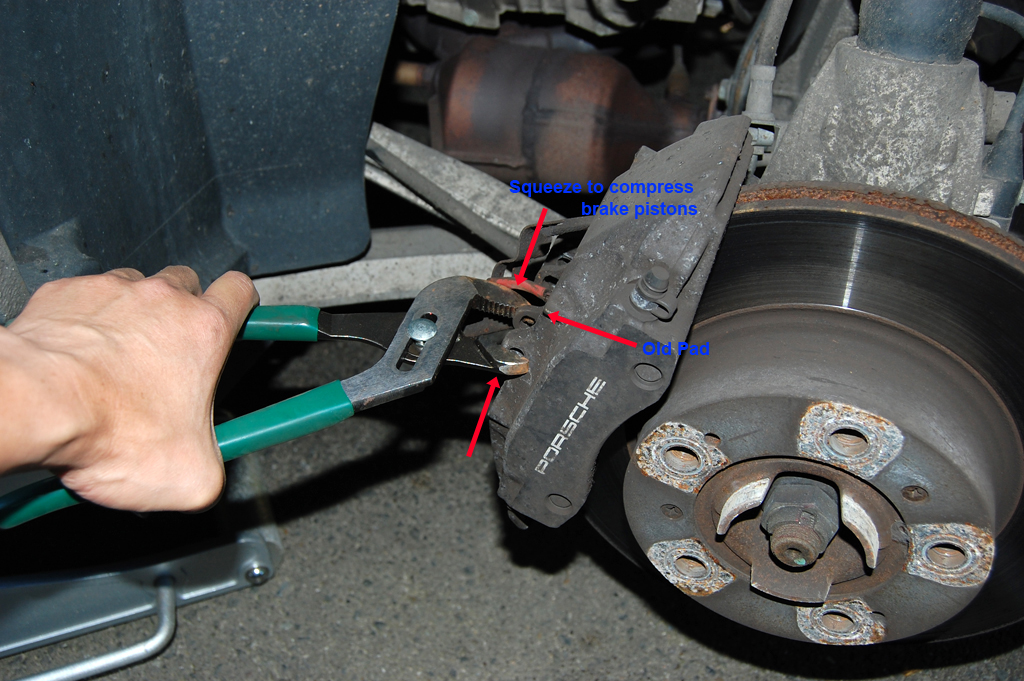
The only new tool we have added over the years is an aluminum rod. The rod made it a lot easier to tap out the brake pad retaining pin. The safety cotter pin must be removed before the retaining pin and spring clip can be freed.
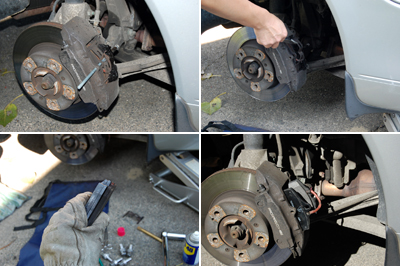
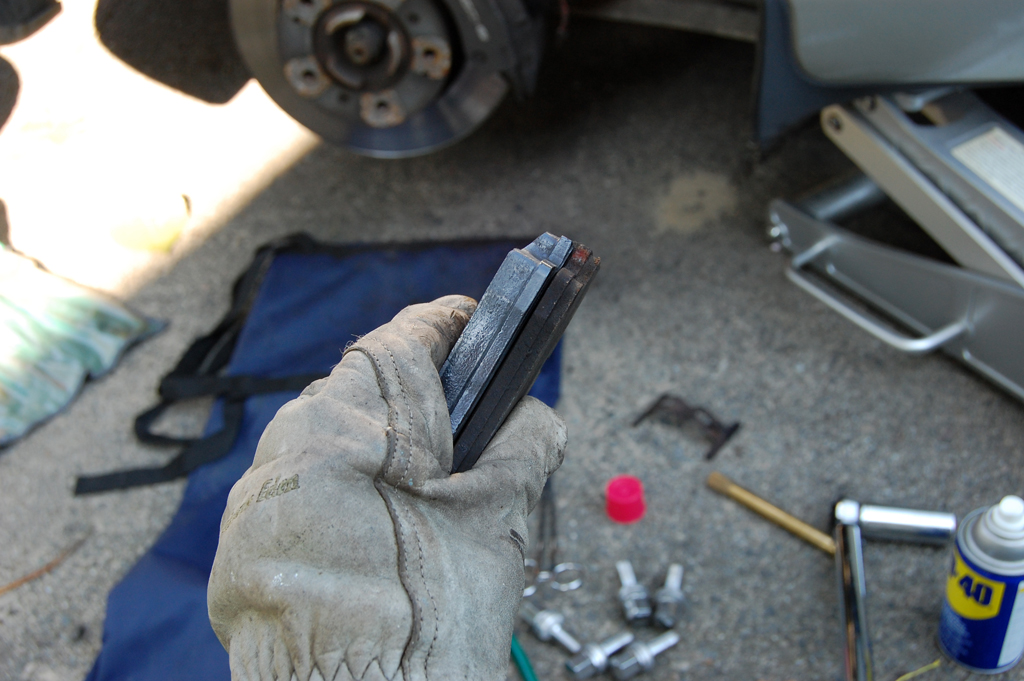
Once we had the old pad out, we easily saw the difference between the old and new pads. While there were still plenty of "meat" left on the pad, it was clear that much had worn away. So when the light comes on, replace the pads. BTW, for readers who had asked about a quick way of pushing back the brake pistons so the new pad can be inserted...here is a tip: use the old pad to push the pistons back.
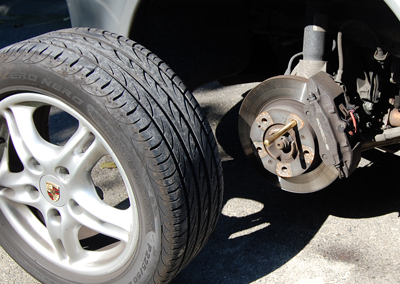 As Boxster owners who like working on their cars, we have found changing brake pads on the Porsche Boxster to be one of the more satisfying DIY maintenance tasks. We save a lot of money and we know the job was done right. Besides, what else have we got to do on a beautiful Fall day :-)[Permalink] - Rear Brake Pad Replacement As Boxster owners who like working on their cars, we have found changing brake pads on the Porsche Boxster to be one of the more satisfying DIY maintenance tasks. We save a lot of money and we know the job was done right. Besides, what else have we got to do on a beautiful Fall day :-)[Permalink] - Rear Brake Pad Replacement
|
|
|
|
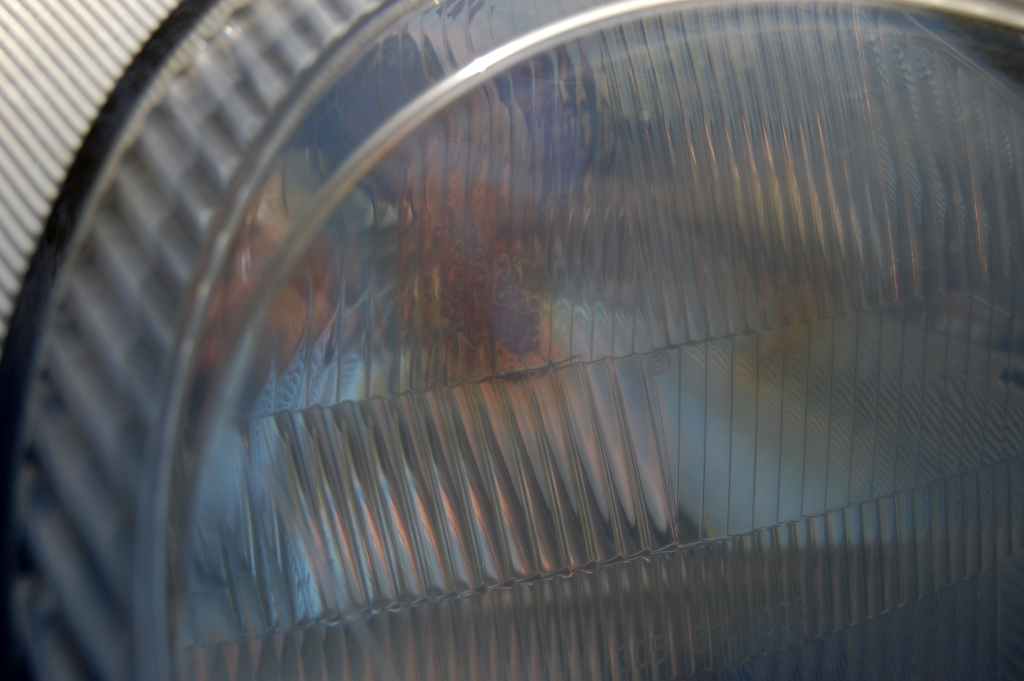
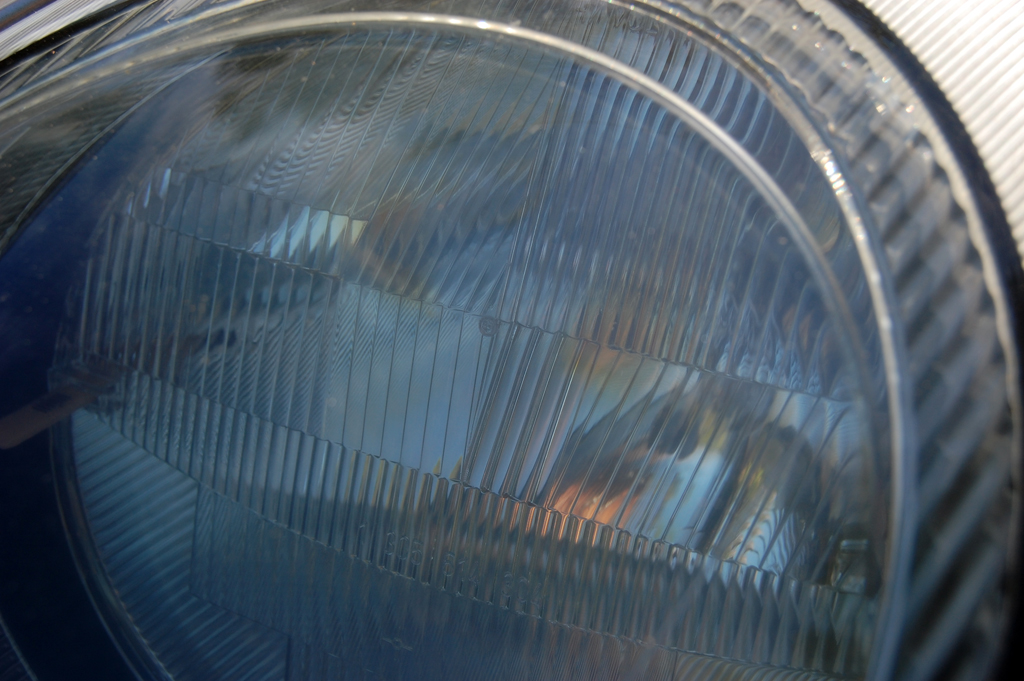
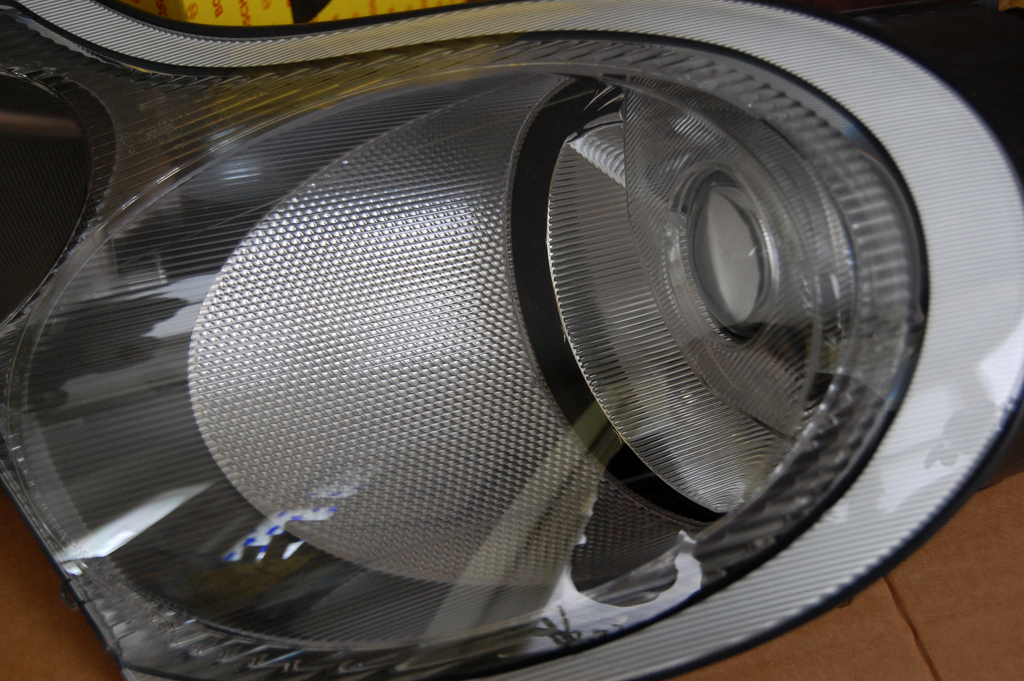
Installing the new litronic headlights in the Boxster was even faster and simpler than replacing the oxygen sensor. We have been wanting to upgrade the headlights on the Boxster for years, but we could never justify the cost to the bean counters' satisfaction. However, when we noticed some melting of the lens cover in the existing halogen units, it was exactly the excuse we needed to convince Purchasing that we needed replacements.
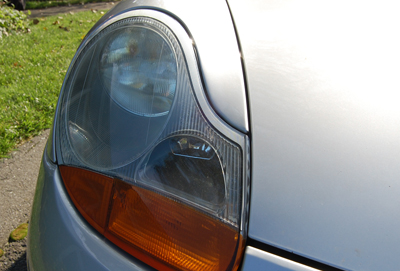
The reasons for the melting are not clear, but it did appear to be getting worse. The bulbs had been replaced, but only with OEM units. No modifications of any kind were made to the lights. Both sides had problems, but the passenger side was worse than the driver side.

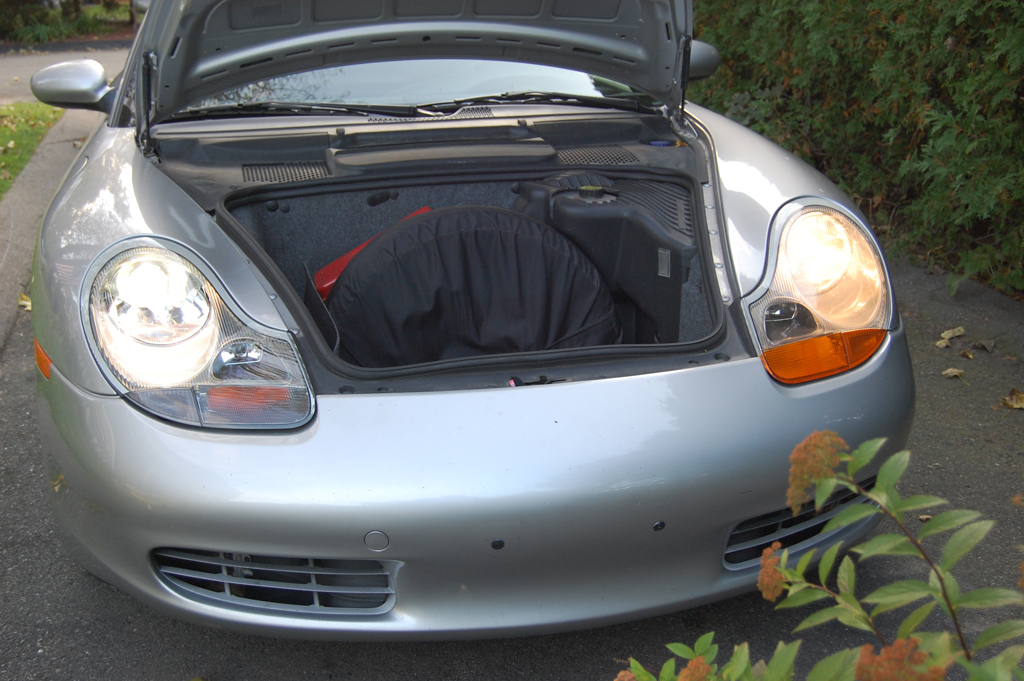
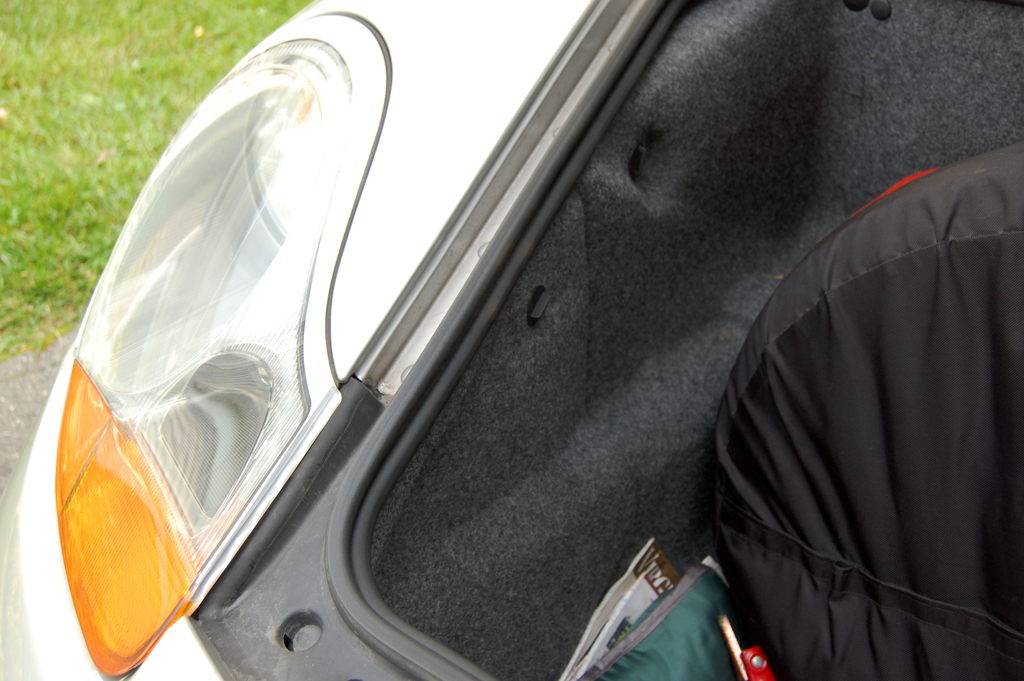
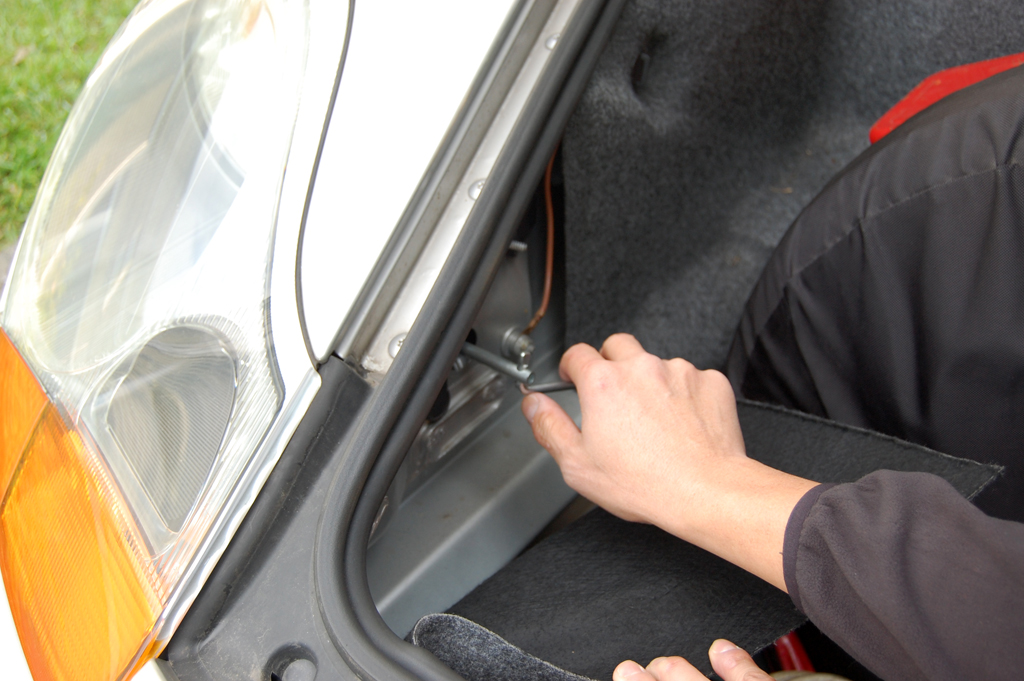
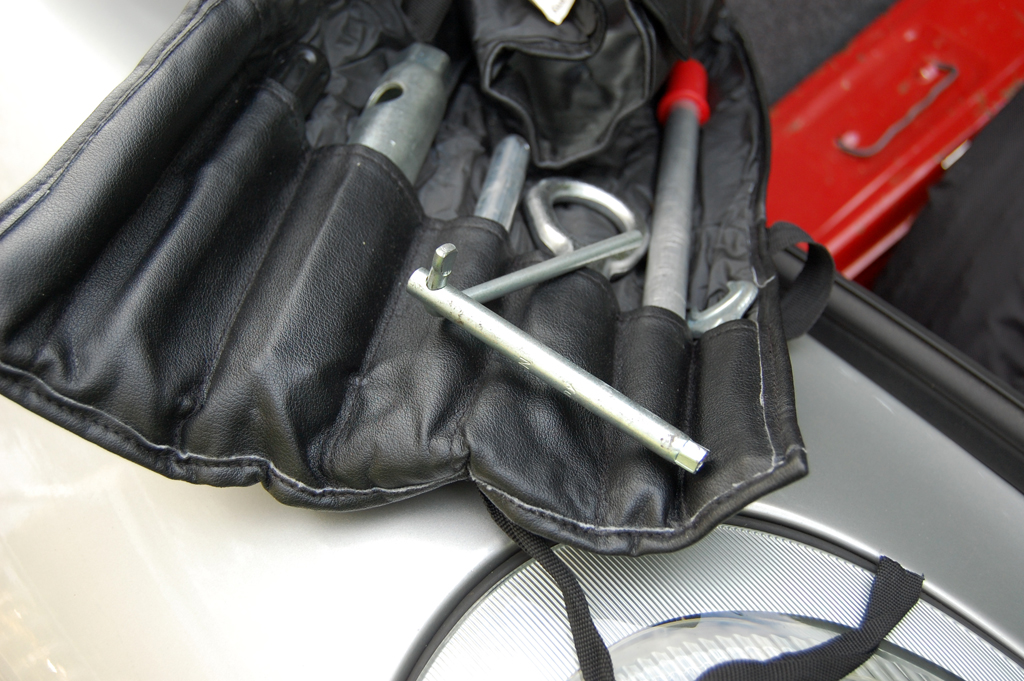
The Boxster light assembly is designed to be user-removeable for bulb replacement. The entire unit will slide out when unlocked using a special tool in the Porsche kit. To access the "release" port, the interior carpet in the front trunk must be pulled back.

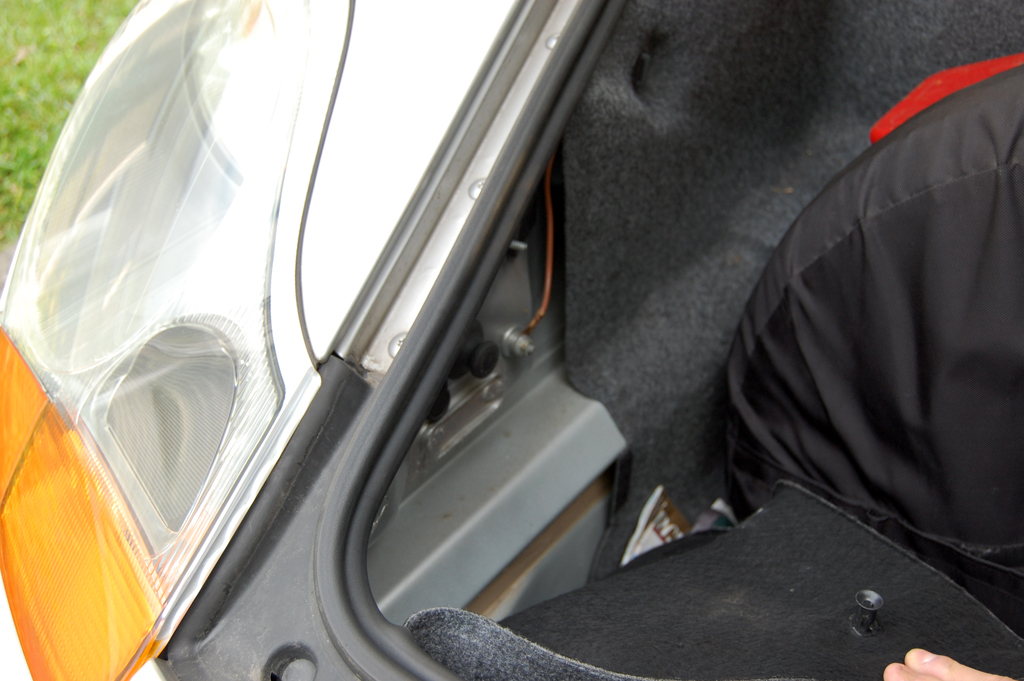
Once released, the unit just slid out with no problems. Upon closer inspection, one can see the channel guides on the side, the lever, and the single connector in the back.
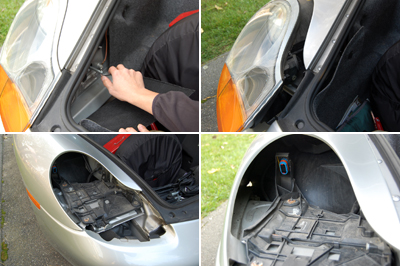
Installation of the new litronic module is just a reverse of the extraction process. We pushed the new unit in and used the tool to lock it in place.

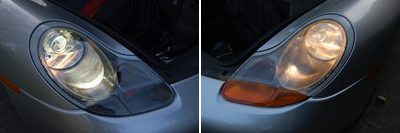
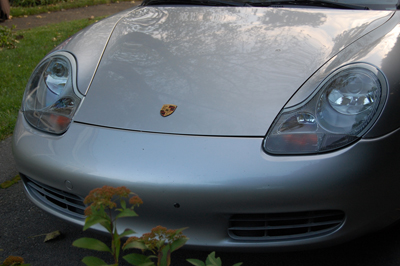
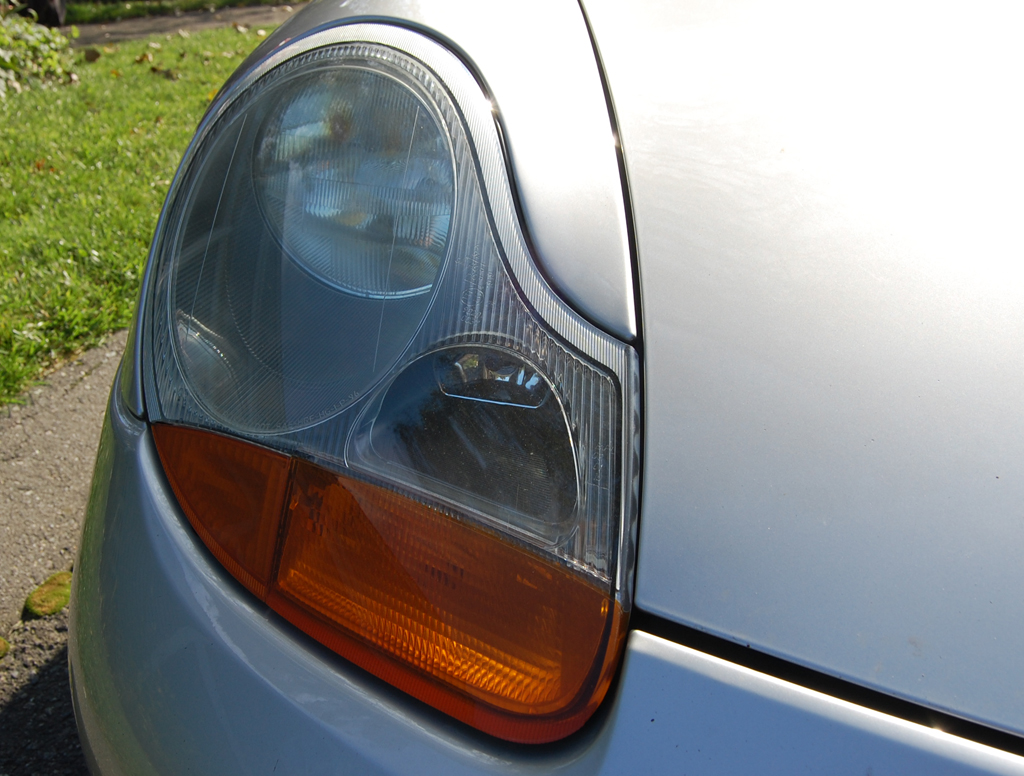
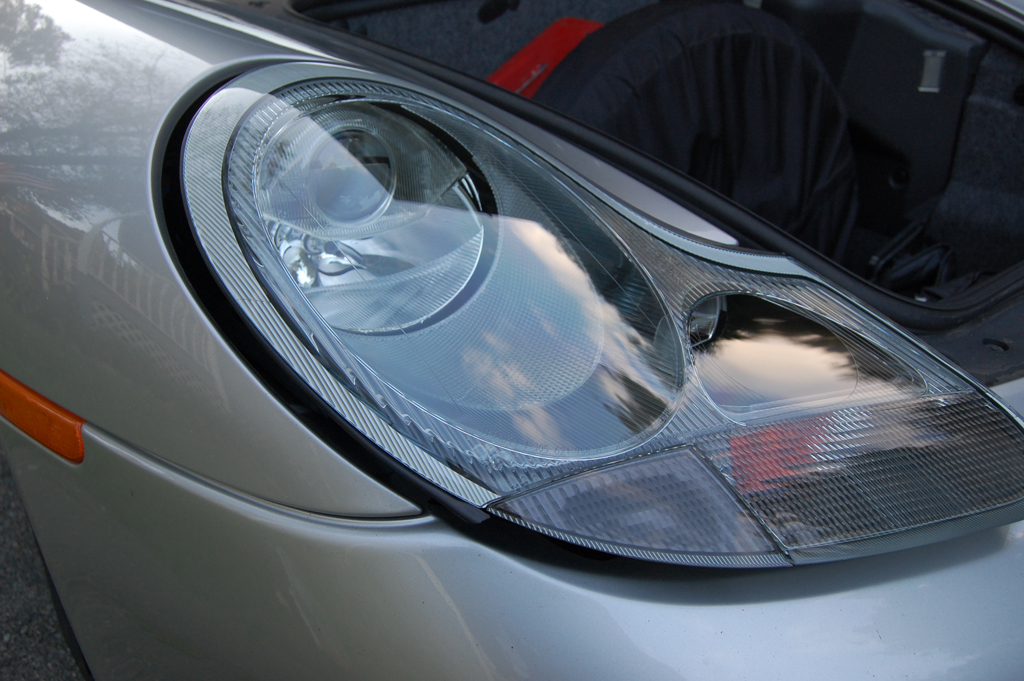
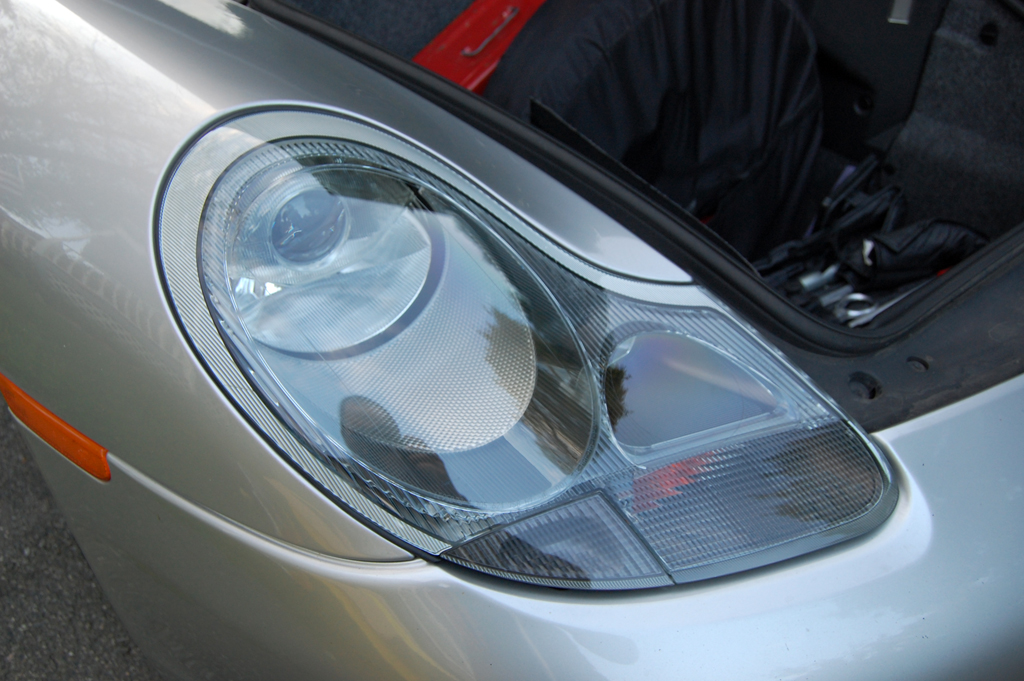
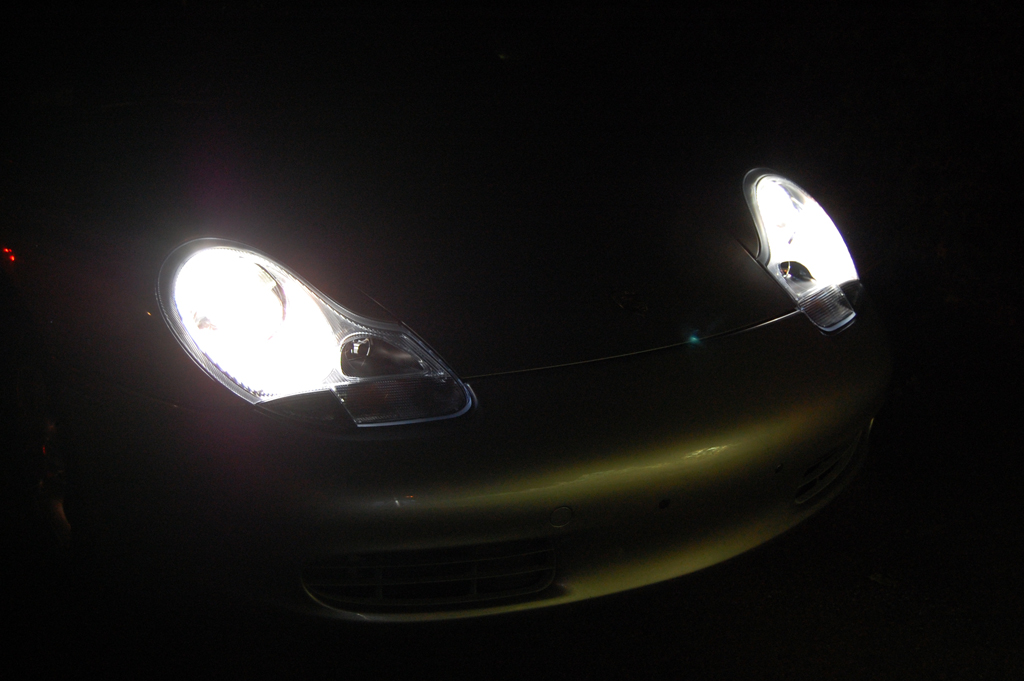
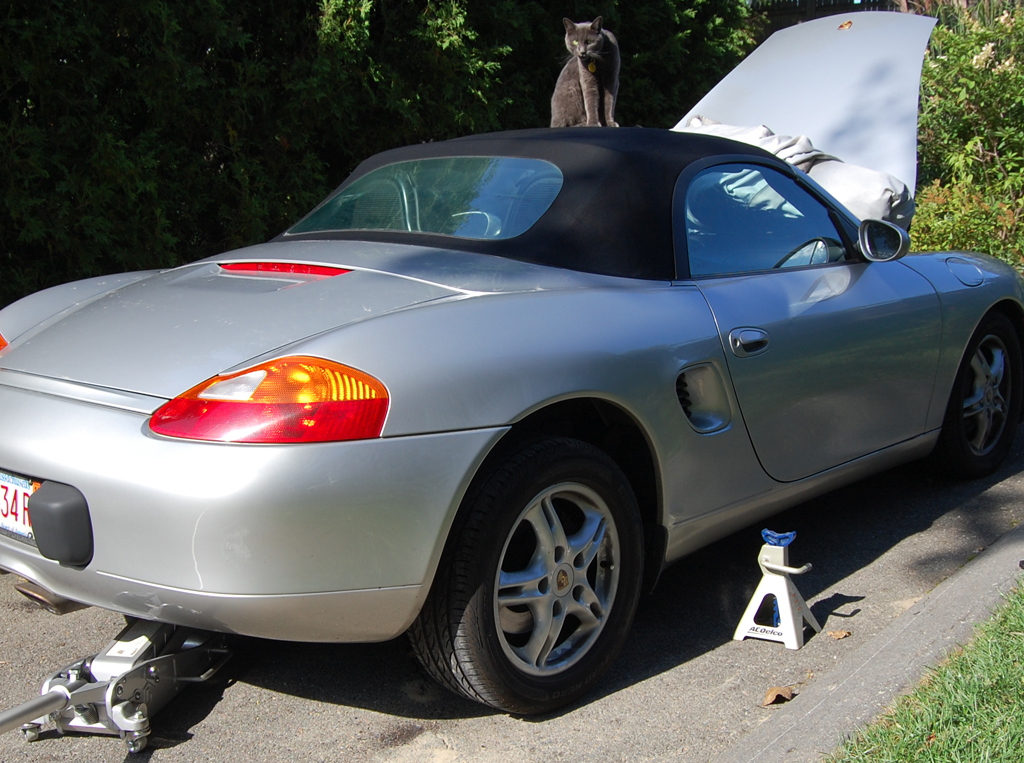
We took a photo of the new and old headlights to show the difference in the quality of the light (new litronic on the passenger side, old halogen on the driver side). Even in daylight it was interesting to note how much whiter the litronics were compared to the halogens.
In addtion to the color difference, the litronic version also moved the amber covers to the inside of the unit. Some like the cleaner all silver look, others still preferred the original amber.
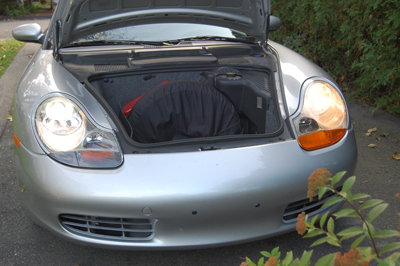
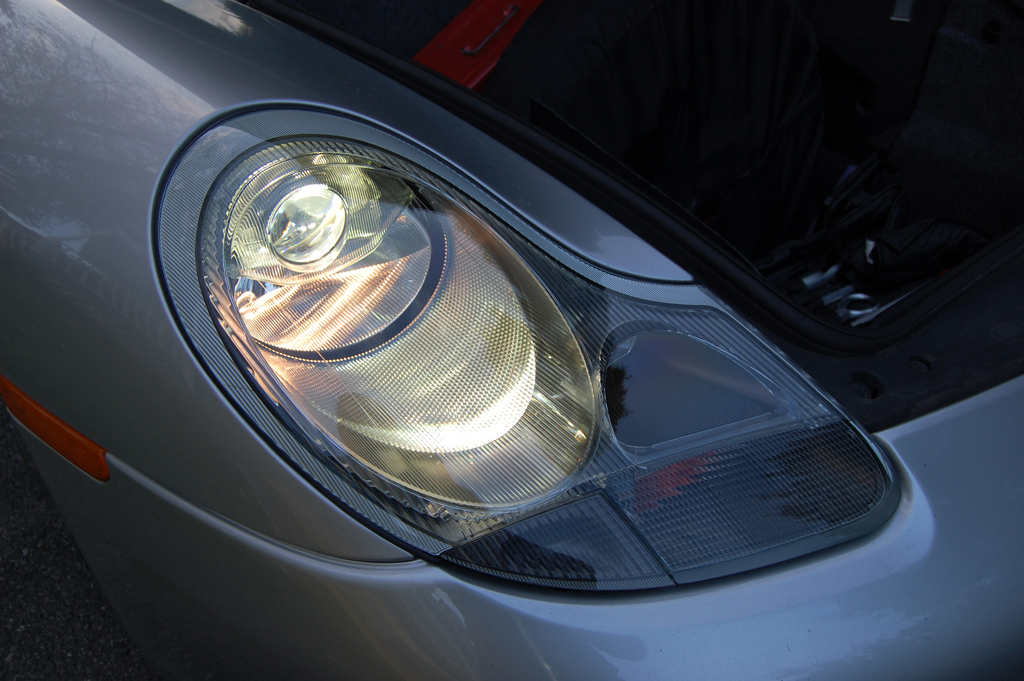
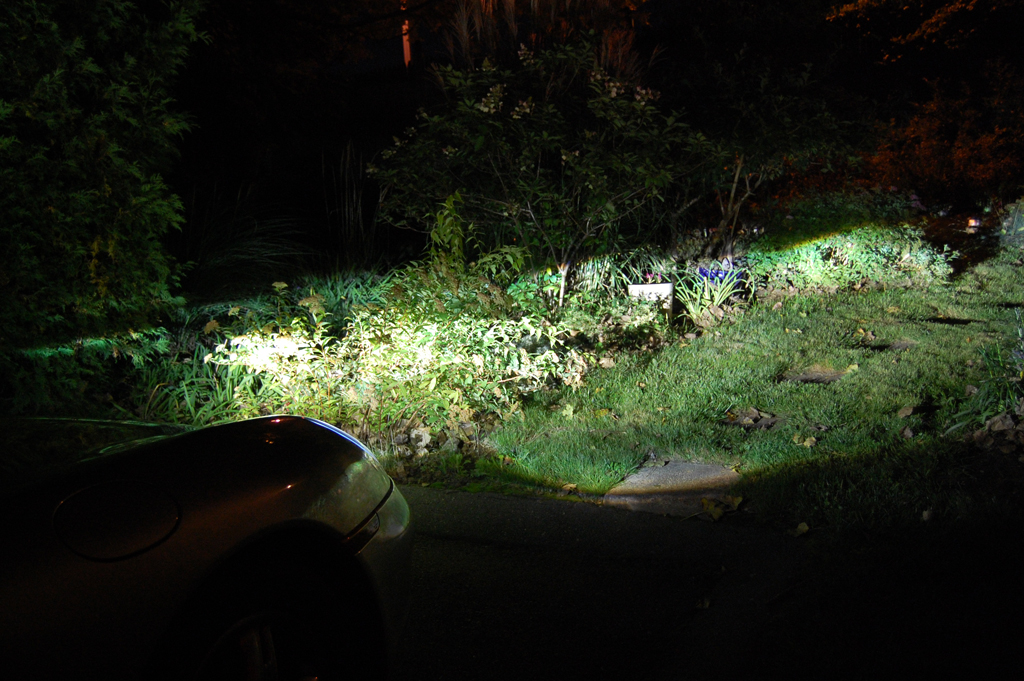
Below is a photo with both litronic units installed. It will take a little time for everyone to get used to the new "no amber" look, but the more important thing is how these new lights perform.
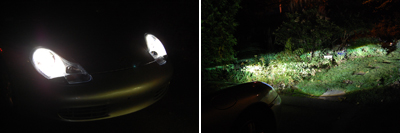
We waited until dark and switched on the new lights. They fired right up with a small popping sound and lit up the grounds. These things are BRIGHT! This upgrade was probably the easiest Boxster project we have done to date. It may also be the one which will have the most significant impact on the usability of the car.
We have received quite a few emails from readers asking about dealing with a UK vendor. Well, we can't say enough good things about our shopping experience with Forest Fine. If you are looking to upgrade, send Rob at Forest Fine an email. Let him know you read about them here. [Permalink] - Boxster Litronic Install
|
|
|
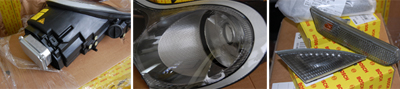
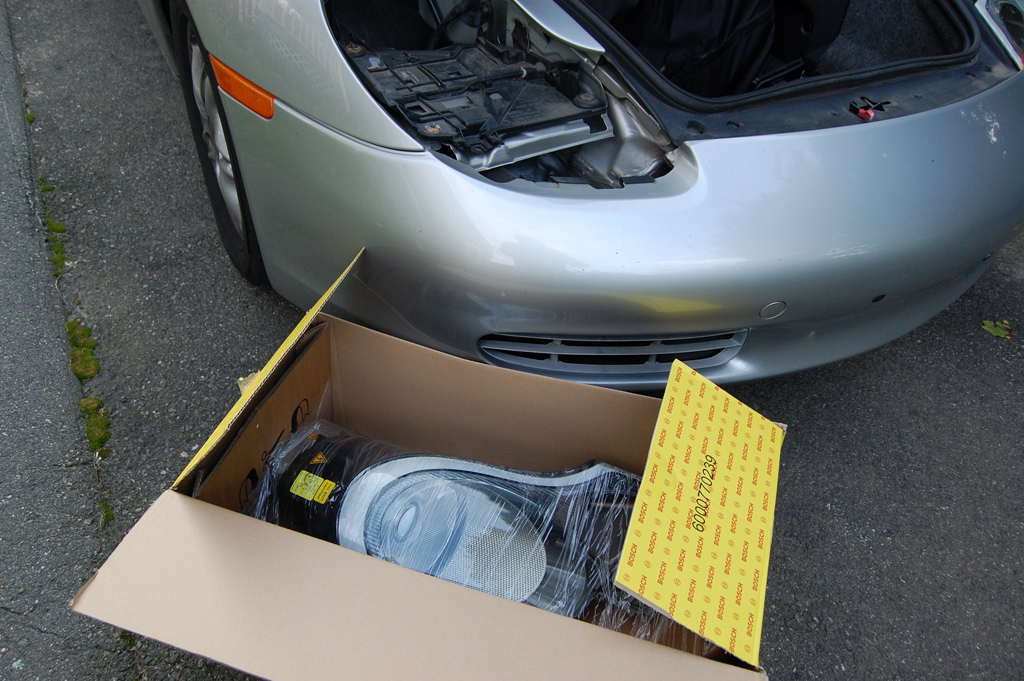
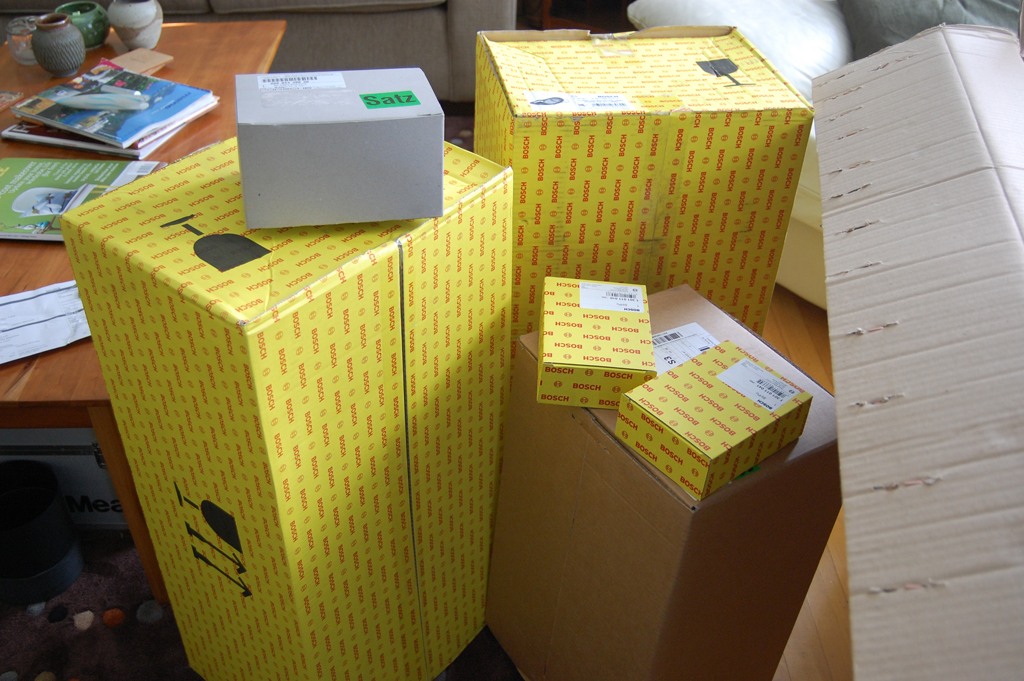
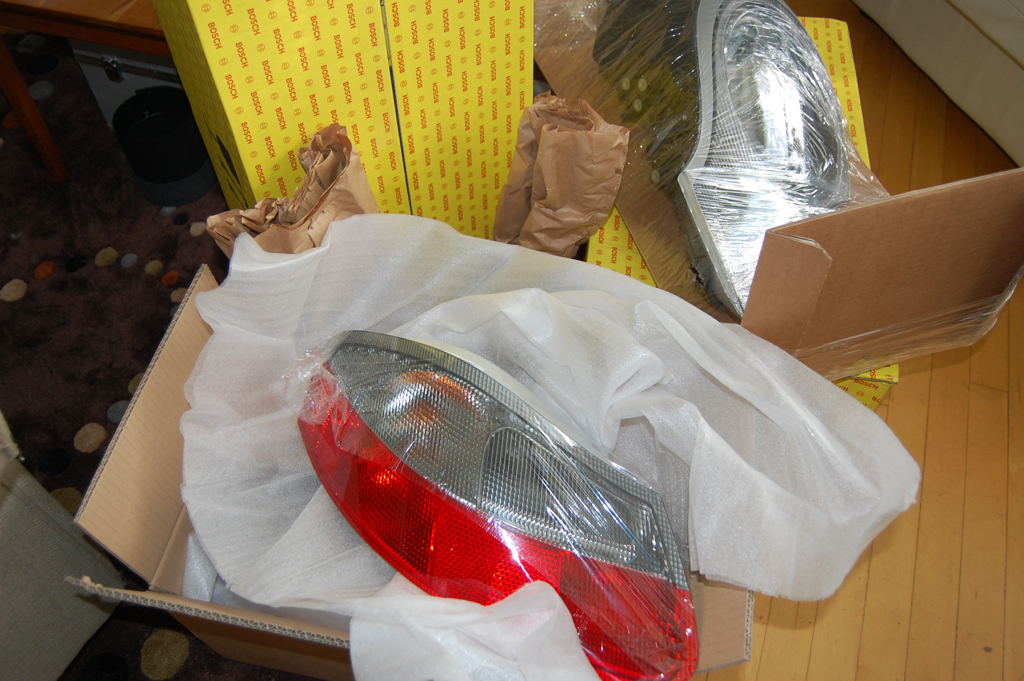
A few weeks ago we ordered a set of litronic headlights for the Boxster from a company called Forest Fine. None of us had heard of them before, but they checked out fine, so we placed our order. About a week later UPS delivered a giant box to the office.
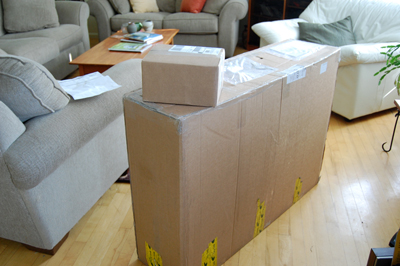
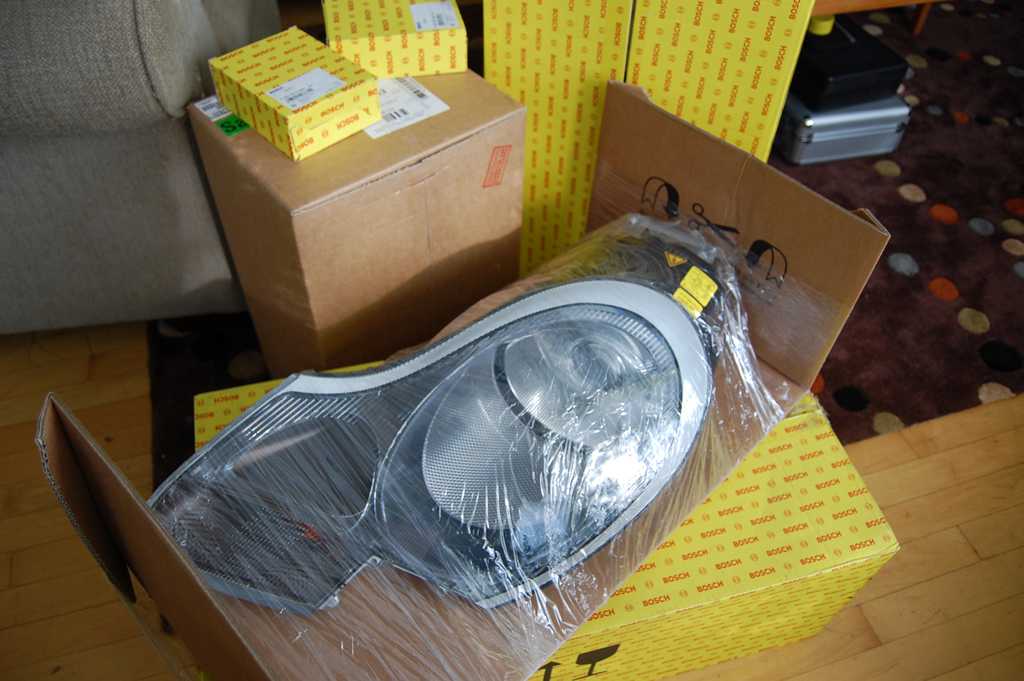
The guys in the RainyDayGarage were a little surprised at the size of the package, but since it was shipped from the UK, they assumed it was just really well padded. When they opened up the package, they found two large boxes and lots of smaller boxes. So what were all these other items???
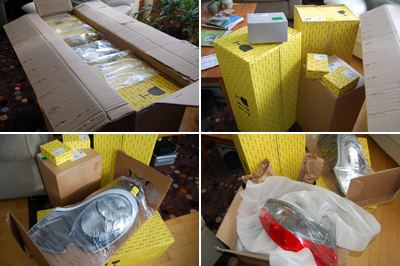
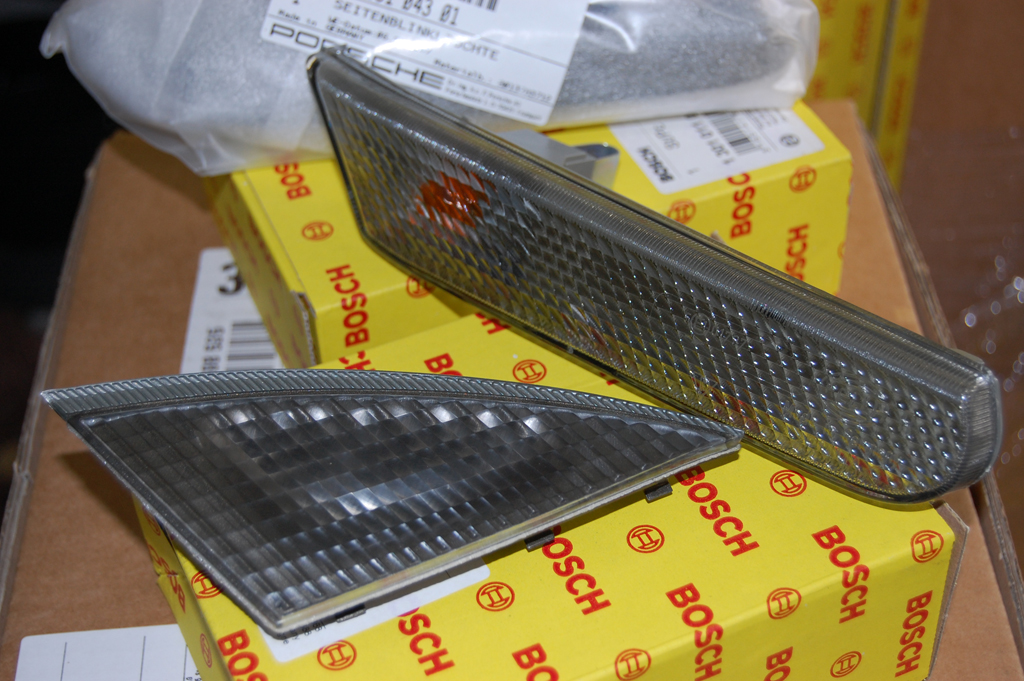
The larger boxes were the litronic headlights themselves. They came well packaged, were brand new, and exactly as expected. The smaller boxes turned out to be the rear lights, side markers, and other accessory pieces. These pieces are usually not included when you order these lights from the dealer.
When we placed the order with Forest Fine, they informed us that they were not able to get the US or Canadian version of the lights from Bosch. However, PPBB board member Larry J, who had purchased a set from another vendor, clued us in to the fact that the Euro version work just fine over here. The UK version, however, has some differences not suitable for the US, so don't order those. Rob at Forest Fine said getting the Euro version would be no problem.
The prices for our litronic headlights came to about $1500 ($1200 + $300 UPS shipping). The exchange rates will fluctuate so your prices may differ. In any case, we found them to be more than 50% cheaper than dealer prices and that's just for the headlights! Once in a while you may find a set for sale up on EBay, but they usually sell for around $1300 used. The other pieces are usually auctioned off separately. If you are looking for litronic lights for your Porsche Boxster, Forest Fine has the best deal available anywhere. We'll post the installation write-up tomorrow. Come back and see the difference between the old and the new lights. We think you'll be amazed. [Permalink] - Boxster Litronic Upgrade
|
|
|
Our Boxster's check engine light came on back in May. The code indicated that the problem was with the oxygen sensor. The local Porsche dealer quoted $317 for the part and $200 for labor to swap out the old sensor. At those kind of prices, we knew we were going to see if we could replace it ourselves.

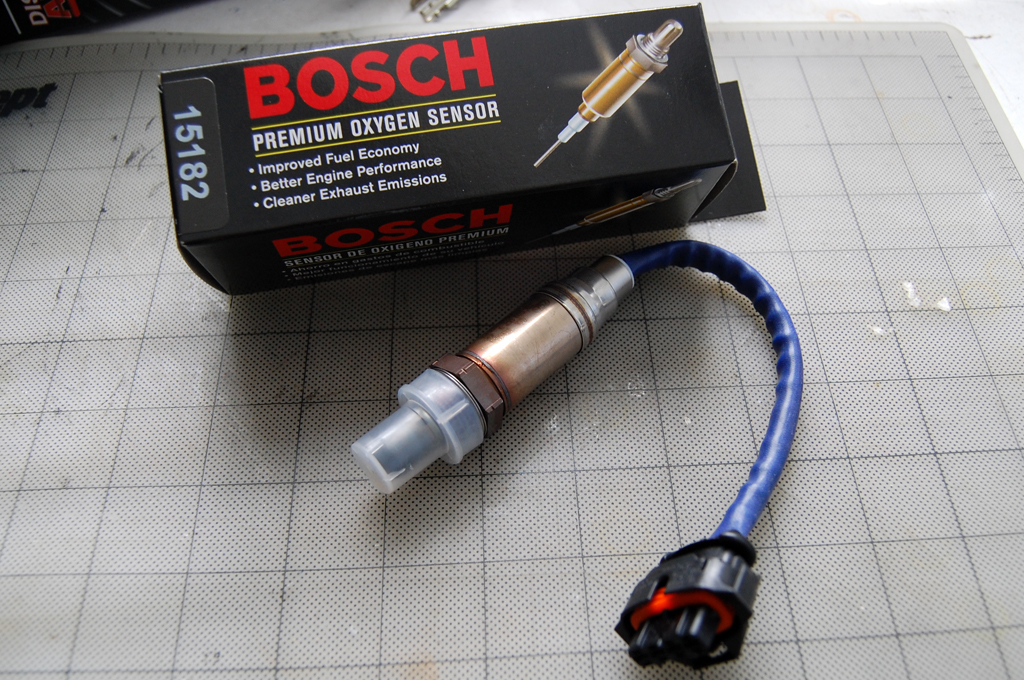
We had been procrastinating because the light would only go on intermittently. We finally got tired of seeing it come on and decided to just get off our butts and replace the sensor. Prices for a replacement sensor were all over the place. We found prices ranging from $45 to $250 on Ebay. Autohausaz.com sells a Bosch unit for $110 with free shipping. We think Bosch is the source of the Porsche OEM part. Most of the less expensive ones did not have the connector already attached.

We didn't want the hassle of attaching the connector, so we ordered the complete unit. We are going to keep the old connector and see how difficult it is to disassemble. We may try using a connector-less sensor the next time we have to replace one.

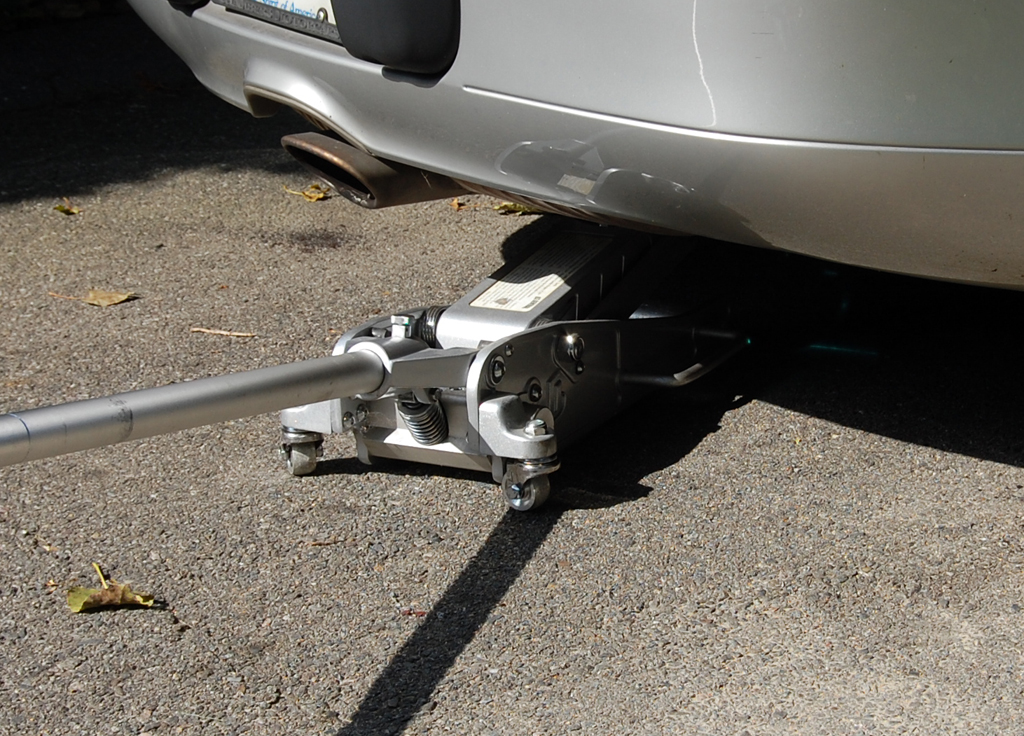
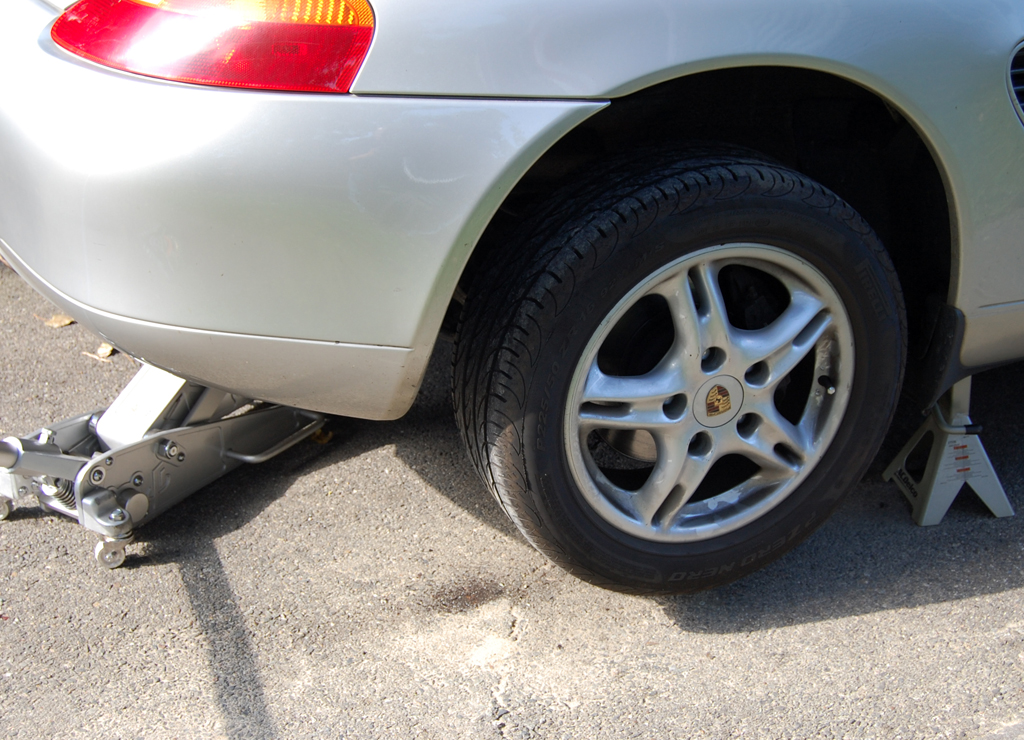
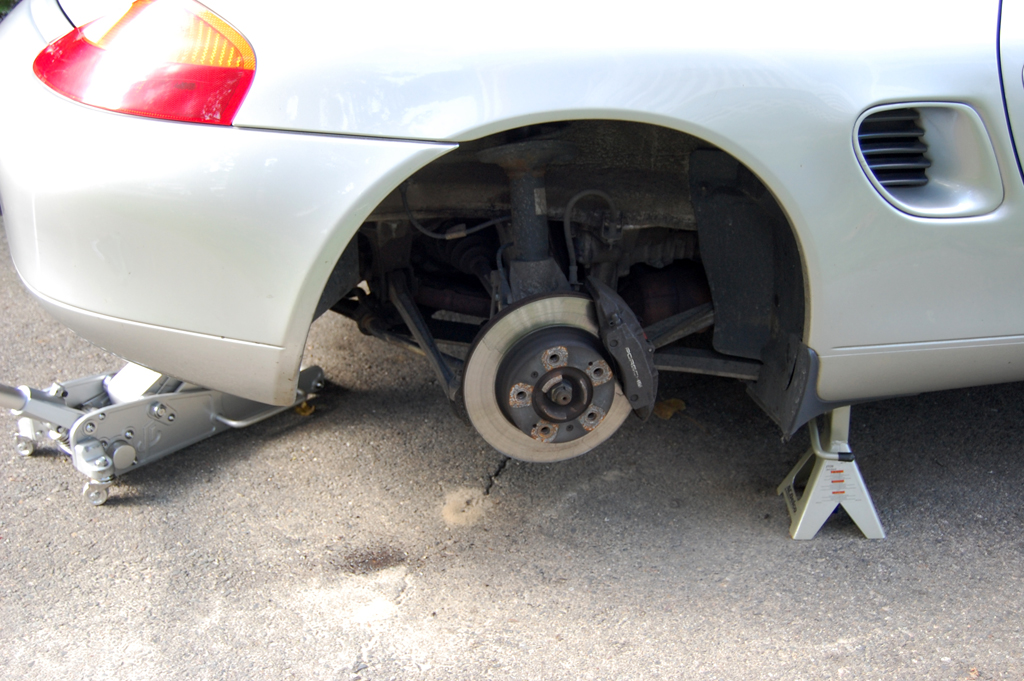
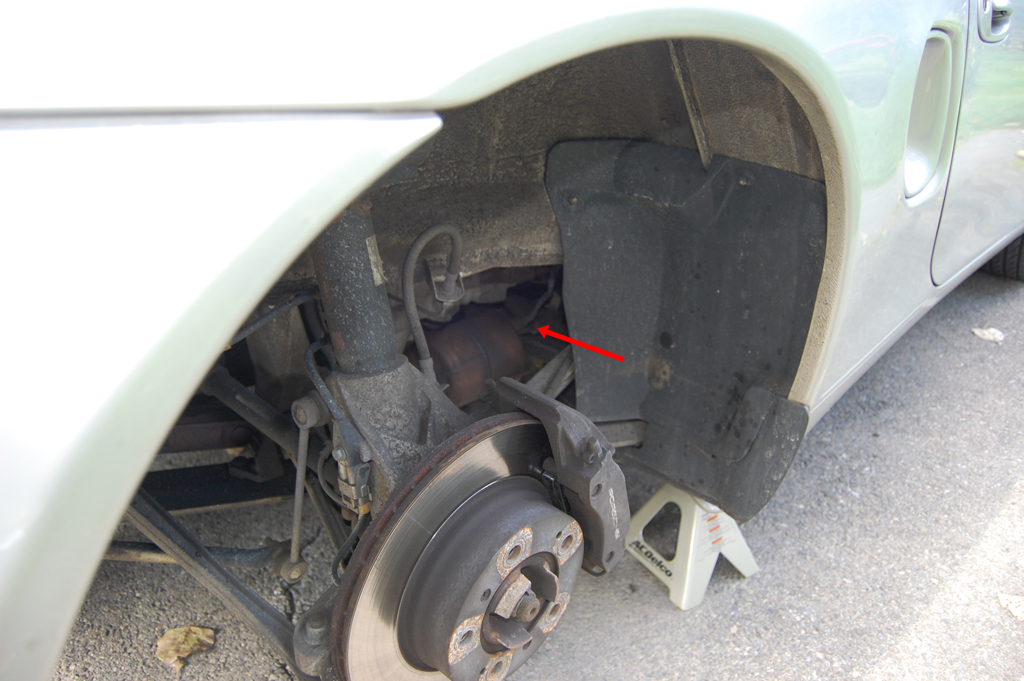
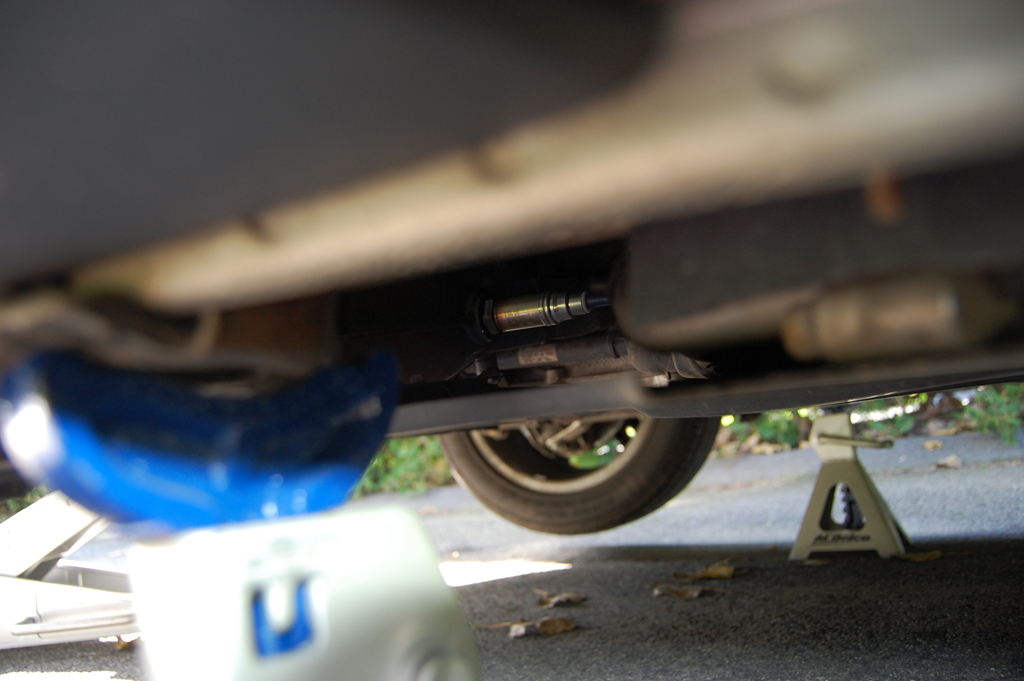
The sensor which needed to be replaced was the one in front of the catalytic converter. To get at the old unit, the car must be raised up. We would absolutely never get underneath a car held up just by the hydralic jack. Thus, jack stands must be used.
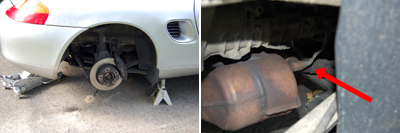
The easiest place to jack up the car is from the rear. Once high enough, the stands may be place under the rear jack points. With the car raised, it was easy to locate the sensor.
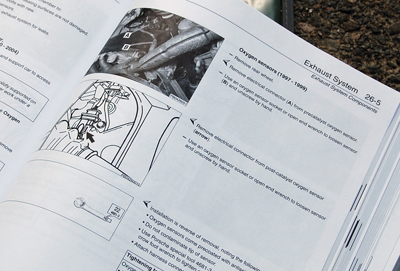
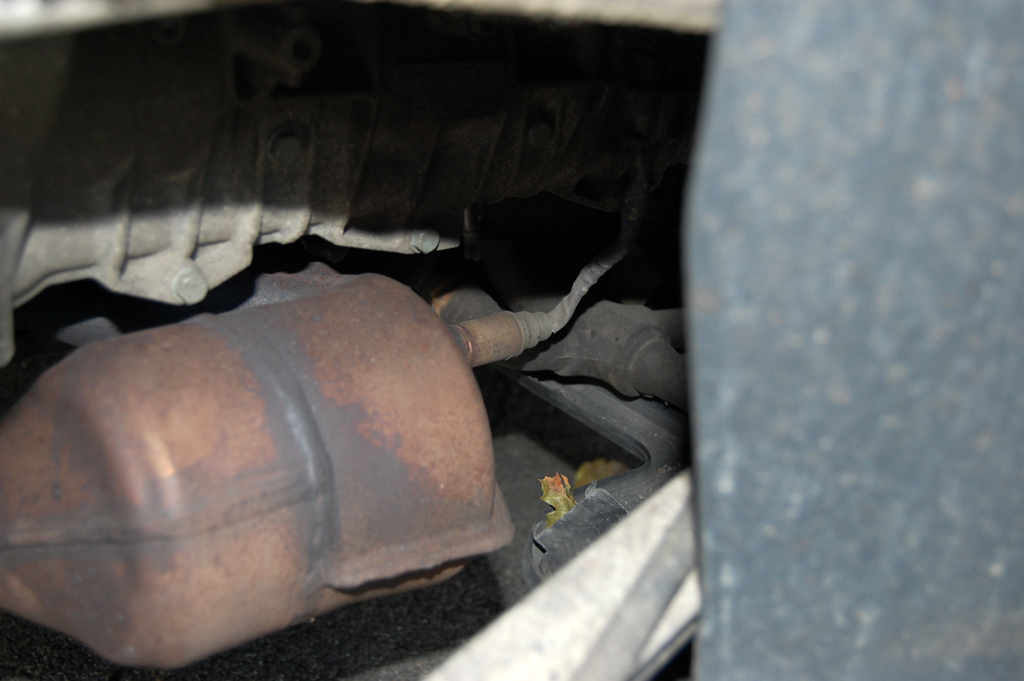
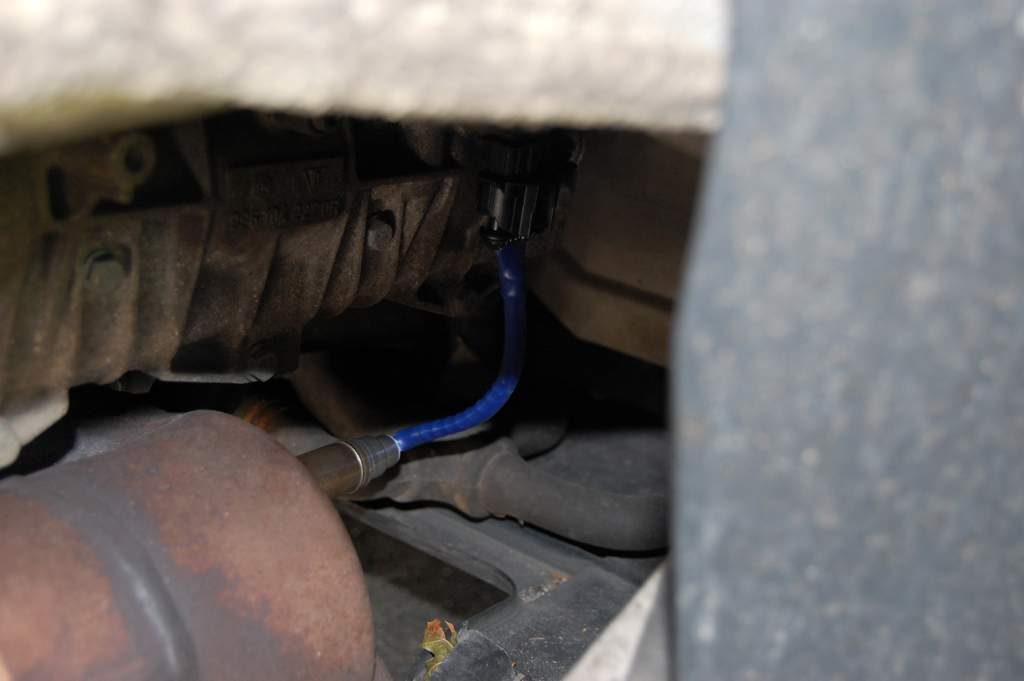
The replacement directions in the Bentley manual were pretty clear, but we had a little trouble visualizing the relative location of the sensor. In hopes of making it easier for our RainyDayGarage reader, we took a few extra photos from various angles to make it a little easier to see.
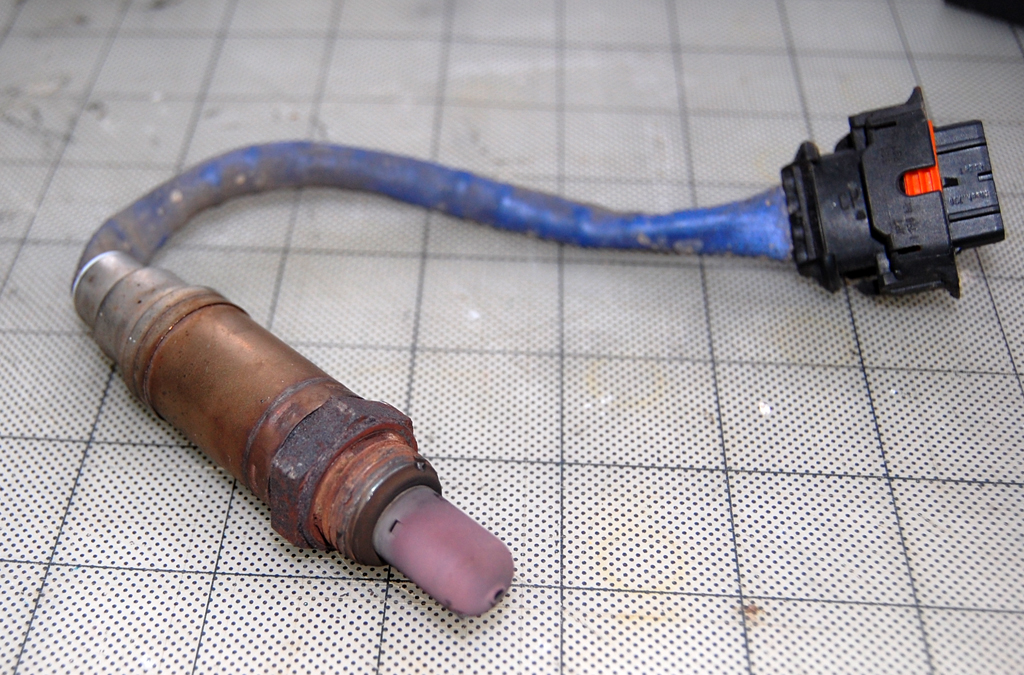
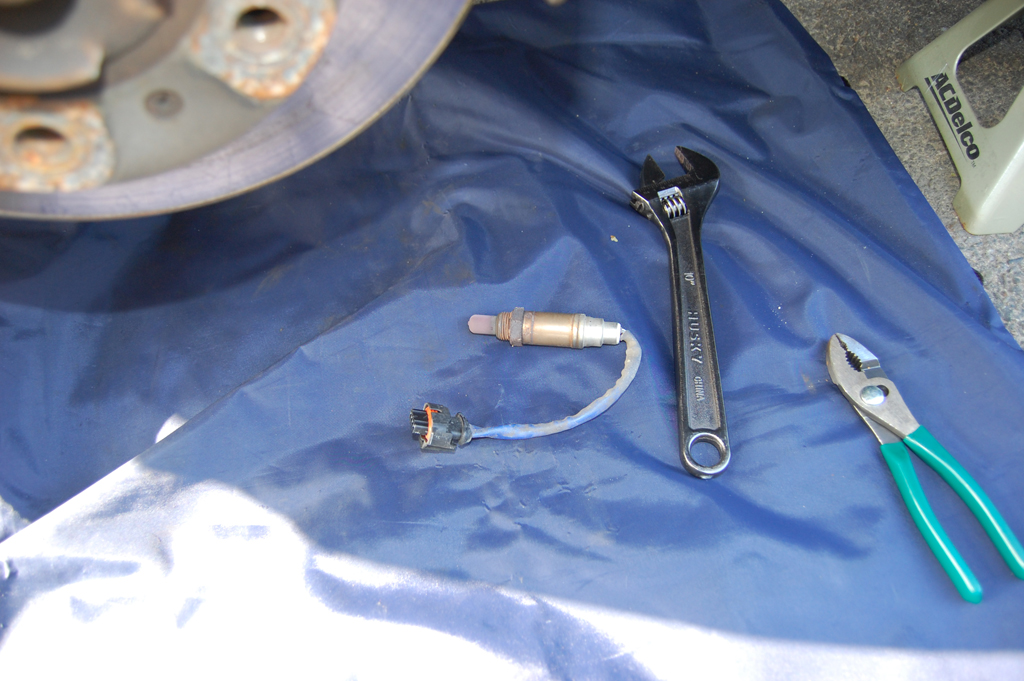
The sensor is easily removed using an adjustible wrench. A lift would have made this task even easier. The working space was a little tight as we had to work from the ground. However, we managed to get the old sensor out in about 5 minutes. Putting in the new one took even less time. Below is what an oxygen sensor looks like after about 90K miles.

This Boxster project was a lot easier than we had anticipated. It is definitely a DIY project within the capability of most who can use an open-end wrench. If you have the tools and can spare about 15 minutes, then you can probably replace your Boxster's oxygen sensor. [Permalink] - Oxygen Sensor Replacement
|
|
|
|
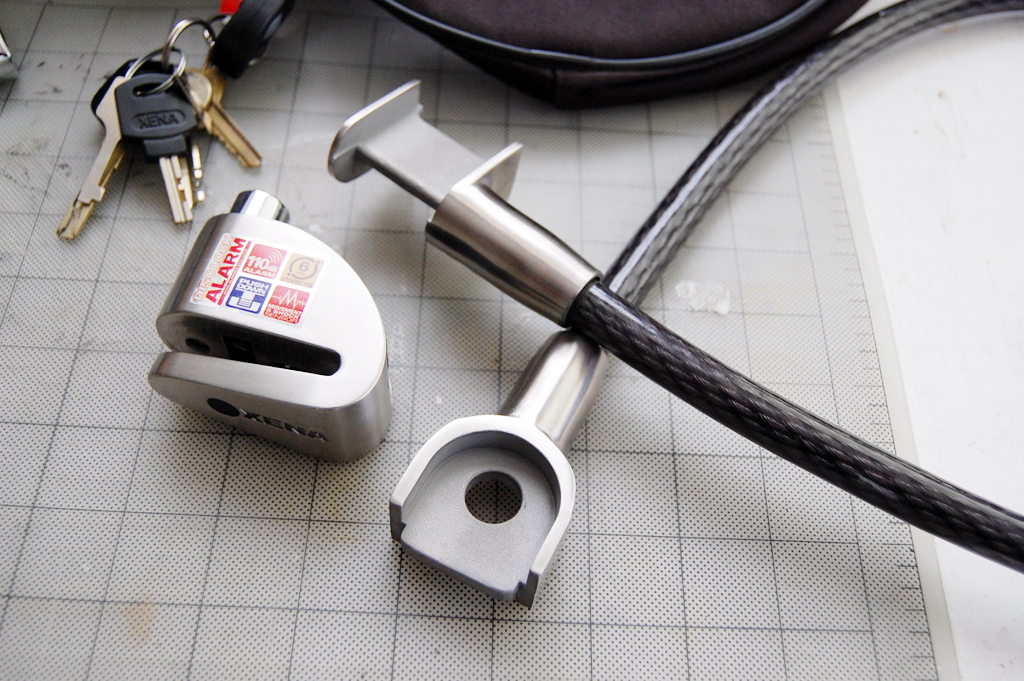
The Xena XV cable is specifically designed to work with the DiscLock. The lock and cable combine to form a portable, alarmed security system which looks pretty tough to defeat.

We took a FirstLook of the DiscLock earlier in the month. Its unique design and integrated alarm is a simple method for protecting a motorcycle or scooter. The XV cable extends that capability to anything which can be tied to a post.

The stainless steel ends of the cable are "matched" to form a slab which fits into the slot of the DiscLock. The pin of the lock fits into the hole, securing the two ends. It also creates an alarmed circuit exactly as if it the lock was attached to the disc of the brakes on the motorcycle.

The cable comes in a few different lengths, but are all made from the same thick high-tensile steel. The XV cable comes with its own carrying case, perfect for corralling it when not in use.

We have the Krytonite chain for securing the Vespa out in front, but the Xena XV cable will be perfect for locking the scooter when we are out around town. [Permalink] - Xena cable FirstLook
|
|
After we did the FirstLook of the Xena DiscLock, we gave it to some local readers with scooters to test. When we acquired our very own Vespa, we asked for the DiscLock back as we can now to do a first hand review of the unit.
Unfortunately, the spacing of the disc and the wheel on the Vespa ET2 is too narrow to accommodate the Xena DiscLock! We were bummed as this lock was such an elegant solution for securing the scooter. A quick check on the Xena site indicated that the ET2 and the ET4 were the only two Vespa models which this lock would not fit.
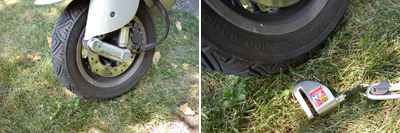
After a little surfing around, we noticed Xena makes accessories for locking the vehicle to a post or an anchor. It was not as "clean" as just using the DiscLock, but both the cable and the anchor were so cool looking that we thought you would definitely want to know about them.
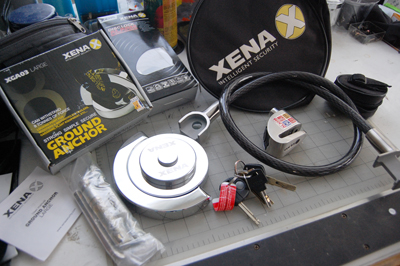
The Xena components make for a complete scooter or motorcycle security system, whether at home or on the road. The anchor is heavily plated to be weather resistant. It also swivels a full 360º so it is easy to attach to from any direction.

The unit comes with an anchor bolt and all the tools (masonry bit, hex key) to install the unit. When properly installed, it can withstand quite a bit of force. This unit will not come out of the ground easily.

Next we'll see about doing the installation of both the Xena and the Kryptonite anchors outside the RainyDayMagazine office. [Permalink] - Xena anchor and cable
|
|
|
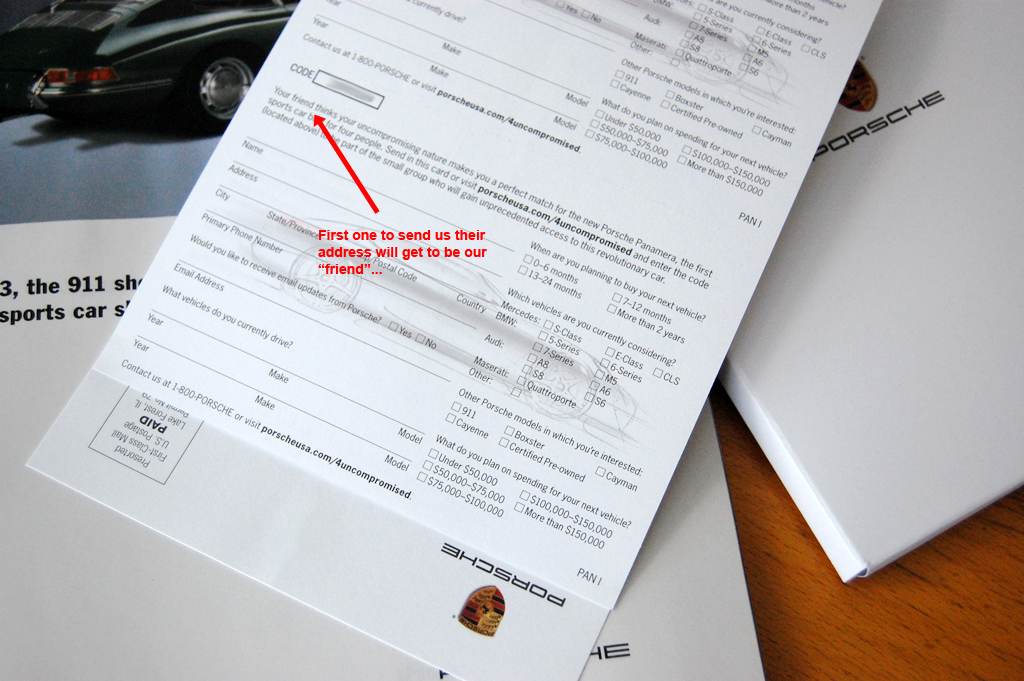
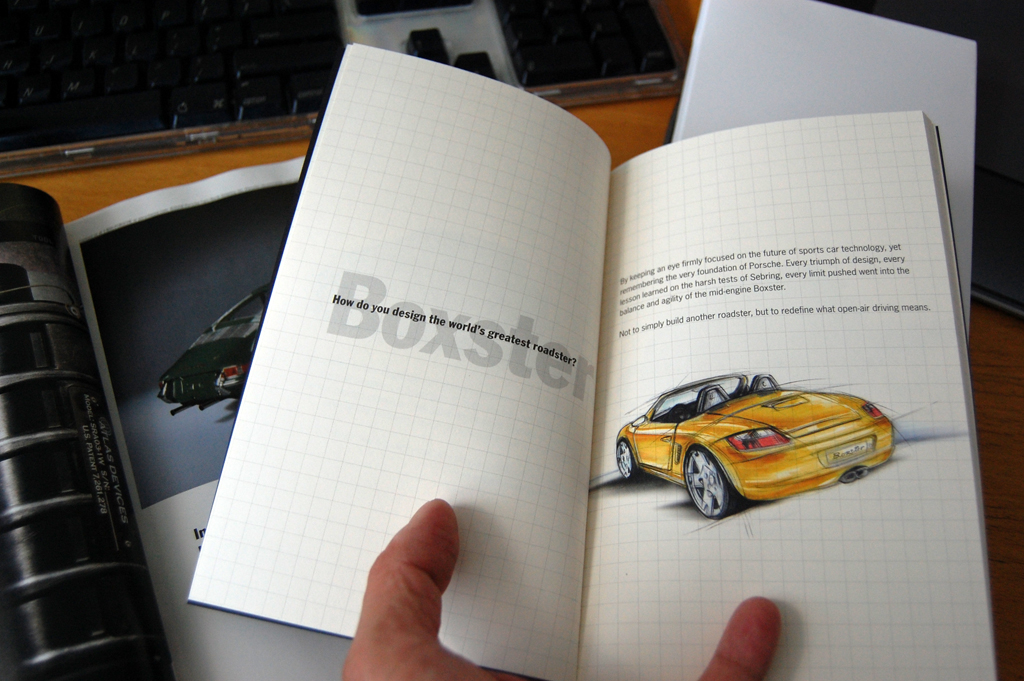
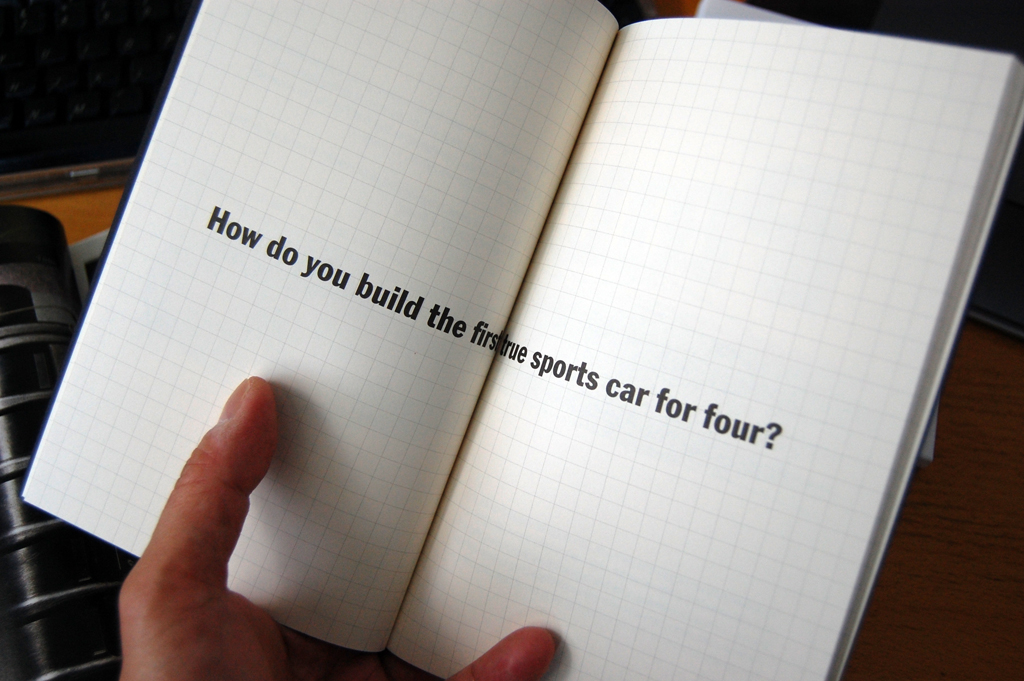
A very intriguing package showed up in our office mail yesterday. It was a teaser ad from Porsche for a new vehicle called the Panamera. The ad was done in the style of an artist's "sketch book."

The images on all of the pages were hand-drawn rendering of Porsche's current line (911, Boxster, Cayenne, Cayman). They then asked the question " How will you build the first true sports car for four?" Our answer would be to buy two Boxsters, but Porsche's answer is the Panamera.
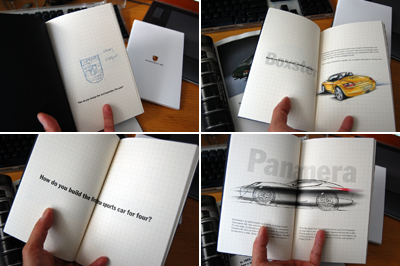
We have not been paying much attention to Porsche's new vehicles (Cayenne, Cayman), and are a little bit confused by the whole concept of a "sports car for four." It reminded us of the 928 back when gas was under a $1.
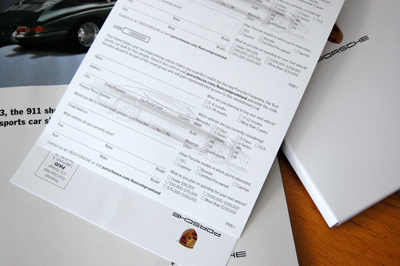
However, Porsche is an interesting company and we have no doubt that they know what they are doing. So we will fill out the form and stay up to date on the progress of the Panamera. If nothing else, we just love getting cool "info-tisments" from Porsche. [Permalink] - Panamera
|
|
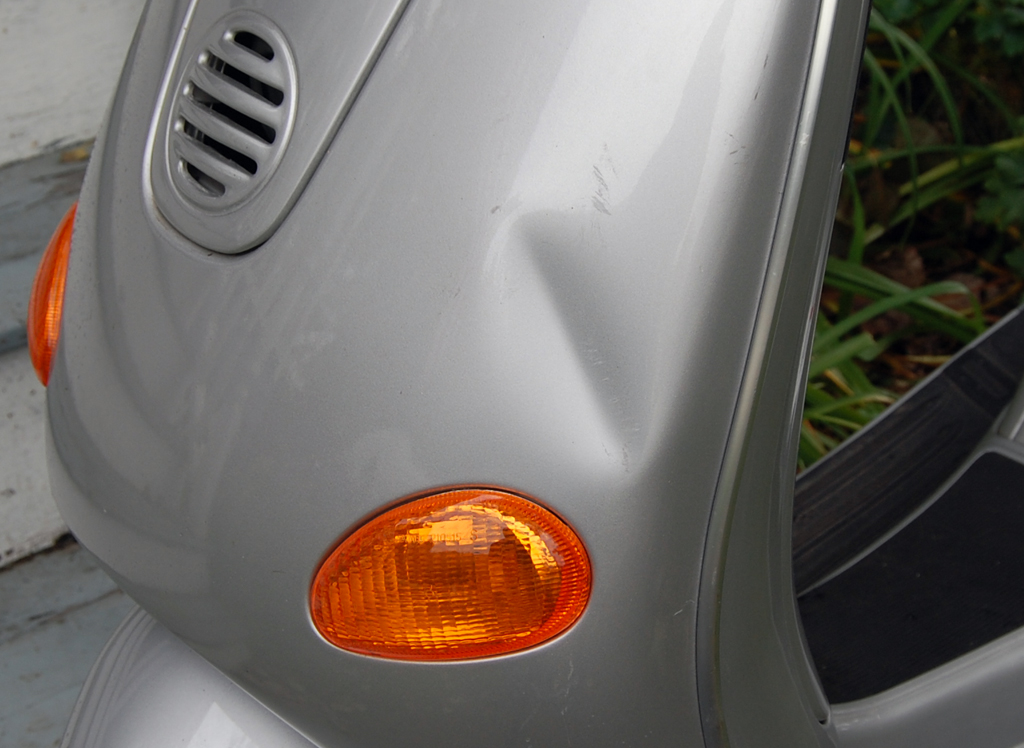
Somebody (we will not reveal whom... cough...Eliot), while learning how to ride the Vespa, managed to put a small indentation on the front panel.

We were happy to just leave it be. The dent, while somewhat unsightly, had no affect on the workings of the scooter itself. This, of course, did not sit well with the RainyDayGarage guys. After all, "fixing" the dent was the perfect excuse they needed to justify taking apart the Vespa.
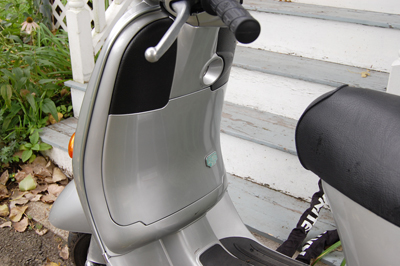
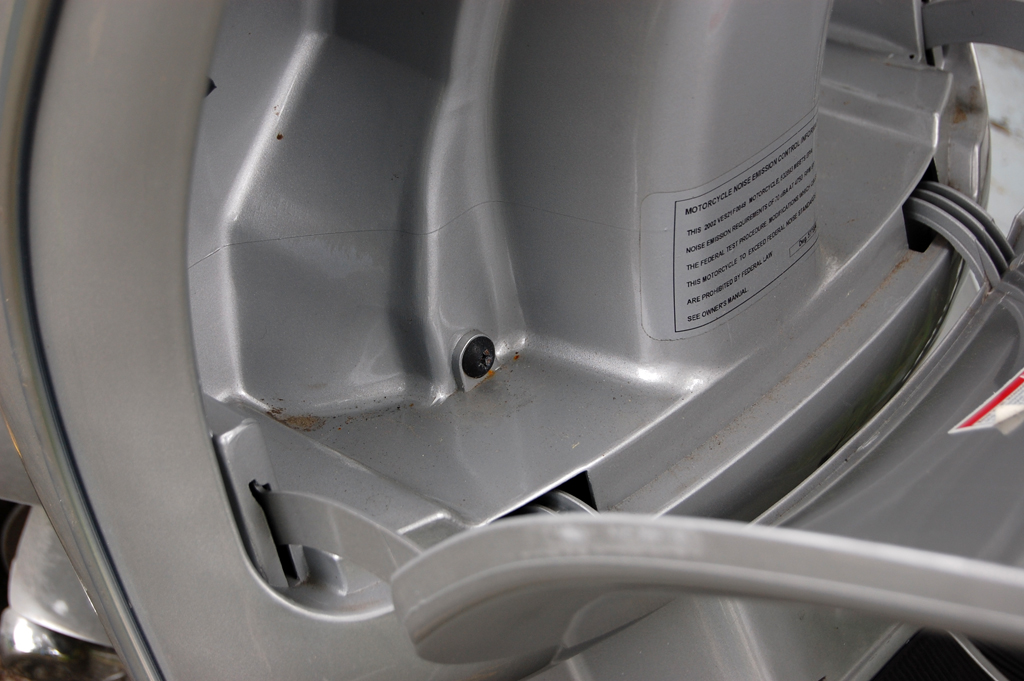
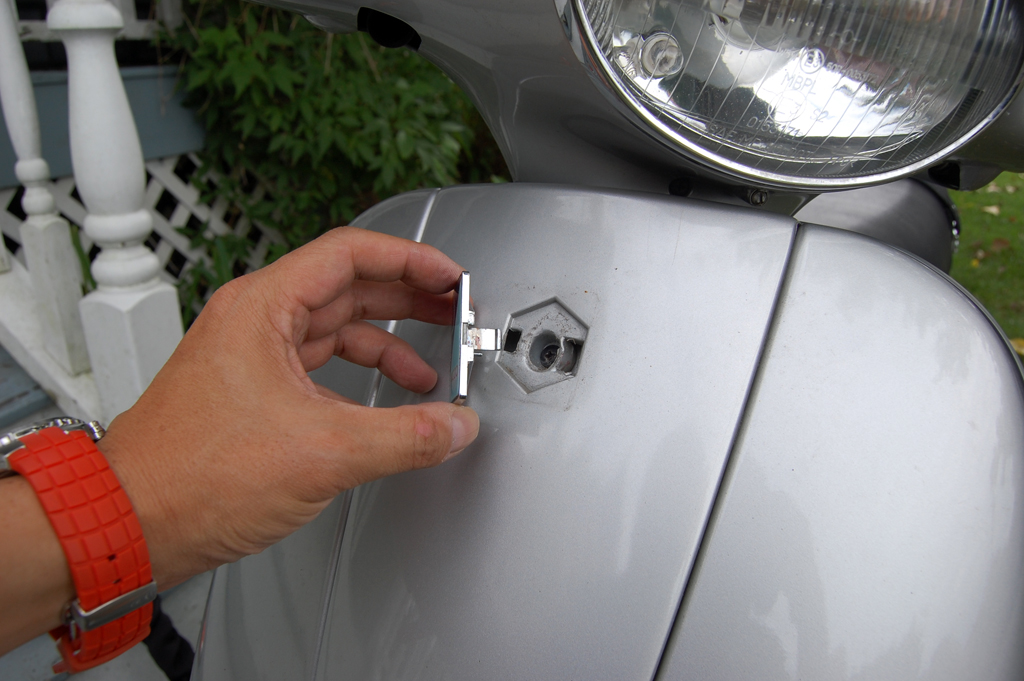
After some discussion, it was agreed that they could take a look to see if accessing the dent from the inside was an easy task. A quick examination revealed that the front storage compartment was held in place by three screws in the back and probably some from the front. It seem like a fairly simple tear-down.
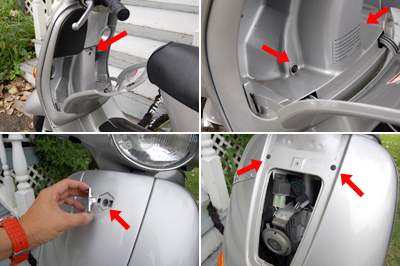
In order to get at the ones in the front, two items needed to be removed: the badge and the cover. The badge was held in place by a tab on the right side. The front cover was secured by a single screw under the badge. Taking off the cover revealed two more screws which must be removed before the storage compartment can be freed.

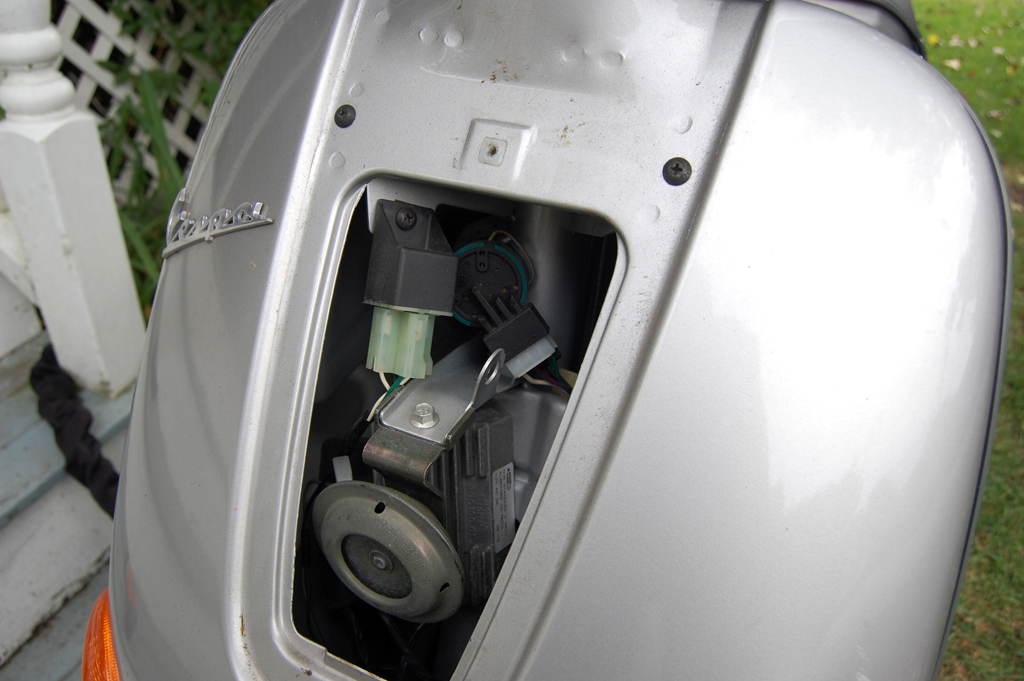
With the cover to the storage compartment removed, the dent was now clearly visible from the inside and can be "worked" without marring the surface. BTW, during the disassembly process, they dropped a screw which rolled into the floor board. The guys took that as a "sign" that we should take off the floor board retrieve the screw, which of course they did :-)
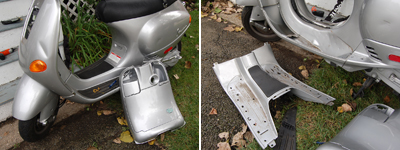
They used a hammer with a slightly curved head and tapped out the indentation the best they could. Working from the outside in, they managed to get it pretty smooth. Even though the dent was now much less noticeable, we could still see some uneveness to the surface.
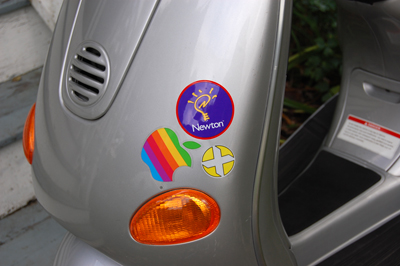
To completely hide those "ripples", we decided to round up some iconic decals and just cover them up. The dent is now much less noticeable. This repair project worked out a lot better than we had expected. If your Vespa needs a little body work, don't be afraid to "go at it" as taking it apart was pretty easy. As to putting it back together... that is left as an exercise for the reader. [Permalink] - Vespa Dent Repair
|
|
|
September 14,2008 (WeekendEdition) |
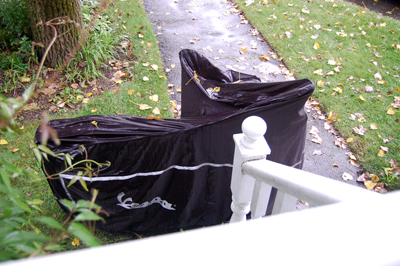
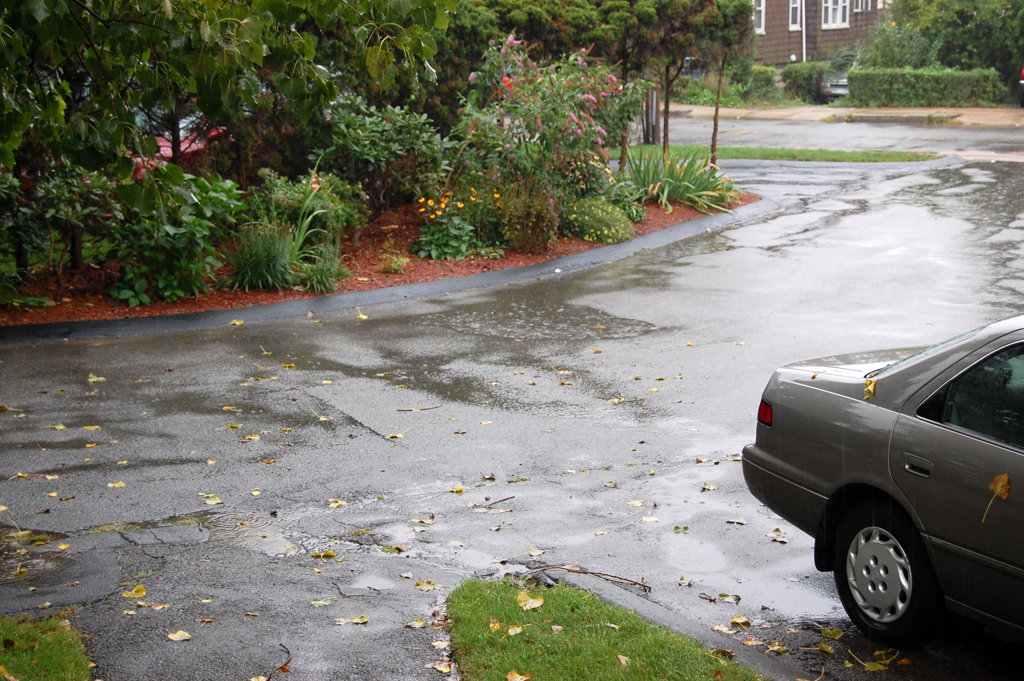
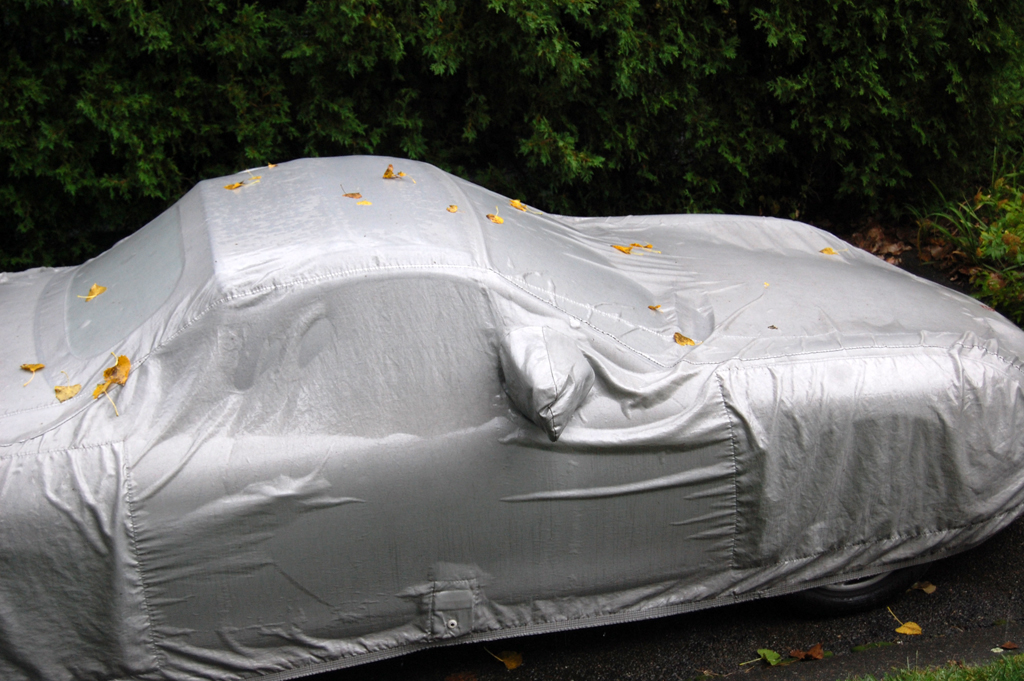
Whether it is the fringe effects from Hurricane Ike down South or just typical New England weather, we have been hit with a few days of on again/off again rain. While all of this rain is great for the garden, it does make a mess of the vehicles.
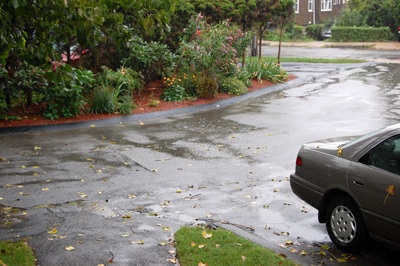
Since we don't have garage parking here at the office, everyone just park their cars out in the open. The weather, birds, and trees drop a lot of "stuff" on the vehicles, but we have learned to deal with it by covering them up.
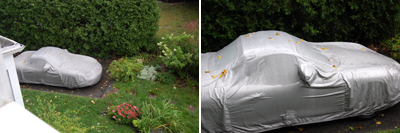
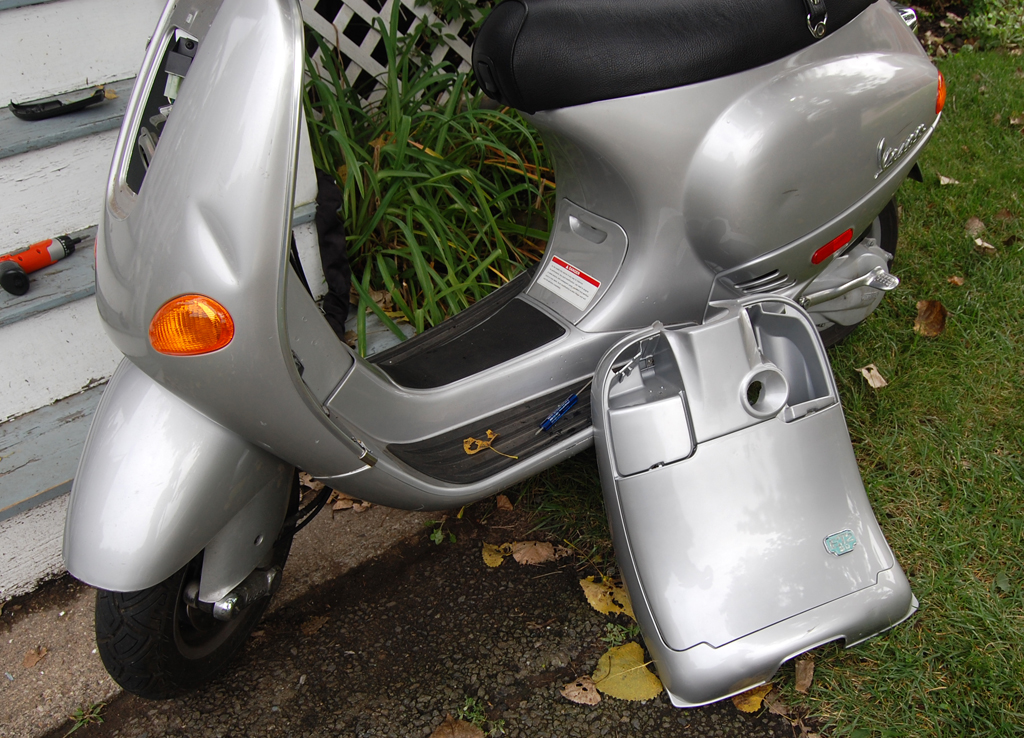
We have covers for both the Porsche Boxster and the Vespa scooter. With covers, we tend to favor those designed to fit a specific vehicle rather than the less expensive generic covers. The main reason is they will stay on even when it is windy out.
Our OEM Porsche cover is 8 years old and will need to be replaced before the snow starts. We will be looking at aftermarket options this time to see if we would get more the money. If you use a car cover and have had a good experience with it, drop us a note, we will take a look and perhaps share it with other readers of RainyDayMagazine. If we do end up choosing the one you recommend, we'll send you something from our pile of goodies as a "Thank you!" [Permalink] - Vehicle covers
|
|
|
September 5,2008 (FahgettabouditFriday) |
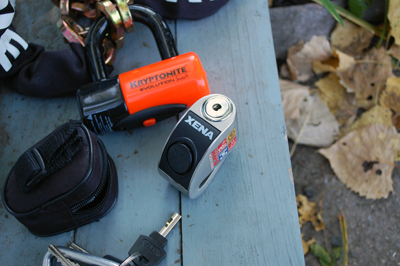
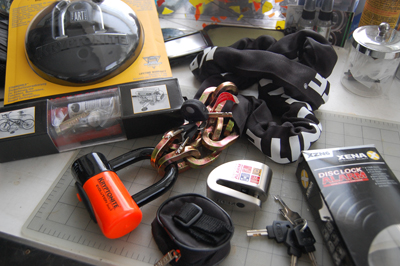
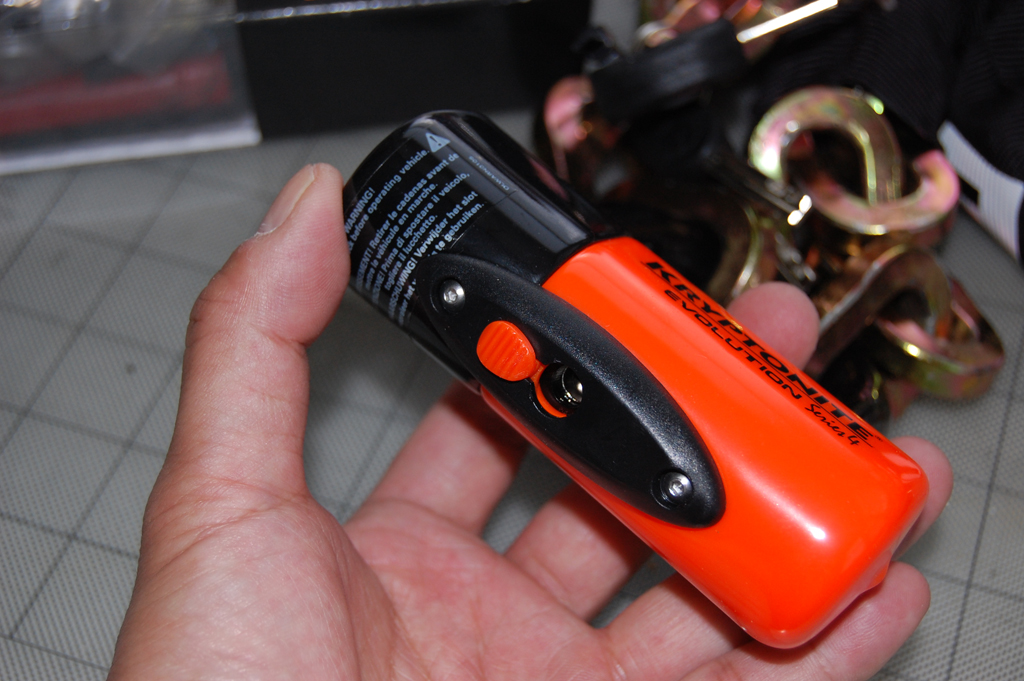
Just about everybody had a Kryptonite lock at one time or another for their bicycle. We still have a few of them around the office somewhere. When we started looking at locks for scooters, we knew we had to check out what Kryptonite had to offer.
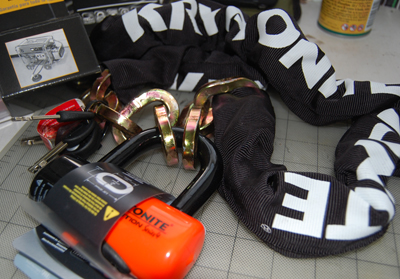
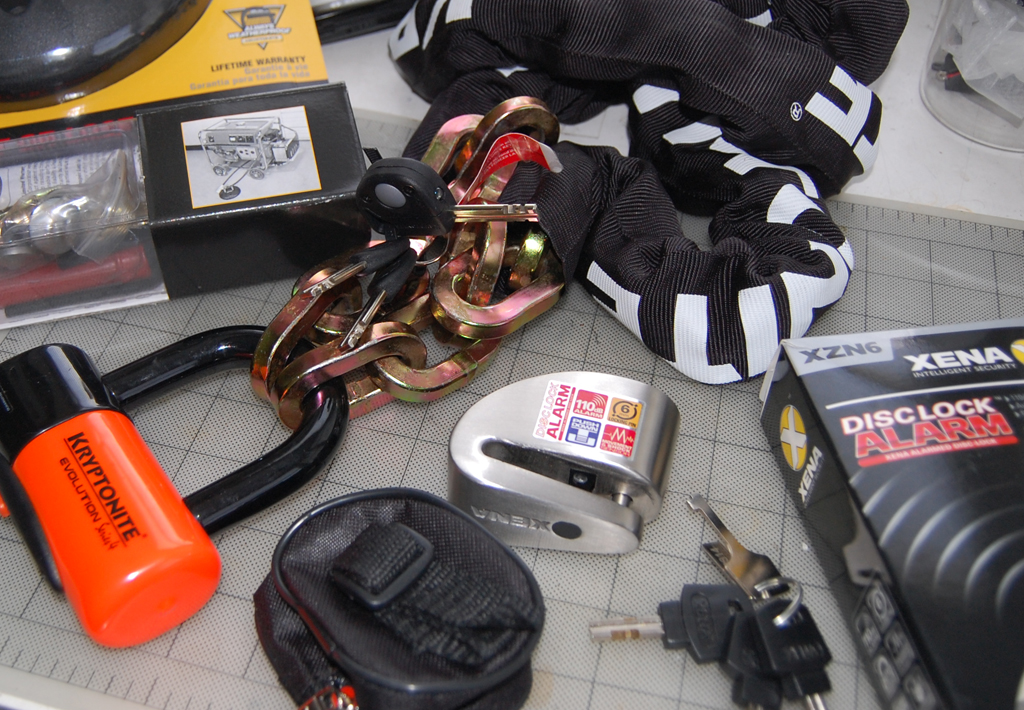
Kryptonite has two chains/lock combo which we thought were worthy of mention: the New York Chain w/Evolution series 4 Disc Lock, and the New York Fahgettaboudit. Since we live and work in a relatively safe area of Boston, we opted for the slightly lighter chain of the Evolution. By the sight of it, we don't think we'll be compromising the security of our scooter one bit. In fact, we are pretty sure we can give up our gym memberships, as just lifting the chain is enough of a workout.
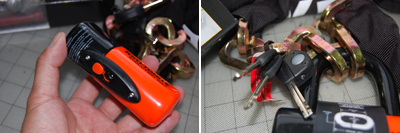
The Evolution Series 4 lock is a made of two parts: a steel U-shape shackle, and a double-deadbolt lock. The cylinder of the lock uses the new, higher-security disc-style design. It comes with three keys. The keys have over a million possible variations. There is even a nice integrated dustcover.
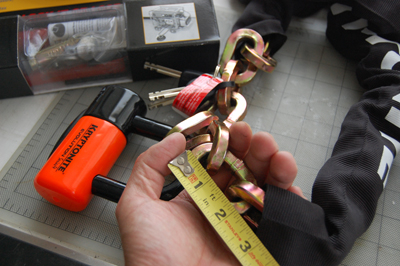
Each link in the New York Chain is almost 2.5" long and 1/4" thick, but are shaped so as to be less vulnerable to "leverage" type attacks. The links are made of heat-treated micro-alloyed steel (boron manganese) and are VERY strong. The heavy nylon cover protects both the chain and the paint of the motorcycle or scooter. The thief will have to REALLY make an effort to find a weak link in these chains.
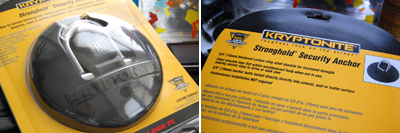
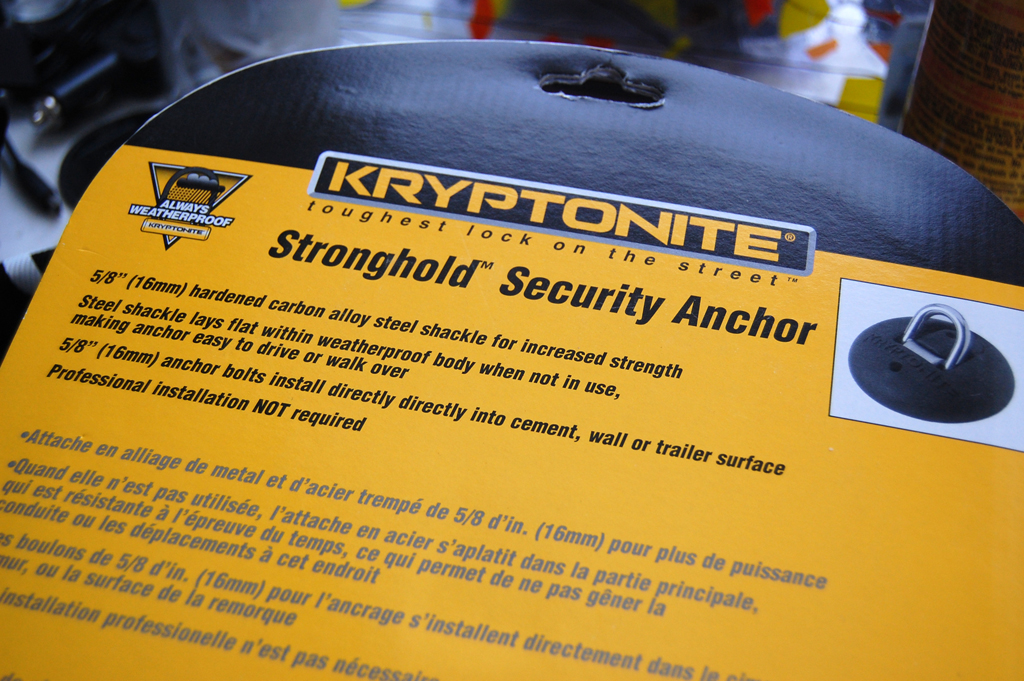
A strong chain and lock still need something secure to lock things to. This is where the Kryptonite Stronghold Anchor steps up to the plate, as it were. The Stronghold is an indoor/outdoor anchor. It has a low curved profile so it can be mounted on the garage floor or in a driveway. We'll be installing this anchor right outside the front walkway to the office. If the weather holds up, we may even attempt the installation project this weekend! [Permalink] - Kryptonite
|
|
September 4,2008 (AlarmTechThursday) |
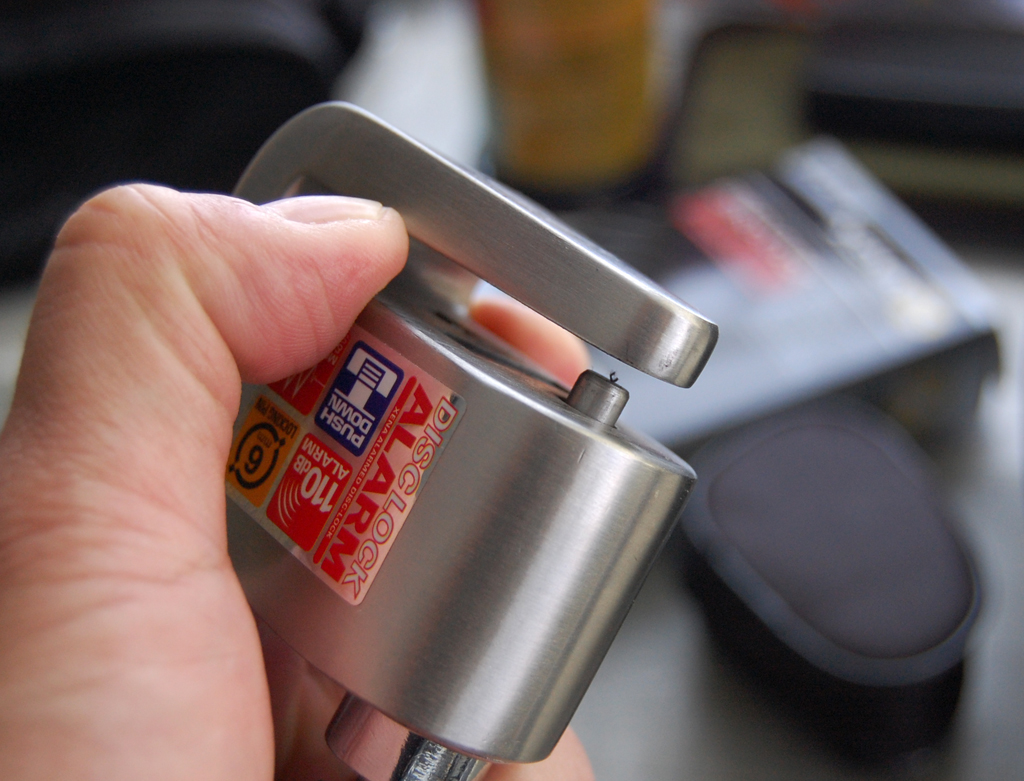
Yesterday we took a general look at the Xena Alarm Disc-lock. Today, we'll take a closer look at the alarm component of this compact security device.
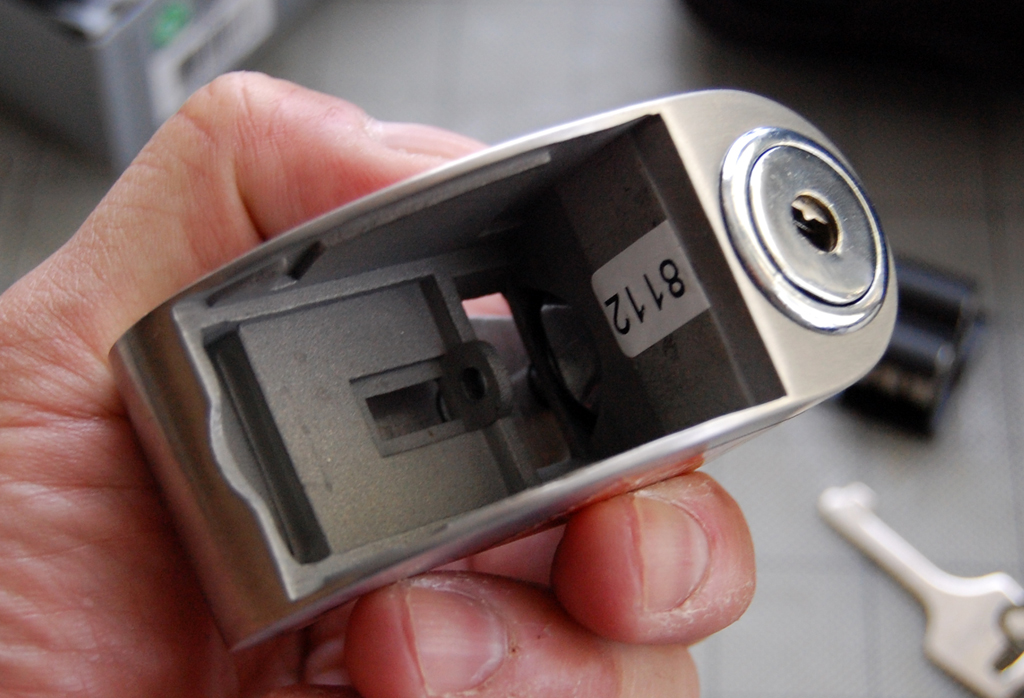
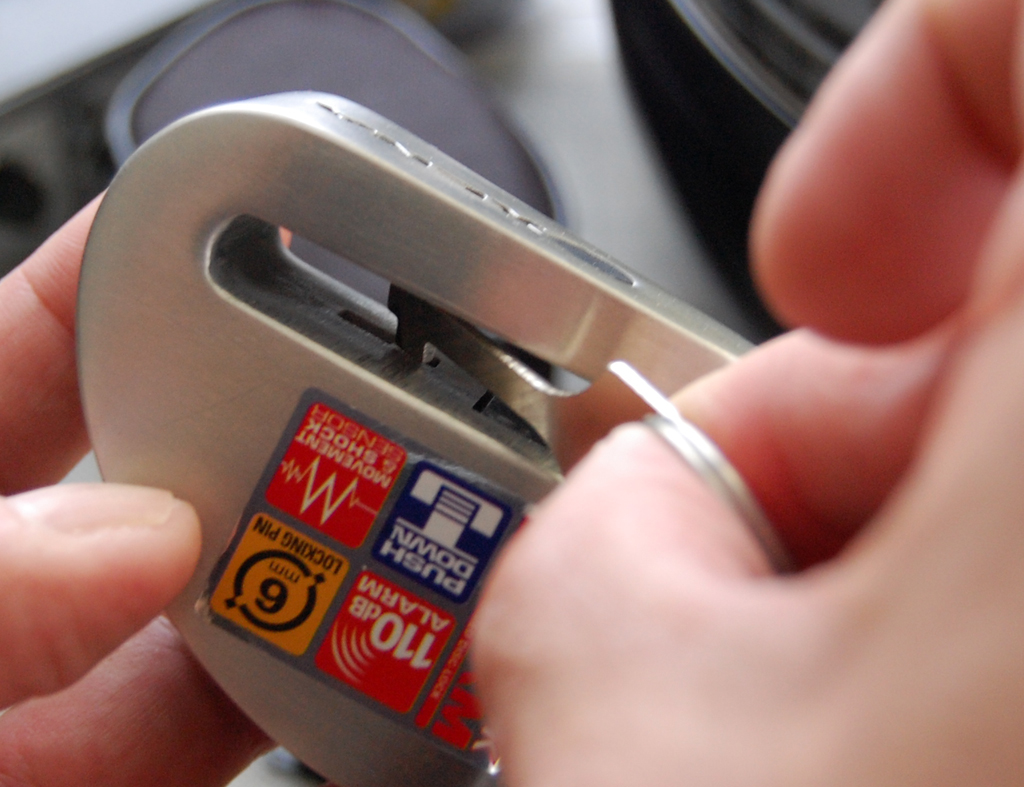
The first thing to note about this Xena alarm is there is no "On/Off" switch. The alarm self-arms when the lock is engaged. This actually makes it a bit noisy when trying to separate the alarm from the frame when the battery still has some juice. Normally one would not need to do that, but we wanted to show the inside of the shell and the alarm unit.
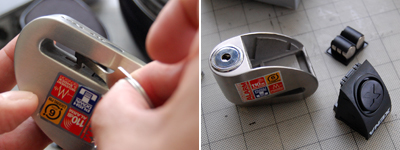
To free the alarm, a key is used to push a recessed pin inside the channel of the lock. This pin is not accessible when the lock is in use because it is blocked by the disc.
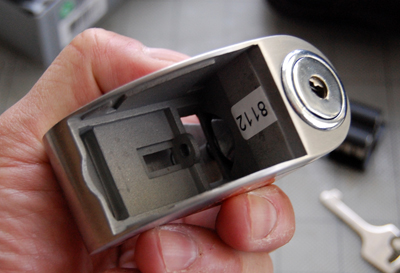
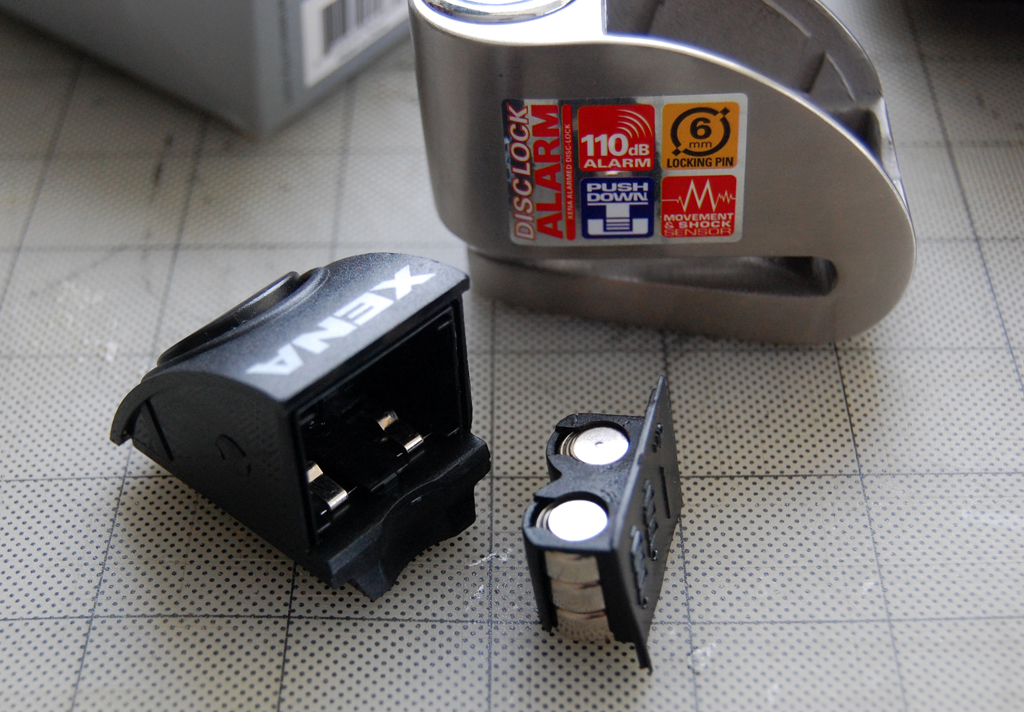
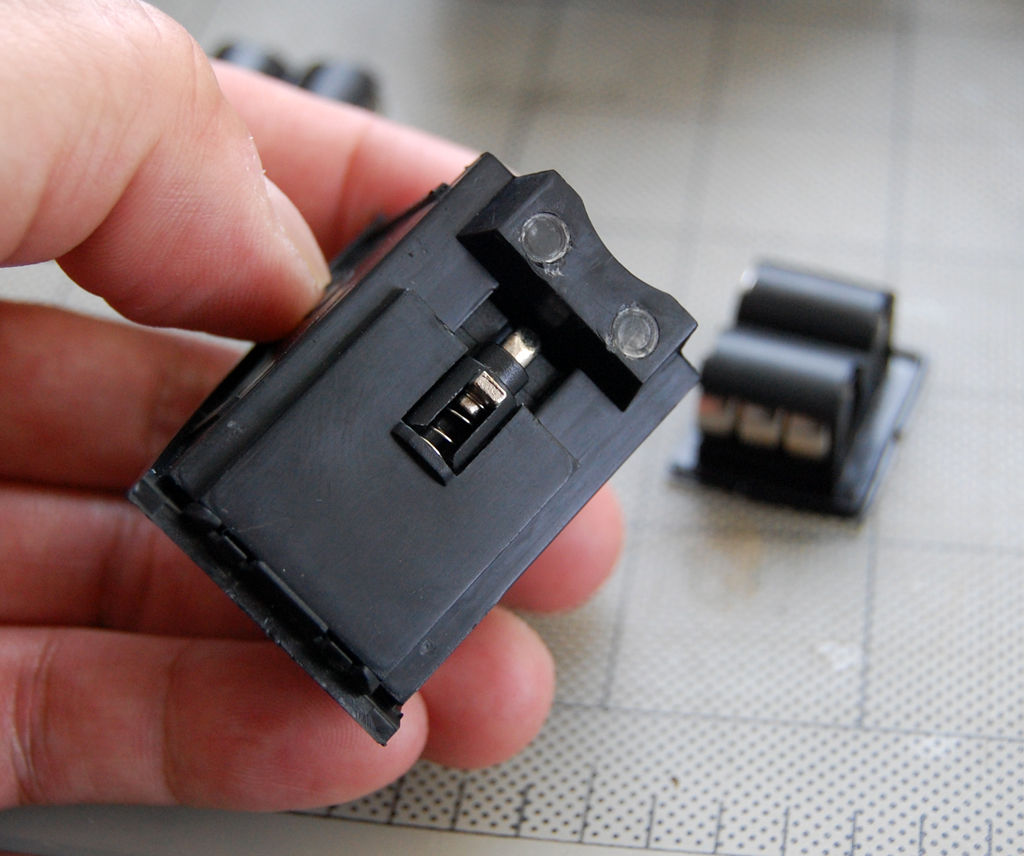
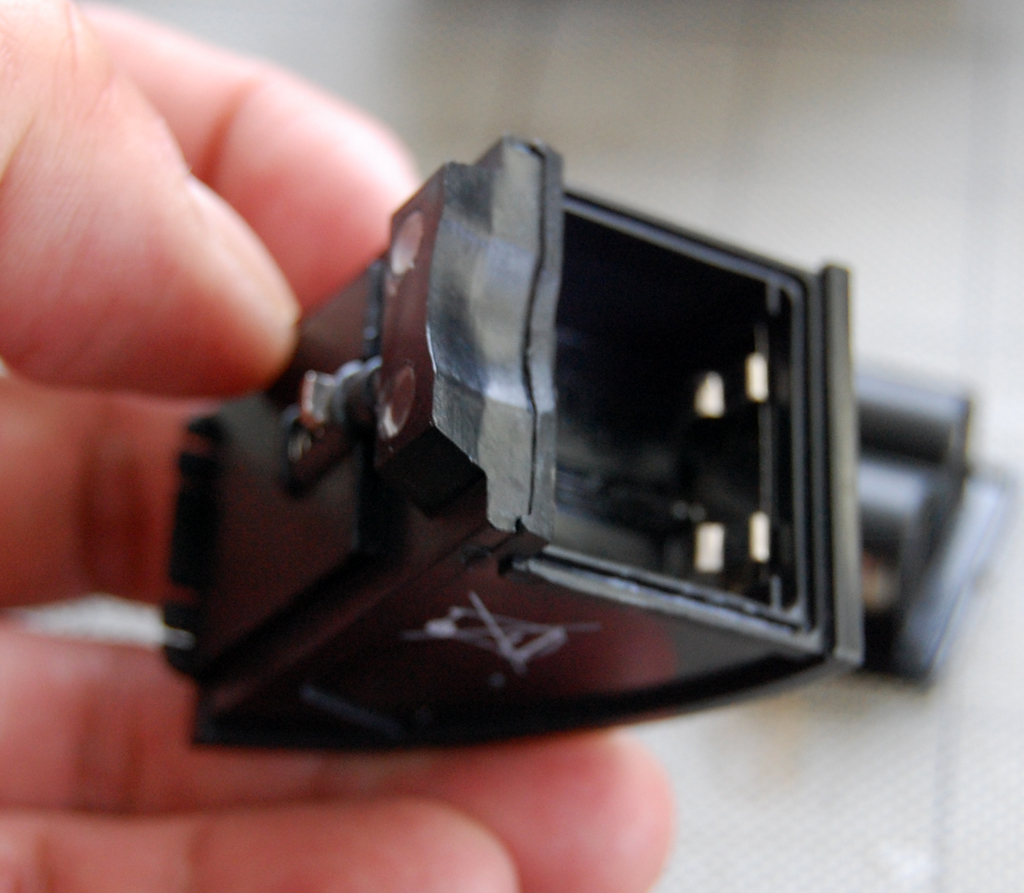
Here is a good view of the solid block of stainless steel used for the shell. The round loop will catch the pin when the alarm is pressed into the cavity. The alarm is powered by six watch batteries, which are held in place by a small tray which slides into a compartment in the alarm, and are removable only when the alarm is out of the shell.
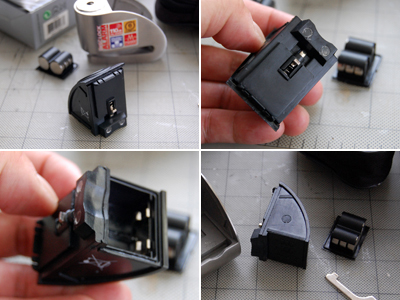
This Xena alarm is very sensitive to any tilt or motion. We are guessing there are mercury switches oriented in different directions inside the alarm.

Overall, this alarm is well protected by the stainless steel frame shell and will not be easily defeated. We like the simple and no-maintenance design of this Xena Disc-lock alarm. In our next installment of this series, we'll look at using this Xena to secure our newly-acquired Vespa. [Permalink] - Xena Alarm
|
September 3,2008 (WowUsWednesday) |
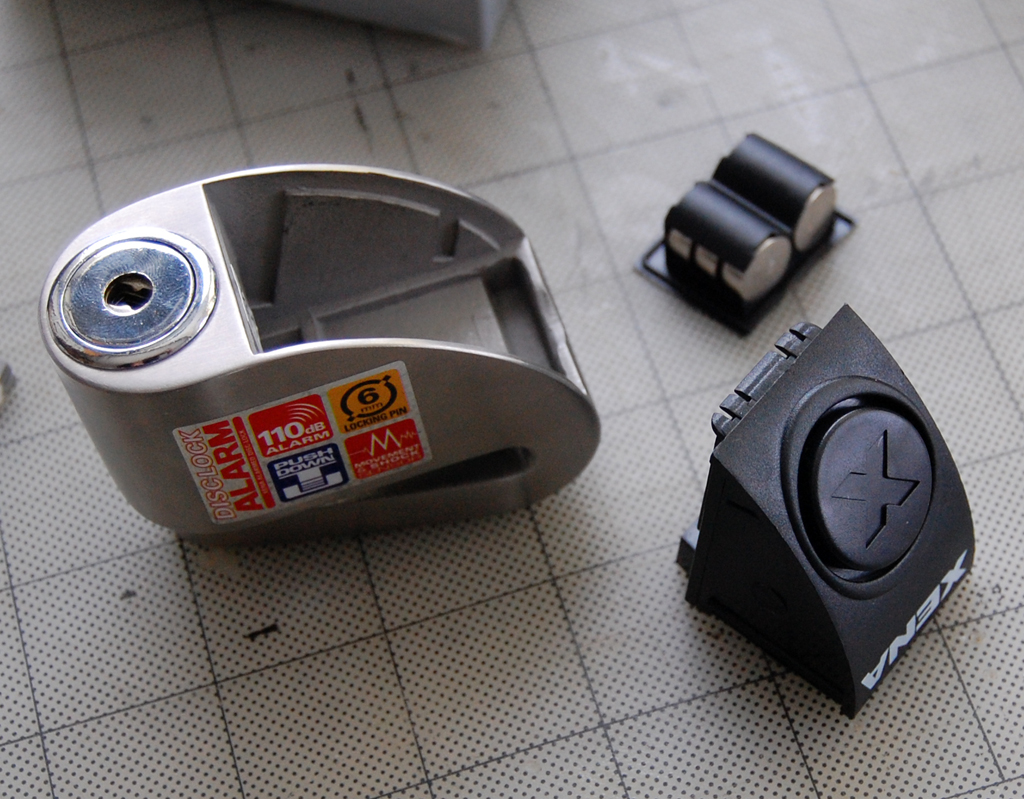
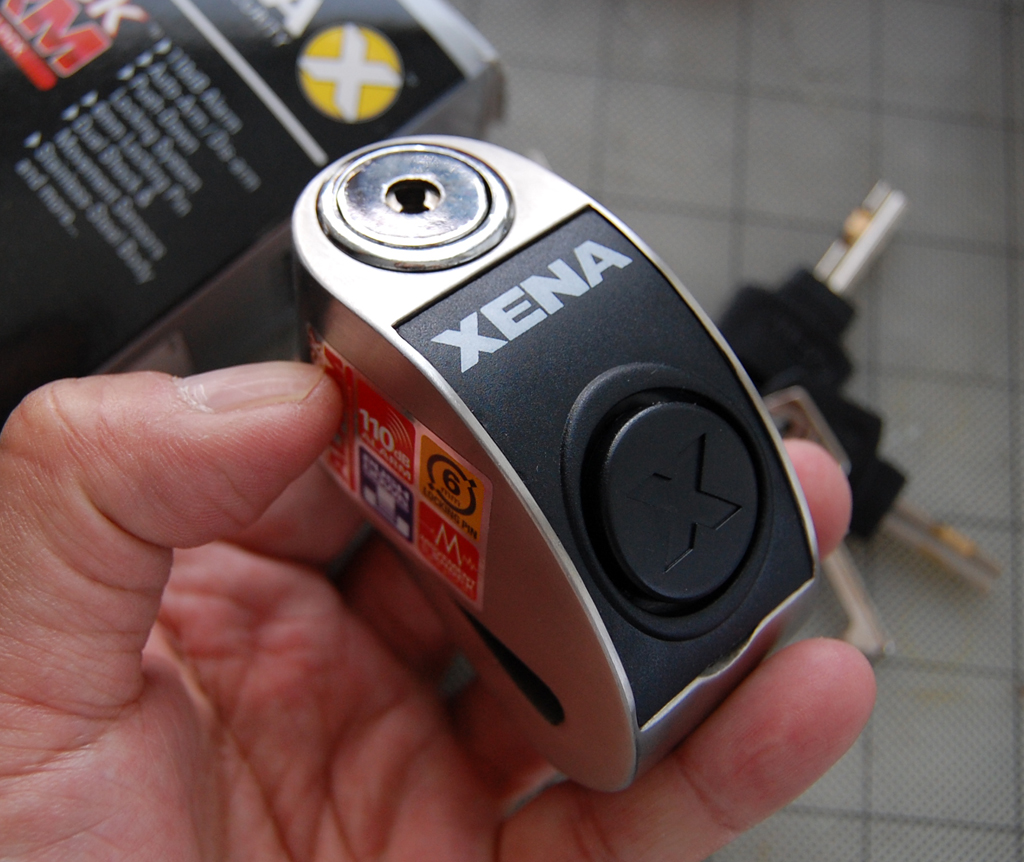
There are a few companies which make disc-locks for scooters and motorcycles. When a disc-lock is attached to the disc of a vehicle's brakes, it makes it impossible for the wheel to rotate. The one we will be testing is from a company called Xena Security.
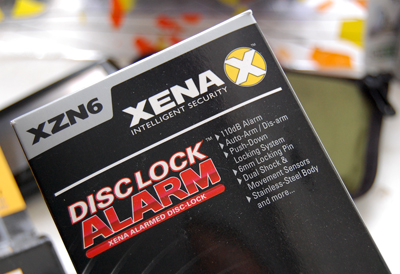
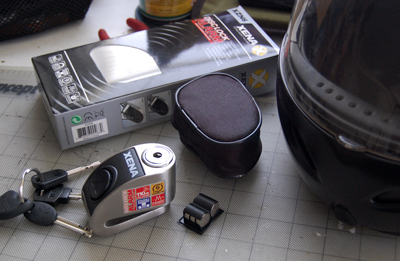
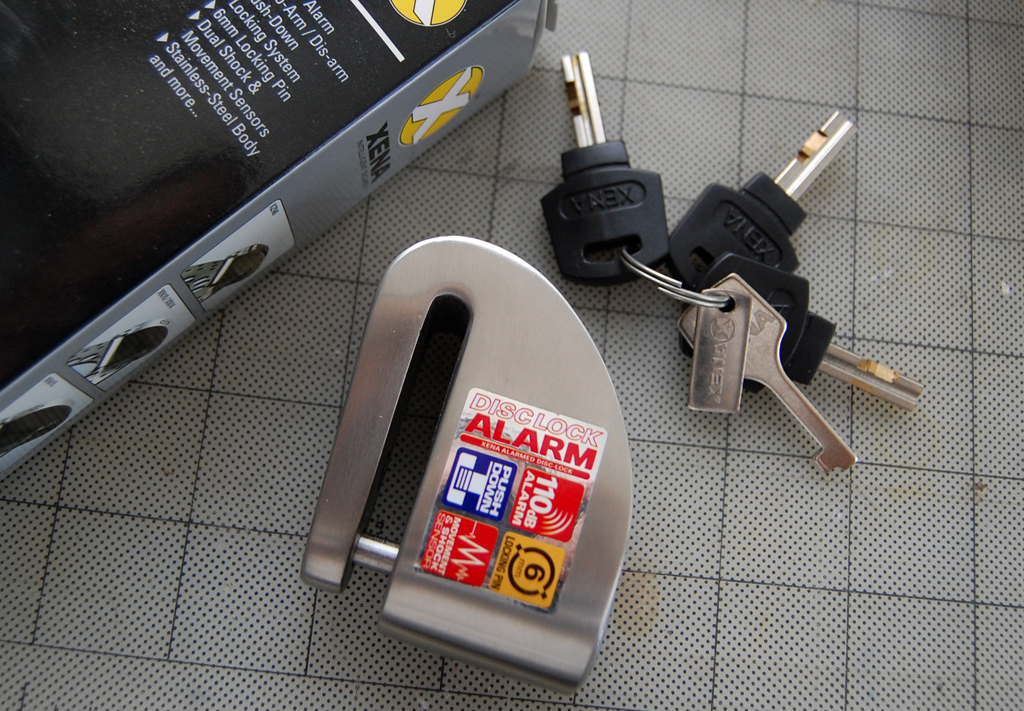
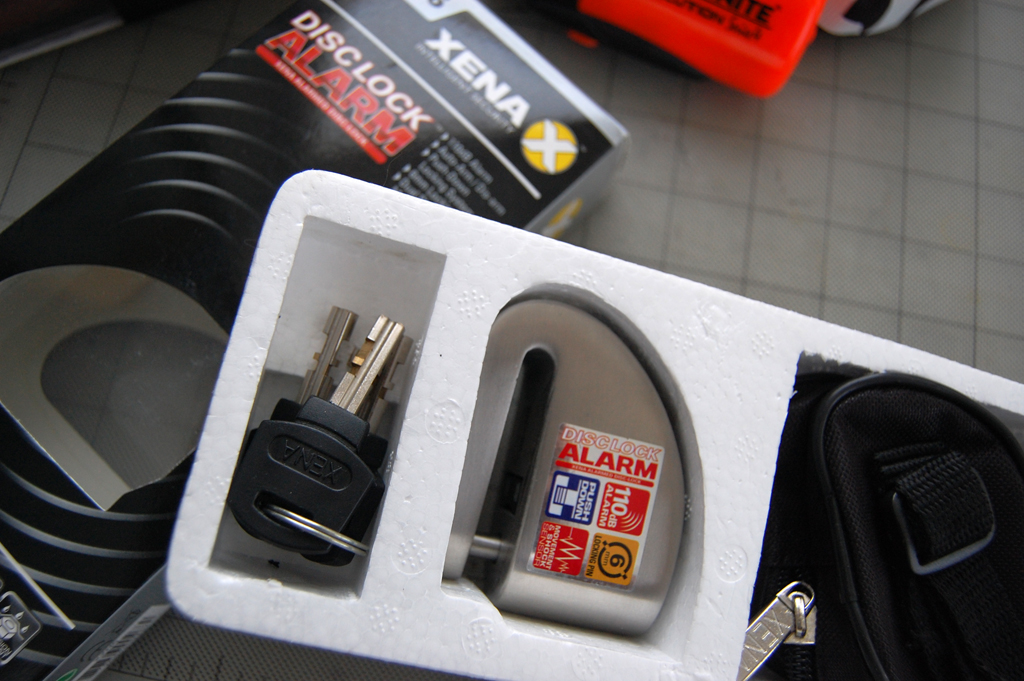
Xena makes a lot of different locks for all kinds of security needs (motocycles, cars, home). The one which seemed most appropriate for our application was the Alarmed Disc-Lock.
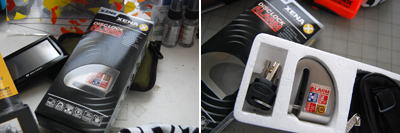
The lock is made from a solid block of stainless steel, has an integrated alarm, and fits in the palm of your hand. The Xena DiscLock Alarm comes complete with batteries, three keys, and a storage pouch.

The Xena DiscLock works on a similar principle as the "boot" used by many traffic enforcement police to lock up cars. The lock works by securing a pin throught a vent hole on the brake disc, preventing the wheel from rotating. Once the lock has been engaged, any movement will trigger the alarm. The 110db alarm is LOUD! After a few seconds, the alarm will turn off and re-arm.

Xena's design is a great idea. It is small, which means it will be easy to carry. It looks simple to use, which means it will actually BE used. It appears extremely well made, which means it will hold up to attacks. We can't wait to give it a try with our new Vespa. [Permalink] - Xena DiscLock
|
|
September 2,2008 (ToughTechTuesday) |
Boston is a great city, but like any city you have to be aware of your surroundings, watch your stuff, and lock things up when you are not around. Scooters and motorcycles are pretty heavy, but a couple of strong guys can still pick it up and put it in the back of a truck.

When we knew we were going to get a scooter, we started looking around to see how we could secure it around town. Two ideas quickly bubbled to the top of the list: one was to get a big chain and a strong lock; the other was to look into something called a "disc-lock." Over the next few weeks, we'll take a closer look at both of these options: how they work, when and where are each most useful, and how well they perform in the real world. [Permalink] - Vespa Locks
|
September 1,2008 (MobileMonday) |
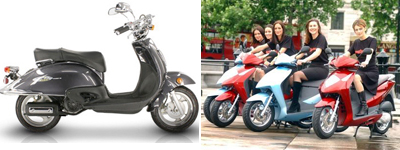
At the beginning of Summer we started seeing more and more questions about scooters: what kind to get, how to secure them, which type of helmets would make sense, etc. We decided to look into all of these questions as we were curious about the answers ourselves. A few of us had considered getting scooters because while we only have a short commute (7 miles), it usually takes about 40 minutes.

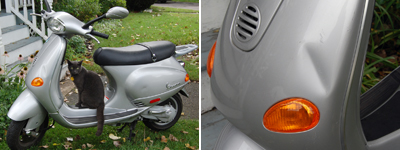
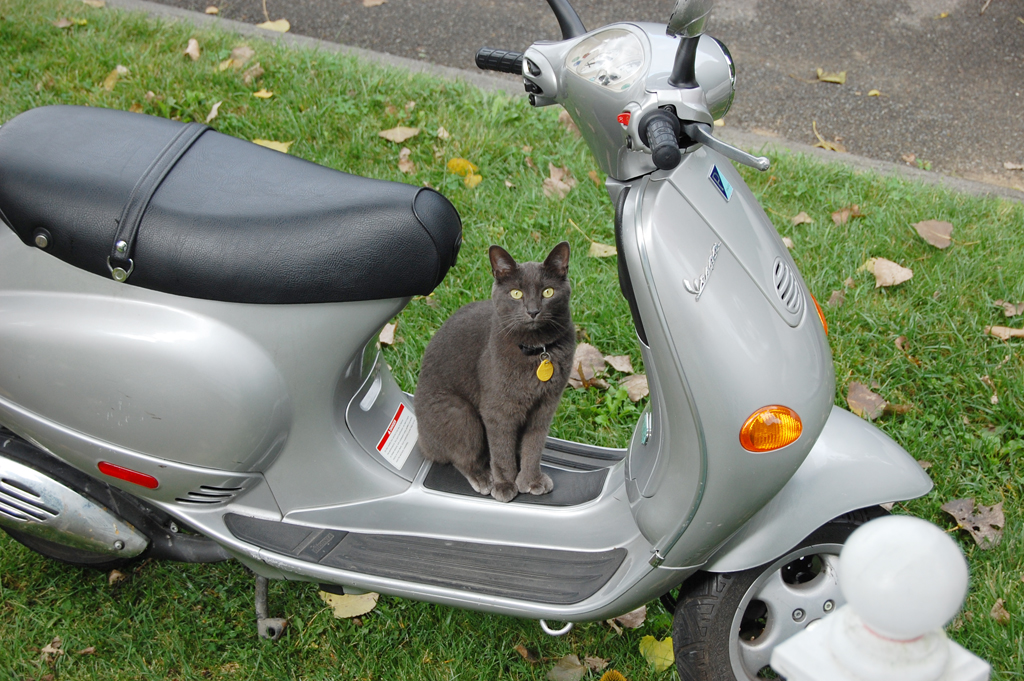
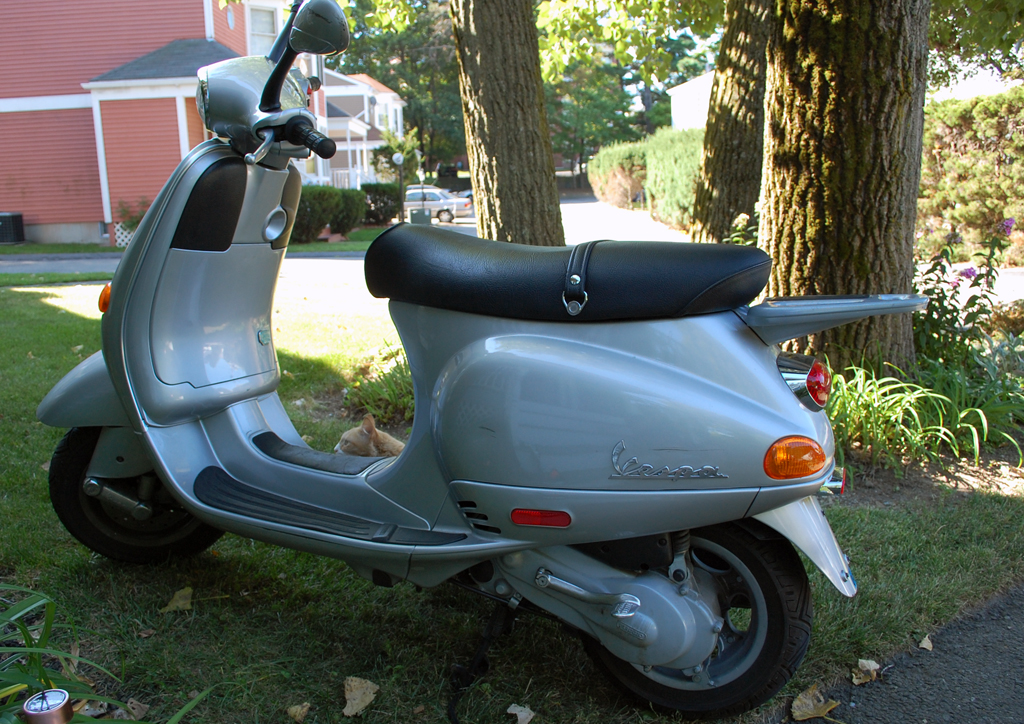
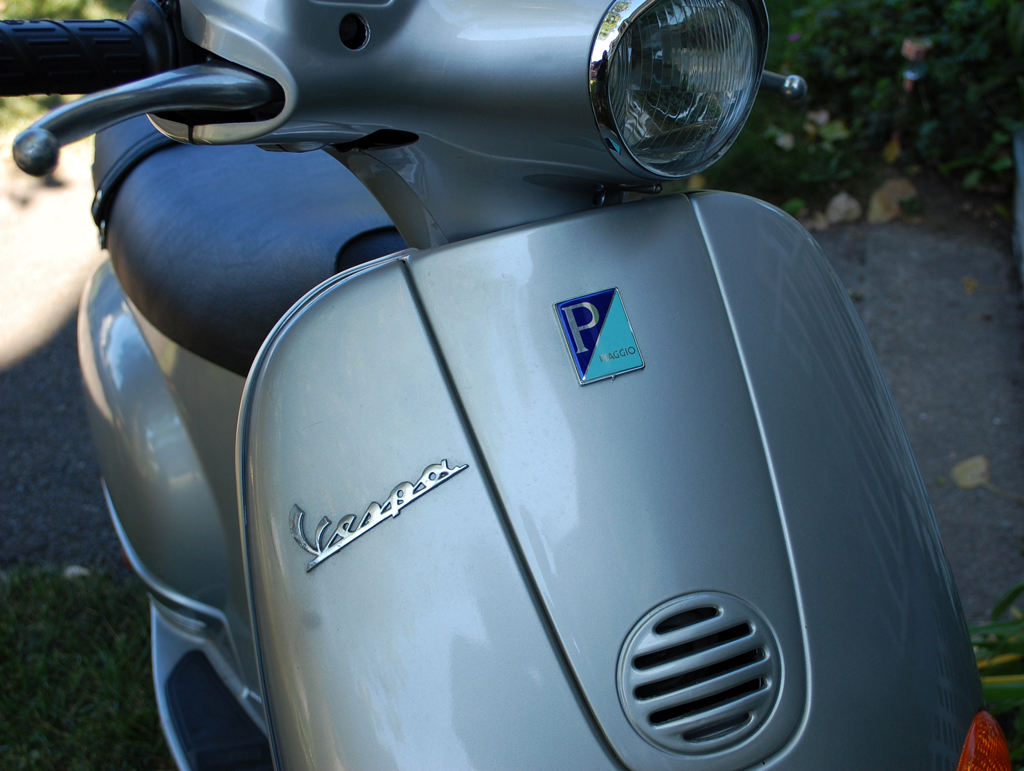
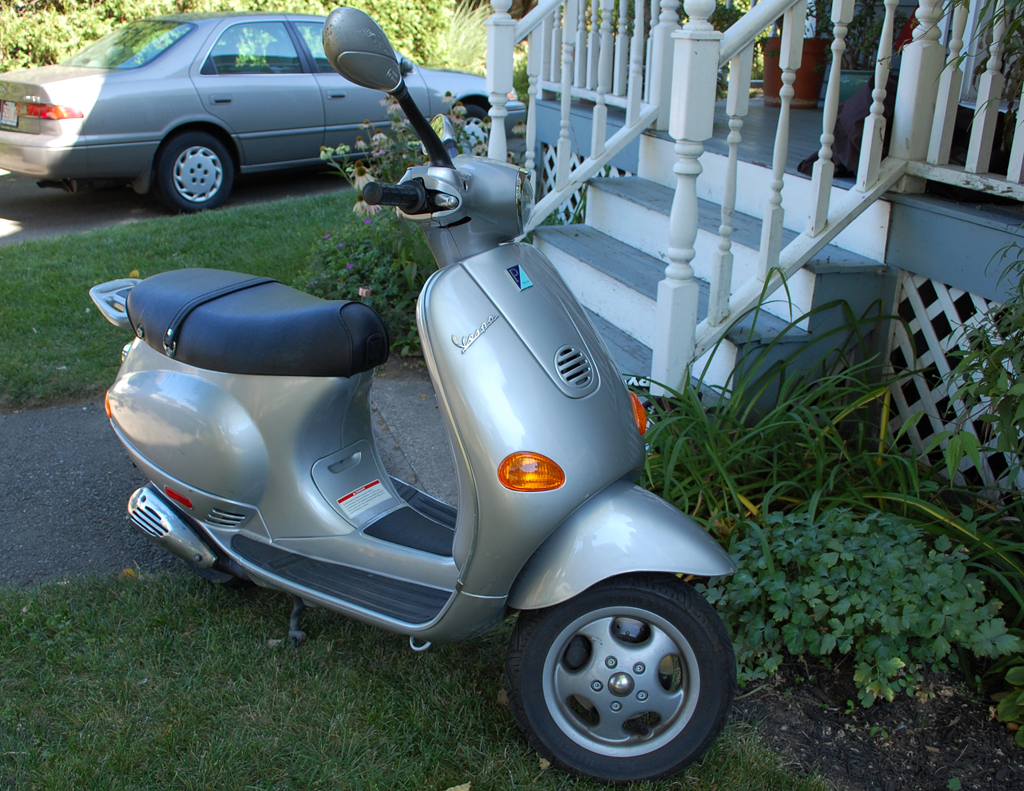
It did not take much research for us to realize that the cheap imports were no bargain (no power, no parts, no service), and to go with a real Vespa. Our plan was to buy a used one on Craigslist. However, that was also the time when gas prices went crazy, quickly followed by used Vespa prices. Fortunately, the interns' perseverance paid off. We managed to find one at an agreeable price, worked out a deal, and are now proud owners of a well-maintained silver Vespa ET2.

The ET2 is in great condition. There are a few scuffs and nicks, but the vehicle was just serviced at Herb Chambers and given a clean bill of health.
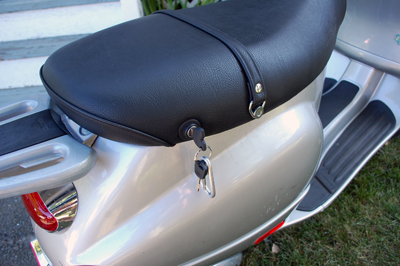
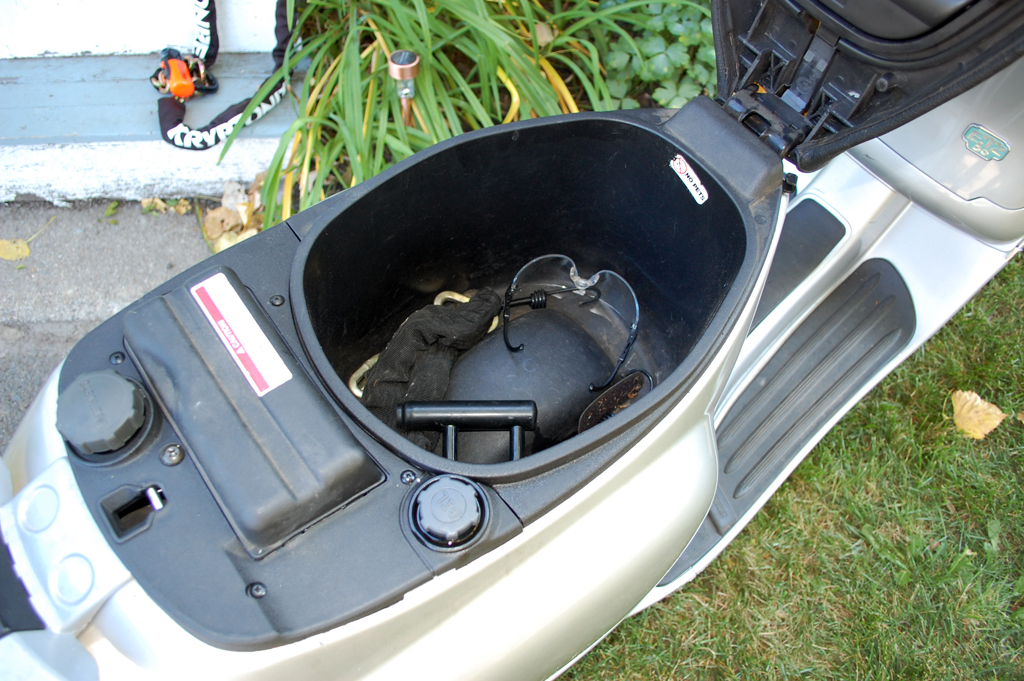
For a small vehicle, the Vespa ET2 was designed to make carrying stuff easy. There is a large storage bin underneath the seat. Perfect for a helmet, the lock, and other large items.
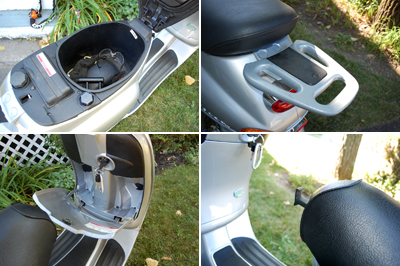
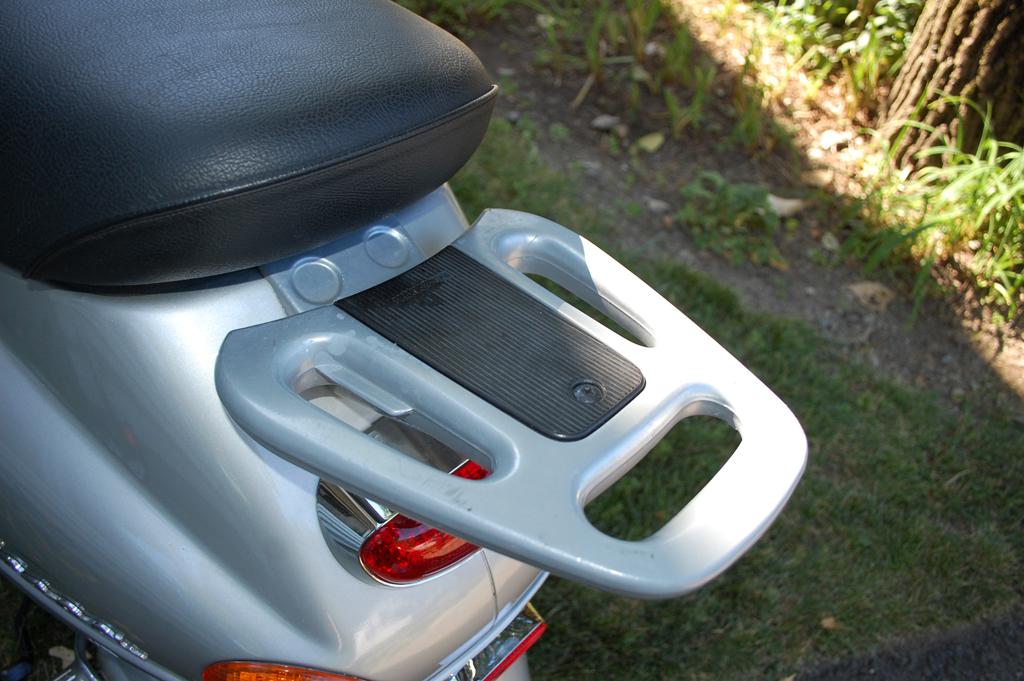
In the front is a flip down compartment for smaller items (cellphones, point&shoot cameras, etc...). In the rear is a flat carrier with slots for tying down packages and such. Built into the seat is a hook which slides out for hanging a grocery bag or a handbag.

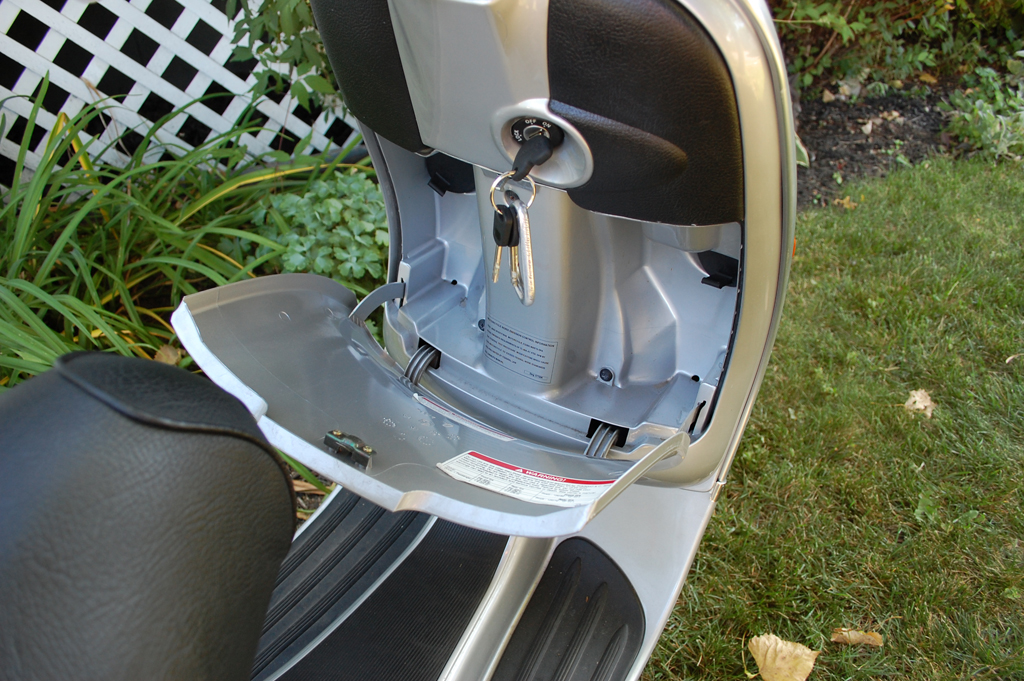
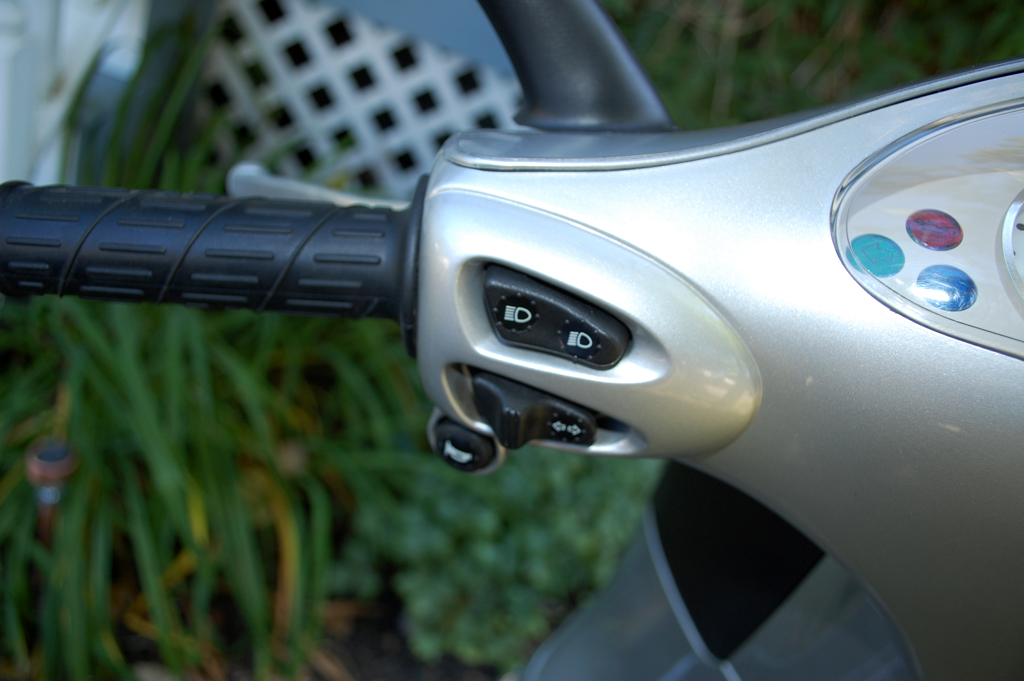
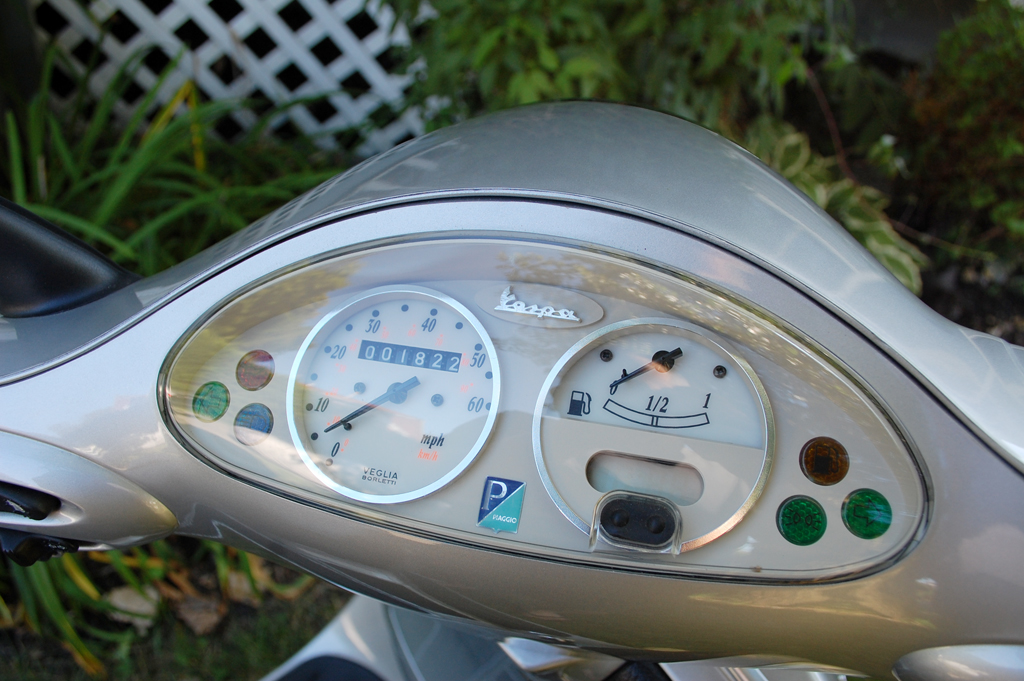
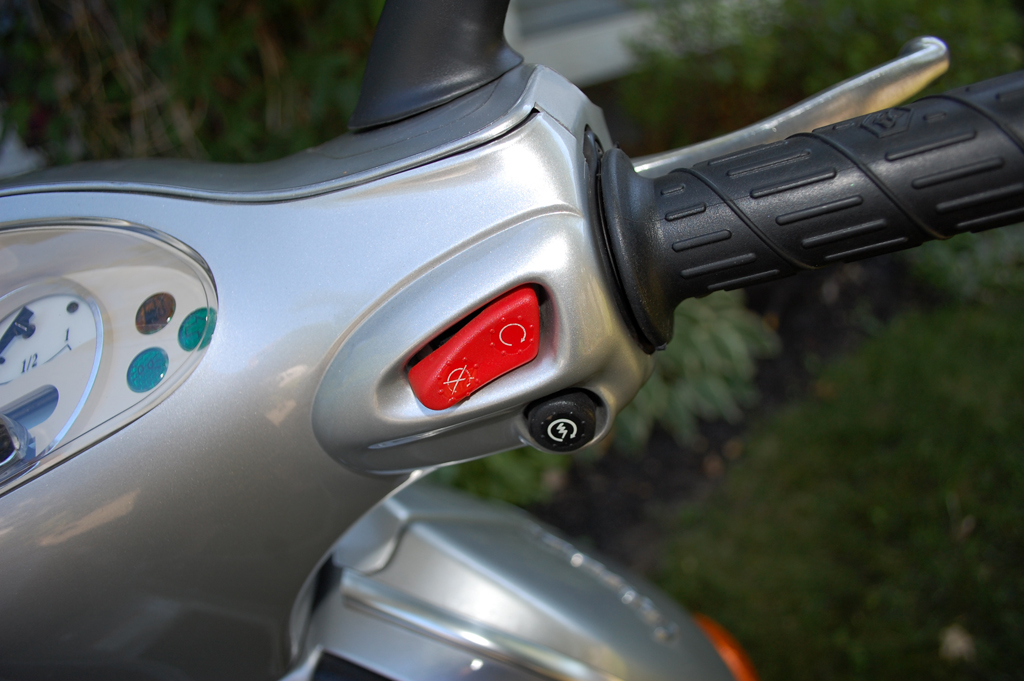
The controls are well laid out and easily accessible. On the left is the rear brake lever, the lights and turn signal switches, and the horn button. In the center are all the readouts (speed, fuel, indicator lights). On the right is the front brake lever, the throttle, and the electronic ignition switch. This Vespa can carry two people and has a maximum speed of around 40 MPH. We should have a FirstUse repot on this scooter in a few weeks. In the mean time, we'll be taking a FirstLook at some of the accessories. [Permalink] - Vespa
|
|
|
July 23,2008 (WowUsWednesday) |
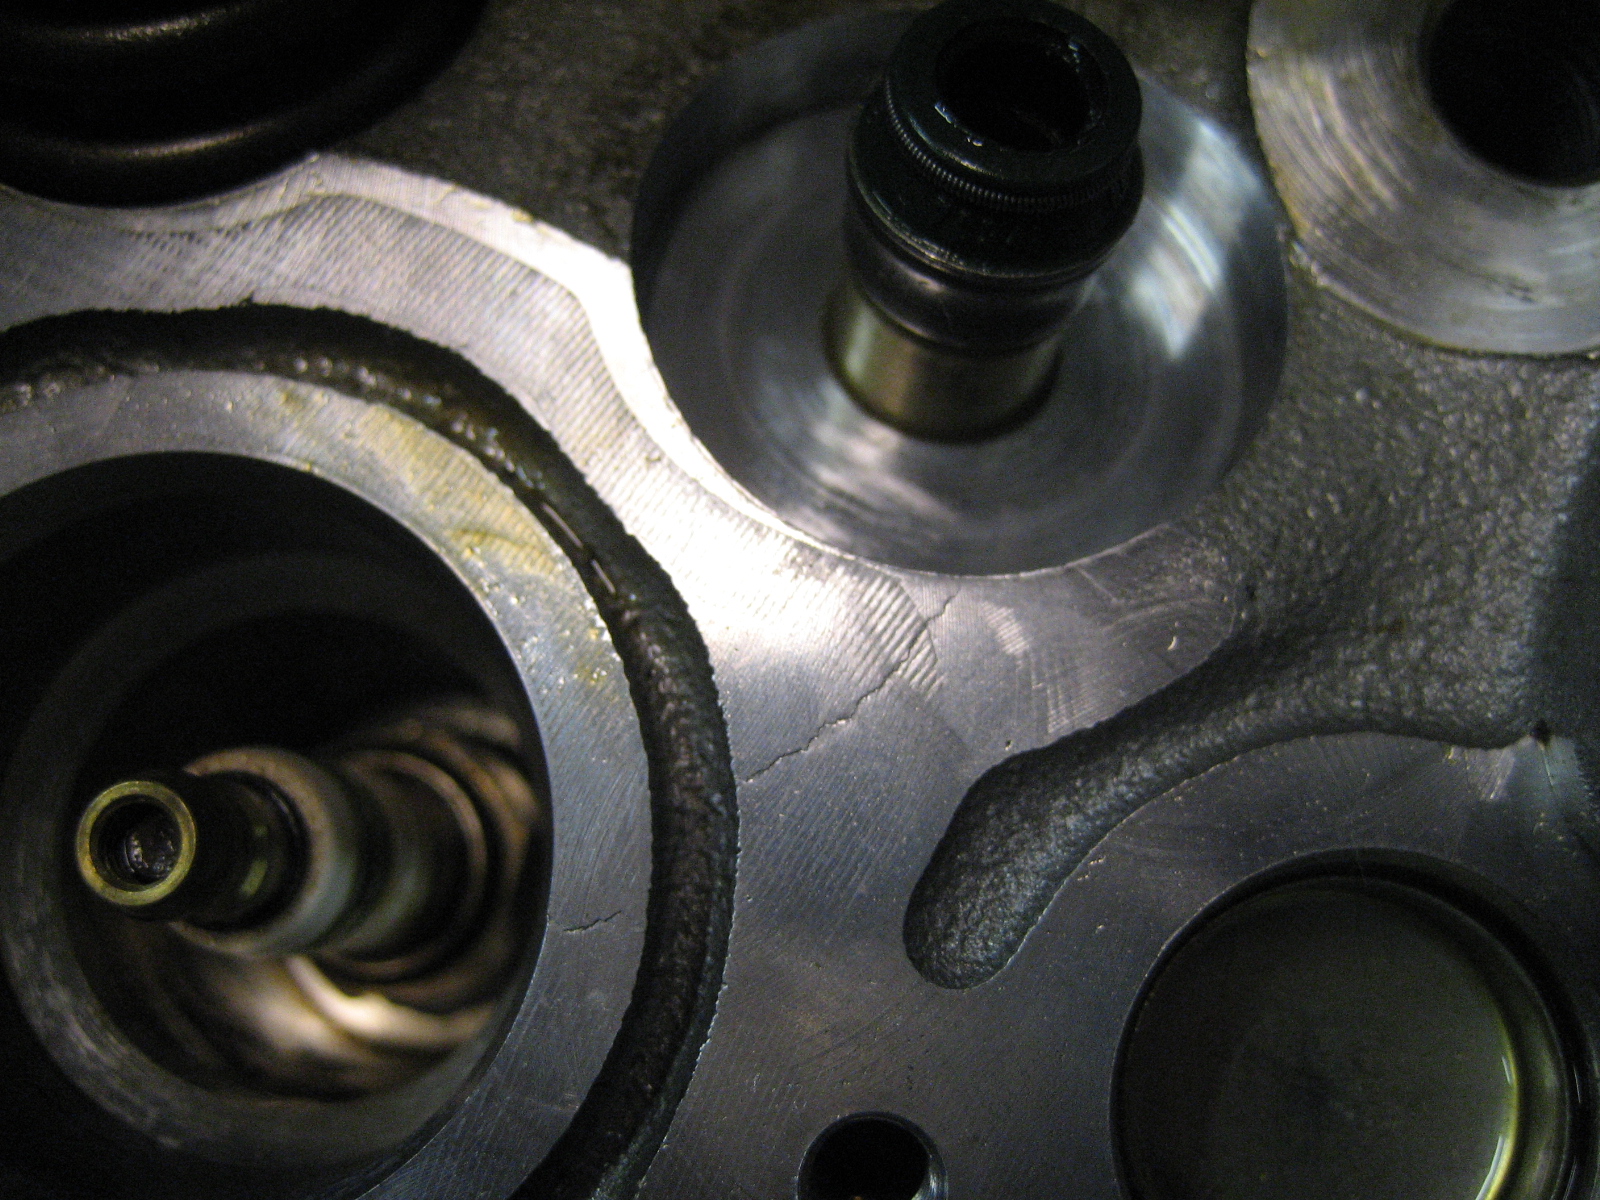
We got a few emails about this guy Glenn who rebuilt the engine of his Porsche Boxster S. He started the project because the cylinder head had developed a crack. Just that accomplishment alone is worthy of a "WowUsWednesday" mention. Not only did he fixed the problem, but the entire disassembly and reassembly process was meticulously documented! Some of the videos are now posted on YouTube.
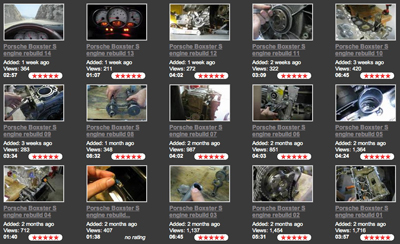
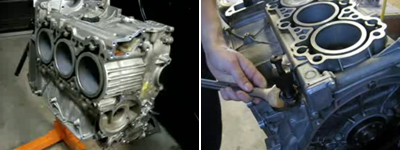

Most of us would pay the $5-7K for the new engine and have a trusted Porsche mechanic do the work, but it is nice to know that even a Boxster engine rebuild is a possible DIY project for somebody :-) Glenn is considering putting together a detailed manual for those interested in tackling a project of this size. Contact him for more info. [Permalink]- Wan Chi Lau
|
|
|
July 14,2008 (GreenMobileMonday) |
A seven mile commute should not take forty minutes. However, the daily trek for one of our editors is, and we have decided to do something about it. We have decided to investigate the various scooter offerings (gas vs electric, Vespa vs newcomers) to see if we can find a better alternative to the car for intra-city jaunts.

We will, of course, be looking at various accessories to keep our scooter from "wandering away" when we are not looking. Our interns have already found some gear from Kryptonite and Xena which look promising. We'll have a more detailed look at both locks next month. If you have others you think we should check out, drop us a line. We'll be happy to follow-up and post our findings here.
Some folks will be heading to Newport R.I. this coming weekend to take a look at the Vectrix electric scooter. Wow, it would be cool if we could set up a solar array to recharge the bike and be totally... ok, maybe that is not really all that realistic. In any case, we'll be posting our bike findings at the beginning of Fall. [Permalink] - Wan Chi Lau
|
|
|
July 3,2008 (TurnaroundThursday) |
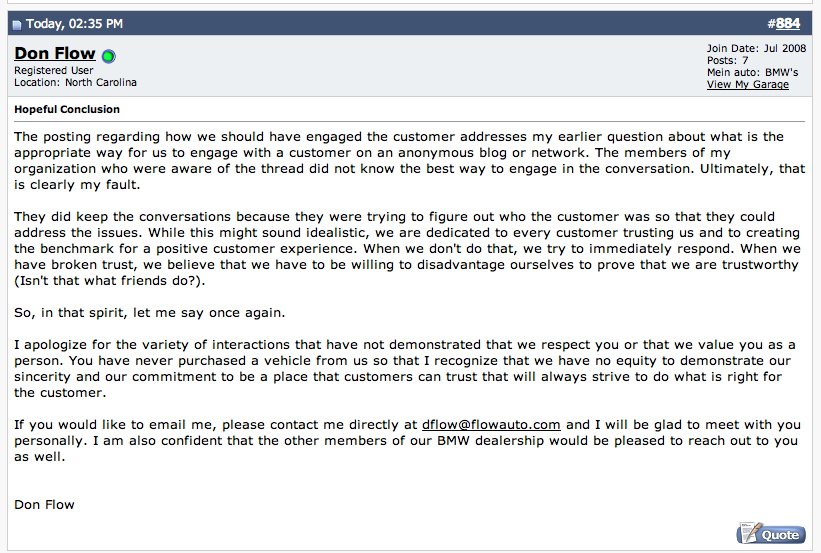
One of our RainyDayGarage readers sent us this link yesterday to a heated thread on the BimmerFest discussion board. We have been known to poke fun at Porsche dealers in the past. However, this story got some of the RainyDayGarage folks into a tizzy after reading it. They said we MUST do a post about the outrageous behavior of this BMW dealership.

In the thread, many different opinions were expressed by the members of that forum. Much of it vilifying Flow BMW for the "stazi-like" behavior of the manager. However, as we followed the conversation to post #877, Don Flow, the owner of Flow BMW dealership, personally posted a response to all of the rancor up to that point.
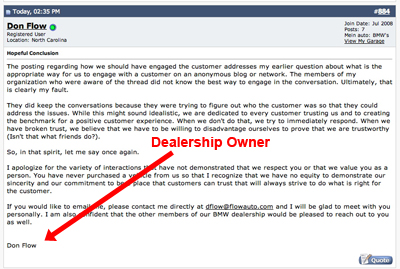
Mr. Flow then followed up in post #884 to further clarify his position regarding the incident. We thought the two responses really changed the tone of the entire discussion. We felt that he so well handled the incident, we decided to make his response the point of today's post. The point being sometimes an apology can go a long way in turning things around. Nicely done Don! Have a great July 4th everyone. [Permalink] - Wan Chi Lau
|
June 28,2008 (WeekendEdition) |
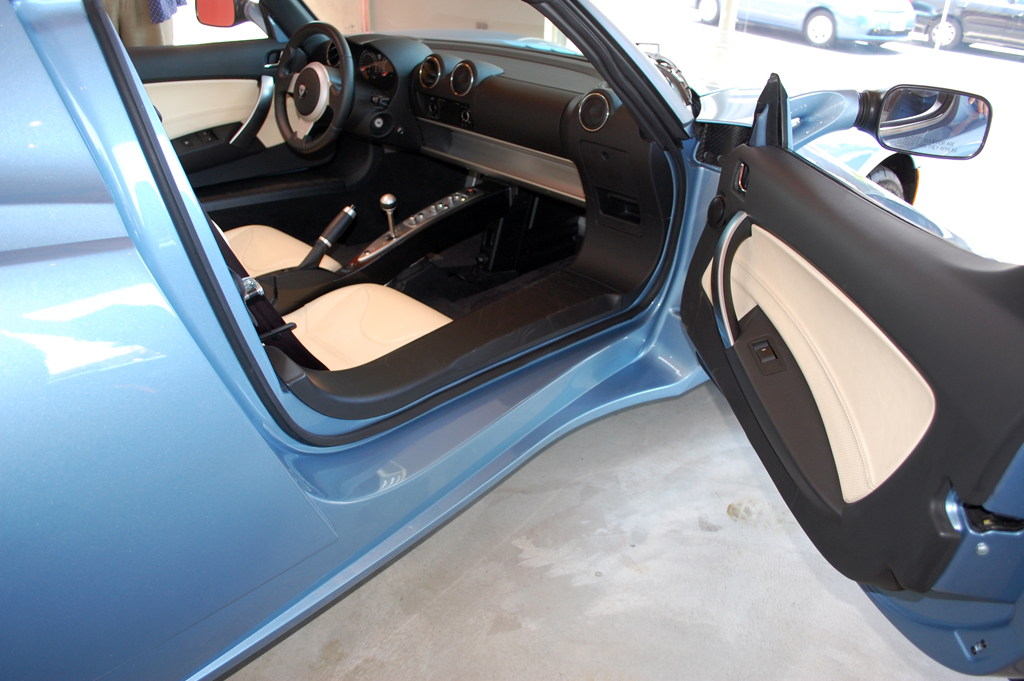
Our recent brush with the all electric Tesla Roadster got us thinking if we were to get something practical (ie: <$100K) for commuting around Boston, what would we get? Would it be something such as a Vespa? Or perhaps something less well tested, but potentially more forward thinking?
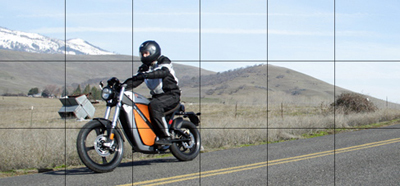
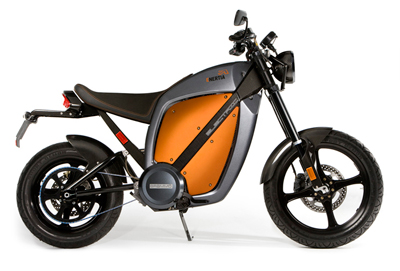
Perhaps something like this carbon fiber Enertia. The Enertia is light weight (280 lbs) all electric motorcycle with a cruising range of about 45 miles. Acceleration is a peppy 0-30 mph in under 5 sec.
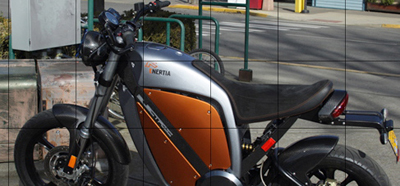
Even though their PR shots shows it cruising out in the country side, its current range is really sufficient only for city dwellers zipping around town. The other limitation to the Enertia is it is a single rider bike. Half the fun of riding one of these is to be able to bring a friend along. For that, one will have to consider the Vectrix.
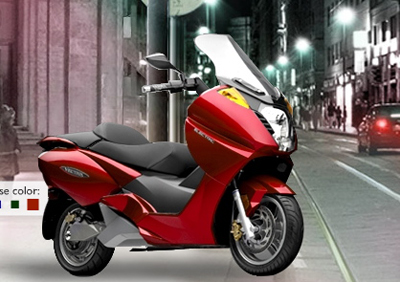
The Vectric is quite a bit bigger and heavier (510 lbs) compared to the Enertia, but the Vectric will carry two and still be able to zip around at reasonable speeds. The range (35 -55 miles) is about the same as the Enertia, but it may be a lot more practical. Since the Vectrix Flagship Store is in Rhode Island, we will definitely go and check this bike out in person.

These electric bikes are definitely a lot more justifiable than the Tesla, but they are easily twice as expensive as the tried and true Vespa. There are still a lot of open questions regarding the actual cost of ownership, battery life, and service. Hopefully, we'll get them answered during our visit. Drop us a note if you have a question in mind. [Permalink] - Wan Chi Lau
|
June 27,2008 (FotoFriday) |
We had always wondered how they got this shot of the Porsche zooming into the future. Some here thought it was Photoshopped, but other thought it was done by zooming during the exposure. Tricky to do either way.

When we were at Tesla Motors last week, we thought we would take advantage of the opportunity and try to do something similar with the Tesla Roadster.


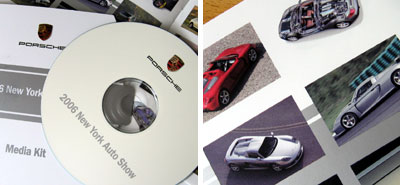
Any idea how we did it? If you do, drop us a note with the subject line "It's a Tesla, baby!" In the body of the email, tell us what we used to create the effect. The prize is a CD of high rez images from Porsche. Contest ends at the end of June. If you need a hint, you have not been reading RainyDayMagazine consistently this month... yes, that was a hint :-) [Permalink] - Wan Chi Lau
|
|
June 26,2008 (TeslaGalleryThursday) |
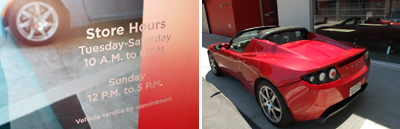
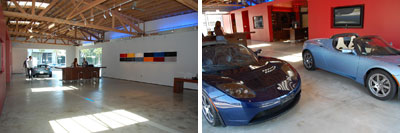
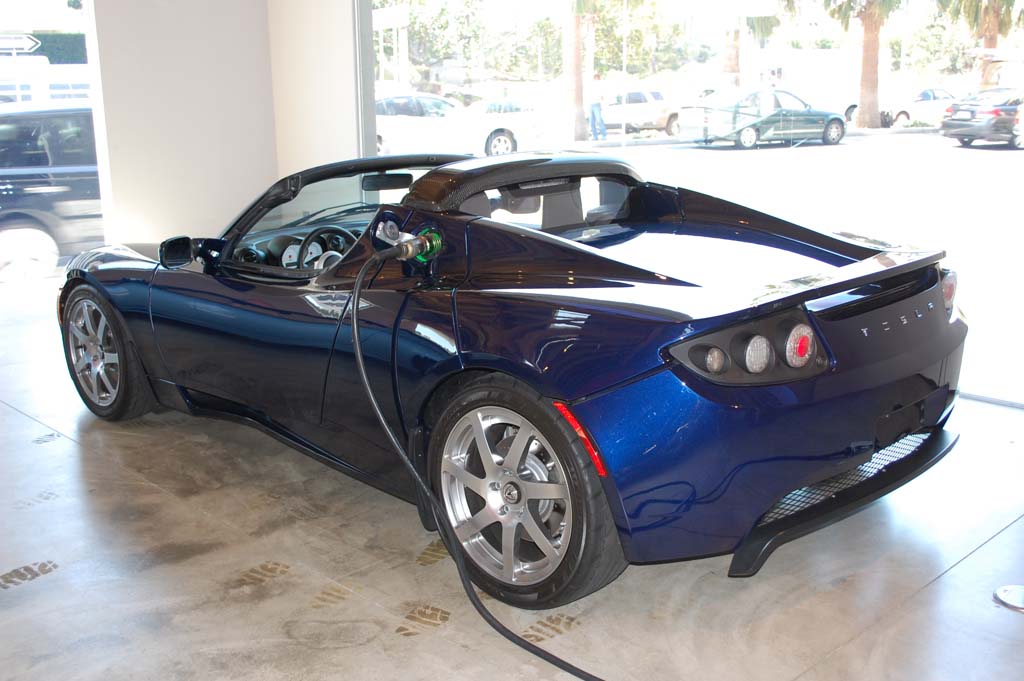
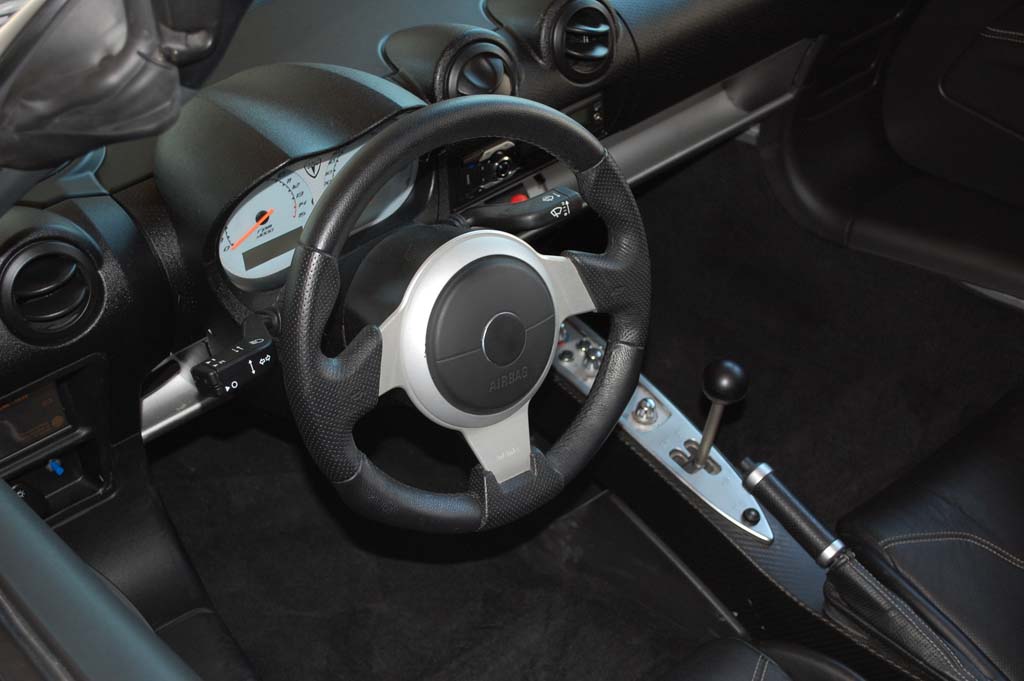
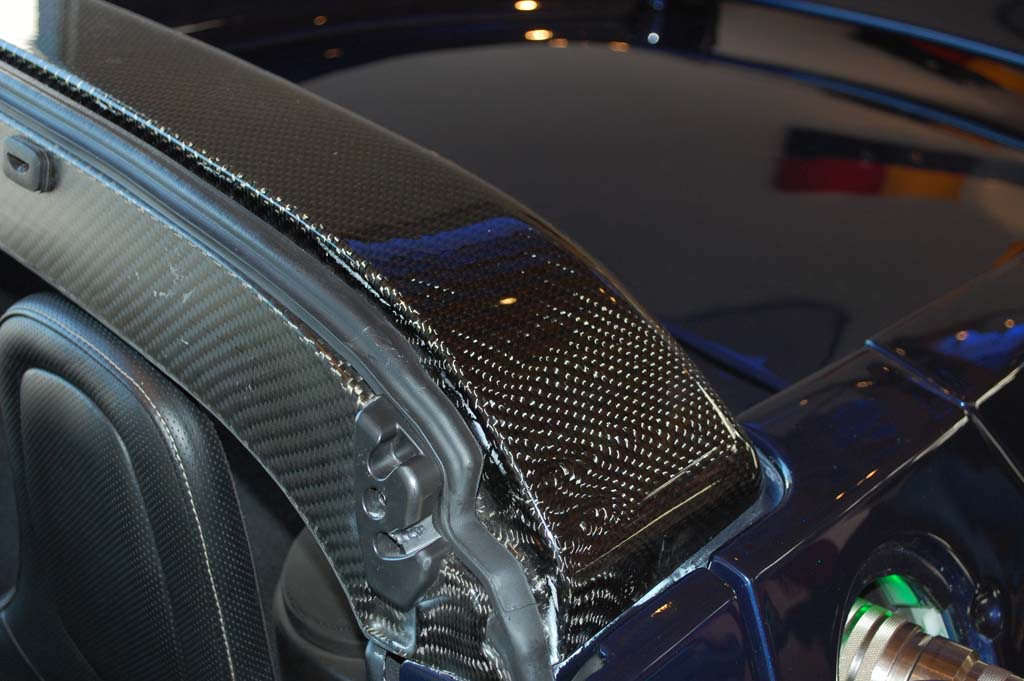
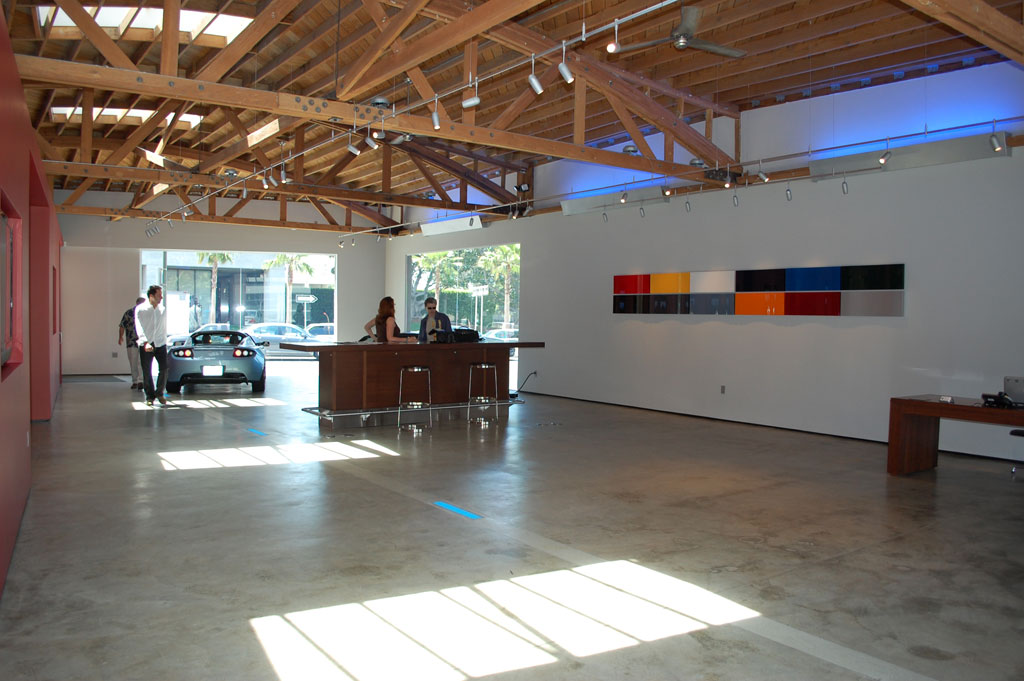
Here is the promised collection of photos from our visit to the Tesla Motors showroom in LA. There were three Tesla roadsters on the floor day we visited. In the collections we tried to select various views of the exterior and interior components. Note the carbon fiber shots!
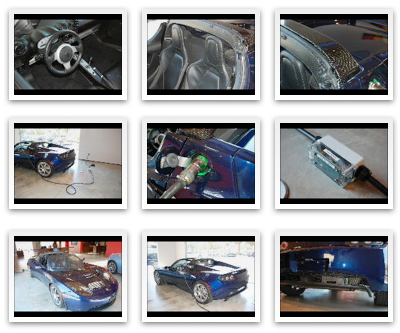
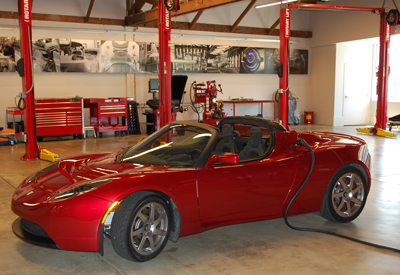
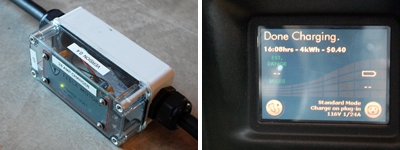
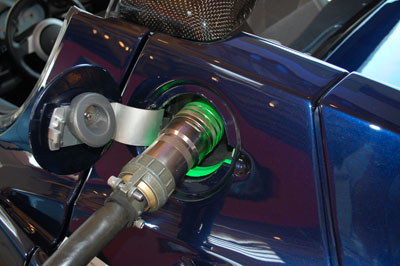
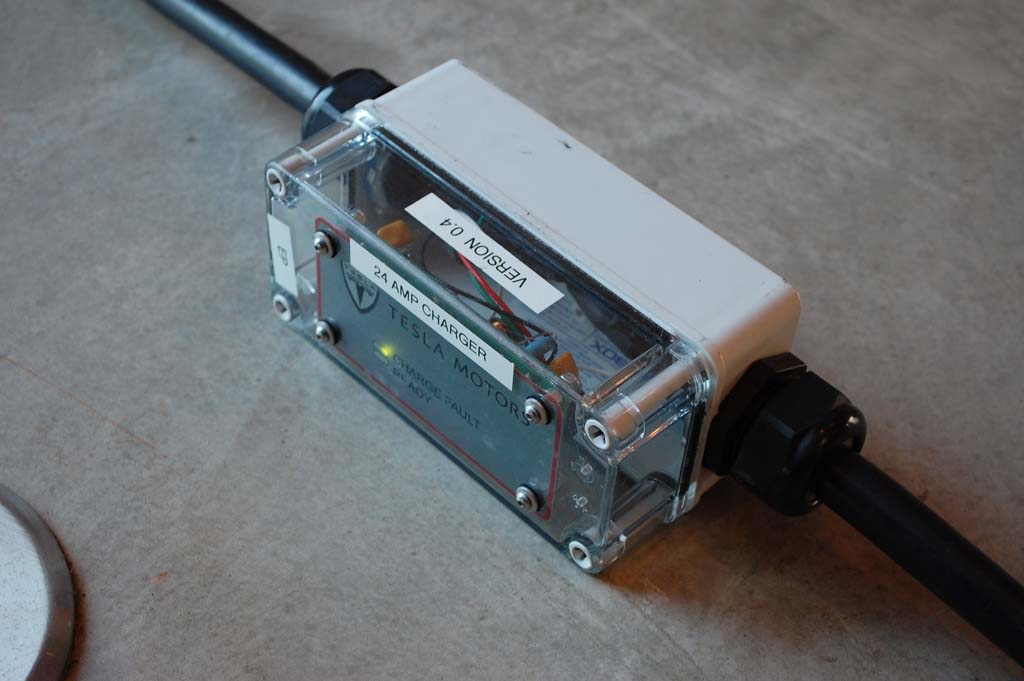
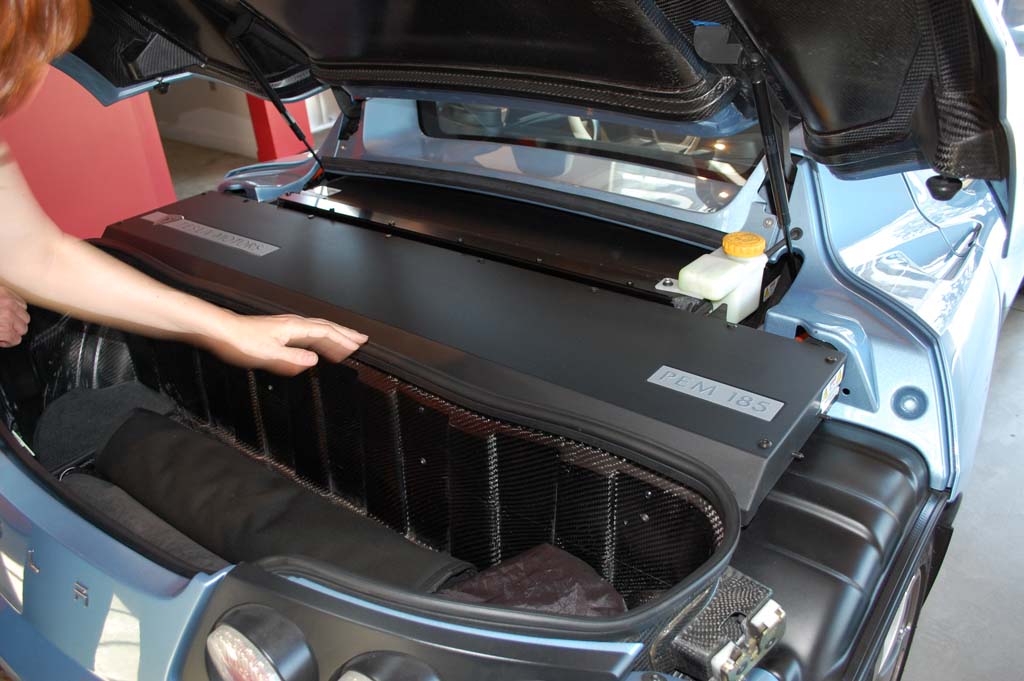
The car is light and very stiff due to the extensive use of carbon fiber through out. The curb weight is under 2700 lbs. Charging is done from a standard AC outlet to a special transformer and cable.
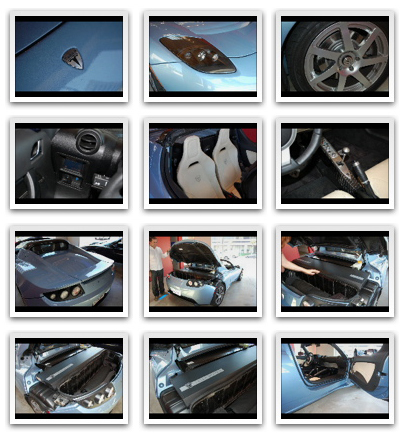
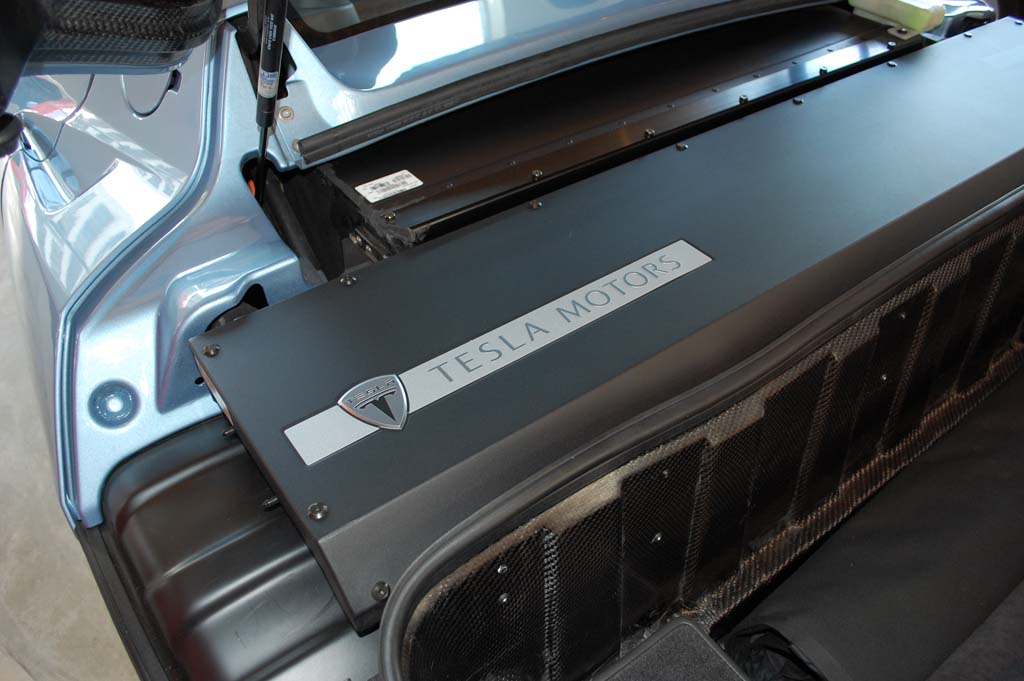
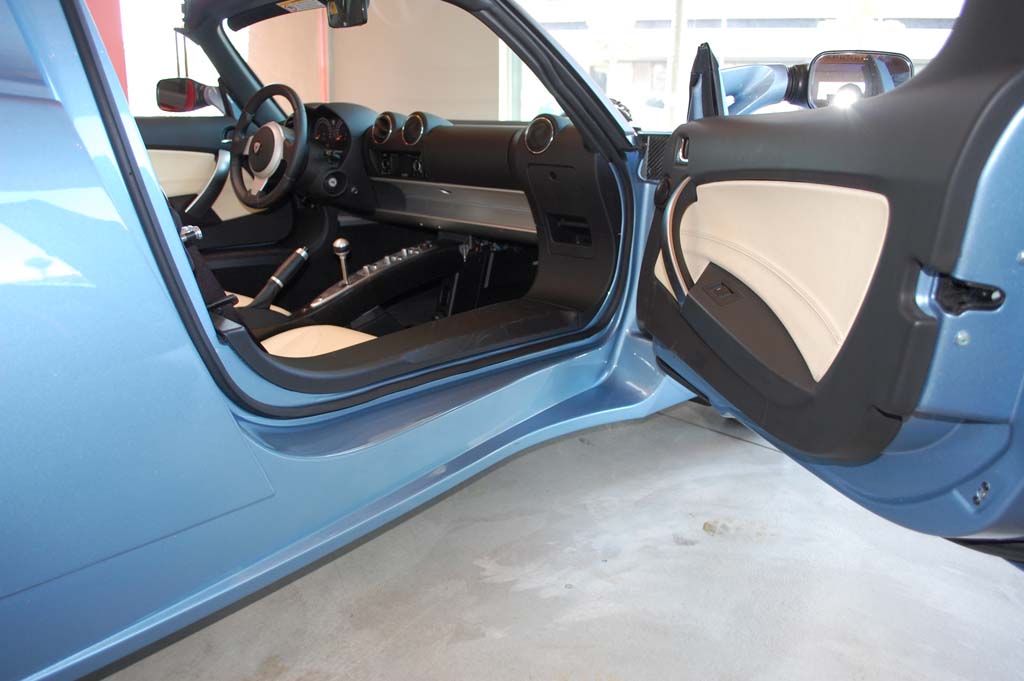
The compartment housing the 7000 Li-ion battery cells is just behind the trunk. The batteries are rated for over 100,000 miles. The carbon fiber trunk has room for the soft top and a bag of golf clubs. Note the high lip on the side of the car. Getting in and out will require a little more flexibility than with a regular sports car.
While this car is probably a lot more practical (if that should even be a point of consideration for a $100K car) in LA than in Boston, we don't care... we want one! You will too once you get a chance to see one up close and personal. If you find yourself in L.A., take the time to drop by the Tesla Motors showroom and check it out for yourself. [Permalink] - Wan Chi Lau
|
|
June 23,2008 (MotorMonday) |
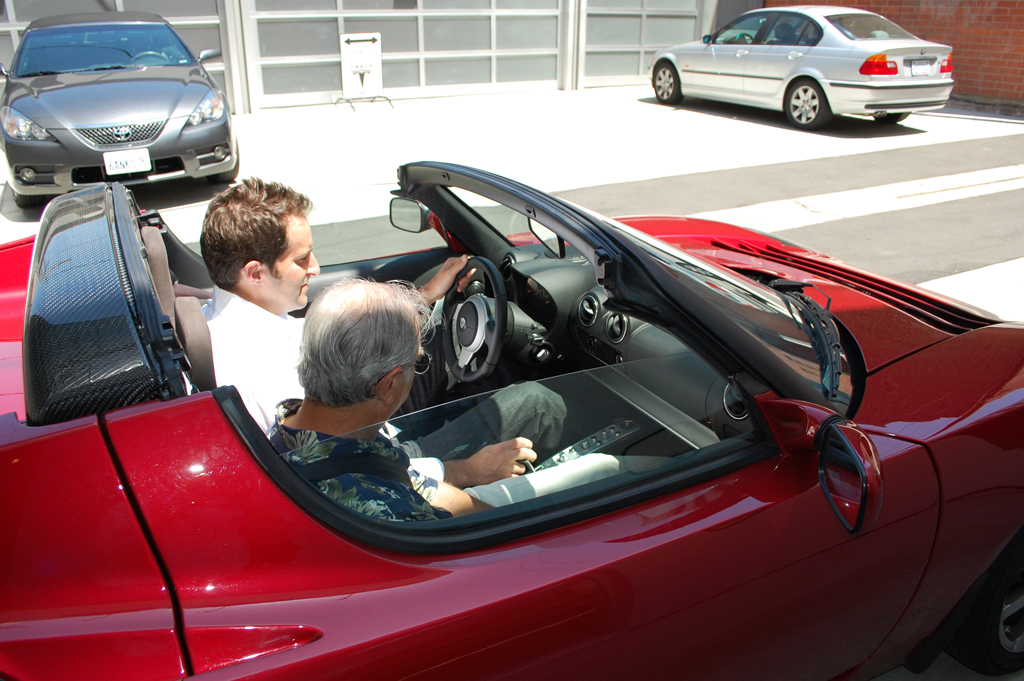
Visiting the Tesla showroom was one of the top LA to-do items on our list. Friday morning was the only gap in our schedule so we headed down and hoped the place was not to busy for us to wander around and get some shots.
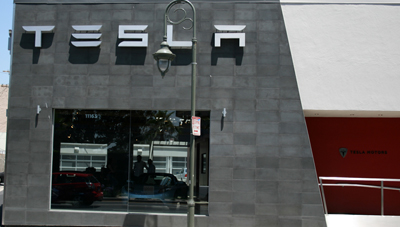
Fortunately for us, the showroom was not too crowded. We pretty much were allowed to shoot undisturbed for almost an hour. The images are being sorted now and we will have a gallery up soon.
Tom O'Leary, the general manager, was about to take someone out for a test drive when we arrived. We took the opportunity and grabbed a few shots of the car starting up and pulling away.

Everyone says the roadster is completely quiet when running and drives without making a sound. However, you don't really realize how odd and awesome it really is until you see (and not hear) this in person. This is the perfect sports car for L.A.
The Tesla Roadster can accelerates from 0-60 in less than 4 seconds. Top speed of the Tesla is 125 mph. Its range is about 220 miles and can be fully recharged in about 3.5 hours.
Tomorrow we will give you a closer look at the interior of the Tesla and talk a bit about the different options available in the 2009 version of this remarkable car. [Permalink] - Wan Chi Lau
|
|
June 20,2008 (FunInLAFriday) |
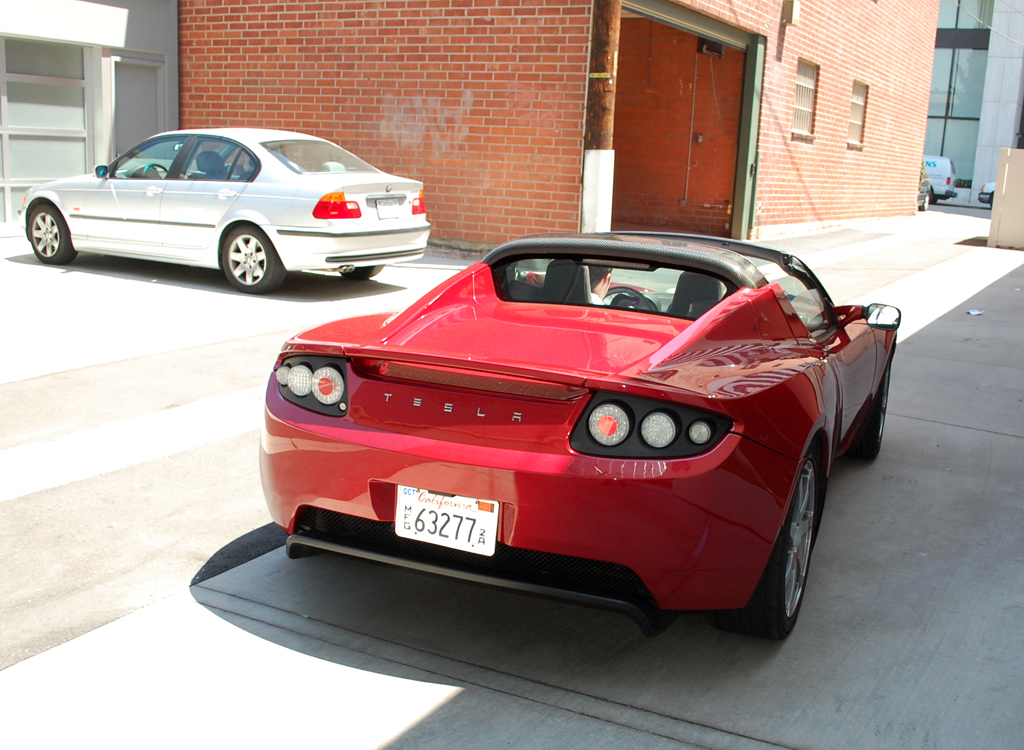
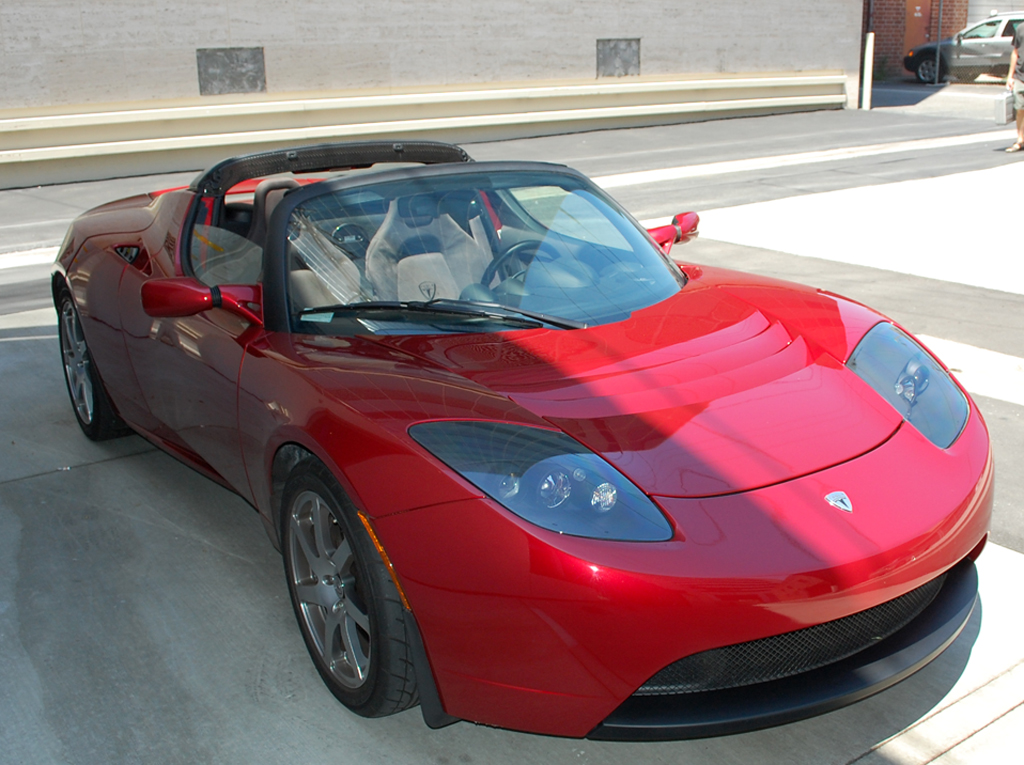
A few of us opted to brave the LA traffic and visited the new Tesla Motors showroom in West L.A. We had been doing periodic updates on the electric Tesla since 2006 and were eager to see one up close and personal. We were not disappointed.
Three of us spent about an hour in the showroom photographing everything Tom O'Leary, the general manager, would let us shoot. We'll post a full write-up of our visit on RainyDayGarage soon. [Permalink] - Wan Chi Lau
|
|
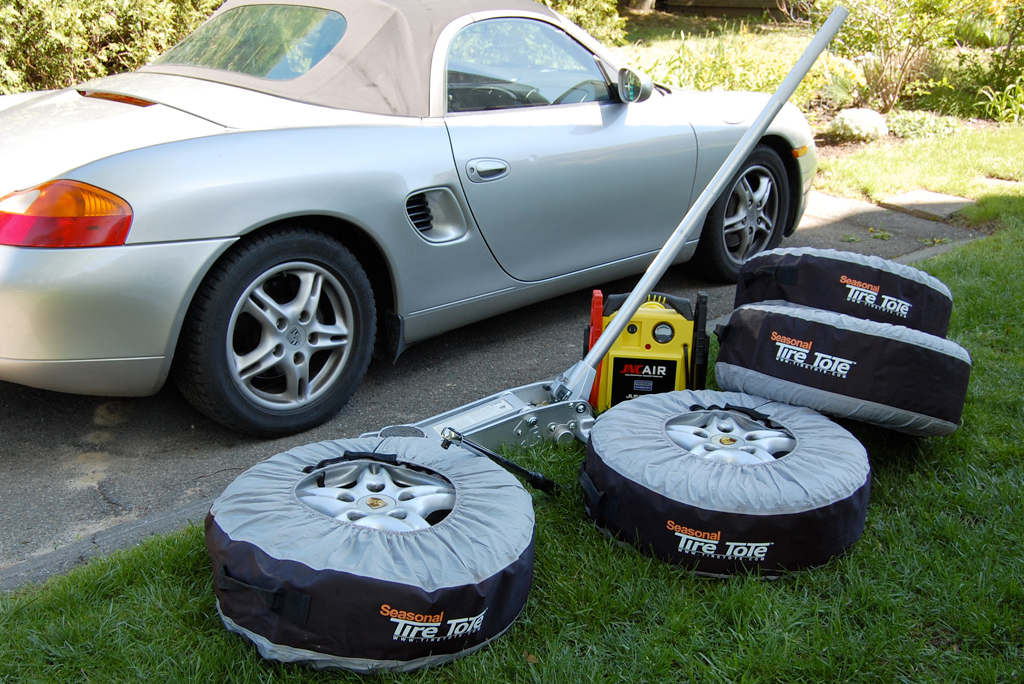
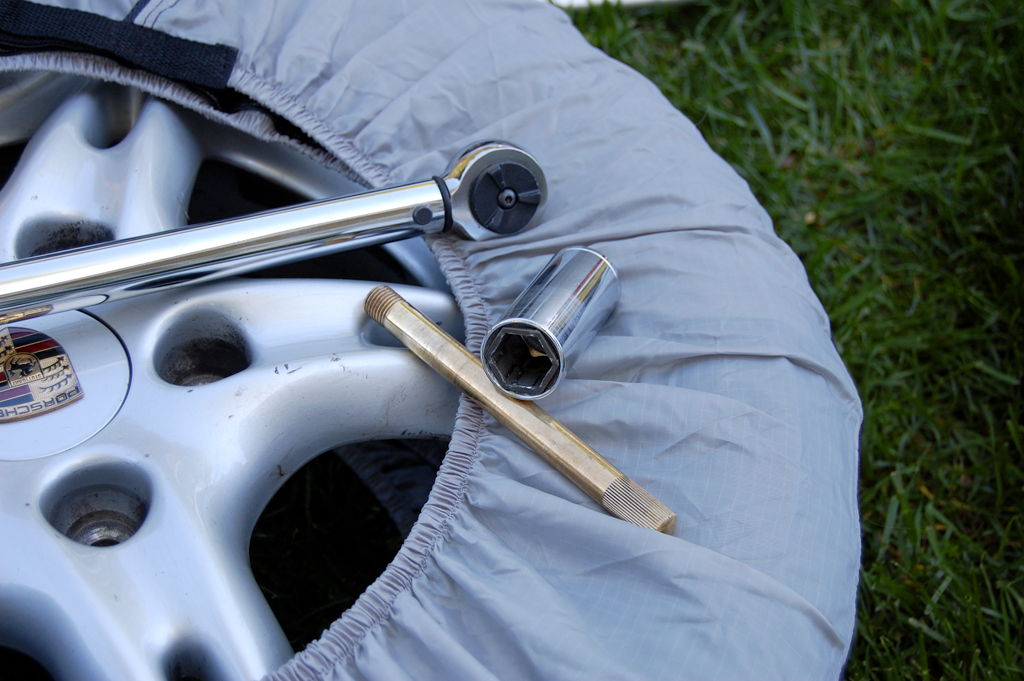
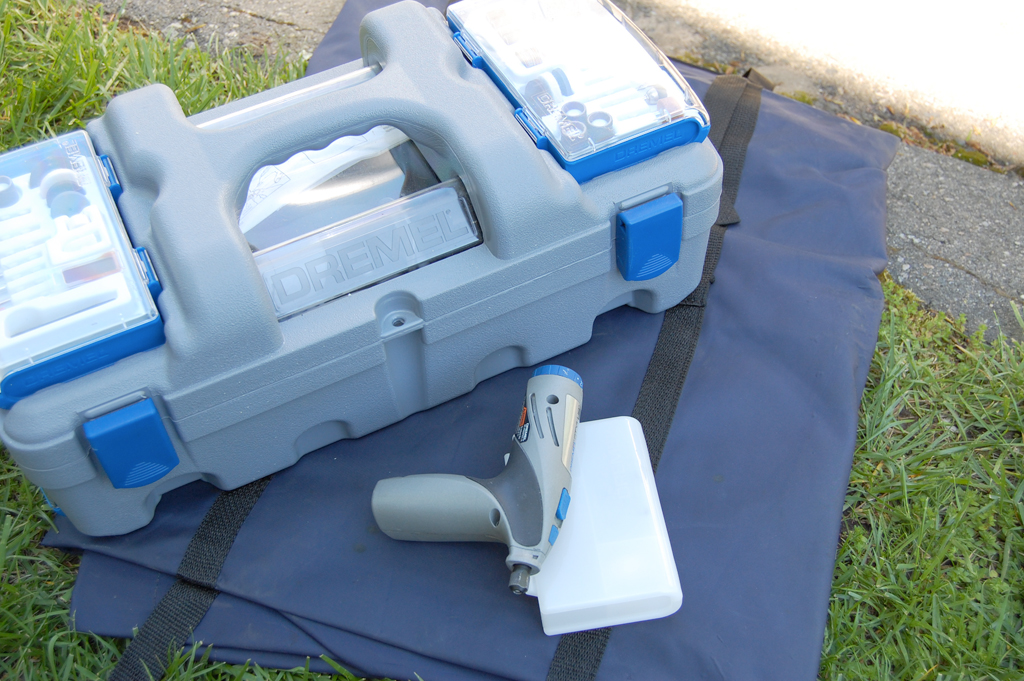
RainyDayGarage reviewed the Kurgo TireTote (FirstLook, FirstUse) last year when we packed up the Summer tires for storage. It is now mid-May and New England's night time temperature has consistently been above 40º. Confidence is high that we will not be getting any more snow, so the Summer tire went back on this past weekend :-)

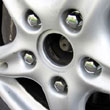
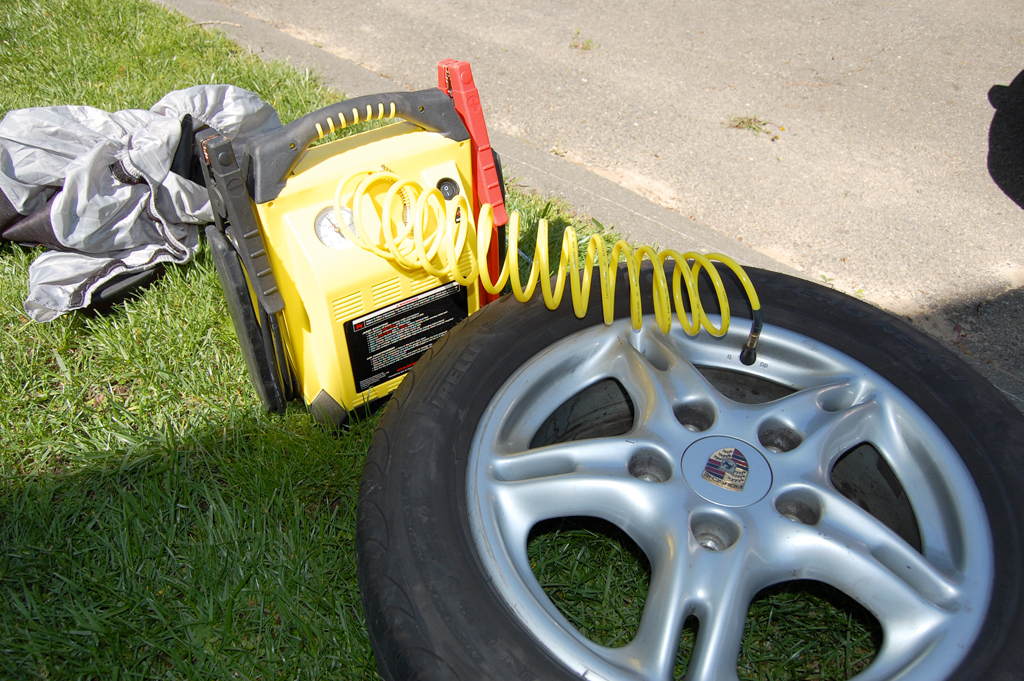
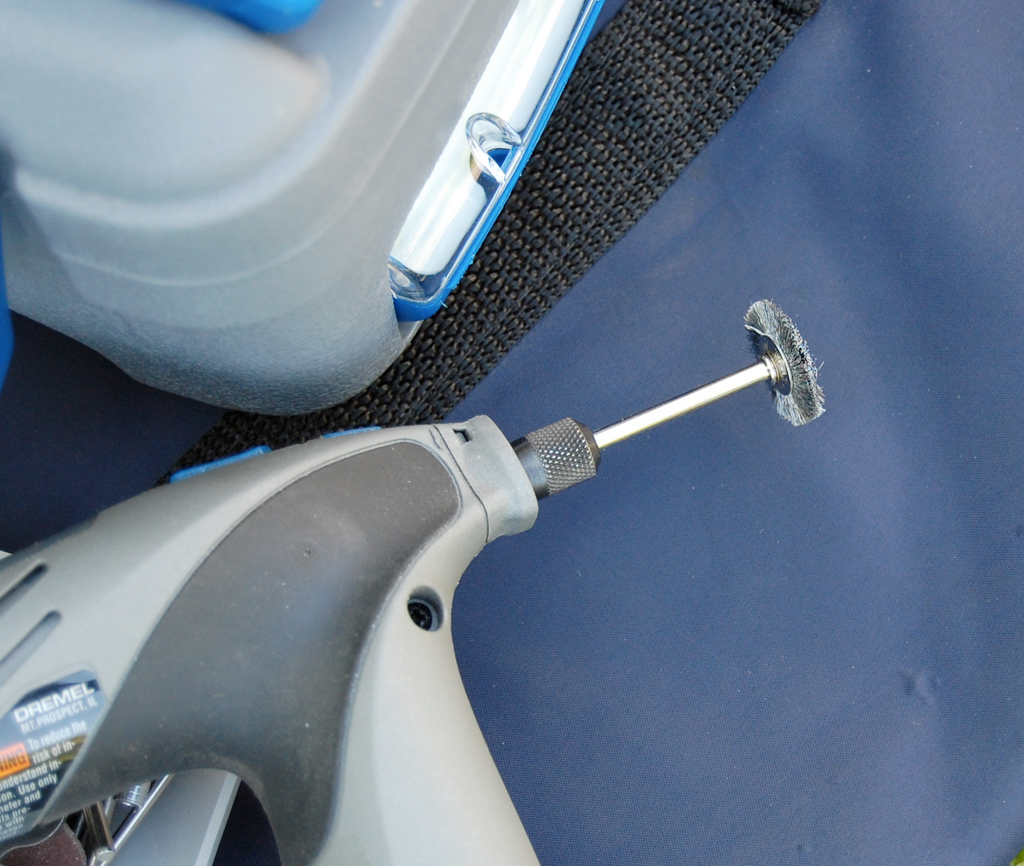
Our usual set of tools for the Winter/Summer tire swap are: torque wrench, soft socket, jack, tire mount rod, air pump, and Dremel tool with a wire brush attachement.
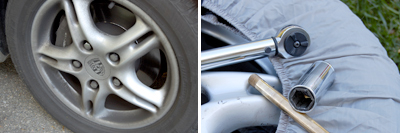
The Summer tires had been in storage in a cool basement since the Fall. Their pressure had dropped a few pounds. The JNC Air got things pumped up (30psi front, 34psi rear) in a hurry.
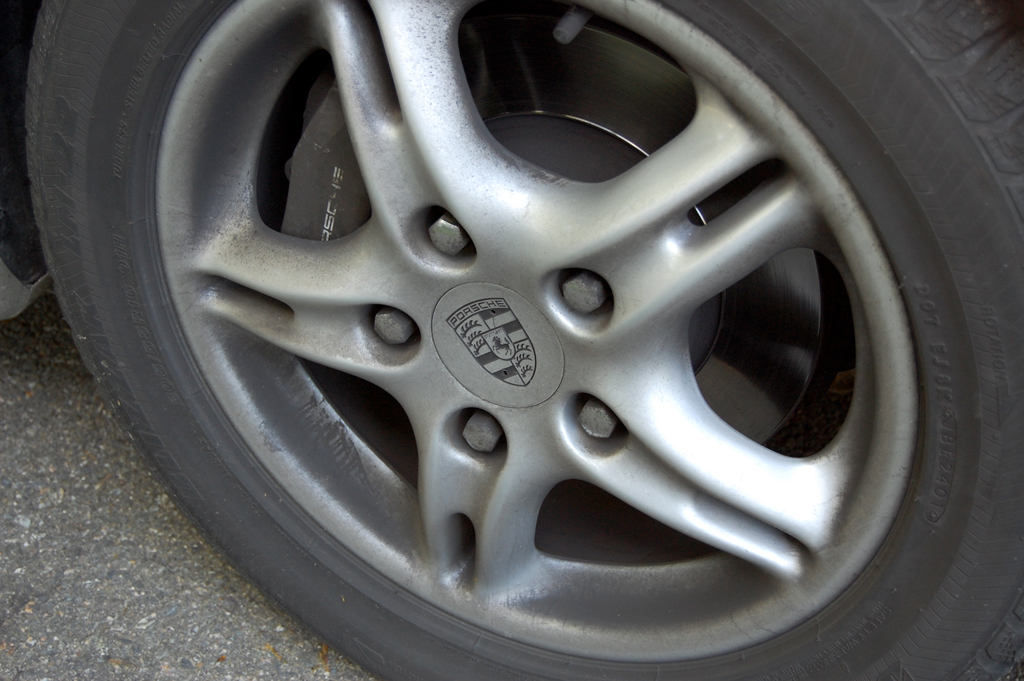
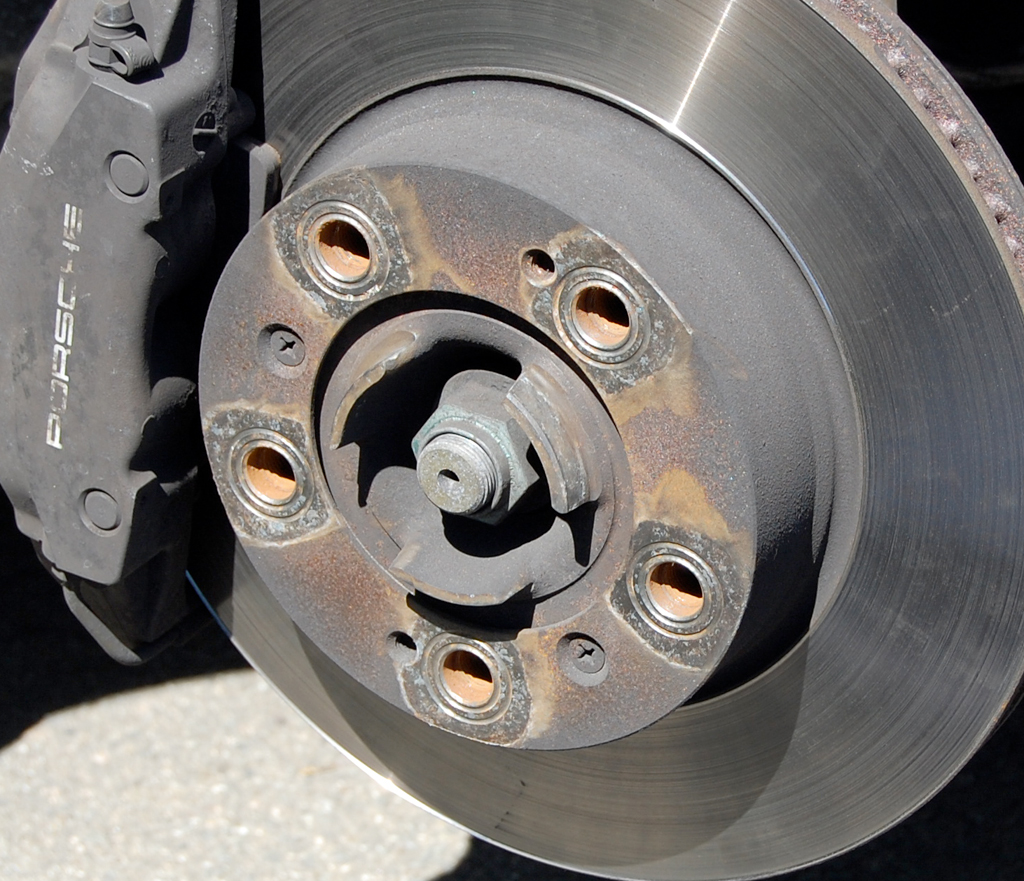
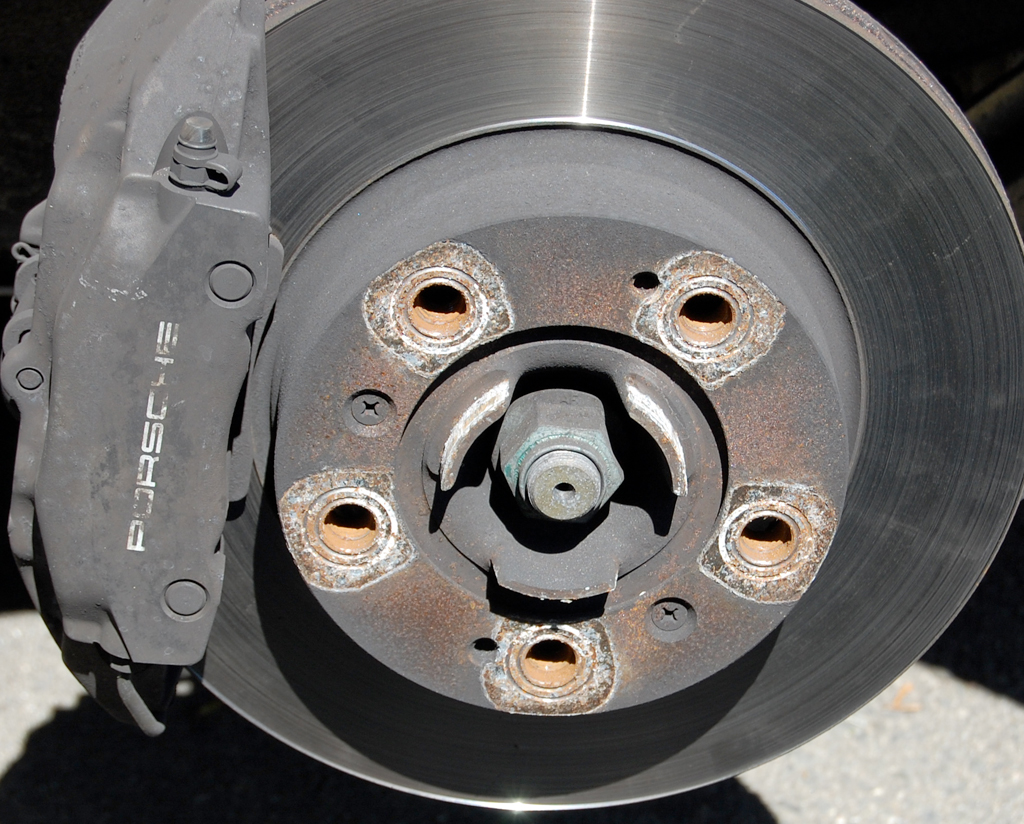
New England winters can be a bit harsh on the car and some cleaning are usually necessary. The Dremel with a wire brush made short work of cleaning off some of the rust and deposits on the rotor and the bolts.
The Boxster had also develope a slight rattle over the Winter in the driver rear quarter. Our intern had thought it was a loose heat shield on the catalytic converter.

It turned out that a plastic shield which ran underneath the length of the rear had cracked. Buffy said she'll figure out a way to secure it to the frame so it doesn't vibrate by next weekend.
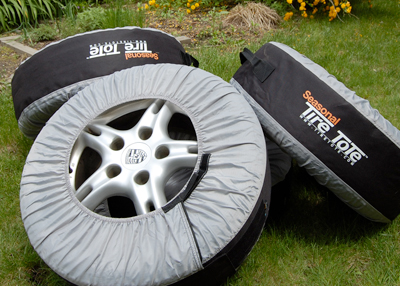
The TireTotes definitely made the process of hauling the tires around SO MUCH easier. If you are "old school" like us and like to use a different set of tires for Summer and Winter, make the process a bit easier and get yourselves a set of these TireTotes! [Permalink] - Wan Chi Lau
|
|
|
|
|
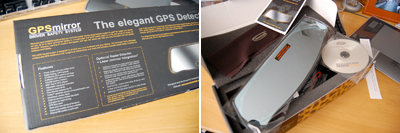
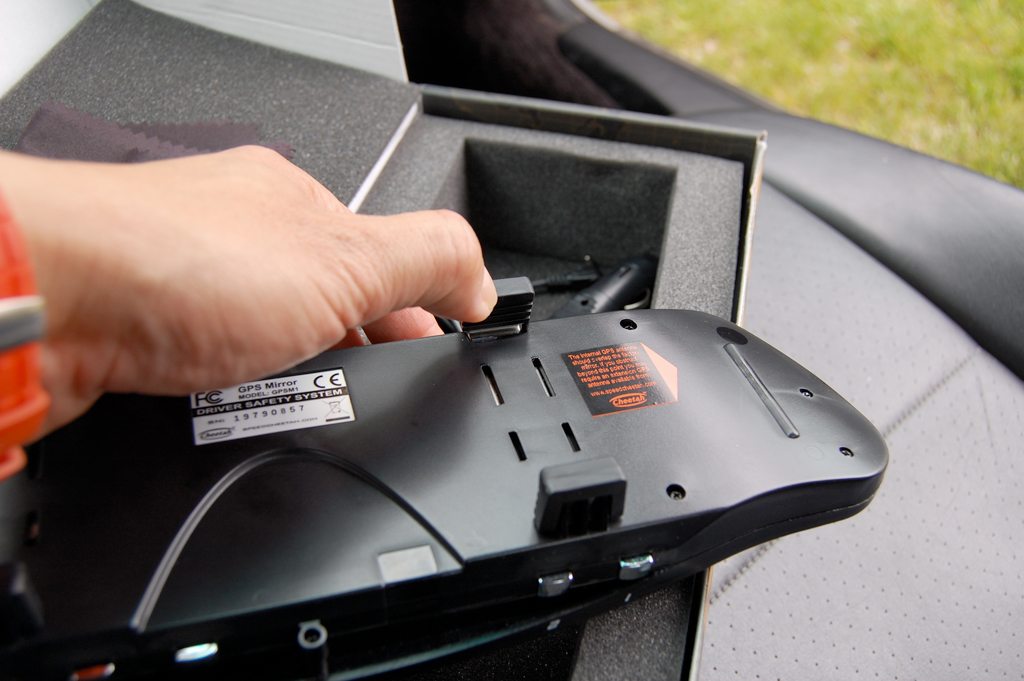
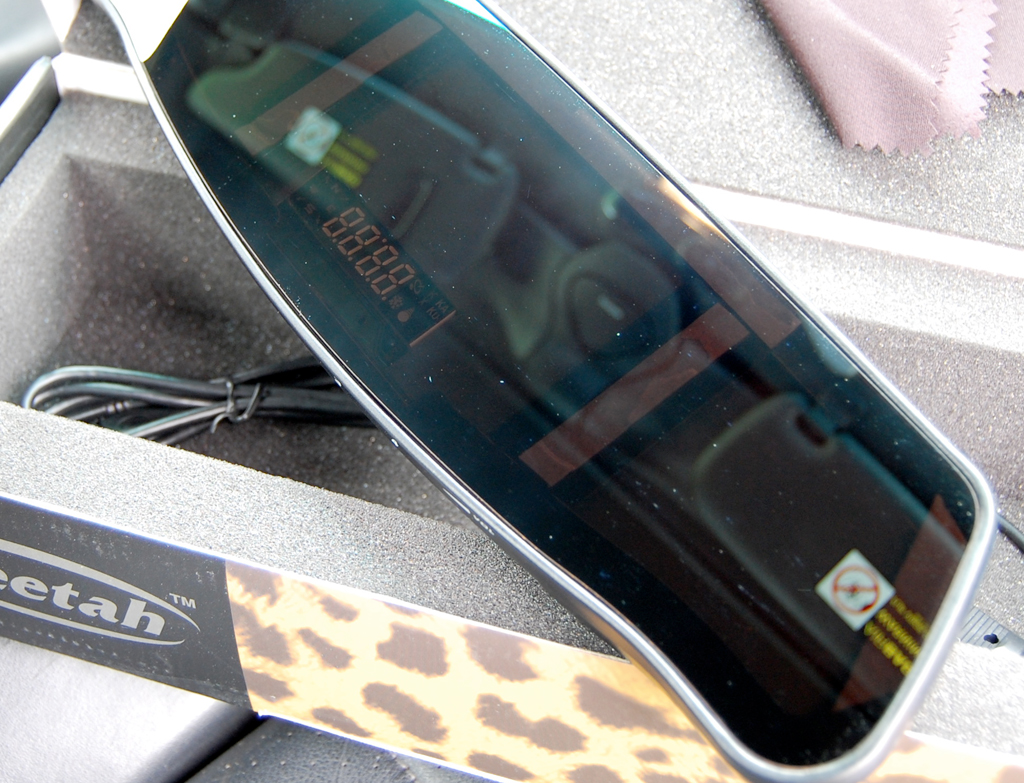
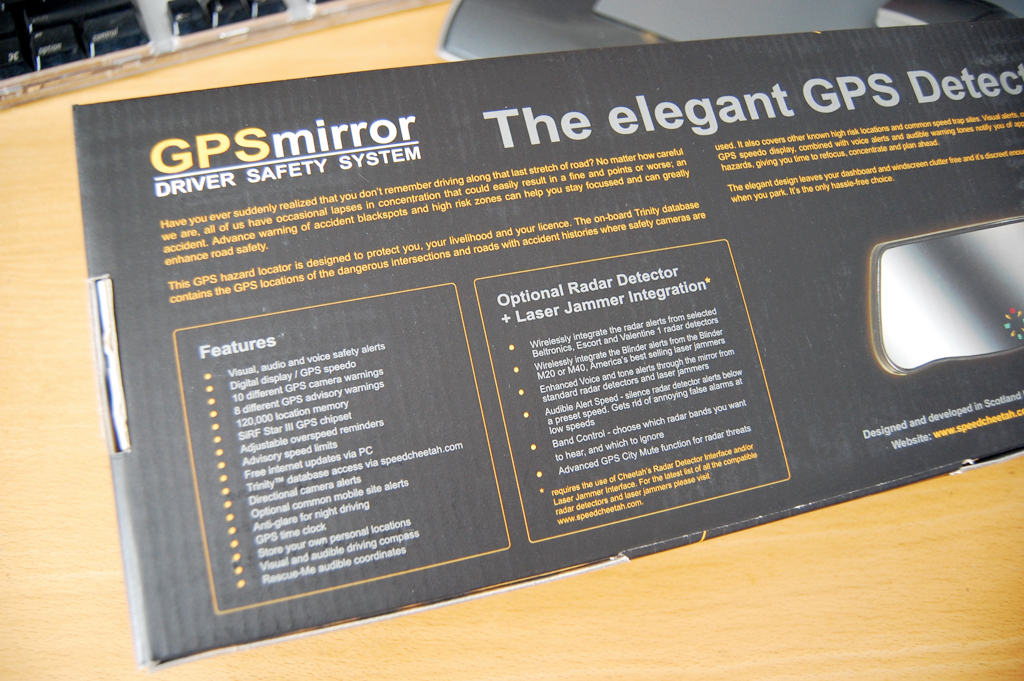
The Cheetah GPSMirror is an interesting device. It will not tell you how to get from point A to point B, it will not help you steer around slow traffic, and it will not be much help if you are lost. So what good is it? It will alert you to every red-light camera in your area. More importantly, it will alert you to red-light cameras when you are travelling in unfamiliar territory.

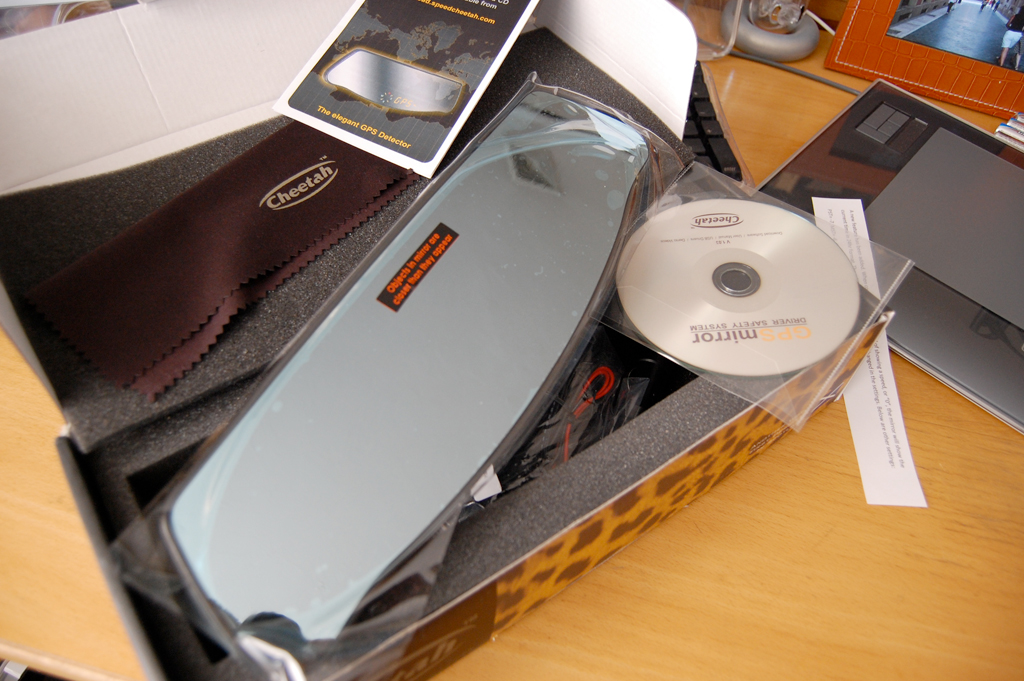
Getting the GPSMirror up and running is a simple task. The unit is loaded with the necessary data and ready to go right out of the box. Today, we are going to show how to install one in about 30 minutes with no tools.
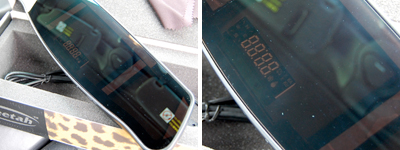
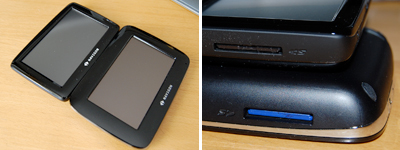
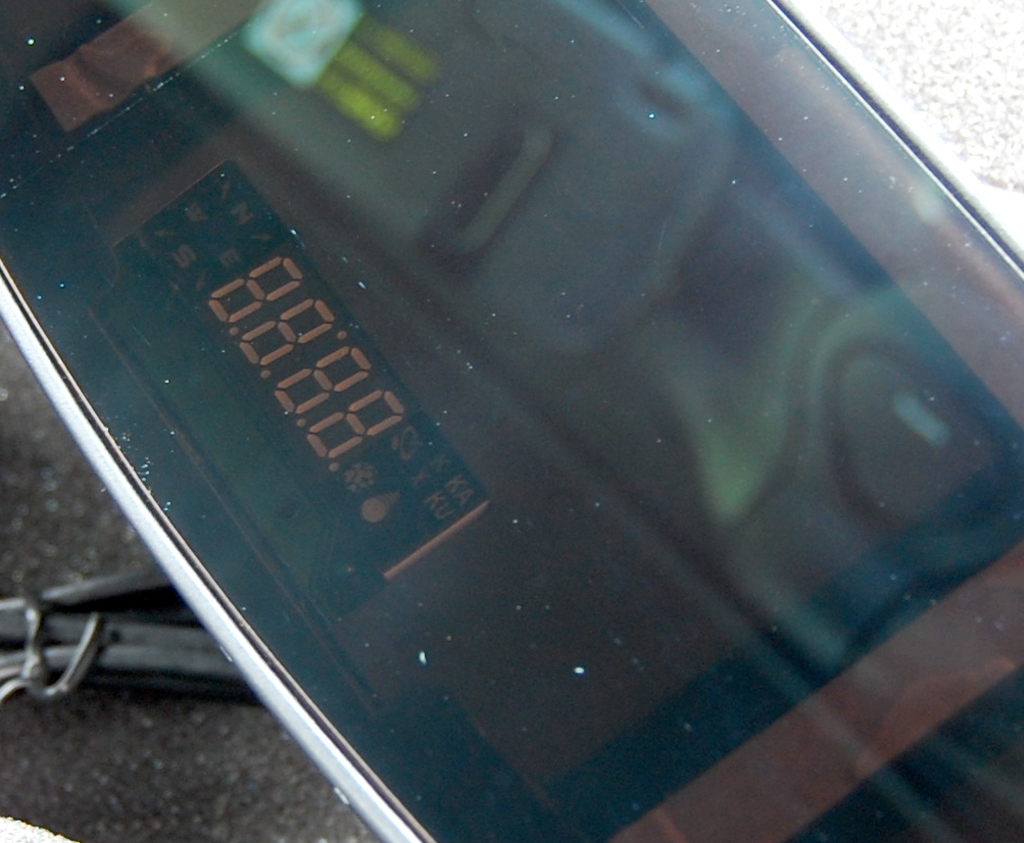
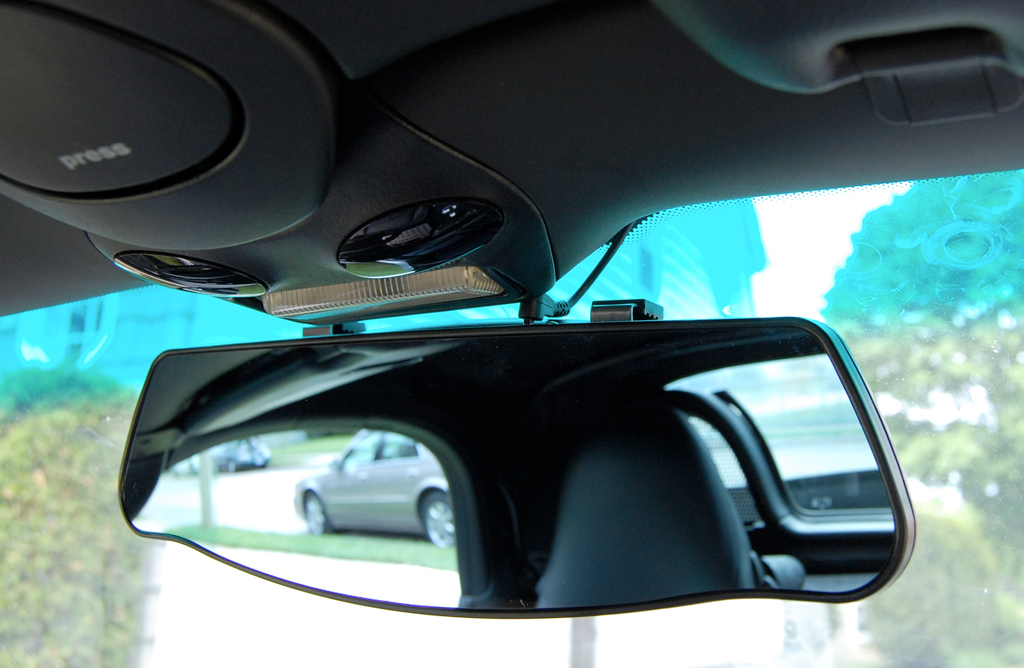
The mirror/GPS/LED readouts are all integrated into one unit. You can just make out the electronics underneath the mirror if tilted and viewed in the right light.
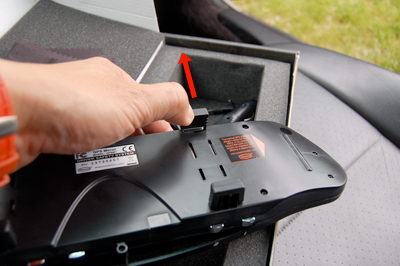
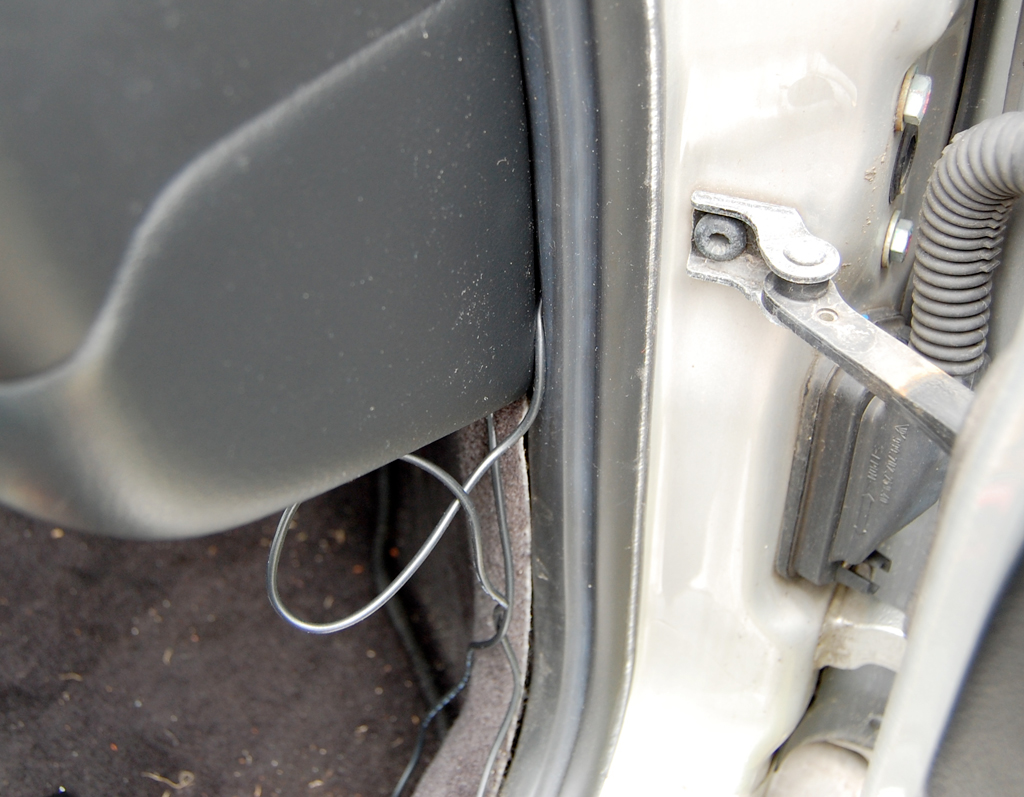
The GPS Mirror will likely be quite a bit longer than most OEM mirrors and is mounted over the OEM mirror with four self-adjusting clips. The power plug is attached to a long cord which will be long enough to run from the cigarette lighter outlet to the mirror.

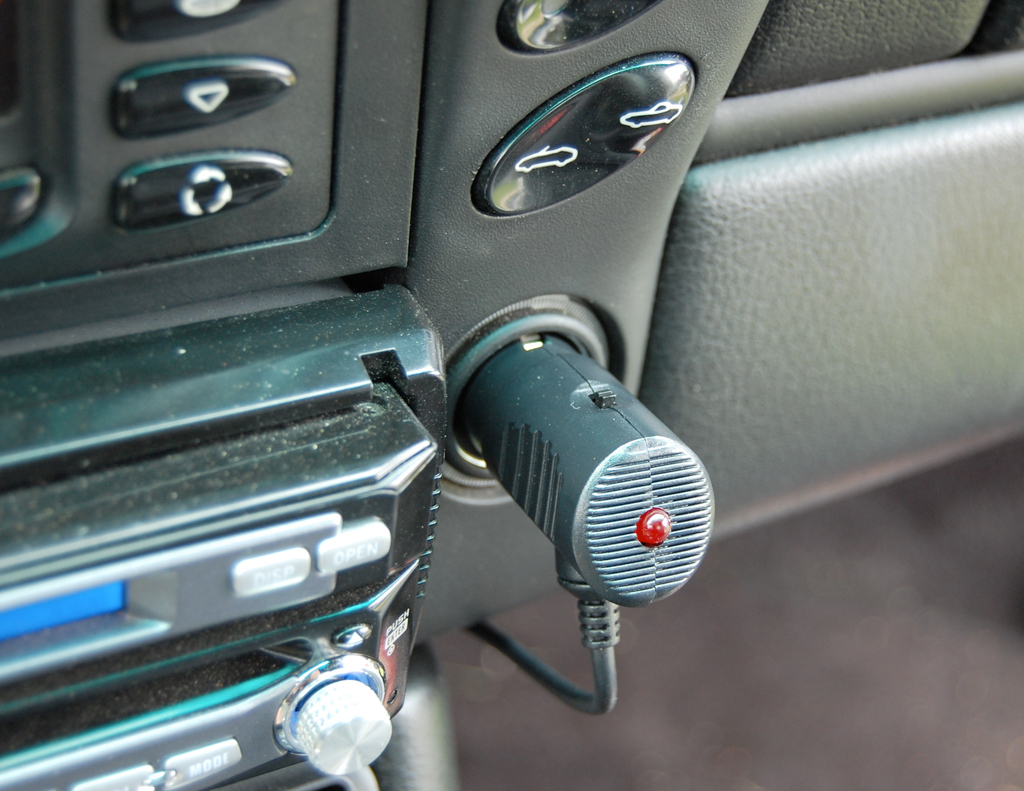
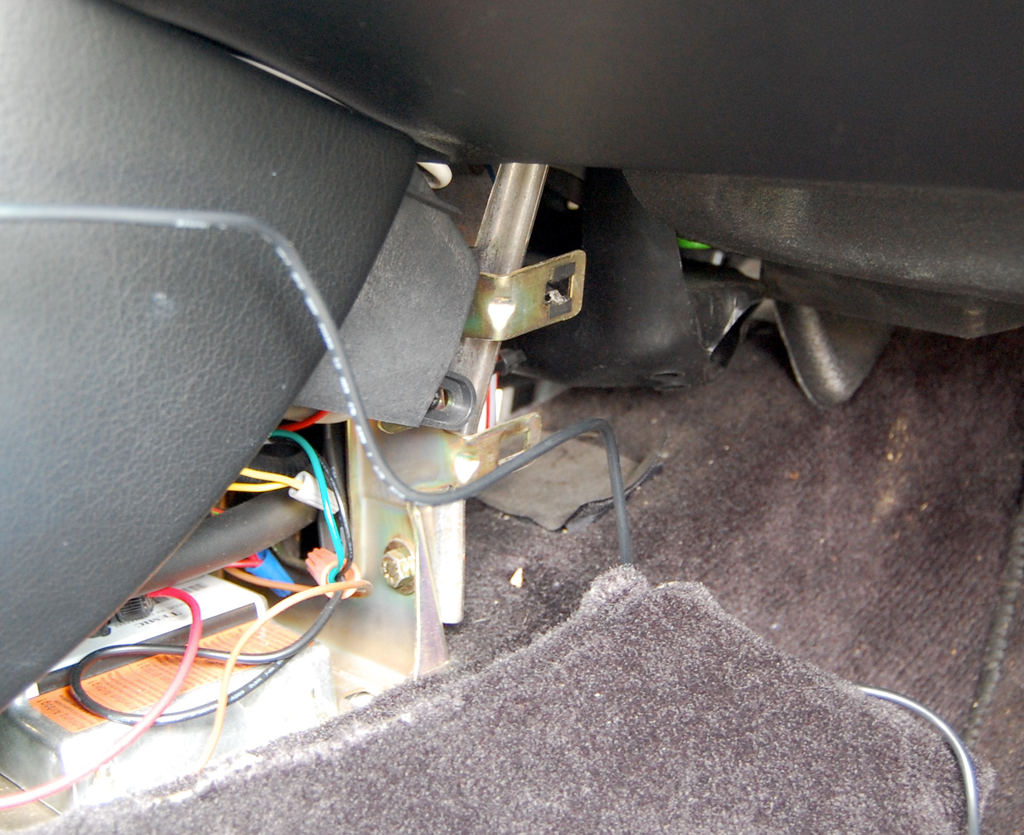
Fitting the cord around the dash is a simple matter of tucking it into various gaps and crevices along the sides and trim. Just remember to start the tucking at the mirror end. Otherwise you will end up with excess cord at the end with no place to hide them :-)

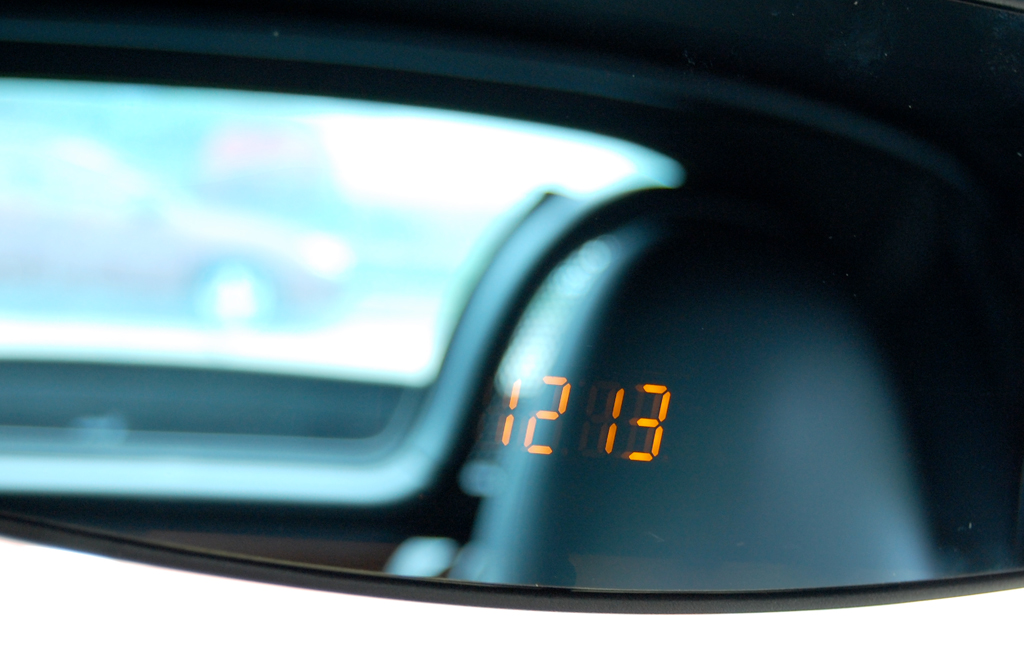
When everything is plugged in and powered on, the GPSMirror will acquire the satellites and set the time automatically. We started this project at 11:45AM, total elapsed time for this install... 27 minutes.
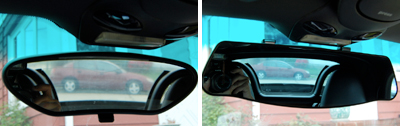
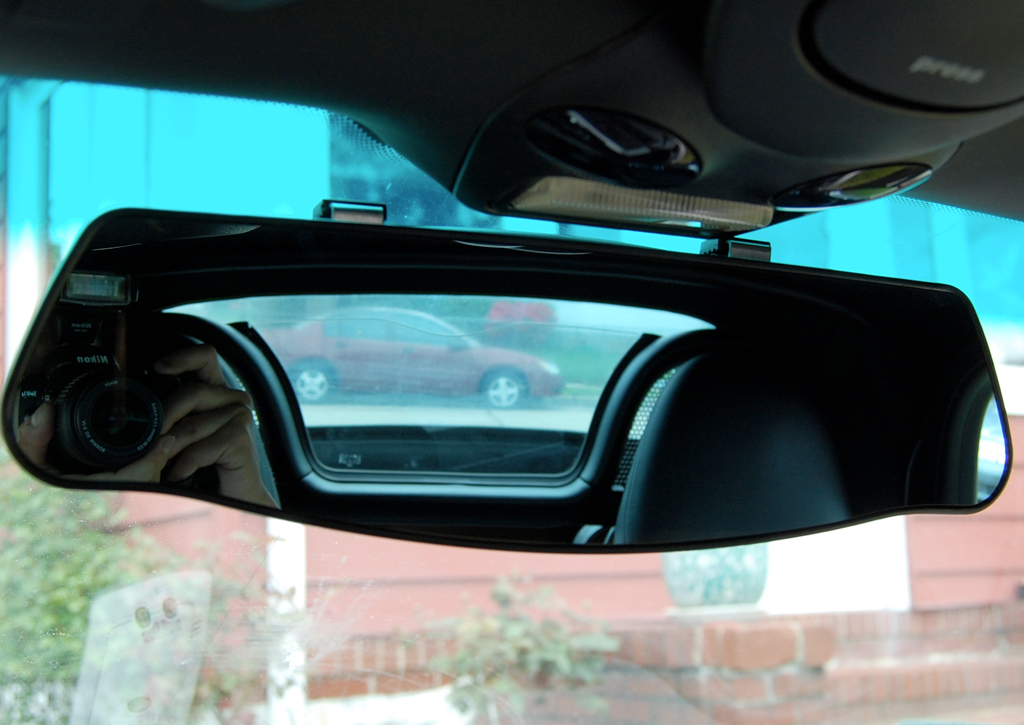
Here are a few photos of how things in the rear looks with the OEM mirror compared to the GPSMirror. For the first time, we can see the entire rear of the car. It definitely eliminated all of the Boxster's blind spots!
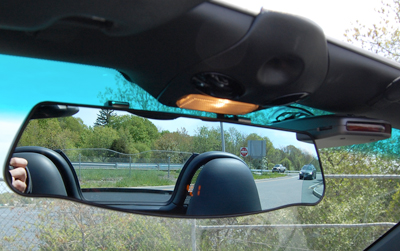
We took the car out for a spin and noticed a HUGE difference in what we can see with a larger rearview mirror. We were also surprised at the number of red-light cameras we never knew existed in our area! [Permalink] - Wan Chi Lau
|
|
|
May 6,2008 (GarageTechTuesday) |
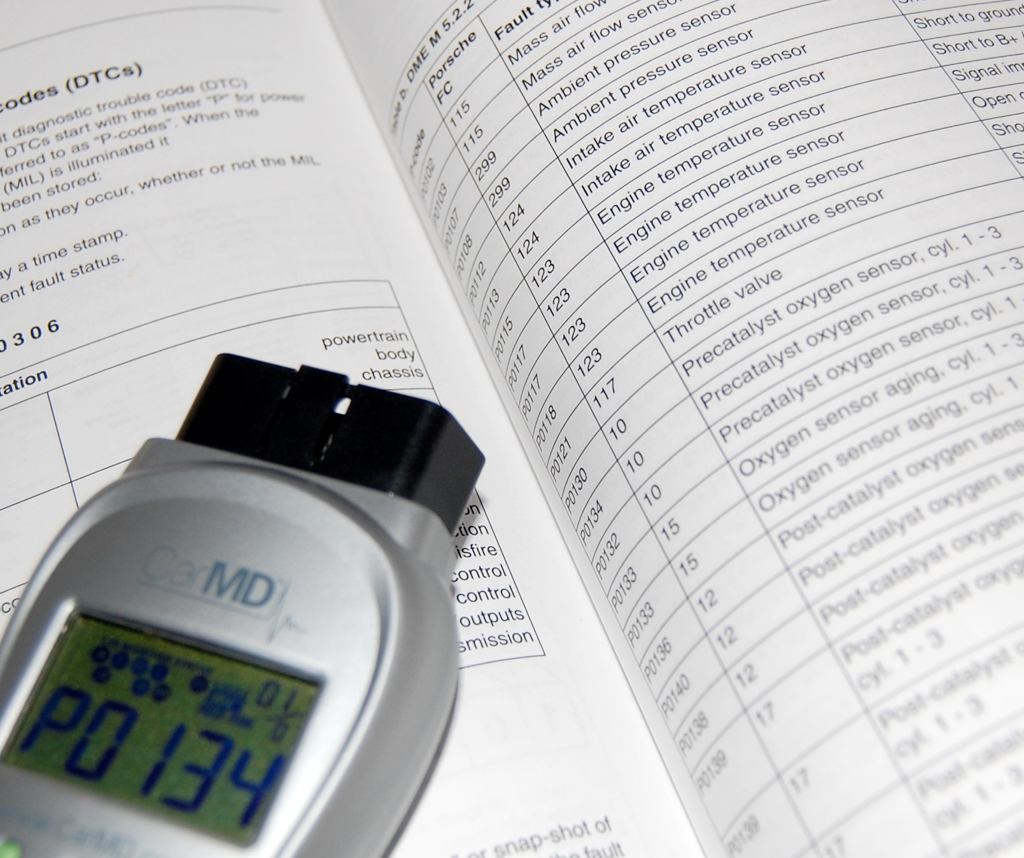
This weekend the "check engine" light came on in the Boxster while we were driving back from the SOS event. We thought... bummer, we just had the car fixed in April!

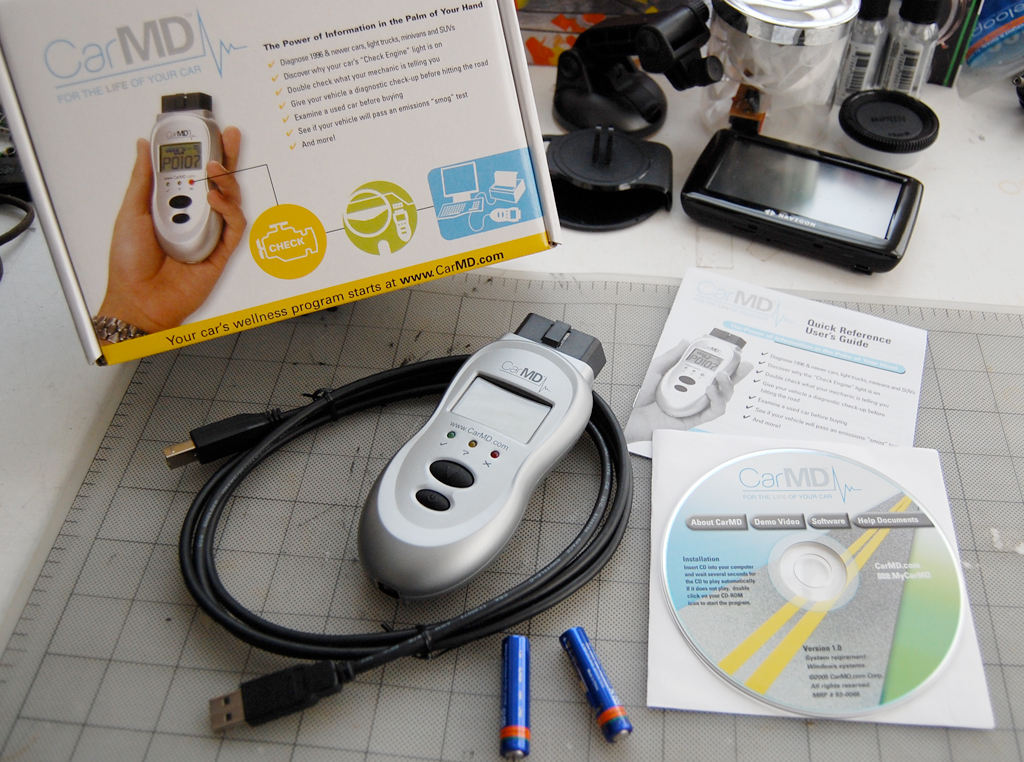
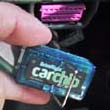
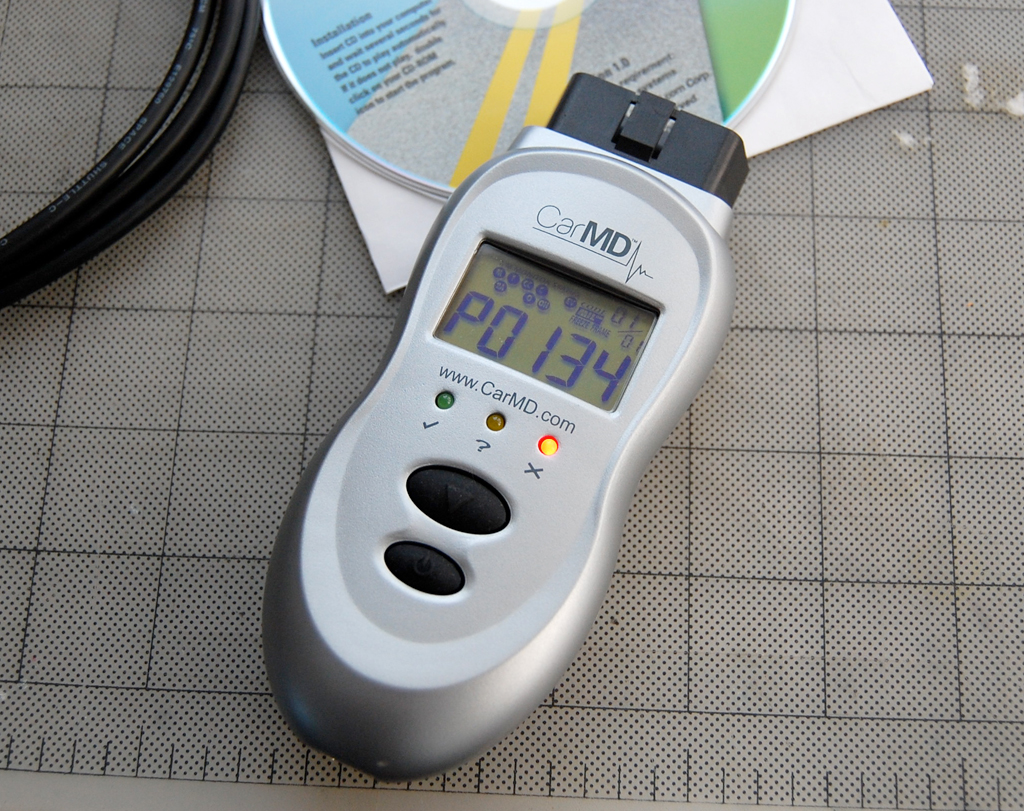
Then we thought... oh good, it would be the perfect opportunity to give the CarMD a FirstUse test. We had introduced the CarMD to RainyDayGarage readers a few months back. The kit comes complete (USB cable, AAA batteries, software) with everything needed.
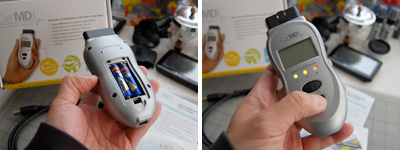
The CarMD OBD reader is ready to use once the batteries are installed. Just plug it in the car, turn it on, listen for the 4 beeps, and read the code.
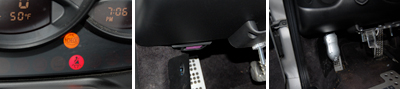
Of course, as you can see in the photo, the connector is oriented such that we couldn't see the display while connected. This wasn't a problem since all of the data is stored in the reader.
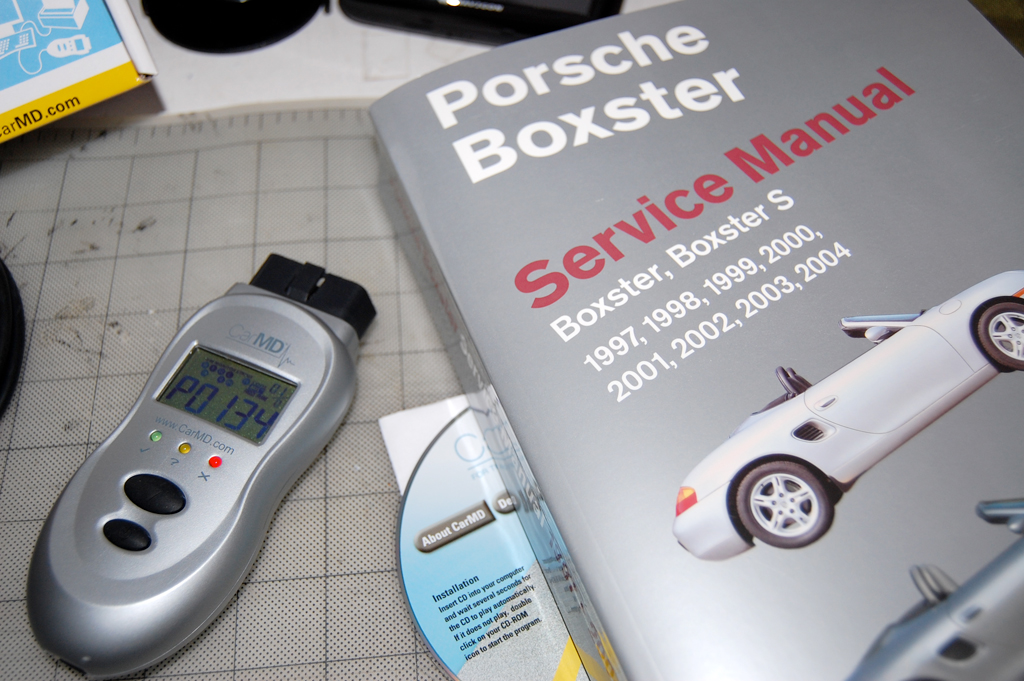
The kit came with some software on a CD. We will install it later and try it out. For now, we'll just look up the code in the Bentley Porsche Boxster Manual.

This CarMD OBD II code reader is very easy to use. We like the built-in LCD display as it makes reading the code much faster compared to the CarChip. What we don't know yet is if the CarMD will allow us to reset the "check engine" light without having to take the car into the shop. I'm sure we'll have more to say about the CarMD as we continue to play with it. [Permalink] - Wan Chi Lau
|
|
|
Apr 24,2008 (TechniquesThursday) |
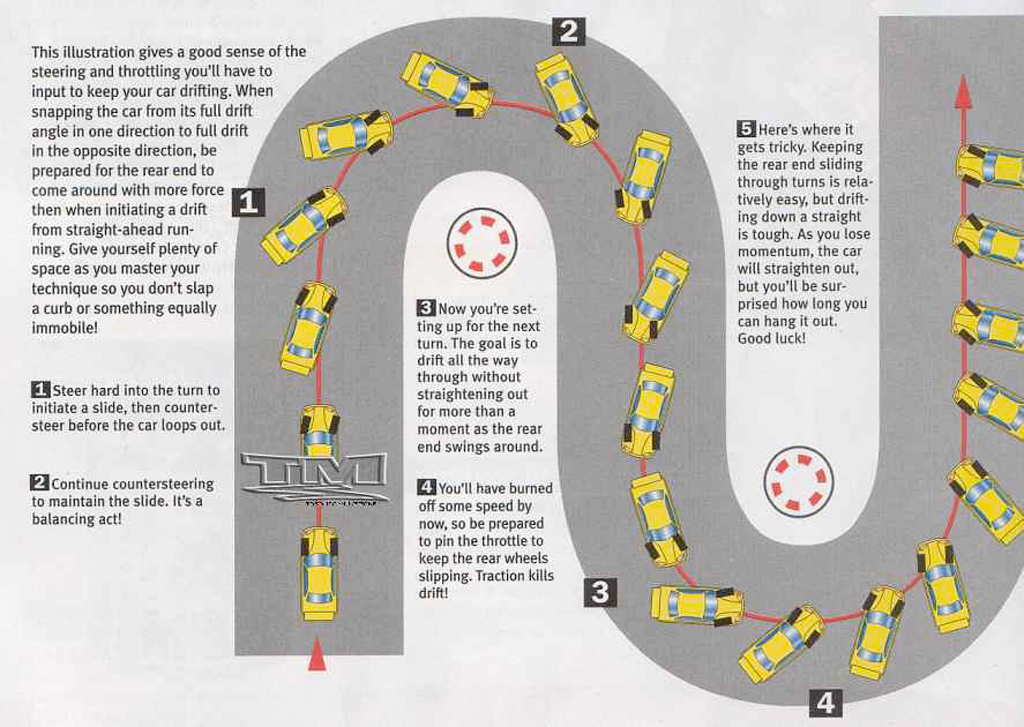
"Drifting" is a phenomenon which has turned into a sport in some circles. A reader pointed us to this interesting diagram illustrating the basics of the technique.

So, if you are tired of slowly meandering around those spiral ramps at your local car park, master the "drift" and get up or down those ramps in record time. Just make sure your car insurance has collision coverage and the payments are up to date. [Permalink] - Wan Chi Lau
|
|
Apr 23,2008 (WowUsWednesday) |
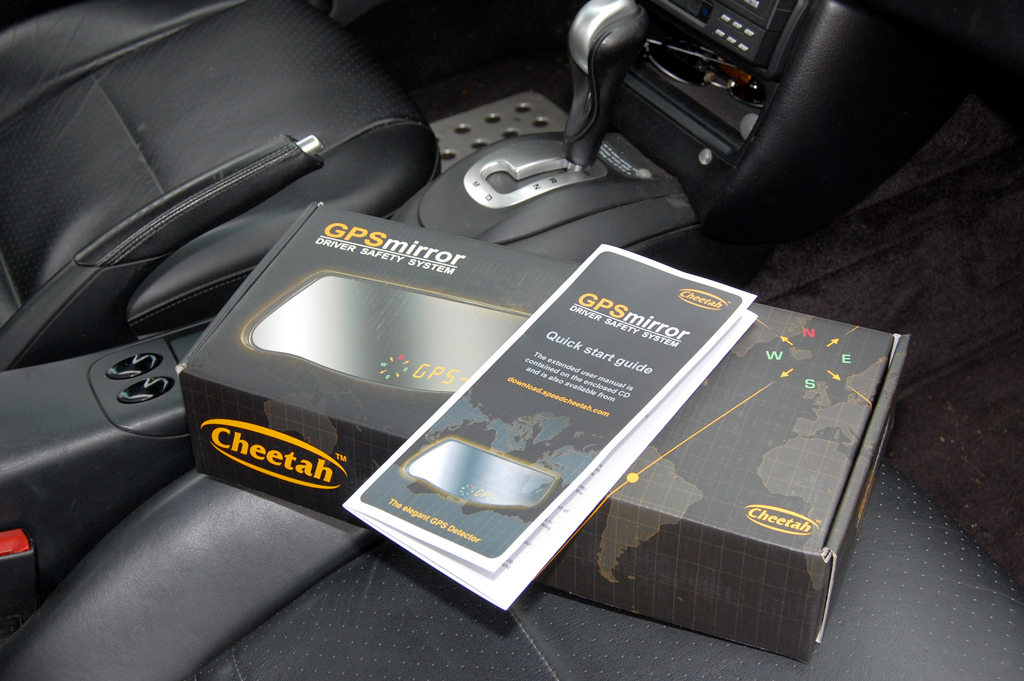
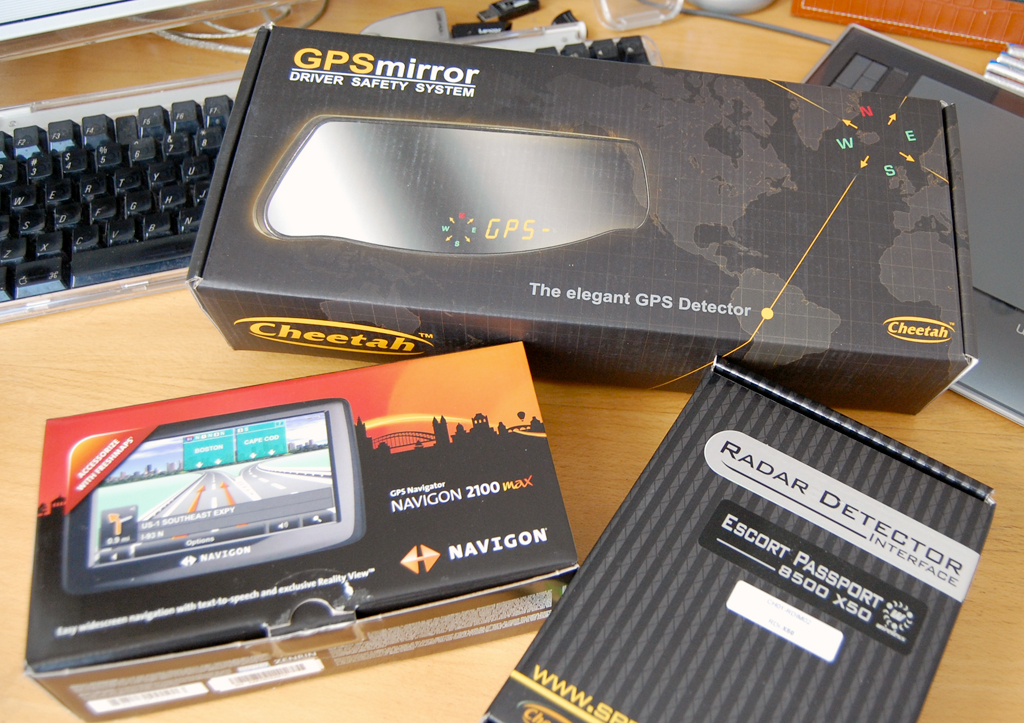
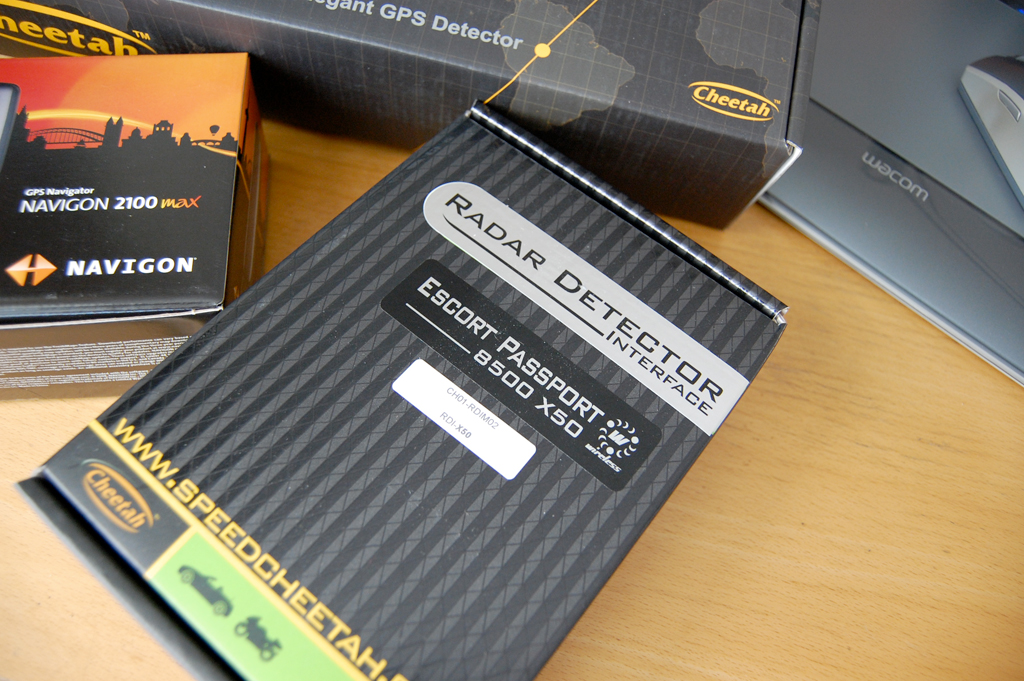
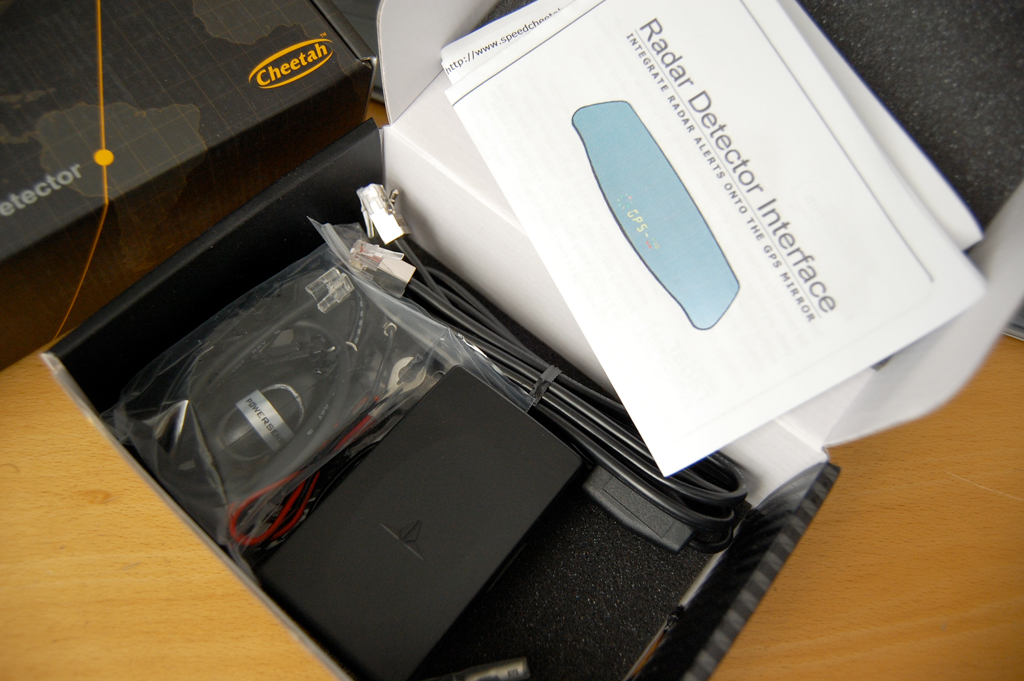
Once in a while we get a product in house that is just so cool that we wonder why it took so long for someone to come up with it. The GPSMirror from Cheetah Advanced Technologies is one such product.

This Scottish company combined a GPS detector with a rear-view mirror. Why? More on that later. For now, just click on the images and get a closer look at this high-tech mirror.
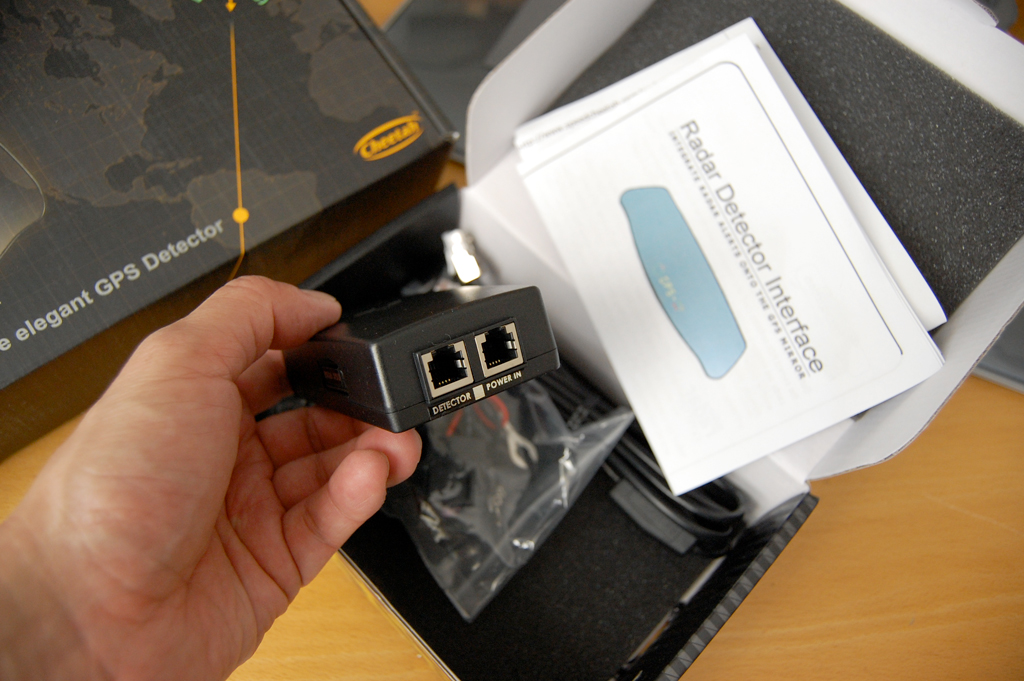
The GPSMirror can also be interfaced with selected radar detectors to enhance the radar detector's capabilities. How? More on that later. For now, take a closer look at the interface unit. It is pretty much plug-and-play.
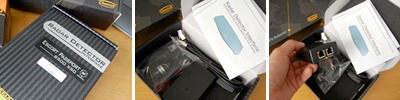
So what does this product actually do? The GPSMirror will help you avoid getting snagged by the revenue-raising "red-light cameras" popping up all over the place. And it does it while enhancing your driving safety.
We'll go into more detail on why this product is brilliant in the next installment of the FirstLook report on this GPS Mirror. If you can't wait, surf over to the Cheetah site and read more about it. [Permalink] - Wan Chi Lau
|
|
Apr 22,2008 (GPSTechTuesday) |
|
Last September we gave you a FirstLook at the Navigon 7100. Even though it was a pre-production unit, we loved all of the features we tested of this GPS...especially the "RealityView" graphics.

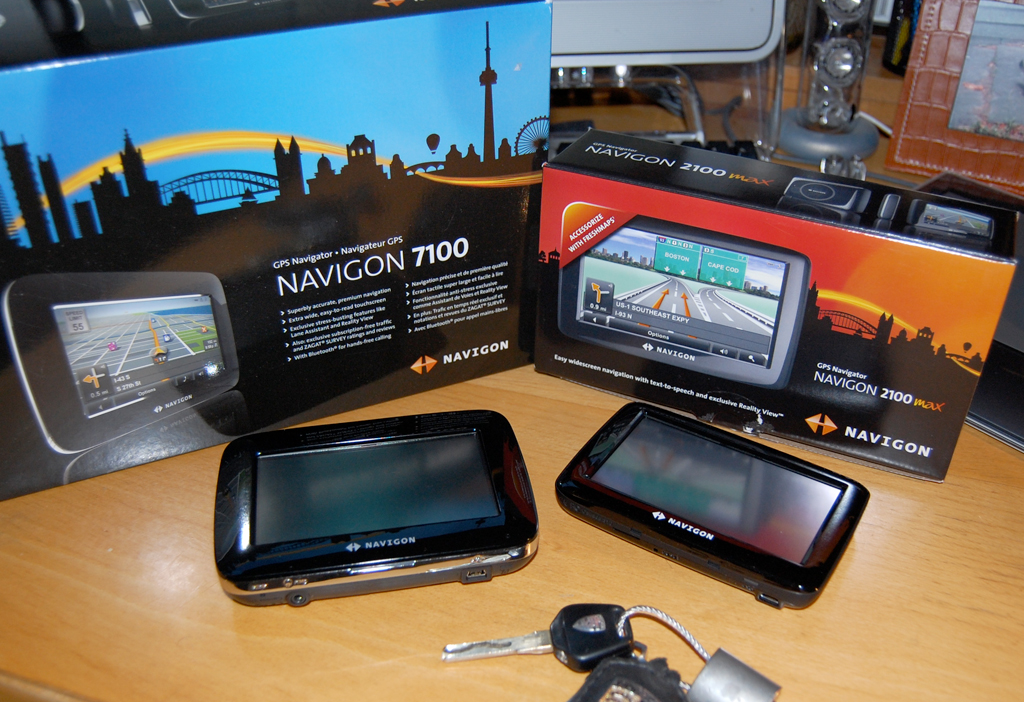
Navigon has not been standing still. This year they released a thinner version called the 2100Max. This unit has the same 3D views, but an enhanced set of GPS specific features. We'll have more to say about them in the FirstUse report.
The 2100Max is thinner, but the display size is the same (4.3" widescreen) as that of the 7100. Like the 7100, the 2100Max has an SD slot for maps.
The Navigon 2100Max comes complete and ready for use right out of the box. Just mount the holder, attach the GPS, plug in the converter and you are good-to-go! [Permalink] - Wan Chi Lau
|
|
| |
|
A lit "Check Engine" light (CEL) is a common sight on many modern automobiles. Some will immediately bring the car into the dealer and get the condition diagnosed. Others may ignor the warning light until they have to get their car inspected. Many have wondered if there are ways to determine what the problem is without having to bring the car to a mechanic to find out.

RainyDayGarage readers have known about the CarChip since 2005. Using the CarChip OBDII is one way to read the diagnostic code from the car's onboard computer. Now there are many other solutions (CarMD, OBDKey) on the market.

While all three of the units (CarChip, OBDKey, CarMD) we have in house will enable us to diagnose a CEL problem. The CarMD is self-contained and is able to give a readout / mini-diagnostic without having to download the data to a computer. The CarMD does have a USB port for downloading the data to a PC for further investigation.

We have been driving our Boxster with a CEL on since last April. This weekend, we are going to see what these three OBD readers think is the problem. Maybe we'll even consider fixing it :-) - Wan Chi Lau (permalink)
|
|
|
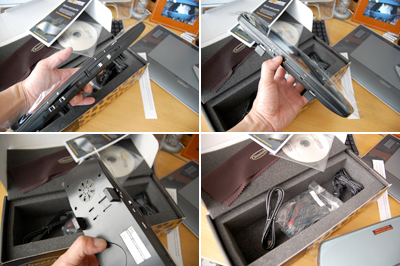
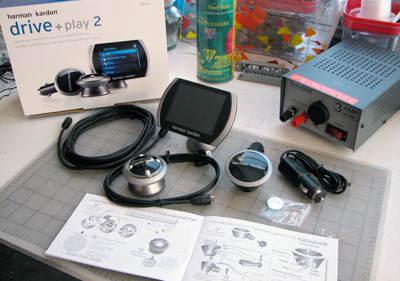
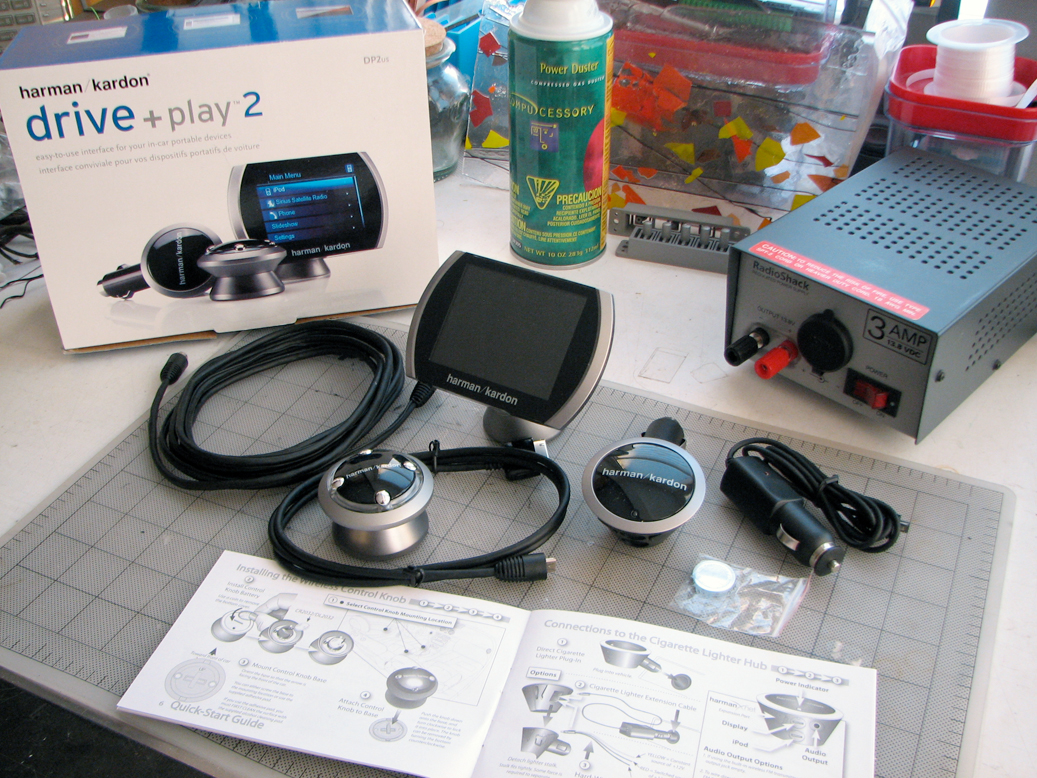
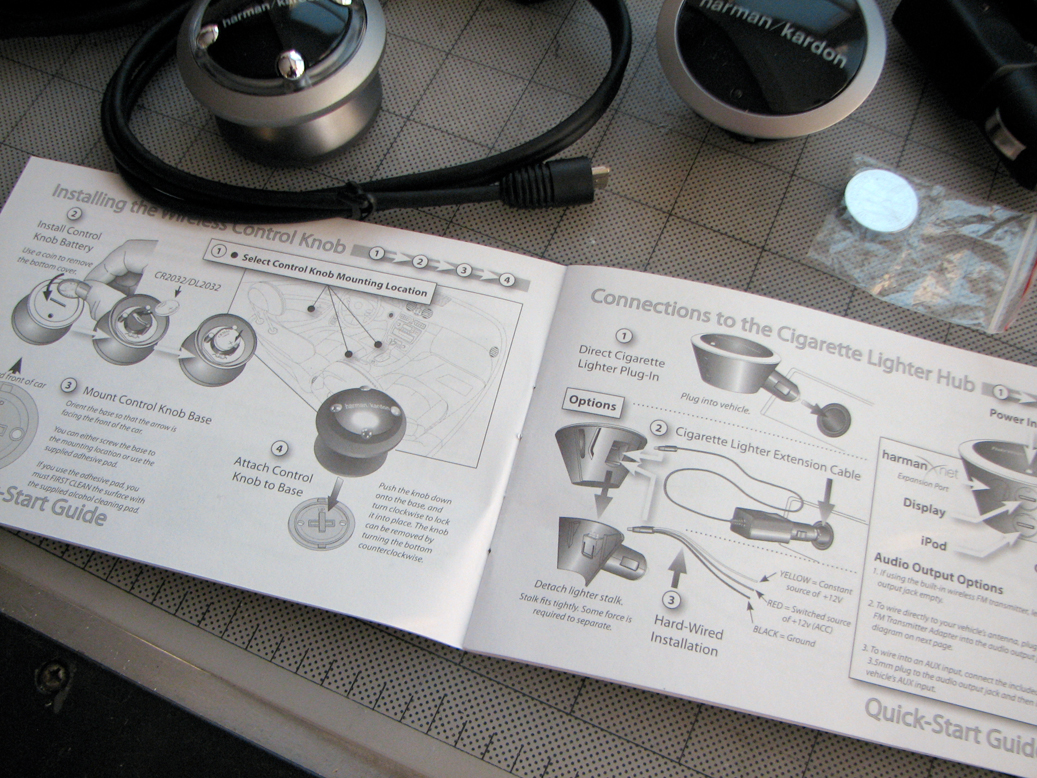
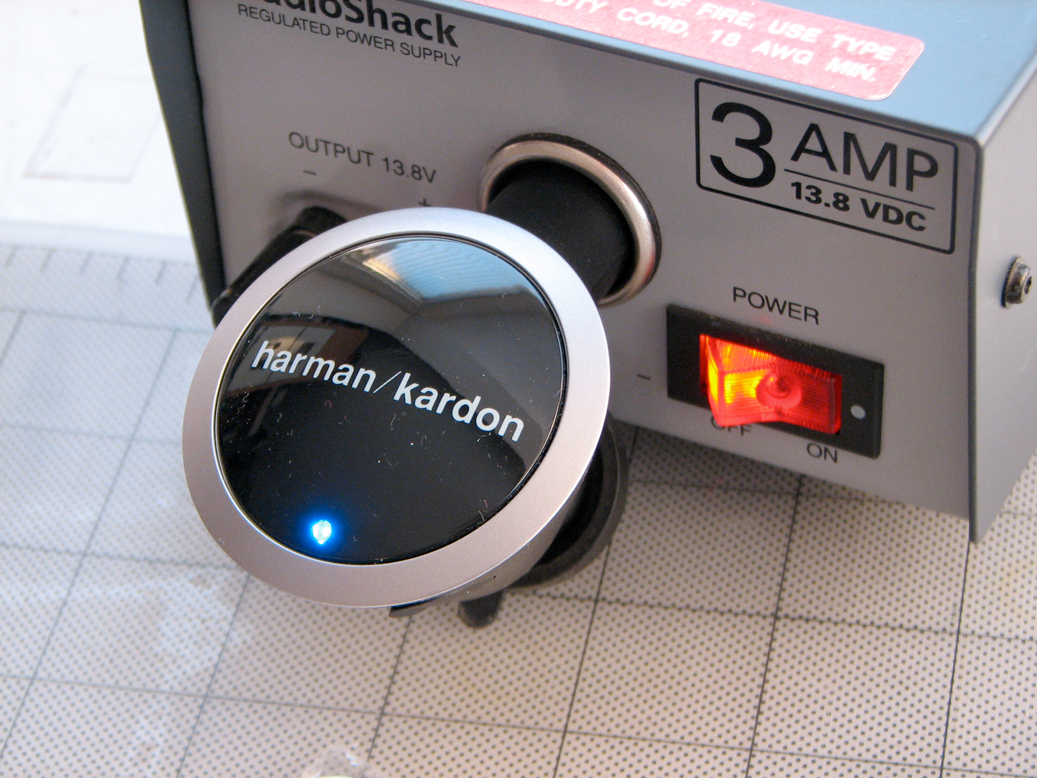
In our FirstLook of the Harman Kardon Drive+Play2 we gave an overview of the various parts which came in the package. Today, we'll do a bench test and take a look at how the pieces (display, hub, controller) work together.
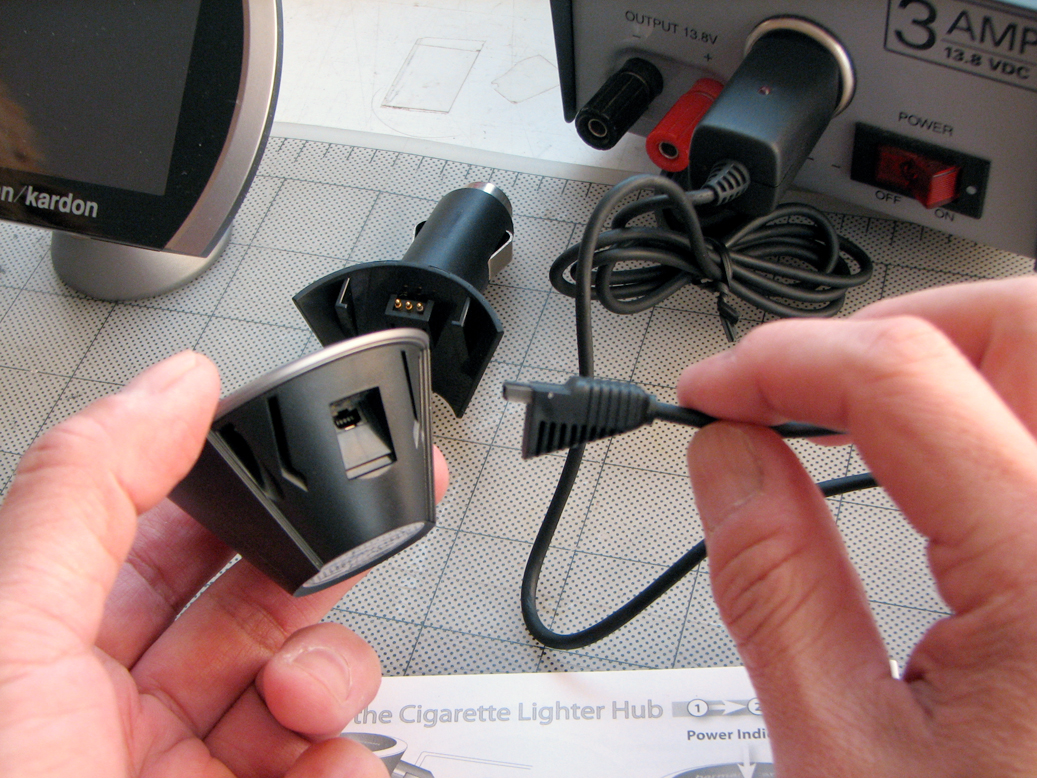
Unlike the DP1, the DP2 hub is much smaller and may be powered in a few different ways. The simplest way is to power the hub directly by the cigarette lighter of the car. This is convenient if you don't plan to permanently install the DP2 in the vehicle.

Harman Kardon also supplies an extension cable if the hub needs to be placed further away from the outlet.
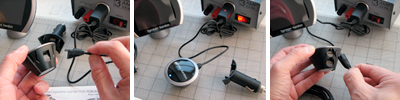
The design of the connectors of the various cables make hooking things up totally foolproof. Each connector is uniquely shaped for its appropriate socket. It is impossible to get it wrong.
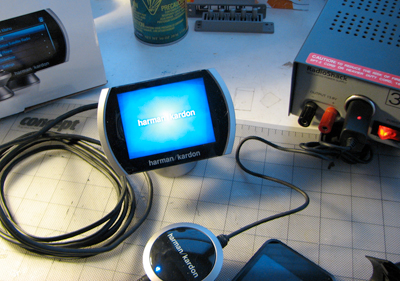
Once we had the various cables connected and the power supply switched on, the screen came to life. We were pleasantly surprised by the crispness of the display. The DP2 screen is a huge improvement over the DP1.
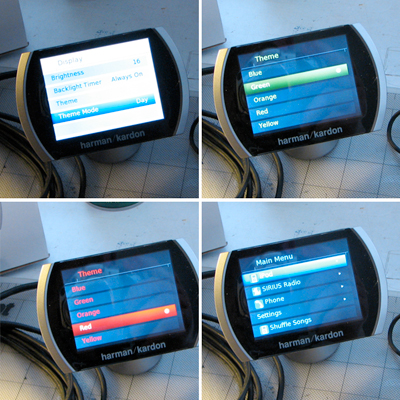
There are a lot of display options (color, day/night, etc...) which we'll walk through in the next installment. We'll also hook up the iPod and run through the features of the wirless controller in part 2 of our Drive+Play2 BenchTest report. - Wan Chi Lau (permalink)
|
|
|
|
As promised on Tuesday, here is more detailed FirstLook at the Harman Kardon Drive+Play2. The DP2 is one of the best looking aftermarket iPod controller for the car we have seen to date.

The three main pieces (display, transmitter, controller) are sleek, nicely sized, and will blend well into any modern car's interior. Unlike the version 1.0, the DP2 designed so it can be moved from one vehicle to another if desired. The transmitter may be hardwired into the car or simply plugged into the cigarette lighter.


The controller is wireless and powered by an internal user replaceable battery. We like the concept of a moveable wireless controller, but we'll have to see how good an idea it really is with some real world use. We can imagine it would be quite annoying if the controller ran out of juice during a road trip.

The display connector is wired, but positioned in the rear so the wires will be easy to hide. Note that there are two separate anchor points for attaching the pedestal to the screen. This give the installer a lot of flexibility in mounting the display.

In our next segment, we'll hook up the DP2 on our test bench and check out the display. It will also give us a chance to test the wireless transmitter / controller to see how they compare to the original DP setup.

Already, we can see that one of the decisions we'll have to make with this installation is what to do about all of the different displays! All three of them (iPod Touch, D+P2, G+P) are functional in their own way. We will have to give it some thought before deciding on an approach. - Wan Chi Lau (permalink)
|
|
|
|
Many of you have been asking us when we will post a review of the Harman Kardon Drive+Play2. Well, we finally got a unit in house. After check out the package, we see that it was worth the wait.

The build quality of the Drive+Play 2 is even better than the original Drive+Play. At first glance, it appears that the main components (screen, controll knob) are about the same size as the original. However, we then realized the main "brain" of the system is now about a fifth of the original and is portable!

This update of the drive+play by Harman Kardon comes with all of the installation options conceivable. We are not sure which installation path we will pick, but unlike the DP1, it appears the DP2 has the possibility that we can easily take the unit with us from vehicle to vehicle. We'll have a more detailed FirstLook in a few days. - Wan Chi Lau (permalink)
|
|
RainyDayGarage 2008
RainyDayGarage 2007
RainyDayGarage 2006
RainyDayGarage 2005
|
|
|


