After receiving my Droid in mid-December '09, there were three options available at the Verizon Wireless retail outlets: - Black "Body Glove" brand cases with a "fuzzy" coated metal structure covered in a diamond-plate textured rubberized external coating ($28) - Generic aluminum cases, with plastic-coated interior and mildly rubberized exterior, in a variety of colors (~$20) - transparent plastic cases, in a variety of colors (~$20).

The plastic case did not look very sturdy and did not appeal to my visual taste, plus, the plastic retaining teeth that held the parts to the phone looked like they could easily wear compared to the metal teeth of the other two cases.
The generic case was my choice because it was the least-bulky of all the options and protected the flat surfaces from normal wear and tear. It has a square hole on the back, located above the Motorola logo and a long rectangular hole (maybe to accommodate a belt clip?) for the Droid's rear speaker. Because it's essentially a new layer of metal in direct contact with the phone, this case offers little more than protection from abrasions.
My wife chose the "Body Glove" case for her Droid as this appeared to have more substantial protection in case the phone was dropped. This has an integrated, removable belt-clip attachment post - removing this post leaves a hole in the case, through which we were able to see that the phone's rear surface is not in direct contact with the interior of the case. We were never sure why this was so...it is elevated about 1.5 mm. We speculated that it was intended to make a chamber for the speaker's sound to vibrate, as it has not outlet hole on this case. If nothing else, this extra space could allow more flex-space in case the phone is banged around.
These current models of cases are all of a similar 2-piece design, with a thin rectangular frame that clips to the screen, and a sturdier base unit frame that clips to the lower half of the phone.
The benefits of these cases are that they are all super-simple to install, they all have belt clip capabilities, holes for the camera lens and LED flash, and they offer protection from normal wear and tear (like abrasions/scratches/scuffs) and possibly some protection from being bashed, especially in the case of the "Body Glove" case.

The drawbacks to these are that they are pretty expensive for what you get, they increase bulk significantly (see the depth difference between pictures - the "Body Glove" brand was even larger), and the clips for the plastic rectangular screen protector inevitibly release when slightly tugged; this part is fragile and could be lost easily, plus, every time it pops off, the teeth wear down. In my case, this increased the likelihood that it would pop off from normal, low-grade repeated stress, especially from the Droid's keyboard being opened and closed. Another drawback I noticed was that the added bulk to the screen made it more difficult for my fingers to reach the top row of keys on the QWERTY keyboard.
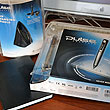
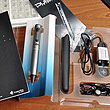
All of these units required the purchase of screen protectors (sold separately). We went to 4 separate Verizon Wireless stores and found that our two options were: - Verizon Wireless "Droid" branded partial screen protectors (sold in packs of 3 for $12.99) [picture a1 & a2 (in package, front & back) and b1 (removed from package)] - Generic full screen protectors, sold at some Verizon Wireless retailers (pack of 1 for $9.99) [pictures c1 & c2 (being removed from my Droid)] The design is simple and the application straightforward, but requiring a precise, patient, steady hand. They stick with static cling and have no adhesive. Each protector is protected by a front and a back cover sheet, each with tabs. They are applied to the screen by removing one cover sheet (see tabs for each layer on picture b1), laying the film on to the screen, then removing the second cover sheet. The most important part of applying these protective films is to have a clean, lint/dust-free screen. If you trap some lint under the film, it's there forever and makes a circle of air around it that is annoying to perfectionists like me. Also, if you warp a corner or edge by applying too much force, that area may never lay perfectly flat and will eventually pull away from the surface, invite dust, etc. To install this, I removed the first cover sheet, aligned the top edge to the top of the screen first, then carefully smoothed the film to the face of the screen, making sure to push any air bubbles out to the edges with a credit card, then removed the second cover sheet, being sure to do this slowly and use the credit card to hold the film to the screen surface. With care for proper alignment, this installation can be done in about 5 minutes, beginning to end. It's expecially important to put these on immediately after you take your phone out of the box - these films are tough and will protect your screen well. My generic screen cover was much more expensive than the other ones, however, you can see from the photo [picture c1] that it covered the whole screen and only had a hole for the speaker, with no notches for the red or green indicator LEDs on the top right of the Droid's screen [picture c2]. The partial screen protectors fit over the face of the screen, with the top edge aligned with the top of the screen. I refer to these as being "partial" because they only cover 90% of the screen, leaving the bottom 4 buttons (back, menu, home, search) on the touchscreen vulnerable to scratching [picture b2]. This is odd to me and seems to be an inferior design as this area is the touched most often! There is a hole for the phone's front speaker, a notch at the top right that are designed to not cover the two indicator LEDs. I do not know why that is important - it seems to unnecessarily expose that part of the screen and introduce a vulnerable point. Unless you botch the installation (hard to do), you'll never need 3 of these, so a pack of 3 does not make sense to me. The design of the Droid phone is sleak and compact - it feels durable, except for the obvious danger of the big, exposed screen. It's a little heavier than the Blackberry and the iPhone, so if it got dropped or took a whack to the screen, it might suffer more. Barring the trauma of being dropped, this unit's only Achile's tendon would be having a lot of surfaces that can be scratched and having an awkward construction that requires complicated body protectors. I like the idea of the ZAGG invisiSHIELD because it allows a basic level of protection without adding bulk. The flat surfaces remain protected from scratches and the phone still looks like a phone as opposed to a bulky accessory. My Droid has been in a protective case and screen protector since I removed it from the box. The total cost of these two items was $30. It's felt a bit bulky in my pocket and not all that protected from impact in a thin, rubberized aluminum case. The ZAGG invisiSHIELD will hopefully allow me to have the same level of protection, without the bulk - plus, the invisiSHIELD kit retails for a fraction of what I've spent. Installation: First, I unpacked the kit - you can see the front and back of the slick packaging (pictures g1 & g2), the envelope with the film in it (pictures g3 & g4), the installation accessories (pictures g5 & g6), and the total contents (picture g7), including the lint-free cloth, the sealed tub of detergent and sponge, the film, and the squeegee card (that cleverly has one sharp corner for detail work). There's a guarantee - I liked that touch. Next, I removed my Droid from it's case and took off the screen protector that I'd installed last month. As the instructions indicated, I washed my hands in soap and water, dried them and used the lint-free cloth to wipe off the surface of my Droid (picture h). I decided to start with the most complicated piece first - the screen cover. I wet my fingers on the sponge to avoid leaving fingerprints on the invisiSHIELD plastic (picture i), opened up the sheets of material (pictures j1 & j2), then peeled off the piece of film cut *exactly* to the size of the screen (picture k). I wet the piece with the sponge (pictures l & m), then aligned the piece of film to the front edge of the screen & began to gradually press out the air bubbles with the squeegee card (pictures n & o). The texture of the invisiSHIELD film was floppy and rubbery compared to the more rigid screen plastic protectors, plus the invisiSHIELD uses water, making it a little trickier to apply than the protectors that use static cling. The fit was perfect, and aside from some friction with the squeegee on the rubbery surface, it was a smooth installation. I only have two specks of lint on the screen, and I can live with that, especially because the invisiSHIELD seems to have shrunk around them instead of remaining a pocket of air. Oddly, there was a notch that exposed one of the indicator LEDs (the red one). I really need to learn why these are not covered... The entire process is repeated for the whole phone, with ~3mm thin trapezoidal strips that protect each of the outside borders of the screen - of course, these do not meet at the corners of the unit, leaving areas that will get scratched or are vulnerable to catching on something and having th estrip accidentally pulled off. I suppose that is the value of the guarantee! As the instructions indicated, I let it dry for 12 hours after making sure that all edges were adhered to the flat surfaces, leaving no raised edges or "flying" corners to the material that might get caught on fabric, etc.. Now the film feels tough as nails. The rear surface of the Droid had 4 major pieces of film that covered each of the sections, leaving the camera lens and the speaker uncovered - this allows the back panel to be opened without removing the invisiSHIELD. The durable invisiSHIELD material now covers all of the flat surfaces of my Droid, protecting it from scratches and gauges. This gives me the exact type of protection I want while saving me the added bulk of a case that offers me very little added value. The plastic itself adds a glossy finish to the otherwise matte finish of the Droid. I like that (see pictures p1-p4)! The price is absolutely right for this kit and I'd recommend it to someone who is fed up with struggling with awkward, bulky or ill-fitting body protectors and partial screen protectors. The only caveat is this: to make it look right, you have to have a patient nature, a steady hand and a willingness to be absolutely methodical and precise. Perhaps I'm in the minority - I love this sort of a challenge. If you lost every time at the game "Operation", then save yourself the frustration and find a friend who is either a surgeon or a Jenga master and ask them to do this for you. For me, the installation took literally 1 hour and 45 minutes. If I were not trying to document the process, it likely would have still taken me a good hour of careful, steady-handed, focused work. My Droid feels like anormal phone and it's totally safe from getting scratched. Thanks ZAGG - the invisiSHIELD is a must have item for Droid owners like me!
[Permalink] -InvisiSHIELD Install for Droid by Toby Bazarnick
|


