The Apple iPad display is amazingly bright and viewable. The main reasons are the ipad's In-Plane Switching (IPS) LCD and its LED backlighting. The two technologies gave the iPad impressive brightness and a large 178º viewing angle. IPS was developed over ten years ago by Hitachi to address some inherent issues of LCDs: poor viewing angle, color inaccuracies. The advantages of LED backlighting are its low cost, long life, immunity to vibration, low operational voltage, and precise control over its intensity. The main drawback is that it requires more power than many other backlighting methods (ELP, CCFL, WF). Click on the various iPads in the image below to see the screen at increasingly obtuse angles to see what we mean.


Unlike a laptop screen, the iPad's screen was designed to touched. In order to keep the smudging to a minimum, the screen has a fingerprint-resistant oleophobic coating similar to the iPhone 3G. From the Apple pamphlet ... “iPad has an oleophobic coating on the screen; simply wipe iPad’s screen with a soft, lint-free cloth to remove oil left by your hands. The ability of this coating to repel oil will diminish over time with normal usage, and rubbing the screen with an abrasive material will further diminish its effect and may scratch your screen.”
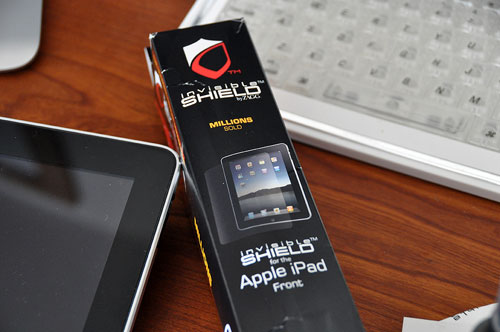
When we read that, we knew an Invisible Shield for the iPad was in its future. As Apple did not give out any technical specs for the iPad prior to the release, the Zagg folks had to wait until April 3rd to get the exact dimensions, and begin production. We are happy to report that Zagg now has the iPad shields in stock. They have two options for buyers: front only and full coverage. Both include the wetting spray and rubber squeegee. We got the full-coverage version, but will likely only use the front cover.

There are a lot of new protective films on the market since we our first InvisibleShield article back in 2005. We have tracked the durability of that first InvisibleShield cover for five years (Year1, Year3, Year5). While the iPod nano's protected front is almost as nice today as the day we first put on the InvisibleShield, the unprotected metal back and sides shows lots of scratches from five years of use.
The is no question the InvisibleShield provides awesome scratch protection, it will not protect the screen from direct impact damage. For that kind of shielding a hard cover will likely be more effective. We suggested a few ideas in a previous article. Those options worked fine for laptop bags, but made the iPad too large for a pack such as the Tom Bihn Buzz. There are a LOT of iPad covers out there. Unfortunately, most of what is currently available did not really appeal to us. We wanted a cover which would offer good protection while being a bit more discrete. Since we could not find any we liked, we decided to make our own.

As it so happened, we had a notebook which was perfectly sized for the task. The overall dimensions gave us about half an inch around three of the sides. The spine will be removed to allow easy lifting of the iPad from the cover. The thickness of the pages was almost exactly that of the iPad. The one problem we have not solved is how to attach the cover to the iPad itself. There are a few suggestions being kicked around, but no front-runner has emerged as of this writing.
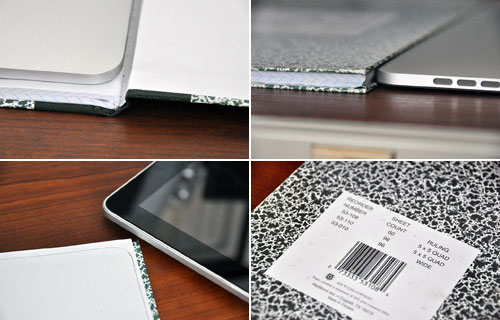
There were two ways we could go in making the cut-out for the iPad: cut then glue, glue then cut. We went with the latter option, but decided that completely gluing the pages together was not necessary. All that was required was to glue the edges together. The glue we had on hand was some Elmer's wood glue. It was a bit thick for our purpose, so we diluted it 2-to-1 with some water and brushed it on the top, right, and bottom edges of every page. This was actually not as problematic as we thought as the pages stuck together and made the work rather quick. Some wax paper was inserted between the cover and the wet sticky pages to keep the cover from being glued to the pages. We then clamped everything downto make sure the edges of all the pages made good contact with each other. It should also keep things from curling as they dry.
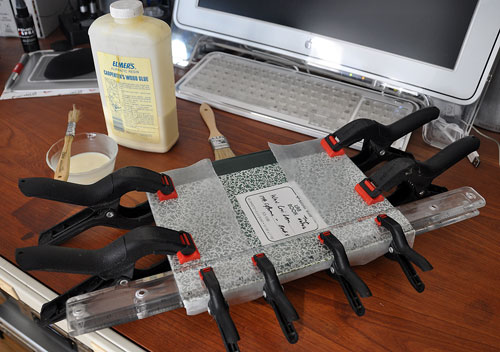
Once the glue has dried, we will cut out the middle and fit it for the iPad. We expect cutting through the glued paper will provide a challenge. We are not sure how best to do the cutting (razor blades, Dremel tool, etc...). We'll continue with this DIY cover project once the glue has set.
We are not fanatical about keeping our gadgets free from everyday wear and tear. However, with the InvisibleShield and our DIY cover, the iPad should have a better chance at surviving the inevitable bump, nicks, and bruises certain to befall a mobile device. [Permalink] -iPad Protection
|

