|
|
|
RainyDayMagazine's content can now be licensed for your print magazine or web site. Please contact us directly here. If you want to see something reviewed, then drop us a note with a link and we'll be happy to take a look.
|
|
August 16-17,2008 (WeekendEdition) |
At this point, pretty much every one on the planet knows about Harry Potter and Michael Phelps. Like the boy who survived, Michael Phelps managed to pull victory out of certain defeat at the last possible moment. In this instance, that moment was a difference of 0.01 seconds. The same thing happened a few days later with Dara Torres, except this time she lost to Britta Steffen of Germany by 0.01 seconds.

While watching the events, we got to wondering: just how fast IS one one-hundredth of a second? We know that light travels at a little faster than 186,000 miles a second. So, in 0.01 of that second a photon would travel 1,860 miles, which is about the distance between Boston and Rapid City, SD. OK, perhaps that example didn't really clear anything up. Maybe the following examples will make it a little easier to relate to 0.01 seconds:
- blink of an eye: 5 times/sec = 0.05 blink in 0.01 sec
- hummingbird wings: 3.3 beats/sec = .03 beats in 0.01 sec
- bumblebee wings: 130-240 beats/sec = 1 to 2 beats in 0.01 sec
So, 0.01 seconds turns out to be about the time it takes for a bumblebee to beat its wings once or twice. Wow, those were REALLY close races :-) [Permalink] - One one-hundredth of a second
|
August 15,2008 (FeynmanFriday) |
A few of us recently saw a play by Peter Parnell called QED, a really funny and really amusing play about Richard Feynam. People who know his name might know it from the Nobel Prize he won in 1965 for his work in quantum elecrodynamics (QED), or they might know it from his being the guy who explained why the O-rings caused the Challenger disaster, to wit: "when they get cold they break."
The play was the result of an initiative call the Catalyst Collaborative@MIT (CC@MIT). Its goal is to examine science and its role in society via entertaining and thought-provoking means. QED's run at the Central Sq theater ended on August 9th. We didn't hear about it until its last week or we would have mentioned it here. Attending the play got us thinking about Mr. Feynman, and we're not joking*.
* This is a little bit of witticism, because he wrote an autobiographical tome entitled "Surely You're Joking, Mr. Feynman!" Like I said, a little bit of witticism.

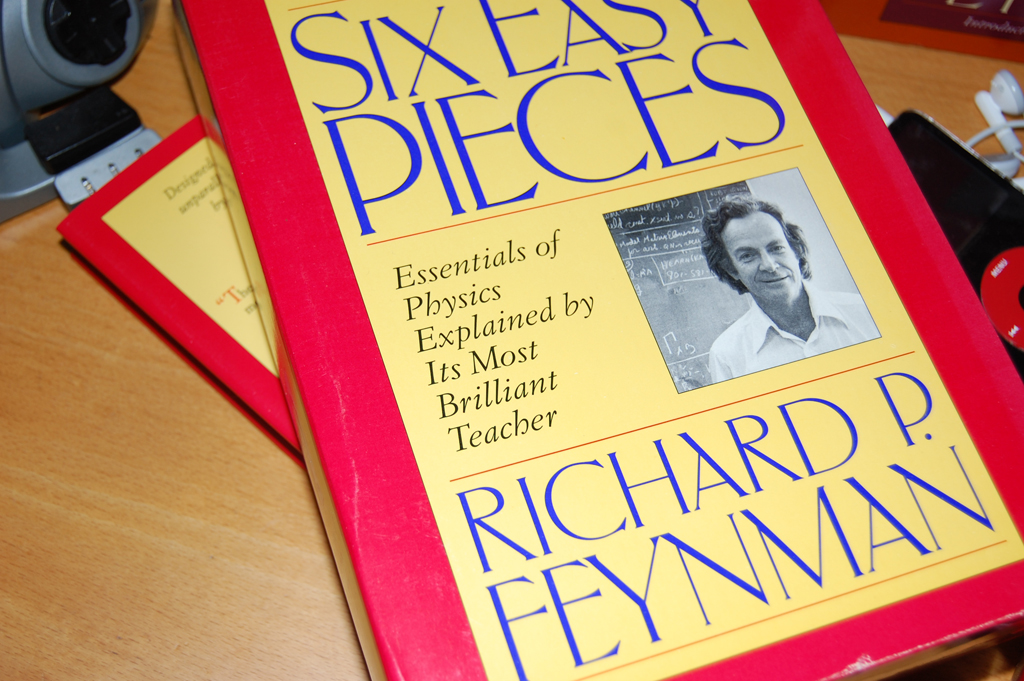
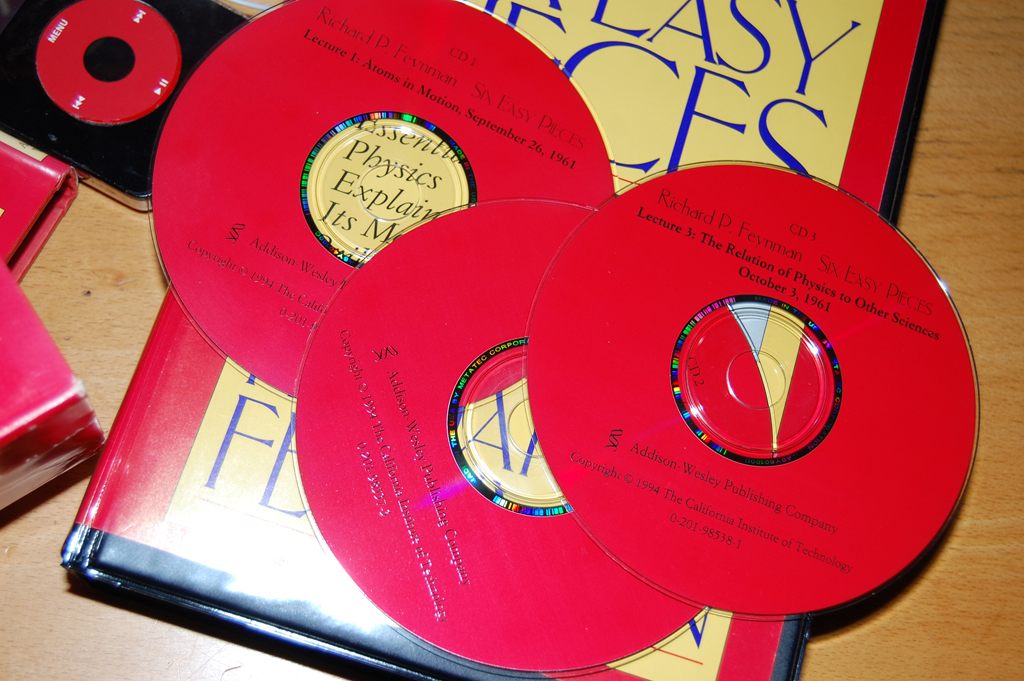
Today we want to bring your attention to two terriffic sets of CDs - original recordings of Richard Feynman's lectures on various topics in physics. Trust us when we say that you don't have to know, understand, or even like physics to enjoy these lectures.
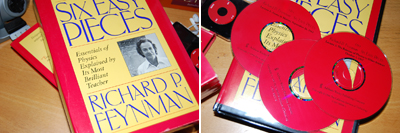
Each set contains both a book and a collection of CDs. The books contain original photographs and diagrams for readers who want a more visual experience. We liked listening to Feyman because his excitement about physics really comes through in his lectures.
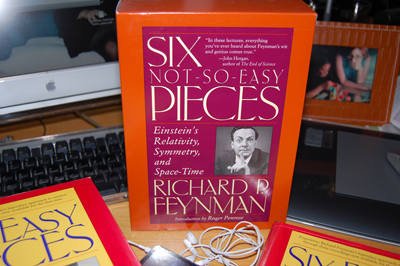
Physics geeks who don't want to revisit the basics may find the second set, Six not-so-easy Pieces, more to their liking. In this set, Feynman lectures on Einstein's Theory of Relativity. We just loaded this set on our iPod. We'll let you know how we made out in a few weeks. [Permalink] - Feynman Lectures on CD
|
|
August 14,2008 (TurnItOnThursday) |
The interns sorted through quite a few responses to yesterday's RainyDayContest. Most readers went with the obvious answer of "lighting the pilot light." However, the correct answer was "connect the exhaust vent." Danny W of Florida was the only one with the correct answer...so Danny, you are the winner! Your prize is the way cool BionicGrip from Loggerhead Tools. It is a handy tool for lots of projects around the home!
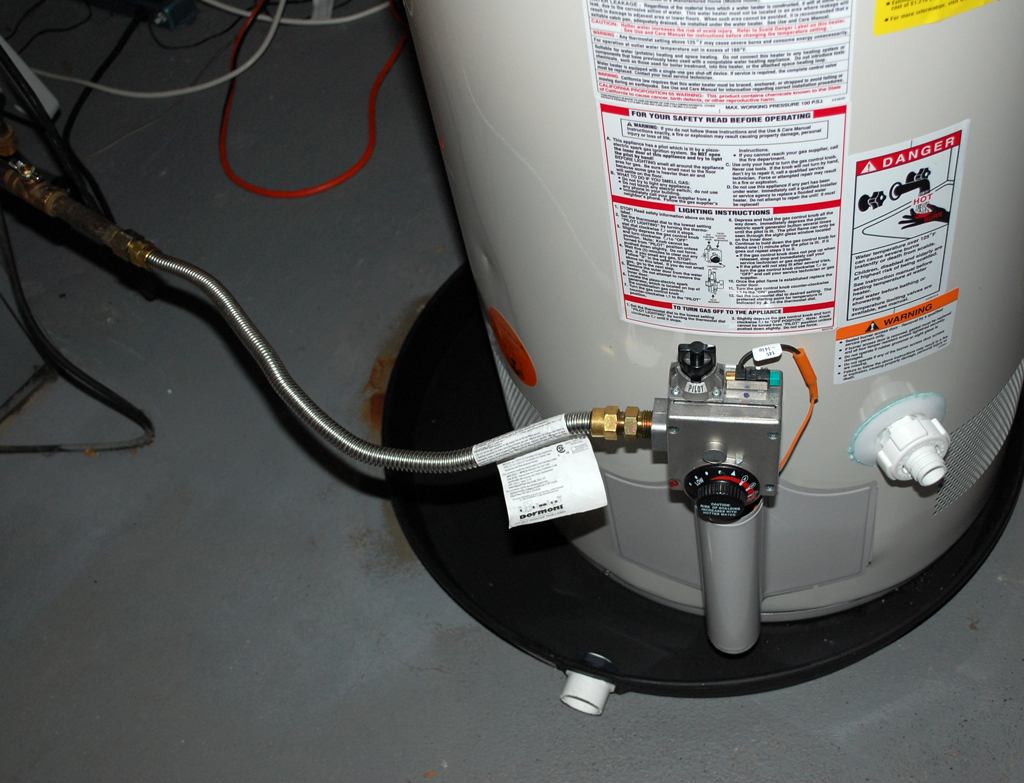
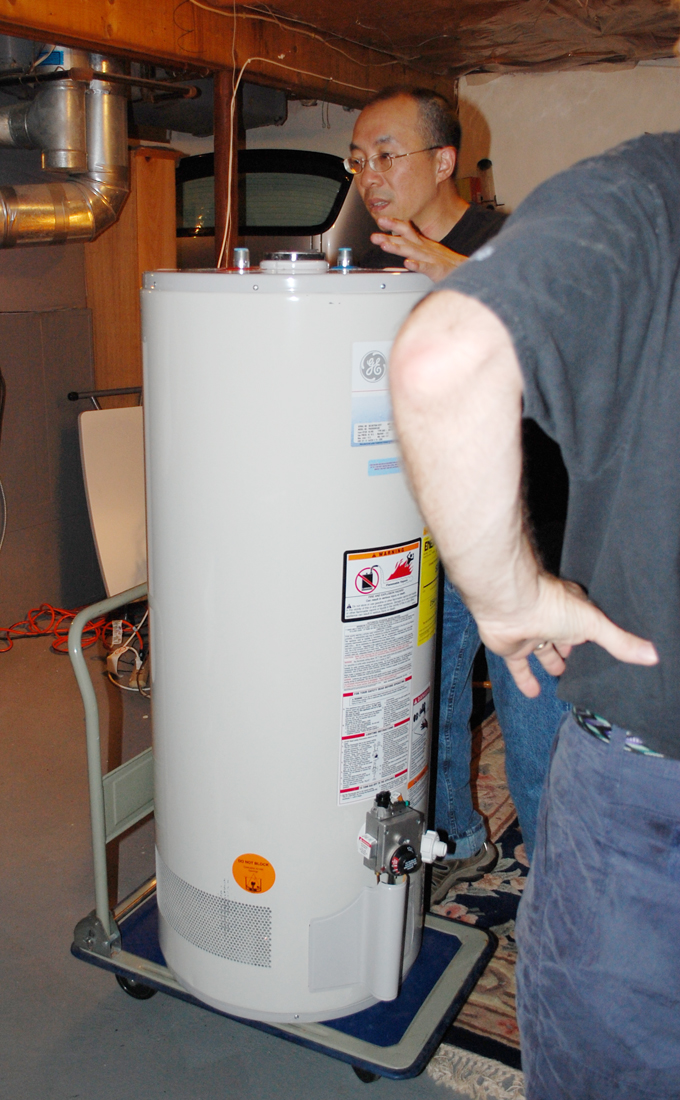
Some of you were wondering which model water heater we had purchased. To tell the truth, we didn't really pay much attention when selecting the unit as all the ones in Home Depot were from GE. The one we chose was a 40 gallon unit with a 9 year warranty. It also came with a one year in-home service warranty.
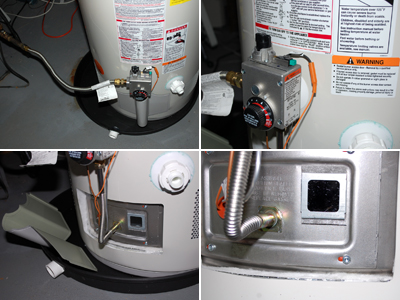
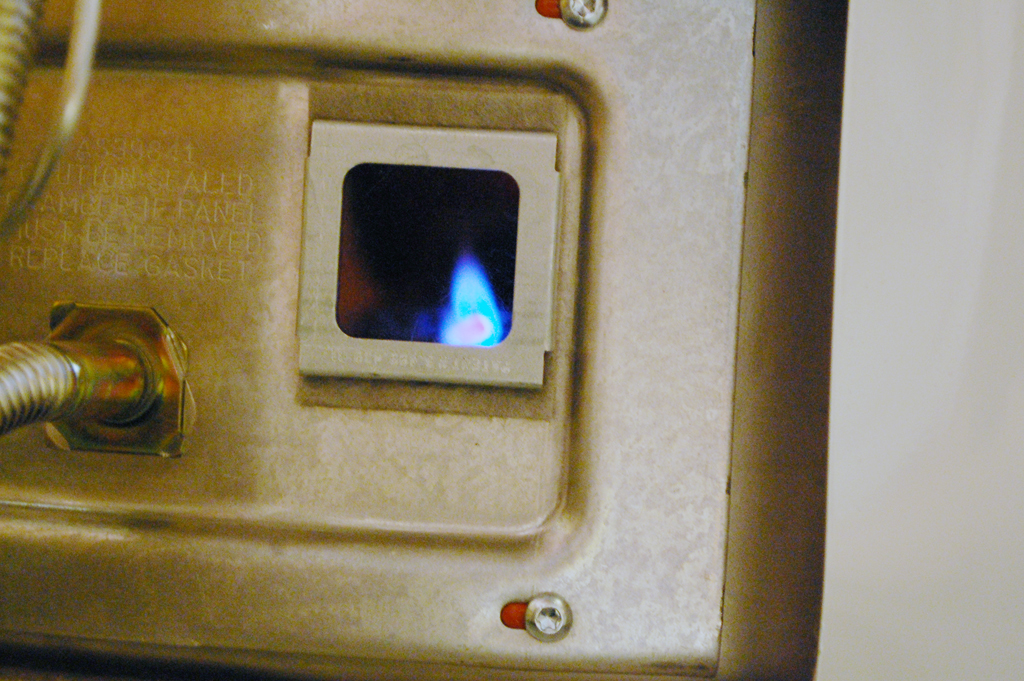
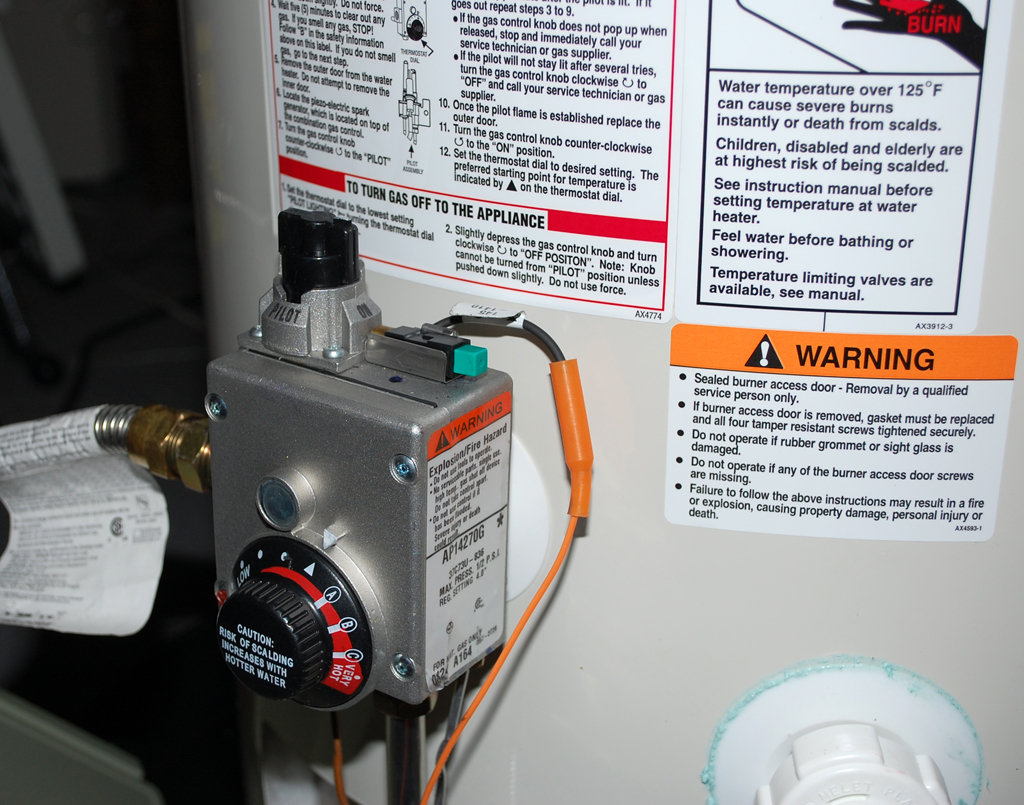
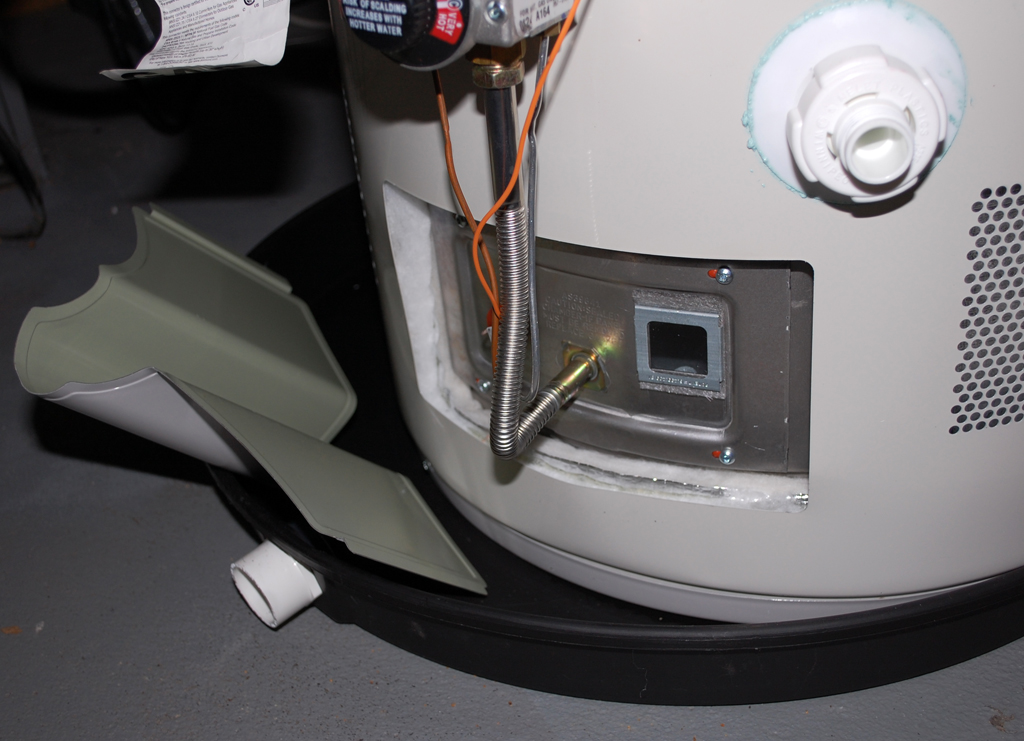
The new GE unit has one feature which was not on our ten-year old unit, a piezo-electric lighter. No longer would we have to stick a match under the tank to light the pilot light. In fact, the entire burner assembly is not even accessible.

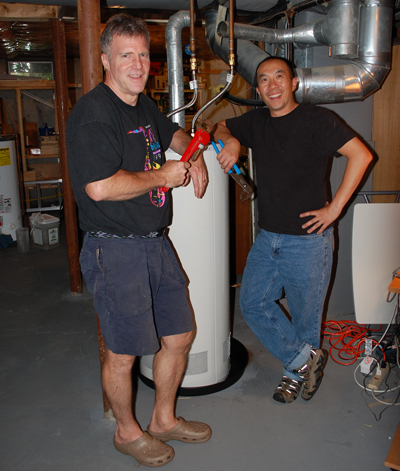
To fire up the pilot light, all we had to do was turn on the gas, put the dial on "Pilot", and push the green lighter button a few times. The pilot flame came on and we were good to go! It took about an hour to heat up the 40 gallon tank and we all got our well deserved showers. Ah...clean is good! [Permalink] - Firing up the water heater
|
August 13,2008 (WaterHeaterWednesday) |
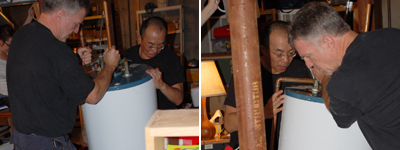
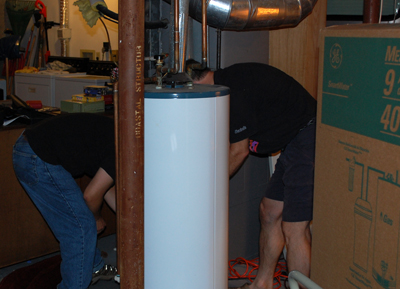
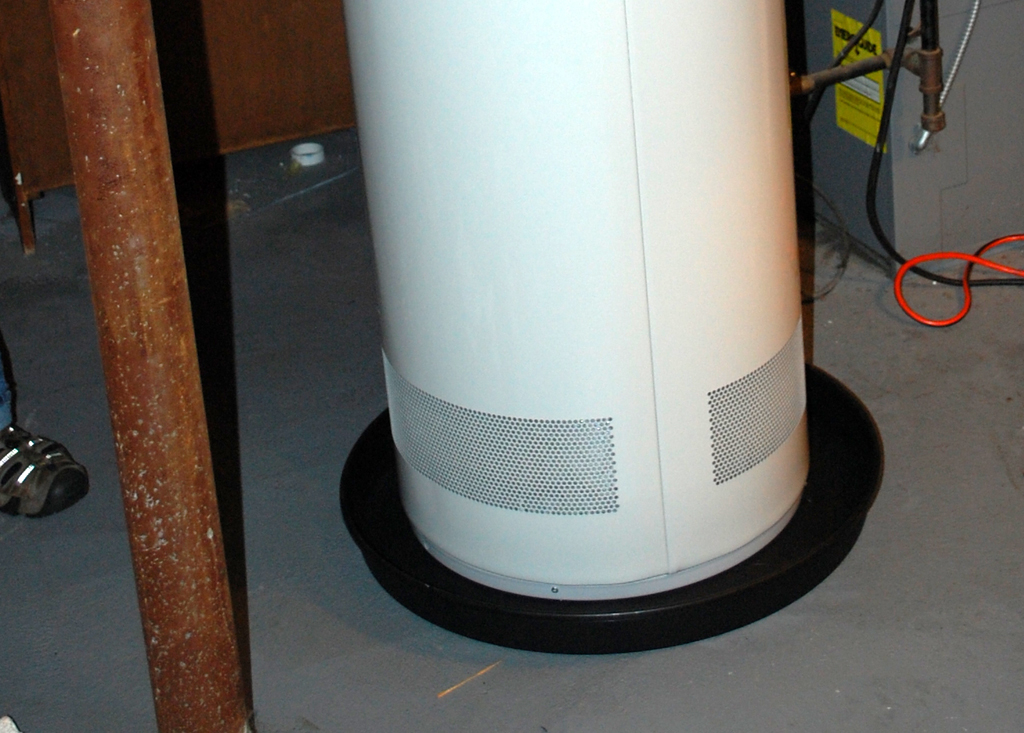
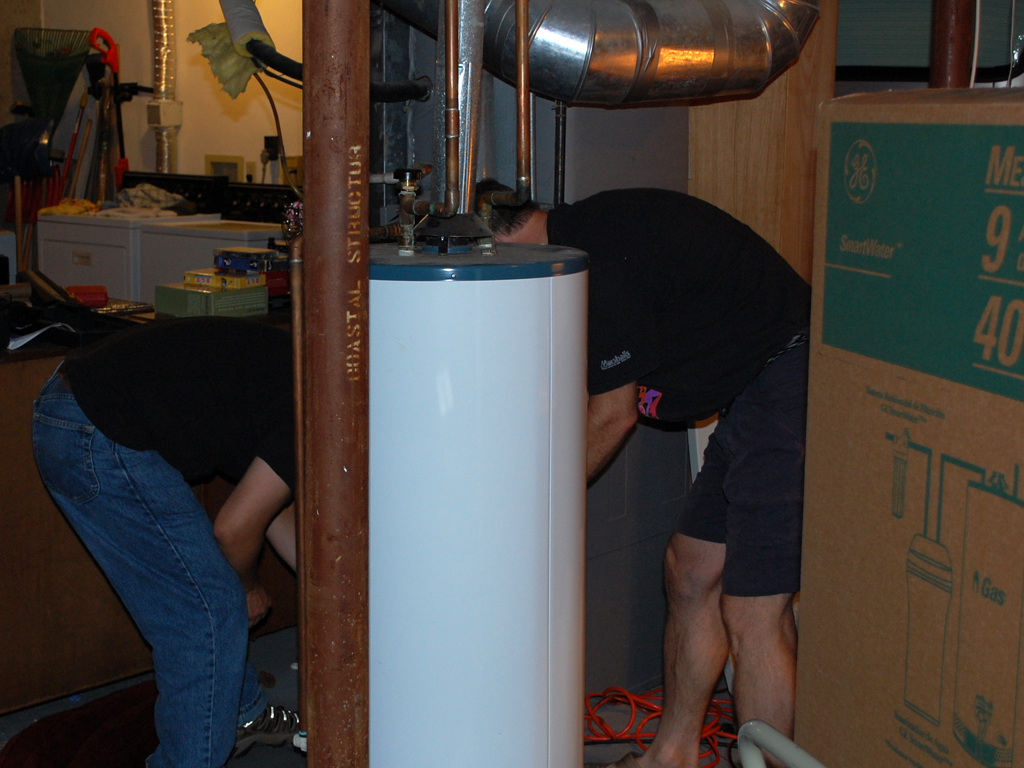
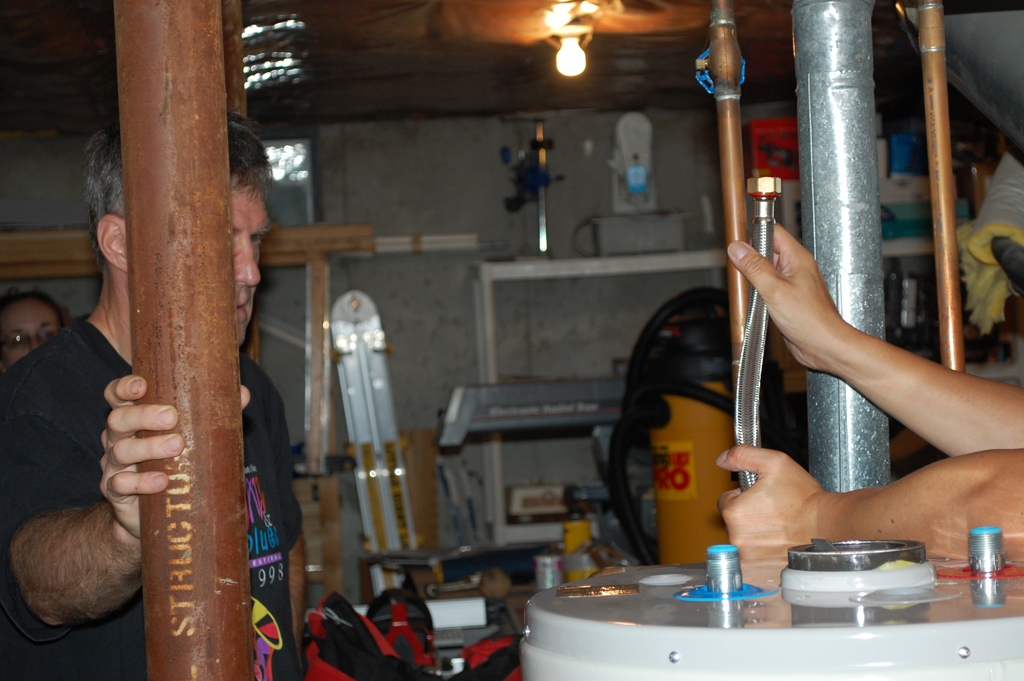
Getting the new water heater into place was a lot easier than moving the old water heater out of the way. To prep for the installation of the tank, we positioned everything and test fitted all the pieces of the kit.
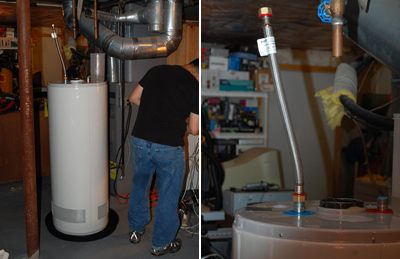
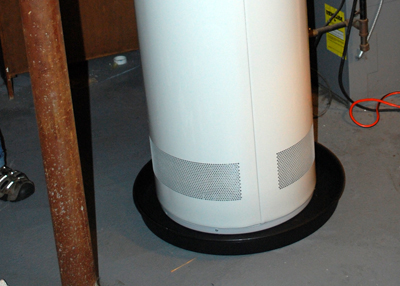
When full, the heater will weigh over 500 lbs, so while it was still liftable we took the opportunity to place the plastic catch tray underneath.
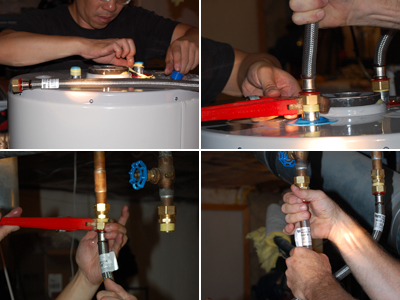
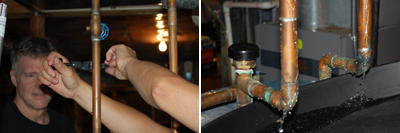
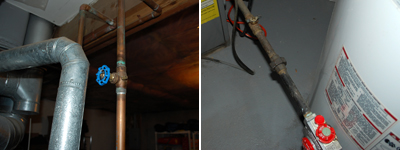
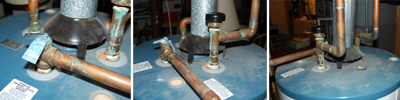
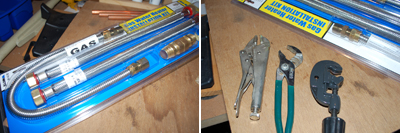
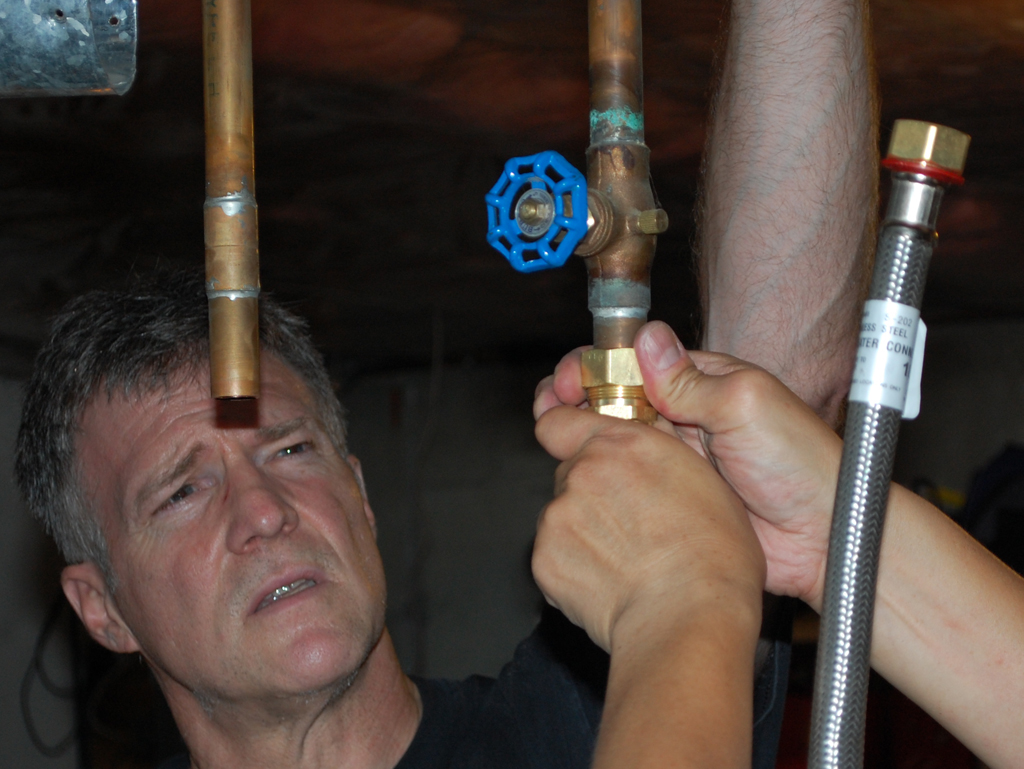
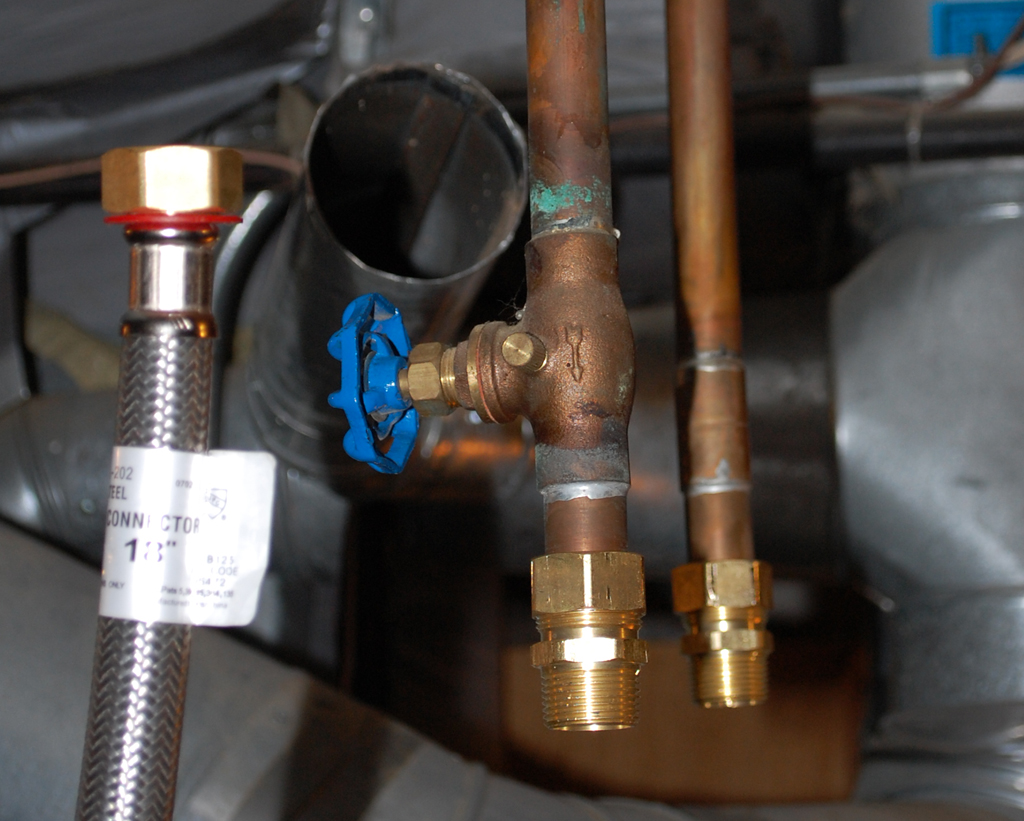
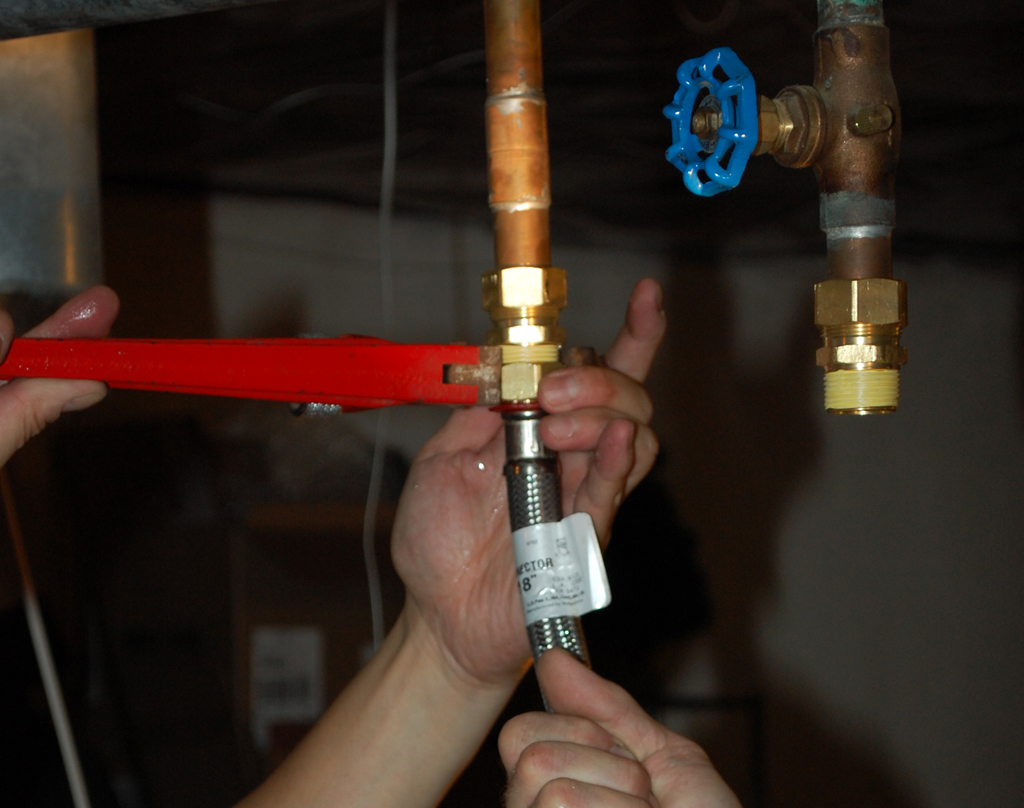
Next step was to attach the compression fittings to the two water pipes. The water-tight fit is accomplished by a nut "squeezing" the internal ring against the pipe. The other end of the connector is threaded so it can accept the flexible stainless steel hose. The key to using compression fittings is to avoid over-tightening, as this will actually cause the joint to leak. The rule of thumb is "hand tighten + 1 turn with a tool."
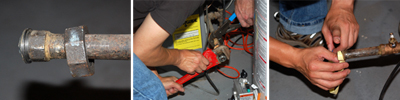
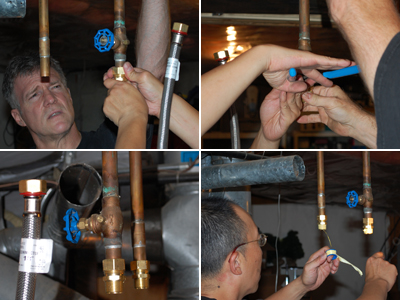
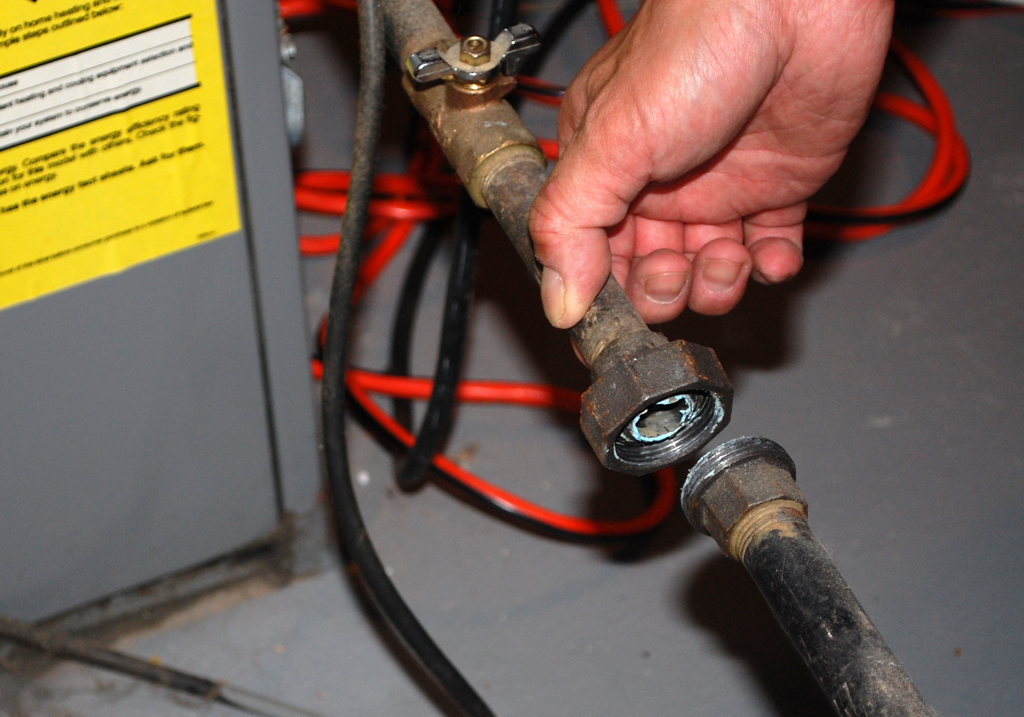
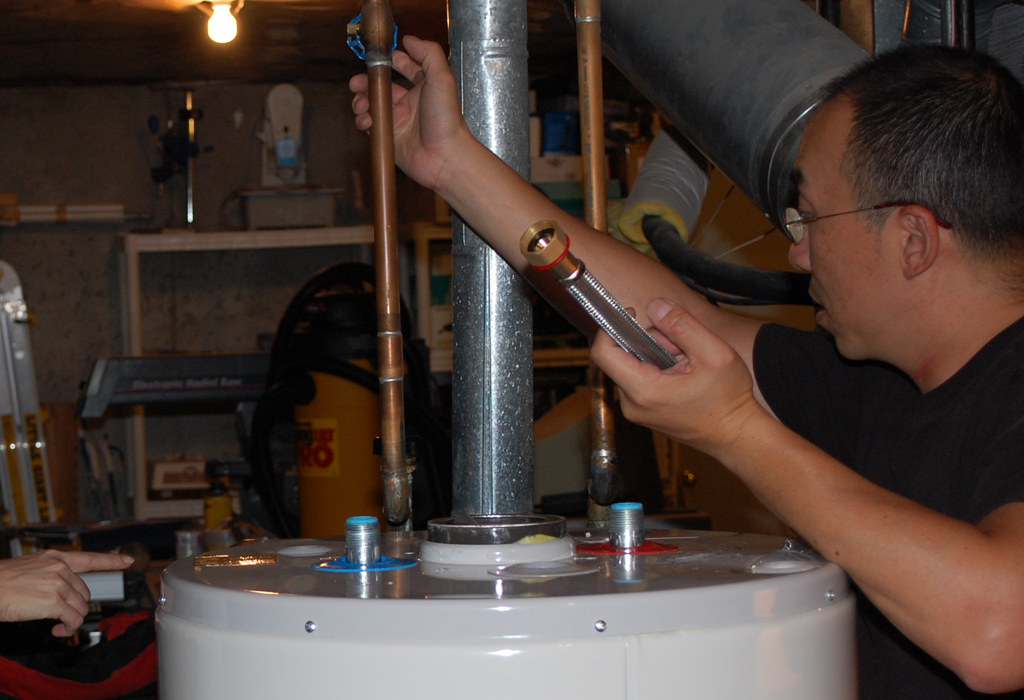
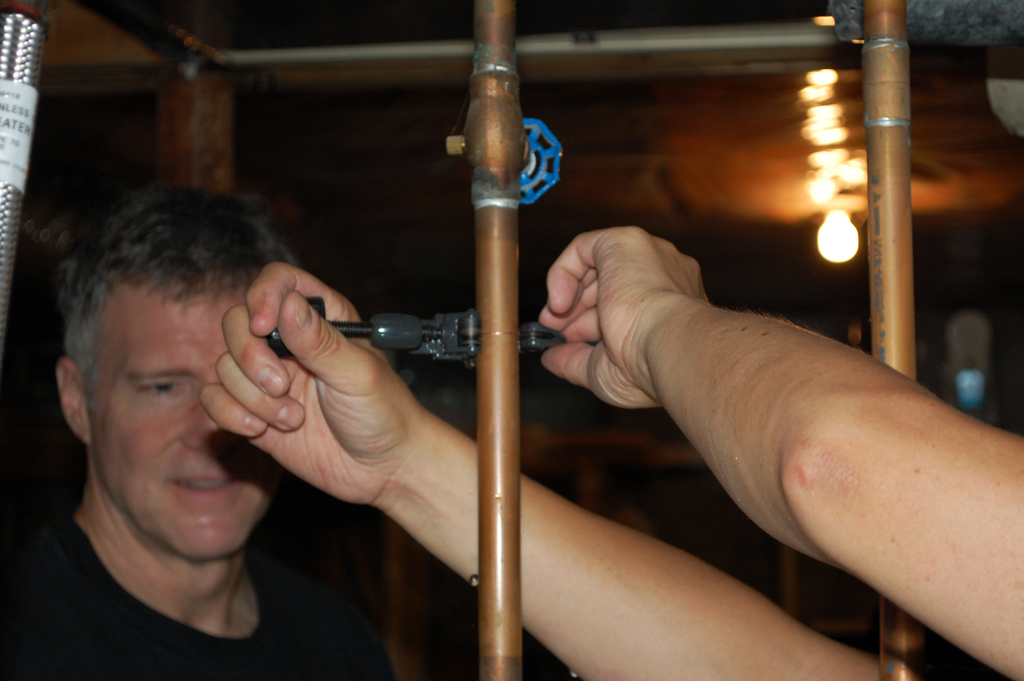
When we disconnected the gas line, we left the joint union on the pipe until we realized it had to be removed in order to attach the flexible gas hose. Two pipe clamps were used, one for keeping the pipe from turning, the other to turn the union.
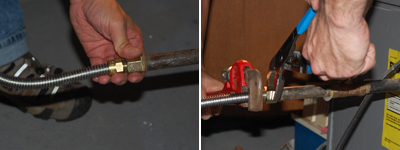
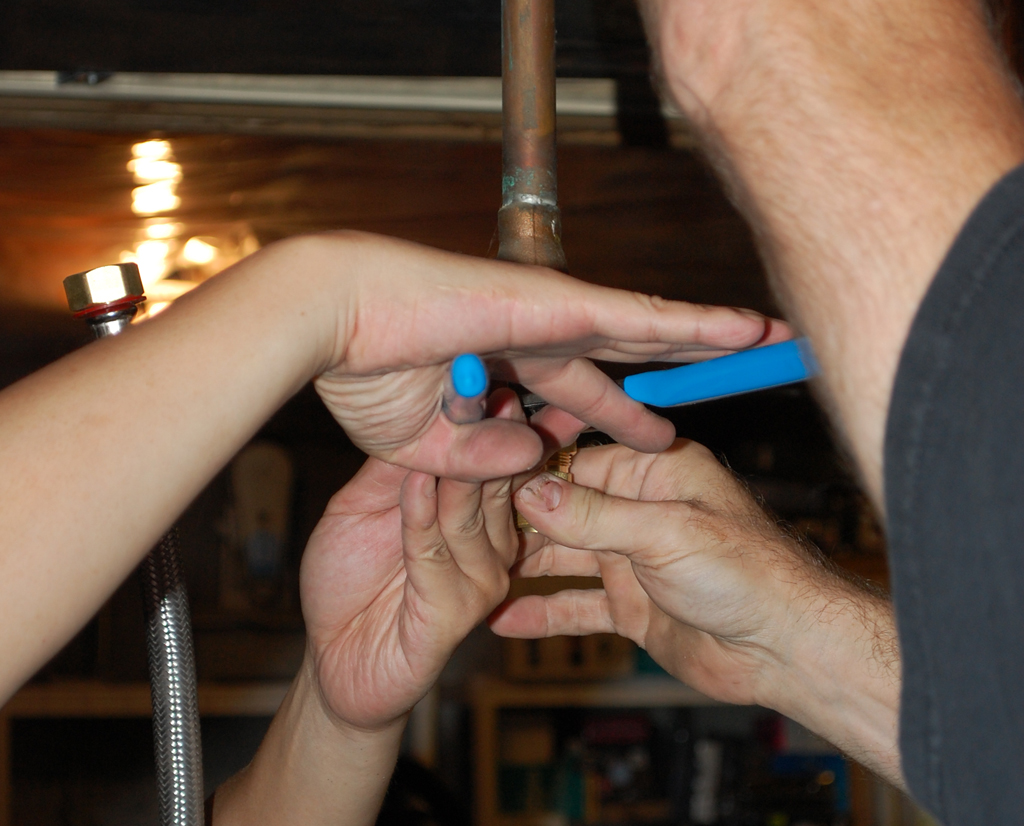
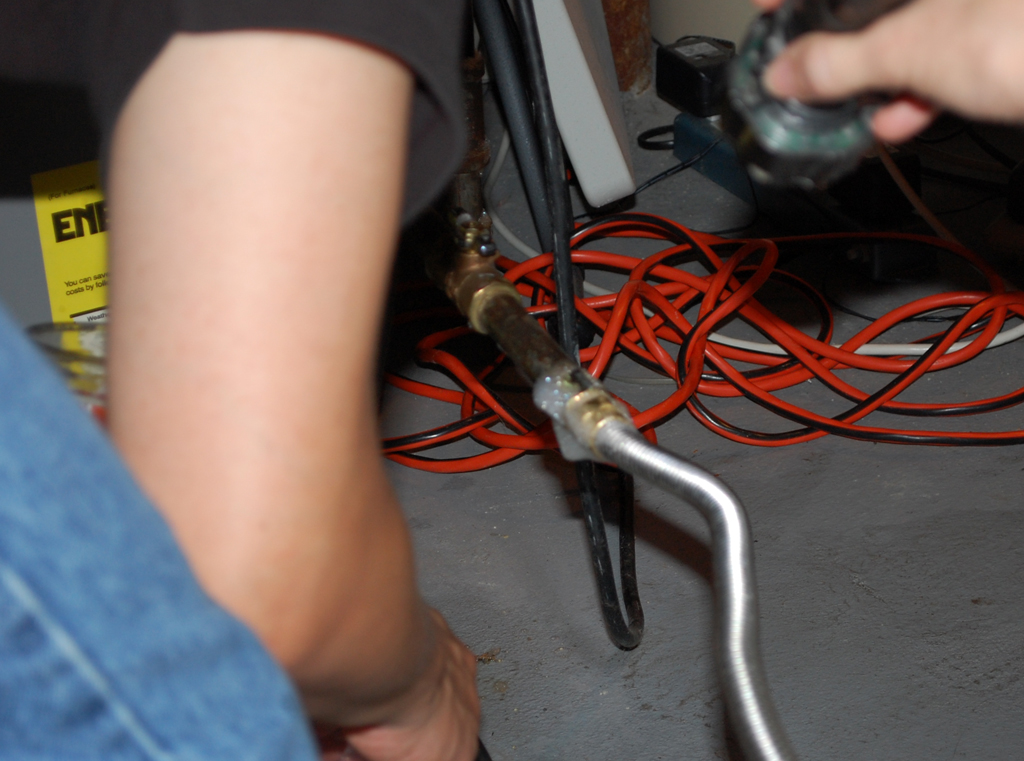
Once removed, we taped the threads using the Teflon tape that came in the kit, then attached the flexible line to the gas pipe. Two tools were used whenever we did not want the hose or the pipe to turn.
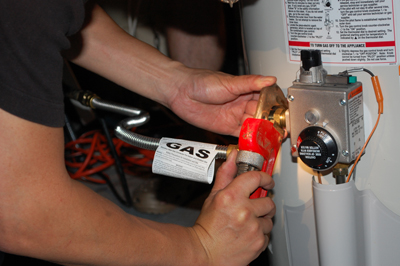
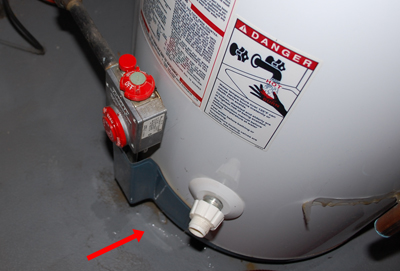
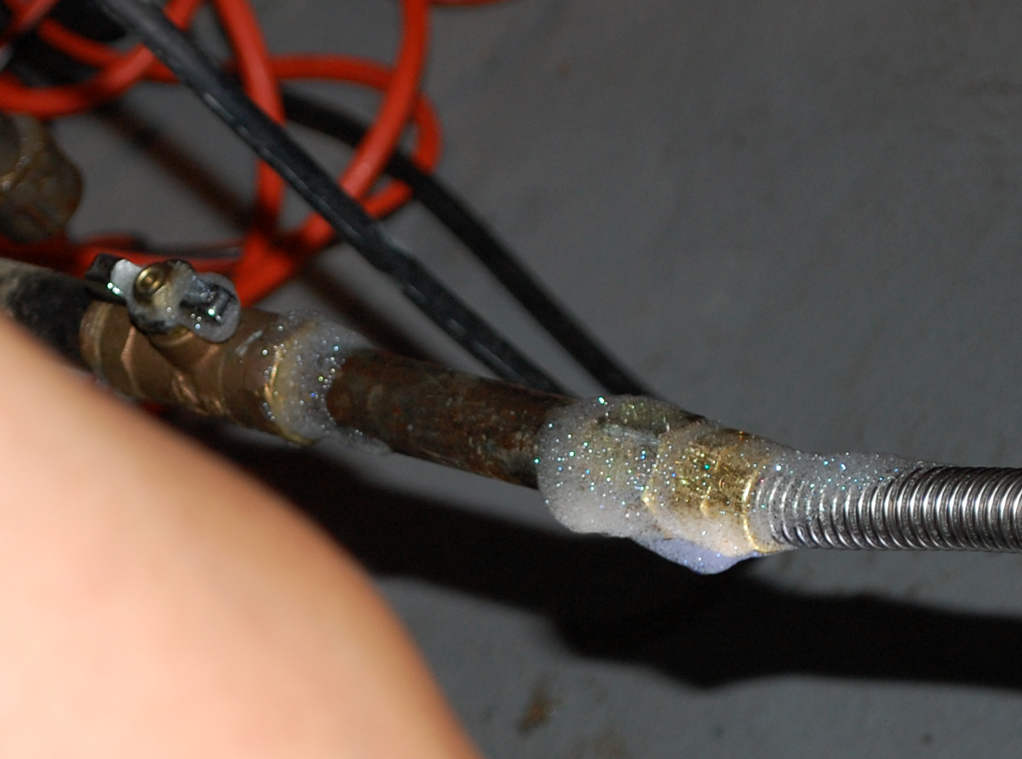
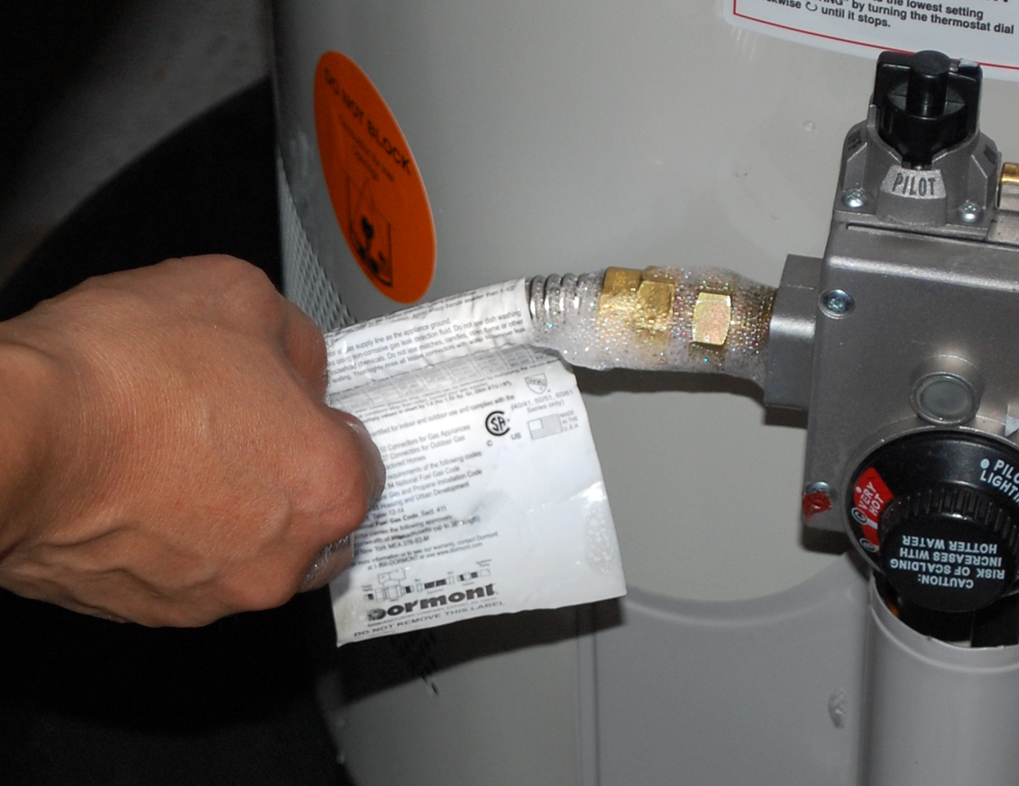
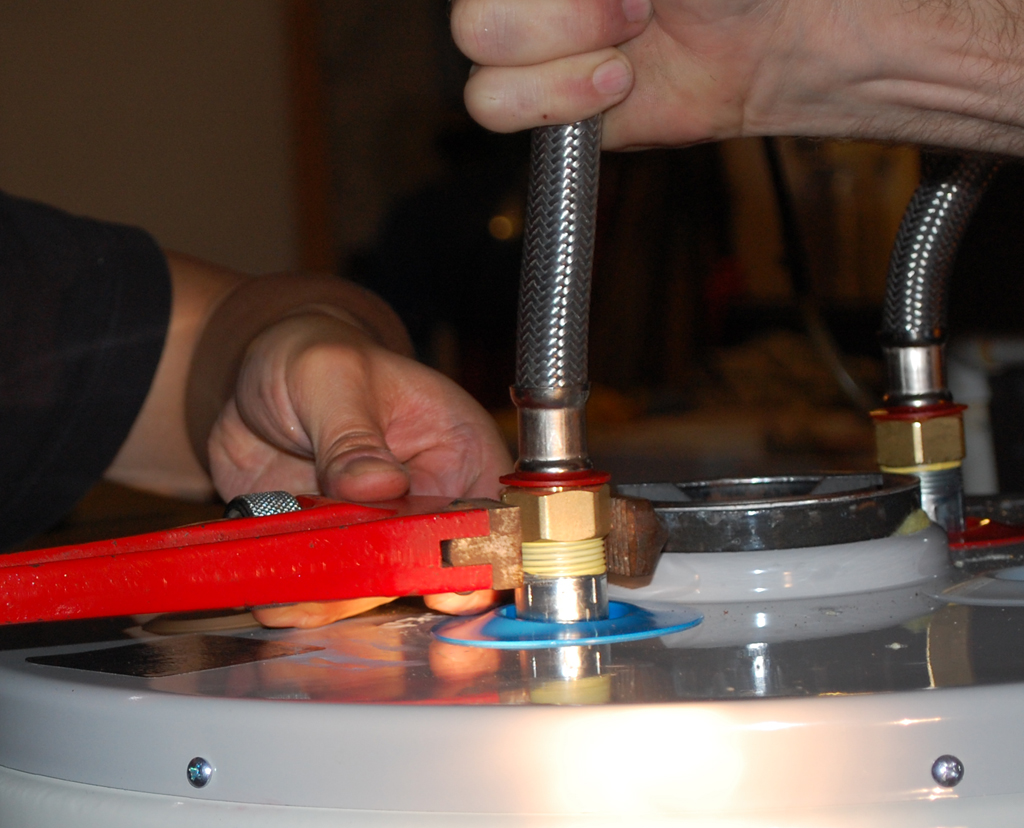
The last gas connection was to the controller on the water heater. Once everything has been tightened, we turned on the gas and checked the connections for leaks.
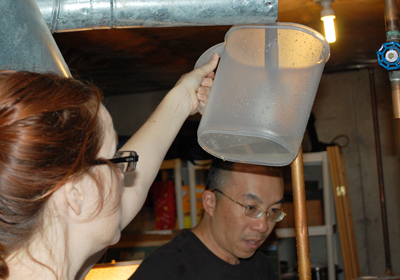
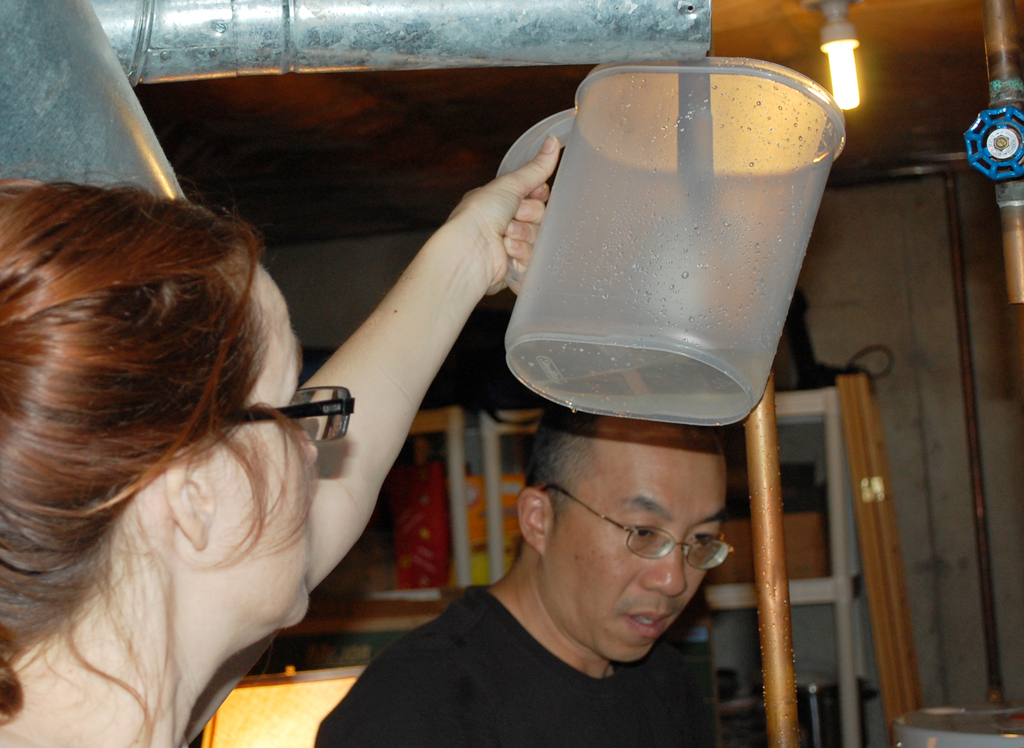
The only safe way to check for gas leakage is to mix up some soapy water, wipe it on the joints, and watch to see if any big bubbles form. Since it would be "bad" if we had any type of gas leakage, we checked and rechecked the gas line connections and made sure we had tightened them properly.
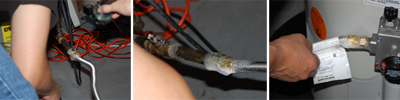
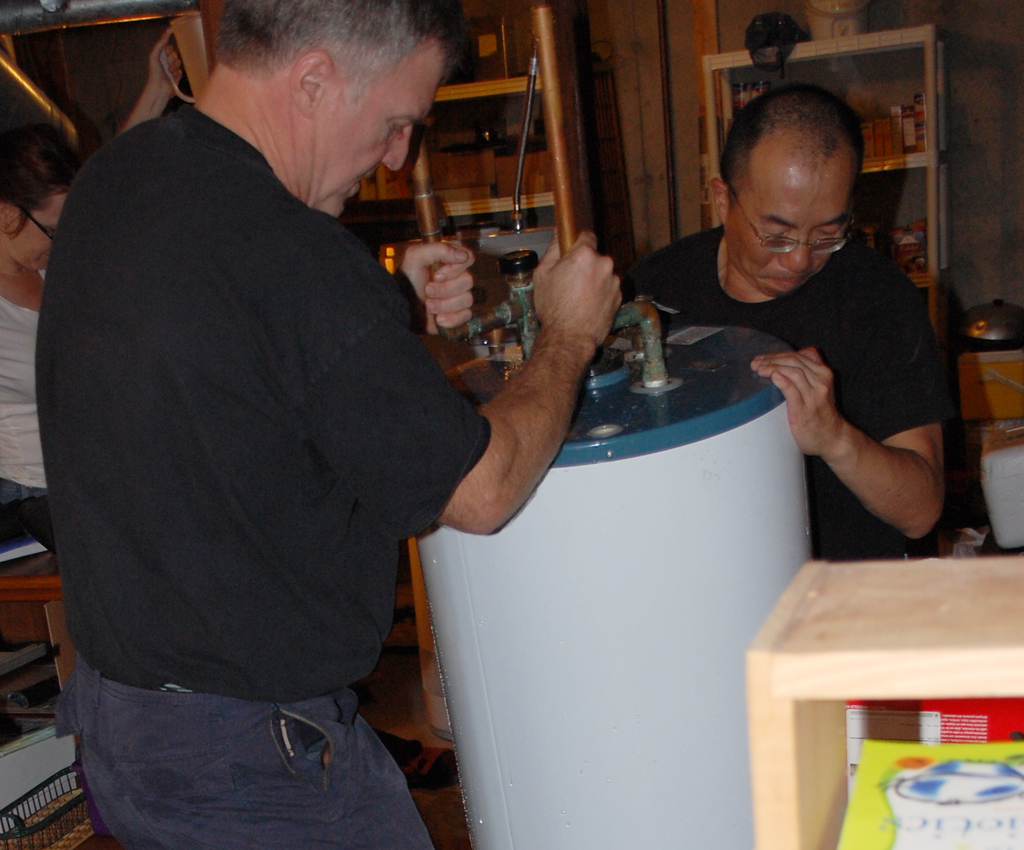
When we were satisfied with our work on the gas line, we wrapped and connected the appropriate water lines to the hot (red) and cold (blue) connectors on the tank. The installation kit, by eliminating all of the soldering work, really made this job SO much easier that almost anyone can tackle this project.
We thought we were done with the installation, but one of the interns noticed that it was not quite yet "Miller Time." The only thing left was to... actually we thought some of you probably could tell us what was left still to do. If you think you know, drop us a note with the subject line "It's almost Miller Time!" and tell us what is still left to do before we should fire up this new water heater. We'll pick a winner amongst the correct answers tomorrow. [Permalink] - Install New Water Heater
|
|
August 12,2008 (TakeItAwayTuesday) |
When we made the trip to Home Depot for the new water heater, we were confronted with one decision... whether to get a gas unit warrantied for 6, 9, or 12 years. We decided to go with the 9 year warranty because we thought 6 was too soon to have to do this again and difference in cost of the extra 3 years for the 12 didn't seem justified.
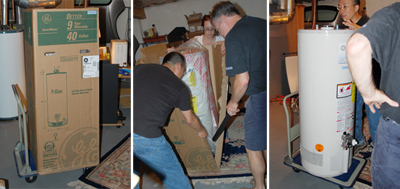
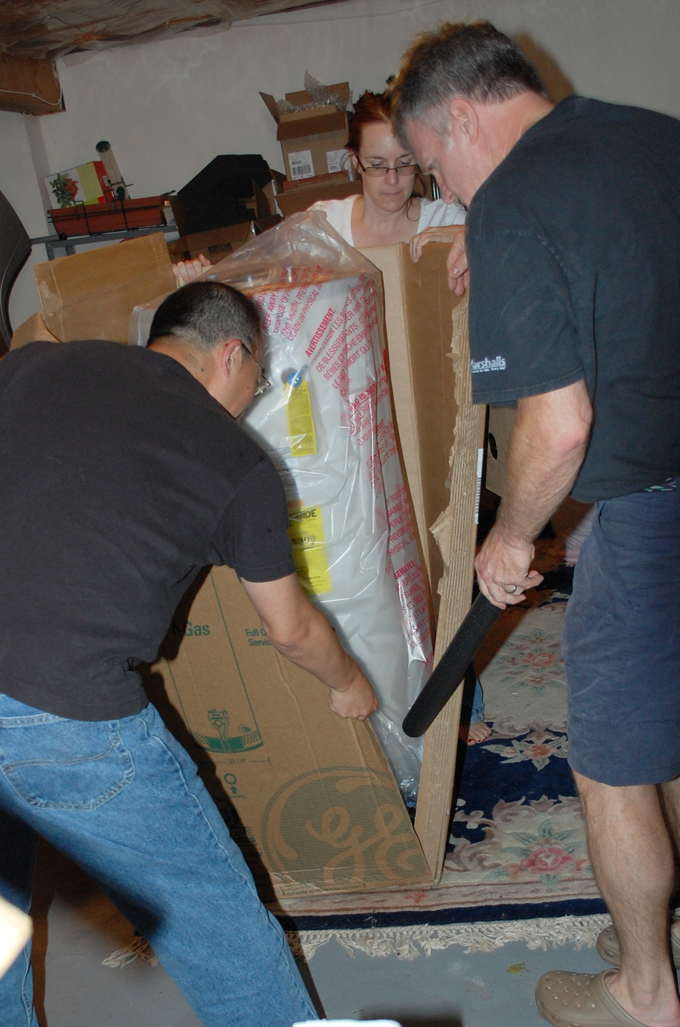
The cart we borrowed from the mail room came in handy for moving the tank around as the unit was still pretty heavy even though it was empty. Once we got the unit down to the basement, our first challenge was how to get it out of the box. One suggestion was to lay it down and slide it out, but just ripping the box ended up being the easiest method.
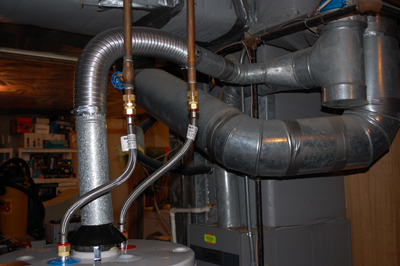
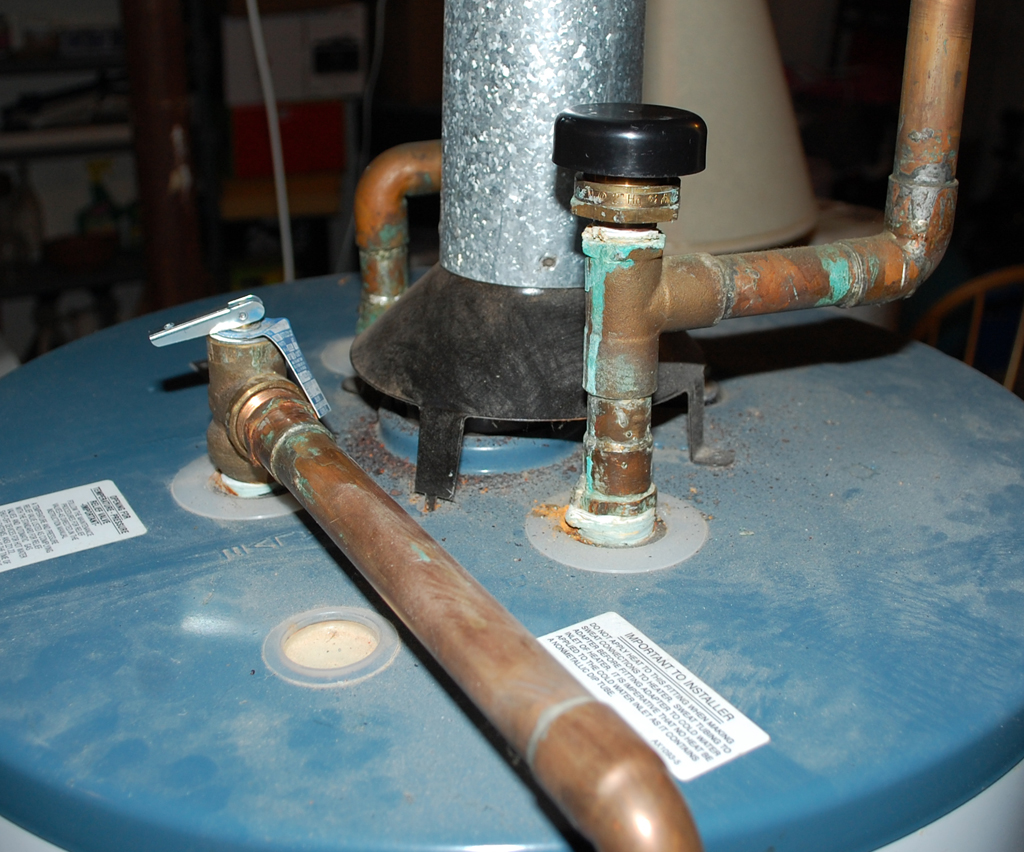
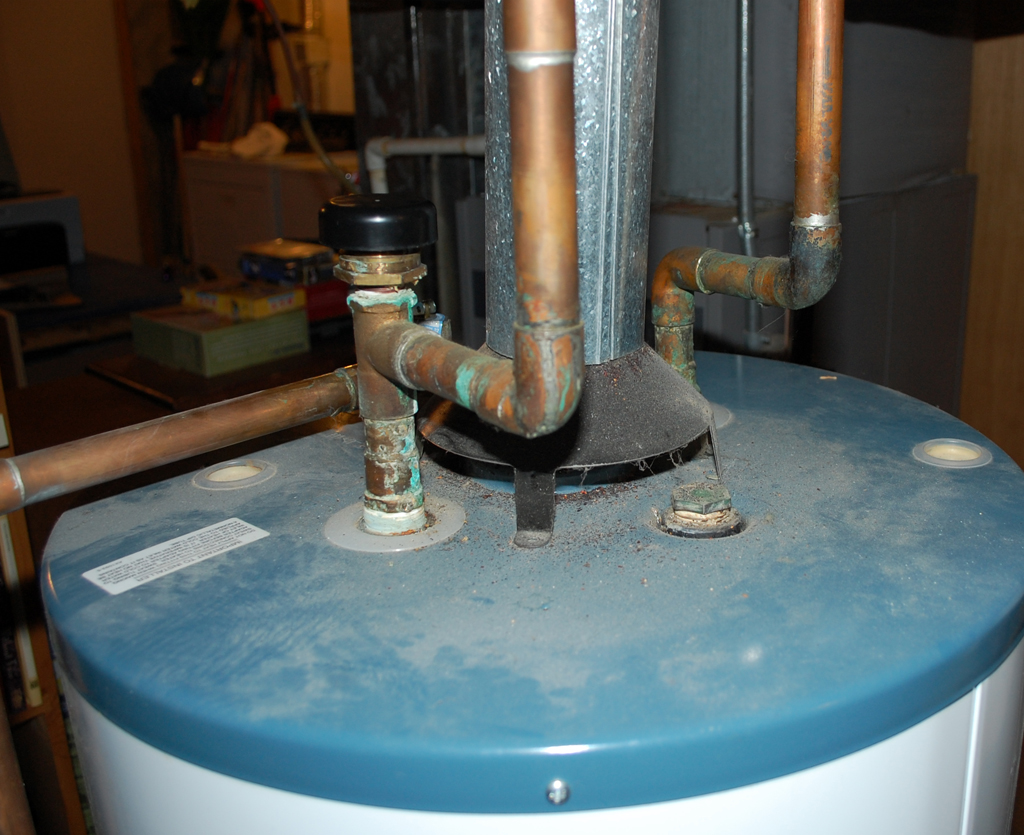
The new unit was about 3" taller than the old unit. We mesured and marked where we should be making the cut in the copper pipes for attaching the flexible tubing. We also double-checked and made sure the water was off before we began the process of removing the old tank.

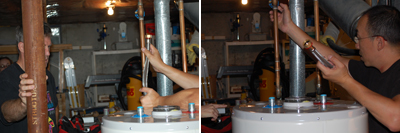
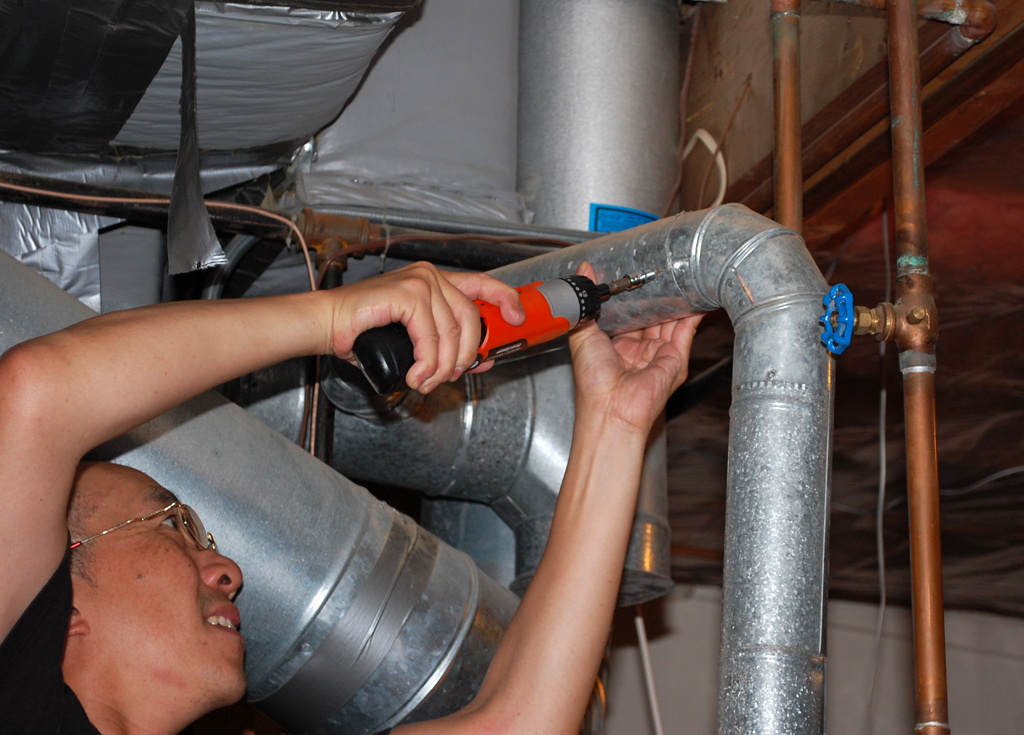
We started with the vent as it was the easiest part to remove. The vent ducts were attached using sheet metal screws. The power screwdriver made working at the odd angle much easier.
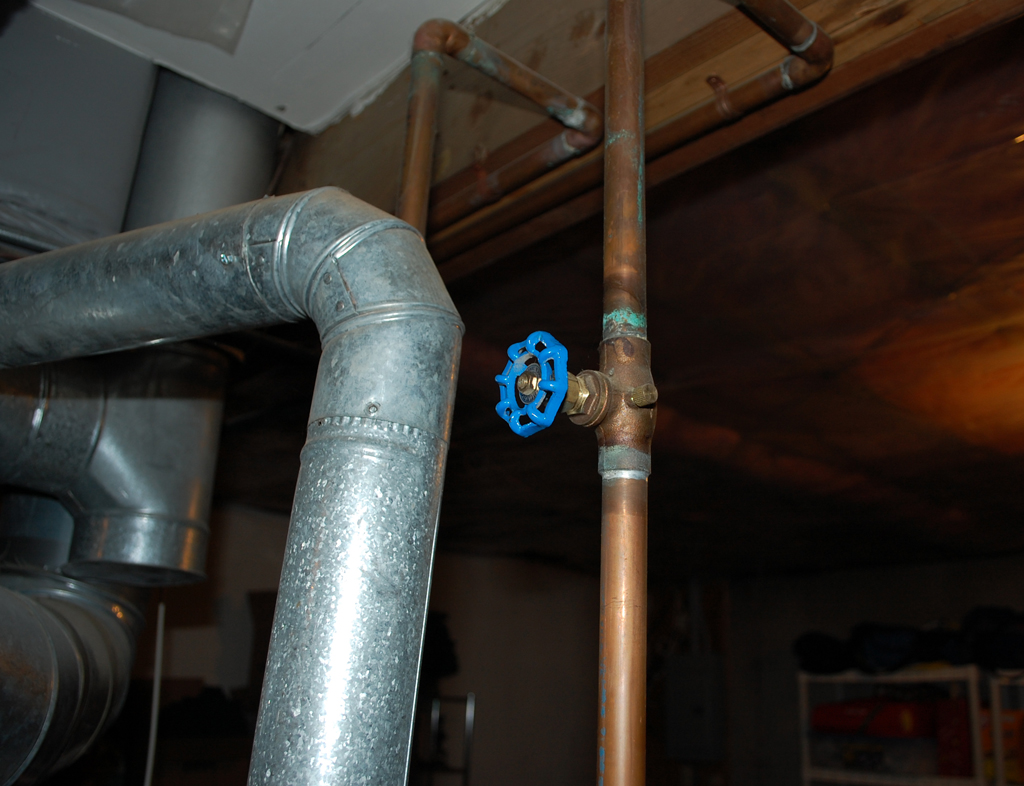
Cutting the pipes was pretty quick as we had plenty of room to rotate the pipe cutter. We made sure we left enough pipe beneath the cut-off valve for the new fitting to attach. Once cut, there was a little bit of back flow of water, but no surprises.

The last connection was the gas pipe. We checked and made sure the valve was in the shut position before disconnecting it from its coupling. We used two adjustible wrenches to turn the central nut. This was so we could hold the pipe in position while turning the nut.
With the vent, water pipes, and gas supply disconnected, we were ready to move the old tank out. We had not drained the tank because the basement has no easily accessible drain. This made moving the tank a LOT more difficult than we had thought. In retrospect, we should not have been surprised as 1 gallon of water weighs 8 lbs, so the 40 gallons added 320 extra pounds to the 100-pound tank. Good thing Jay had not left on his trip to Europe yet!
With the old water heater out of the way, we are ready to roll the new unit into position, hook things back up, and take a hot shower. Believe it when I say we all needed it :-) [Permalink] - Removing Old Water Heater
|
|
August 11,2008 (MopItUpMonday) |
Most home water heaters have a life span of about 10 years. The one we have in the basement of the RainyDayMagazine office was replaced around 10 years ago (almost to the day). Some of the editors in the office noticed a big puddle of water in the storage area last week. By Thursday it was clear the water was from the water heater.
To prevent any damage, they turned off the cold water and gas feeds to the hot water tank. This did not stop the water leaking from the tank, but it did slow it enough for them to decide what to do next.
They debated whether they should get it fixed so they could take a hot shower during the day or whether they should wait until the rest of the team returned from NYC. As this appeared to be a great DIY article for RainyDayRenovation, they decided to wait (actually, it was the managing editor who decided that they would wait...).
Replacing a hot water heater is conceptually not difficult. There are four (maybe five) things which need to be detached/attached when replacing the unit:
- connect the cold water feed to the unit
- connect the hot water outflow from the unit
- connect the gas or electric power to the unit
- connect the vent if it is a gas powered unit
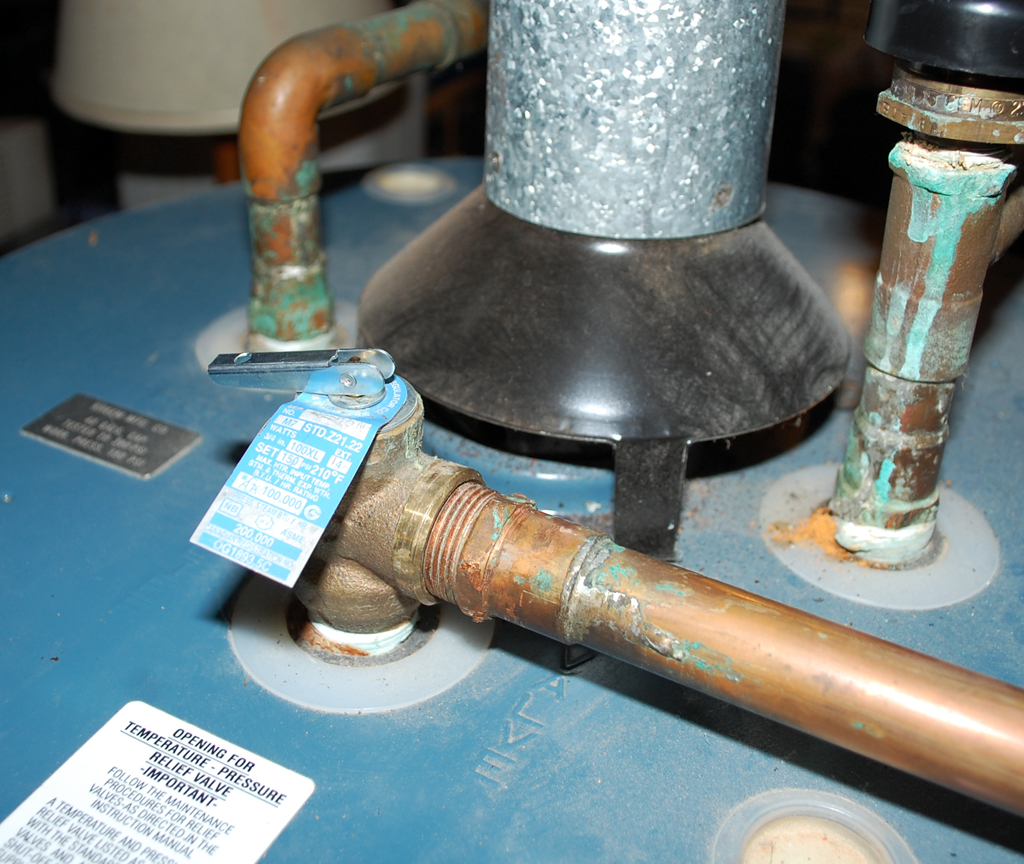
- connect a temp/water overflow gauge if needed
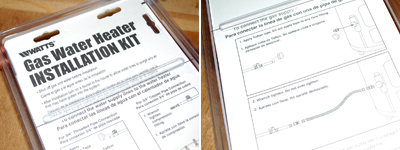
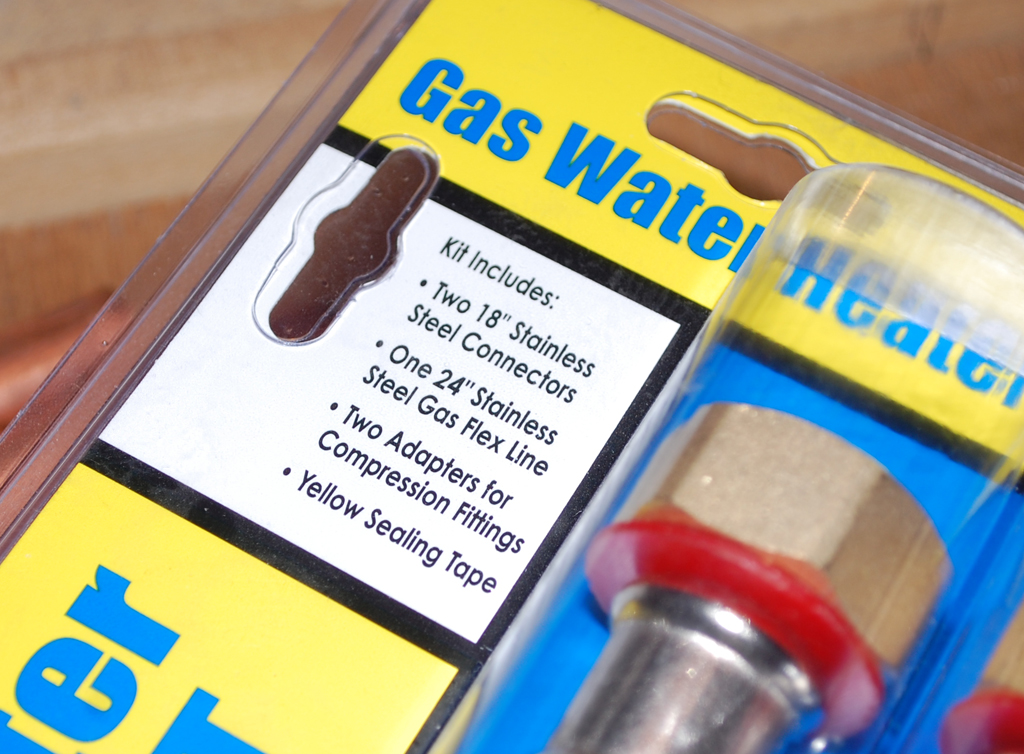
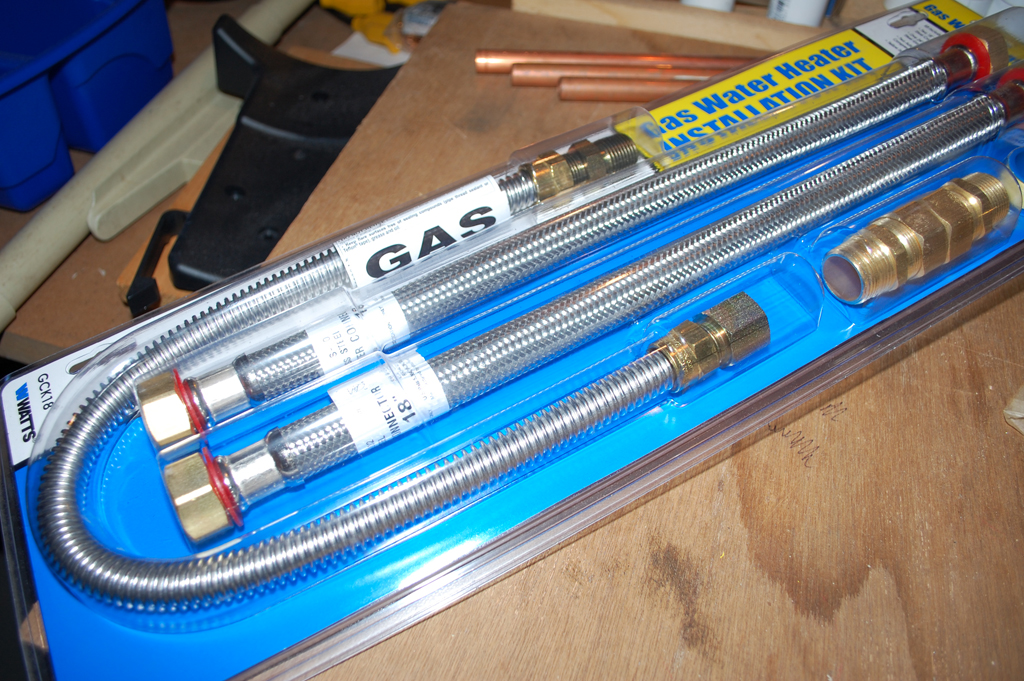
Those who have done soldering of copper pipes before may find this next suggestion excessive. However, we would like to pass it along for those uncomfortable using a butane torch. Home Depot sells a $20 kit which makes soldering unnecessary when installing a water heater. Plumbers may not like this kit as it makes it so that pretty much anyone can replace their own water heater!

The kit contains all of the parts (water hoses, gas hose, fittings, etc...) and the connections are made using compression joints. Another big advantage of using this kit is that its flexible hoses make placement of the water heater less critical than if rigid pipes were used.
The maintenance crew explained the details of the installation project to the editors. They also decided that the editors themselves should attempt the project, since someone (we are not saying who) had remarked within their earshot that, especially with the Watts kit, it looked "pretty simple and straightforward."
The editors, emboldened by the success of their Advantium installation, accepted the challenge. They are now down in the basement looking over the task and are going to draw straws to decide who gets the task of emptying the water from the old tank. We'll catch up with them tomorrow to see how they did. [Permalink] - Leaking Water Heater
|
|
|
[Dec] [Nov] [Oct] [Sep] [Aug] [Jul]
[Jun] [May] [Apr] [Mar] [Feb] [Jan]
....... 2007 ......
[Dec] [Nov] [Oct] [Sep] [Aug] [Jul]
[Jun] [May] [Apr] [Mar] [Feb] [Jan]
....... 2006 .......
[Dec] [Nov] [Oct] [Sep] [Aug] [Jul]
[Jun] [May] [Apr] [Mar] [Feb] [Jan]
....... 2005 .......
[Dec] [Nov] [Oct] [Sep] [Aug] [Jul]
[Jun] [May] [Apr] [Mar] [Feb] [Jan]
....... 2004 .......
[Dec] [Nov] [Oct] [Sep] |
|
|


