| Today |
| Carolyn's World |
| Gear & Gadgets |
| Garage |
| Garden |
| Kitchen |
| Unaccompanied Minors |
| Workshops |
| Contact Us |
| Index |

| RainyDayProjects... |
||
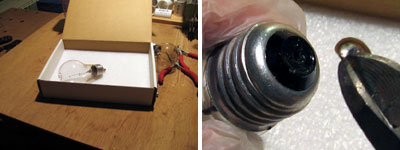
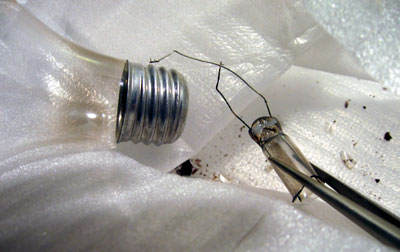
Cleaning out the bulb according to John's directions was pretty easy. We did make one addition to the step which we think really helped in containing the loose chips of glass from the base. We have worked with glass enough to know what a pain it is to have little slivers all over the place. One good trick is to have a box with some styrofoam at the bottom to catch the bits.
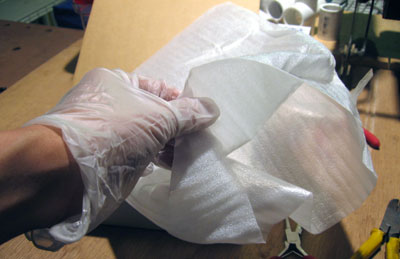
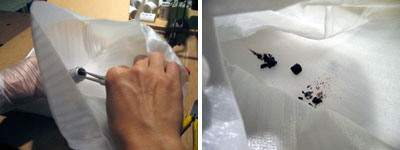
However, when we started to nibble at the glass insulator, we realized the box was not going to do it. We needed to contain the flying bits inside a bag.
The bag approach worked perfectly. Everything was contained inside...and there were a LOT of micro-slivers. Definitely not something you want all over the work surface.
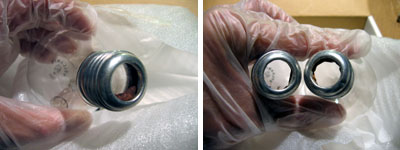
Once the internal wires have been pulled out, the rest is just cleaning up. It took us about 5 minutes to do the first one and 30 seconds to do the second one. There is really not much to this once you have got the hang of it.
We started with clear bulbs so we didn't have to clean out the frosting, but we did have to wipe away the black burnt soot. Do it with dry tissue paper or you'll end up with will fibers all over the inside of the bulb.
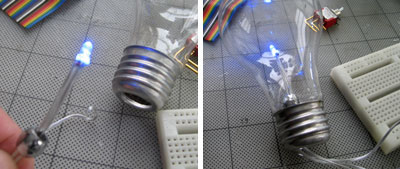
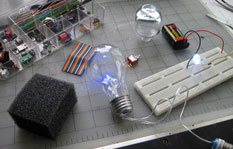
Making a LED assembly is not that hard. All that is needed is a LED , some wires, some batteries, a resistor, and a switch. However, it may be enough to stop some from tackling this project. What if you didn't have to make anything? What you need may already be in that bag from the last tradeshow you attended :-) We found exactly what we needed from such a trip. Some vendor was giving away some blinky blue LED on a wire...perfect for this project. Why build when you can "repurpose?"
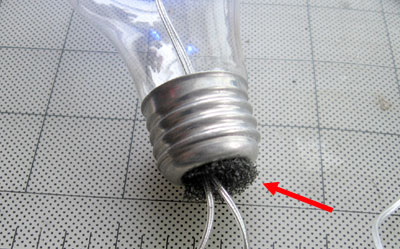
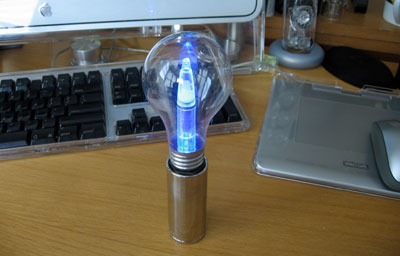
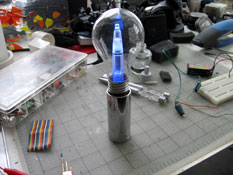
We used some packing foam to secure the wire inside the hole. Be careful here because there may still be some pieces of glass embedded in the glue inside the hole. The LED bulb is totally self-contained. This particular LED is fairly bright, but there are other even brighter LEDs on the market. If you want to make a bulb which can actually light up an area, come back in a few weeks for the update to this article :-)
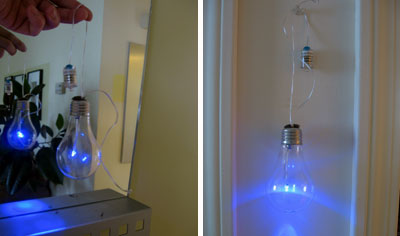
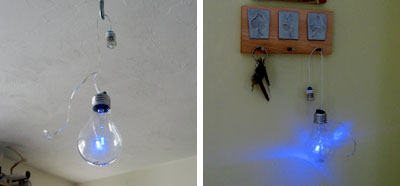
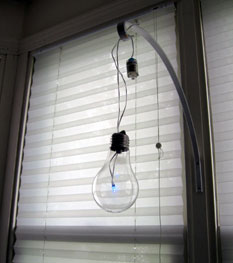
The whole project only took 10 minutes, but the end result was pretty cool. The bulb is light enough to be hung anywhere. The weight of the batteries acts as a counter balance to the bulb.
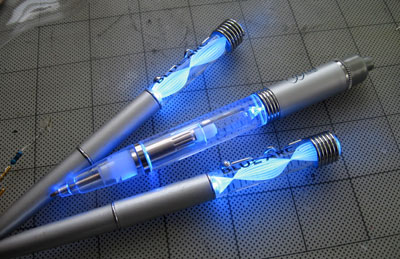
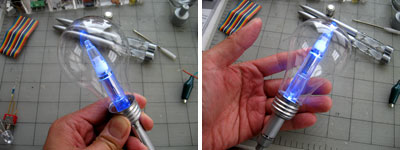
The whole idea here is to remind folks that not everything has to be made from scratch. There are probably tons of stuff you have laying around which would be great for quick little projects. Send us you best efforts...if we post it, Eliot will send you something from his pile of tradeshow goodies! UPDATE: We scrounged around some more and came up with a few LED pens from a Pharma trade show. I think we went because they promised us a free lunch. Anyway, we came back with some great blue LED pens. These will be perfect for other LED bulb projects.
We know that not everyone is a pack rat like us and may not have a LED assembly laying about. In the next segment, we'll show you how to make your own switched LED unit for a few bucks. The LED will last about 10,000 hours...the battery will not. |
LED Light Bulb |
|
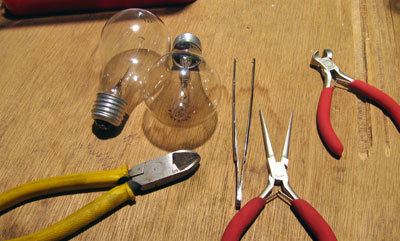
Some projects we do require a knowledge of electronics. Some just look like it does. We read about this great idea on MAKE about how to "clean out" a burnt out lightbulb and use it for various projects.
We thought it would be fun to clean out one of the broken bulbs we had around the office and replace the internal mechanism with an LED and make a freestanding LED light bulb.
LED Light Bulb Project: |
||