| Today |
| Reviews |
| RainyDayAstronomy |
| RainyDayBiology |
| RainyDayChemistry |
| Contact Us |
RainyDayScience's content can now be licensed for your print magazine or web site. Please contact us directly here. If you want to see something reviewed, then drop us a note with a link and we'll be happy to take a look.
|
||||
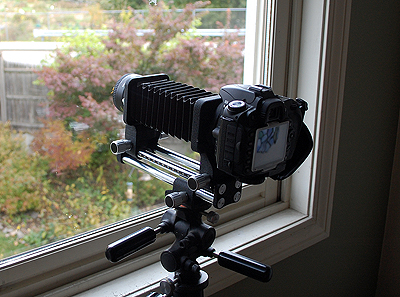
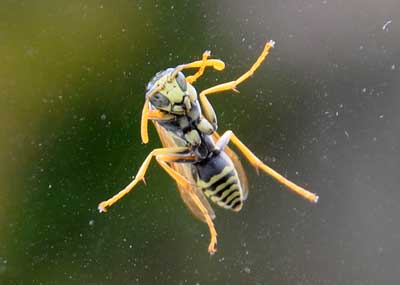
We have been experimenting with our macro setup when time permits. Most of our shots have been on inanimate or very slow moving objects. Because of the cooling Fall temperatures, an opportunitiy presented itself the other day which enabled us to try our hand at an insect.
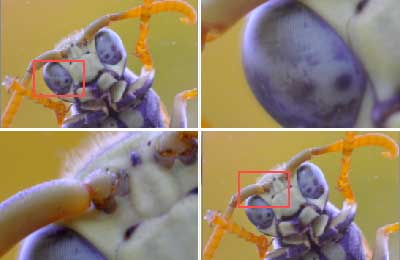
We noticed a common yellow-jacket wasp on our upstairs window. The cool temperature had slowed down its movements to a crawl. Once things warmed up the insect would likely be on its way. We had to work quickly if we wanted to get some shots. The bellows setup works best when there is plenty of light. The placement was perfect for our macro efforts (except for having to shoot through a pane of glass) because the wasp was back-lit and its exoskeleton nicely illuminated. However, even with such great lighting, it was still difficult to see exactly what was in focus. In the end, we did manage to get some interesting shots of the wasp. Due to the shallow depth of field, only a part of the insect was in focus in any given shot. We picked out a few representative samples to show the different parts at full resolution. Click on any of the images for a closer look.
We now have a better appreciation of just how difficult it is to take good macro shots. There must be a more precise way of achieving critical focus. This will be our next topic of research. We will share more as we delve further into this interesting branch of photography. [Permalink] - Macro Opportunity |
||||
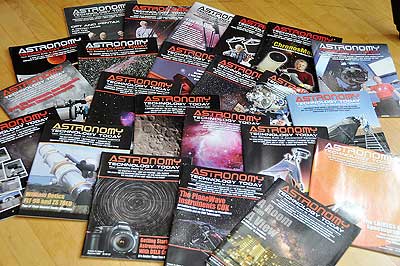
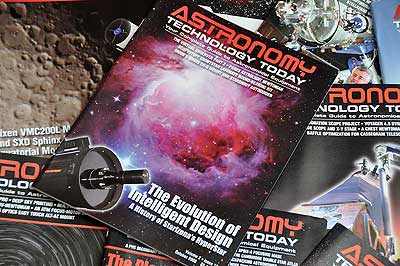
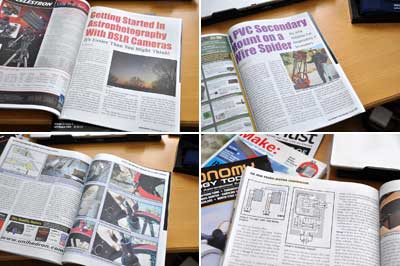
Astronomy Technology Today magazine is having an offer so amazing that we felt compelled to give them a shout-out here. In one easy move, readers can have the entire collection of ATTM for just $30! We have already sung the praises of ATTM back in August. We were happy to be able to obtain a complete collection of all of the issues (except for May 2007) in such an easy manner. We are excited and looking forward to flipping our way through the entire collection on the next "rainy day" :-)
Since June, we have been working on a special astro-photography project. The first task was putting together a "portable astro-imaging" setup. We settled on the Celestron 6SE optical tube assembly (OTA) because of its compact size and removable secondary mirror. The removable mirror is important because we want to do deep-sky imaging using the new Starizona C6 Hyperstar lens.
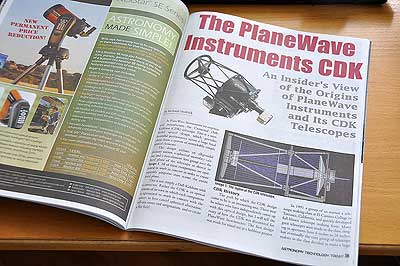
The Starizona Hyperstar lens, when paired with a Starlight H9C CCD camera, converts the Celestron 6SE OTA from a f10 to a super-fast f2 imaging system! In practical terms, it means we can take a deep-sky image in seconds instead of hours! To learn more about Hyperstar Imaging, check out the info on Starizona's site. We'll have a complete review of both the C6 and M10 Hyperstar lenses over the next six months. When we started putting the gear together for our portable deep-sky astro-imaging system, we did quite a bit research about the capabilities of the Hyperstar lens. However, we did not know much about its "history." While thumbing through the various topics in the back issues of Astronomy Technology Today, we came across an issue where the lead story was about the "evolution" of the Hyperstar lens! Awesome!!! Can't wait to see what other gems we'll uncover in our stack of back issues :-) [Permalink] - ATTM Back Issues |
||||
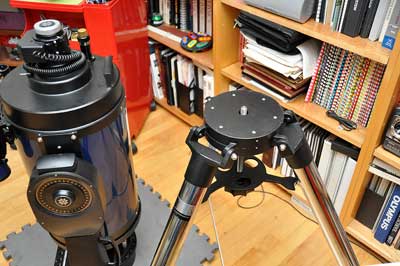
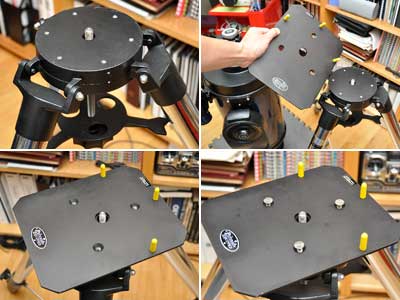
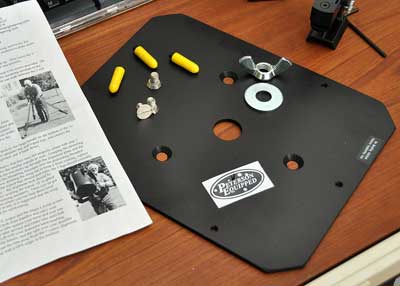
The Peterson Mounting Assistant (PMA) installation was a lot easier than we had anticipated. The hardest part with the whole project was getting the scope off the tripod :-) It was a LOT heavier than we remember. The base of the tripod has six predrilled and pre-threaded holes. The main anchoring bolt is the one in the center. The PMA has three holes and they match precisely those on the base of the tripod. The installation kit has three stainless steel screws for anchoring the plate.
Attaching the three guide pins and screwing down the plate to the anchor is all there is to the PMA installation. The guide pins make sure the base is positioned such that the main bolt is directly aligned with the hole in the base of the mount of the scope. Just one try was all we needed to convince us.
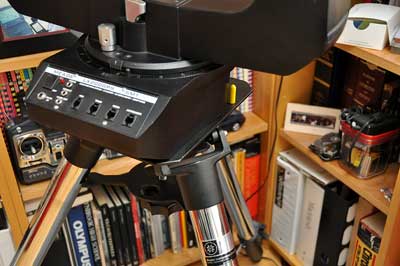
The Peterson Mount Assistant is a rock-solid platform and a "must have" upgrade for the tripod. It is a bit unwieldy to pick up the scope with just one person. However, once the scope is lifted, getting it centered and locked down was fast and simple. If you have a big scope, don't even bother wondering whether you need this. Just get it. Spend your time deciding which finder (red dot or laser) to get instead. We hope you enjoyed our week-long focus on Astronomy. Next week we will mix it up a bit, but the focus will shift to more home-improvement related topics. The weather is getting drier, so we hope to give the painting project one more go before the cold weather takes over. Have a fun weekend! [Permalink] - Peterson Mount Assistant Installation |
||||
A 10" SCT telescope tube is a very light-weight and compact design when compared to its refractor equivalent. However, the tube and fork together can still weight around 60 lbs! Trying to put the assembly on top of the tripod is a difficult one-person operation. We know. We tried it when we first brought the Meade LX200 into the office. Some of the folks thought there had to be an easier way. That was when we came upon this thing called the Mounting Assistant designed by Pete Peterson. The Mounting Assistant is an aluminum plate which enables one person to precisely align the scope assembly on the tripod for the insertion of the mounting screw. The instructions seem simple enough. We love the photos of Pete mounting a 12" scope all by himself.
The design is very clever. Three steel pins on the plate precisely guide the base so the mounting hole is aligned without fumbling around with it. The plate can stay on the tripod and need not be removed unless we decide to change over to an equatorial wedge. Here is the base of the Meade 10" LX200 GPS scope. The plate will sit between the drive box and the tripod. Looks to be a pretty simple installation project. We'll have the write-up of the installation in the next day or two. [Permalink] -Meade LX200 Peterson Mount Assistant |
||||
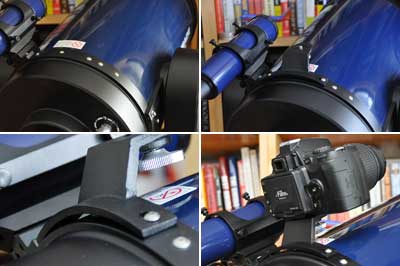
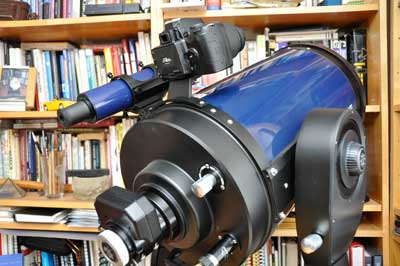
There are many ways to capture photographs of the heavens. One way is to image through the telescope. This is great for planets and other celestrial objects. To get a wide-field photo of the night sky, though, the better way is to attach a camera to the top of the telescope. The main reason for this is that in order to get a sharp image, compensation of the Earth's rotation is required, and piggybacking on the scope's mount is the easiest way to do that. The front and rear rims of the LX200 tube are already pre-drilled and fitted with stainless steel machine screws. They are spaced appropriately for various size mounts. On the LX200, the camera mount we got spanned three screws. The mount was curved in such a fashion that the middle screw does not interfere with its attachment.
The mount has the standard tripod screw for affixing a camera. It is a little bit awkward to work the knob, but the camera feels really stable when attached. Of course, the real test is whether there are any shakes or vibrations when the scope is tracking. Fall is coming. We have been getting our gear together for a new series of astrophotography projects. There will be more reviews, how-to articles, and definitely some pretty cool DIY hacks. It should be a whole lot of fun! [Permalink] -Meade LX200 Camera Mount |
||||
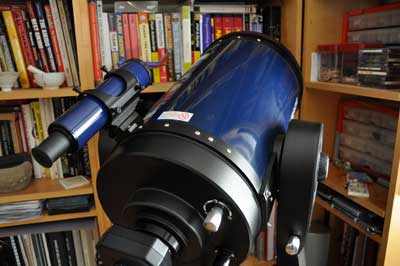
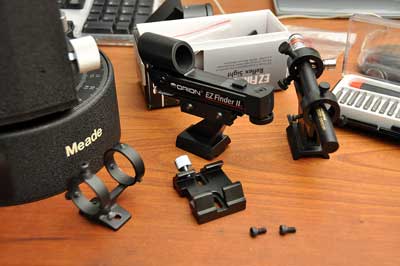
Upgrading a scope's finder is an easy way to improve the usability of any telescope. When we started looking into what was available, we discovered quite a few potential options, the three main ones being: a better finder scope, a red-dot finder, and a laser finder. It is still unclear which option we will go with in the end, but a useful change to make is the finder mount. We found a good dovetail base for the finder scope from Orion. It is made of metal, designed specifically for SCT, and very simple to install.
Most finder accessories can be mounted using this dovetail base. The quick-release screw on the base enables accessories to be easily swapped. Note the notch at the front of the base. For mounts with an appropriate tab, it will act as a safety to prevent the mounted item from accidentally sliding off when the main OTA is at an angle.
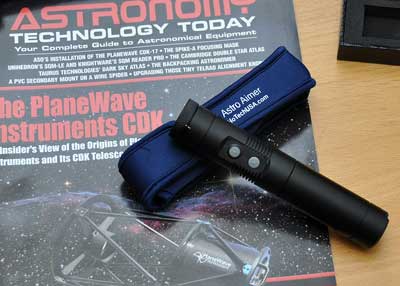
The Orion EZFinder and the Wicked Laser mounted without any problems. The HoTech Laser was too large for the mount we had, but it did fit onto the OEM mount which came with the Meade 2045. While we are not sure yet which one will work best with our "grab-n-go" scope, the smart money is on the HoTech AstroAimer. It is multi-functional, compact, and ruggedly built. Regardless of which one finally makes the cut, we will have a lot of fun finding out :-) [Permalink] - Finders for the Meade 2045 |
||||
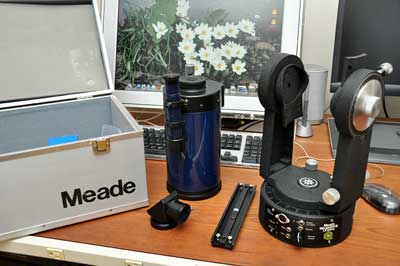
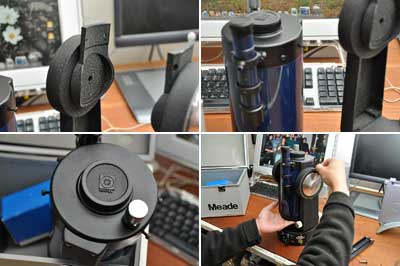
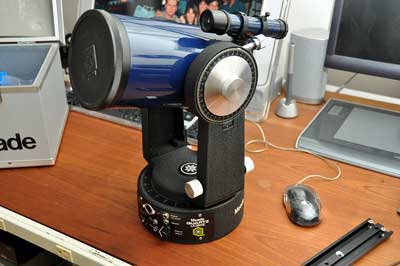
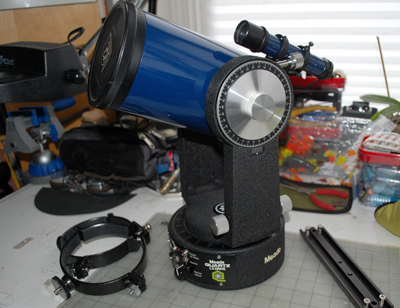
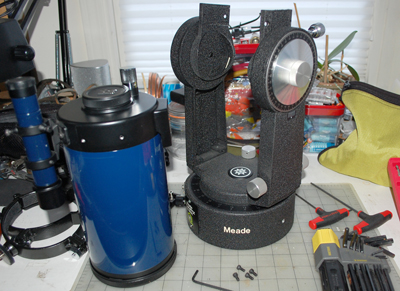
A while back we disassembled the Meade 2045 so we could use it on the Celestron CG-5 GoTo mount. Recently, we acquired a Nexstar 6" OTA (more about it later) for the CG-5 mount, so we thought it was time to put the Meade back together. The great thing about the Meade 2045 is that it was designed as a spotting scope, so taking it apart and putting it back together was a simple process. Just four screws and we were back in business.
It will be nice to have a "grab-n-go" scope in our collection. We are going to give the scope a thorough check-up to make sure the alignment is good, as this is the telescope we'll be taking with us to the Cape on Columbus Day weekend. Over the next few days, we'll be checking out a few potential upgrades for the Meade. That is the fun thing about telescopes, no matter how old a scope is, there is always some new piece of gear one could get to make it perform just a little better. [Permalink] - Remounting the Meade 2045 |
||||
The "Manga Guide To" series of books published by No Starch Press are wonderful. We have read many of them and have always enjoyed them immensely. Topics such as Electricity, Physics, and Statistics were presented in a manner which is fun and digestible by anyone. The Manga Guide to Molecular Biology is another great addition to the series. It is one of the best introductions to the subject we have seen to date. This book is suitable for a lot of different readers: high school student, investors, DIY biologists, etc... Molecular Biology came into the everyday vernacular in 2000 with the pending completion of the Human Genome project. There was a lot of press and wild expectations associated with this awesome scientific achievement. Companies involved in genomic research saw a huge influx in investments. We know. We were at a company which grew from $300M to over $9B in four years! Money flowed like water. Of course, like every bubble, it eventually burst. Expectations and valuations were "reset" to more realistic levels.
Today, the impact of molecular biology is all around us, but what that impact is is not clear to many. Is genetically-engineered food good or bad? What is gene therapy, what is personalized medicine? In order to debate or even understand these topics, one needs a basic understanding of the fundamentals of molecular biology. This is where the Manga Guide comes in.
Molecular Biology is conveyed via the adventures of Rin and Ami, students who have to attend summer school because they skipped their science class all semester. The storytelling approach is a delightful way to ease into the subject. Readers will start off engaged in the story and end up learning molecular biology along the way. Awesome fun! [Permalink] - Manga Guide To Molecular Biology |
||||
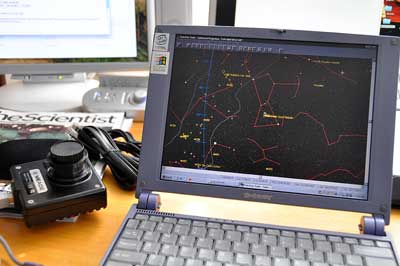
When we purchased our Meade LX200 GPS scope, it came with a lot of accessories. One of which was the Deep Sky Imager (DSI). The DSI is a special-purpose CCD camera designed for astrophotography. When the original owner purchased the unit, it cost over $300. He never used it. In fact, it looked like it had never been taken out of the box. We thought that since we wanted to take it with us on the Columbus Day Weekend trip, we should get the the DSI set up and do some trial runs now. We also realized that since it required a PC to drive it, this would be a perfect task for one of our really old, but perfectly serviceable ultra-slim Sony laptops.
It has been a while since we installed any software on a Windows 98 machine, but the Meade software installation was relatively pain-free. We did run into some confusion when we got a dialog about some bizarre communcations error. We just ran the installer again and it completed without problems the second time around. The software is pretty "techie," but we think we can muddle through it. We did manage to get the camera to be recognized by the software at the first try...which is a big deal in the Windows world. The specs on the camera are pretty low by today's standard, but we are still eager to see what kind of images we can get with this DSI. The sensor appears to be working, but we should really do a daytime test to confirm the quality of the image. We'll post more soon. [Permalink] - Meade Deep Sky Imager Installation |
||||
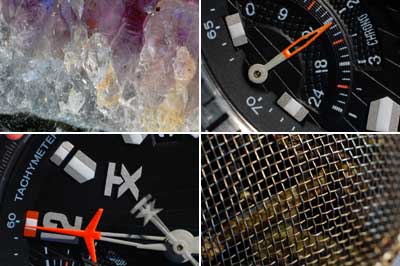
All the discussion regarding the Nikon PB-4 macro bellows setup brought an onslaught of email. Most were requests for more image examples. Not knowing what would make for good subjects, we just grabbed a few objects and started firing away. It didn't take us long to get the hang of using the macro setup. All of our examples were shot with available light. The images were taken with the camera in "manual" mode. We didn't note the aperture/ shutter speed setting as it was so easy with digital to just arrive at the right combination by trial and error. We wanted a large depth of field (more things in focus) so we set the aperture at F16 and "found" the right shutter speed setting when we got a bright enough exposure. Click on any of the images to see the larger versions.
Since the weather was gorgeous yesterday, we spent some time outside in the RainyDayGarden. With all the rain this Spring and Summer, the vegetable (beans, tomatoes, etc...) got plenty of water and the vegetable garden produced a very nice harvest. While picking some of the remaining tomatoes Carolyn noticed this giant caterpillar. Even before she finished saying "you gotta see this..." we were setting up the macro gear :-) Shooting outside was a whole different experience. There was plenty of light, so we were able to use a much smaller aperture, thereby giving us greater a depth of field. We found it easier to first focus with the aperture wide open, then stop-down to a smaller opening when we were ready to take a shot. While the increase lighting was helpful, the occasional breeze made it harder to get a sharp photo. Eventually, we decided to open up the aperture a little in exchange for a faster shutter speed.
The compromise meant a slight loss in depth of field so not everything we had wanted to be in focus was, but it was the best option available under yesterday's conditions. We had to guess at the shutter speed. At f8, most of these shots were taken at 0.5 sec. However, we didn't really pay all that much attention as we were just looking at the LCD and adjusting on the fly. Shooting macro images with our new bellows setup is a lot of fun. The gratification was immediate and the results often surprising. There are so many unexpected patterns when you get up really close that we could have easily spent the day in one spot and not exhaust all of the photographic possibilities. We think we'll be spending a lot of time outside this Fall. BTW...the catepillar was a Tomato Hornworm (Manduca quinquemaculata) and it will emerge as a moth in next Spring. [Permalink] - Macro Samples |
||||
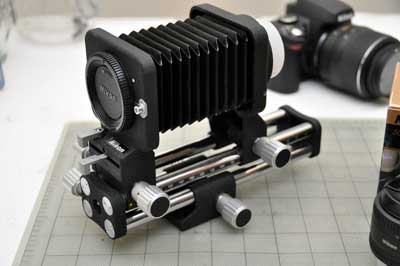
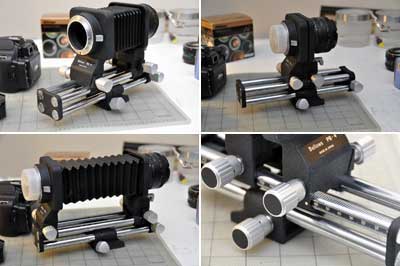
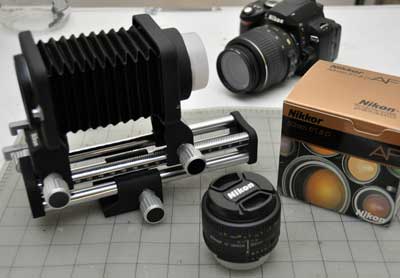
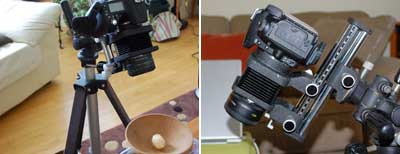
The Nikon PB-4 macro bellows setup from last week generated quite a bit of reader emails. Most of the requests were for a more detailed look at the Nikon bellows. We had some down time during the Snow Leopard upgrade this past weekend. So we took a few shots of the PB-4 for those who were curious about its details. The Nikon PB-4 is no longer in production. EBay and Craigslist are now the main sources for one. These units were built like tanks, so as long as the bellows is light-tight, the rest of the unit will likely be in excellent shape. Expect the prices to range from $100 to $300 depending on luck and included accessories (adapters, slide copier, etc...).
A bellows is actually a very simple contraption. A lens attaches at one end, the camera body at the other. The bellows main purpose is to allow the photographer to vary the distance of the lens relative to the imaging plane (film or CCD sensor) of the camera. By adjusting this distance, one can control the focus and the degree of magnification of the subject.
One of the more diffcult things with shooting good macro photos is achieving proper focus. A ridgid and stable rail supporting the bellows is the key. There are multiple ways to get an image into focus, as both ends of the bellows can be moved as well as the rail itself.
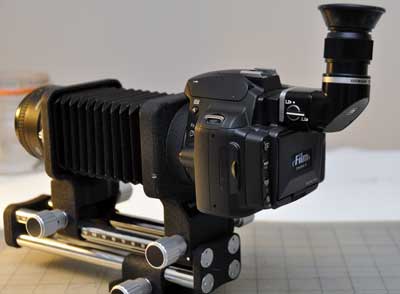
To mount the camera body, the connector must moved to the end of the rail. Once attached, the body may be rotated to the desired orientation. A viewfinder magnifier is also a great tool for achieving proper focus. A while ago we had adapted an Olympus Varimagni viewer for use with the Nikon to assist in our astrophotography. It should come in handy for our macro photography efforts. There is an additional feature of the PB-4 which we did not cover in the FirstLook: the PB-4 has the ability to shift the focus point from the center of the image plane to other horizontal locations. This is achieved via a lateral movment of the lens relative to the image plane. We'll save that discussion for a future article. In the meantime, let us know if have any further question on this Nikon bellows. We'll be happy to talk more about this interesting piece of gear. [Permalink] - Nikon PB-4 Bellows FirstLook |
||||
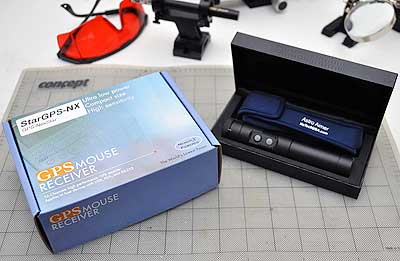
Every year the entire crew goes away around Columbus Day weekend. Last year we brought along our Meade 2045 scope. This year we plan on doing the same. Along with the Meade, we also plan on bringing with us some new astro gear to review. Awhile back we picked up a non-functional Celestron CG-5 ASGT mount via Craigslist. We brought it back to life and mounted our Meade 2045 scope on it. The CG-5 is a fairly easy GOTO mount to use. To make setup even simplier, some have added GPS tracking to the mount.
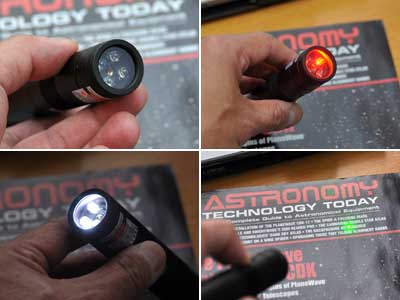
We wanted to do the same, but Celestron charges over $300 for their GPS Another item we'll be taking with us out into the field is the new HoTech AstroAimer. The AstroAimer is a flashlight/laser pointer combo designed specifically for astronomy use. The unit is water resistant, has both red and white LEDs, and an integrated 5mW green laser. The red LED has 3 variable brightness modes, controlled via the end cap. The red light is used so night-adapted vision is not disrupted when more illumination is needed.
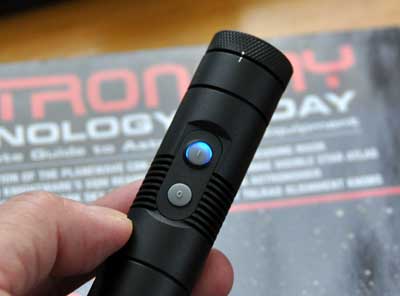
The AstroAimer's controls have more capabilities than the standard flashlight or laser pointers. There is a time-delayed laser switch. This enables the user to have both hands free...no need to use one to keep the laser on. There is also a blue "laser on" indicator under the switch for safety. This is a better way to see if the laser is activated then by waving it around. The body of the AstroAimer is about 1" in diameter. It is sized to fit nicely into most 6x30 finder scope mounts. The housing material is anodized high-grade aerospace aluminum. In fact, this unit may replace our SureFire as the flashlight of choice for everyday use.
We are looking forward to the Columbus Day outing. If the weather cooperates, we'll give both the StarGPS and the HoTech AstroAimer a thorough workout. Look for our FirstUse report in October. [Permalink] - StarGPS and HoTech AstroAimer |
||||
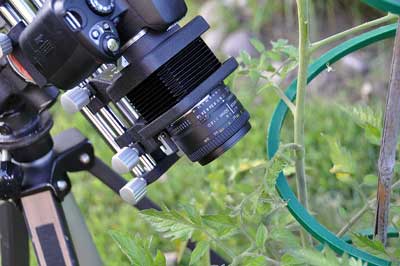
Taking closeups, even of everyday things, can make for an interesting experience. Looking "really close" can open up a whole new world. The equipment needed for macro photography can be expensive, but it does not have to be. We managed to put together a lens/bellows macro setup for our Nikon D90 for around $200. The 50mm Nikkor lens was obtained new from Amazon for $100. We had to search a bit on Craigslist and EBay and was finally successful in getting a used Nikon PB-4 bellows for $109.
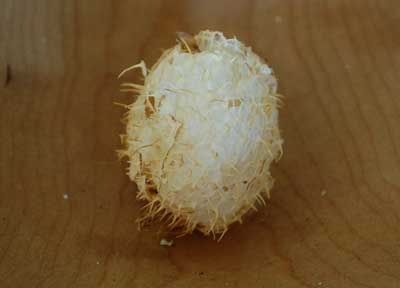
We don't have much experience with this macro setup yet but did manage to get some reasonably good images our first time out! The seed pod below was taken using the 50mm without the PB-4 bellows. However, with the bellows attached, we were able to get MUCH closer. What we gave up was depth of field. There are ways around the DOF problem, but that is a topic for another day.
For now, we just wanted to show some first attempts of our macro efforts with the new 50mm Nikkor and bellows combo. It took a little work to get used to working at this scale, but it was a lot simpler than we had expected. We will be taking the macro rig outside and trying it on everything we can find. Check back in a few weeks to see what we were able to reveal. [Permalink] - Macro Bellows
|
||||
There are a lot of ways to keep up with what's new in astronomy. A few astronomically-experienced readers recommended we check out a publication called Astronomy Technology Today. We took a look at a few back issues and the magazine s definitely perfect for those who are into the gear. It covers a wide range of astronomically related topics. The focus of the articles is technical, but both novice and advanced readers will get something out of them. There is a "DIY themes" to the articles. They not only show what others have made, but how to build them yourself.
The thing we really liked about Astronomy Technology Today is their heavy emphasis on the GEAR. If you love reading about the latest telescopes, a new digital imager, or how to get the most out of your setup, then this is the magazine for you. This magazine is one of those which we will save. The back issues are as much fun to read as the latest copy. While some of the articles may be beyond our understanding now, as we get more knowledgeable, we are sure we would want to go back and take another look. Subscriber ($15/year), will have access to all of the back issues online. We like astronomy because it is the one of the last purely scientific pursuits for which there is minimal financial upside or government restrictions. Try setting up a genetics or chemistry lab at home and see how long it would be before Homeland Security or the DEA come knocking at your doors. Don't even get us started about the number of permits required for a building a home version of a high energy particle accelerator. People get together for star parties because they love seeing what is out there. Looking through a telescope at 3AM will probably not lead to finding a cure for cancer or help one predict the next hot stock, but it will expand ones appreciation of the vastness and beauty of the universe...all from ones own backyard. And that is a worthy endeavor at any price. [Permalink] - Astronomy Technology Today
|
||||
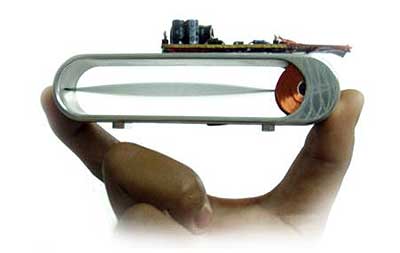
A few years back we did a quick article about a young inventor by the name of Shawn Frayne who came up with a very cool wind-based micro turbine. We caught up with him recently and thought readers would be interested to see what he has been doing with the idea.
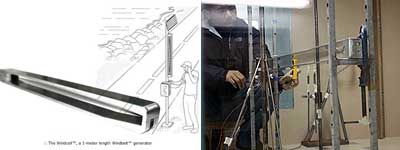
Shawn and a few others have launched a company called Humdinger Wind Energy to bring the micro-turbine to market. Expanding on his original concept, they have built a working prototype of a medium-sized version called the Windcell. This unit is perfect for powering bigger things such as WiFi repeaters, traffic cams, and other such applications. The Windcell would also be a good second power source to work in tandem with solar cells.
Since 2007, the membrane-based micro generator technology has undergone several transformations. The small tabletop proof-of-concept has been transformed into the microBelt, the Windcell, and the Windcell Panel. Humdinger Wind Energy's goal is to bring clean, low cost, wind power everywhere. Readers will be hearing more about the Windbelt as this looks to be one of the key tools of energy harvesting in the 21st century. [Permalink] - Windbelt micro generator update
|
||||
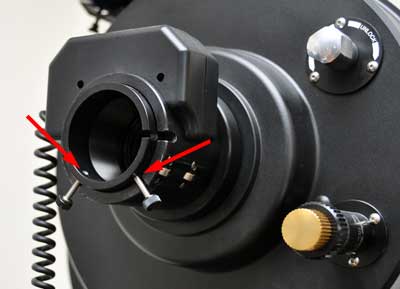
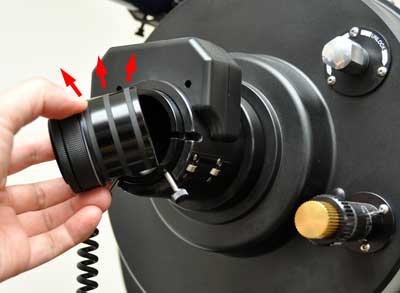
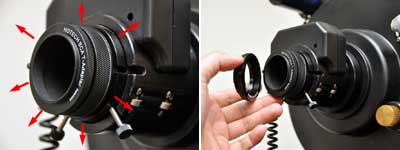
Yesterday we took a FirstLook at the HoTech "self-centering" adapter. Today we will show the installation and discuss a bit more about why this 2" SCA T-adapter is an improvment over the traditional T-adapter. The scope we used for this installaion was the Meade LX200 GPS. Unlike the Celestron C8, the LX200 has a removable 2" threaded ring. The ring is held in place by the two thumbscrews at the bottom (red arrows).
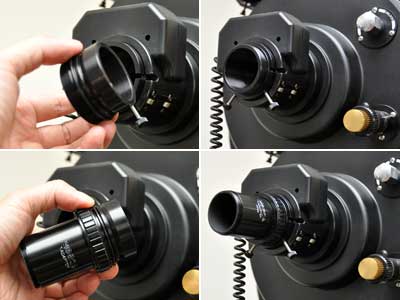
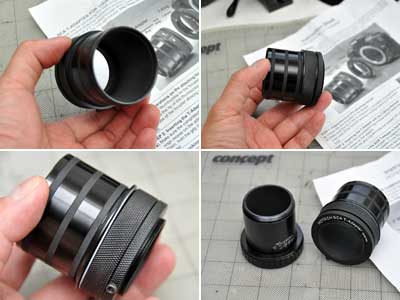
The 2" ring threads on to the normal T-Adapter on one end and the camera adapter threads on the other end. In order to hold the entire assembly in place, the thumbscrews push from the bottom. Even though the tolerance is very tight, a slight mis-alignment due to the uneven forces is unavoidable with the thumbscrew approach. The slight difference in pressure will cause a detectable shift of the imaging plane. The HoTech approach to holding the adapter in place is to use three gaskets. The gaskets are forced to press outwards when the end rings are tightened. This outward movement forces the adapter to center itself inside the opening of telescope.
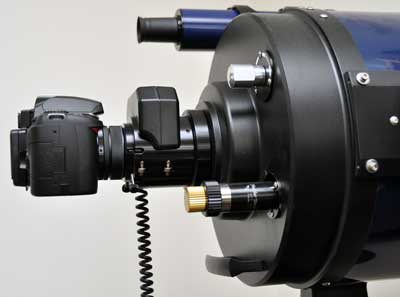
The end of the adapter is threaded to accept a camera body adapter. The type of mount is specific to the camera manufacturer (Nikon, Canon, etc..). A different one is needed for each make. Fortunately, this piece is only about $10 on EBay. Shown above is the Nikon D40 mounted to the Meade LX200 using the HoTech 2" SCA T-Adapter. Here is a close-up image of the adapter assembly. The HoTech approach solved a long-standing problem imaging problem. We are eager to see if we can see the difference. [Permalink] - HoTech SCA T-adapter installation |
||||
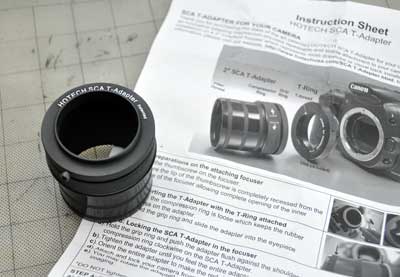
A few readers told us about this T-Adapter from HoTech. We did not pay much attention to the emails at first because the t-adapter is just a simple connector between the camera body and the telescope. There is no glass involved. It is literally just a tube...or so we thought. HoTech took a fresh look at this simple connector and made a clever design change which will have an impact on anyone trying to do astrophotography. The amazing thing about this improvement is the elegance of HoTech's approach. Instead of a screw-in mechanism to tighten the mount to the scope, the HoTech adapter uses an expanding gasket to self-center the unit within the channel of the scope.
The outward push of the gasket ensures an even and precise centering of the tube. On the camera end is the standard tread for attaching a camera adapter. It is not included with the SCA T-Adapter, but they are camera specific and are readily available on Ebay for under $10. In our next installment, we'll show to attach this HoTech SCA T-Adapter to our Meade LX200 scope. We will also discuss a bit more about why this adapter is so cool! Once the skies clear, we'll have some fun with the astrophotography setup. [Permalink] - HoTech SCA T-adapter |
||||
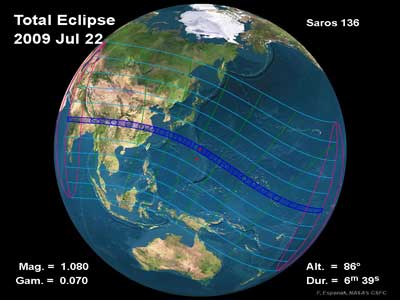
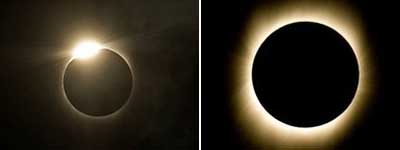
The big story today is the over six-and-a-half minute total solar eclipse which occurred on the other side of the world while we slept. This eclipse is the longest of the 21st century. It's path started in India, then to Nepal, and passed over the following Chinese cities : Chengdu, Suining, Chonging, Wuhan, Xiaogan, Hangzhou, and Shanghai. The path continues into the south of Japan and ending at the Marshall islands. There is a lot of technical info of the eclipse on NASA's site. Video and photos of the eclipse from those on the ground in India and China have started to hit the web.
For readers interested in learning more about solar eclipse, there is a man called "Mr. Eclipse" who has more info on his site than anywhere else on the Web. Learn as much as you like, but come back soon :-) [Permalink] - Total Solar Eclipse
|
||||
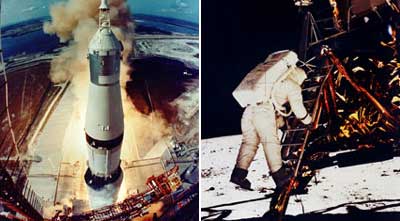
We remember watching the live TV broadcast of the moon landing 40 years ago today. We watched it on a 10-inch, black and white Zenith TV. The video was grainy and the sound static-y, but it was the coolest thing ever. Recently, NASA announced they were able to partially restore and enhance some of that historic video footage. Go explore the landing site here. Forty years later, the moon is no longer NASA's focus. There are lot of projects vying for the same "space dollars." Many of them have yielded greater understanding of our planet and outer space, but none of them have been as dramatic or as inspirational as the moon landing.
Space exploration is expensive. Space projects today oftentimes require support from the international community. Alot of people question whether we can really afford to spend our resources and energies on space exploration in today's economic climate. To that, we would answer: if we simply want to exist, maybe space exploration is not really necessary. However, if we truly want to LIVE, how can we not? [Permalink] - Apollo 11, 40 years ago |
||||
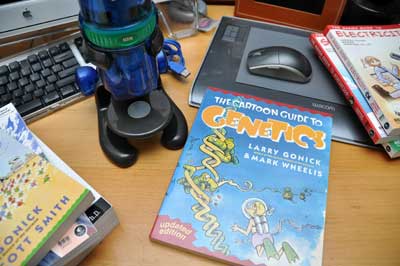
We understand that re-reading old college physics and calculus texts may not be everyone's idea of fun reading, but we sometimes like to refresh ourselves on some of the things we have forgotten...or never really learned. Maybe the reason why we find reading these subjects enjoyable now is because we are not trying to memorize everything we are reading. Maybe it's because we don't have a test in an hour and haven't not done any of the reading until now. Whatever the reason, it's actually an enjoyable way to chew up some of RainyDay leisure time. A few months ago, we discovered the Manga Series from No Starch Press. The series is a collection of books on tech-y topics (electricity, physics, etc...) written in the style of Japanese comics. These are fascinating subjects when engagingly presented. The light-hearted approach is perfect for some of the traditionally drier topics (databases, statistics).
The comic-book approach to teaching math and science is by no means new. We have a few other ones on our library shelves. The common thread in the approach is that math and science are not just formulae and equations, but are lively and dynamic topics, which when understood, gives us a better understanding and a richer appreciation of the world around us. So, whether you are a DarkAngel fan trying to understand the science of transgenics, a PartyPoker.com hopeful with a need to understand the odds of your card showing up on the turn, you will find that reading comics can be fun, entertaining, and may even give you an edge! If not, you still may learn something useful. [Permalink] - High Tech Comics |
||||
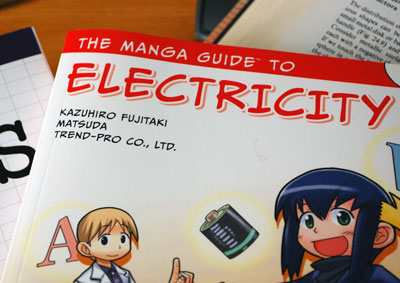
Electricity is a puzzle to a lot of people (certain editors here at RainyDayMagazine included). Learning about it from standard physics books can be illuminating...for those who enjoy reading physics books. Budding scientists (as well as "normal" people) may find the Manga Guide to Electricity from No Starch Press a lot more digestible than the standard text on the subject. The Manga Guide to Electricity combines an entertaining plot with authentic manga comics and lessons that offer readers a unique introduction to the world of electricity. Readers learn alongside Rereko as her tutor explains the basics of electricity by examining everyday devices like flashlights, heaters, and circuit breakers.
Just compare the typical explanation of Coulomb's Law from an Intro Applied Physics text to that of the Manga Guide. We fell asleep after the first sentence of the standard text :-)
Don't let the light-hearted approach of the Manga Guide fool you. Its explanation are accurate and detailed. It is not some light fluffy "physics for poets" approach to explaining a hard-to-grasp topic. The illustrations help the reader visualize what the equations are trying to describe. As readers progress through the book, they will explore advance concepts and modern IC topics. We read it from cover to cover even though we already understood the topic...or at least we did when we took our last physics test 25 years ago :-) While we would not replace a standard text with the Manga Guide, we would certainly have no problem recommending the Manga Guide as an introduction to the topic of Electricity. [Permalink] - Manga Guide |
||||
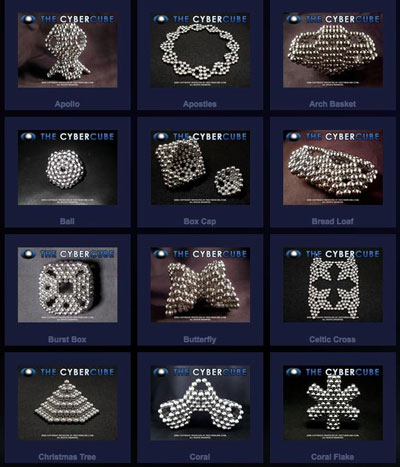
There are a lot of little "conversation pieces" on the table next to our desk. They are all fun to play with and help us keep our hands busy when we have to sit and think. The one item which we find ourselves playing with more than the others is this CyberCube. We reviewed it back in October. Making the basic cube and some other patterns were not as easy as we thought. The magnets behaved in interesting ways when grouped in large configurations. We did start to get a hang of some of the patterns after playing with it a while and were able to make many of the basic shapes. If you want to see what other shapes can be made with a bunch of round magnets, check out the new gallery on the CyberCube site. They are having an inventory clearance over the next few days. It is a great puzzle for a rainy day. It is also something that will keep you entertained way after the rain has passed. [Permalink] - CyberCube Puzzles
|
||||
Look closely at the screen below. Notice anything odd? Yes, it is in black and white. Yes, it is visible in bright sunlight. Yes, it is attached to a laptop. This new screen is a combination of an e-paper display and a color LCD screen. Interesting. The color LCD screen is for when working indoors and the e-paper display will take over when out in bright sunlight. The concept is good but the key will be the response time is of the e-paper screen. Our guess is it will be fine for working with text and would not expect it to be fast enough to handle video...even if it was it still not be in color, so maybe it doesn't really matter. Of course, the "real" solution to this "sometime" problem is a fast, vivid,color e-paper display. That will be coming at some point. Until then, Pixel Qi new screen is the only game in town if you need a display which is visible both inside and out. We just don't see the average laptop market all that interested in a dual display screen. Not that it won't be nice, but most folks just don't work outside in the bright sunlight all that often. Of course, there are markets with a greater need for something like this (military, GPS displays, etc...). In any case, Pixel Qi claims they will be shipping the screen later in the year. [Permalink] - Pixel Qi |
||||
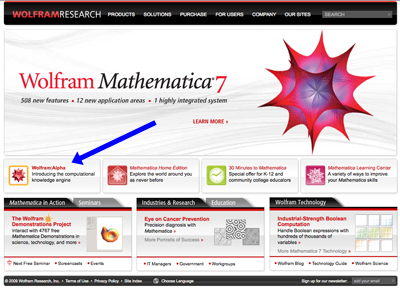
The much anticipated Wolfram Alpha has launched. Is it a search engine? Is it a "Google killer?" Or is it something completely new? If it is from Wolfram Research, you can be sure it is a bit of all of the above. Data is needed to generate information. Information is required for knowledge. Knowledge is the key to understanding. Wolfram Alpha is a tool which takes massive amount of information, uses who knows how many computers to synthesize knowledge on demand, and makes that power accessible to everyone. It may be easier to show what Wolfram Alpha is than to try to describe it. Go and try it for yourself. Type in your birthday and see what comes back. Put in your two favorite stocks and see what happens. Enter what you had for breakfast and look at the results. You may be surprised at the usefulness of this tool once you have spent some time with it. It may just be the killer app for the iPhone! [Permalink] - Wolfram Alpha
|
||||
We got tons of emails with a link to this awesome video, shot using a modified DSLR (IR filter removed) configured for astrophotography. The video was created using a wide angle lens and time-lapsed over the the course of the night. Truly spectacular.
Galactic Center of Milky Way Rises over Texas Star Party from William Castleman on Vimeo. [Permalink]-Milky Way
|
||||
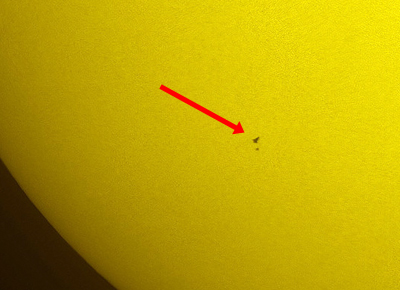
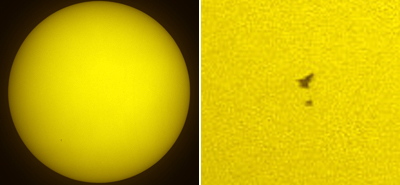
The Hubble Telescope is probably the most famous instrument in the history of science. This week NASA launched the shuttle Atlantis to do a final upgrade to the Hubble Telescope. It will be sad to see this amazing piece of gear go "dark" in five years, but it has served its purpose and has earned a well deserved place in history. Look closer at the image below. The specks in front of what looks like an egg yolk are not what you might think. French astronomer, Thierry Legault, managed to capture the first ever photo of a space shuttle (Atlantis and the Hubble space telescope) passing in front of the Sun! The entire transit event lasted less than one second. Had you been looking and blinked, you would have missed it. Images of the sun are possible with the proper equipment. With the aid of a Takahashi TOA-130 refractor (diameter 130mm, final focal 2200mm), Baader solar filter, and a Canon 5D mark II, Legault was able to capture history. The exposure was 1/8000s at 100 ISO, extracted from a series of 16 images (4 images/s) started 2 seconds before the predicted time. Earth-bound astronomers often make significant contributions in the discoveries of comets and other far away objects. It is great to see there are also interesting celestial events closer to home. [Permalink]-Shuttle Atlantis Solar Transit |
||||
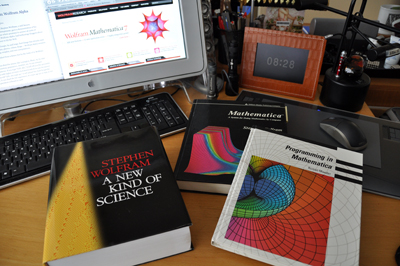
Stephan Wolfram of Wolfram Research has always been using mathematics to extend the boundaries of human understanding. He made his first commercial mark with Mathematica, a software tool that did for science and research what spreadsheets did for business. He then went quiet for about a decade and came back on the scene with a book called A New Kind of Science. NKS caused all kinds of passionate comments and discussion when it was first published. Some compared it to Newton's Principia. Others thought it a compilation of loosely strung together ramblings. A lot of it was about how Wolfram went about publishing his theories, research, and conclusions. Good scientific works can always stand the test of time. It will be interesting to see how NKS is viewed a few hundred years from now. For readers interested in something a bit more immediate, Wolfram Research has been getting a lot of press recently about a new application called "Alpha." Like other of Wolfram's projects, its goals are to change the way we work and see the world. Ambitious to say the least... Some have seen bits and pieces of it. Others have actually touched and played with it. Sometime this month, we will all get to experience it first hand. This could be a very interesting month. [Permalink]- Wolfram Alpha |
||||
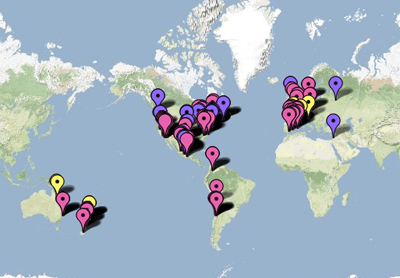
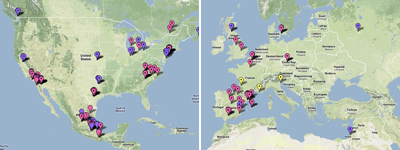
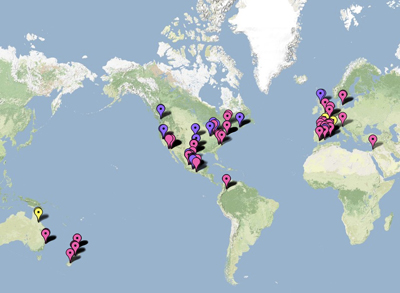
This Google Maps view of the spread of the Swine Flu infection is a valuable tool for tracking the reported cases of the infection. We wish there was a way to animate it to see the spread, but as it is really just a mapping of the "reported" cases, it is not a true representation of the movement of the disease. Interesting nontheless.
So far, the areas of infection are pretty much where you would expect, but there are reports from some surprising spots around the world. If you are sick, stay home. If you are well, stay home. [Permalink]- Where has it spread? |
||||
What to do if you have the flu? The Center for Disease Control has some pretty good suggestions. Basically, you need to REST, drink fluids, and see a doctor if you get really sick.
A flu shot can help protect you from getting the flu. However, it is too late for this outbreak as there are no vaccines available. There are some drugs which may be effective against the flu if taken early (within 48 hrs) after getting infected. These drugs will NOT help in preventing an infection. Using them before getting the flu does nothing.
There are lots of over-the-counter medicine which will treat the symptoms of the flu. They won't make the flu go away any faster, but they will make you feel better while you body waits out the infection. If you are sick, stay home. If you are well, stay home. [Permalink]- What to do? |
||||
How can you tell if it is the flu? The flu is characterized by a collection of symptoms that can come on quickly. Ask yourself if the following are true...
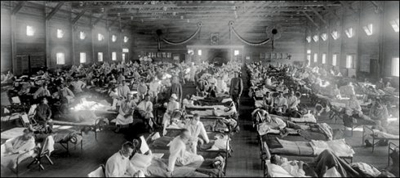
If you are sick, stay home. If you are well, stay home. BTW, the photo is of two of our editors napping on the job...they don't have the flu :-) [Permalink]- Is it the flu? |
||||
What is Swine Flu? Why is it so virulent? How did it move from pigs to human? We thought these were interesting questions so we did some digging and got some answers. The "flu" is caused by the influenza virus. Viruses are strands of DNA or RNA molecules that can take over a cell's machinery and instruct it to make more of itself. By making its "host" sick (sneezing, coughing, etc...) it can spread itself so it can continue to replicate.
There have been three flu pandemics in the past century: the 1918 Spanish Flu that killed more than 50 million people worldwide, the Asian Flu of 1959 claimed around 2 million, and the Hong Kong Flu of 1968-69 that brought down over 750,000.
What is Swine Flu? Swine flu is a type of virus that normally just infects pigs. Pigs are actually genetically very close to humans. It is the reason why insulin made by pigs can be used by humans. It is also why a virus which can infect pigs can mutate slightly and be able to infect people. The best way to stop the spread of the virus? If you are sick, stay home. If you are well, stay home. [Permalink]- What is Swine Flu |
||||
Swine flu is moving around the world at a rapid pace. What was just an outbreak in Mexico will potentially be global in a week. There are things we can do to limit the damage, but it will have to be done quickly. Travel will have to be limited, events will have to be cancelled, and the infected will have to be quarantined. The CDC has a lot of good information on how to stop the spread of germs. Most of the steps are common sense, but they are worth listing:
We'll keep an eye on this but it is going to worse before it gets better. So for the next week or so, if you can...stay inside and stay healthy. [Permalink]- swine Flu |
||||
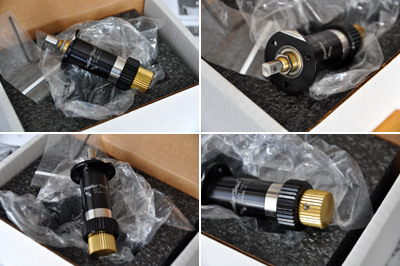
When you hear terms such as "focus" or "get a grip"...what is the first thing that comes to your mind? If you have been following our Winter projects, then the Feather Touch MicroFocuser/Meade LX200GPS scope upgrade would have been your first thought :-) We gave readers a FirstLook of Starlight Instrument's Feather Touch MicroFocuser back in Mid-March. Today we'll show how easy it was to install. The replacement/installation is conceptually very simple and if the instructions are followed, should only take about 15 minutes. However, if the scope is not properly "prepped," things could go awry very quickly. The step-by-step instructions from SI were very thorough, but we have a few suggestions which may make the task even easier.
As per SI's warning, the scope must be in a HORIZONTAL position. This is to prevent the main mirror from moving forward or backward accidentally. So triple check this before loosening any screws. The kit came with a 5/64" allen key. It fits, but was a bit cumbersome to use as it was too short. We had a 4" long one which made the job of removing and replacing the screws much easier. For readers with large fingers, don't even bother trying to use the small allen key. Go get a longer one. It will save you a lot of headaches.
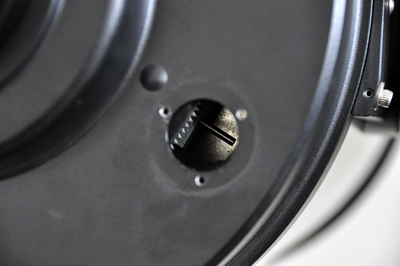
Once all of the screws had been removed, we followed the SI directions and had no problems freeing the OEM knob. With the focus knob removed, it was easy to clearly see the dowel inside the scope. This is the dowel which must be threaded into the hole at the stem of the MicroFocuser.
To ensure that the stem will reach the dowel, we extended the length of the screw of the FeatherTouch unit to match that of the one removed. As our scope was the 10" SCT, we did not have to worry about the orientation of the fillet, but those with an 8" SCT should take note.
Installing the new focuser was just a matter of sliding the end over the dowel and replacing the screws. This step cannot be done by "feel." You have to visually line up the hole with the dowel before you can slide it in. We found it easier to see and thread the end if we lit the inside of the scope using a flashlight. Once everything had been retightened, we played with the knob and could immediately tell that the new knob will make a huge difference in achieving critical focus. We are very happy with the quality of the unit and the ease of the upgrade. This project is within the skills of everyone and will probably be one of the most significant aftermarket upgrades you can do for your equipment. We have time to do a few more quick projects (Bob's Knobs, laser pointer, EZ FinderII) as it is still a bit too cold at night for us to do much viewing. Once the weather warms up some we'll be getting this scope outside to test out all of our recent upgrades. It is going to be a fun Spring! [Permalink]- FeatherTouch Installaiton |
||||
There are two sets of knobs which can influence the sharpness of the image seen through our Meade LX200 GPS telescope. The first set is the collimation screws at the front. They are for aligning the secondary mirror so that it is perfectly planar to the larger primary mirror. When the two mirrors are perfectly aligned, the stars should appear as a sharp point. The other knob affecting the quality of the image is the primary mirror focus knob. The job of this focus knob is to carefully move the large primary mirror in the back closer or farther from the secondary mirror in the front so objects can come into focus when viewed in the eyepiece. As with most equipment, refinements can be make to the original. The two items listed above may be upgraded with minimal cost and effort to enhance the LX200 GPS scope's ease of use. A company called Bob's Knobs sells a set of replacement screws to make quick work of the secondary mirror calibration task. Another company called Starlight Instruments make a replacement focus knob which, when installed, will enable the user to make ultra-fine adjustments of the mirror unattainable with the OEM knob.
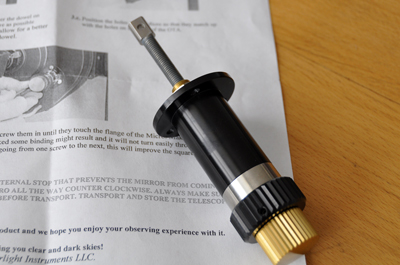
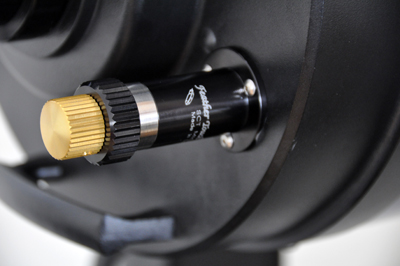
The FeatherTouch knob has two controllers to replace the single one on the Meade scope. The black inner knob is a 1:1 focusing knob. The smaller gold one is a 10:1 fine focusing knob. Note the presences of the deep ridges on both of the knobs of FeatherTouch as compared the OEM one. The ridges are so they could work with a motorized controller for completely hands-free remote control of the focusing operation. We'll save that for another day.
We are going to do the installation and post the write-ups of both the collimation screws and main focus knob replacements by the end of April. If you are looking for a few final Winter projects for your telescope, consider these upgrades. Dollar for dollar, these focus- related upgrades will probably have more impact on your viewing experience than anything else you can do for your scope. Starlight Instrument's FeatherTouch (FM-MEA8) Micro Focuser is a direct replacement for the knob of our 10" Meade LX200 GPS scope. Starlight makes them to fit all of the popular SCTs. Check their site for info regarding your specific model. [Permalink]- Meade Focus Knob upgrades |
||||
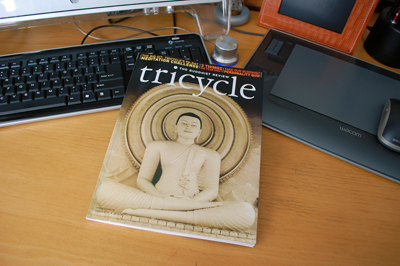
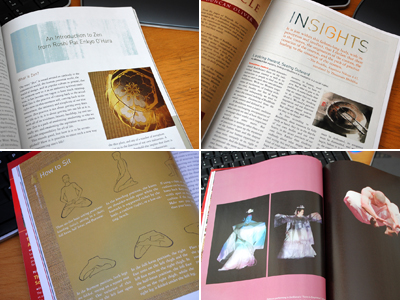
Zen is an attitude, an approach to living, a way of being in the world. There are many ways to learn, develop, and incorporate Zen practices into one's daily life. Yoga is one way, Aikido is another. One of the most popular is to just sit and meditate. A few years ago, the staff at Tricyle invited their readers to a "Commit to Sit" meditation challenge. They have once again asked those interested to join them in this 90-day practice. Go here to learn more.
We learned of Tricycle from a few readers who pointed us in their direction after reading our first article of the year. The Spring 2009 issue of Tricycle came in the mail about two weeks ago and have been circulating around the office. There are a full range of Buddism related article. Some thought-provoking, some practical, and all wonderfully written. For readers looking for something to add to their reading list, we could not think of a better recommendation. We know we will be reading this and all future issues from cover to cover. [Permalink]- Tricycle |
||||
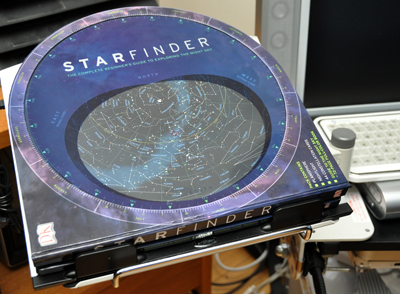
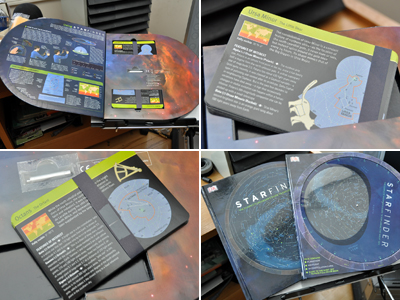
The movement of the stars is well understood. Their location in the sky relative to Earth can be predicted with a very simple device called a planisphere. DK Publishing has put together a kit for star gazers called StarFinder. The StarFinder set includes an integrated planisphere on the front cover, a well-illustrated guide, a red nightlight, and a handy deck of reference cards for the field.
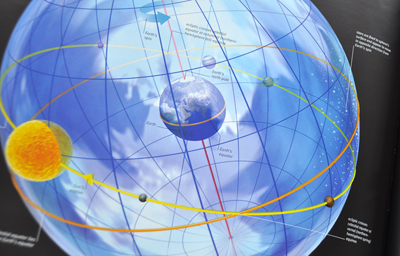
This kit contains everything needed to understand, observe, and enjoy the night sky in any hemisphere. The guide is perfect for a beginner, but is still useful for an experienced astronomer.
The StarFinder is not just for learning about the sky. It is a tool which may be used outside. On the cover there is a built-in planisphere which can help locate the various celestial objects and constellations. Instructions for how to use the planisphere is on the inside of the cover.
In order to see at night, the eye takes about 20 minutes to fully adapt to the low light conditions. However, any white light will "reset" the eye and ruin the low light adaptation. The included nightlight puts out a red light for use with the planosphere so it will not interfere with the night-adapted vision of the user. The StarFinder may be enjoyed both indoors and out. One of the benefits of this low-tech piece of astronomy gear is that it is much easier to set up outside than a 100lb telescope. We will take it out for a FirstUse on the next clear night. [Permalink]- StarFinder |
||||
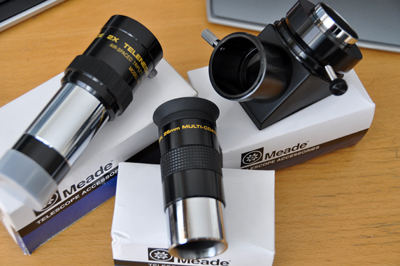
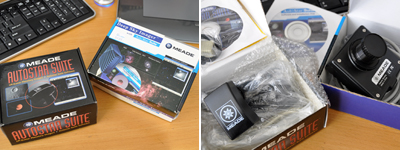
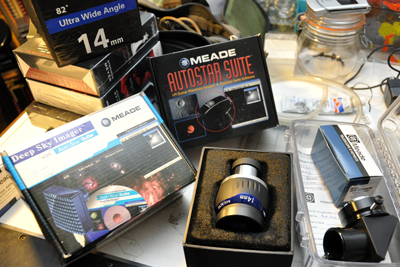
The Meade LX200 GPS telescope we purchased in January came with quite a few accessories. We had not expected so many items to be part of the deal when we were negotiating with the seller, but we were thrilled when he decided to throw them all in as part of the package after we had agreed on the price. The first set of boxes we opened had items such as an eyepiece, a 2x tele-extender, and an erect image prism. The other boxes contained two CCD cameras, one for auto-guiding, one for deep sky imaging. Both of them were brand new as they were still sealed in their respective packaging.
The difference between these CCD imagers and a webcam is these does not have a lens in front of the imaging sensor. The telescope is the lens. The larger imager also has fins on the back of the unit for heat dissipation. This is so the noise affecting the CCD sensor is kept to a minimum during long exposures.
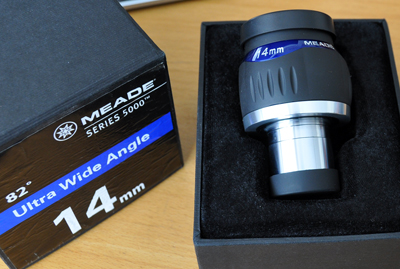
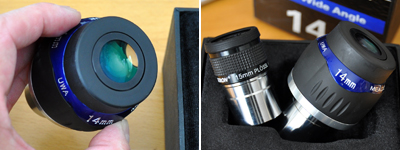
One "big" surprise accessory is the 14mm Ultra Wide Angle eyepiece. We had no idea this expensive lens would be in the mix! We have never used one before and are eager to see what we can see with this huge unit. Meade Series 5000 eyepiece has a 82º field of view and appears to be extremely well crafted. Even the box was heavy duty and made with care. We posed it next to one of our standard lens just to give you a size reference.
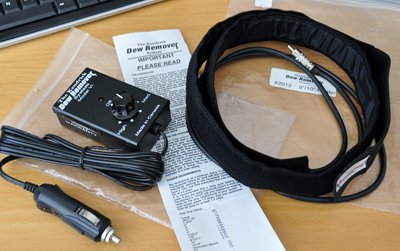
The last item we found was a dew remover/ dew shield (not in photo) combo. A dew remover is basically a heating strip. It wil keep things warm, preventing condensation from forming. This item also looked unused. We had thought our initial deal for the Meade LX200 GPS scope was a great one. After adding up the value of the accessories, we realized this entire package was an AMAZING steal. We have bought and sold seven telescopes since we started the RainyDayScience section. I think we have finally found the two scopes which will keep us busy for a while. Of course, if a good Questar deal comes a knockin', we'll be a dealin' :-) [Permalink]- Telescope Accessories
|
||||
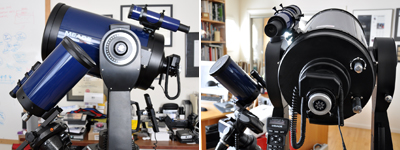
Astronomy is a great hobby. One can start just by going outside and looking up at the night sky. Once comfortable with what is up there, a telescope is useful to see out a little further, details a little clearer, and objects a little bigger. Last month we found a great deal on a 10" Meade LX200 GPS telescope up in New Hampshire. We took half a day off, drove for 2 hours, and brought back an almost brand new telescope along with a large collection of accessories.
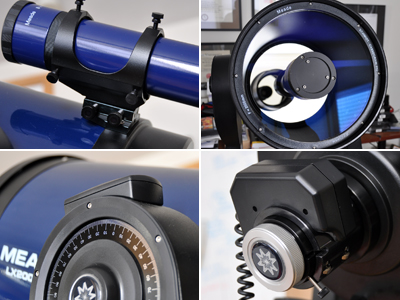
The 8x50 finder is standard, along with the zero image-shift microfocuser, and 145,000-object library. The Meade LX200 GPS scope is that of a Schmidt-Cassegrain design. The near focus is about 50 feet. The focal length is 2500mm with a focal ratio of f/10. The maximum practical visual power is about 650X. Ours came with the optional UHTC coating. We will have more on the UHTC technology in a future article. The GPS alignment system is comprised of a 16-channel GPS receiver with magnetic declination compensation and true-level North sensors.
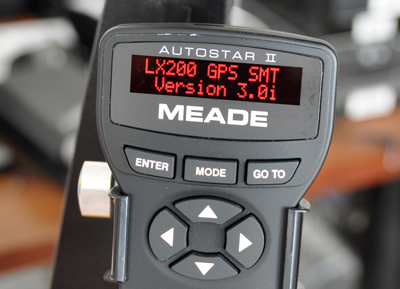
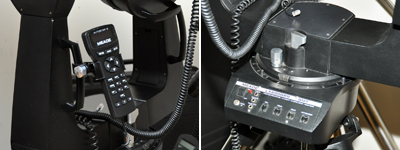
The Autostar II control system consists of a handheld controller, an upgradeable database, and an integrated control panel. Software upgrades may be downloaded from Meade and transferred to the scope's flash memory via the RS-232 port. We expect that the software in our scope is probably a few upgrades behind. We will take a look on the Meade site to see what is the latest version of the firmware and upgrade accordingly. The next segment of this series will focus on the accessories which came with this Meade scope. Look for it in March.
We will set up the LX200GPS scope for a FirstUse when the weather gets a bit warmer. Both the the Meade 2045/CG-5 and the LX200GPS will be contributing to our astrophotography efforts in the Spring. [Permalink]- Meade LX200GPS
|
||||
Sometimes interesting things can happen when SaveTheEarth collides with DoItYourself. For example, who knew you can make an algae bioreactor out of recycled water bottles? It is unclear whether biofuel is a scalable solution for the world's energy needs, but it is definitely renewable, possibly carbon-neutral, and clearly "green" :-) [Permalink]- Algae Bioreactor
|
||||
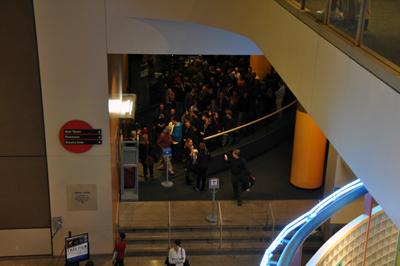
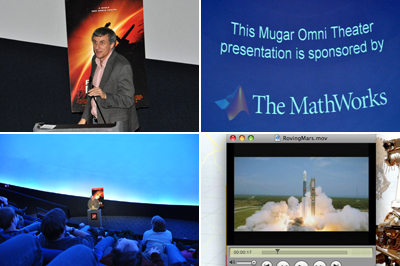
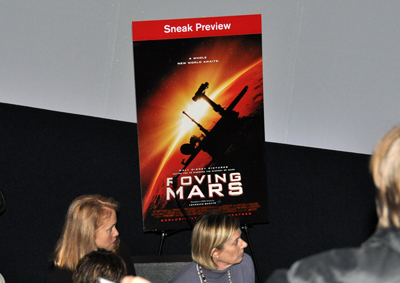
Last Friday we took advantage of the FreeFilmFridays event at the Boston Museum of Science and saw the new Omni film Roving Mars. It was an amazing film and we urge all of our readers to see it if they can. For readers who are in the New England area, all MOS films on Fridays in January (Jan 9, 16, 23) are free to the public on a "first come, first served" basis. The shows are sponsored by MathWorks. If you are interested, you need to go to the museum and get your tickets EARLY as there are NO RESERVATIONS for any of the shows. There is a limit of 2 shows per guest. The crowd last Friday was large, and with good reason. MathWorks and the Museum of Science brought in the lead scientist of the Mars Rover project, Cornell astronomer Steve Squyres, to introduce the film.
There was also a special, junior rover which visitors could "control" remotely (through a computer) to get a feel for how the scientists at JPL control the rover on Mars. We wanted to give it a try, but there was a hugh line of kids ahead of us (for some reason, we were the only grownups in line).
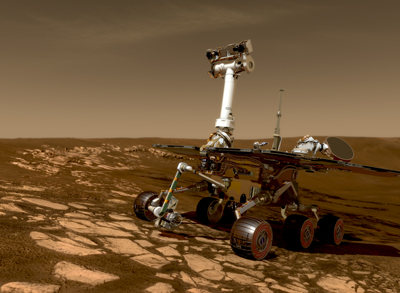
Instead, we went and took a look at the life size version of the rover on the display floor. The rover was a lot bigger than we would have guessed, considering it had to be sent all the way to Mars! However, if it had to survive the trip and work in the harsh Mars environment, it had better be well built. Considering the actual rovers have lasted five years longer than the three-month life expectancy, the build-quality was pretty high :-)
If you don't have time to go today, you will have one more chance. The last week for FreeFilmFridays is 1/23. If you are hungry after the show, check out the Science Stree Cafe. We did. Had a great time! [Permalink]- Free Film Fridays
|
||||
A few weeks ago, we sold both of our larger telescopes (8" Celestron, 10" Newtonian) to raise funds for a very specific type of SCT. We were looking for a Fastar, Celestron, or Meade with a removable secondary mirror so that we could do some deep space imaging using a Hyperstar lens. Check out Hyperstar's site and find out why we are so excited about their technology. As luck with have it, Greg L in New Mampshire had a 10" Meade LX200 GPS that was exactly what we were looking for. The problem was not that we were nowhere close to where he lives. The problem was that we were nowhere close to his asking price. However, after explaining to Greg what we wanted to do and why, he basically gave us a deal that we could not refuse.
The deal we worked out was for the Meade 10" GPS scope, but Greg also threw in a collection of brand new astrophotography gear he no longer needed. Deals like this do not come along too often. It is a great way to start the year for the RainyDayScience folks! There were more items which came with the purchase. The interns will log all of the pieces and we will take a look at them in detail. It is going to be very exciting to see what we can see with this new scope. BTW, if you have a lead on a Hyperstar lens for our new 10" Meade LX200, drop us a line. We will definitely be interested. [Permalink]- Meade LX200 GPS
|
||||
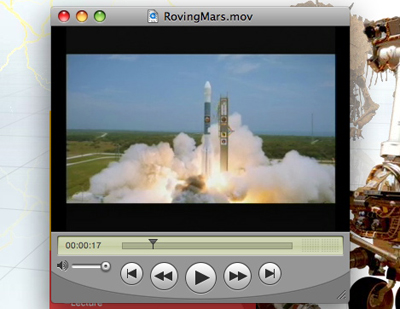
My poor, bedraggled United States of America: housing bubble bursted, financial industry turmoiling, people losing their jobs leftist, rightist, and centrist. Sigh. Well, if you need a shot in the arm of “this is how great America can be,” then get yourself right over to the Museum of Science and watch the IMAX movie “Roving Mars,” one of the truly stunning cinemagraphic achievements in this century (as measured from 1908). You think gettin’ us landed on the moon was a big deal, try sending the cousin of WALL-E on a seven month, three hundred MILLION mile journey to Mars, knowing that at the end of the trip there’d be a six-minute window where you’d have zero communication with the craft while it descended through the Mars atmosphere, and also knowing that you might never even hear from it again because the landing was, well, entirely up to the rover and its bouncy-ball inflatable air-bag (yes, I know there’s no air in space, just flow with the imagery). And then to have to wait for MORE than those six minutes for contact to be re-established, all the while thinking "did we do everything right, did we anticipate all possible issues, are we gonna fail like two-thirds of all missions to Mars?"; you wouldn't think watching people watching a blank wall of monitors would make your heart pound, but it does.
The Mars Bars (as I started thinking about them while watching the film) didn’t think they’d make it: the thing was heavier than they thought it would be, the thing was bigger than they thought it would be, and they had to re-figure out how to land it since their initial parachute designs got shredded during practice runs. They thought they were going to run out of time; they thought they were going to run out of money. AND, they had this little window, that only comes around every 28 years, when Earth and Mars are aligned in such a way that there’s even a hope of getting the thing off our planet and towards the other planet in such a way that the planet would actually be where it needed to be when the craft got to where it was going. The liftoff sequence was so amazing, so “Oh my gawd, human people thought this up?” that it almost made me cry. And even though I knew (roughly) the ending of the whole thing, watching the Rover team watching those screens on touchdown day was so full of tension and suspense that I almost couldn’t watch it. And then to “see” the rovers on Mars, and to know that the movement on the screen was exactly the movement that occured on Mars because the movie people used the data from the Mars rovers make the movie rovers move, I thought, well, now I’ve been to Mars. Seeing the solar panels delicately unfold like origami, then seeing the panels get covered with dust and start to lose their capacity and THEN seeing the wind whipping up and finally blowing off the dust merely proves that there is magic in space. So back to America: watching this movie made me proud of who we are, and who we can be when we have a noble and arduous task set for us. That whole team - all races, both genders - accomplished a feat of enormous proportions, and this movie gives you an idea of what they did and how much effort went into getting it done. The filmmakers are so good at what they do, have such an ability to tell the story of the team and their two little crafts (and trust me, these crafts give new meaning to the word “crafty”), that "Roving Mars" is one of the most inspiring films I have ever seen. [Permalink]- by Carolyn Donovan |
||||
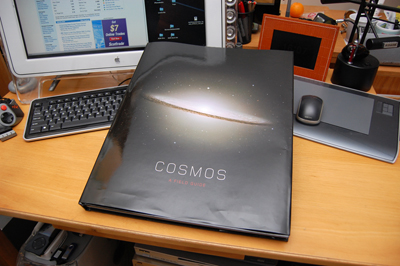
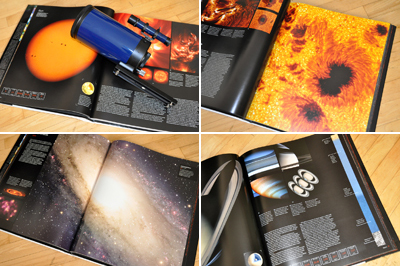
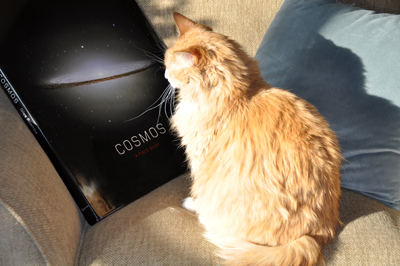
The interns were out at a local mall yesterday doing some after-Christmas bargain hunting when they spotted a stack of this amazing book (Cosmos: A Field Guide - Giles Sparrow). The book is no longer in print and were marked down to just $19.95! This book is BIG. 17.5 x 14 inches big. We took a few photos of the book next to some familiar objects (telescope, desk, Buffy) to give readers a sense of its size. As the book's subject is the Cosmos, its size seems appropriate. Click on any of the images for a larger version and a closer look.
The book is organized in sections (Interplanetary, Interstellar, Intergalactic) similar to how they are "out there." The oversized photos (500) in the 224 pages are ALL amazing. As we don't have our own spacefaring vehicle, these images are the closest we will come to these views. The interns did a quick check of EBay and there is one up there now for $65!!! They are planning on going back to buy up what's left. If you want one... check EBay in a few days. Alternatively, you can haul tail down to your local Borders bookstore and see if they have any left. Just don't tell our interns that we told you. As for us, we now have to find a coffee table big enough for the reception area to hold this book:-) [Permalink]- Cosmos |
||||
|
| ||
| Science Gear | ||
|
|
||
| Recent Projects | ||
