Computerized Dentistry : The 2-Hour Crown
This is not your father's dental office!!!
We’ve had a regular dentist for many a years and the work have been just fine.
After a recent root canal (never mind why) for one of the editors, a crown was needed for the “rooted” tooth…and a Facebook ad popped up (weird right?) for a new dentist in Brookline with a 3D milling machine who (which?) can do crowns in less than 2 hours.
Normally, we are skeptical of these, but this time the interns clicked on it…you know AI-targeted ads, they don’t make billions of dollars for no reason.
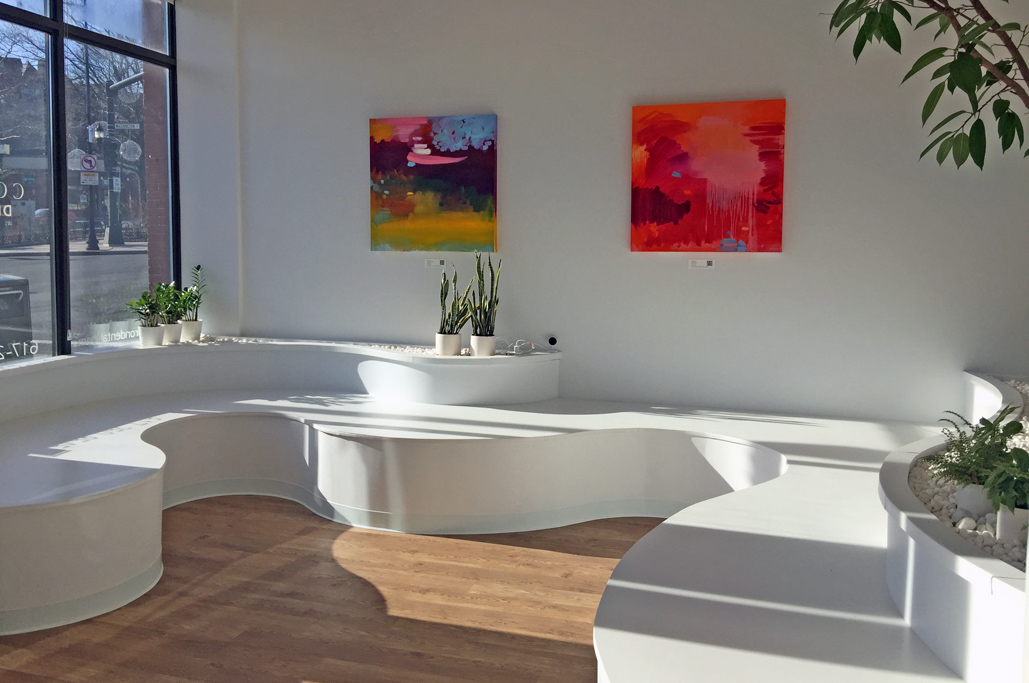
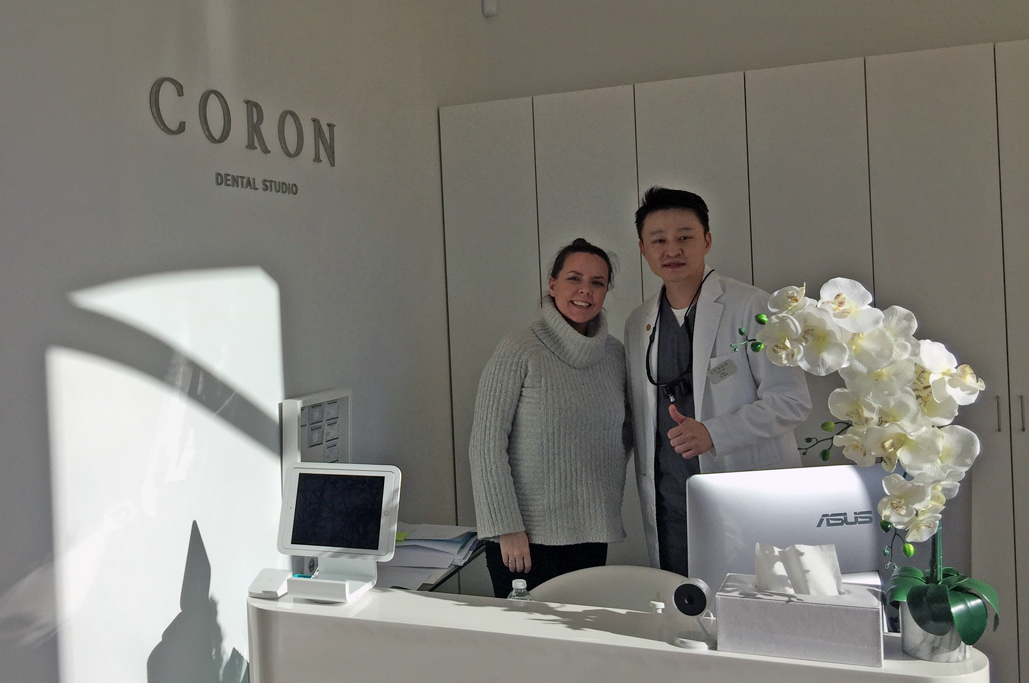
The Office: Coron Dental Studio

We sent someone to check out the operation, talk to the dentist, and get a price quote. It is BRIGHTEST dentist office ever…no one’s teeth will appear white in this place:-)
The place looks super legit (young doctor and dental techs, new high tech office/equipment, nice part of Brookline), so we pulled the trigger and made an appointment.

A week later we had the “less than 2 hours” appointment, and it could not have gone any smoother!
If you need a crown and your dentist is still using the make a mold/install a temporary crown/go back for the permanent one a week later way, find a new dentist. If you are in Boston, go and check out Dr. Kim at Coron Dental Studio.
The best part? The new way can actually be less expensive because there is only one appointment and everything is done in house!

The Visit: Getting A New Crown… in 2 Hours
The basic steps are:
- Shape tooth to hold crown (~30 minutes)
- Scan and acquire 3D data of area around shaped tooth (~15 minutes)
- Build a 3D model of crown (~15 minutes)
- Send the model to milling machine to make the crown (~20 minutes)
- Bake milled crown to harden (~20 minutes)
- Glue hardened crown onto shaped tooth (~10 minutes)
- Go home
Total elapsed time: less than 2 hours.

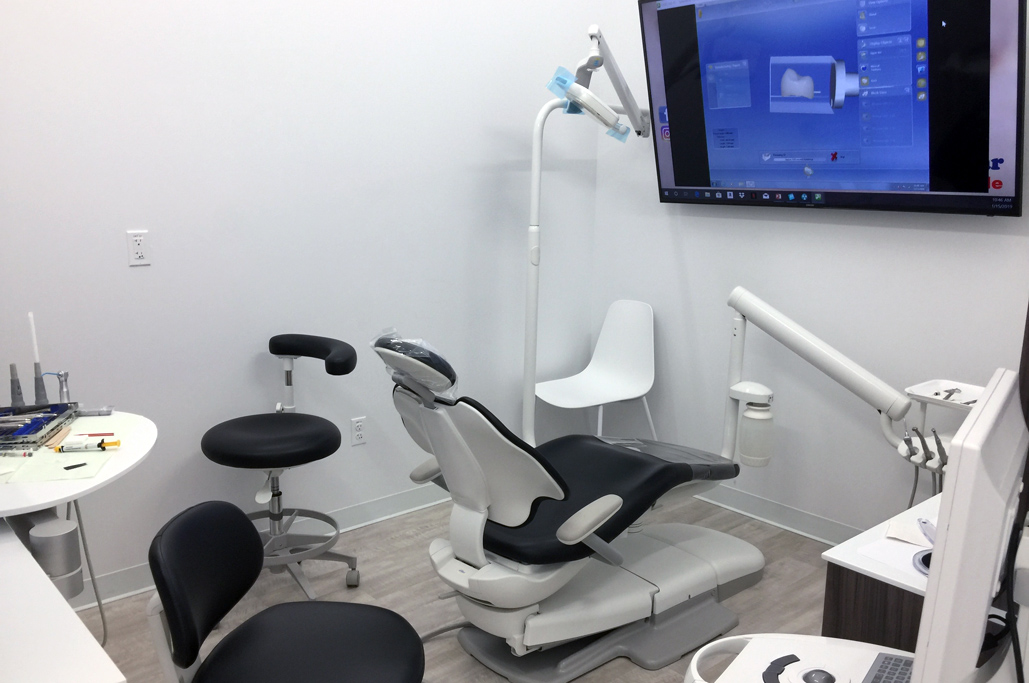
The first thing we noticed when we were brought into the examination room was the very comfortable chair.
The chair was accompanied by the latest equipment, including a large monitor showing you exactly what is happening. What the dentist sees on the imaging monitor is shown on the big screen (for those who are interested in what’s going on – you can shut your eyes if you want).

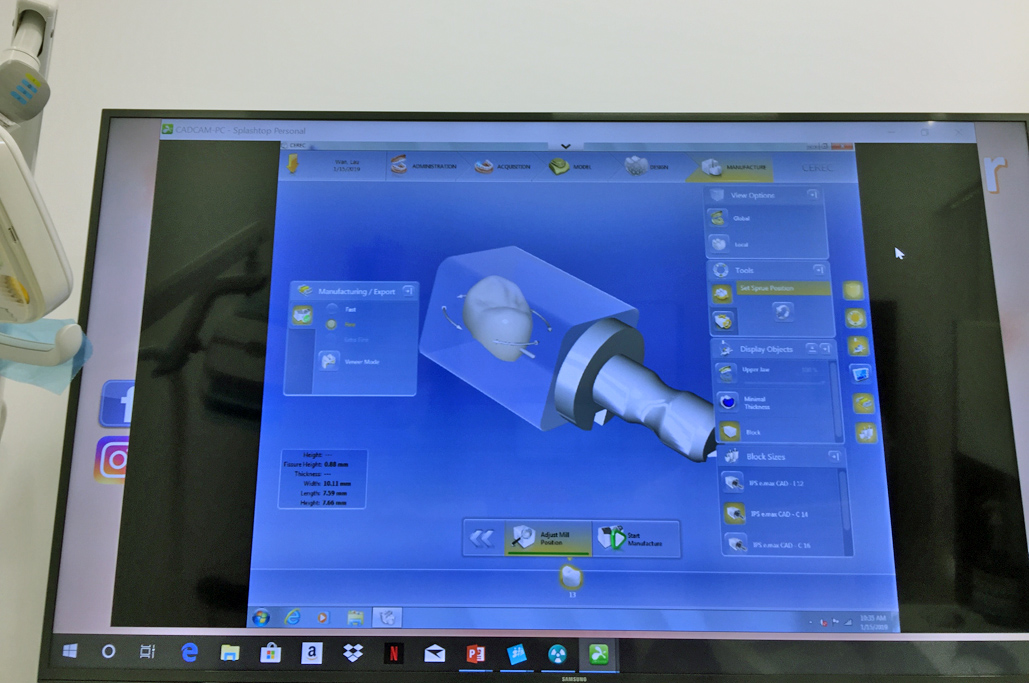
Below is a 3D image of our tooth and the surrounding area after the dentist turned it into the post for the crown. This mage was computer-constructed, from a series of digital 2D images made using a wand with a camera on its end. The 3D image was viewed from all different angles to get a clear understanding of how the crown would fit into the space.

Since the computer now had detailed 3D data of area, it could digitally create an exact crown to fit the space while compensating for the teeth around it. This is an amazing application of technology.

The ceramic block from which the crown was milled is affixed on a metal post. Depending on the tooth and location, different materials and hues are used to make it appear just like its neighbors.
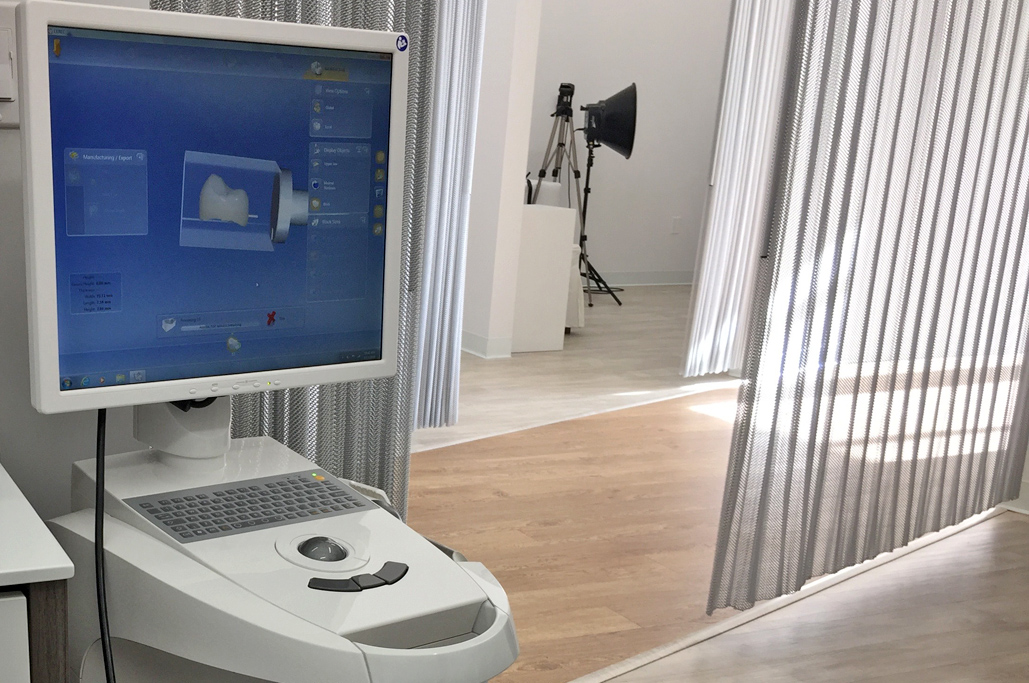
The image below is a computer-generated representation of the crown inside the ceramic block. The dentist is able to make fine adjustments to the model. Also, the exact location to mill the crown can be specified.
The amount of control is amazing, all done in 3D-space, in real time. Once satisfied, the data is sent directly to the milling machine for making the crown.

So why aren’t all periodontal offices doing it this way? Well, like most people, we do what we know and sometimes don’t invest in updating skills or equipment when things “work.” Young doctors with the latest training and starting a practice, though, don’t have the this is how we’ve always done it mentality, and go with the newest tech because they are starting from the ground up!
Trust us, with medical and dental technology…newer is better 😉
The Technology: 3D Milling on the Desktop

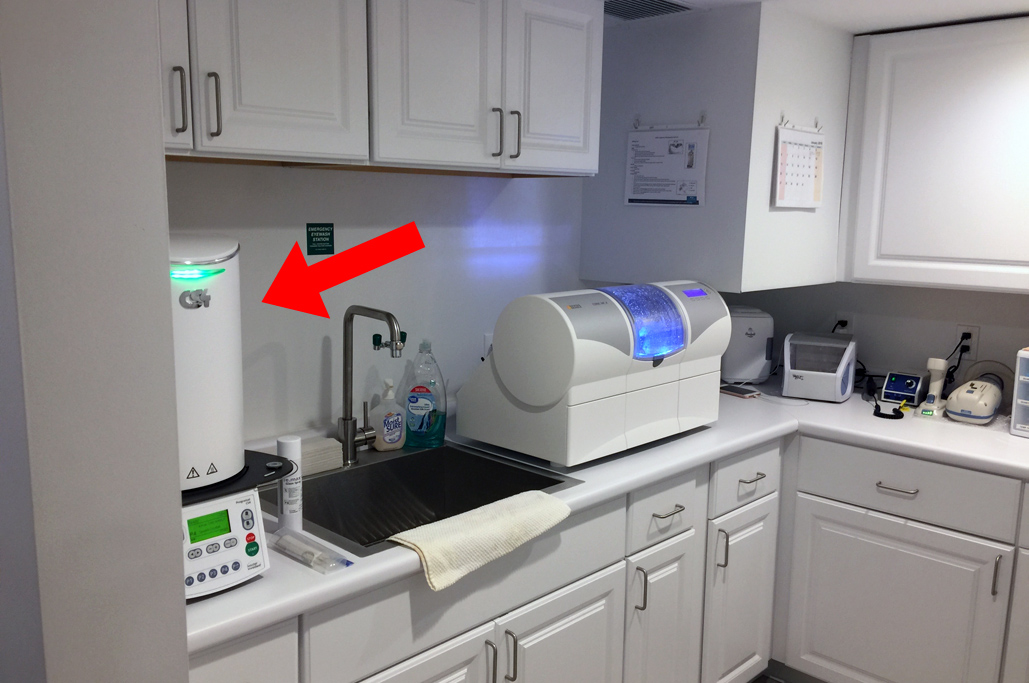
The 3D milling machine used by Coron Dental Studio is the CEREC MC X. The machine is completely self-contained and the entire milling process is completely hands-off once it has started.
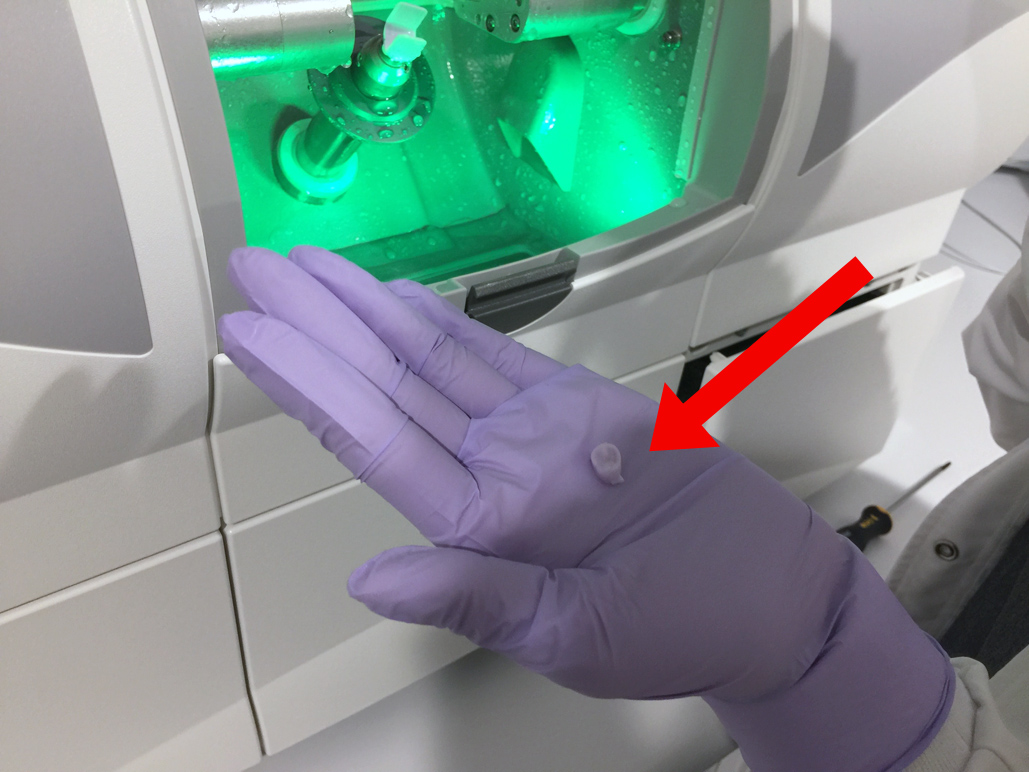
Below is a close up of the mounted ceramic block from which our crown was shaped.

Here it is milling our crown. It is water-cooled during the milling process to keep both the drill bits and the ceramic block from over heating.

10 minutes later, our shaped crown was ready for “baking.” The unit is calibrated weekly and the milling bits changed after about 10 crowns to keep everything precise “to the micron level.”

The “oven” is a small unit near the milling machine. To harden the crown, the “oven” heats the crown up to…hmmm, must be pretty hot (clay-ceramics hot)(which is really, really hot).

Like the milling process, the “baking” step is also completely hands-off, as all the control parameters are sent directly to the “oven.” This eliminates any programming and/or operator errors.
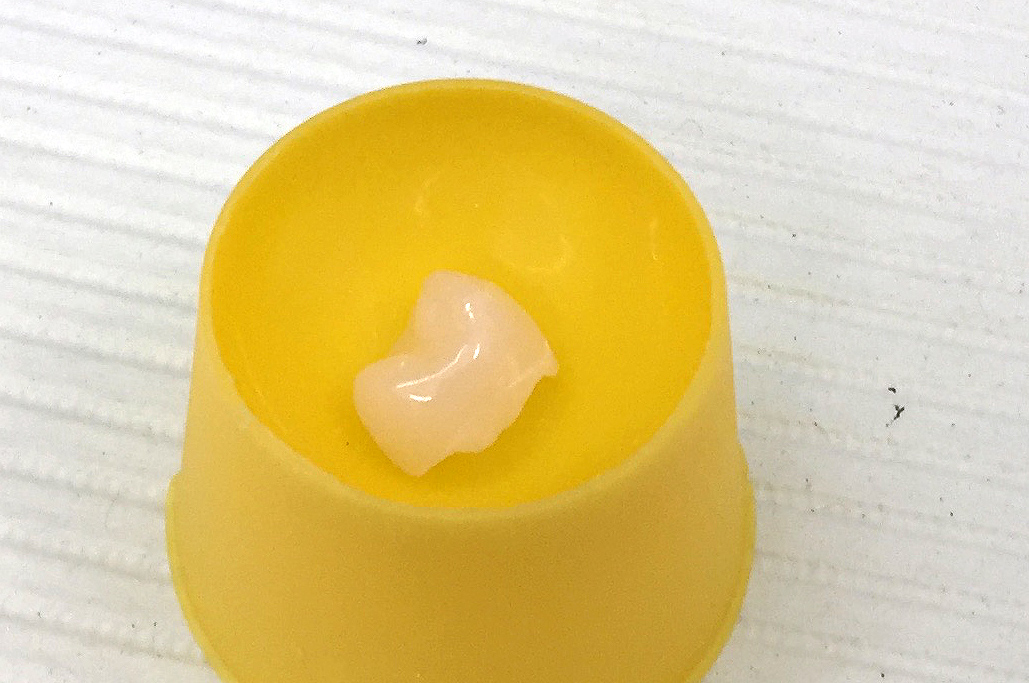
In the tiny yellow bowl is our crown after the hardening process (aka baking) and is now ready for installation into our mouth. Check out how smooth it is!!!

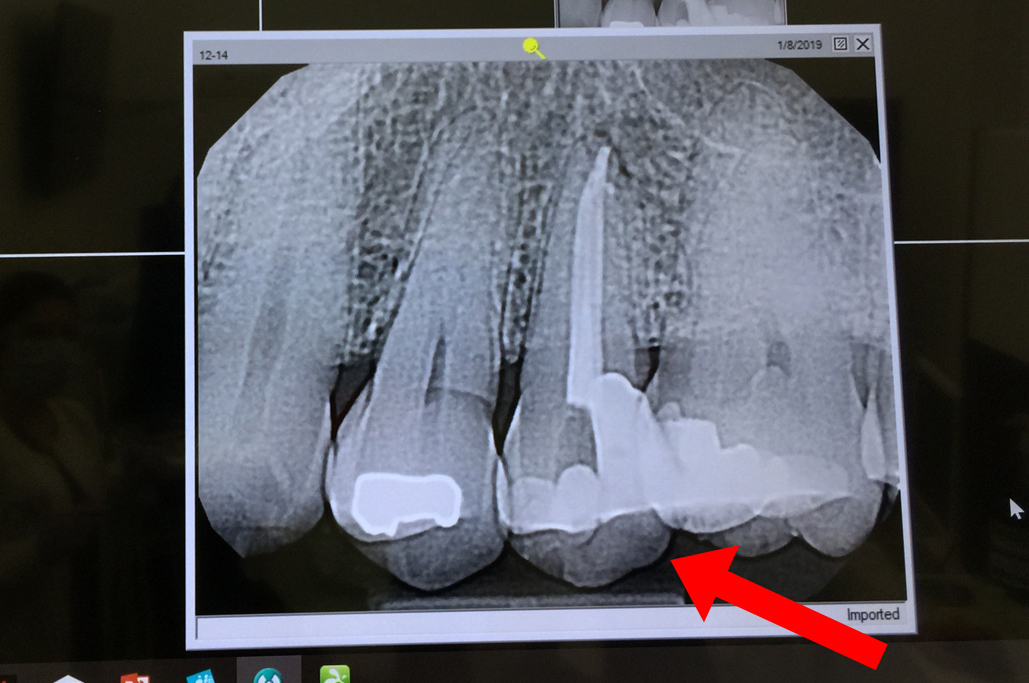
After gluing the crown onto the tooth-post, the dentist took an X-ray to make sure everything looked as it should. The root canal is obvious both in the pre and post crown installation x-rays. The crown is not as clear if you are not used to looking at X-rays…but the red arrows in the X-rays should help 🙂
UPDATE: It has been three weeks and everything is perfect!!!


The fit was so precise that there was no post installation touch-up sanding needed. We can’t even tell that there is “something” new there. Seriously, this new dental technology is awesome! Look into it if you need it.
NOTE: If you are in Boston and do go to Coron Dental Studio, tell them RainyDayMagazine referred you, and you’ll get $50 off the visit!


Leave a comment