TapHanger “In The Wild”
The EASIEST way to hang multiple frames
It’s been a year to the day that we first told RainyDayProjects readers about the fantastic tool TapHanger. While other frame-hanging tools we’ve reviewed are good, the TapHanger is our go-to tool whenever we need to hang a frame…as long as it’s made of wood. Why only wooden frames? Read on, my fellow interior designers, read on…

The TapHanger makes it incredibly easy to put a frame exactly where you want it. We think it is the BEST tool for grouping/aligning multiple frames without spending all day futzing with each and every placement.

TapHanger
The TapHanger is a well-conceived, well-designed, effective tool for quickly hanging frames on walls. Two conditions must be true in order for this tool to work: the frame must be made of wood, the surface of the wall must be soft enough for a pin to penetrate (sheetrock, wood, etc).
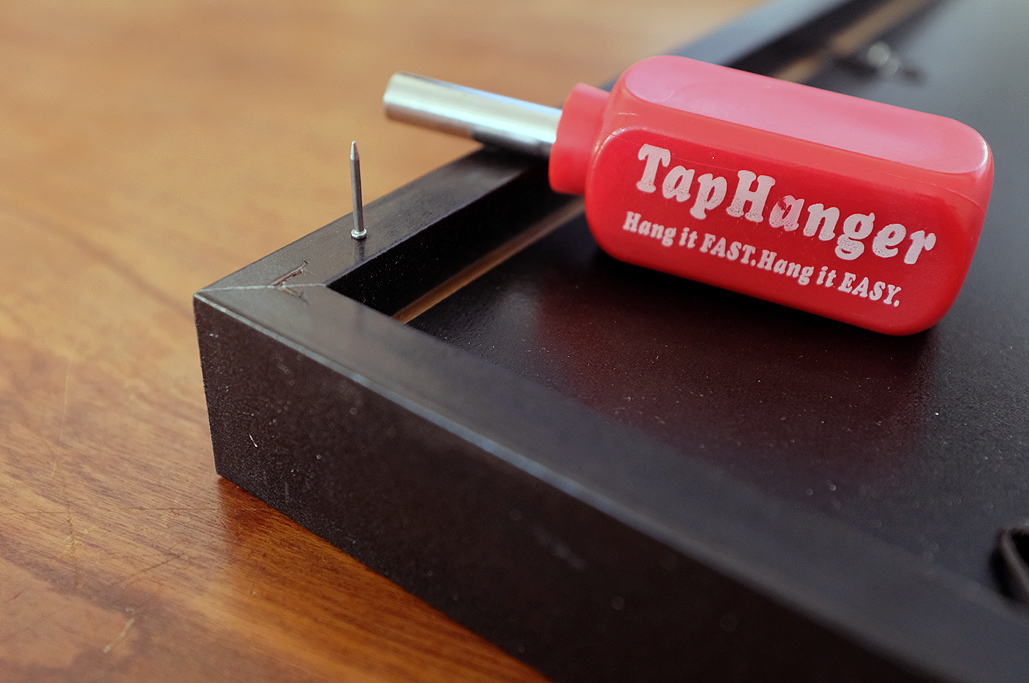
The TapHanger works by inserting two custom pins—two pointed ends with a ridge in the middle—into the top edge of the frame and then pushing the frame onto the wall.

If the wood is soft enough, the pin may be pushed in the frame with the TapHanger instead of tapping the TapHanger with a hammer.
Care should be taken to make sure the pin is inserted as straight as possible because that will make it much easier to push the other end into the wall.

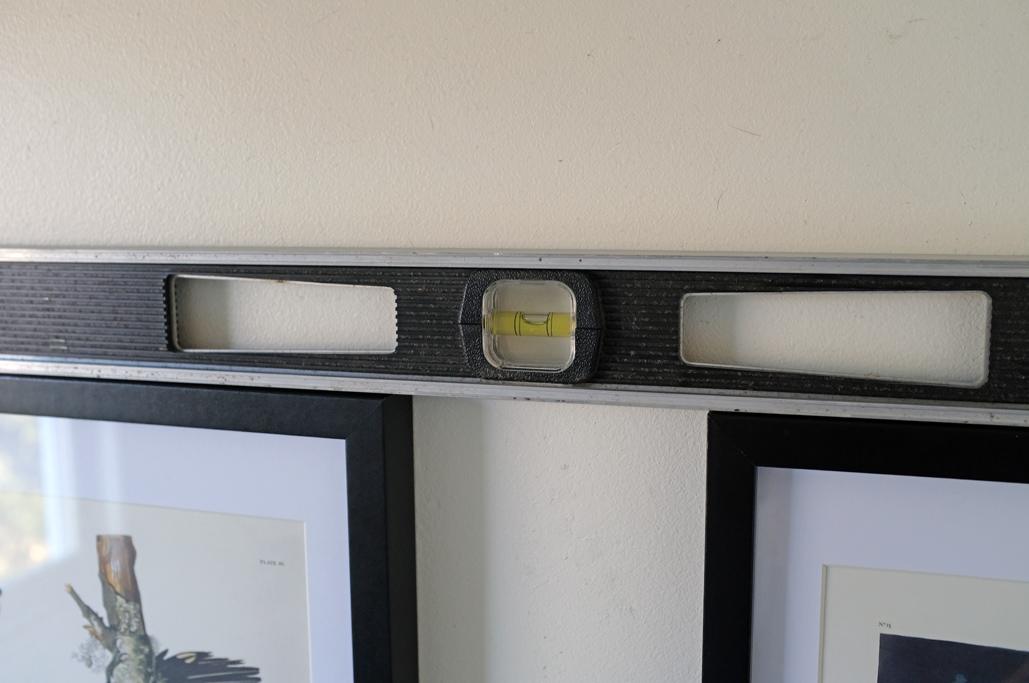
Once the pin is in the frame, just mark off on the wall where you want one of the corners to go, make sure the frame is level, and steadily push the corners into the wall. Yes, just Mark, level, and push. That is all there is to it…REALLY!!!

Note below how precise the corner of the frame ended up to the mark on the wall. This is the kind of exactness one can expect with the TapHanger. A lot of time saved and no more having to “play around” with adjusting the wire behind the frame!!! Also, the frame is absolutely flush with the wall and will NEVER shift…can’t say that with other methods.

Hanging Multiple Frames

Hanging one frame with the TapHanger is so easy that tackling “multi-frame” hanging projects is no longer daunting. To quickly hang multiple frames—and you WILL want to once you have used it to hang a single frame—we want to share some tips which helped us.

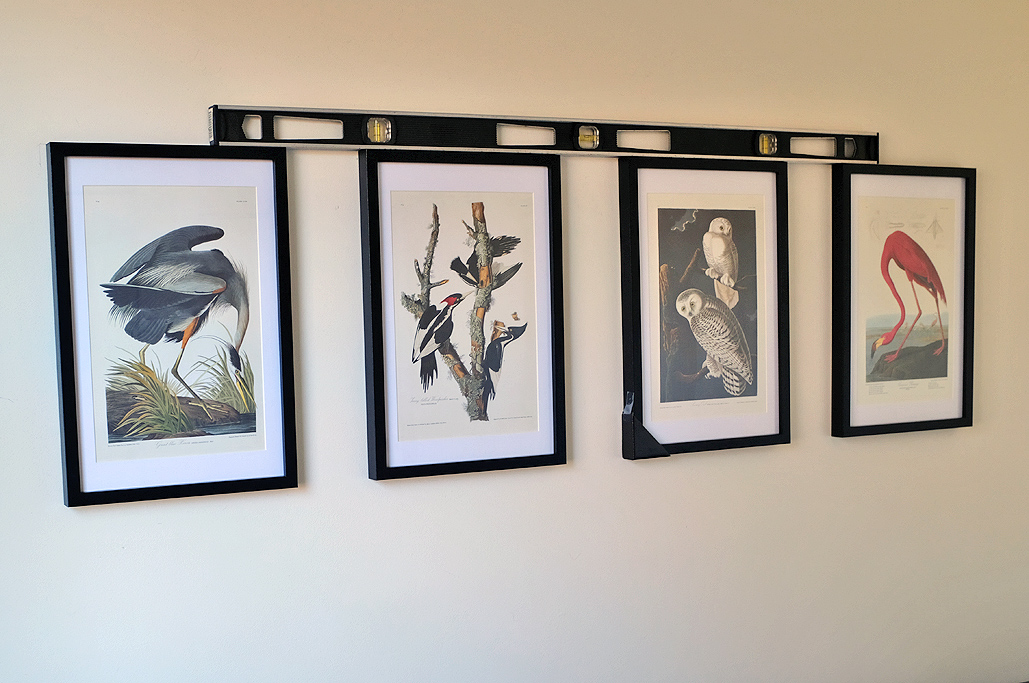
The KEY, we have found, when mounting multiple frames straight across, is to put up the two end ones first. This approach should work for any number of frames. Once the two ends are in place, then do some math to figure out the spacing and align the remaining ones in between. Using this method, we didn’t have to measure anything out ahead of time, as long as there is enough space in between them to fit the remaining frames 🙂

Another important aspect of hanging multiple frames is to have a LEVEL reference line to align everything. A laser line is good, but when possible, we prefer to use a physical level. We have both tools, but we like the “no setup” ease of the 4′ long level, and also that we can use it as a straight edge for marking.

Because the TapHanger placement is WYSIWYG, once the leveling line is drawn and the spacing determined, all that is left is to “push” the frames into place. The best technique for pushing is to apply steady pressure straight on. This will allow the pins to travel straight. BTW, all four frames were installed using just the TapHanger tool and without the need for a hammer. Because we have done these projects a few times, this time it only took us about 10 minutes to mark, align, and hang the four Audubon prints, including making mistakes on the calculations. Ten minutes, people!

Amazon links to items mentioned:


Leave a comment