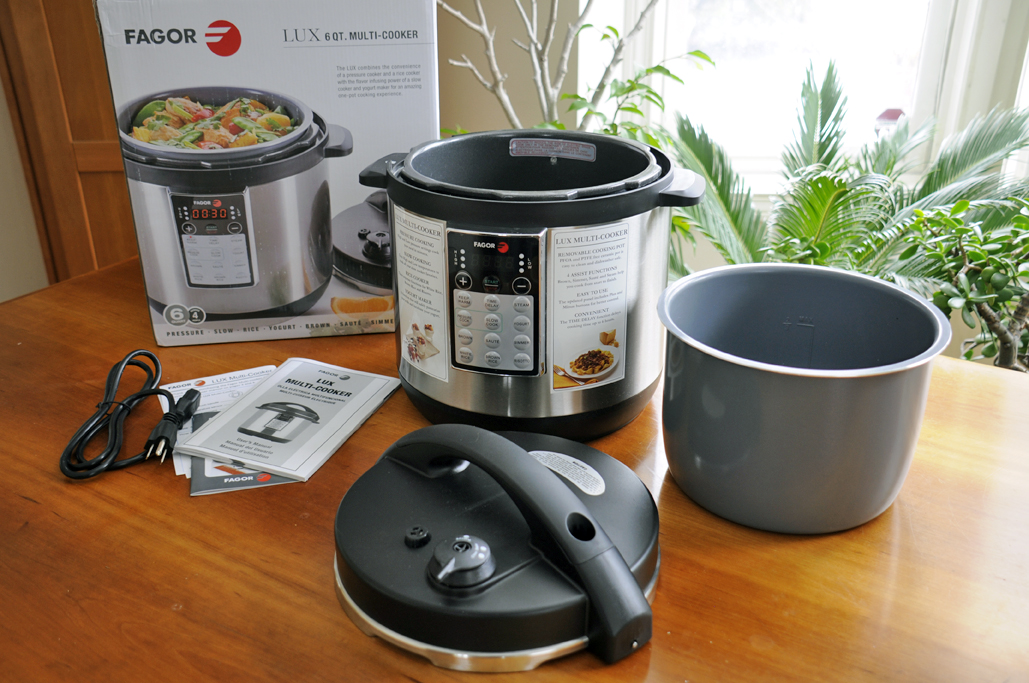
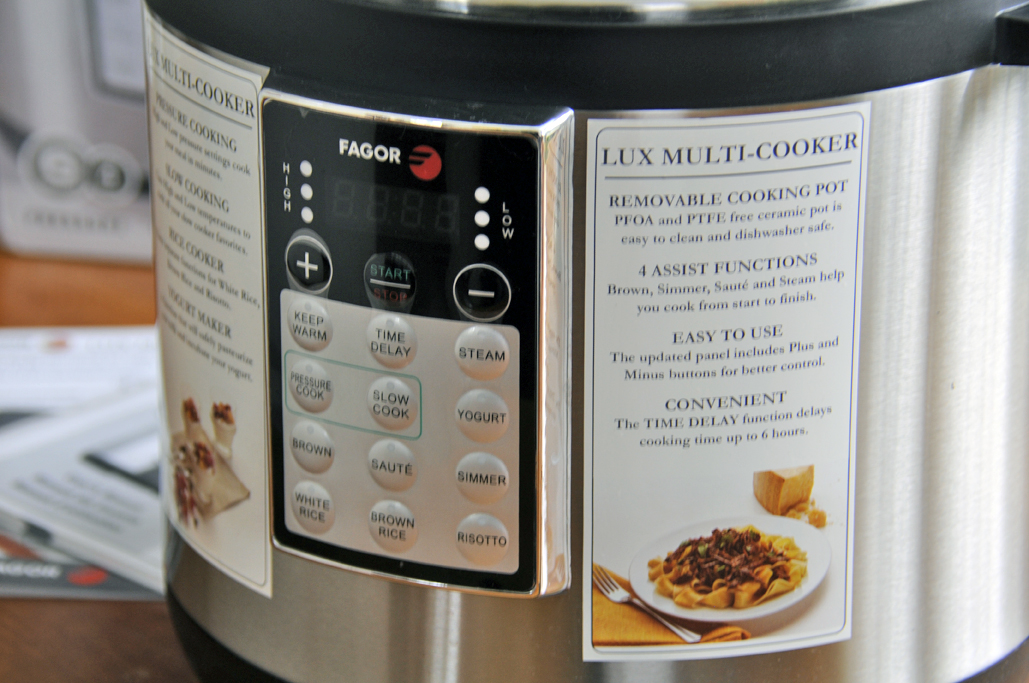
Fagor LUX multi-cooker : FirstUse
Not your parent's pressure cooker!!!
I know what you’re thinking: What the…duck…is a Fagor?
Well, technically there is no such thing as “a Fagor” since that is actually the name of the company who makes this it-only-looks-daunting piece of electronic wizardry/appliance.
Although we seemed to have created a new verb in the RainyDayKitchen, a la “That was good rice; did you Fagor it?”

The Fagor Lux unit is a multi-cooker, as in, it offers multiple methods of cooking in the same unit. The most satisfying part is knowing that this single appliance offers (among others) two of the most disparate methods of cooking known to human kind: slow cooking and pressure cooking. In the same pot, I tell you! Just not at the same time 😉
We decided that our FirstUse would be using the pressure cooking feature, as one of us has been afraid of pressure cooking ever since she mistakenly thought a double boiler was the same thing as a pressure cooker, and…well never mind about that. It was time to put her big girl pants on, look pressure cooking in the eye, and stop worrying about putting another hole in the ceiling (I said never mind about that).

We chose Fagor’s pea soup recipe (downloadable from their website) as our “getting to know you” recipe, basically because we had all the ingredients.
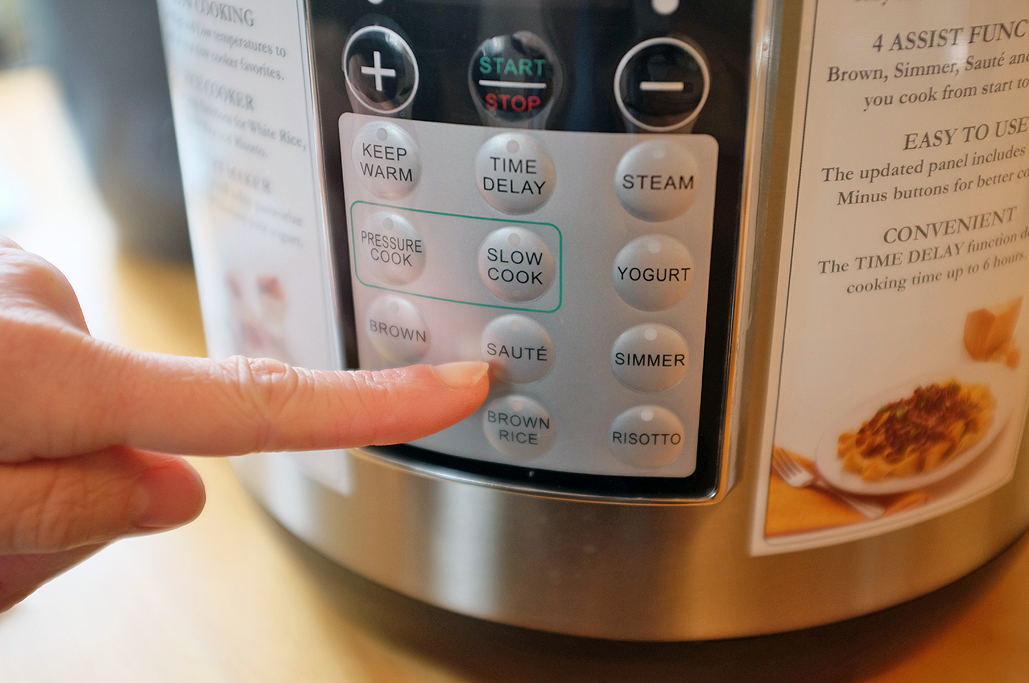
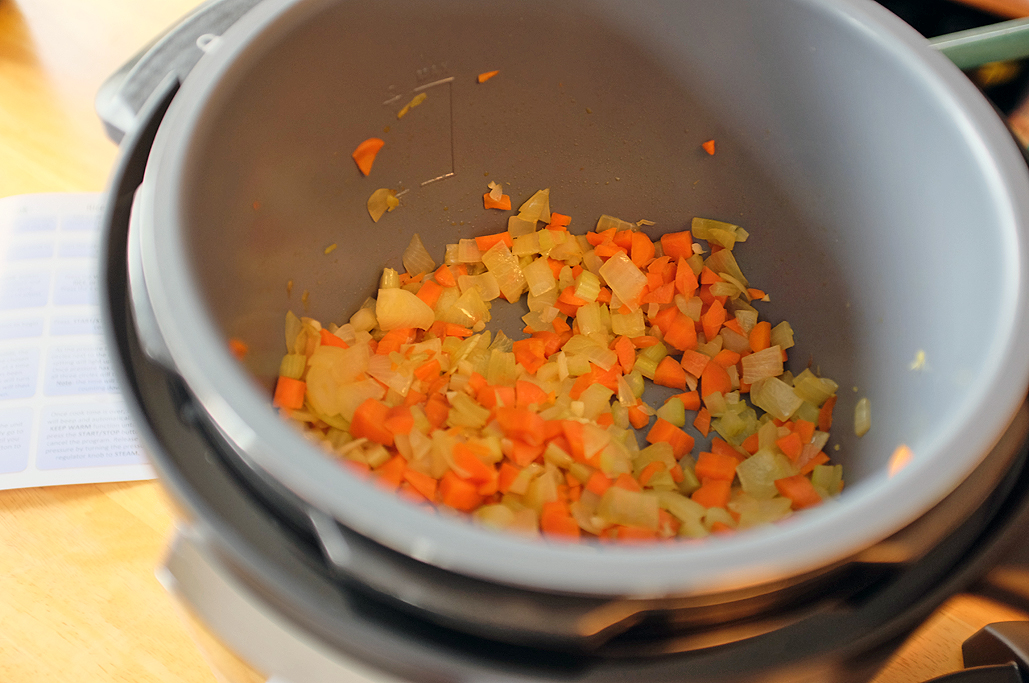
First up, sauté the onions. In the pot. Using the SAUTÉ button. Set the timer to five minutes (then press Start). Bingo bango, go off to make a cup of tea and the onions are done by the time you get back.

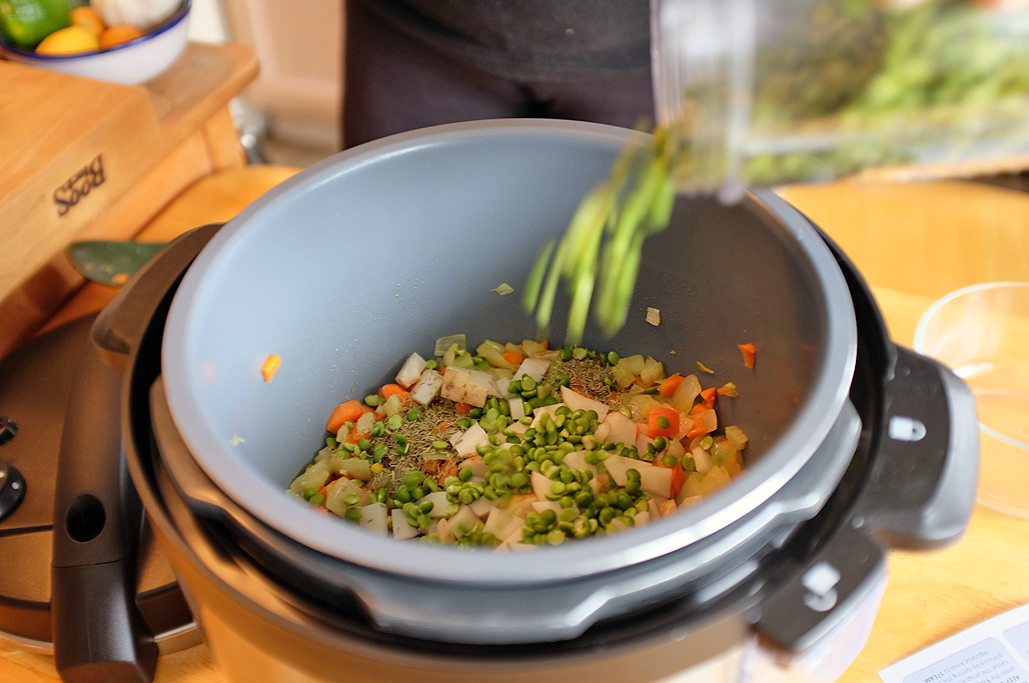
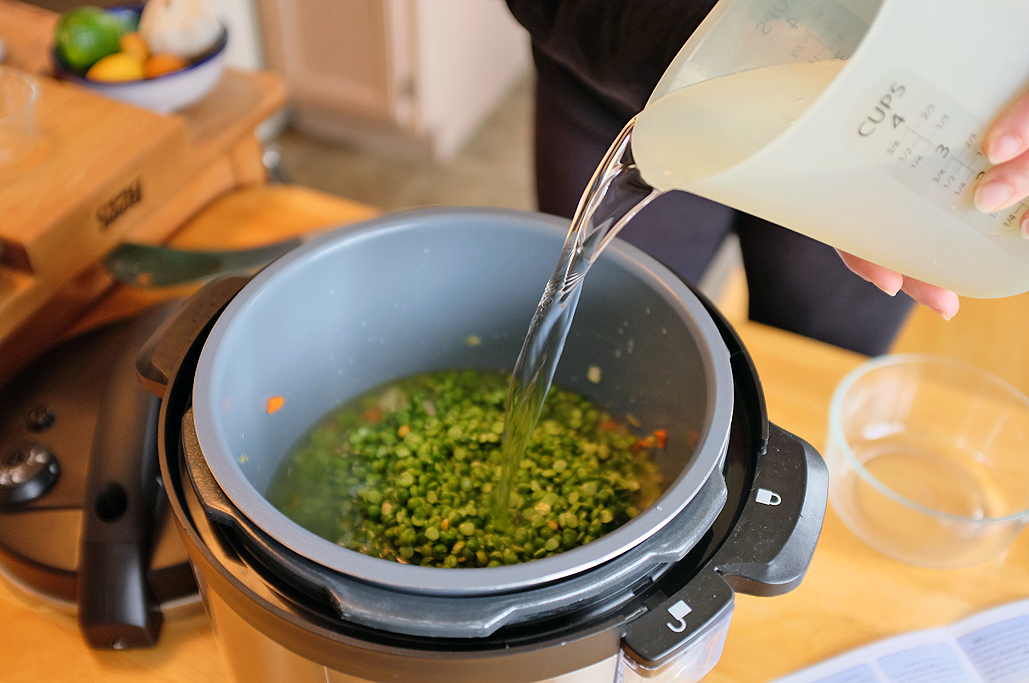
Then add the carrots, celery, and garlic, sauté for two minutes more. After all the sautéing is done, add the split peas, potato, and herbs.

Pour in the liquids (we used water but broth would’ve worked also).

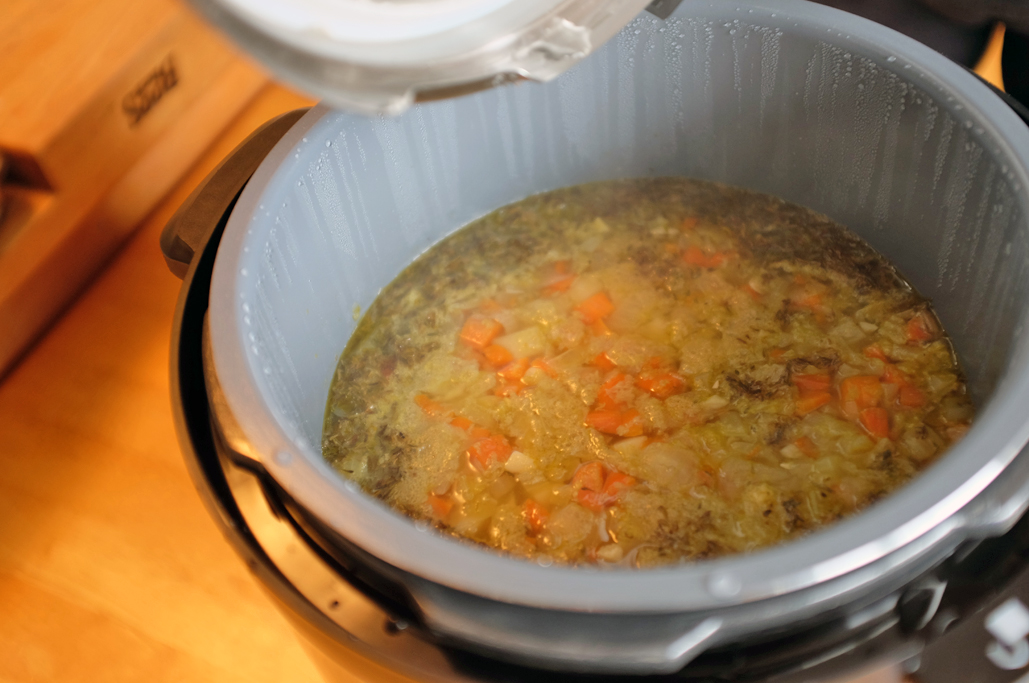
Put the lid on (and making sure it’s locked), press the PRESSURE COOKER button, set the timer for 10 minutes, and press START.

In ten minutes, you’ve got…not soup, but the beginning of the pressure cooking. It took approximately 10 minutes for the Fagor to build up to the right pressure. BUT, once it did, the soup really WAS done in ten minutes!
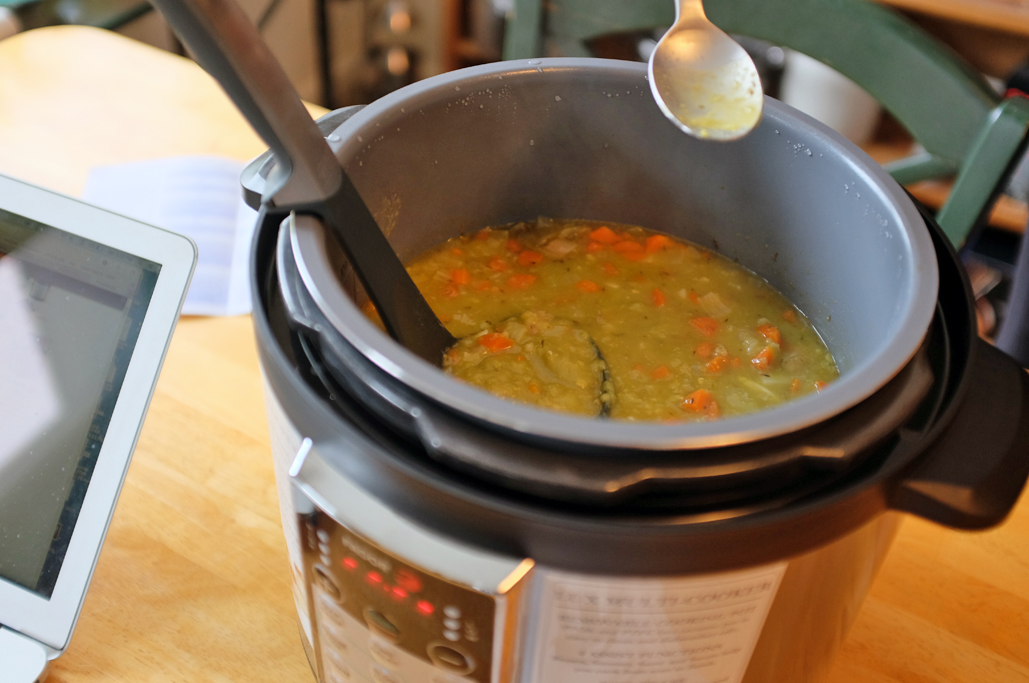
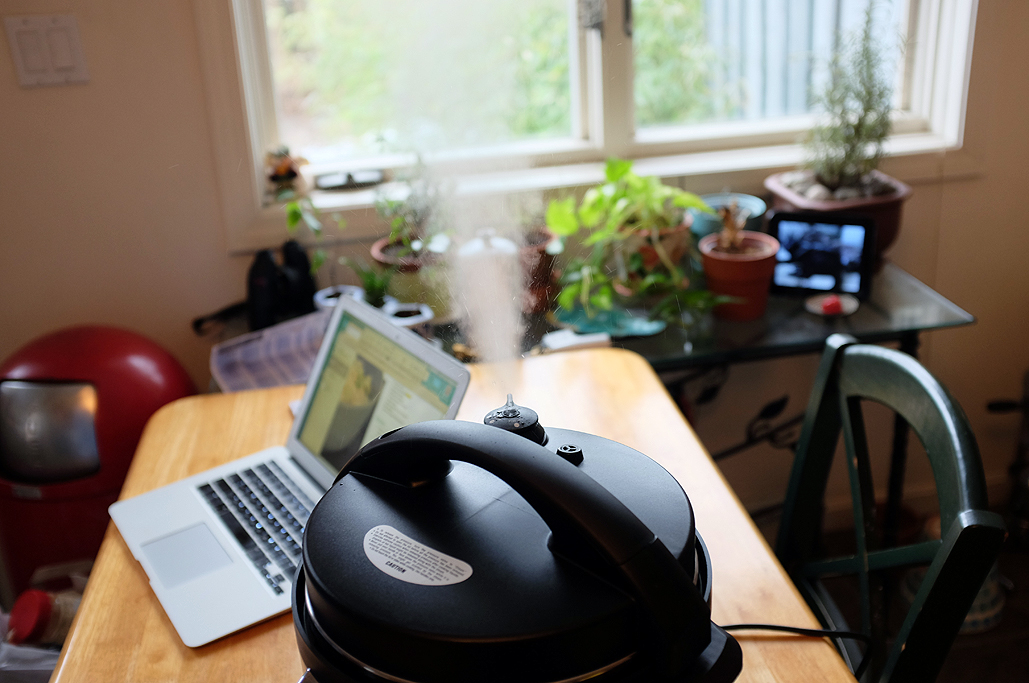
The recipe said to use the “Natural Release” method of releasing the pressure, which is to leave the thing alone for approximately 10 minutes until the heat dissipates sufficiently that the pressure, um, dissolves. As this was our first try we followed the instructions. You’ll know if you’re in the right Natural time frame when, as you move the lever on the valve/pressure regulating knob on the lid just a little bit, no steam is released (because it’s already, naturally, been released).
So for the soup, it was 30 minutes start to finish. Not bad.
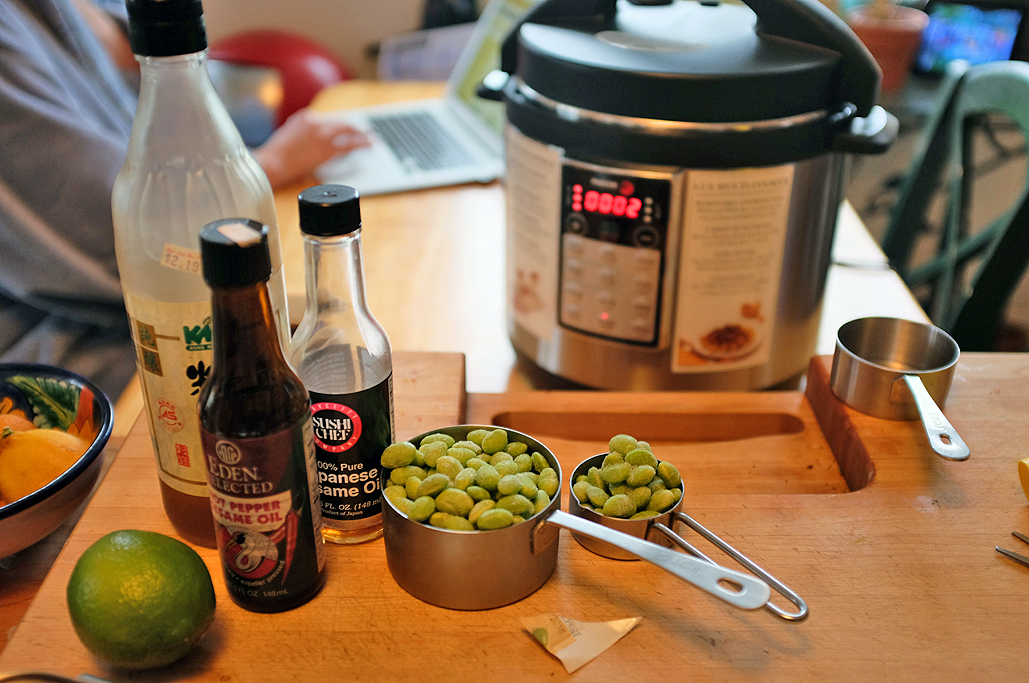
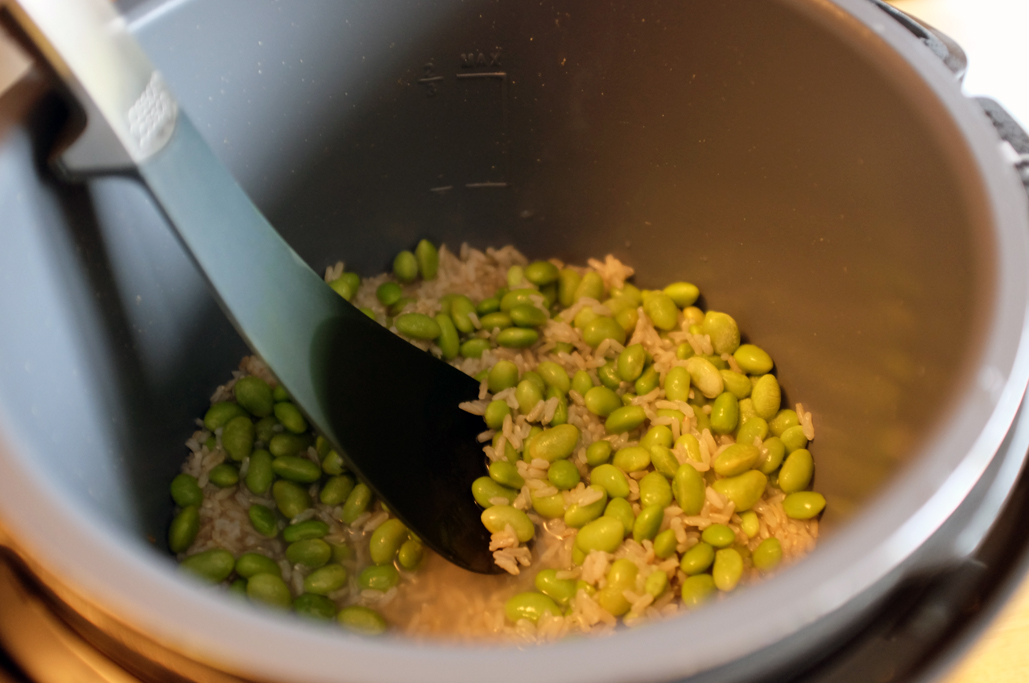
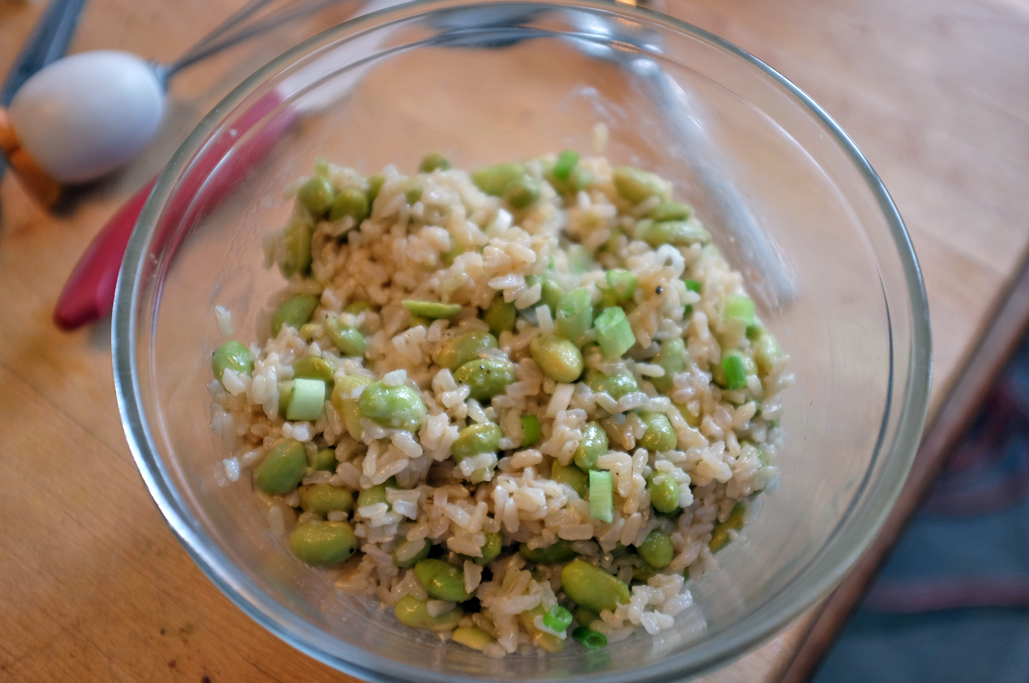
Feeling like we had just won the Easy-Peasy Cooking Bowl, we decided to make another dish, Fagor’s recipe for Brown Rice and Edamame (again, because we had the ingredients). This was even simpler.

Cook brown rice, using the (wait for it) BROWN RICE button, for 12 minutes.

Quick Release the pressure by moving the lever on the valve/pressure regulating knob on the lid; this will take less than 60 seconds.
Add the edamame, lock the lid, move the lever back to Pressure, set timer for 10 minutes on HIGH, and sing Adele’s “Rolling in the Deep” 2.87 times. When the unit beeps, it’s all over but the eatin’.
(The recipe includes a terriff sauce, which you make whilst the Fagor is making everything else).

I am delighted with having gotten over my fear of the pressure cooking. The Fagor Lux unit is a great addition to the kitchen, especially if you have a small kitchen but want to utilize many cooking methods (you can make yogurt in this thing, for heaven’s sake, by pressing the YOGURT button).
There are four things to be aware of:
- After you decide which cooking method you’re going to use and set the timer, you must press the START button, else no cooking occurs.
- When releasing the pressure, do not reach your hand across the lid to do so; that will put your hand/arm in the way of the pressure, and that would hurt very, very much. The best/safest way to release the pressure is to stand behind (as it were) the valve and place your hand at the end of the level and open it that way (i.e., don’t reach across the lid, reach around the side).
- To decrease the time-to-pressure, make sure your liquids are hot when you add them. I made some straight brown rice the other night starting with two cups of dry rice, which meant I needed four cups of water/broth. I heated up the liquid before adding it, and the unit was pressurized in two minutes and 15 seconds. The Brown Rice and Edamame dish called for only two cups of liquid, so it’s possible that if it took two cups ten minutes to get to pressure, four cups would take closer to twenty minutes. Ah, the things you learn when you’re hungry…
- The lid must be in the locked position when pressure cooking. If it is not in the locked position, it will not pressure cook. This is an excellent safety feature, because sometimes things look like they are in the position they are supposed to be in when they are in fact not. So take that extra second to ensure that the lid is properly seated and set to the locked position.
Amazon links to items mentioned:


Leave a comment